Transforming a pair of pants into a jean bag
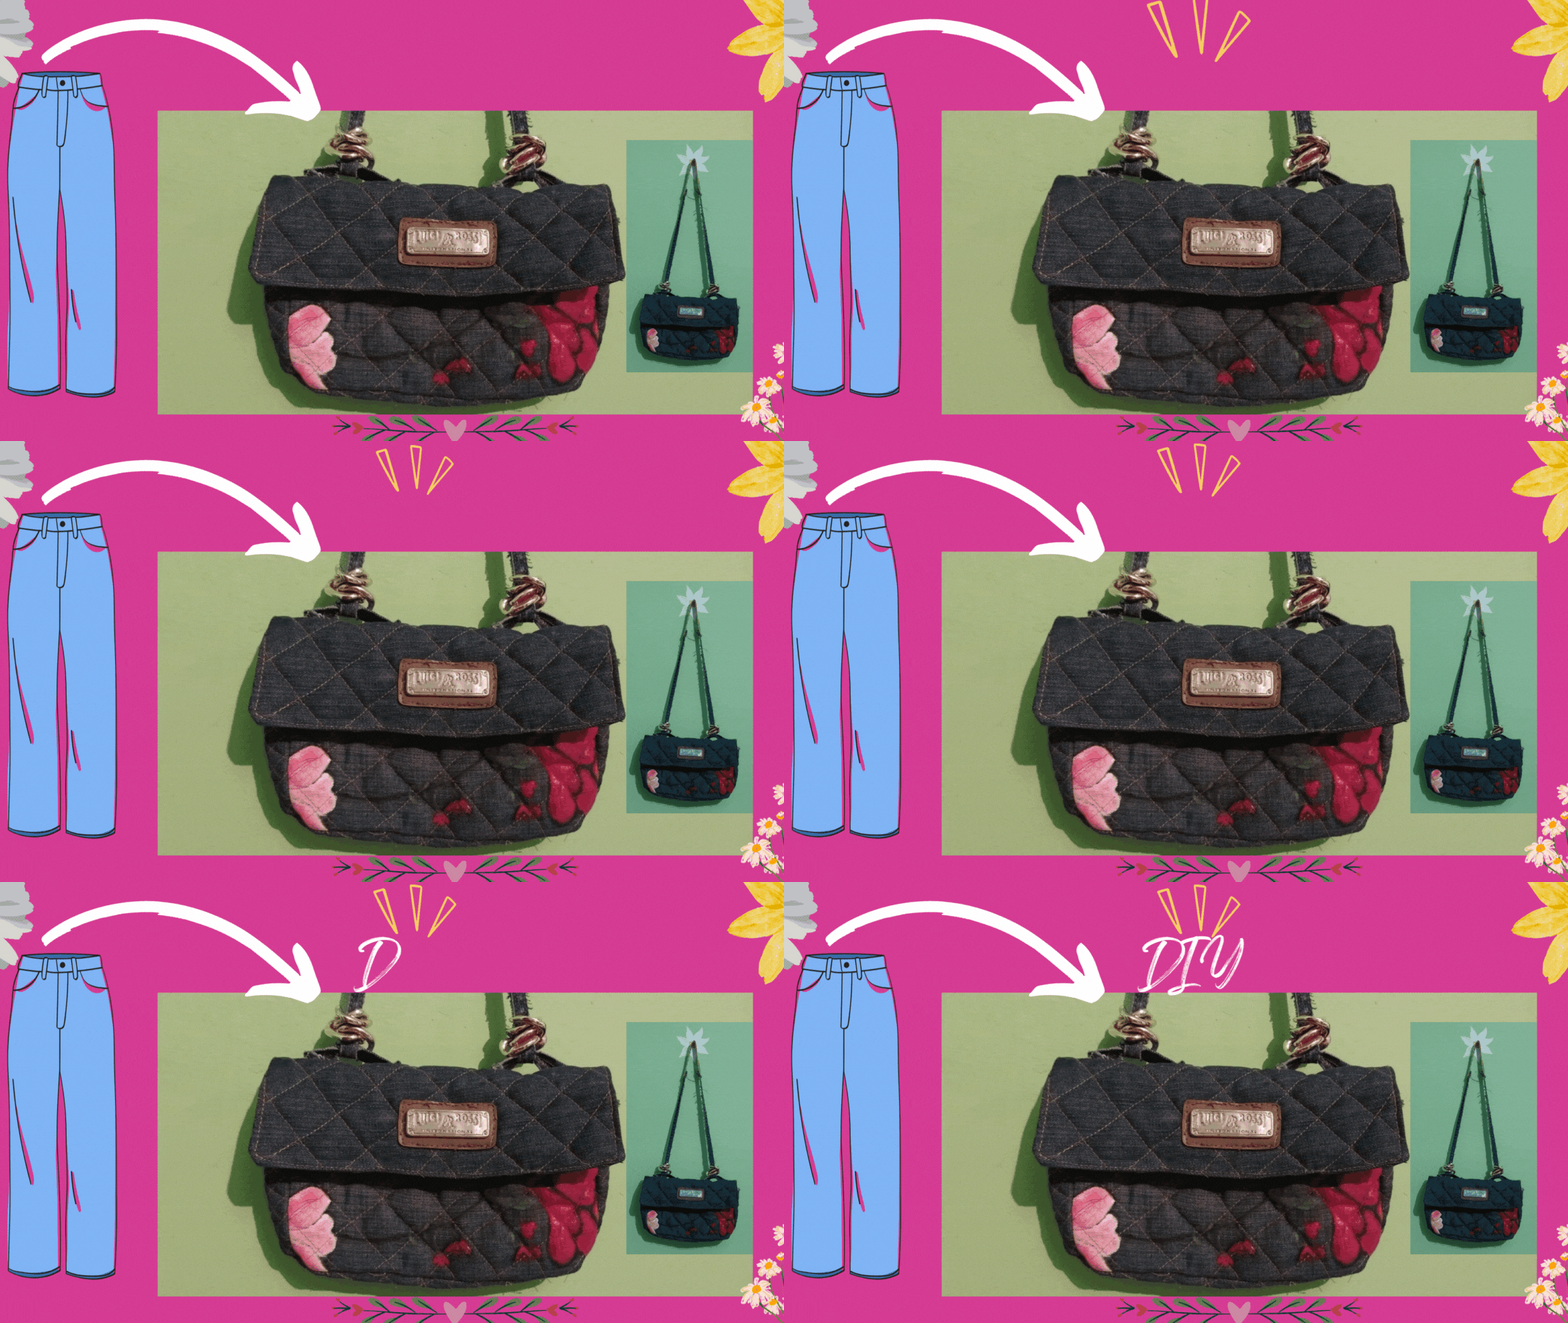
Hello my dear Hive friends. I hope you are feeling great! Happy beginning of the month. I hope that December will be a month full of happiness for all of you, that you will be able to reunite with your family and friends. And may your dreams and goals materialize soon.

Today I show you a very easy project to recycle pants that you no longer use, a way to recycle these and turn them into a bag.
I hope you like it.
Materials
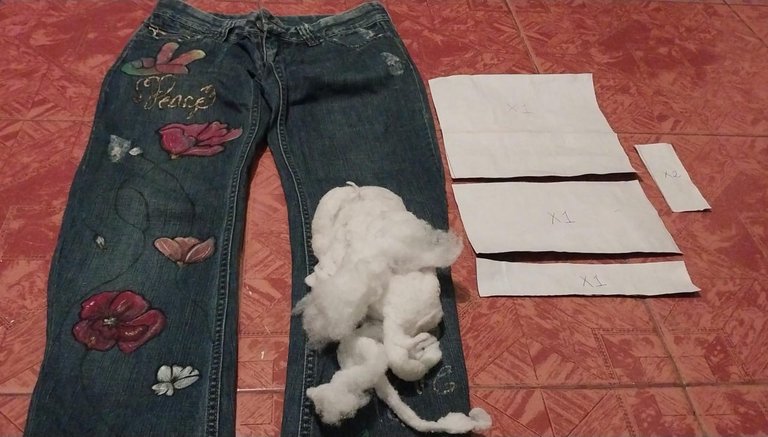
- Rectangle patterns for the bag.
- Pants
- Stuffing
Step by Step
1
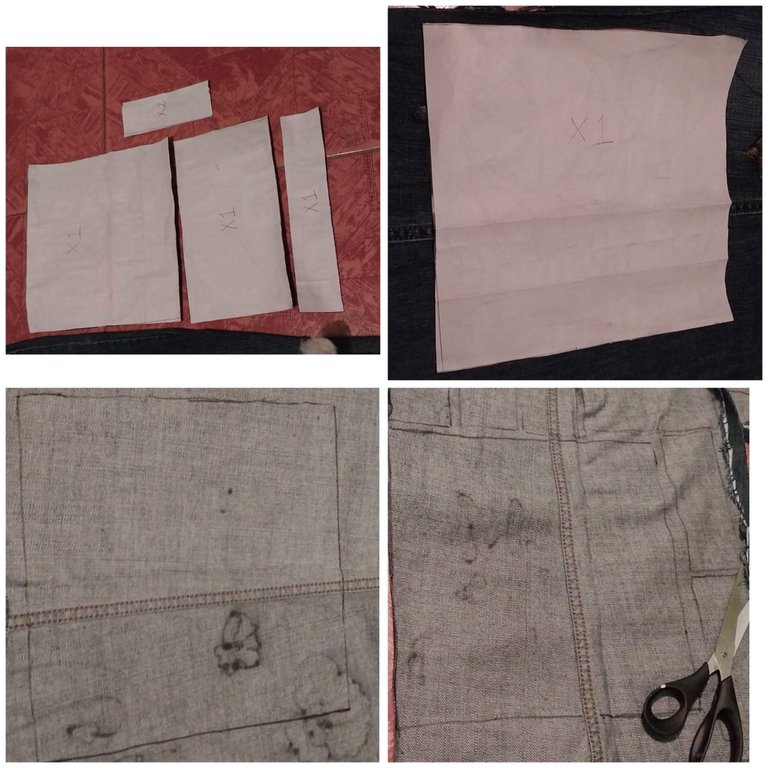
We take the patterns and we are going to mark these patterns on the fabric of the pants, we cut out 2 pieces of each pattern. Then we cut out with the help of the scissors.
2
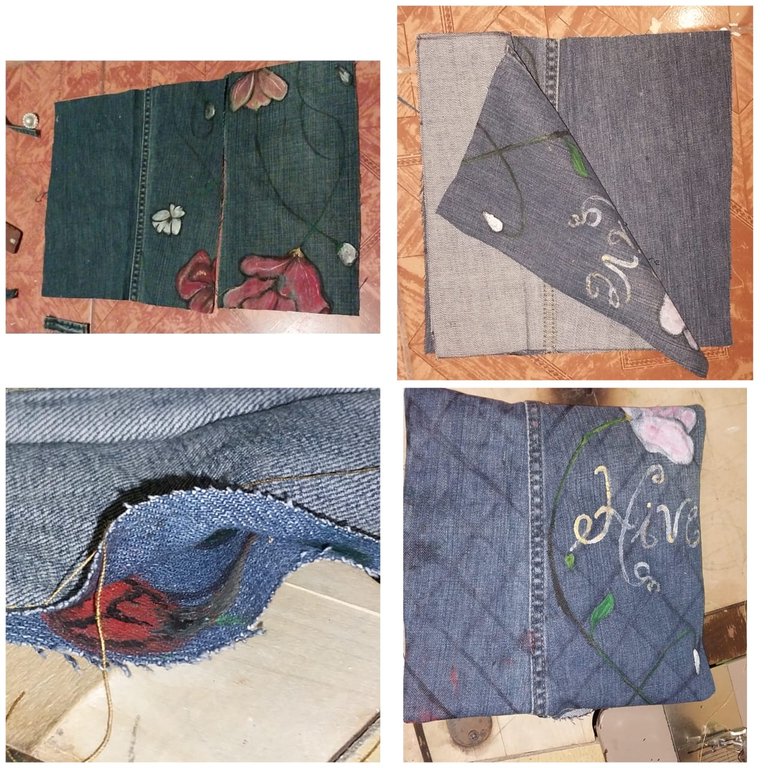
Then we must place the pieces face to face to be able to sew them together! Then we sew these and leave only one hole that allows us to flip the piece right side out.
Then we must make zig zag lines with the help of the marker.
3
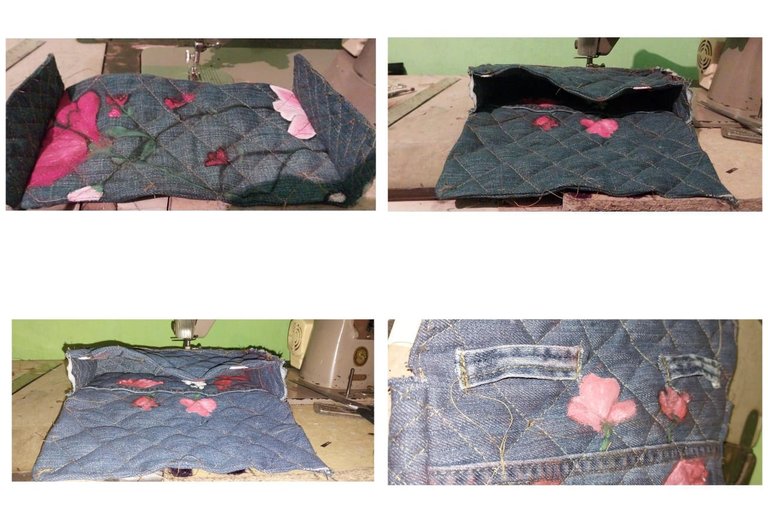
Then we sew the sides, and then the base piece and the front piece. Then we should sew two of the trouser loops and sew them to the top of the bag.
4
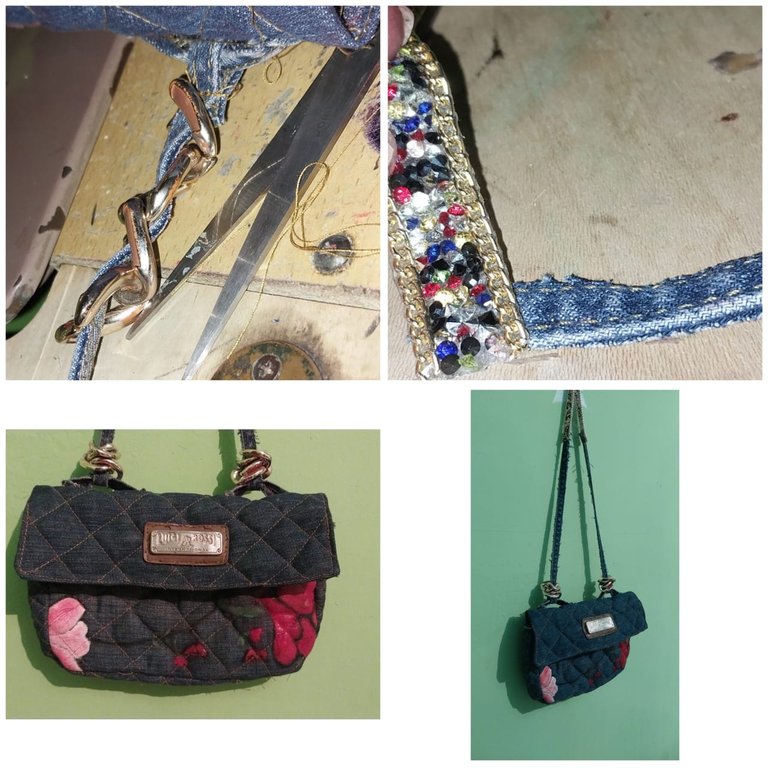
Then we sew a ribbon and then we insert the rings and sew a ribbon of crystals to it.
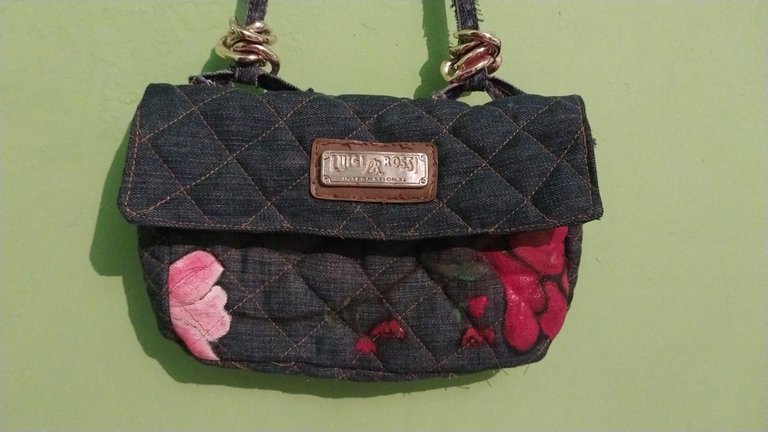
**This is the final result, thank you very much !

- Images belong to me
- Translator: Deepl Traslator
- Editing: Canva

Hola mis queridos amigos de Hive. Espero que se encuentren muy bien! Feliz inicio de mes. Espero que diciembre sea un mes cargado de mucha felicidad para todos, que logren reunirse con sus familiares y amigos. Además que sus sueños y metas se materialicen pronto.

Hoy les tango un proyecto muy fácil para reciclar pantalones que ya no uses, una forma de reciclar estos y convertirlos en un bolso.
Espero que les guste.
Materiales

- Patrones rectandulares para la elaboracion del bolso.
- Pantalon
- Relleno
Paso a Paso
1

Tomamos los patrones y vamos a marcar estos patrones sobre la tela del pantalon, recortamos 2 piezas de cada patron. Luego recoratamos con la ayuda de la tijera.
2

Luego debemos colocar cara a cara las piezas para poder coser estas! Luego cosemos estas y dejamos solo un orificio que nos permita voltear la pieza del lado derecho.
Luego debemos hacer líneas en forma de Zig zag con la ayuda del marcador.
3

Luego cosemos los laterales, y luego la pieza de la base y la pieza delantera. Después debemos coser dos de las trabillas del pantalón y la cosemos en la parte superior del bolso.
4

Luego debemos coser una cinta y seguidamente introducimos las argollas y cosemos a esta una cinta de cristales.

Este es el resultado final, muchas gracias!

- Las imágenes me pertenecen
- Traductor: Deelp traslator
- Edicion: Canva
Wow, your work is amazing. The bag looks so nice and stylish. Lovely work all round
Thank you very much Diyhub! Greetings and Merry Christmas 🧑🎄🎄
Cool... it looks like a real design bag, and even better than a store-bought one, very good workmanship 🎅👌👌👌☃️🎄🦊⭐🌺 it is hard to find more good words.
Thank you very much for your words and support. 🎄
welcome 🌺👌👌😋😋😋☺
Wow!!! This is so creative. I learnt so much from this tutorial.
thanks my friend
Berro quedó bien bonita parece que fuera comprada
Muchas gracias amiga! tan bella, saludos
Wow! una linda cartera amiga, hiciste un gran trabajo, es muy original y elegante, si que sabes aprovechar y darle una segunda oportunidad a las prendas que ya no están en uso.
Saludos!
!DIY
Muchas gracias mi querida amiga! gracias por el apoyo.
You can query your personal balance by
!DIYSTATSmuy bonito, practico y combina con todo
very nice, practical and goes with everything
si, muchas gracias amiga! Saludos
Your post was manually curated by @crazyphantombr.
Delegate your HP to the hive-br.voter account and earn Hive daily!
🔹 Follow our Curation Trail and don't miss voting! 🔹
thanks 🇧🇷 🇧🇷
Incredible, the outcome is beautiful.
thanks friend
Wow!!! This is awesome, creativity at it's finest. Well done ❤️🌹
Thank you very much friend!