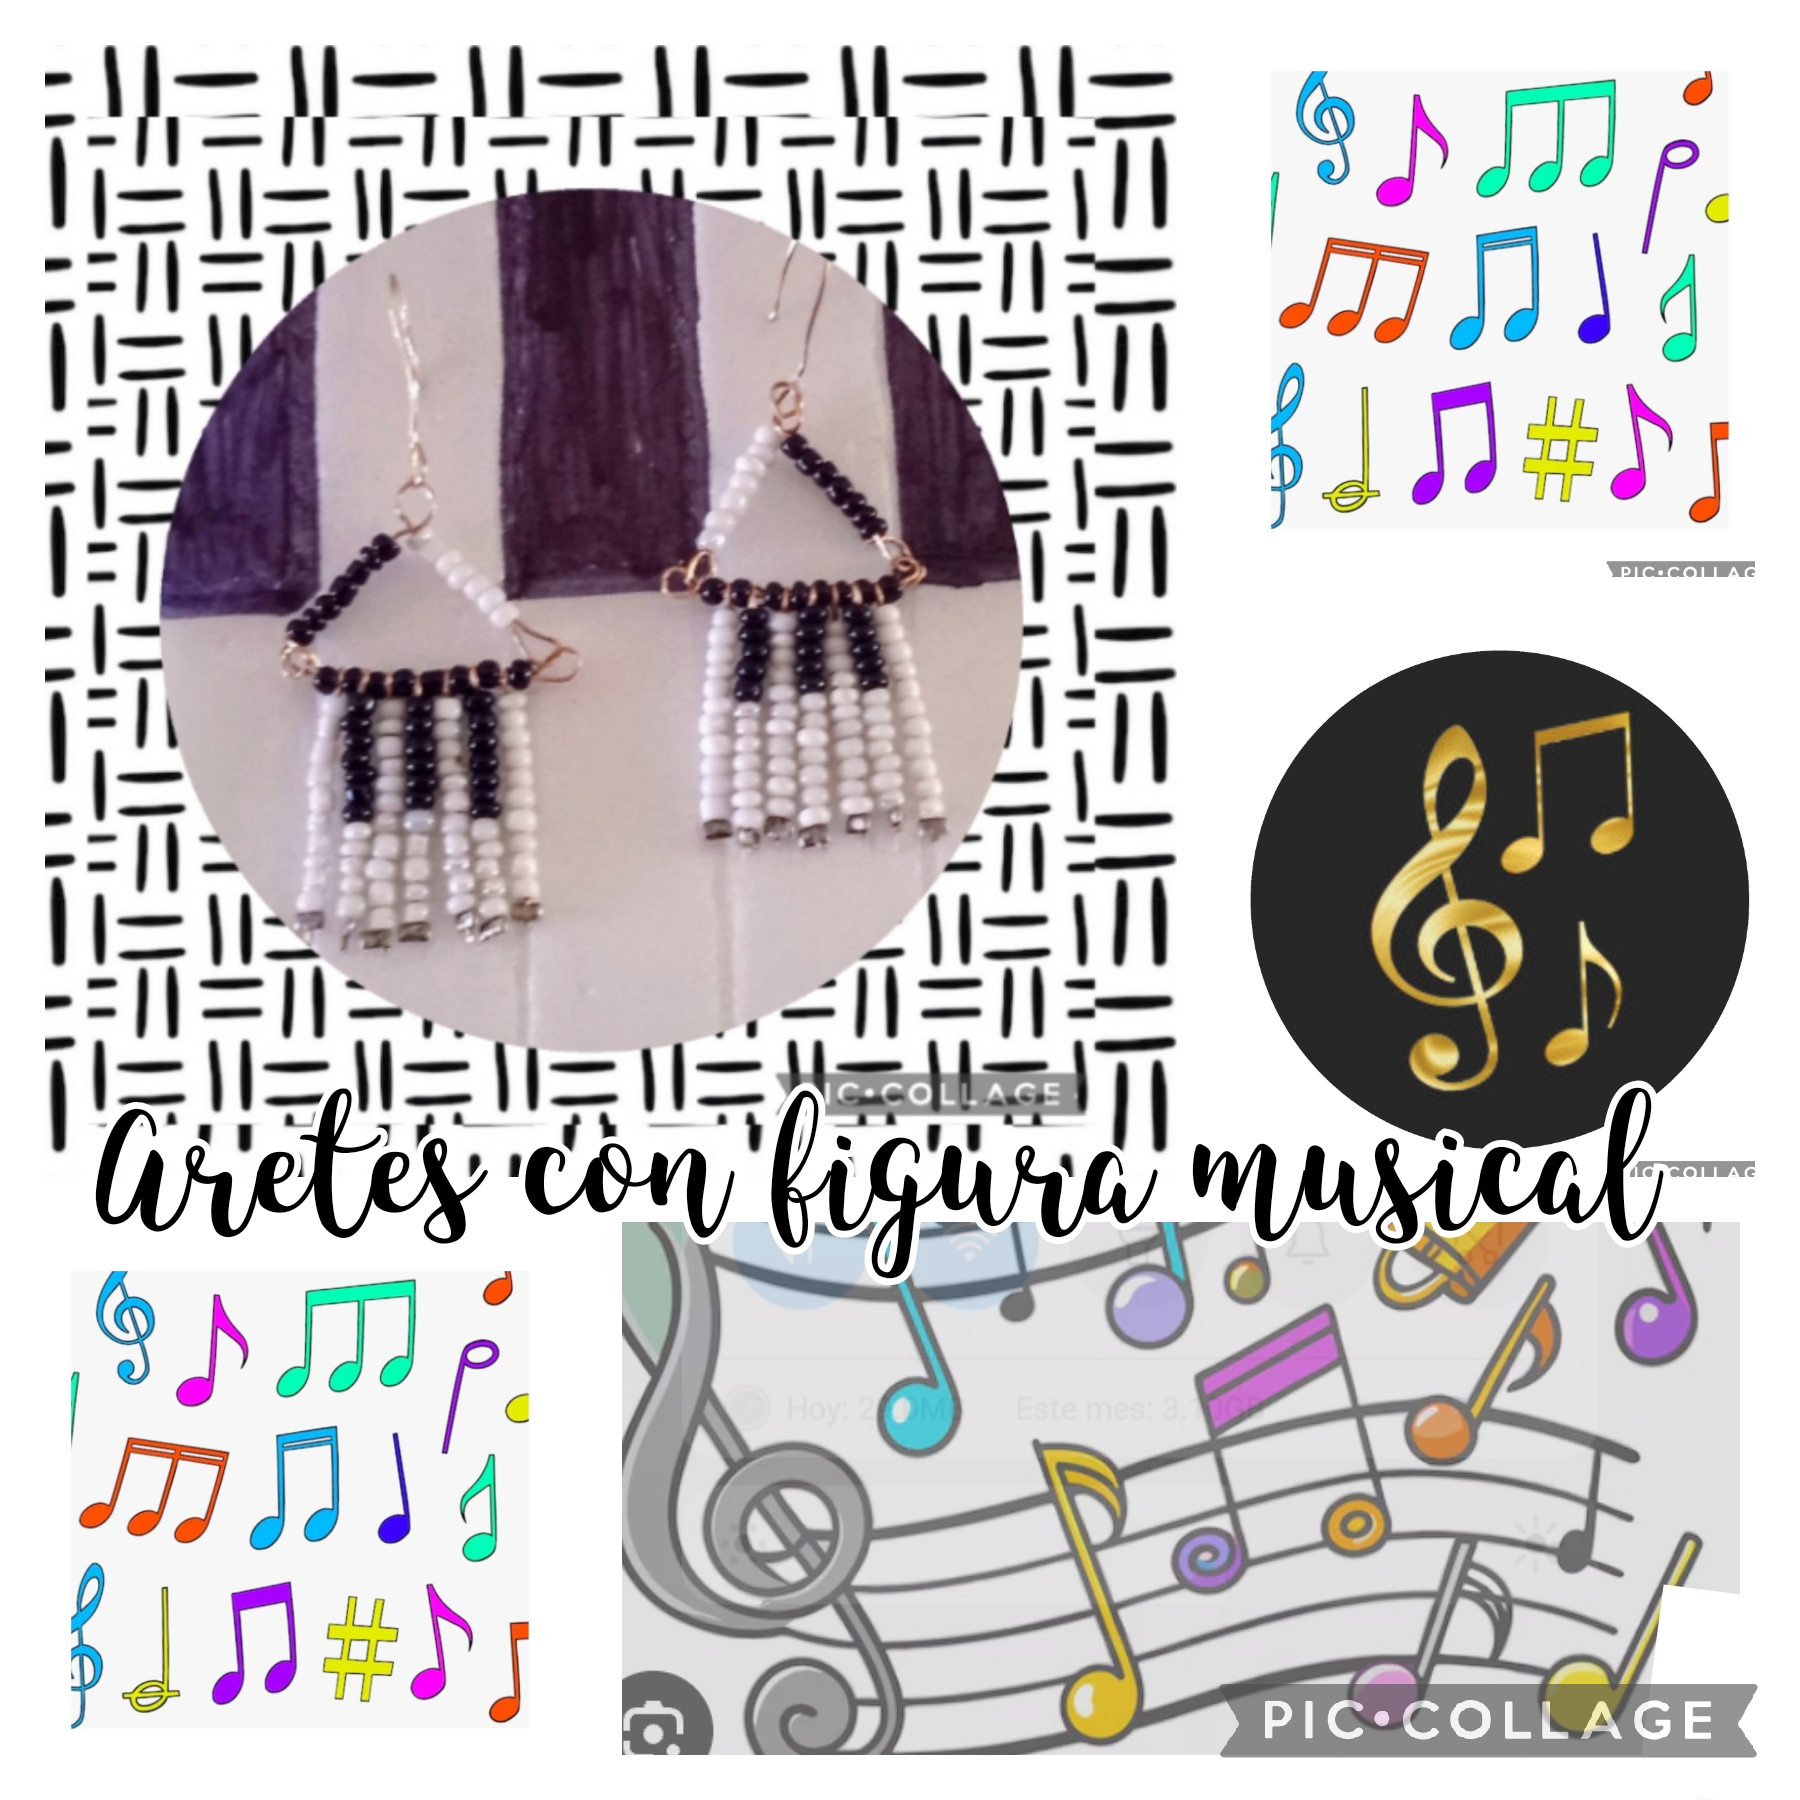
Tutorial: This is how I made these unique earrings to celebrate Musician's Day.// [Esp-Eng]
Saluditos, Artistas Creativos de las Manualidades y la Joyería y solo faltan cinco días para finalizar noviembre, espero que todos estén radiantes de alegría y muy felices por las fiestas que se aproximan ya estaremos en diciembre a solo treinta y un día de terminar el año 2024, fue un año bisiesto ya hasta dentro de cuatro años no habrá otro.
Y el 22 de noviembre fué el Día del Músico, se escogió está fecha para tal celebración porque aquí se conmemora la muerte de Santa Cecilia Patrona de los mismos. Está celebración se realiza con misas, grupos musicales tales como conciertos, coros escolares y una diversidad de eventos en honor a la Musica.
En otras ocasiones para esta fecha he realizado accesorios para mis amigos músicos, y también a una sobrina que toca varios instrumentos entre ellos el piano, me pareció que una octava que es un intervalo de ocho grados entre dos notas de la escala musical en forma de Aretes sería su mejor presente Así que sigan leyendo para que vean como los hice.
Greetings, Creative Artists of Crafts and Jewelry and there are only five days left to finish November, I hope that everyone is radiant with joy and very happy for the holidays that are approaching, we will already be in December, just thirty-one days away from the end of the year 2024, it was a leap year and in four years there will not be another one.
And November 22 was Musician's Day, this date was chosen for such a celebration because here the death of Saint Cecilia, Patron of the same, is commemorated. This celebration is carried out with masses, musical groups such as concerts, school choirs and a variety of events in honor of Music.
On other occasions for this date I have made accessories for my musician friends, and also for a niece who plays several instruments including the piano, it seemed to me that an octave which is an interval of eight degrees between two notes of the musical scale in the form of Earrings would be her best gift, so keep reading to see how I made them.
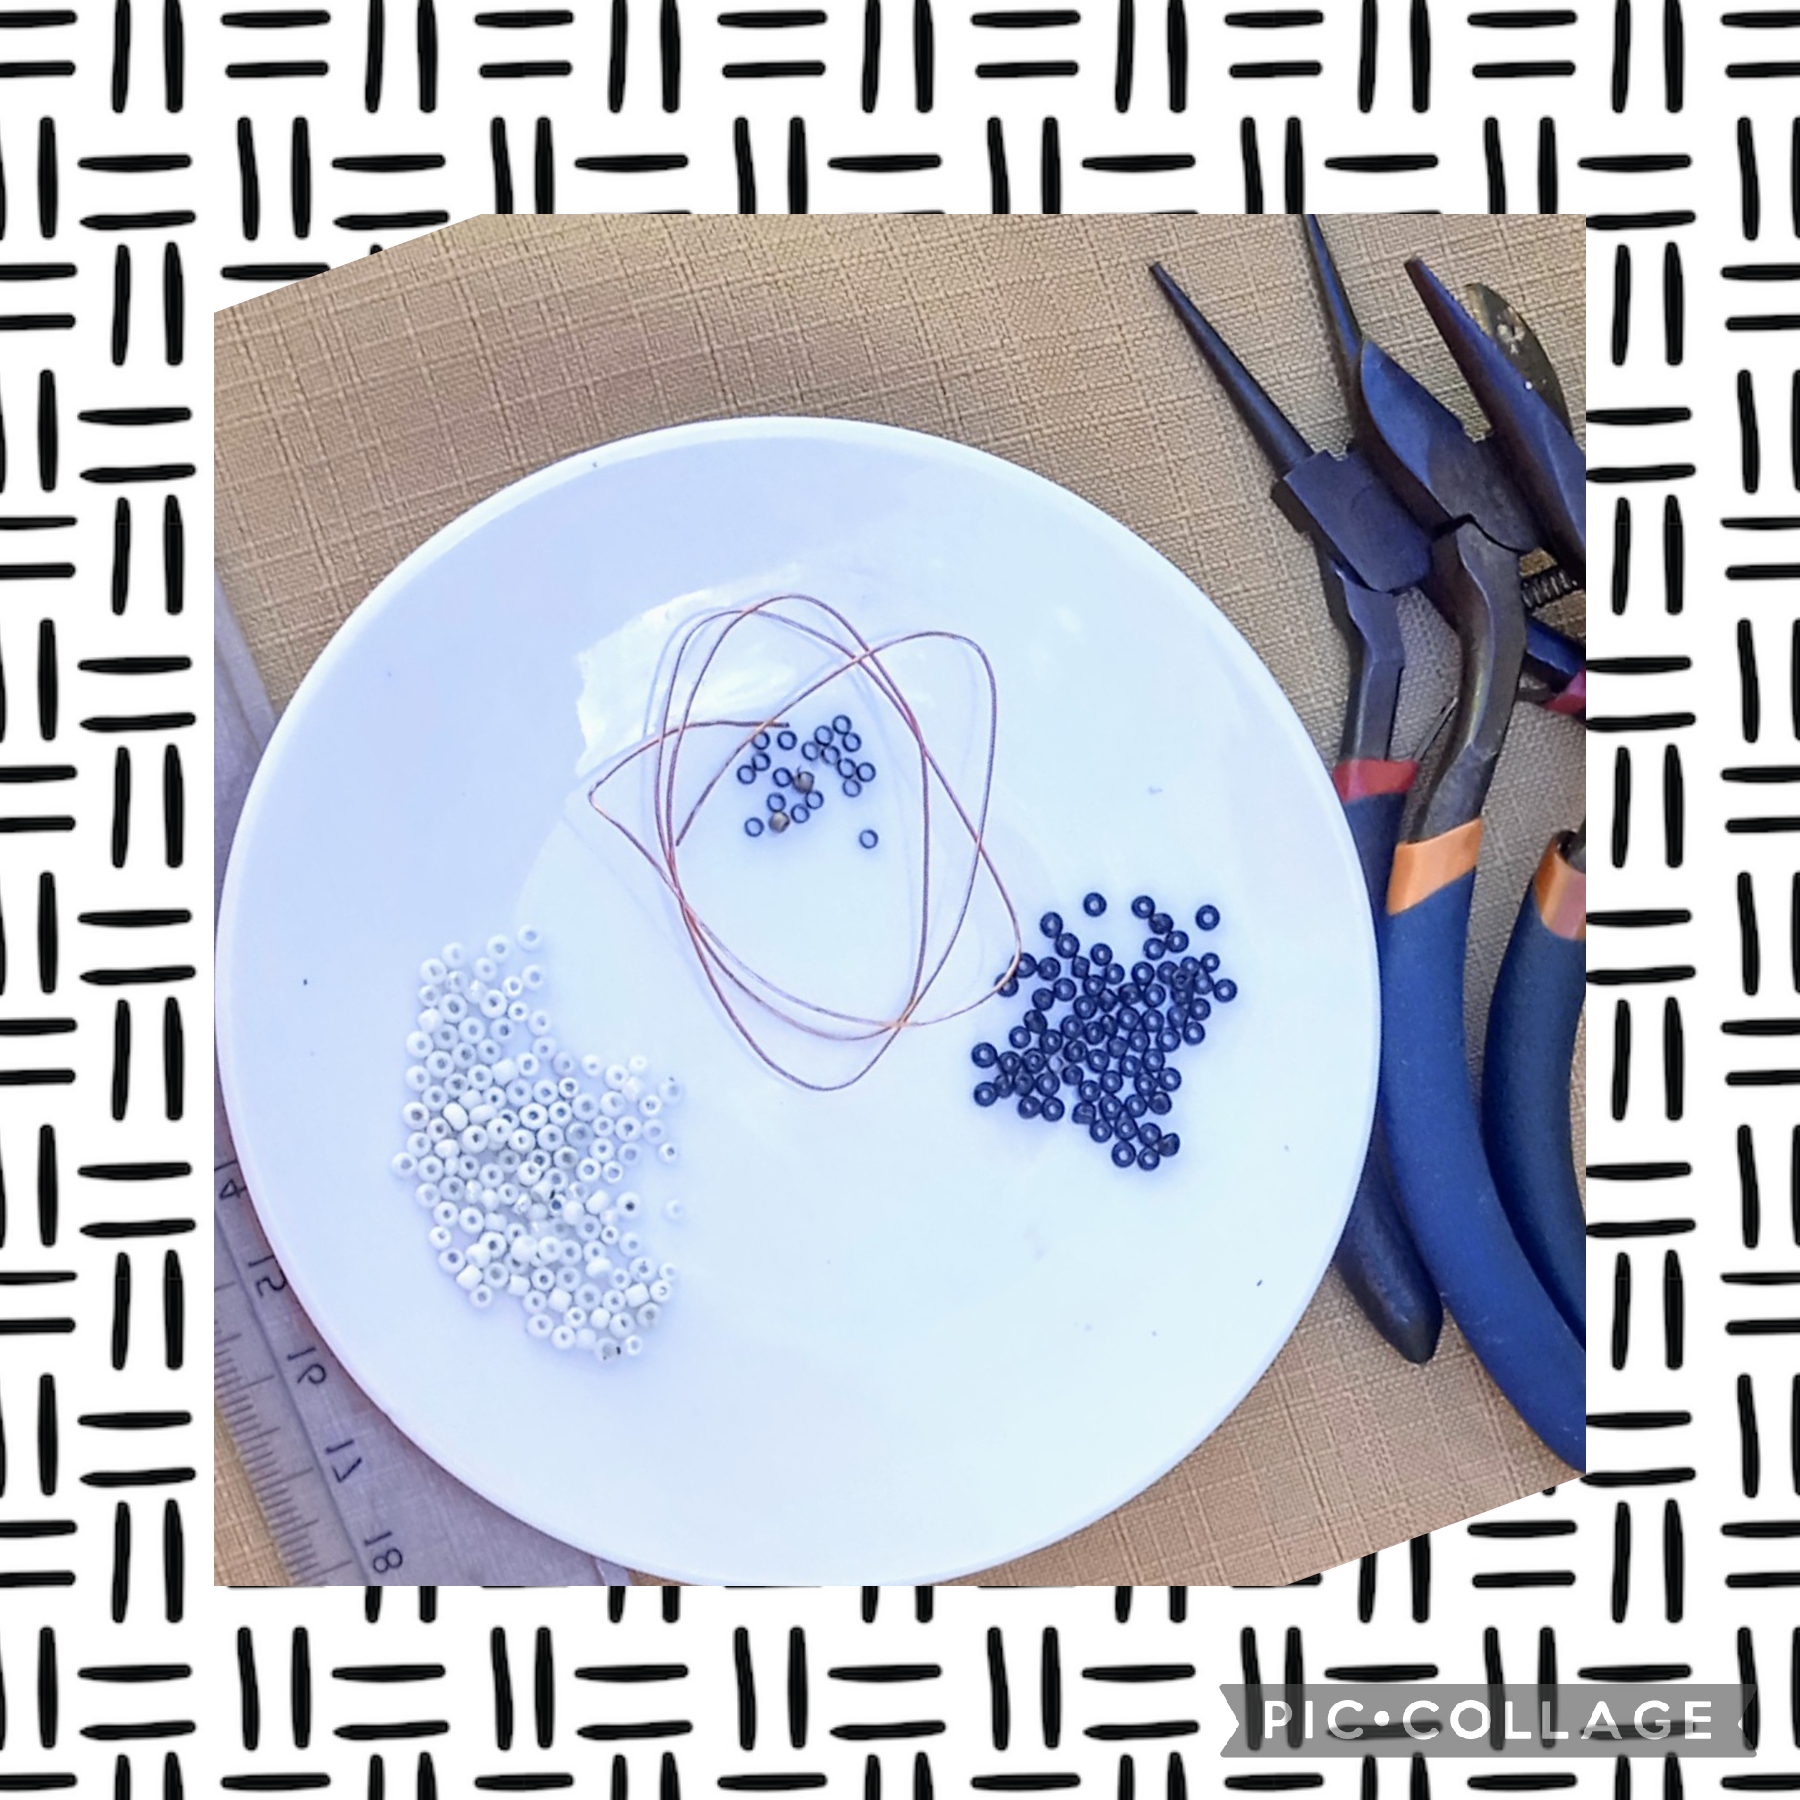
MATERIALES USADOS PARA ELABORAR ESTOS SINGULARES ARETES:
✓ Mostacillas negras.
✓ Mostacillas blancas.
✓ Alambre para bisutería calibre 28 "
✓ Grapas.
✓ Regla.
✓ Pinza plana.
✓ Pinza punta redonda.
✓ Pinza de corte.
MATERIALS USED TO MAKE THESE UNIQUE EARRINGS:
✓ Black beads.
✓ White beads.
✓ 28" gauge jewelry wire
✓ Staples.
✓ Ruler.
✓ Flat pliers.
✓ Round tip pliers.
✓ Cutting pliers.
PASOS QUE USE PARA ELABORAR ESTE PROYECTO:
PRIMER PASO:
Para la elaboración de estos Aretes, comienzo usando el alambre para bisutería y mido con la regla a la altura de dos centímetros y medio. Corto catorce tramitos iguales para hacer el par.
STEPS I USED TO MAKE THIS PROJECT:
FIRST STEP:
To make these earrings, I start by using the jewelry wire and measure with the ruler at a height of two and a half centimeters. I cut fourteen equal lengths to make the pair.

SEGUNDO PASO:
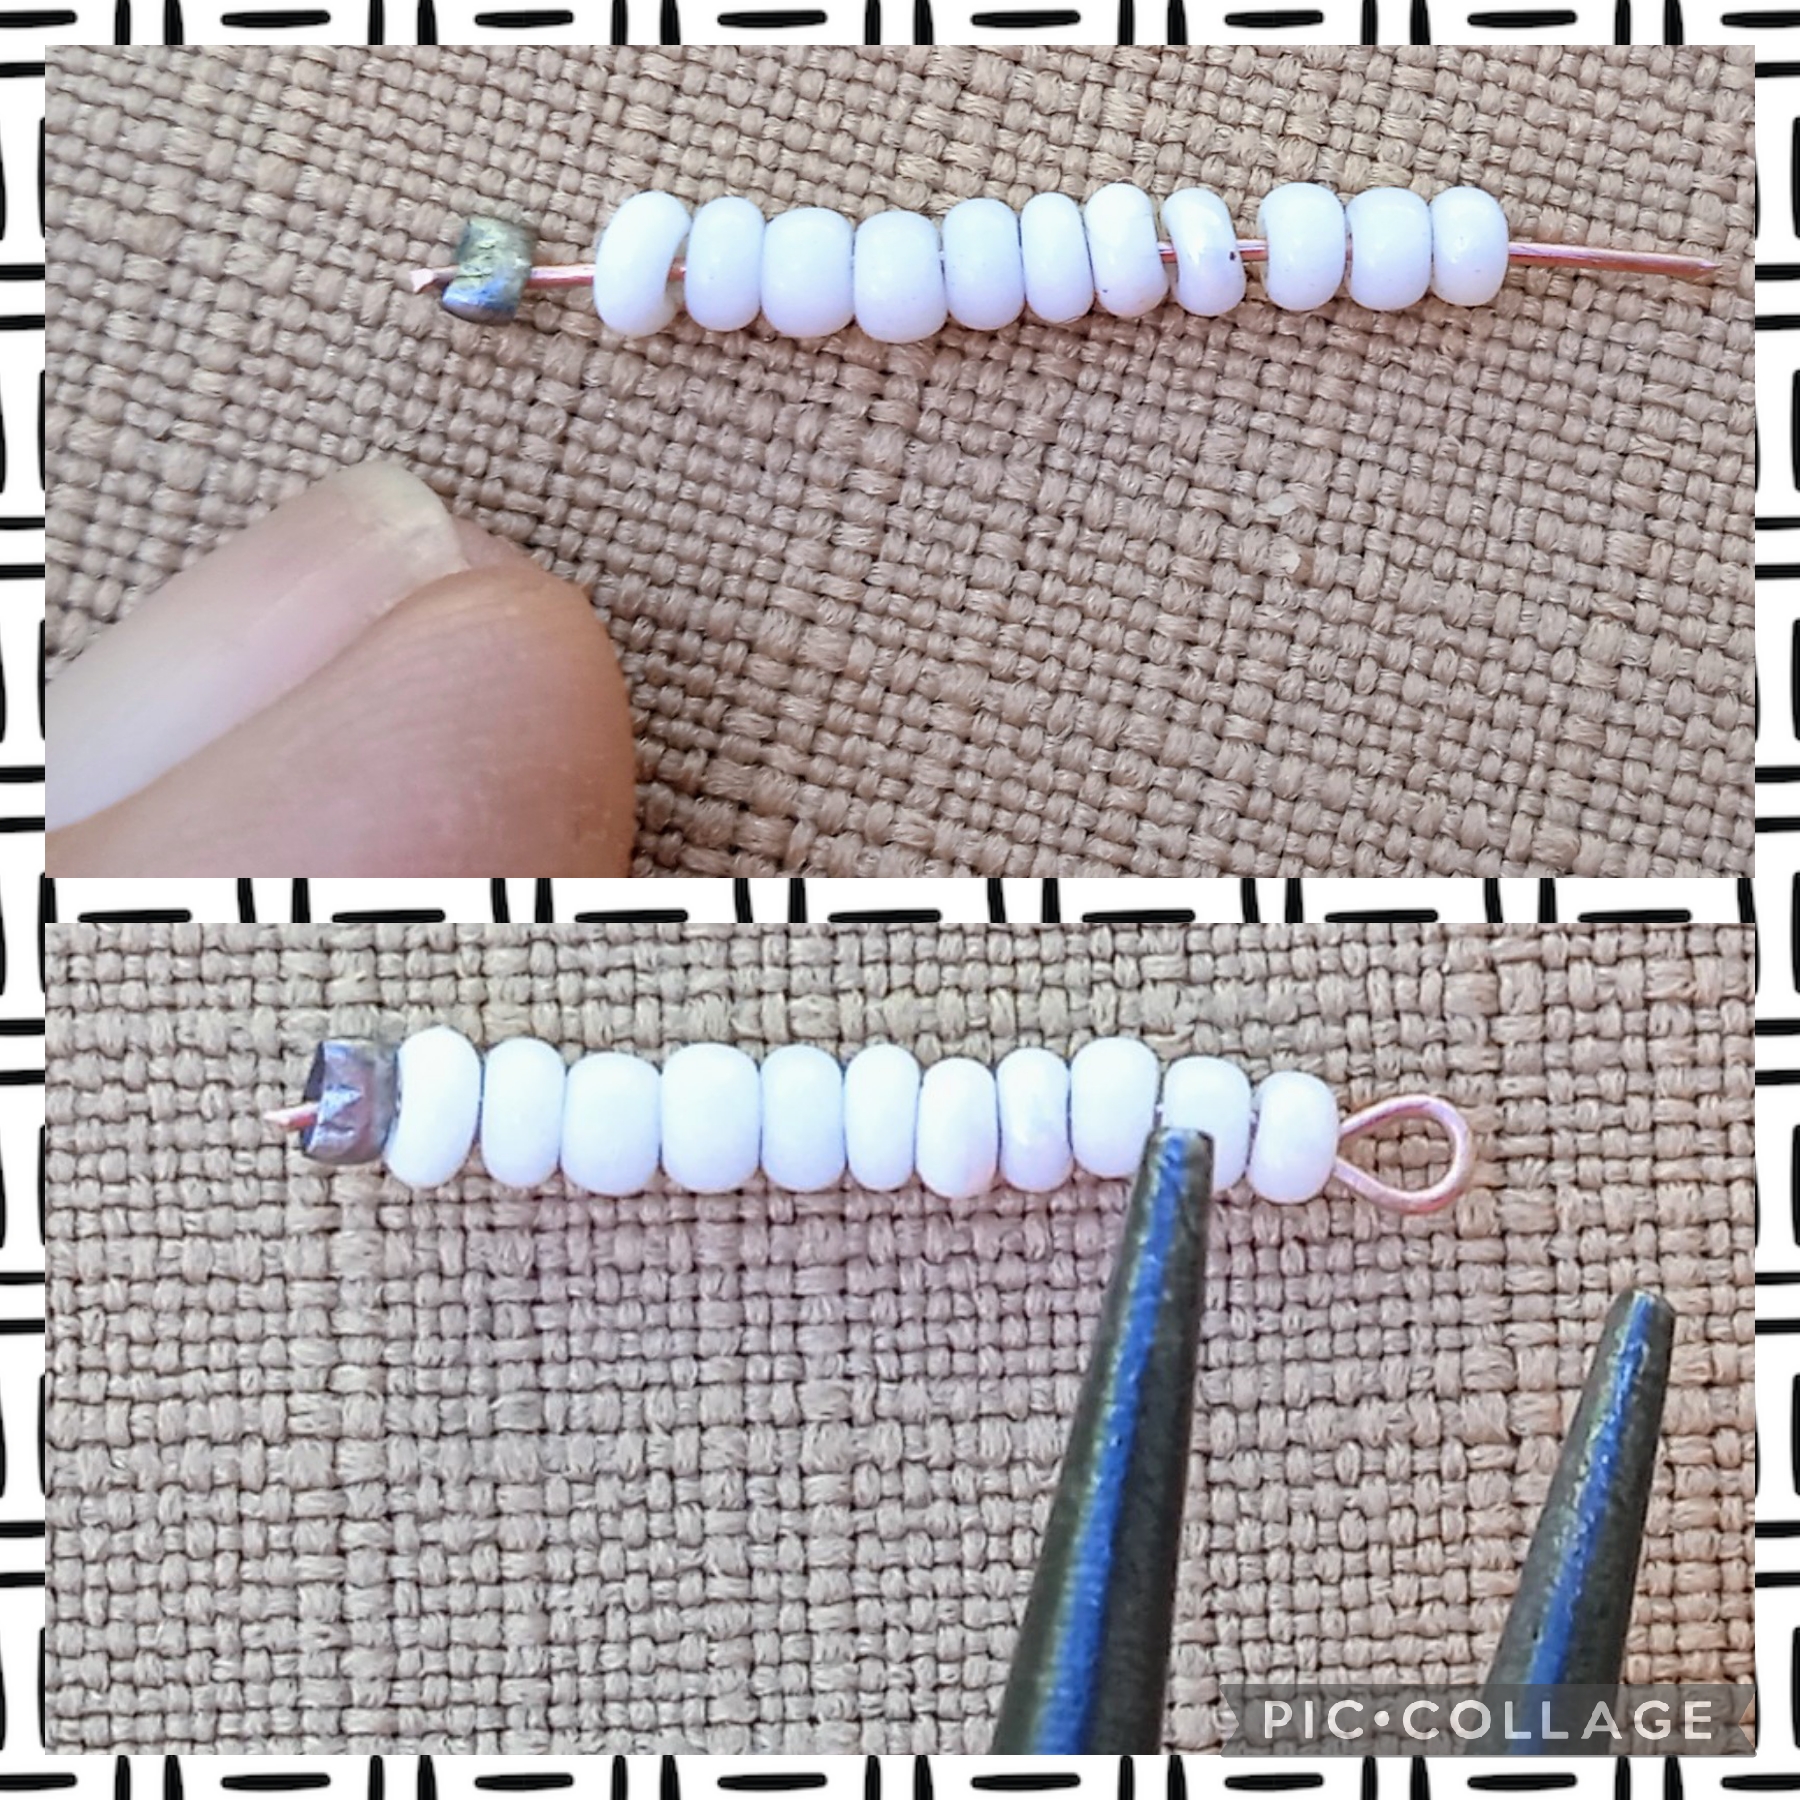
Una vez que tengo cortadas mis piezas, tomo una de ellas, inserto por uno de los extremos una grapa y con la ayuda de la Pinza plana, la ajusto bien al alambre, ahora por el otro extremo inserto once mostacillas blancas, y con la ayuda de la pinza punta redonda realizo un anillo como en la foto.
SECOND STEP:
Once I have cut my pieces, I take one of them, insert a staple through one of the ends and with the help of the flat pliers, I adjust it well to the wire, now through the other end I insert eleven white beads, and with the help of the round-tipped pliers I make a ring like in the photo.
TERCER PASO:
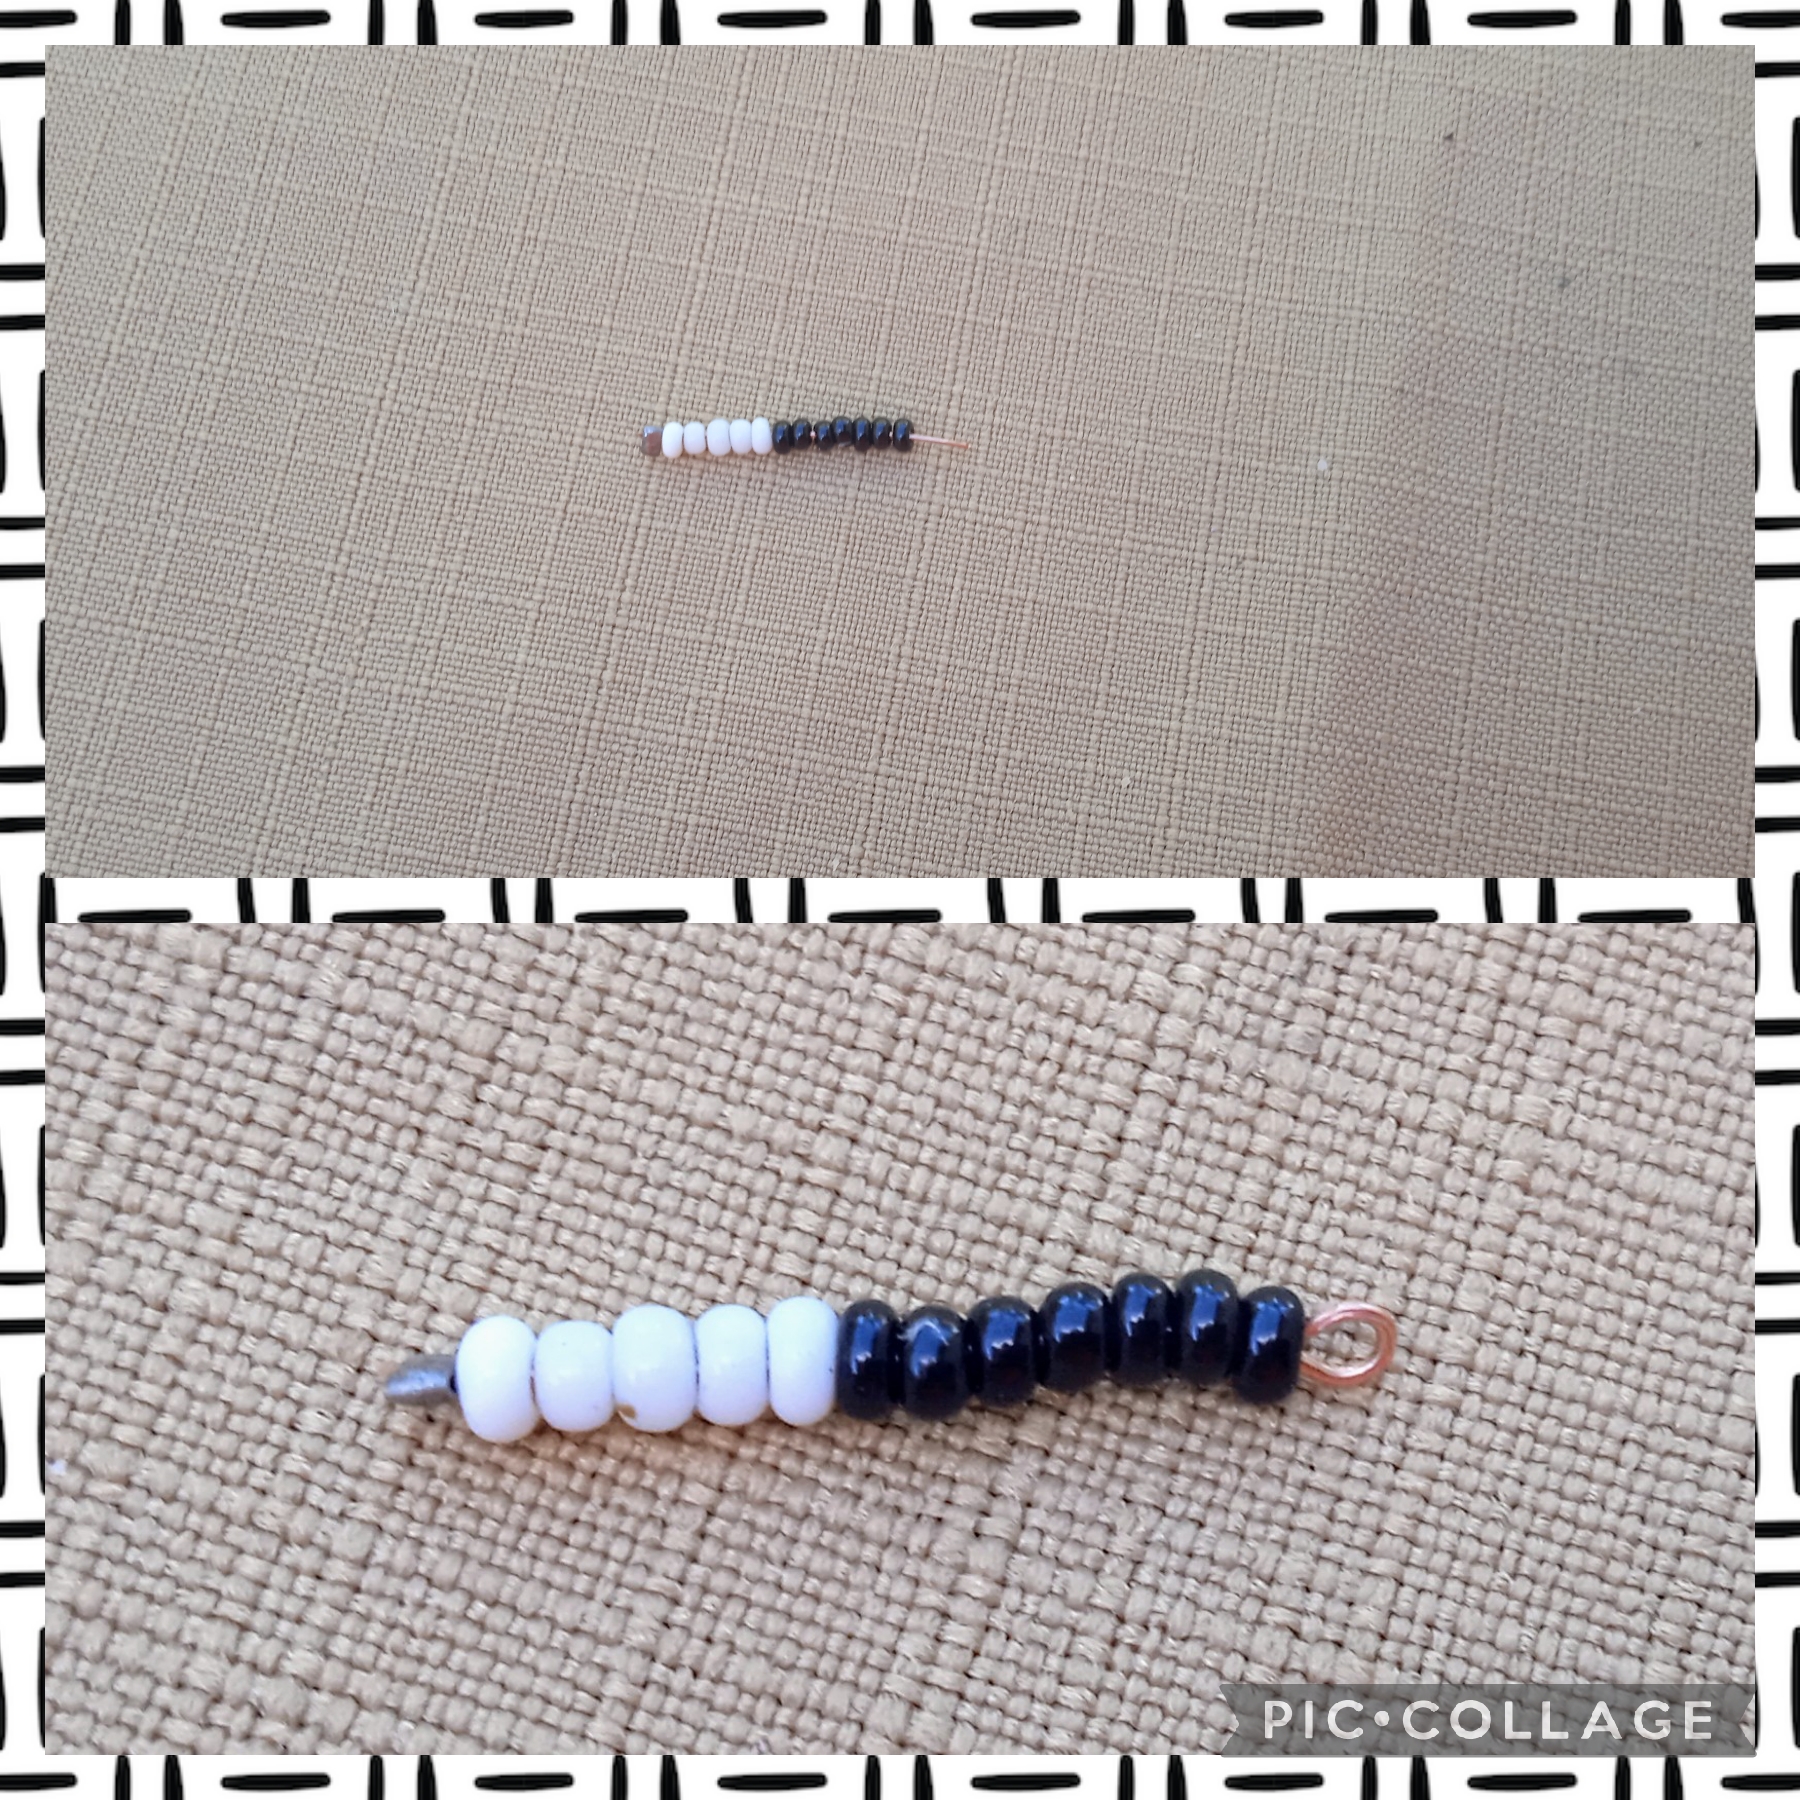
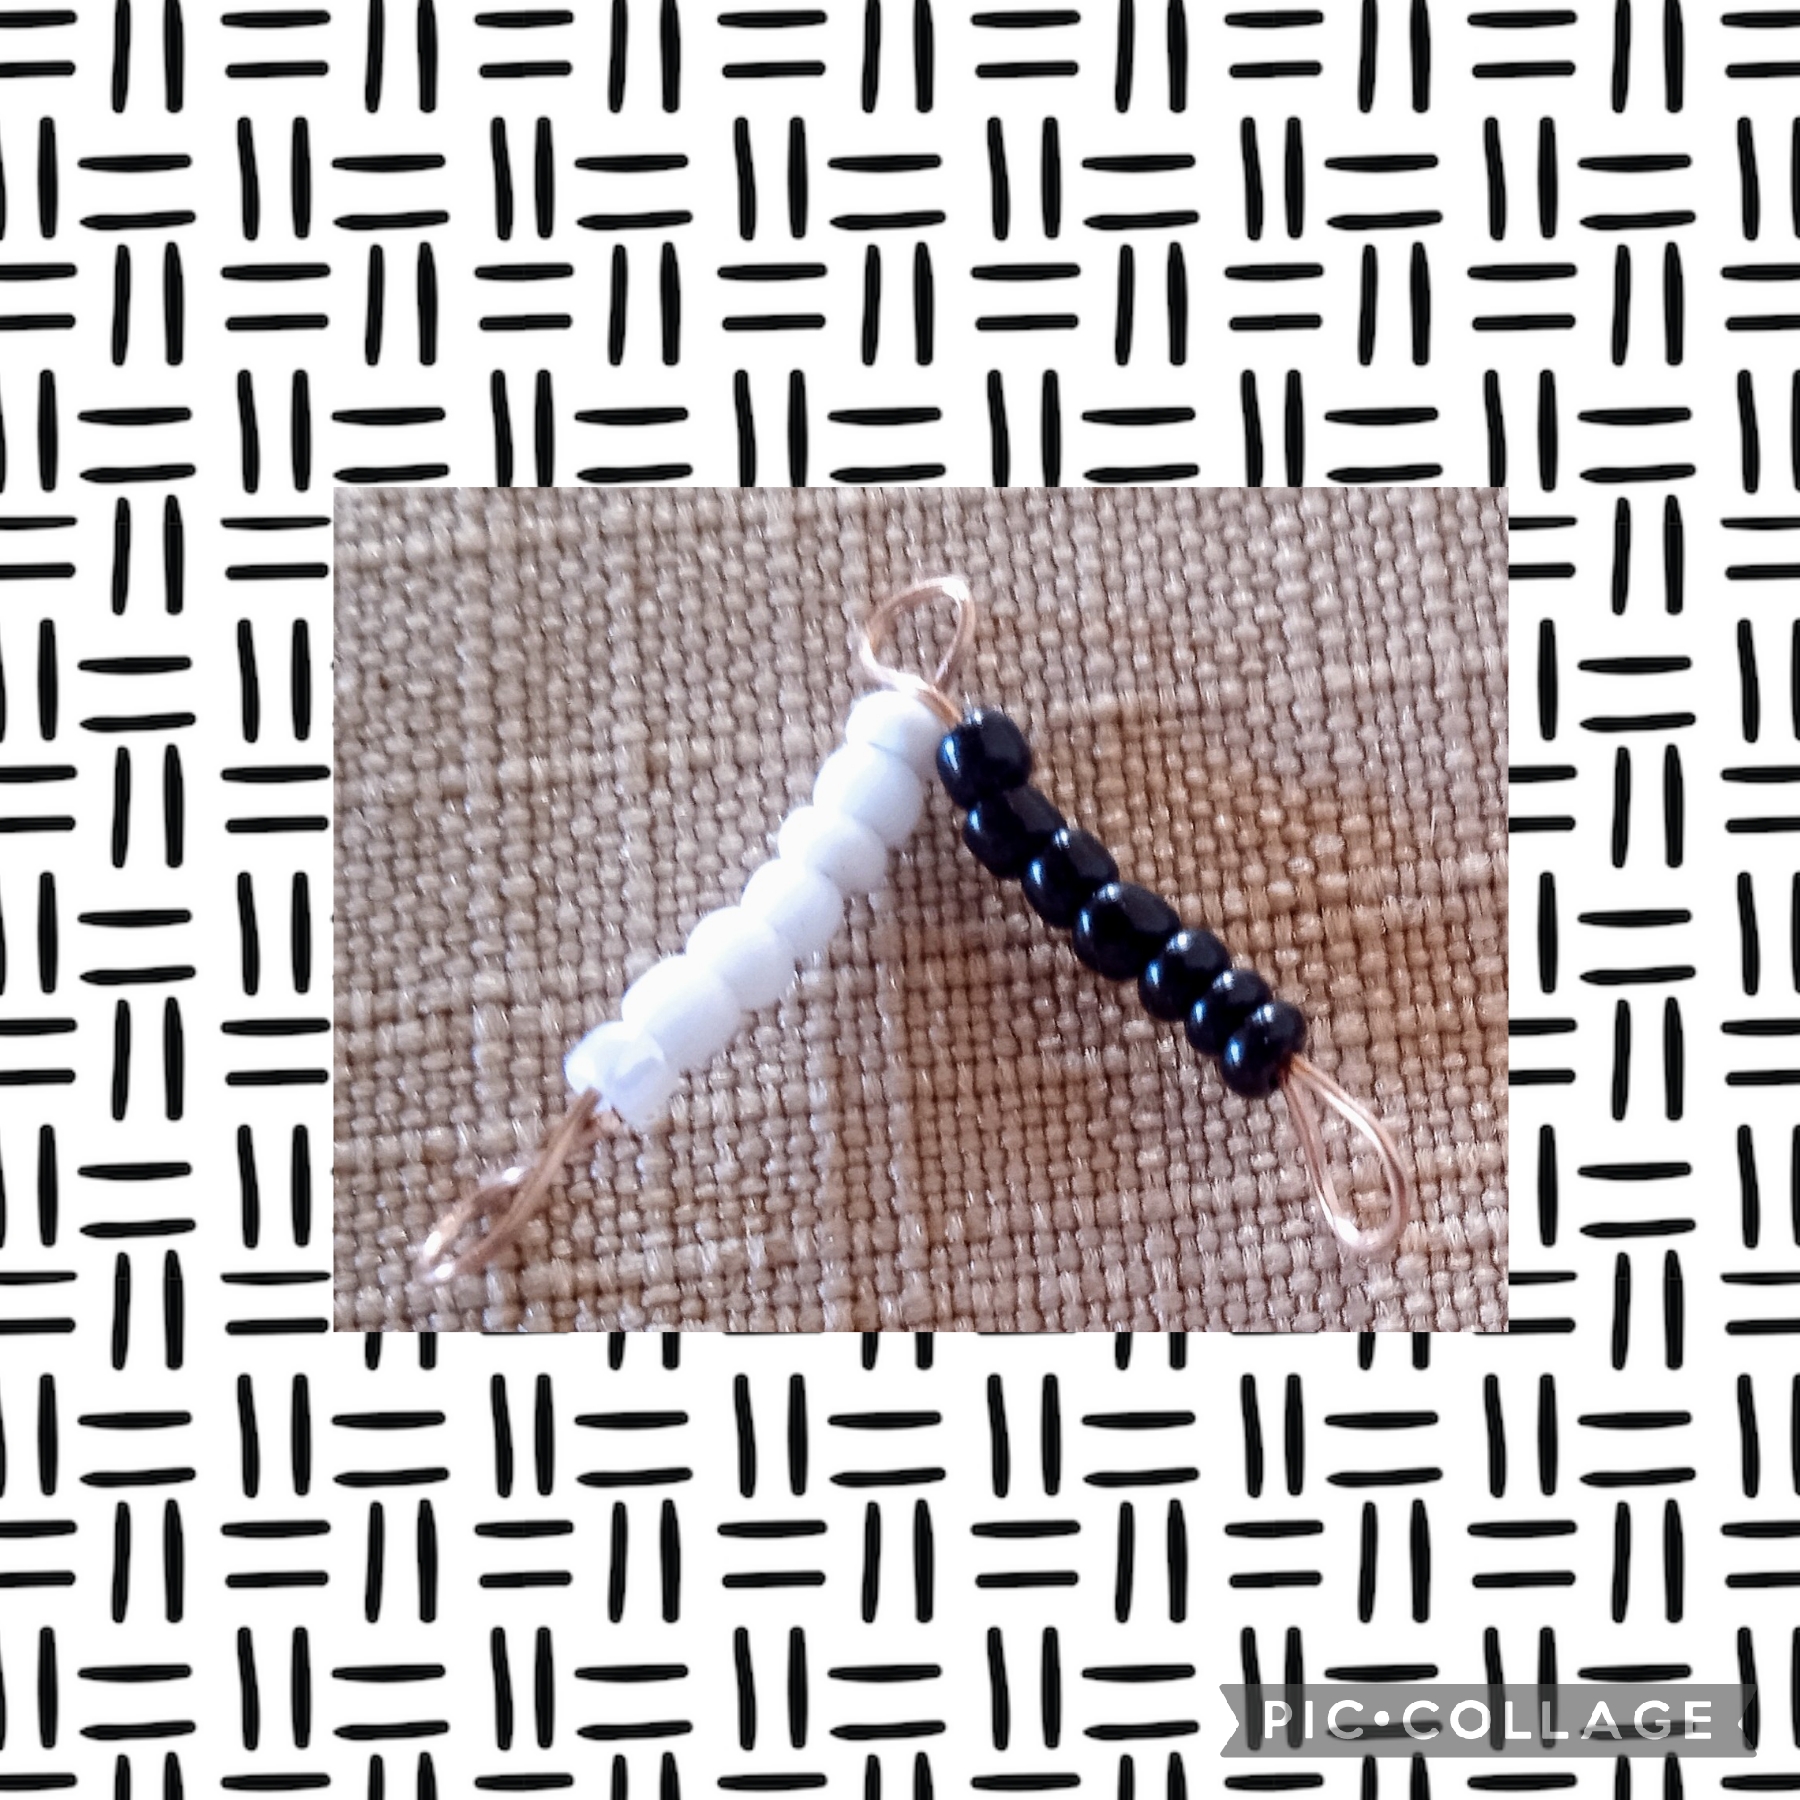
En este paso voy a realizar un procedimiento parecido al anterior, solo que voy a usar mostacillas negras y blancas, vuelvo a usar un trozo de alambre de los picados y de la misma manera en un extremo inserto una grapa y la ajusto, luego coloco cinco mostacillas blancas, y siete mostacillas negras, con la pinza punta redonda realizo un anillo, como muestra la imagen.
THIRD STEP:
In this step I am going to perform a procedure similar to the previous one, except that I am going to use black and white beads. I am again going to use a piece of chopped wire and in the same way I insert a staple at one end and tighten it. Then I place five white beads and seven black beads. With the round-tipped pliers I make a ring, as shown in the image.
CUARTO PASO:
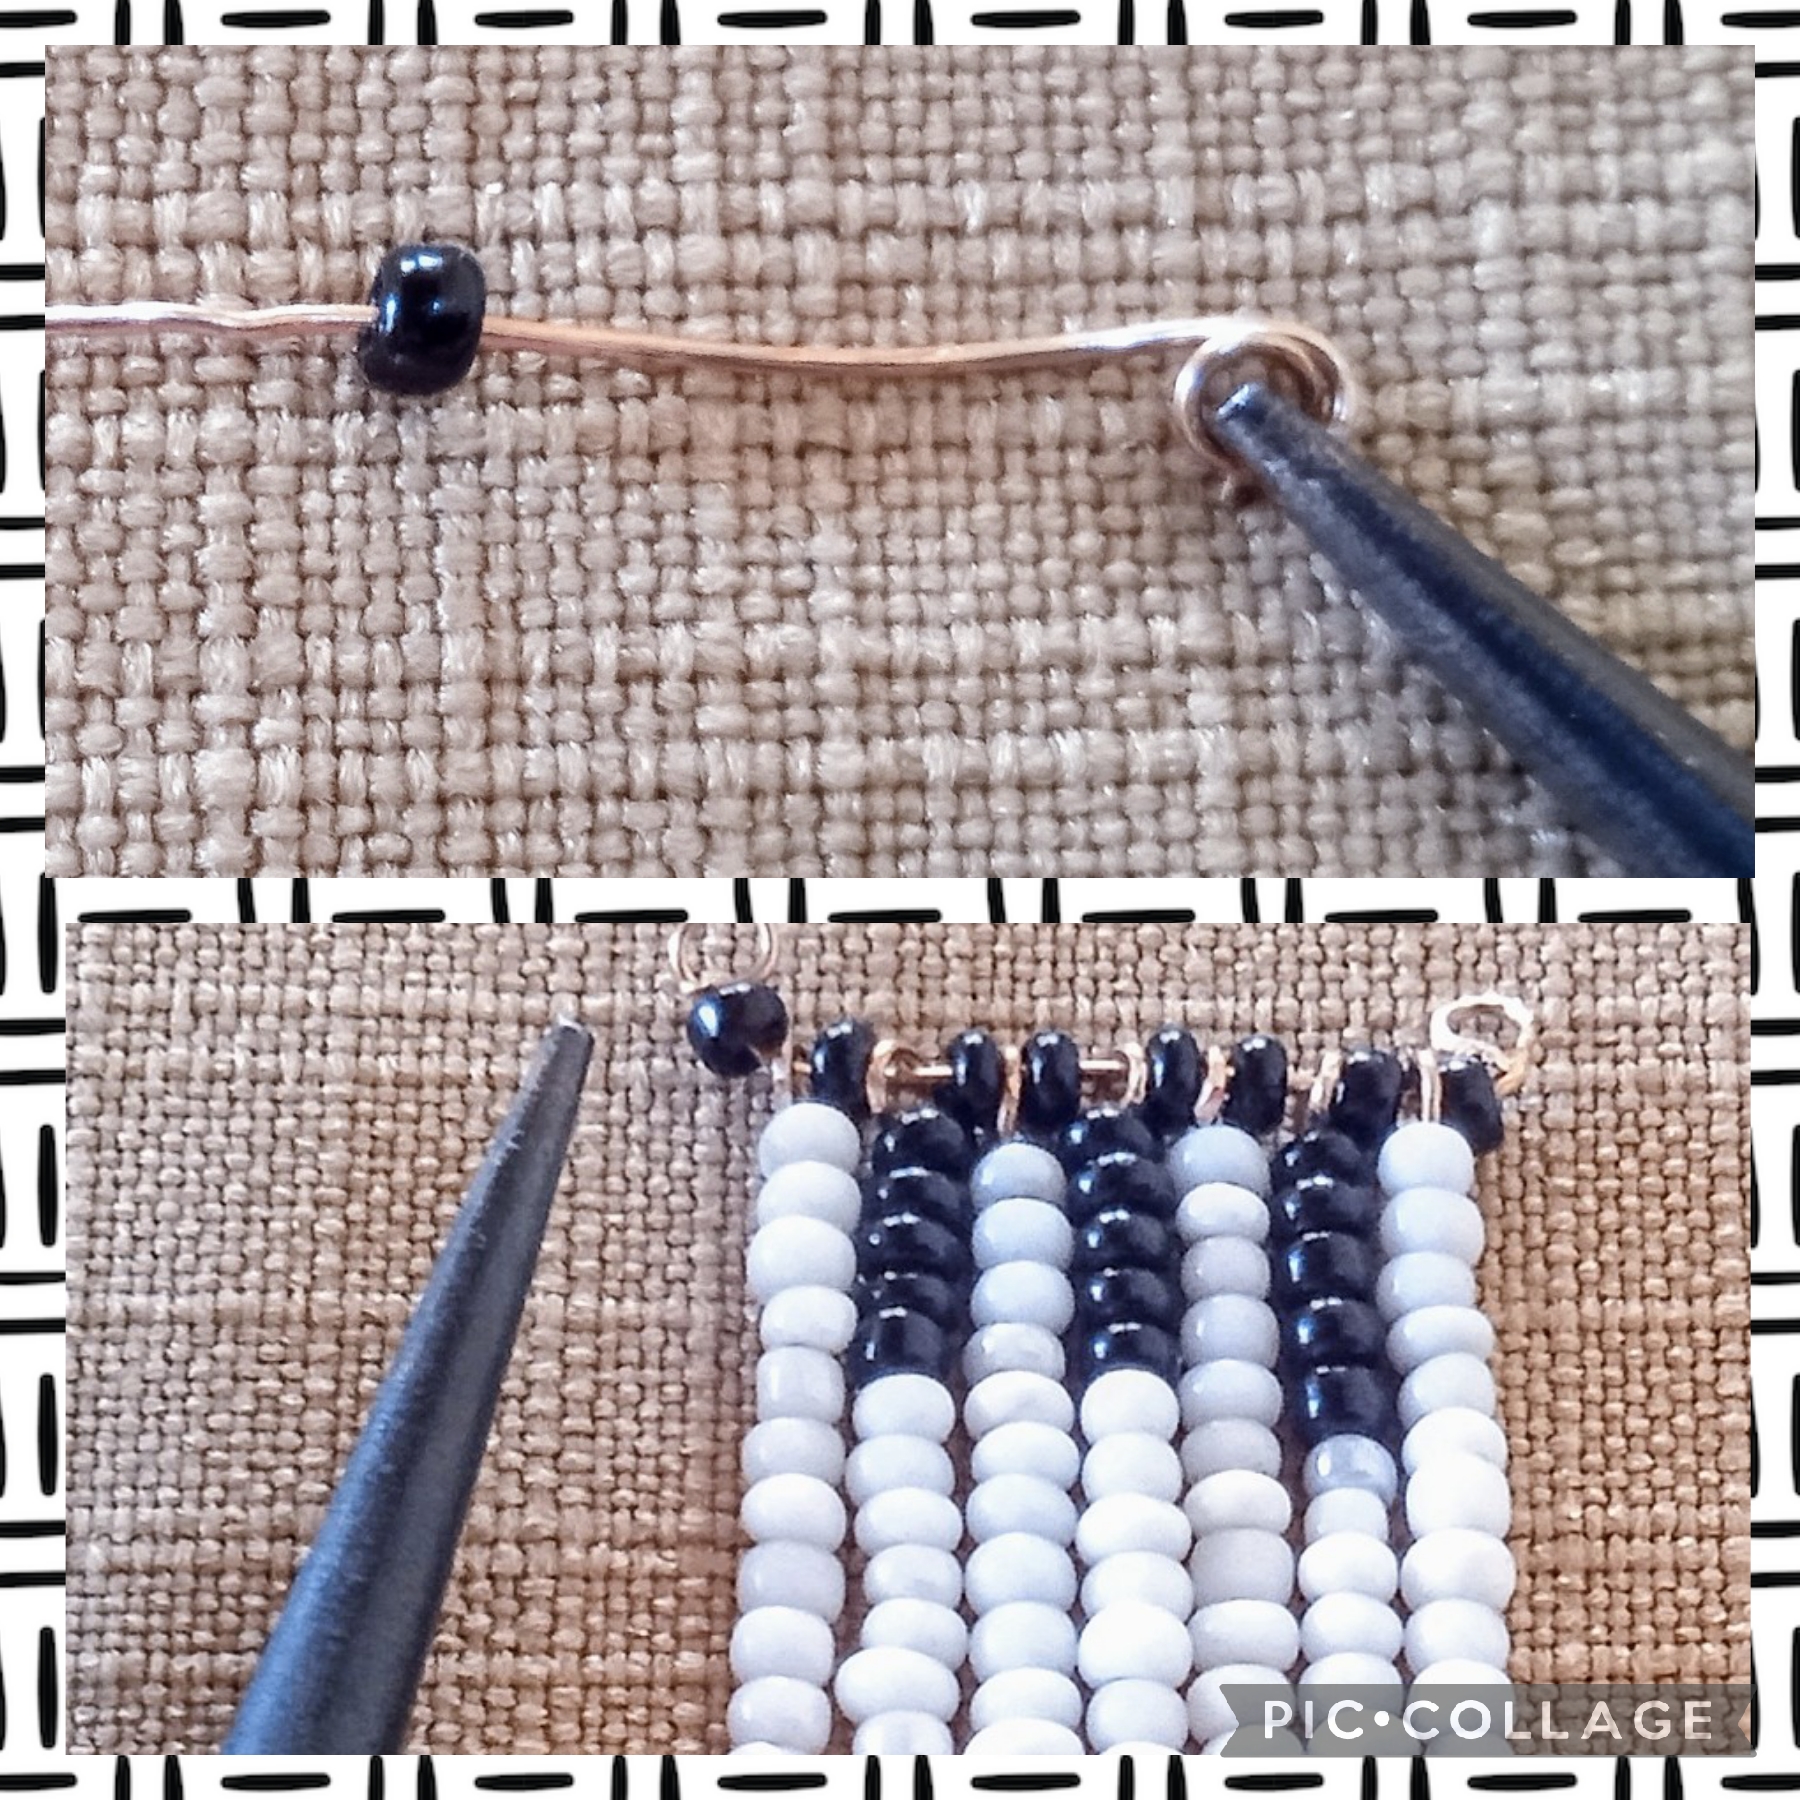
En este paso uso la pinza de corte, mido con la regla 📏 un trozo de alambre de tres centímetros. Realizo con la pinza punta redonda un arito en un extremo, inserto una mostacilla negra ahora un bastoncito de mostacilla blanca, luego una mostacilla negra, sigo con un bastoncito blanco y negro, otra mostacilla negra porque estás son como separadores, otro bastoncito blanco, otro blanco y negro, otro blanco, otro blanco y negro y otro blanco, de nuevo hago un arito al final como se ve en la imagen.
STEP FOUR:
In this step I use the cutting pliers, I measure with the ruler 📏 a piece of wire of three centimeters. With the round-tipped pliers I make a ring at one end, I insert a black bead now a white bead stick, then a black bead, I continue with a black and white stick, another black bead because these are like separators, another white stick, another black and white, another white, another black and white and another white, again I make a ring at the end as seen in the image
QUINTO PASO:
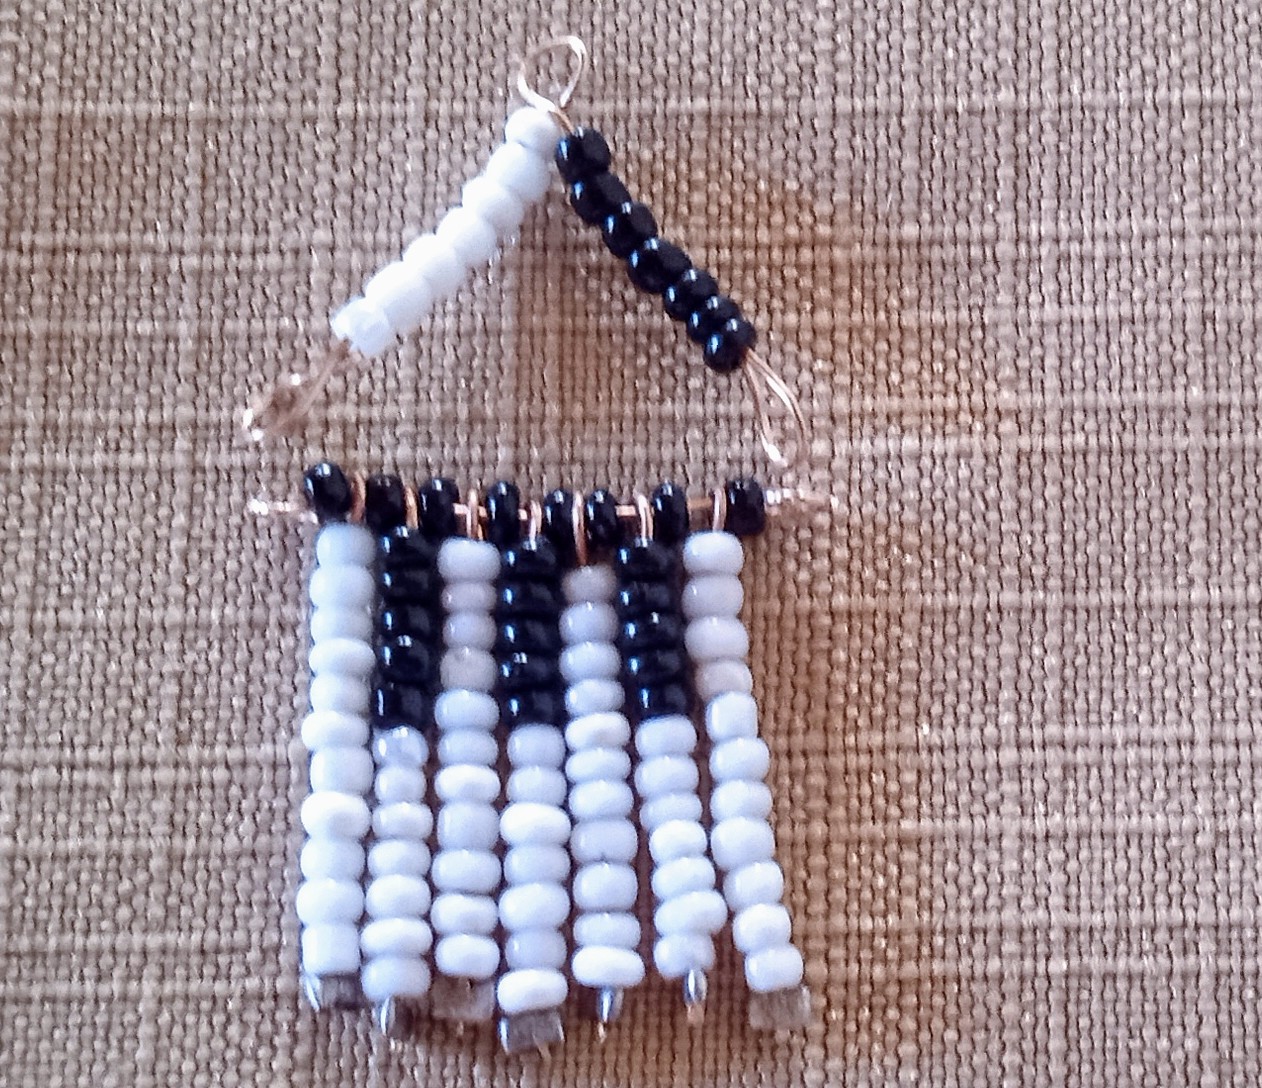
De esta manera hago el soporte para colgar el Arete, en un trozo de alambre de cinco centímetros que corto del alambre para bisutería, lo doblo a la mitad y hago un anillo como muestra la imagen de un lado inserto seis mostacillas blancas y del otro lado seis mostacillas negras, lo abro como si fuera un triángulo y paso la punta de cada alambre por los anillos que están en los extremos de la imagen anterior, aseguro y cierro, previamente había realizado un par de anzuelos para aretes que no detalle su elaboración porque ya lo he compartido en contenidos anteriores, tomo de nuevo la pinza plana abro un poco uno de los anzuelos y lo paso por la argolla del Arete, cierro de nuevo y asi queda.
FIFTH STEP:
This is how I make the support to hang the Earring, on a five-centimeter piece of wire that I cut from the jewelry wire, I bend it in half and make a ring as shown in the image on one side I insert six white beads and on the other side six black beads, I open it as if it were a triangle and I pass the tip of each wire through the rings that are at the ends of the previous image, I secure and close, previously I had made a pair of hooks for earrings that I did not detail their elaboration because I have already shared it in previous content, I take the flat pliers again, open one of the hooks a little and pass it through the ring of the Earring, close it again and that's how it remains.
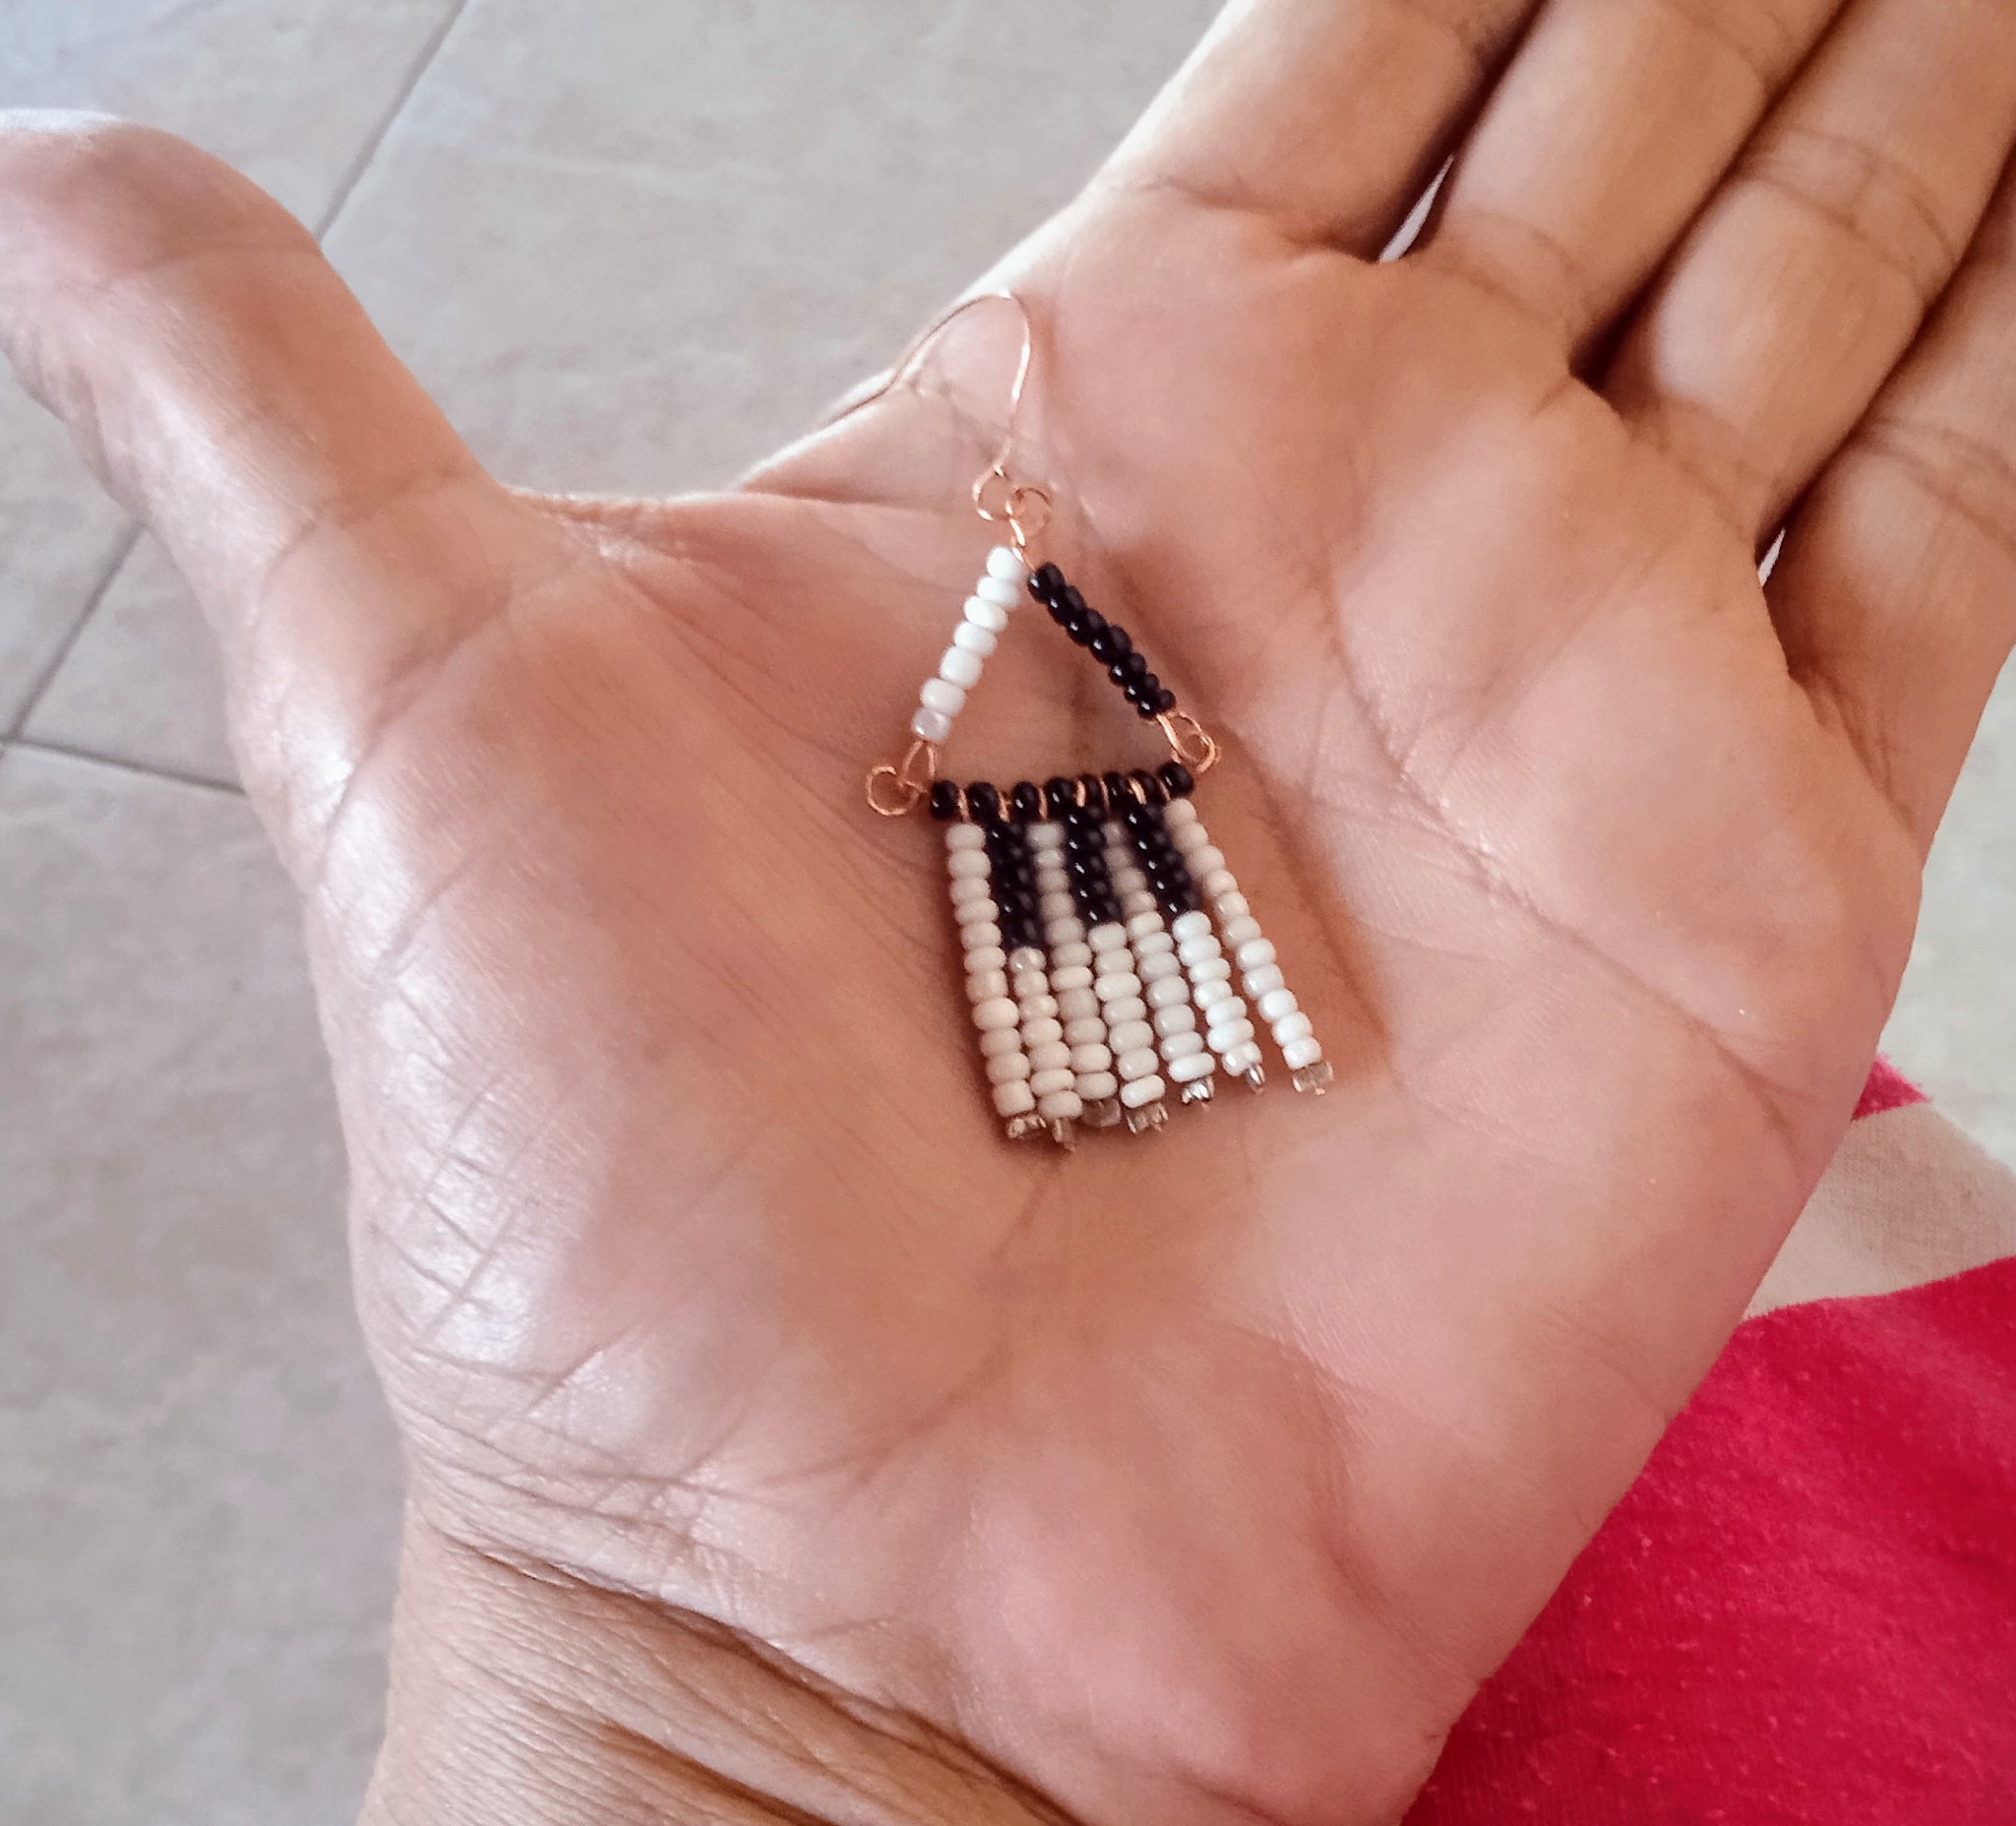
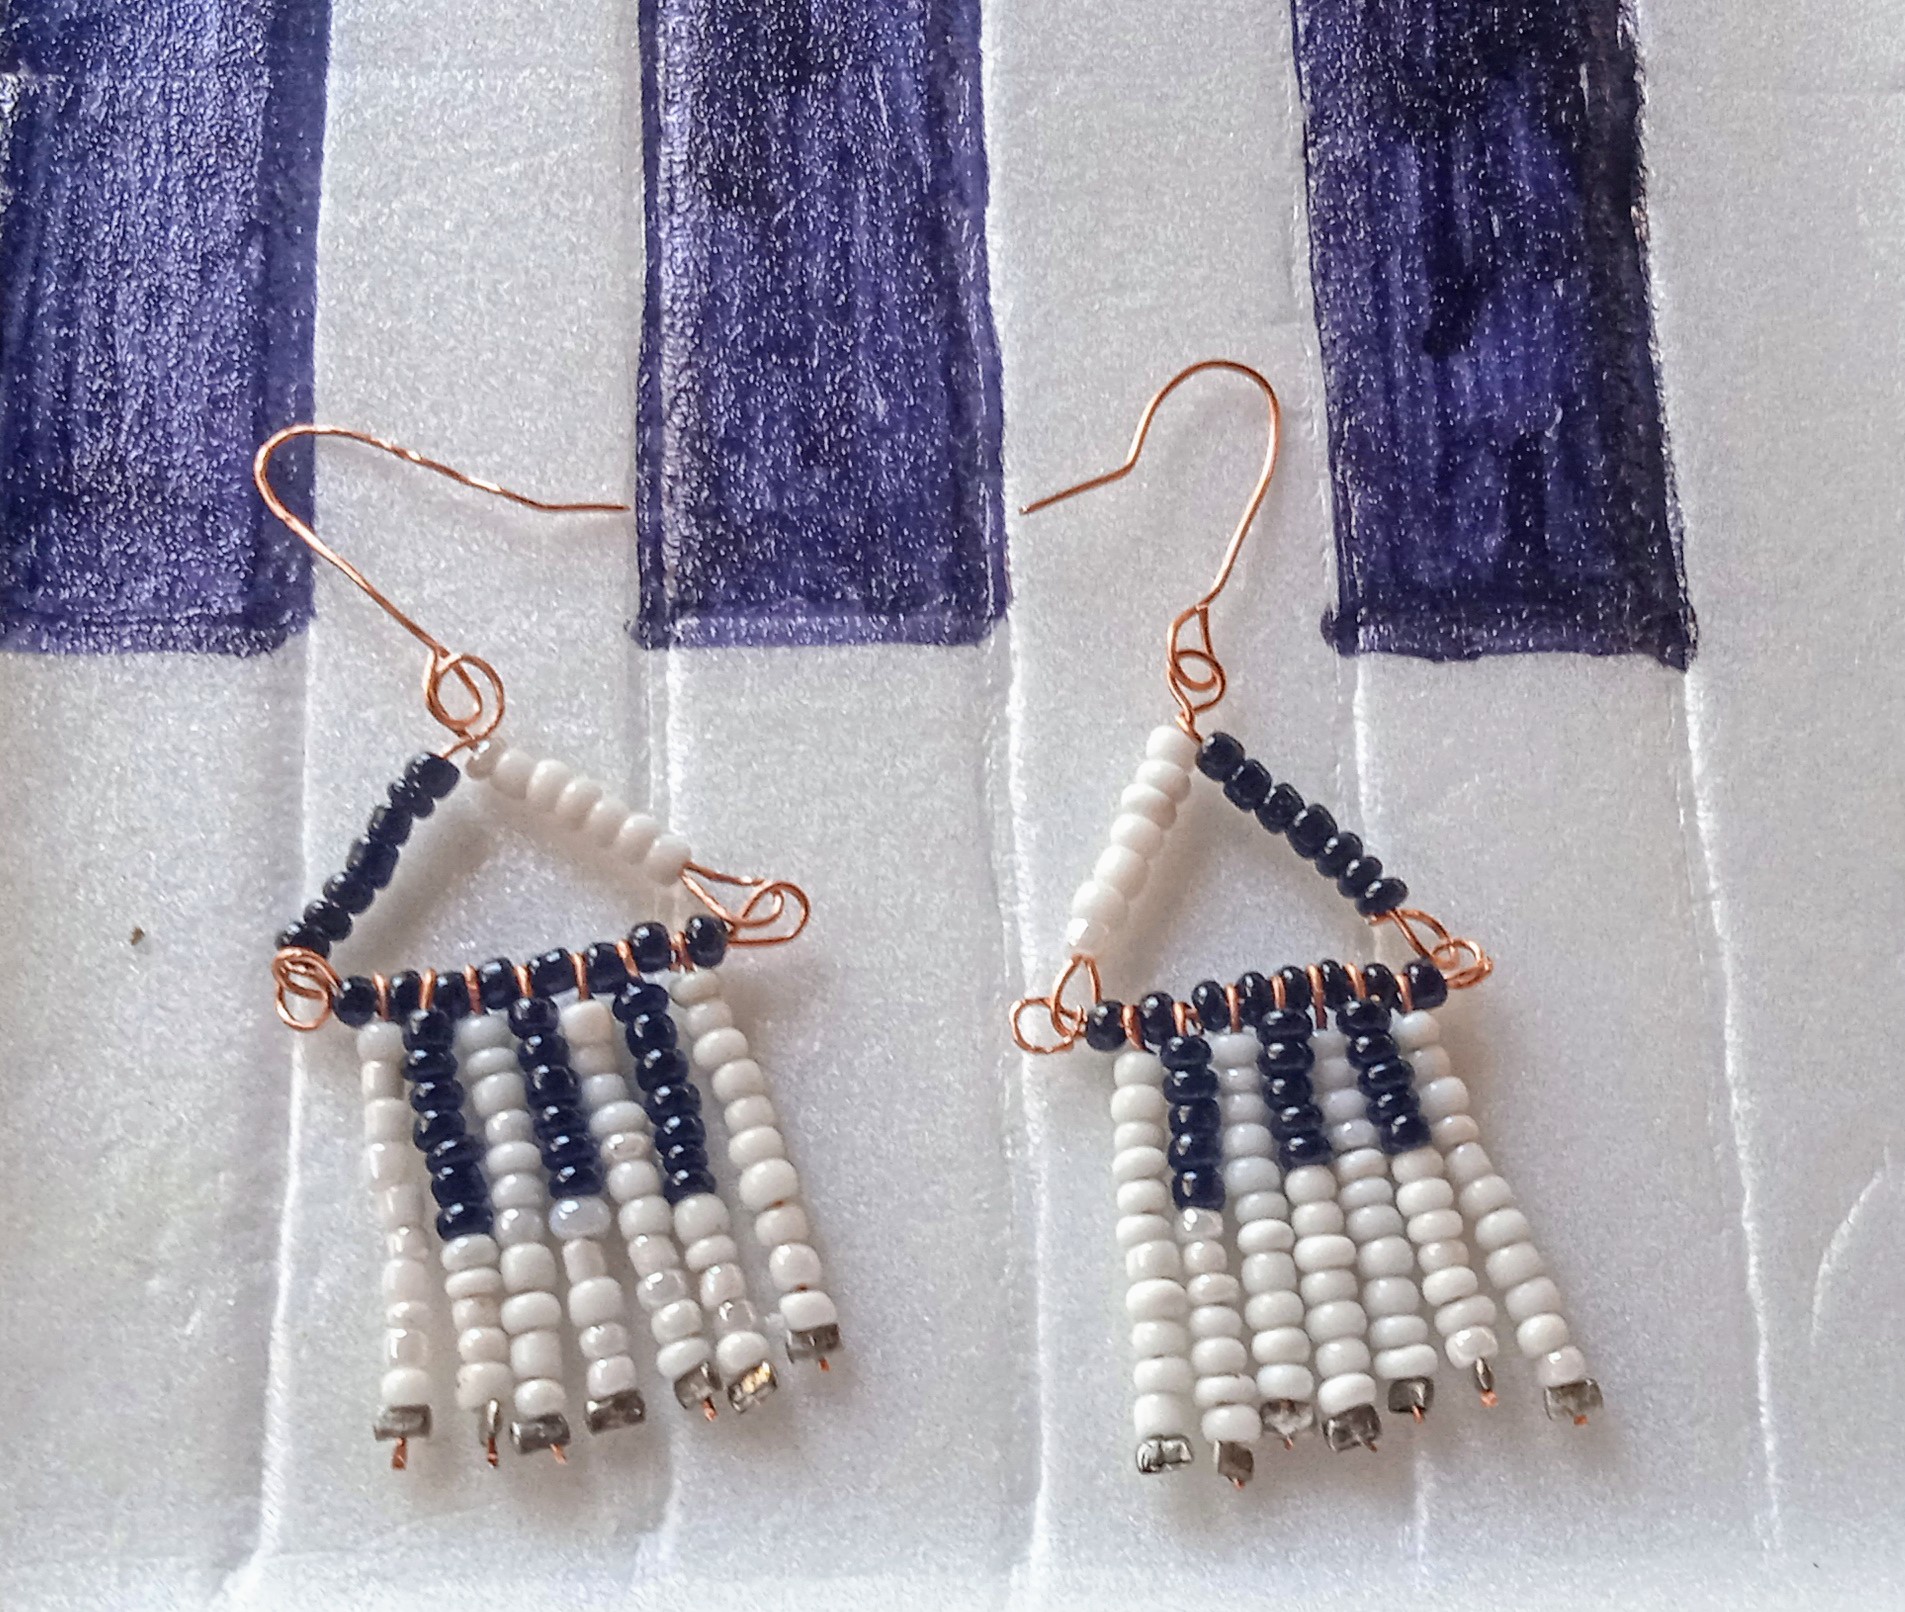
Artistas Creativos de las Manualidades y la Joyería, este es el resultado final de este bonito proyecto realicé otro Arete igual para tener el par y así lo muestro, espero que les guste mi idea y me dejen sus valiosos comentarios, gracias a todos por leer y ver mis publicaciones, nos vemos en la próxima manualidad, bye bye .
Creative Artists of Crafts and Jewelry, this is the final result of this beautiful project. I made another identical earring to have the pair and this is how I show it. I hope you like my idea and leave me your valuable comments. Thank you all for reading and viewing my posts. See you in the next craft. Bye bye.
Las imágenes y redacción de éste tutorial son de mi exclusiva propiedad, las fotos fueron tomadas con mi teléfono celular redmi 9 y las edite con una aplicación gratis del mismo. Para traducir texto use Google traductor.
The images and writing of this tutorial are my exclusive property, the photos were taken with my redmi 9 cell phone and I edited them with a free application of the same. To translate text use Google translator.

Son todo un espectáculo querida @nhaydu, tu creatividad es asombrosa. Besitos 😘
Que tierna @lorennys, como se ve que soy tu mamá🥰
Te quedaron hermosos y elegantes, me encanto tu motivo de inspiración con la temática musical, un creativo par de aretes.
!discovery 40
Gracias querida @dayadam, tus conocimientos en el arte y las manualidades me hacen sentir muy halagada con esos comentarios, saluditos
This post was shared and voted inside the discord by the curators team of discovery-it
Join our Community and follow our Curation Trail
Discovery-it is also a Witness, vote for us here
Delegate to us for passive income. Check our 80% fee-back Program
¡Felicidades! Esta publicación obtuvo upvote y fue compartido por @la-colmena, un proyecto de Curación Manual para la comunidad hispana de Hive que cuenta con el respaldo de @curie.
Si te gusta el trabajo que hacemos, te invitamos a darle tu voto a este comentario y a votar como testigo por La Colmena.
Si quieres saber más sobre nuestro proyecto, te invitamos a acompañarnos en nuestro servidor de Discord.
Beautiful 😍😍
Thanks
Welcome