Tutorial: Como dibujar una lata aplastada [ESP/ESNG]
Hola artistas de Hive! Hoy quiero compartir con ustedes una de mis recientes ilustraciones. Será una especie de tutorial, pues lo hice precisamente con ese fin, enseñarles una nueva tecnica.
La tecnica en cuestión consiste en hacer lineas irregulares (en lugares especificos) y sombreado para crear la sensación de arrugado o aplastado, la cual en esta ocasión usaremos para dibujar una lata de refresco aplastada.
Hello Hive artists! Today I want to share with you one of my recent illustrations. It will be a kind of tutorial, because I made it precisely for that purpose, to show you a new technique.
The technique in question is to make irregular lines (in specific places) and shading to create the feeling of wrinkled or flattened, which this time we will use to draw a flattened soda can.
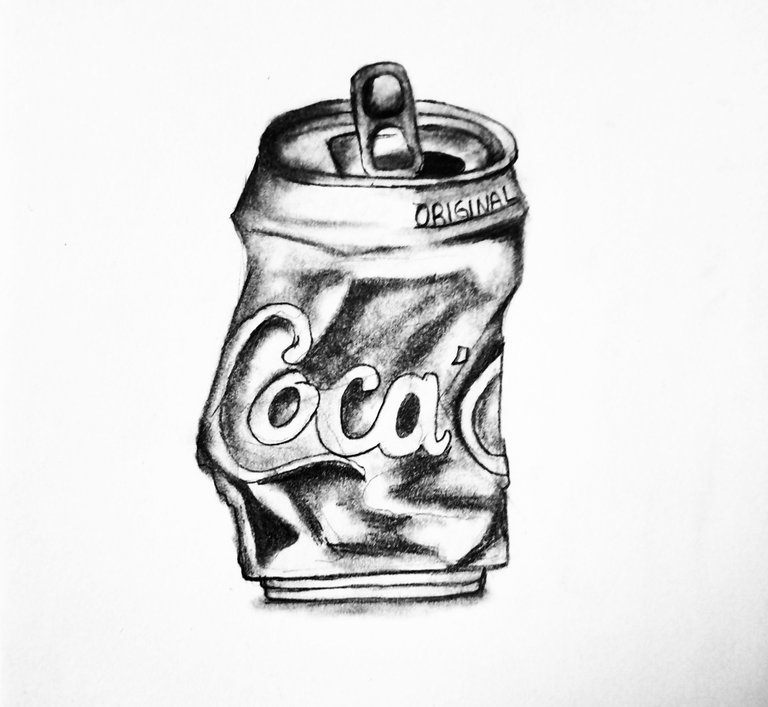
PROCESO // PROCESS
Lo primero que haremos sera dibujar la base, la cual está compuesta basicamente por un rectangulo (no tiene que quedarles perfecto), dos ovalos horizontales (uno arriba y otro abajo del rectangulo), y unas lineas pararelas puestas de esta forma:
The first thing we will do is to draw the base, which is basically composed of a rectangle (it does not have to be perfect), two horizontal ovals (one above and one below the rectangle), and some parallel lines placed in this way:
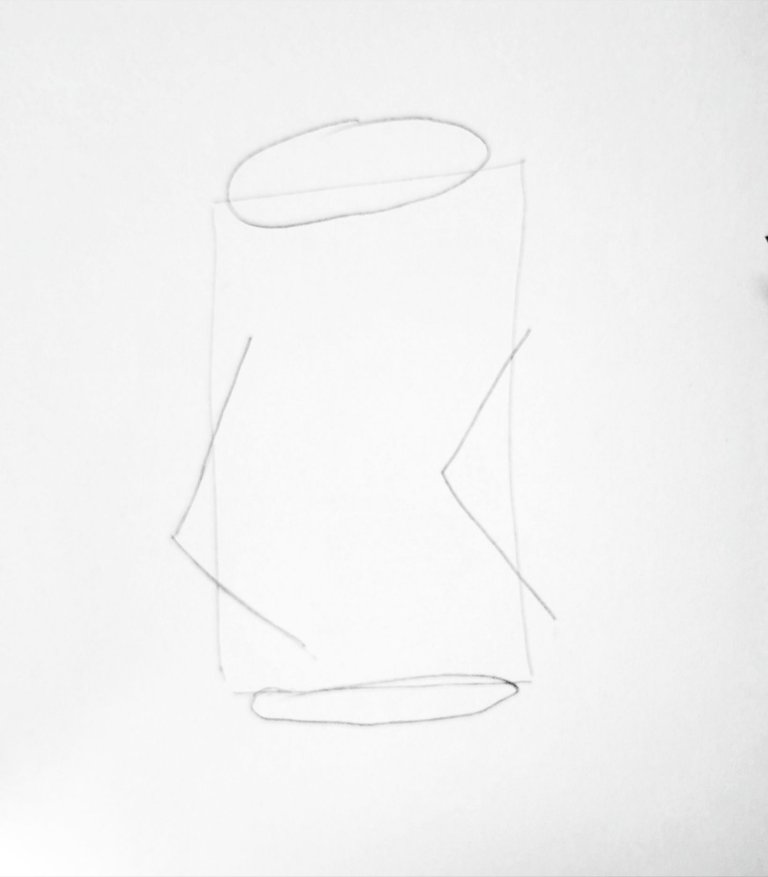
Le di forma a la parte de arriba solamente para saber donde iba ubicado todo y para que fuera cogiendo forma de lata. Con solo este paso, ya vamos viendo de que va el dibujo.
I shaped the top part just to know where everything would be located and so that it would take the shape of a can. With just this step, we can see what the drawing is about.
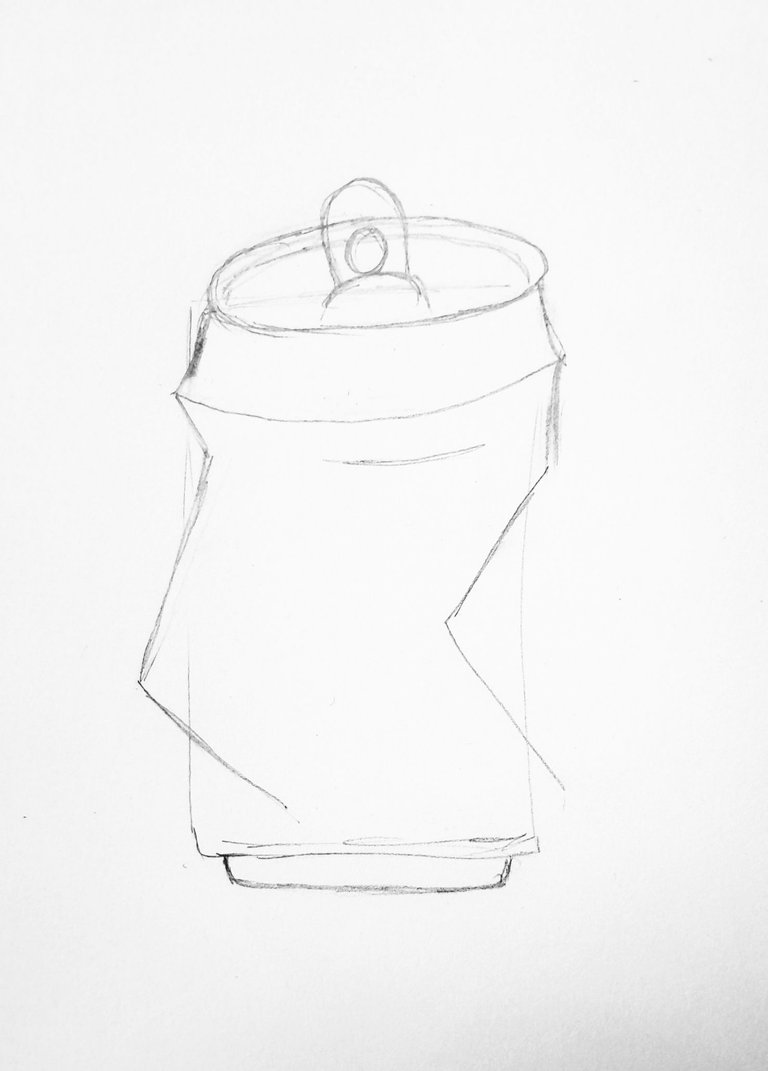
Aqui empecé a dibujar lineas irregulares para dar esa textura de lata aplastada. Aunque no lo parezca, si se necesita un orden o por lo menos saber el concepto del dibujo
Para este dibujo, yo queria que la lata estuviera aplastada y por ello marqué las lineas paralelas iniciales; ellas marcaban la parte exacta de donde deben partir las "arrugas" y donde deben terminar. En la imagen tambien se explica:
Here I started to draw irregular lines to give that flattened can texture. Although it doesn't look like it, you need an order or at least to know the concept of the drawing.
For this drawing, I wanted the can to be flattened and so I marked the initial parallel lines; they marked the exact part from where the “wrinkles” should start and where they should end. This is also explained in the image:
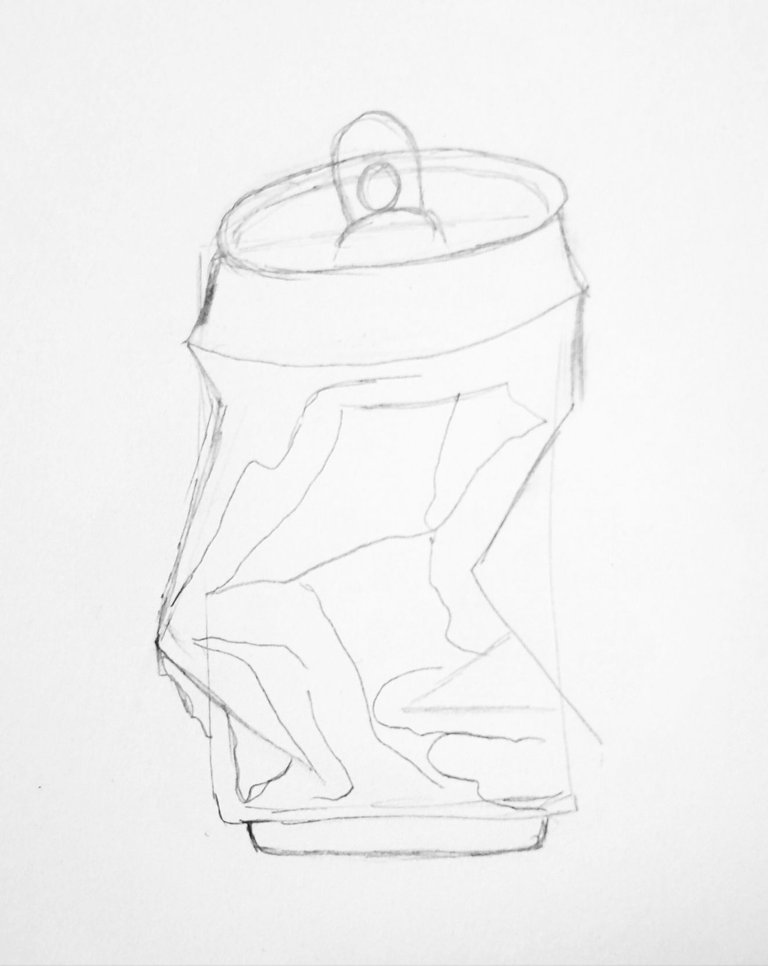
A continuación, le agregue el logo y otros detalles para darle algo de realismo.
Then add the logo and other details to give it some realism.
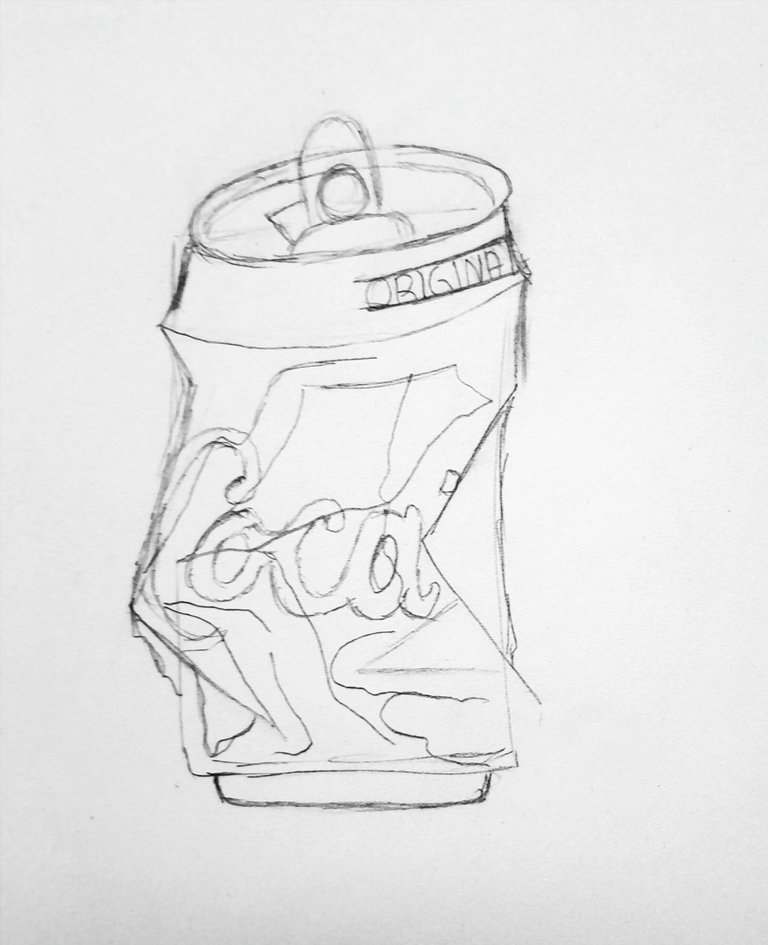
Le apliqué la primer capa de sombra, guiandome de las lineas irregulares por supuesto.
I applied the first layer of shadow, guided by the irregular lines of course.
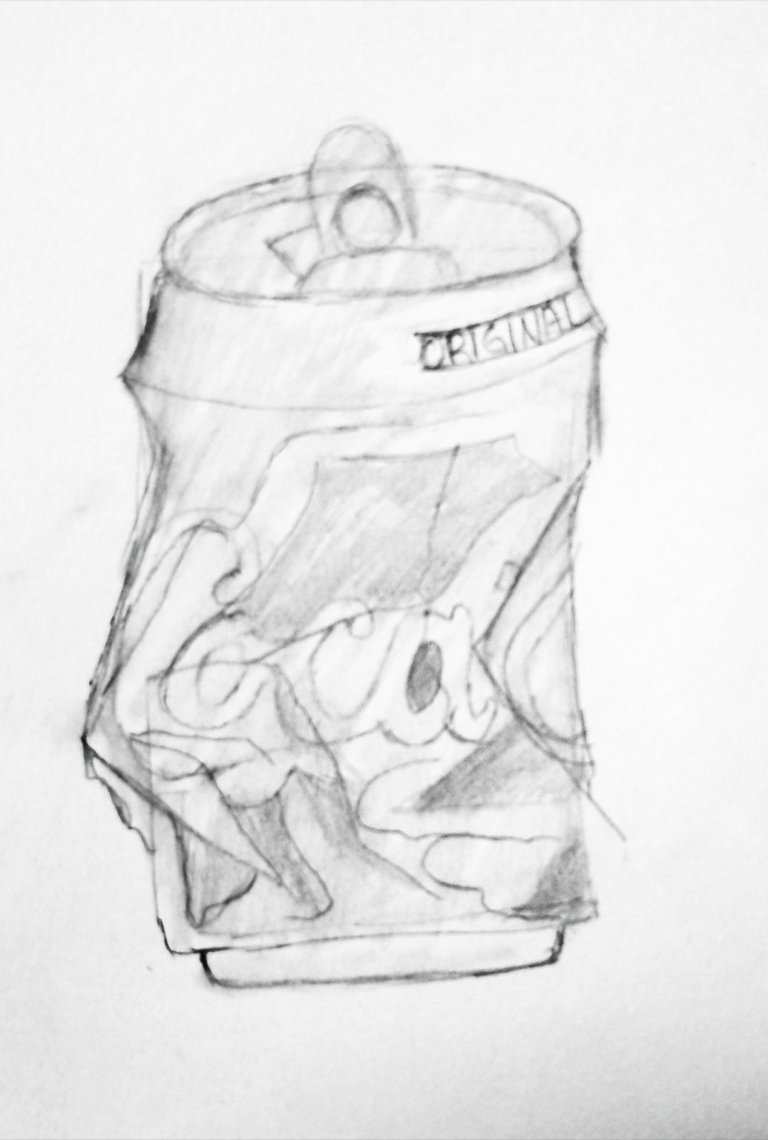
Y con un tono de lapiz mas saturado, termine de darle profundidad.
And with a more saturated pencil tone, I finished giving it depth.

Y listo, eso fue todo, ¿que tal les pareció?
And that's it, how did you like it?
Thanks for reading and watching.
@tipu curate 4
Que esperas para unirte a nuestro trail de curación y formar parte del "proyecto CAPYBARA TRAIL"
Upvoted 👌 (Mana: 35/75) Liquid rewards.
Upvoted 👌 (Mana: 0/75) Liquid rewards.
Thank you so much❤️✨️