DIY electronic circuit board [Eng+Spa]
Greetings to the Hive DIY community, I hope you are in the best situation you can possibly be in.
I have been through a series of some pretty interesting situations that have kept me a bit entertained, luckily we are back now.
This post I am sharing with you is the continuation of the ice machine repair I was working on a couple of weeks ago.
Image Source - Fuente de la Imagen
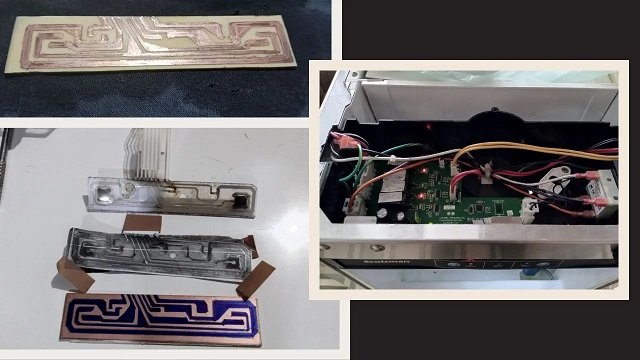
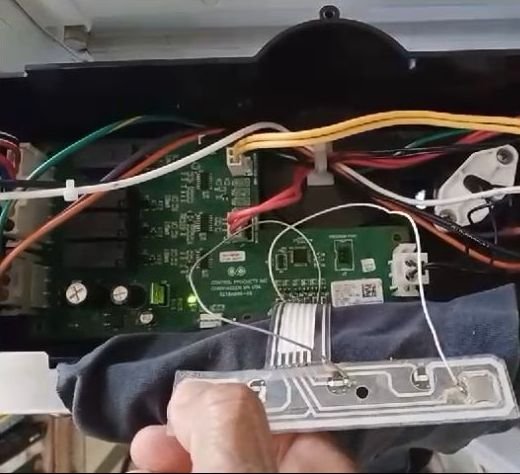
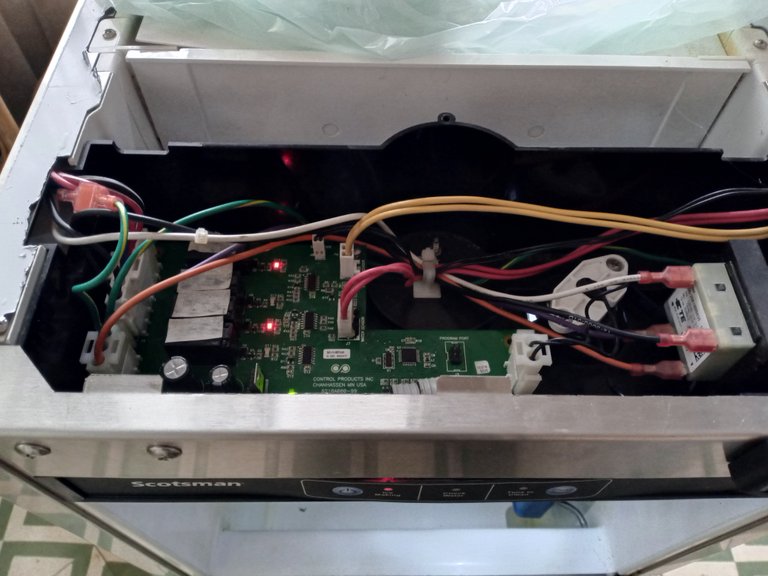
I had separated the mechanical and electronic parts of the equipment, we had already verified that the mechanical part worked well, it produces ice without any problem.

The fault of the equipment was undoubtedly in the electronic control part.
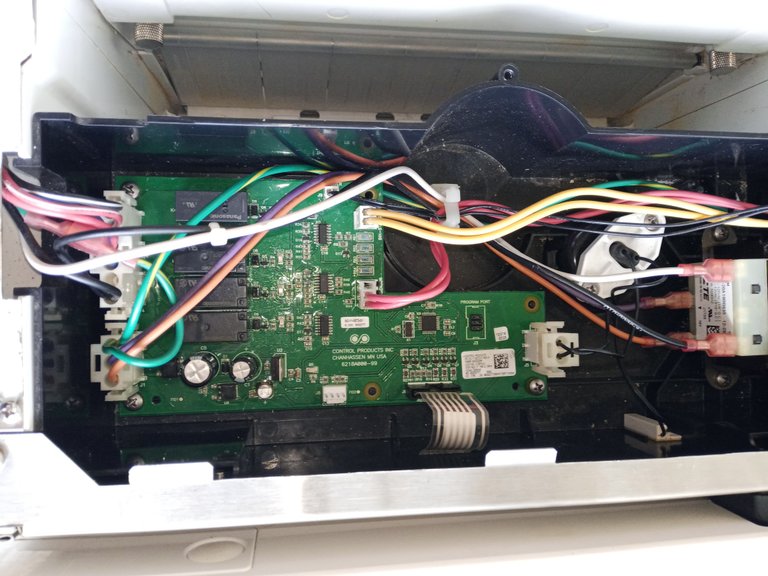
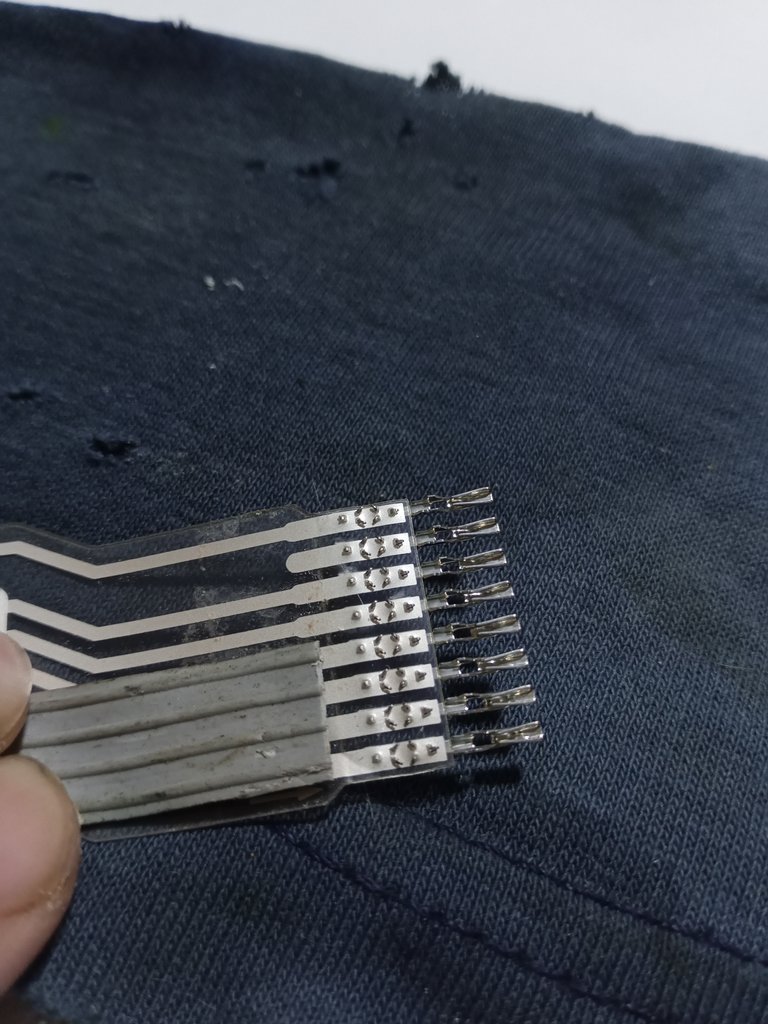
The control panel did not turn on the machine, so I tested its operation directly.
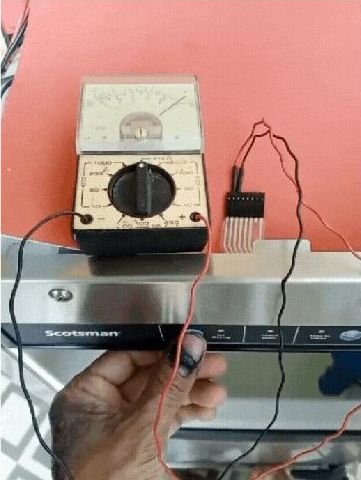
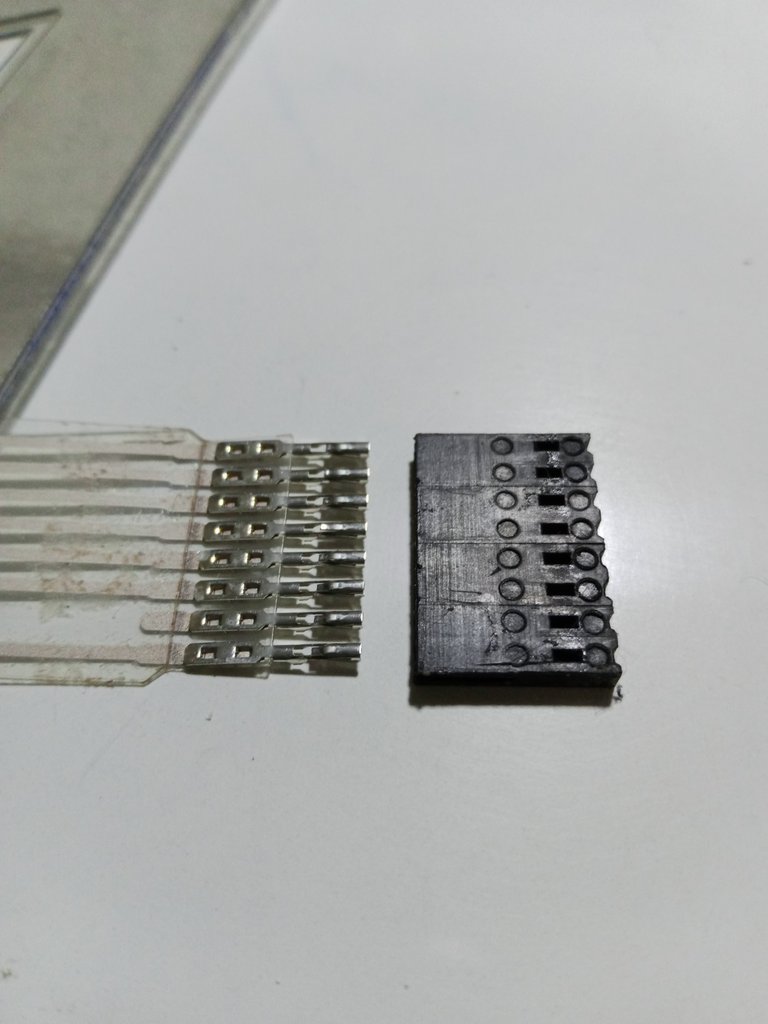
The power button, connected to pins two and three of the control panel flex, was permanently shorted.
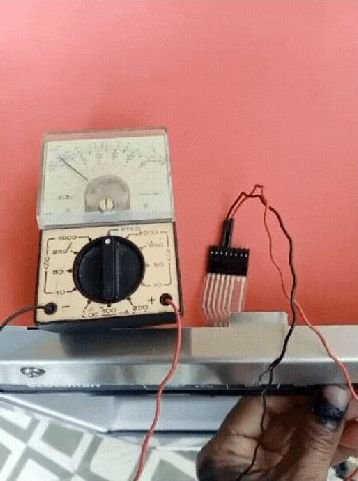
The right side control button was also damaged, it didn't respond in any way, it was connected to pins three and four of the flex.
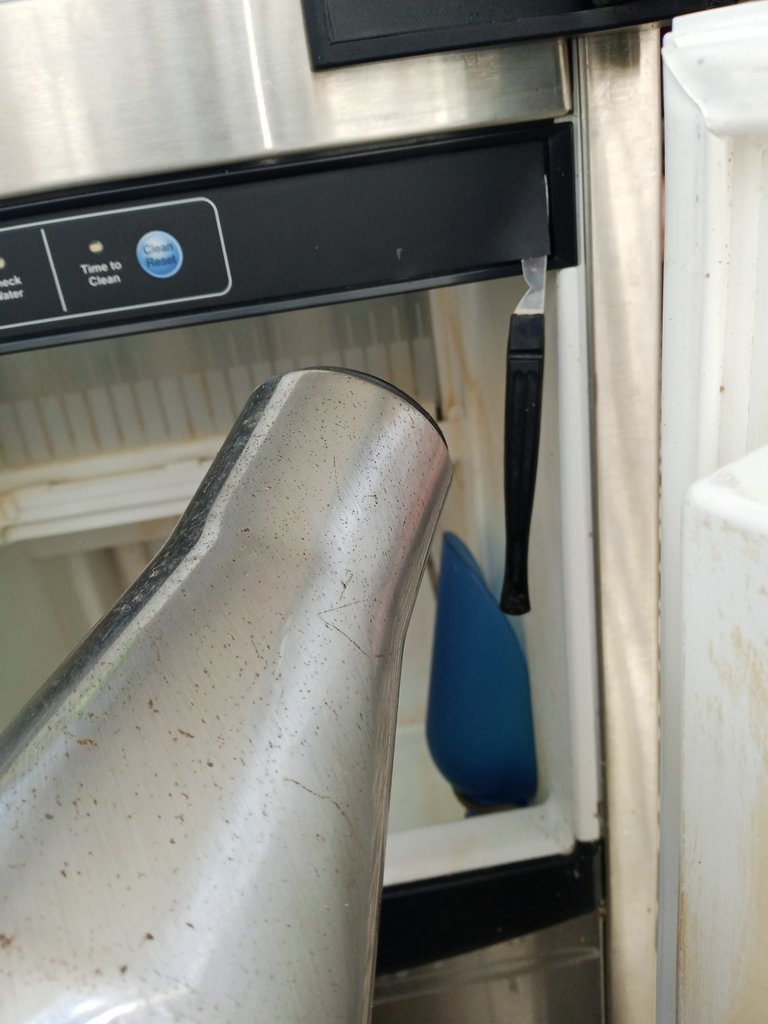
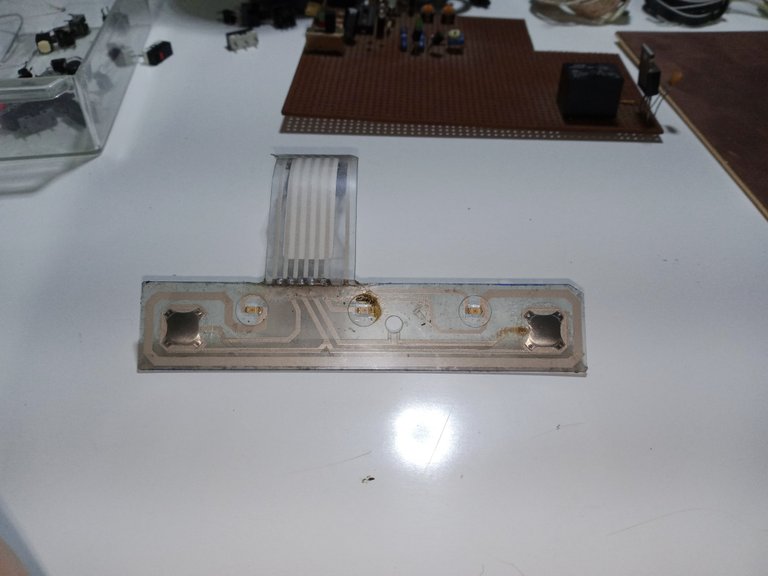
I had to remove the piece to check in more detail what the fault was, I applied heat with the help of a hair dryer and I separated the cover from the front panel.
It's a simple trick, which allows me to remove this type of covers without damaging them, the heat gun I have has too much temperature, a hair dryer is enough for the job.
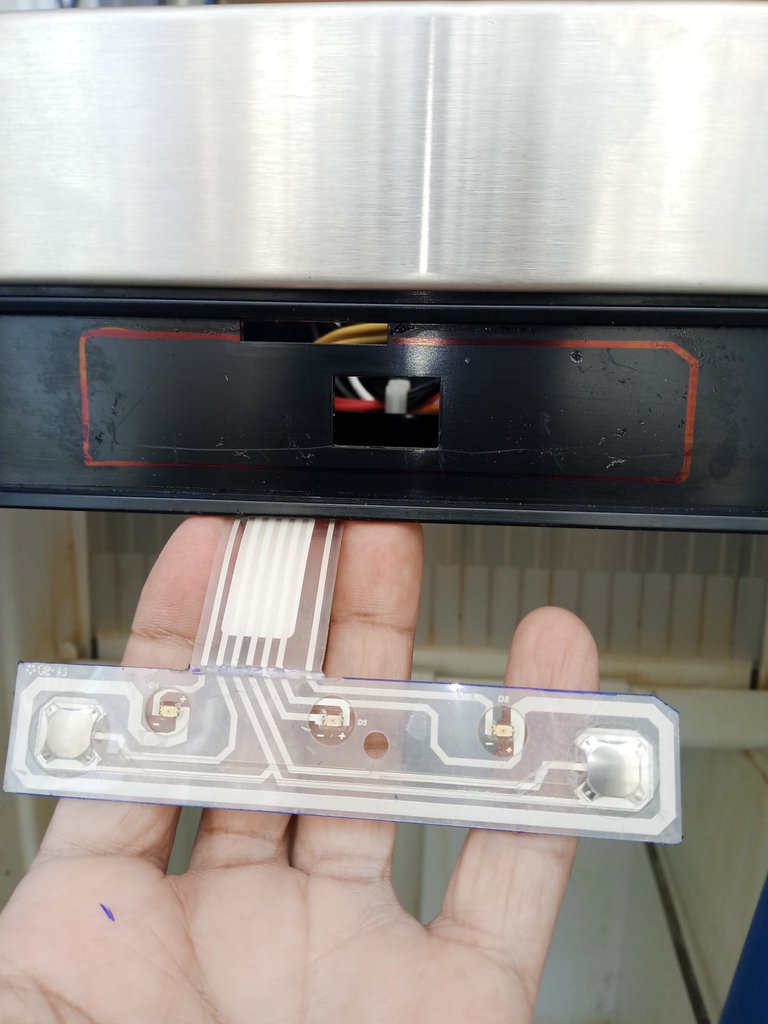
Mark the position where the button template came from the factory with an indelible marker.
This is a common fault in this manufacturer, the flex connections are not usually very reliable.
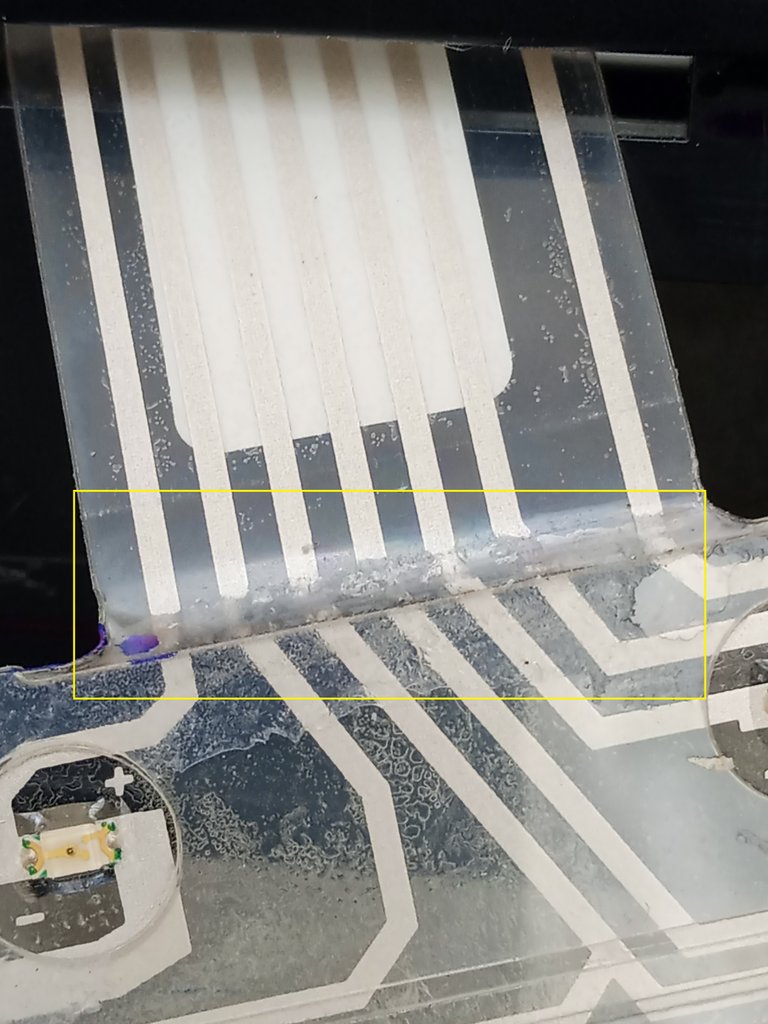
I had to make sure it was the problem with the machine's power on before asking them to buy the replacement, I carefully scraped and separated the shorted tracks, carefully soldered some cables to connect the damaged tracks and test that the buttons would activate the equipment.
The spare part on Mercado Libre had a retail price of $180, (I'm not sure if I can share that screenshot in the post), the customer asked me to try to solve the problem with the spare part in another way.

Manufacturing spare parts is a custom in my workshop, in order to provide customers with more economical options and to be able to complete the work.
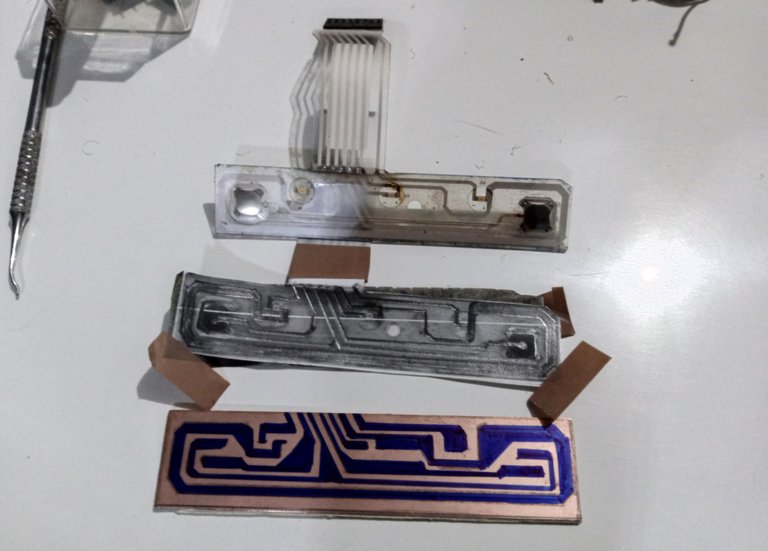
I don't have a laser printer at the moment, which would help me a lot in the manufacture of the piece, nor do I have a CNC machine in the workshop, so we will do it the old way, with a copy of the circuit and copy paper.

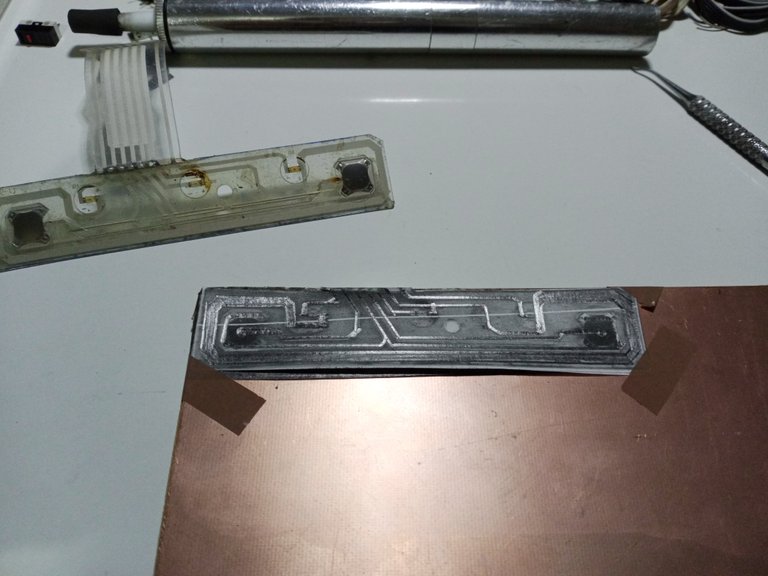
With the help of a pencil, rulers and squares and a lot of patience, we will trace the tracks.
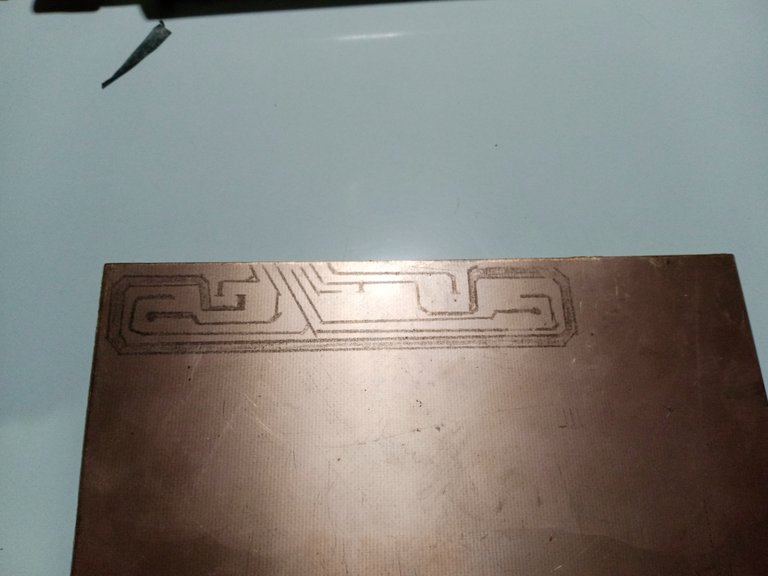
Then we have to give them a go over with a good permanent marker.
Finally, we have all the clues ready.
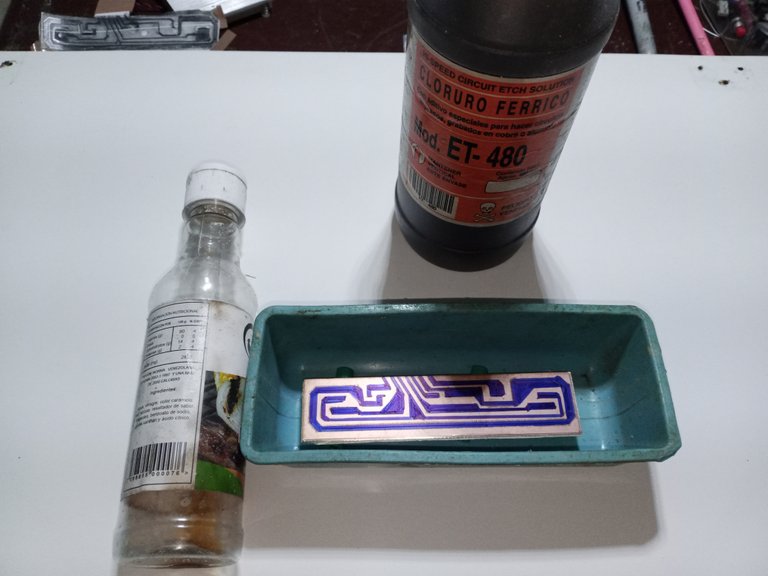
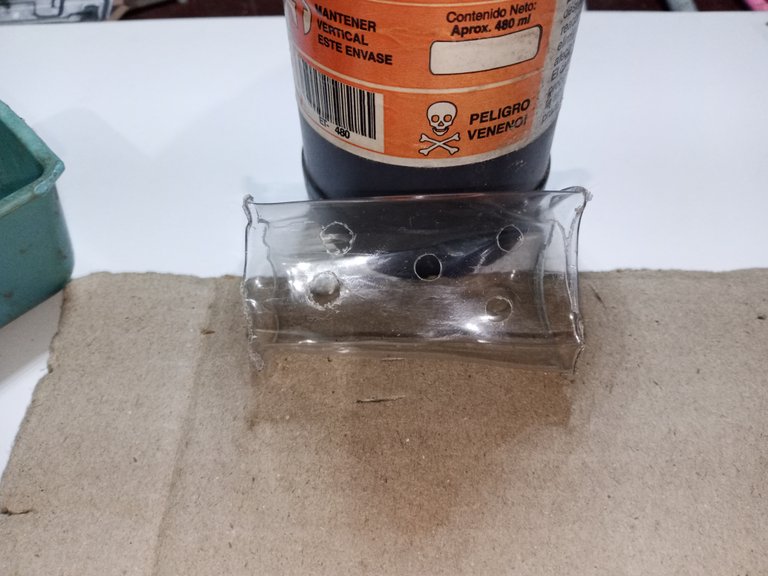
I don't have plastic tongs to hold the plate in the acid, but there's no problem if I use a small plastic sauce container and use some heat to shape it into a support for the plate, you shouldn't touch the acid with your hands.
A little heat to shape the plastic support and some drills to condition it well.
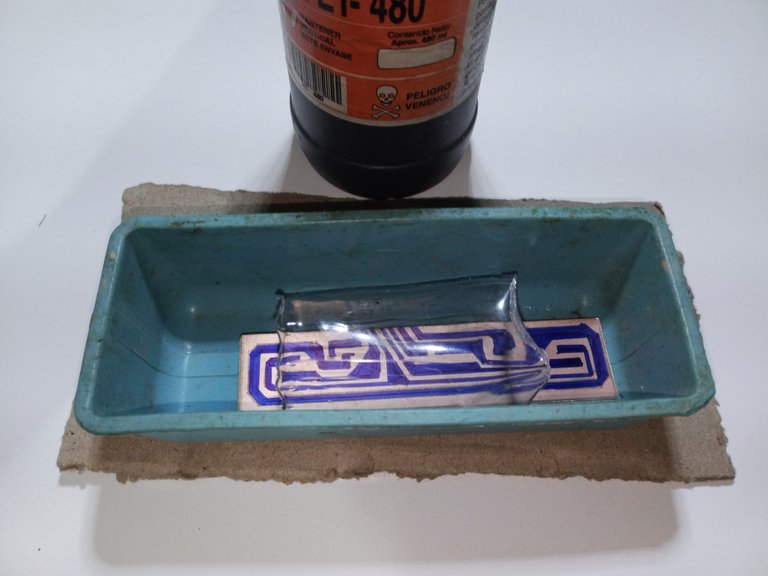
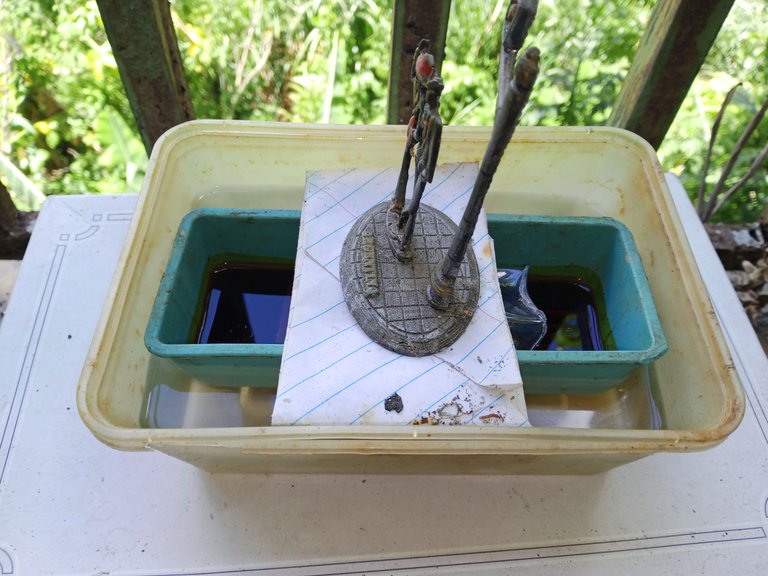
In a few minutes the ferric chloride will burn the plate, I let it react in an open area, it is dangerous to use chemicals inside a closed room.
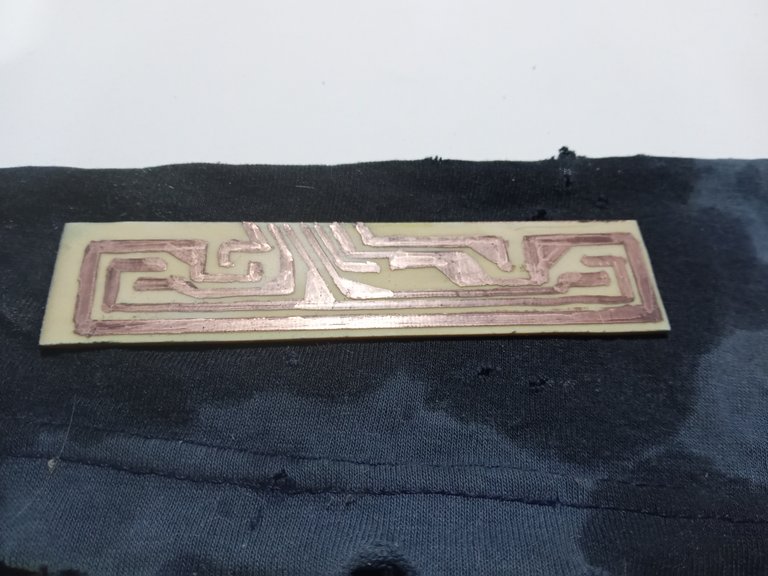
The acid acts quite quickly, if you are careless, all the work can be damaged.
The piece is almost ready, you have to wash it well so that there are no traces of acid left, you just have to make the flex cable, solder the components and place the flex cable connector that will go to the electronic control board.
It was a bit complicated to get a connector for cables of that exact size.
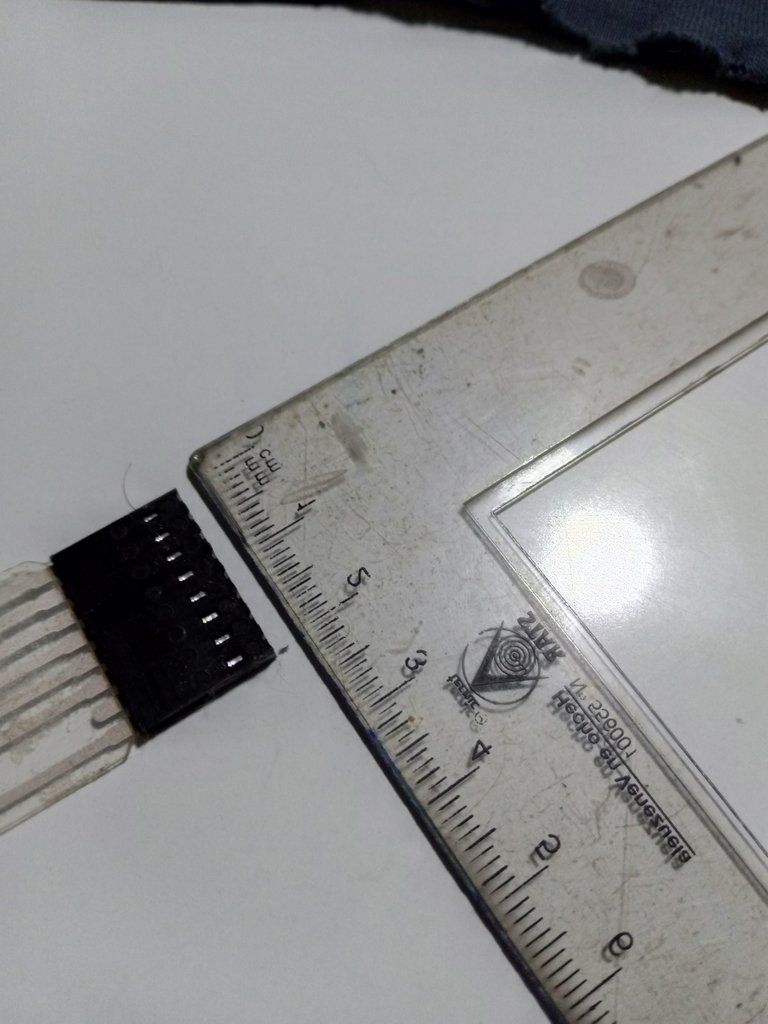
So I went back to using the one that originally came with the flex.
It also took me some time to get the right cable from the depot, it took me a bit of time to do this part of the job.
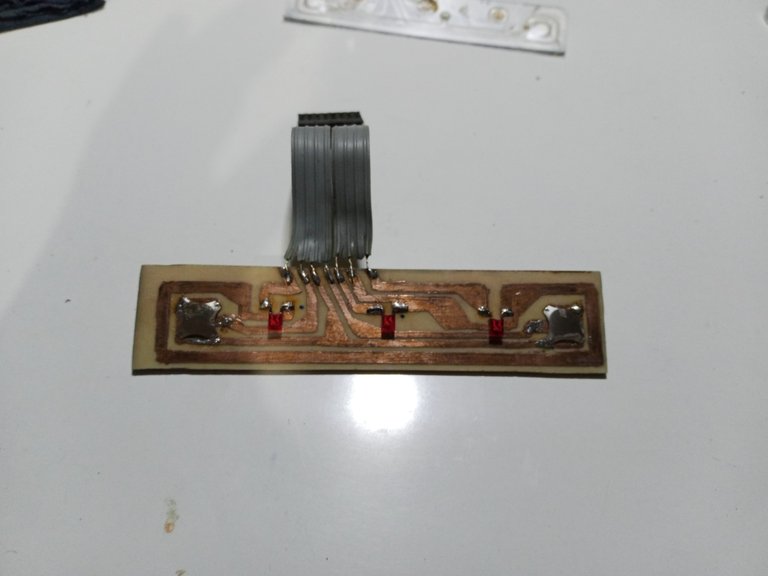
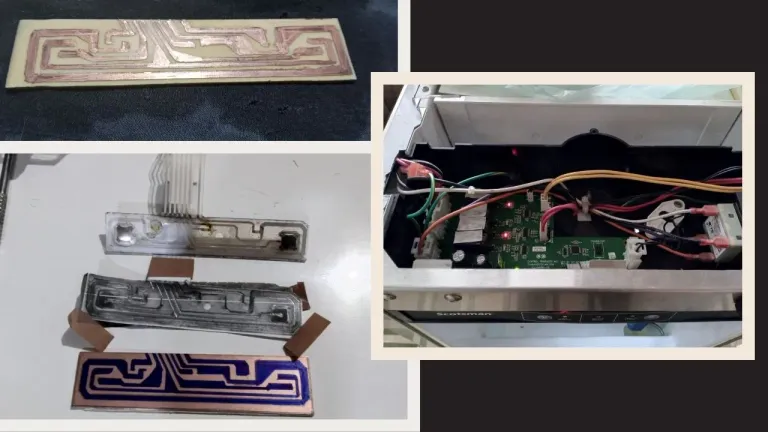
I'll summarize a bit so as not to tire you out with explanations, this is what the replacement we made looks like after soldering the components.
The view of the assembled part, before placing the front plastic cover.
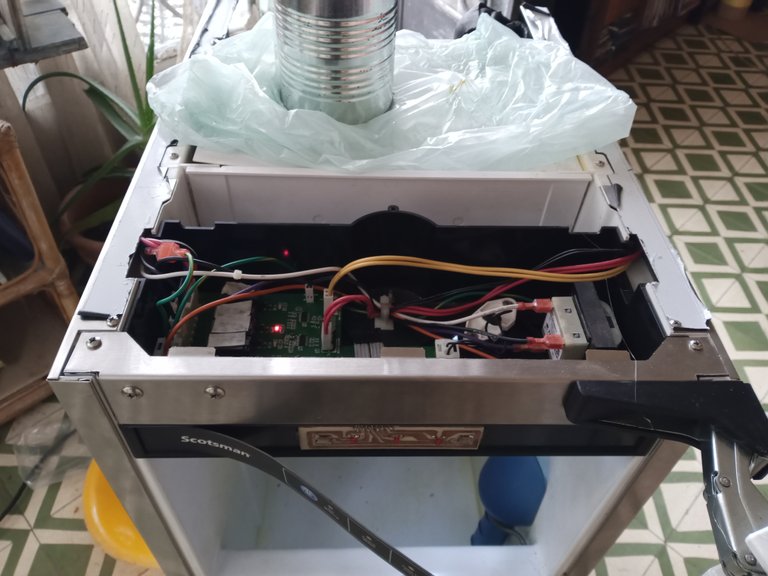
Now connected and working.
Well, at this point the client had the idea of taking the machine in a hurry, since the equipment turned on and for some reason he took the machine in a hurry without letting me test it to verify that it did not present additional faults.
The job was to find out why the ice machine wouldn't turn on and make the replacement part that was damaged. Another shop was convincing him to change the electronic board and God knows what else.
I finished the job as best I could and completed the repair, and I'm satisfied with that.
Thank you very much for taking a moment to read me.
Sorry for the length of the post.
Have a great week.
Peace.
Note: I share part of my work, it is not a tutorial, you should not work with chemicals or electrical equipment, without having proper qualification and instruction.
Let's avoid accidents, if you are passionate about the subject, I recommend that you take the corresponding courses to work properly.
- I have used Google Translate for the English language.
- The images unless indicated are screenshots of my work in my workshop.
- I have used TexStudio to generate the decorative title in Spanish.

Saludos a la comunidad de Hive DIY, espero que estén en la mejor situación en que sea posible estar.
He pasado por una serie de ciertas situaciones bastante interesantes que me han mantenido un poco entretenido, afortunadamente ya estamos de regreso.
Esta publicación, que les comparto, es la continuación de la reparación de la máquina de hielos en que estaba trabajando hace un par de semanas.
Image's Source - Fuente de la Imagen
Había separado la parte mecánica y la electrónica del equipo, ya habíamos comprobado que al parte mecánica funcionaba bien, produce hielos sin ningún problema.
La falla del equipo sin duda estaba en la parte de control electrónico.
El panel de control no daba encendido a la máquina, así que probé directamente su funcionamiento.
El botón de encendido, conectado a los pines dos y tres del flex del panel de control, estaba en corto permanente.
El botón de control del lado derecho estaba también dañado, no respondía de ninguna manera, estaba conectado a los pines tres y cuatro del flex.
Tenía que retirar la pieza para revisar con más detalle, que era la falla, le fui aplicando calor ayudándome con un secador de cabello y fui separando la cubierta del panel frontal.
Es un truco simple, que me permite retirar este tipo de cubiertas sin dañarlas, la pistola de calor que tengo tiene demasiada temperatura, un secador de cabello es suficiente para el trabajo.
Marque la posición en que venía la plantilla de botones montada de fábrica con un marcador indeleble e inspeccione con cuidado.
Esta es una falla común en este fabricador, las conexiones con flex no suelen ser muy confiables.
Tenía que asegurarme que era el problema del encendido de la máquina antes de pedir que compraran el repuesto, raspe con cuidado y separe las pistas en corto, soldé con cuidado unos cables para conectar las pistas dañadas y probar que los botones activaran el equipo.
El repuesto en mercado Libre costaba 180 $, (no tengo claro si puedo compartir esa captura de pantalla en la publicación), el cliente me pidió que tratara de solucionar el problema del repuesto de otra manera.
El fabricar los repuestos es una costumbre en mi taller, para poder darle opciones más económicas a los clientes y que se puedan completar los trabajos.
No tengo de momento una impresora láser, que me ayudaría mucho en la fabricación de la pieza, tampoco tengo en el taller una máquina CNC, así que lo haremos de la forma antigua, con una copia del circuito y papel de copiar.
Con ayuda de un lápiz, escuadras y mucha paciencia, le vamos calcando las pistas.
Luego tenemos que darles un repaso con un buen marcador indeleble.
Finalmente, tenemos todas las pistas listas.
No tengo pinzas plásticas para sujetar la placa en el ácido, pero no hay problema si aprovecho un envase pequeño de plástico para salsa y uso algo de calor para darle forma de soporte para la placa, no se debe tocar el ácido con las manos.
Un poco de calor para darle forma al soporte de plástico y unos taladros para acondicionarlo bien.
En unos minutos el cloruro férrico quemará la placa, lo dejo reaccionar en una zona abierta, es peligroso usar productos químicos dentro de un cuarto cerrado.
El ácido actúa bastante rápido en un descuido se puede dañar todo el trabajo.
La pieza está casi lista, hay que lavar bien que no quede restos de ácido, falta por hacer el cable flex, soldar los componentes y colocar el conector del cable flex que irá a la tarjeta de control electrónica.
Fue un poco complicado conseguir un conector para cables de esa medida exacta.
Así que use volví a usar el que originalmente trae el flex.
También me costó algo de tiempo conseguir el cable adecuado en el depósito, se me hizo un poco tardado en esta parte del trabajo.
Voy a resumir un poco para no cansar con explicaciones, así luce el repuesto que fabricamos después de soldar los componentes.
La vista de la pieza montada, antes de colocar la cubierta plástica frontal.
Ahora ya conectado y funcionando.
Bien, en esta parte al Sr. cliente le dio una idea de llevarse la máquina a toda prisa, ya que el equipo encendía y por algún motivo se llevó a toda carrera la máquina sin dejarme probarla para verificar que no presentar fallas adicionales.
El trabajo era encontrar el porqué no encendía la máquina de hielos y fabricar el repuesto. Otro taller lo estaba convenciendo de cambiar la tarjeta electrónica y Dios sabe que otras cosas más.
Yo terminé el trabajo lo mejor que pude y cumplí con hacer la reparación, ya con eso quedo satisfecho.
Muchas gracias por pasar un momento y leerme.
Disculpen por lo largo de la publicación.
Que tengan una excelente semana.
Paz.
Nota: les comparto parte de mi trabajo, no es un tutorial, no deben trabajar con sustancias quimicas ni con equipos electricos, sin tener una debida calificacion e instruccion.
Evitemos accidentes, si les apasiona el tema, les recomiendo que hagan los cursos correspondientes para trabajar de forma adecuada.
- He usado el traductor de Google para el idioma Inglés.
- Las imágenes a menos que se indique son capturas de mi trabajo en mi taller.
- He usado TexStudio para generar el título decorativo en español.
Y pensar que la mayor falla puede que fuera solamente ese flex. Me recuerda muchas cosas que se ven en casos de reparaciones de electrodomésticos y computadoras portátiles.
!ALIVE !PGM !BBH
Greetings, thank you very much for the support.
Exelente chamba bro, saludos ✊🏻🇻🇪
!DOOK
You just got DOOKed!
@fonestreet thinks your content is the shit.
They have 3/200 DOOK left to drop today.
Learn all about this shit in the toilet paper! 💩
Saludos, muchas gracias por pasar y leer, me resulto una reparación bastante entretenida.
This post has been manually curated by @bhattg from Indiaunited community. Join us on our Discord Server.
Do you know that you can earn a passive income by delegating to @indiaunited. We share more than 100 % of the curation rewards with the delegators in the form of IUC tokens. HP delegators and IUC token holders also get upto 20% additional vote weight.
Here are some handy links for delegations: 100HP, 250HP, 500HP, 1000HP.
100% of the rewards from this comment goes to the curator for their manual curation efforts. Please encourage the curator @bhattg by upvoting this comment and support the community by voting the posts made by @indiaunited.
Greetings, I am very grateful for your continued support of my work.
Thank you very much.
I know that its not an easy task that you have done but must say that you have a thorough knowledge of electronics circuits. Great
Friends, thank you very much for reading and appreciating my work.
Have a great week.
This is a fantastic tutorial! I thought I was the last person left that still did these kinds of repairs. It's good to see that there are still other people out there building things for themselves!
Greetings, thank you very much for stopping by and reading.
Spare parts are sold here at a very high cost. As a result, alternatives have to be sought to complete the repair at a reasonable cost for the customer.
Excelente trabajo hermano, has solucionado el problema con mucha creatividad, lo mejor es que demostraste ser un técnico de verdad, pues encontrar el motivo de la falla es la verdadera solución, no como esos que dices que le estaban sugiriendo cambiar la tarjeta electrónica, seguramente sin ni siquiera revisar bien. Me llamó la atención el elevado costo de ese pequeño teclado de membrana, que locura 😲. A veces se pueden reparar con pintura conductora, pero bueno tu solución será más duradera, eso es seguro. Saludos hermano
Si el costo de los repuestos aquí es irrazonable, como ejemplo le comento: una manilla de cocina eléctrica, te la venden al precio de la cocina nueva.
Gracias por pasar y leerme amigo.
Guao! Maestro, esto fue estupendo de verlo, osea que si se puede crear las pistas!!!! Quede impresionada. Me encanta ver tus trabajos. Saludos mi querido.
Muchas gracias por las palabras de ánimo, me sube mucho la moral.
No estaba muy conforme, con una impresora láser o una máquina CNC, habría sido mucho mejor el terminado de la placa de circuitos, igual le puse mucho corazón a la reparación y el equipo salió trabajando.
Se nota mi corazon. <3
Es un estupendo trabajo el que haces, me parece que alcanzarías mayor visibilidad en curación si colocas como portada parte de tu proceso, una foto como esta:
Es solo una idea, que muestre el producto.
Muchísimas gracias.
Está listo y luce genial.
Tengo que aprender a hacer este tipo de arreglos gráficos es realmente muy útil.
Me ha pasado de no considerar la potencia de la pistola de calor y arruinar trabajos sencillos, si tan loso me hubiera dado cuenta que con el secador de pelo era más que suficiente jajaja
Totalmente de acuerdo con las conexiones flexibles, permiten esa flexibilidad pero si tiene o sufren movimientos al tiempo se estropean me pasa con una impresora 3D que usa unos cables planos flexibles, sumado a que si en mi caso quedan con un falso contacto el daño puede ser crítico.
Saludos, amigo puedes hacer un conector de flex usando los cables que suelen tener las fuentes de DVD y reproductores de CD, es lo que suelo hacer.
A menos que las conexiones sean demasiado delgadas, en ese caso es muy complicado.
El secador me ha servido también para desmontar cubiertas de tornillos en los ratones y similares, sin perder el pegamento y volver a usarlo.
Gracias por pasar y leerme.