Handmade Necklace - Native Technique (Pattern + Video) [Eng-Esp]
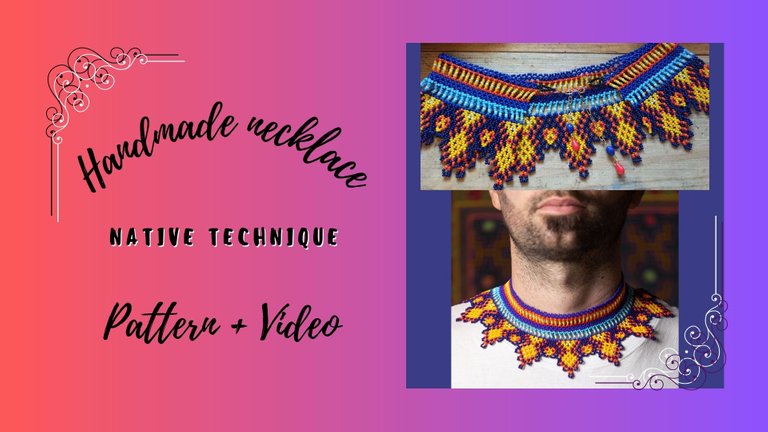

This is the third necklace I weave with this technique. And although I haven't quite learned it yet, I see that it is getting easier and easier. I hope you like it...
Hola linda comunidad de #NEEDLEWORKMONDAY Feliz comienzo de semana, el día de hoy me gustaría compartir con ustedes en este espacio el último proyecto que estuve tejiendo. Se trata de un collar nativo hecho a mano sin telar, desconozco si esta técnica tiene algún nombre pero sí sé que es la forma tradicional de tejer de las tribus indígenas que se encuentran ubicadas en la selva de Venezuela y de Brasil.
Este es el tercer collar que tejo con esta técnica. Y aunque aún no la tengo del todo aprendida, veo que se me va haciendo cada vez más fácil. Espero les guste...
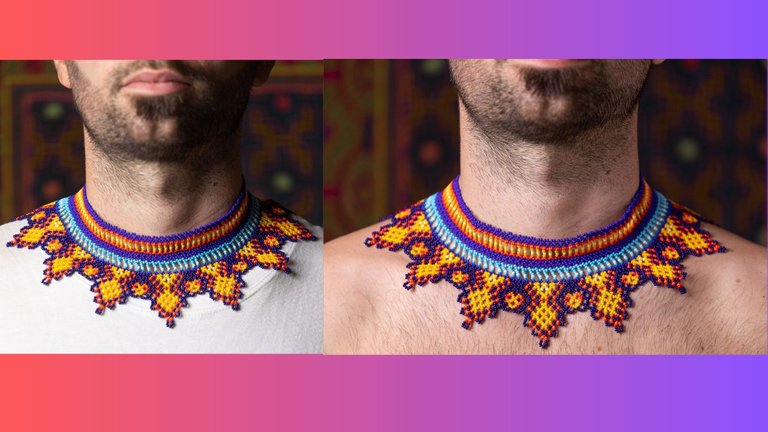
This necklace took me 30 hours to make, weighs 75.1 grams and has a length of 42 centimeters from end to end, not including the chain which was an addition I made at the end of goldfield and Czech beads.
Hacer este collar me llevo 30 horas, tiene un peso de 75.1 gramos y tiene un largo de 42 centímetros de extremo a extremos, sin incluir la cadena que fue un agregado que hice al final de goldfield y cuentas checas.
Materials | Materiales
- Nylon thread 060 Blue color
- Czech mustard nº10
- Scissors
- Jeweler's tweezers
- Hilo Nylon 060 color gris
- Mostacilla Checa nº10
- Tijeras
- Pinzas de joyero
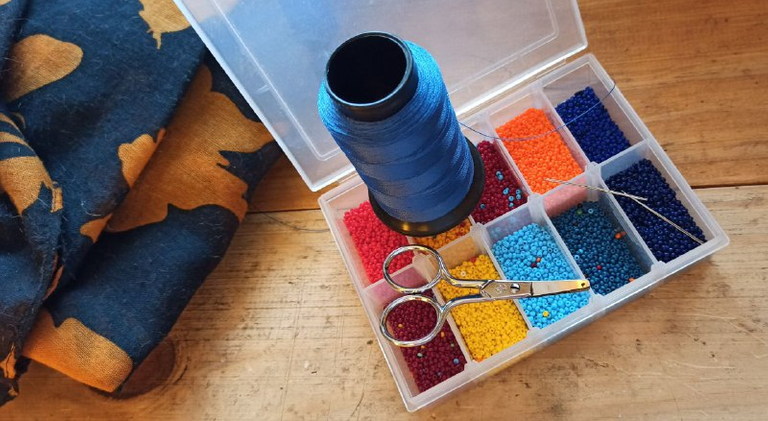
One thing I have learned over time is that it is best to work with lines of thread of a maximum of two meters, this prevents tangling when passing the thread.
Un dato que he aprendido con el tiempo es que lo mejor es trabajar con lineas de hilo de máximo dos metros, eso evita que se enrede al estar pasando el hilo.
Pattern | Patrón
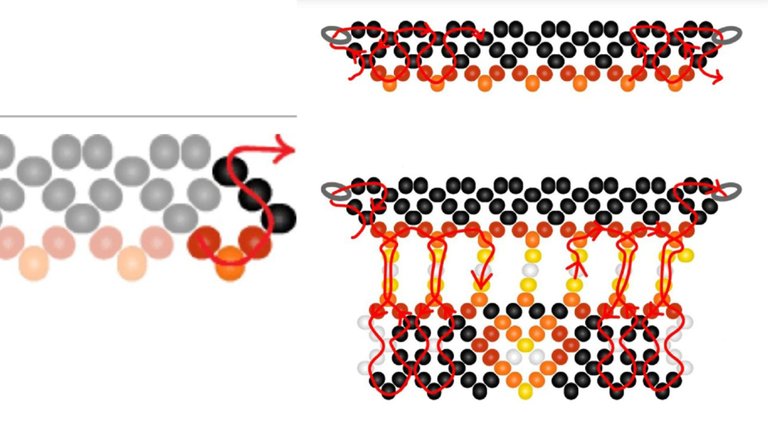
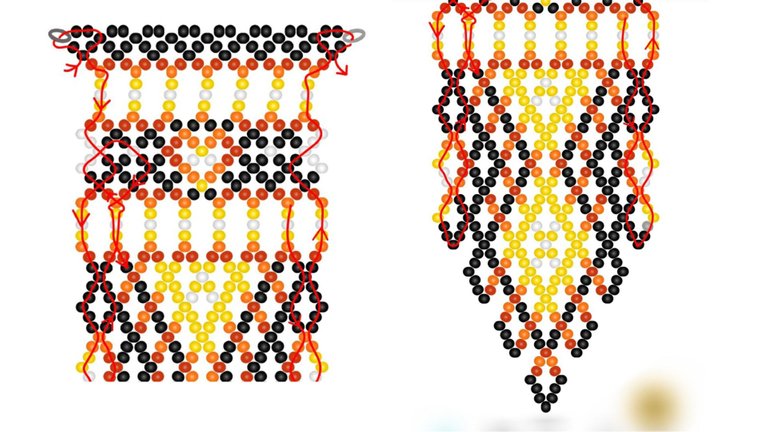
I got the pattern from a phone app I downloaded from the app store called "kreative beads" It's paid, but has a free version that allows you to see the step by step by just watching an ad. I took some pictures which are the ones you see here, which is a more generalized view of the first bead of the necklace. At first you need some imagination to start the design but there comes a point where the beads start to fit and when you see the pattern done, it makes more sense.
El patrón lo saque de una aplicación para teléfonos que descargue en la app store llamada "kreative beads" Es paga, pero tiene una versión gratuita que te permite ver el paso a paso con solo ver un anuncio. Yo tome algunas fotos que son las que ven aquí, que es una visión más generalizada del primer pico del collar. Al principio necesitas algo de imaginación para comenzar el diseño pero llega un punto donde las cuentas comienzan a calzar y al ver el patrón hecho, se le encuentra más sentido.
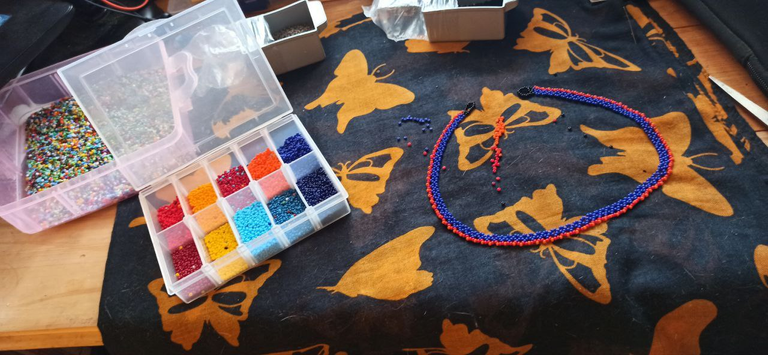
Con este tejido comencé intentando hacer toda la parte superior de extremo a extremo para calcular el tamaño exacto que queria lograr, ya que es un collar que va para una persona que realmente es muy grande.
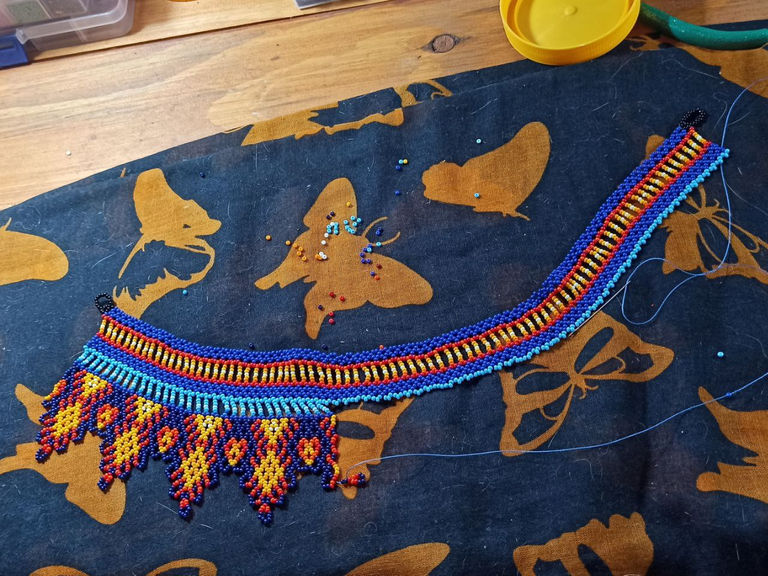
Really one of the things that I find most difficult while I'm knitting, is this part of documenting, sometimes I am very attentive, but there are days that I just prefer not to touch the phone to not get distracted, you'll understand me 😄 I still do what I can to document the process, so today I prefer to show you a short video of what has been this project ....
In the previous photo I skipped the middle horizontal line, but basically the whole pattern is the same, in this case I did it in a zic zac pattern, line by line, like layers that were being filled in. This technique can also be done in rows, like the photo of the pattern. I have already made it in both ways and I have noticed differences, the most relevant is that in rows the necklace is closer to the edge of the neck and in lines (like this example) the necklace is tight to the top and front of the neck.
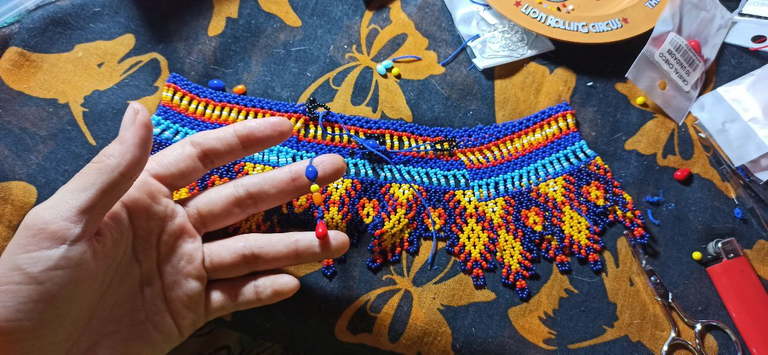
Por ultimo me llevo un buen rato pensar en cómo quería que cerrara y la primera idea que tuve fue hacer algo parecido a un nudo corredizo con macramé, compré algunas cuentas más grandes de colores variados y con hilo chino comencé a tejer. No me pareció que se viera estilizado y la verdad es que se veía tosco.
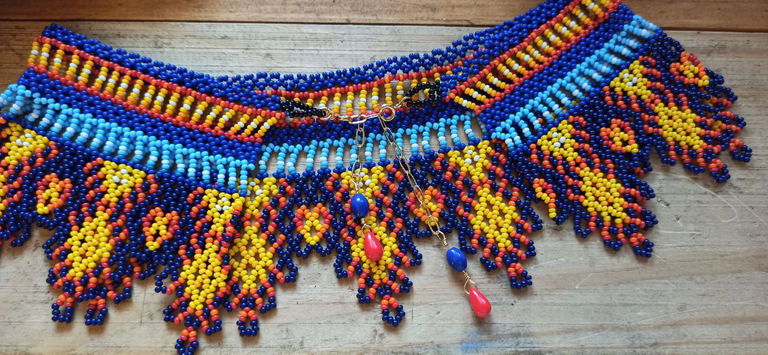
For this reason I decided to use goldfield chain, I used 5 centimeters and with wire of the same material I made two lines to give it a more stylized finish, to this I added two clasps and thus I closed the necklace completely.
Por esa razón me decidí por cadena de goldfield, utilice 5 centímetros y con alambre del mismo material hice dos líneas para darle un acabado más estilizado, a esto les agregue dos broches y así cerré por completo el collar.
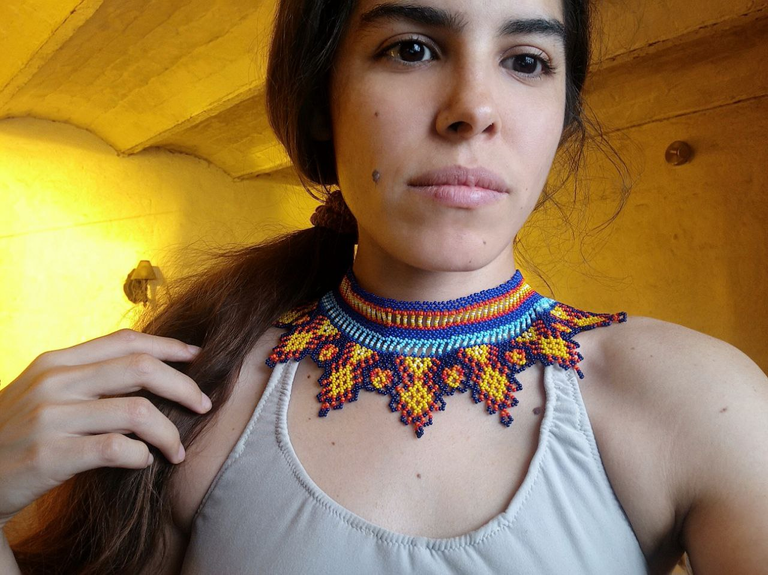
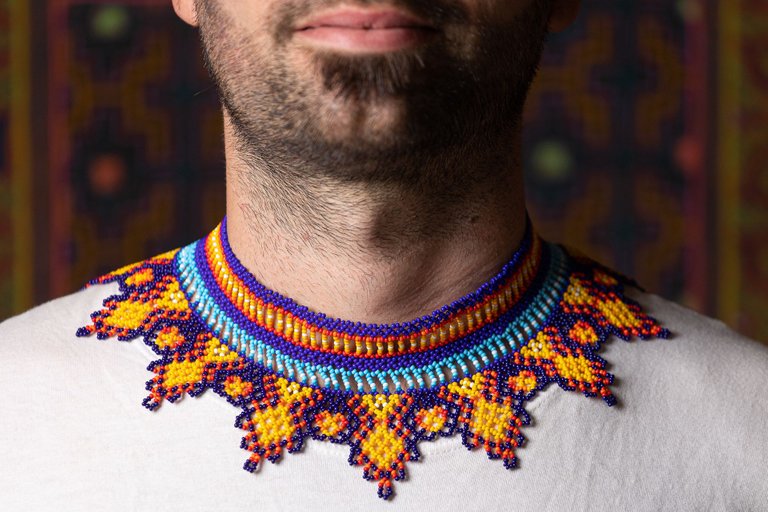
Thanks to Marquitos and Carlitos (Model and Photographer) for helping me to show such a beautiful image.
Gracias a Marquitos y a Carlitos (Modelo y Fotógrafo) por ayudarme a mostrar tan bonita imagen.
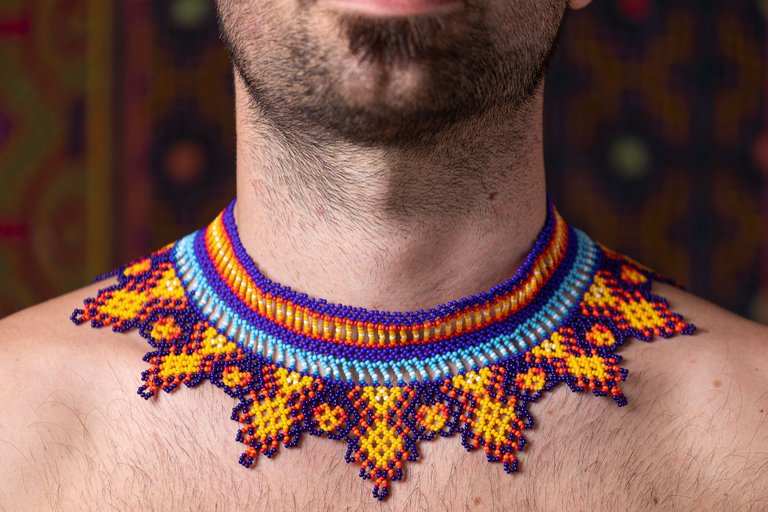
That's all for today, I hope you enjoyed the journey through this transformation process in the home workshop. Best wishes for this week.
Esto ha sido todo por hoy, espero que hayan disfrutado del recorrido por este proceso de transformación en el taller de casa. Las mejores vibras para esta semana.

Congratulations @auelitairene! You have completed the following achievement on the Hive blockchain And have been rewarded with New badge(s)
Your next target is to reach 900 comments.
You can view your badges on your board and compare yourself to others in the Ranking
If you no longer want to receive notifications, reply to this comment with the word
STOPTo support your work, I also upvoted your post!
Check out our last posts:
Support the HiveBuzz project. Vote for our proposal!
Waoo, un hermoso arte el que hiciste amiga @auelitairene, se nota la dedicación. Te felicito 👍☺️
Gracias Kathe, sí, creo que estoy algo orgullosa del resultado. Me alegra te haya gustado. Saludos, nuevamente gracias por pasar.
☺️🙏🤗
It’s a beautiful outcome 😊. I think you picked a great color combo for this piece. I know what you mean about putting down the phone and just working. Sometimes we won’t get process photos for a project and that’s okay. Showing the finished work (especially with clear images like yours) is amazing enough.
Seeing the photos of the pattern was pretty neat. Thanks for sharing this week ~
Thank you very much! I appreciate your support and comment, and yes, I think the part of documenting is essential but not always achieved hahahaha, the good thing was that I had the help of this photographer friend and did super nice job to show the result. I hope you liked it. A pleasure to belong to this nice community, we'll keep seeing each other, greetings.
You’re very welcome. 😉
Yes, it’s very nice when you can get help with your photos. Having vibrant photos really helps bring a post to life even more.
I really enjoyed reading and viewing your work. It’s great to have you here. I’ll be seeing you around ~
Shure! thanks u!!!
Saludos amiga un hermoso trabajo, me imagino que requiere tiempo y dedicación, gracias por compartir.
Bendiciones!
Gracias Belkys por pasarte y comentar.Si fue un laburo extenso, cómo lo comenté en el texto, fueron 30hrs de trabajo dedicado, es hasta el momento el collar más grande que he hecho. Saludos
Me imagino que requiere paciencia para ir ensamblando cada pieza, te quedó espectacular, he visto tejidos similares en las joyas y llaveros que venden los indígenas en el terminal de Ciudad Bolívar, en su mayoría utilizan "pionias".
Si, este tipo de tejido tiene lo suyo, las indígenas de Amazonas que son las que conozco son unas especialistas en el área, hacen hermosuras, pero si, de vez en cuando ves collares y pulseras pero de mostacilla china o de otras piedras o semillas como la pionia... Igual un trabajo que lleva su tiempo. Hermoso, yo lo conozco es por ellas.
It is a beautiful necklace @auelitairene ❤️
I love the combination of colors and the design, grear work!🙂
Thank you very much! I appreciate your support and comment. how nice that you liked my work
I will pick you as one of a great teacher because your post is well explain to make it easy for anyone that want to give it a trial