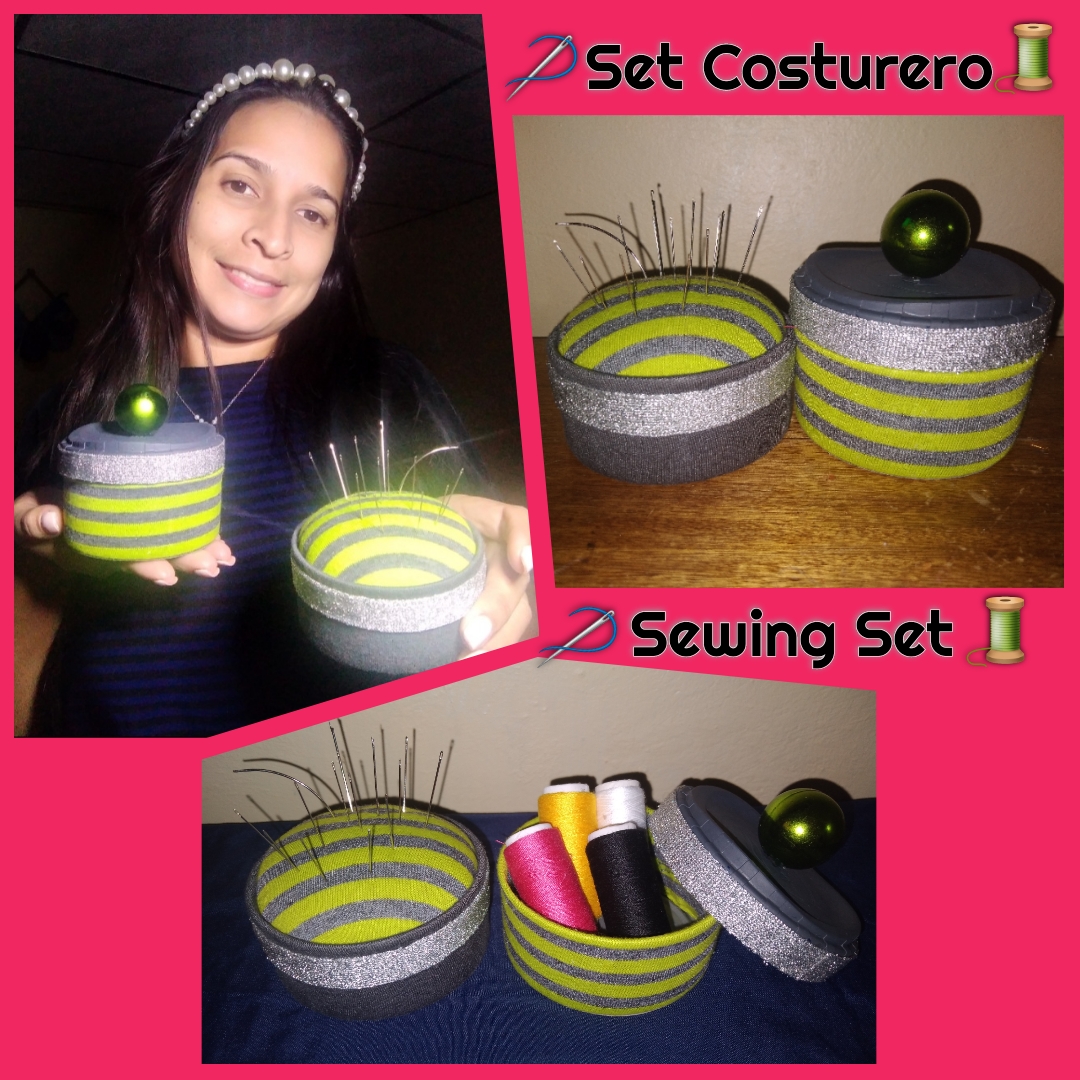
Esp~ Eng: Set Costurero🧵🪡 Hecho con Materiales de Provecho ♻️😉/Sewing Set🧵🪡 Made with Profitable Materials ♻️😉.
💖 BIENVENIDOS
A MI
BLOG 💞
HOLA mi gente linda hiver's feliz inicio de senana para todos, espero esten muy bien, los extrañe mucho 🥺 Fueron muchos días de ausencia por varios motivos personales pero ya estoy bien gracias a Dios , mi proyecto creativo de hoy es un set de costura hechos con material reciclado en este caso latas de atun, tapa de plastico, pegado de esponja vieja, bolita de navidad dañada y las telas eran de unas mangas de camisa que me dio mi mamá, este set lo hice especialmente para mi madre que es costurera.
💖 WELCOME
ME
BLOG 💞
HELLO my beautiful hiver's people, happy start of the week to all, I hope you are very well, I missed you a lot I was absent for many days for various personal reasons but I'm fine now, thank God, my creative project today is a sewing set made with recycled material in this case tuna cans, plastic lid, glued old sponge, damaged Christmas ball and the fabrics were from shirt sleeves that my mom gave me, I made this set especially for my mother who is a seamstress.
A continuación lo que necesitaremos y su elaboración:
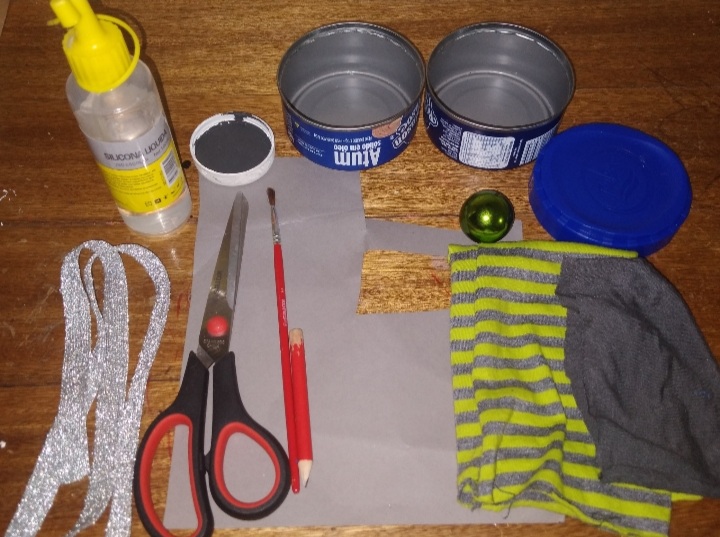
📝 Materiales:
• 2 latas
• 1 tapa plástica
• 2 Pedazos de tela
• 1 Pedazo de esponja
• Pintura Gris
• Cinta plateada
• Bolita de Navidad
• Pedazo de cartulina
• Pincel
• Silicon
• Lápiz
• Tijera
Here is what we will need and how to prepare it:
📝 Materials:
• 2 cans
• 1 plastic cap
• 2 pieces of cloth
• 1 piece of sponge
• Gray Paint
• Silver ribbon
• Christmas ball
• Piece of cardboard
• Brush
• Silicone
• Pencil
• Scissor
💁🏻♀️ Elaboración:
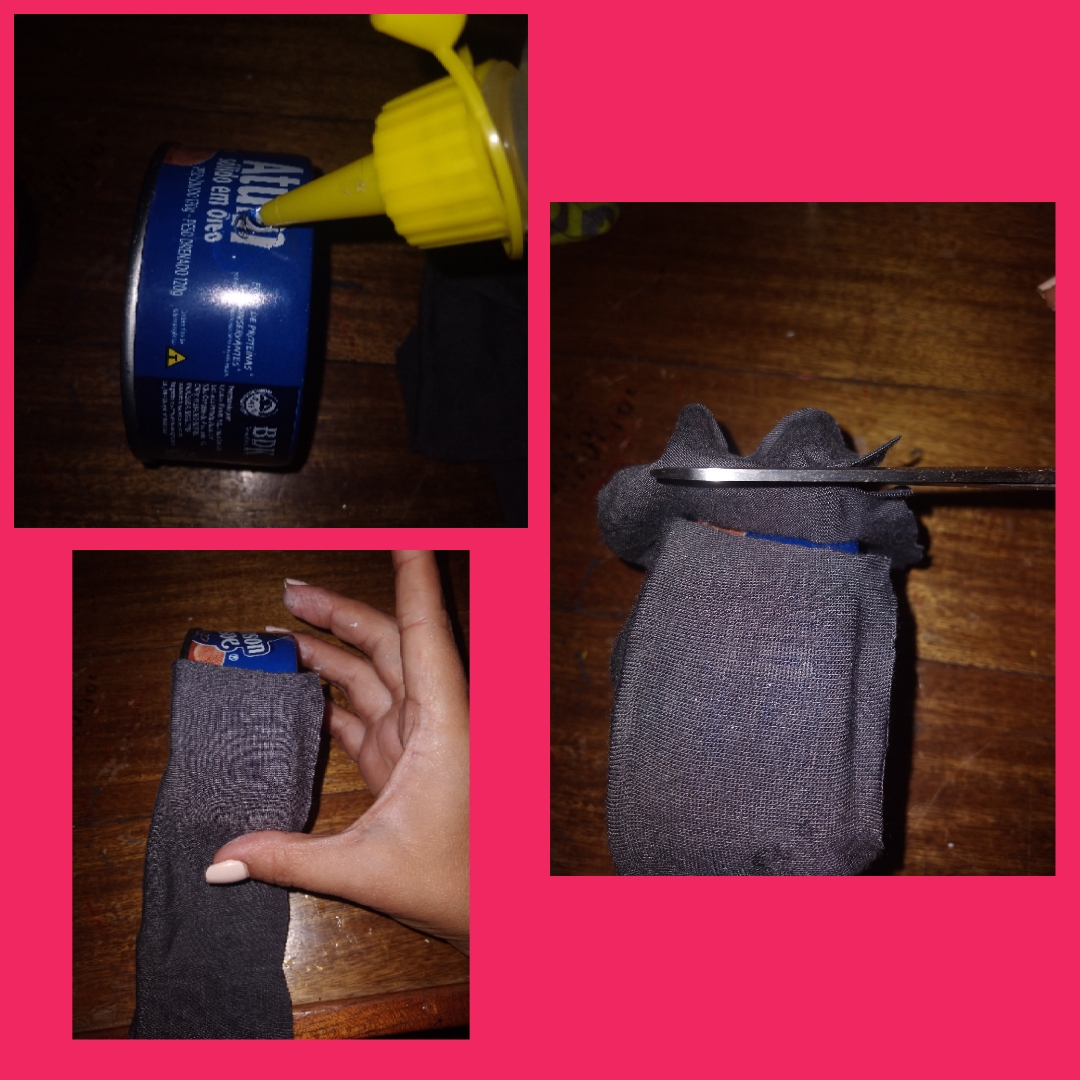
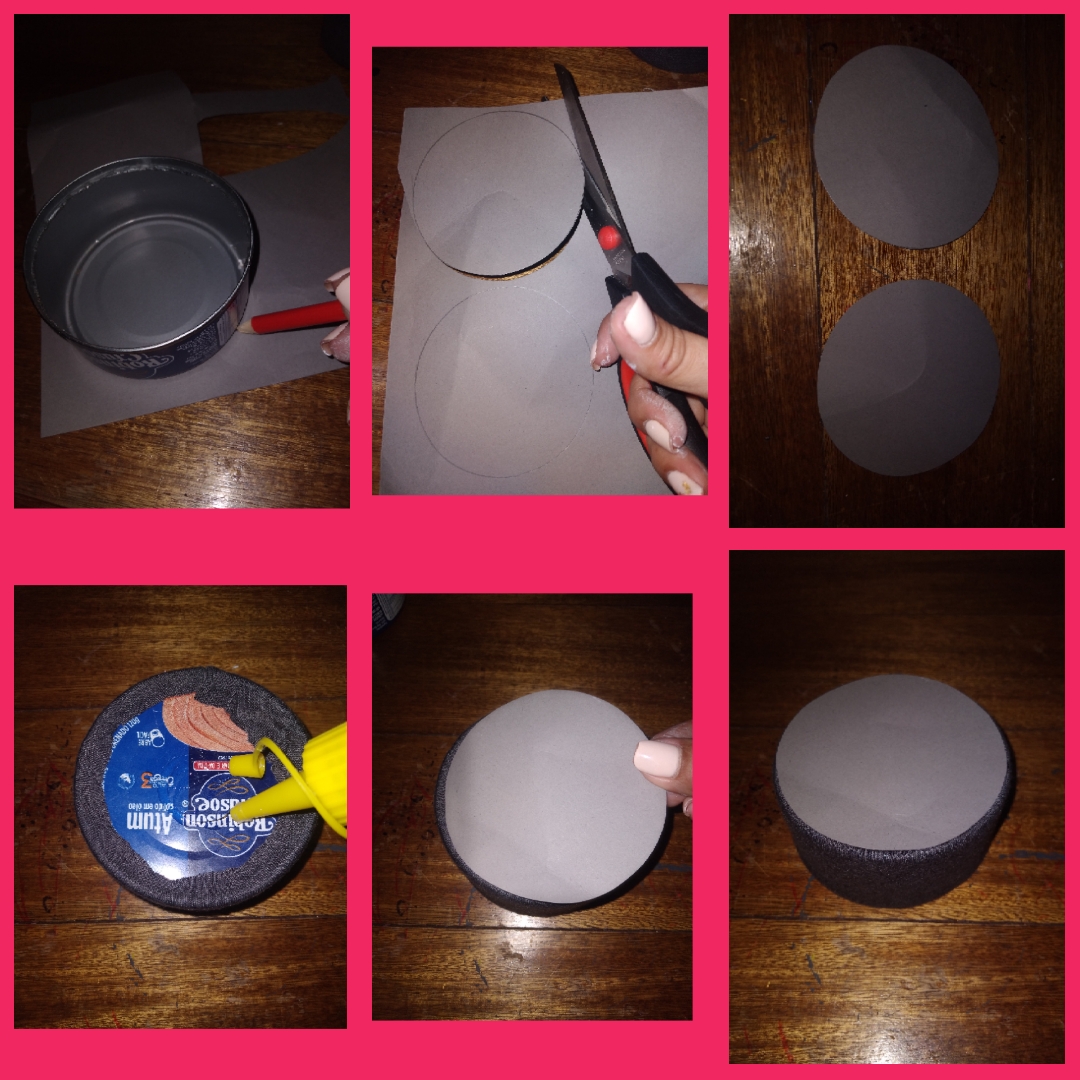
• Lo primero que hacemos es el organizador de alfileres y agujas, tomando la tela gris y se la pegamos a una de las latas de atun cortando el sobrante e tela, dejando un Pedazo de la tela hacia la parte interna y solo un poco para la parte trasera de la lata.
💁🏻♀️ Elaboration:
• The first thing we do is the organizer of pins and needles, taking the gray fabric and sticking it to one of the tuna cans, cutting the excess fabric, leaving a piece of the fabric towards the inside and only a little for the back of can.
• Luego pegamos la tela que les mencione antes para la parte interna de la lata, como también la de la parte trasera.
• Then we glue the fabric that I mentioned before to the inside of the can, as well as the one on the back.
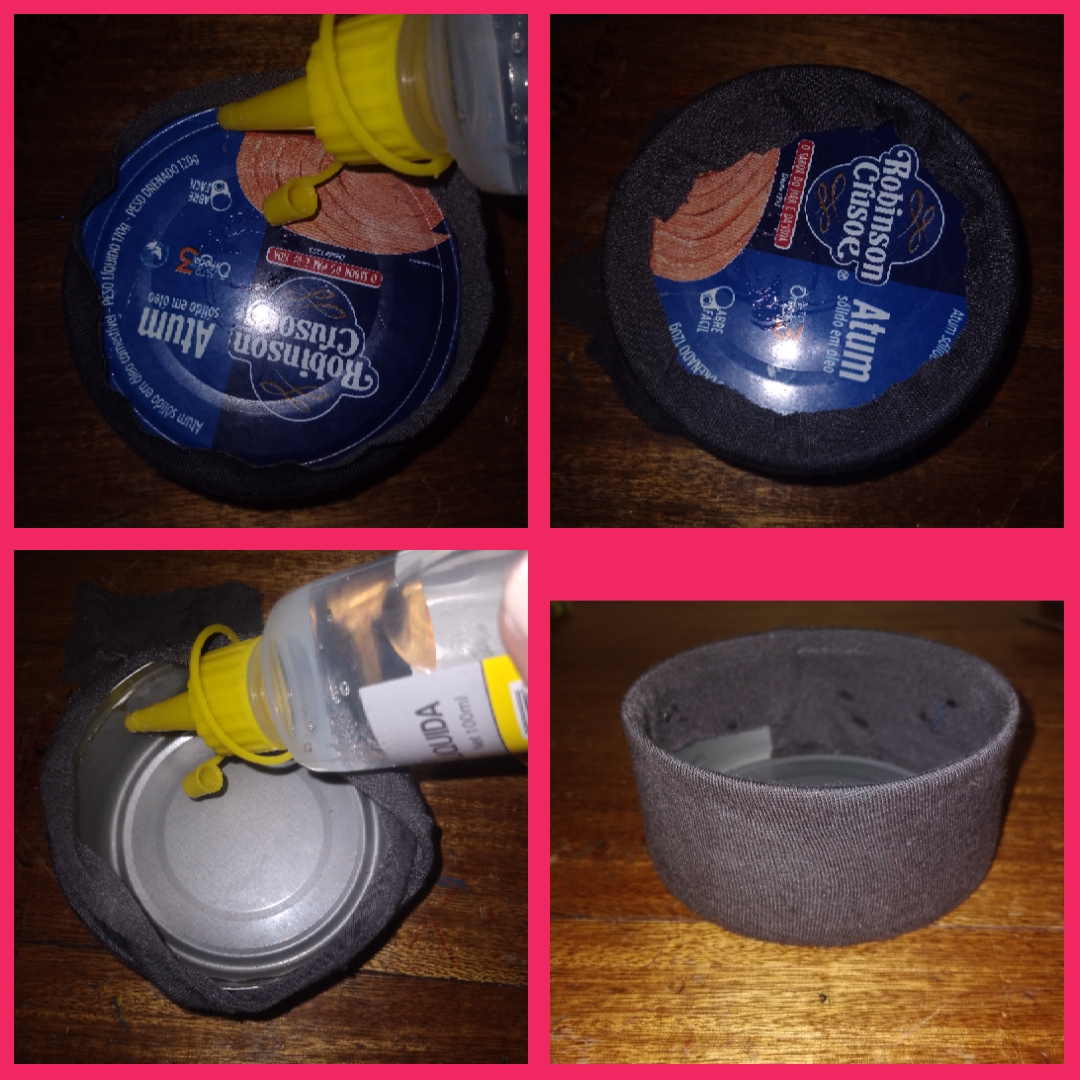
• Del Pedazo de cartulina gris marcamos dos circulos con la otra lata, uno se lo pegamos a la parte trasera de la lata que ya forramos y el otro lo reservamos.
• From the piece of gray cardboard we mark two circles with the other can, we stick one to the back of the can that we already lined and the other we reserve.
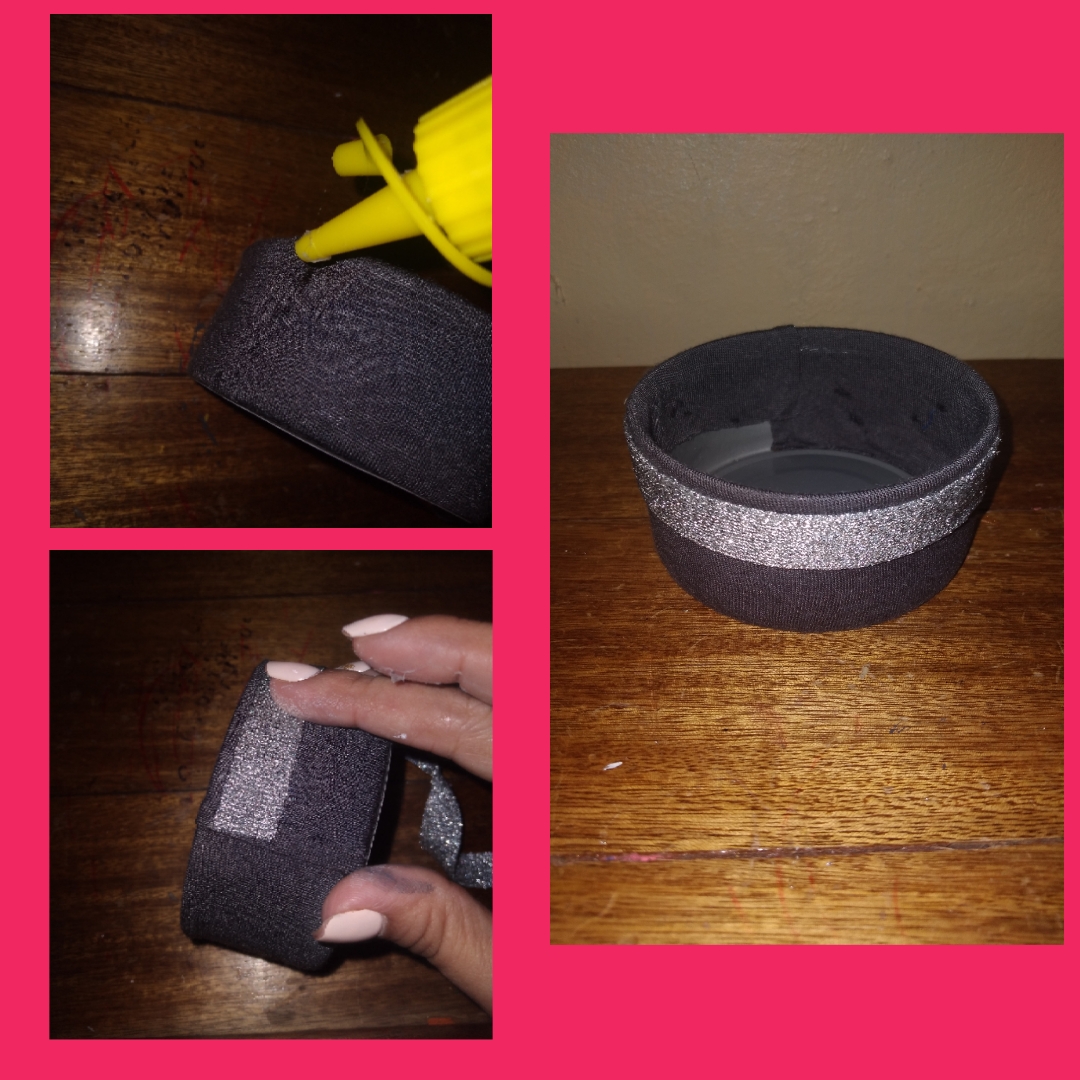
• Para agregarle otro detalle le pegamos la cinta plateada un poco mas abajo de la orilla para que se vea lindo.
• To add another detail, we glued the silver ribbon a little below the edge to make it look nice.
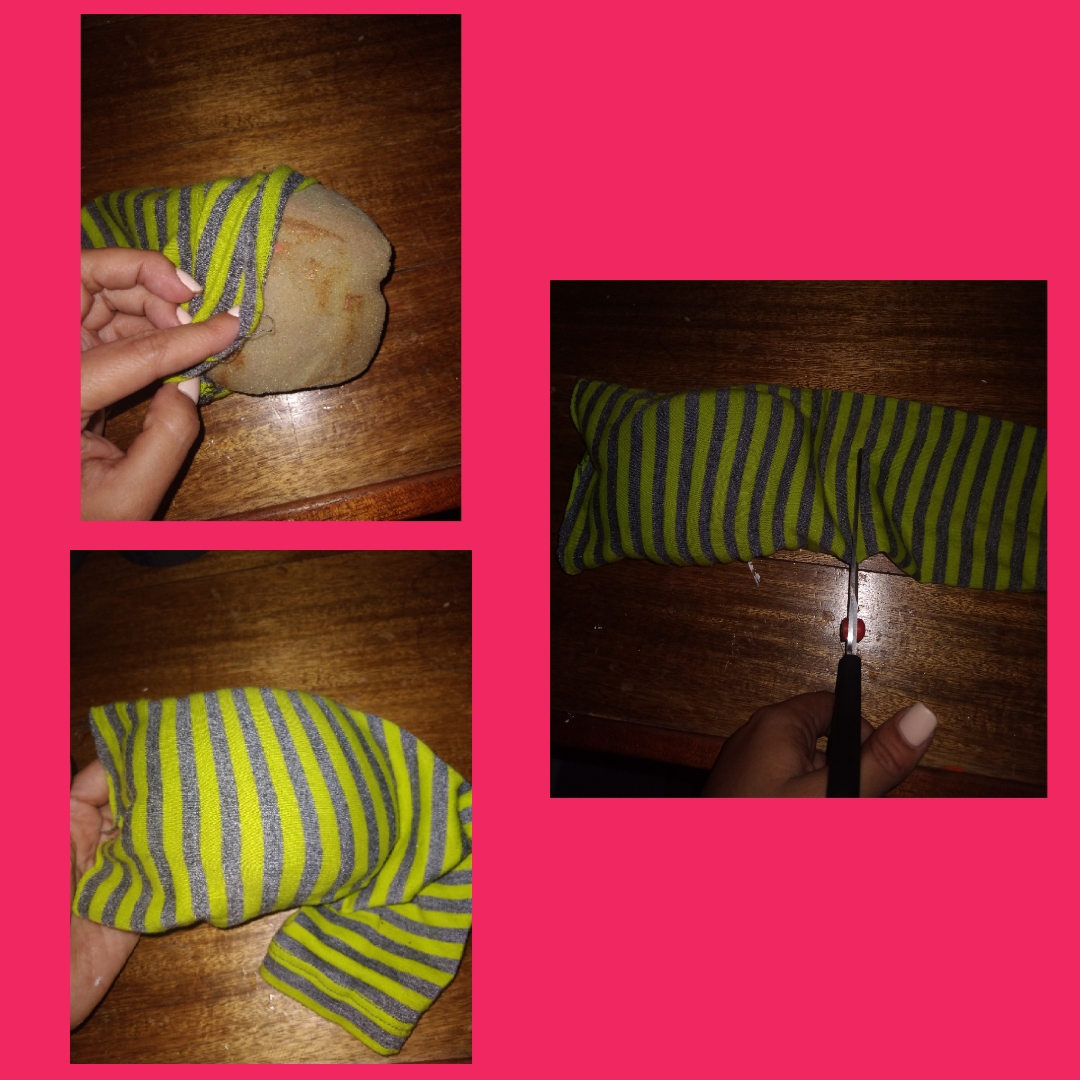
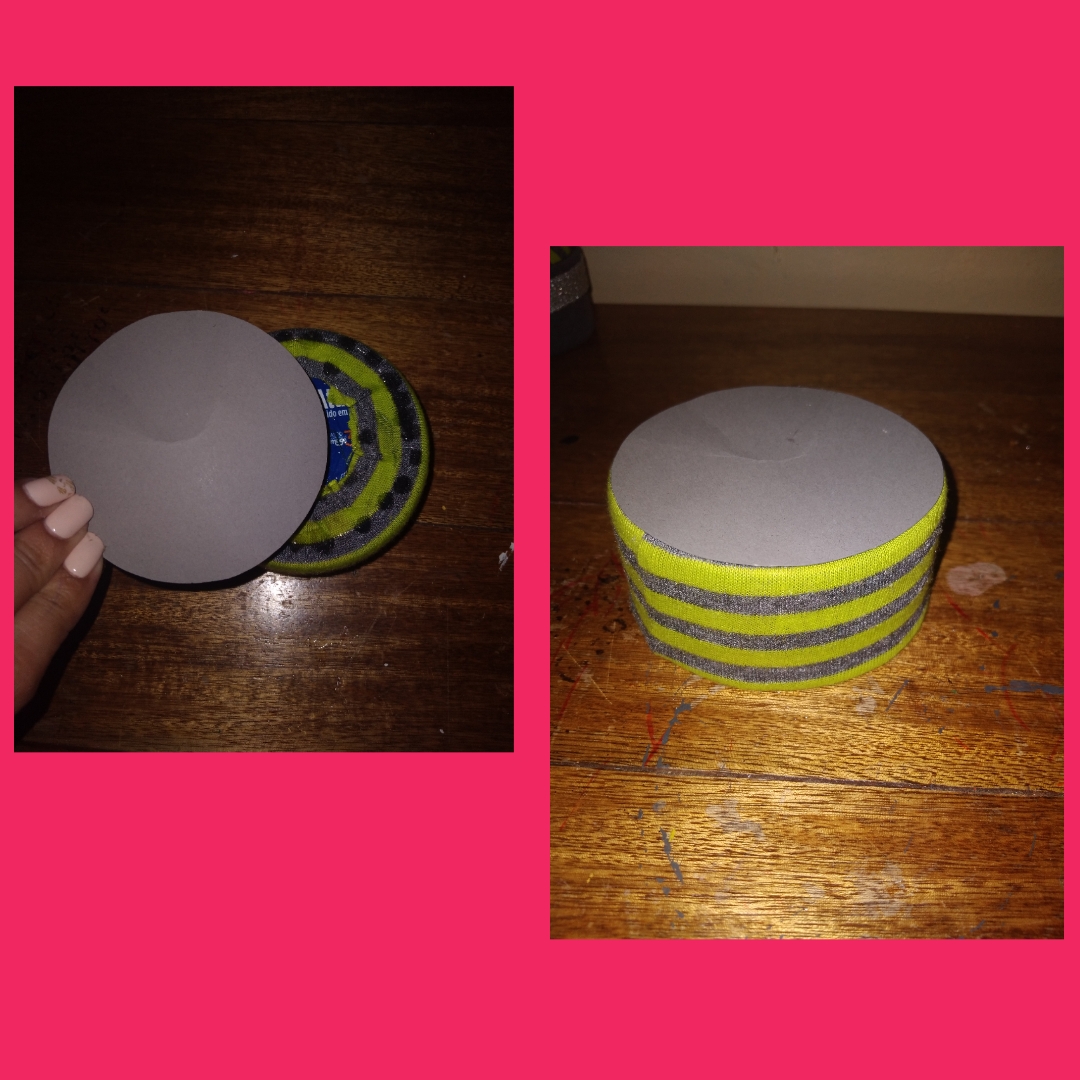
• Ahora tomamos la tela de raya y le introducimos la esponja, cortamos la tela sobrante.
• Now we take the stripe fabric and introduce the sponge, cut the excess fabric.
• Agarramos los dos extremos y los amarramos haciendole dos nudos apretando muy bien para hacer la forma de una pelota, como te muestro en las imagenes.
• We grab the two ends and tie them by making two knots, tightening them very well to make the shape of a ball, as I show you in the images.
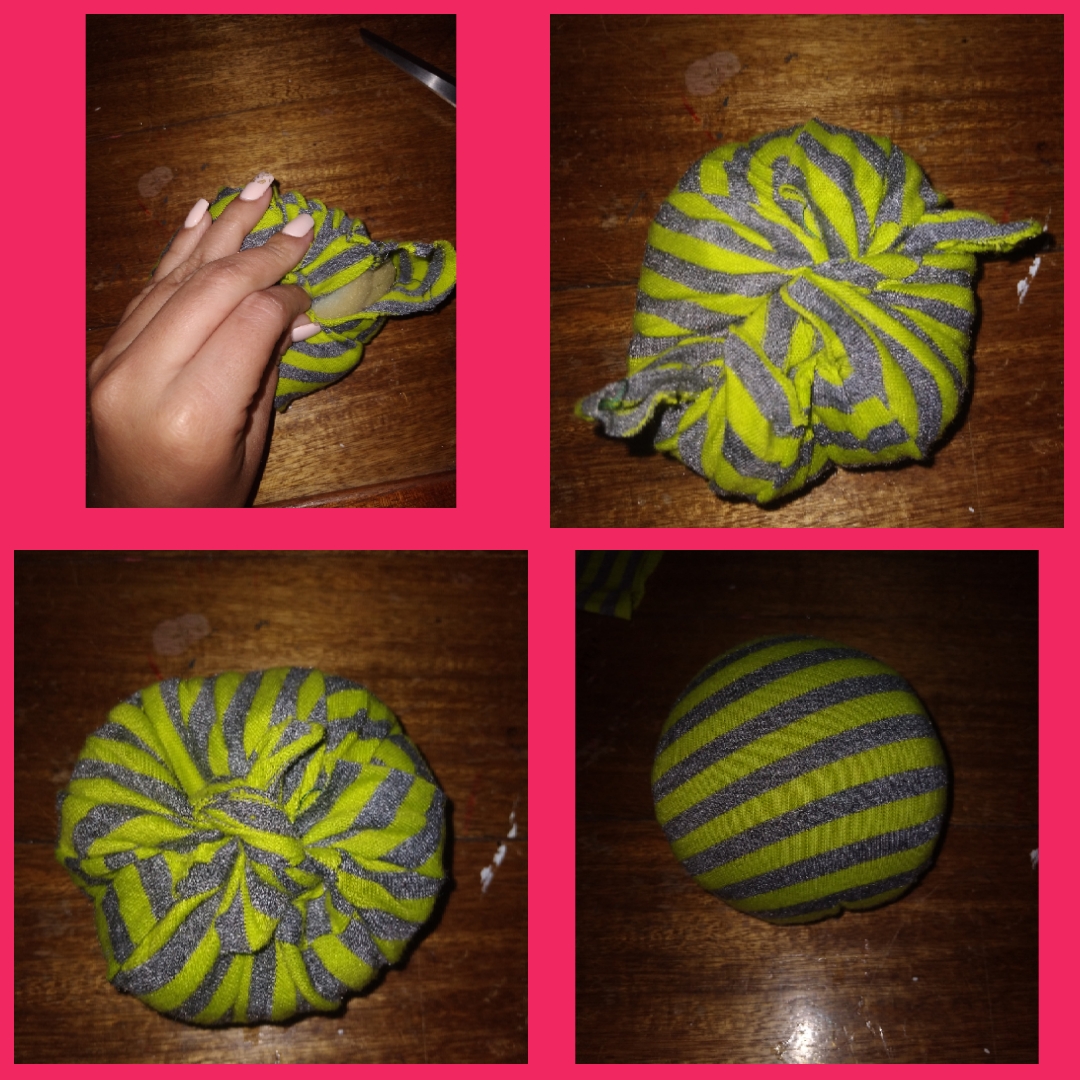
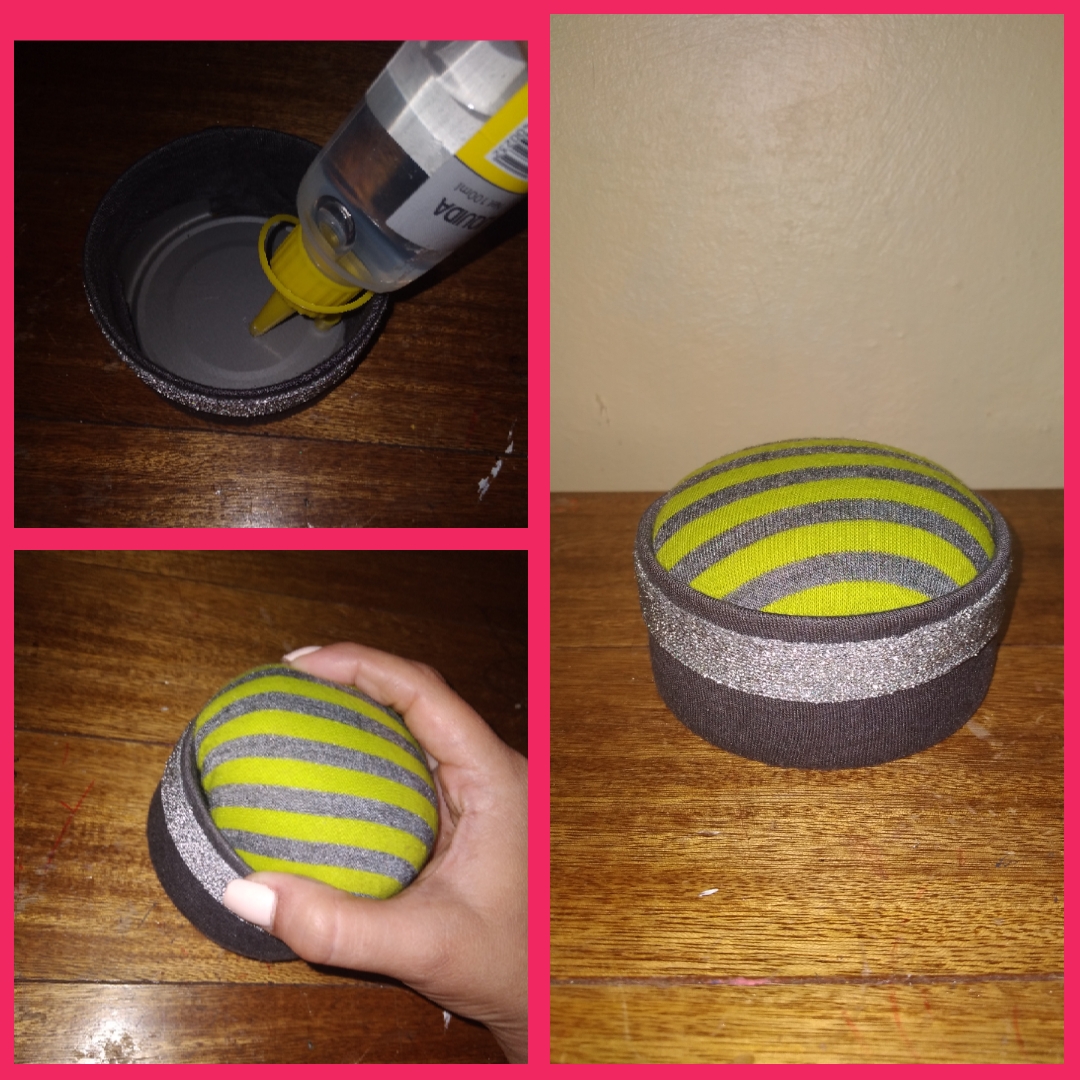
• Por ultimo le echamos silicon a la parte interna de la lata e introducimos la esponja forrada y obtenemos un lindo organizador de agujas y alfileres.
• Finally, we pour silicone on the inside of the can and insert the lined sponge and we get a nice organizer for needles and pins.
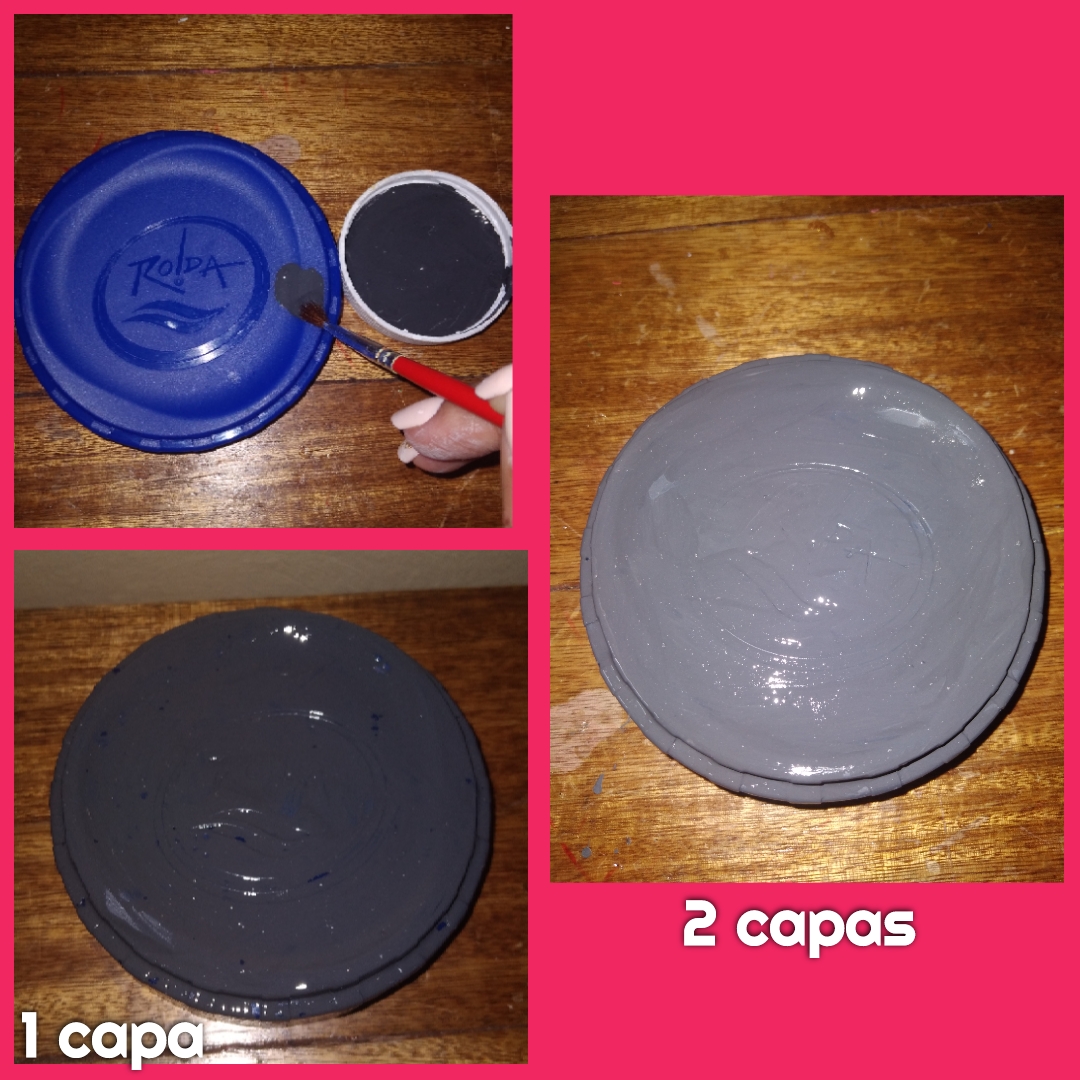
• A continuación haremos el otro organizador utilizando los mismos colores que use para el otro pirque se trata de un set costurero, lo primero que hacemos es pintar la tapa de plastico, como yo no tenia gris, mezcle pintura blanca con negra obtener ese color, le aplique dos capaz de pintura para que tuviese mejor cobertura.
• Next we will make the other organizer using the same colors used for the other pirque it is a sewing set, the first thing we do is paint the plastic lid, as I did not have gray, mix white paint with black to obtain that color, I applied two layers of paint so that it would have better coverage.
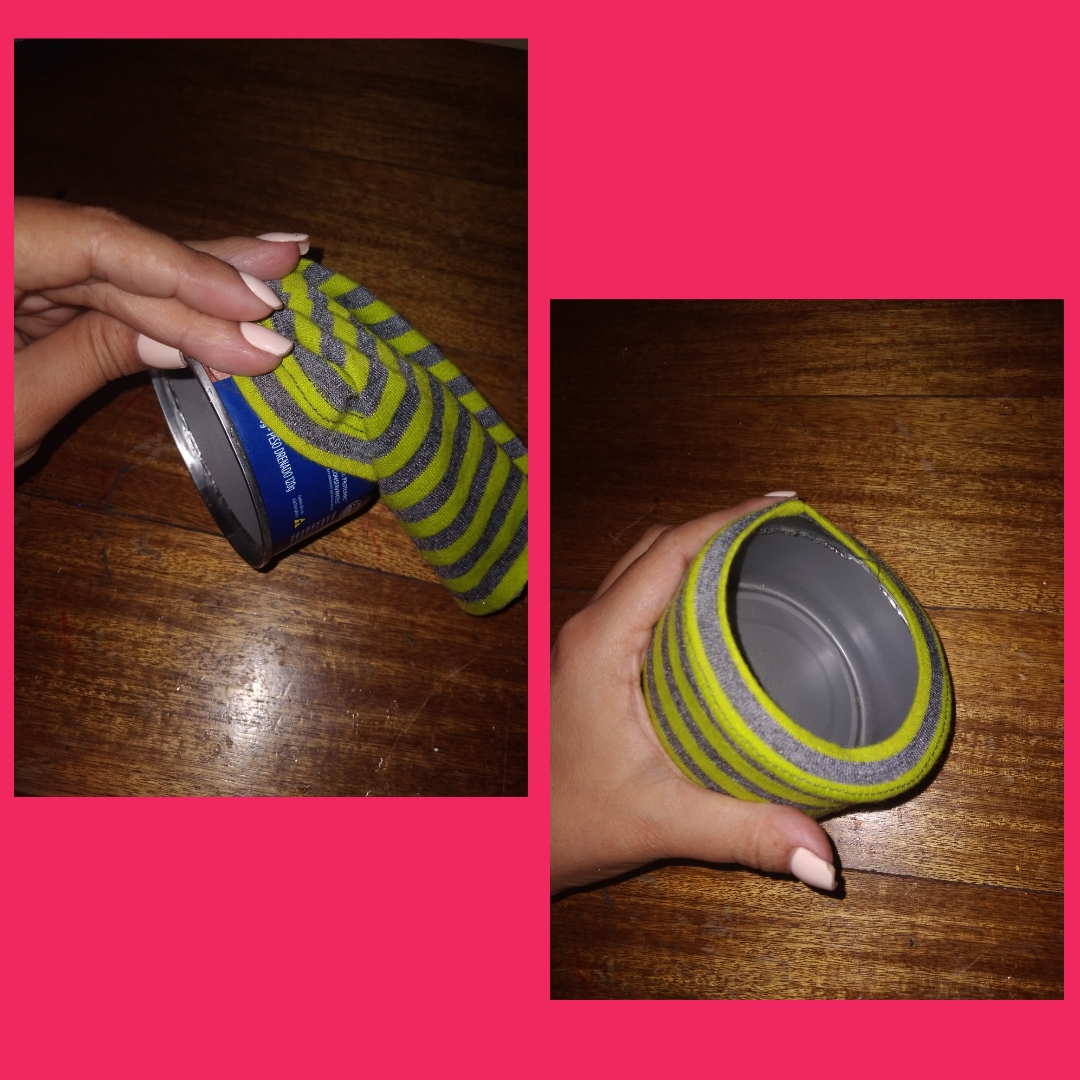
• Mientras la tapa se seca, tomamos el sobrante de la tela de ratas y le introducimos la otra lata haciendo el mismo procedimiento de la lata anterior.
• While the lid dries, we take the leftover rat cloth and introduce the other can doing the same procedure as the previous can.
• Pegamos la tela en la parte interna de la lata al igual que en la parte trasera.
• We glue the fabric on the inside of the can as well as on the back.
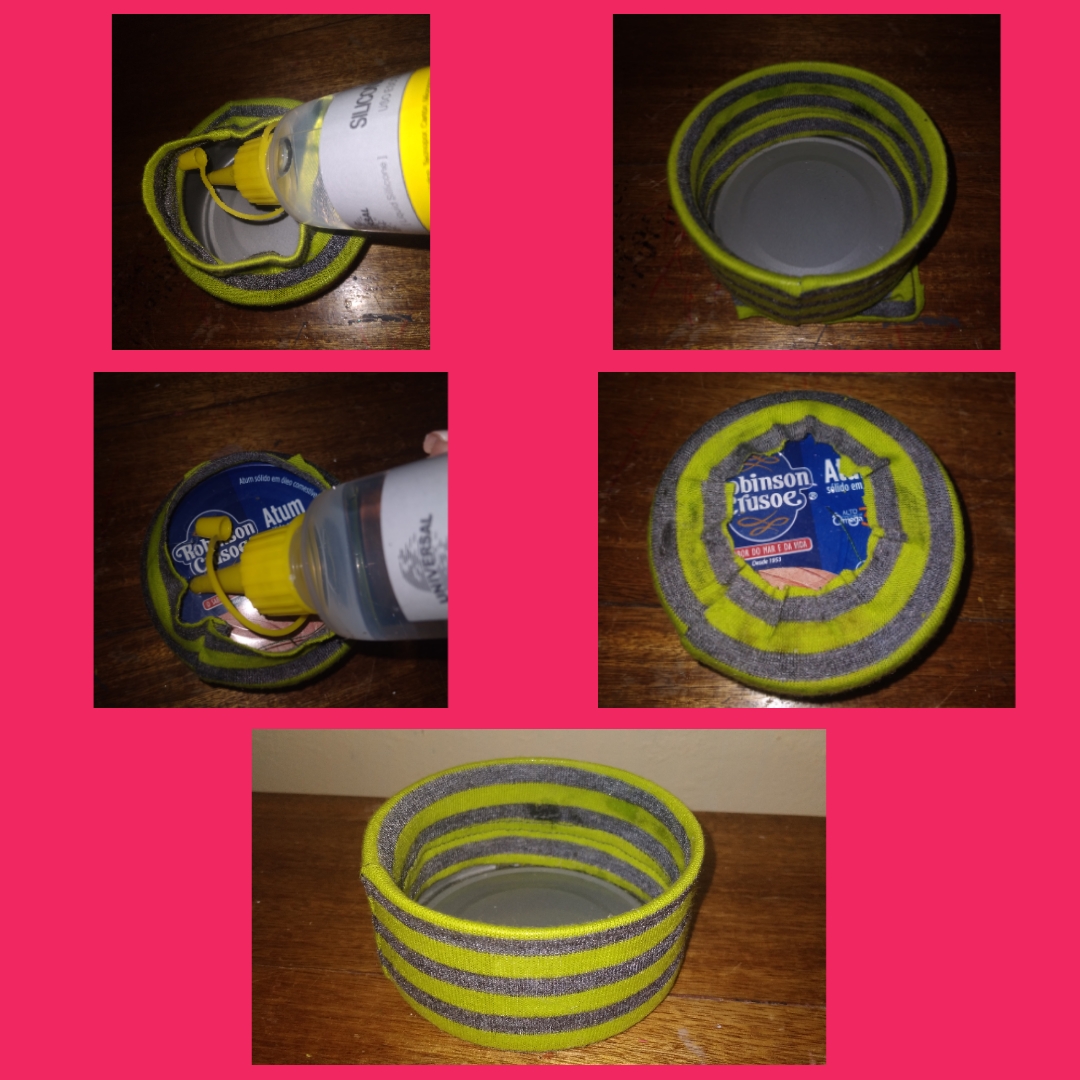
• Tomamos el circulo de cartulina que teníamos reservados y se lo pegamos en la parte trasera de la lata.
• We took the cardboard circle that we had reserved and glued it to the back of the can.
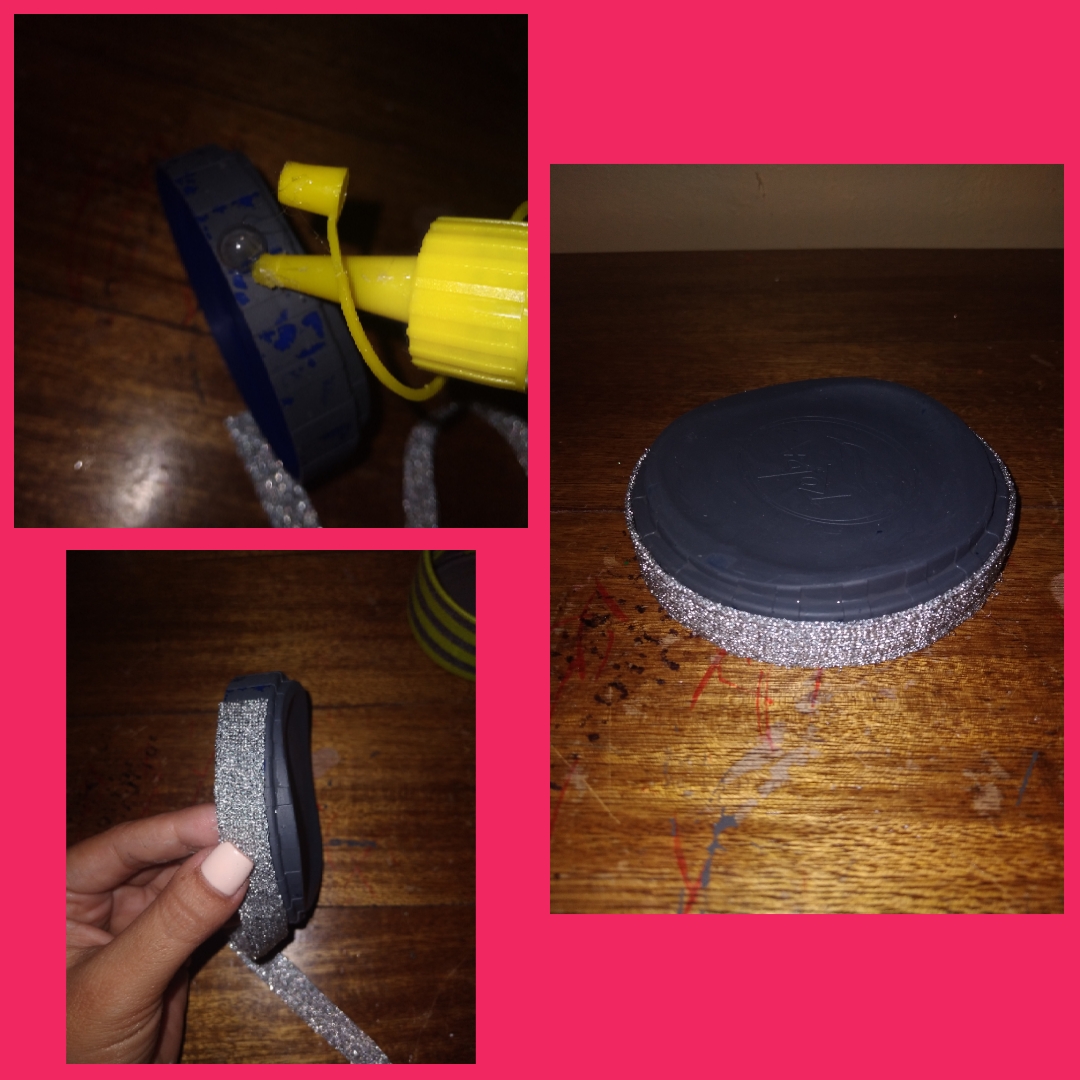
• Una vez seca la tapa le pegamos por todo el alrededor la cinta plateada sobrante, a esa parte de la tapa le eche una sola capa de pintura porque después que la pinte recordé que llevaba la cinta🤭.
• Once the lid is dry, we stick the remaining silver tape all around it, I put a single layer of paint on that part of the lid because after I painted it I remembered that I had the tape🤭.
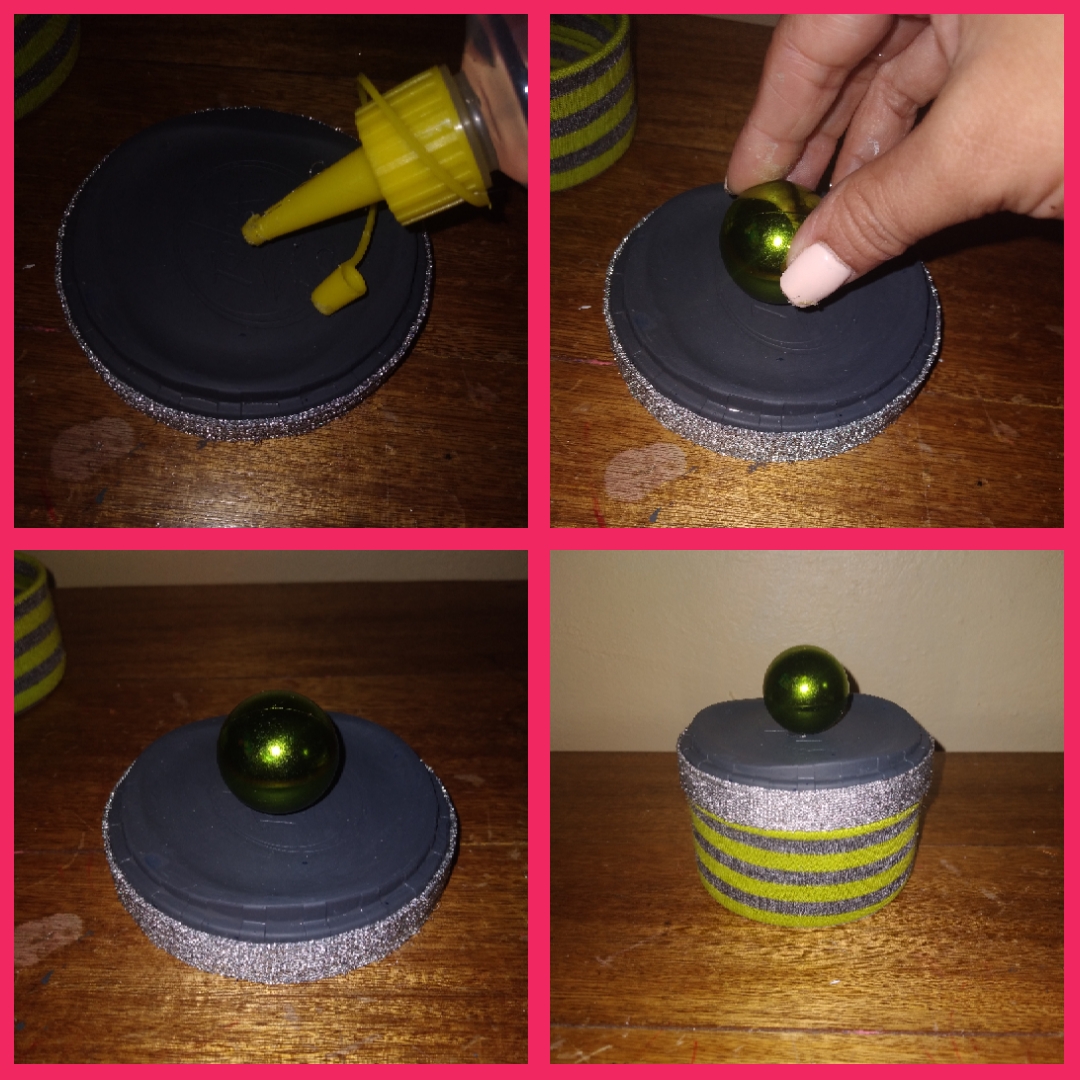
• Por ultimo tomamos la bolita de navidad que dije que estaba dañada porque se le rompio la parte de donde se cuelga al arbolito 😁, y la pegamos en todo el medio denla tapa y obtendremos un organizador de hijos y bobinas de costura.
• Lastly, we take the Christmas ball that I said was damaged because the part where it hangs from the tree broke 😁, and we glue it all over the middle of the lid and we will obtain a children's organizer and sewing bobbins.
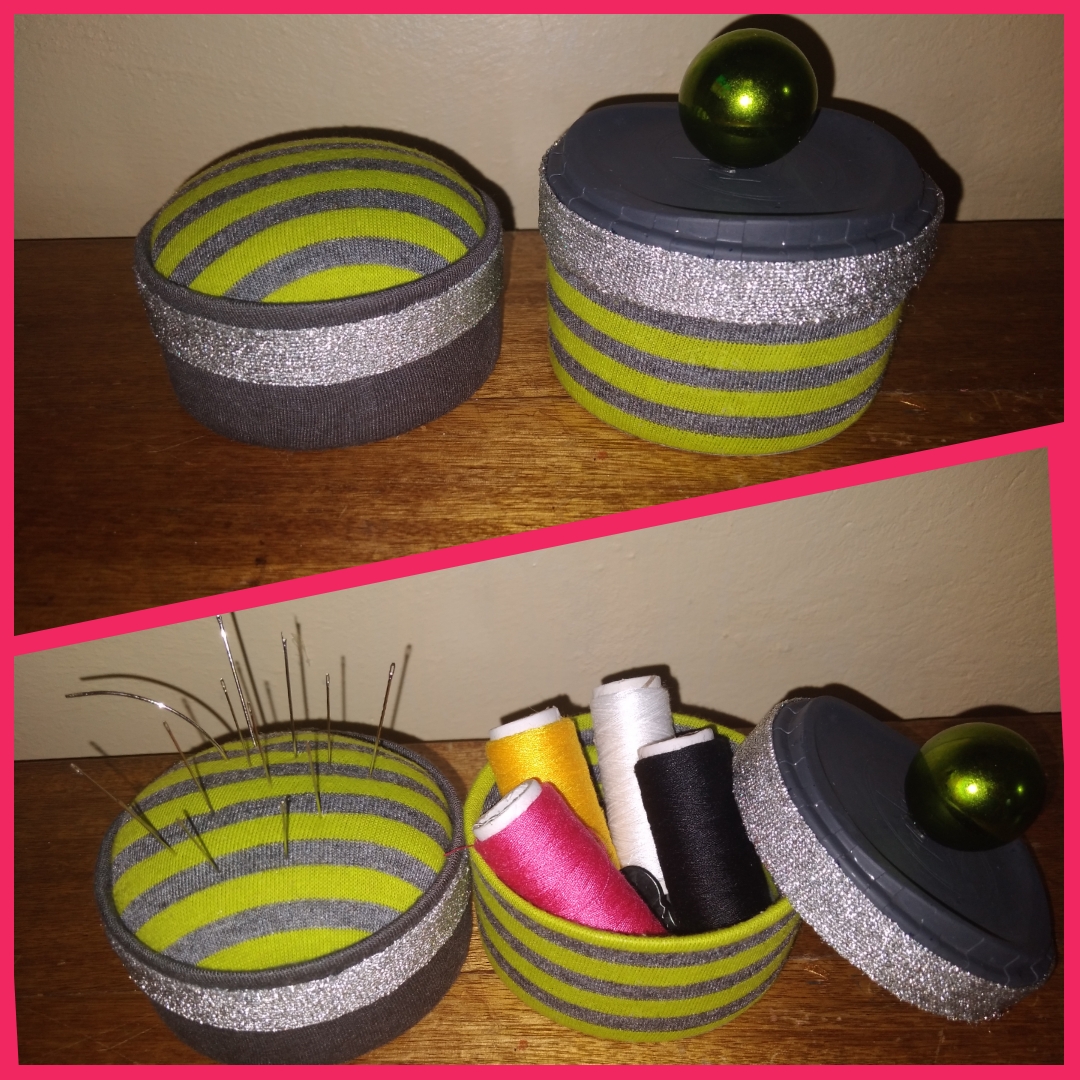
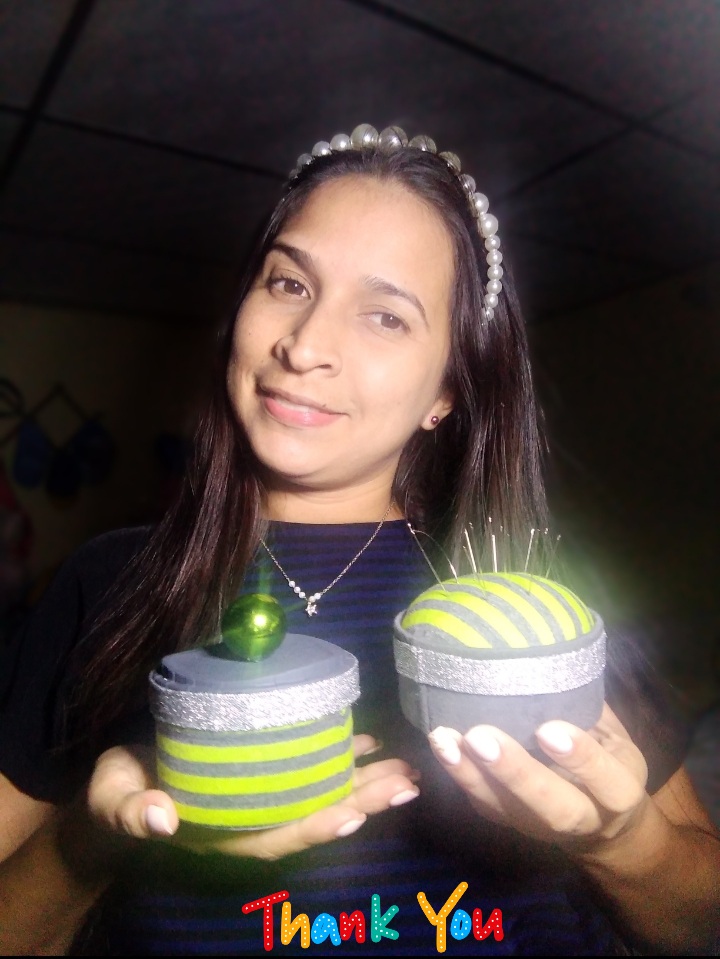
• Y listo! Aqui esta el resultado de mi manualidad un creativo set costurero, uno para agujas y alfileres y el otro para bobinas, botones, hilos y objetos pequeños, ideal para mi mamá 😉.
• And ready! Here is the result of my craft, a creative sewing set, one for needles and pins and the other for bobbins, buttons, threads and small objects, ideal for my mom 😉.
Nos vemos en mi próxima publicación 👋🥰
See you in my next post 👋 🥰
Es un gusto compartir con ustedes mis ideas💡
It is a pleasure to share my ideas with you
Dios les bendiga 😇
God bless you 😇
Ma sono meraviglioso!
Bravissima
Ti auguro una buona serata
@luba555
!hivebits