Esp~Eng: Bello y Creativo Organizador Multiuso Hecho con Material de Provecho♻️😃/Beautiful and Creative Multipurpose Organizer Made with Useful Material♻️😃.
💖 BIENVENIDOS
A MI
BLOG 💞
HOLA mí gente bonita hiver's excelente día para todos, espero esten muy bien, yo estoy bien gracias a Dios, mi ausencia se debia a que el telefono se me habia dañado otra vez pero ya me repararon y aqui estoy nuevamente con ustedes, Mi manualidad de hoy es un creativo organizador multiuso grande hecho con material de provecho ♻️, en este caso una caja de cartón y unas canicas.
💖 WELCOME
ME
BLOG 💞
HELLO my beautiful hiver's people excellent day for all, I hope you are very well, I'm fine thank God, my absence was due to the fact that my phone had been damaged again but they already repaired me and here I am again with you, My handicraft of today it's a creative large multipurpose organizer made with useful material ♻️, in this case a cardboard box and some marbles.
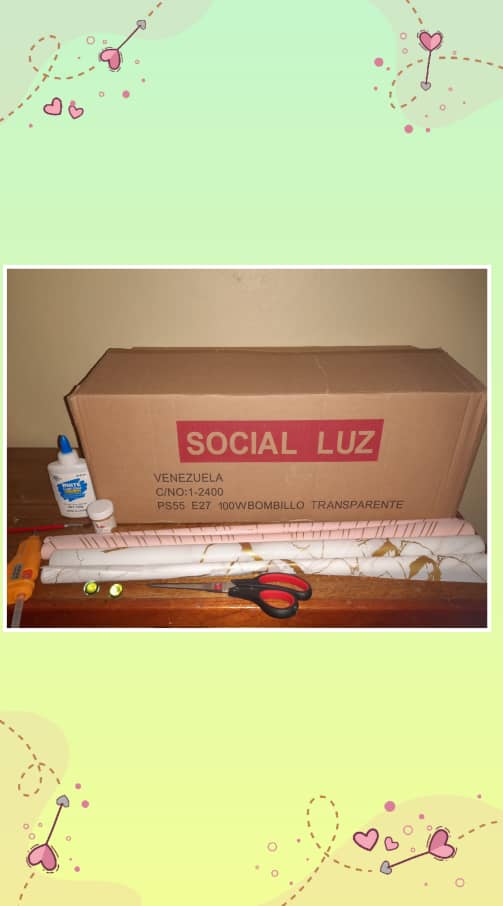
A continuación lo que necesitaremos y su elaboración:
📝 Materiales:
• 1 caja de cartón
• 2 canicas
• Pintura dorada
• 4 papel de envolver
• Tijera
• Pistola d Silicon
• Silicio frío
• Pincel
Here is what we will need and how to prepare it:
📝 Materials:
• 1 cardboard box
• 2 marbles
• Gold paint
• 4 wrapping paper
• Scissor
• Silicon Gun
• Cold silicon
• Brush
💁🏻♀️ Elaboración:
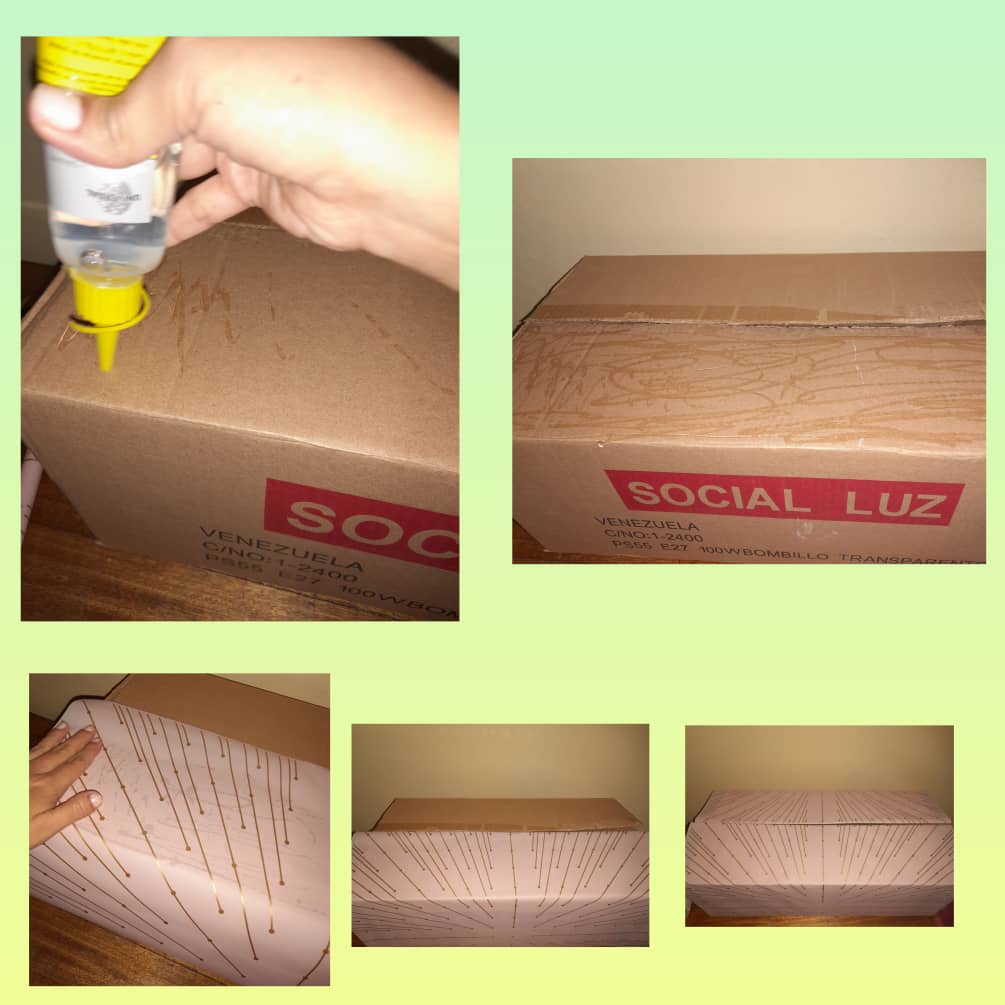
• Lo primero que hacemos es tomar unos de los pliegos de papel de envolver, tome el rosado por el diseño que tiene, echamos silicon líquido a la caja y forramos solo la parte externa, de estos dos pliegos que utilice solo sobro un pedazo como de 10cm de ancho y del largo del papel.
💁🏻♀️ Elaboration:
• The first thing we do is take one of the sheets of wrapping paper, take the pink one because of the design it has, we pour liquid silicone into the box and cover only the outer part, of these two sheets that I use only a piece left over like 10cm wide and the length of the paper.
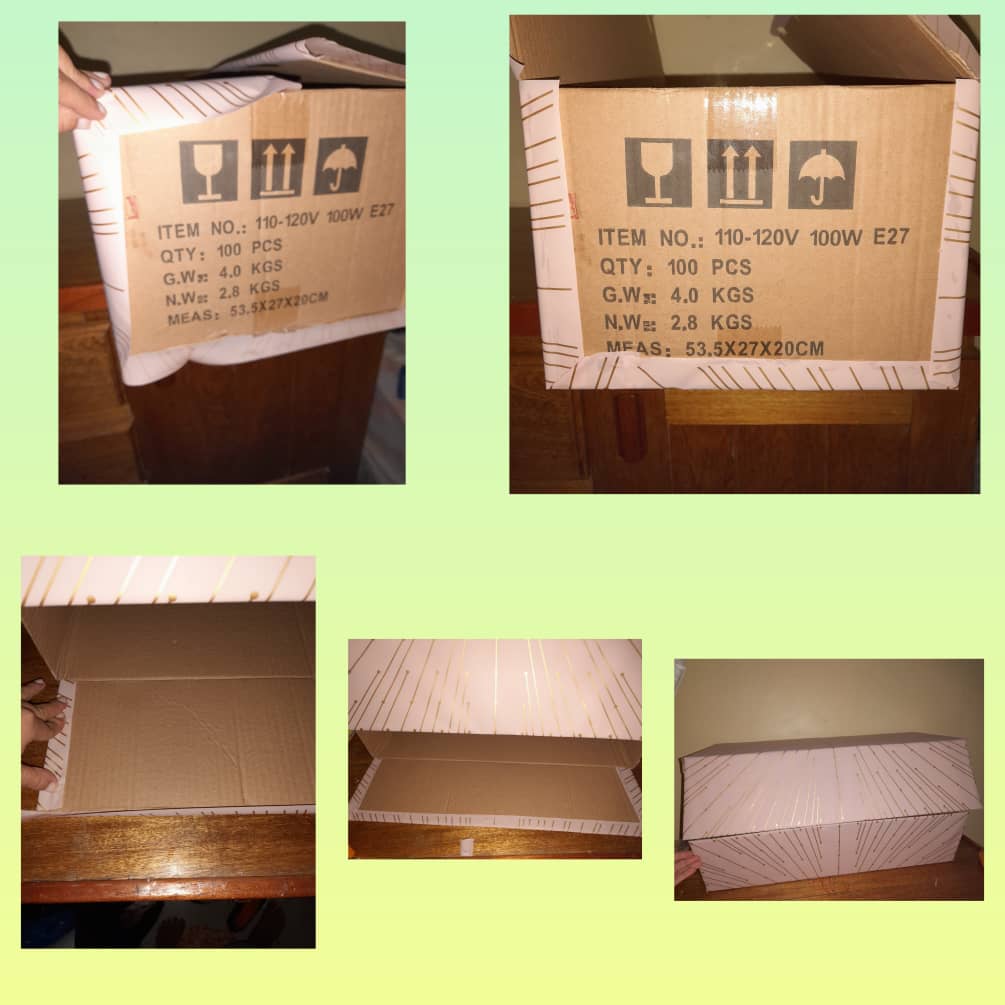
• Luego que la forramos le pegamos el papel que sobra de los laterales y las tapas como te muestro en las imagenes.
• After we cover it, we glue the remaining paper from the sides and the covers as I show you in the images.
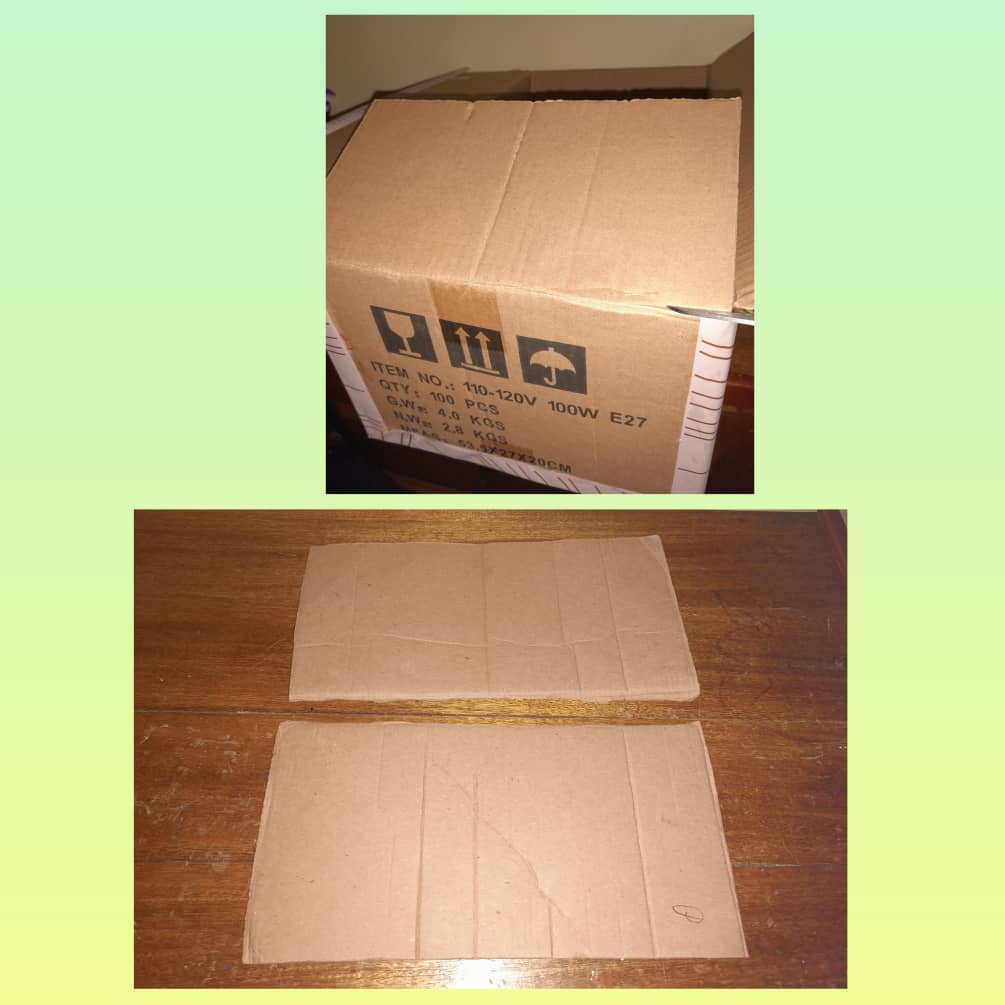
• Antes de forrar la caja en la parte imterna le cortamos las pestañas de los laterales y las reservamos.
• Before lining the box on the inside, we cut the tabs on the sides and reserve them.
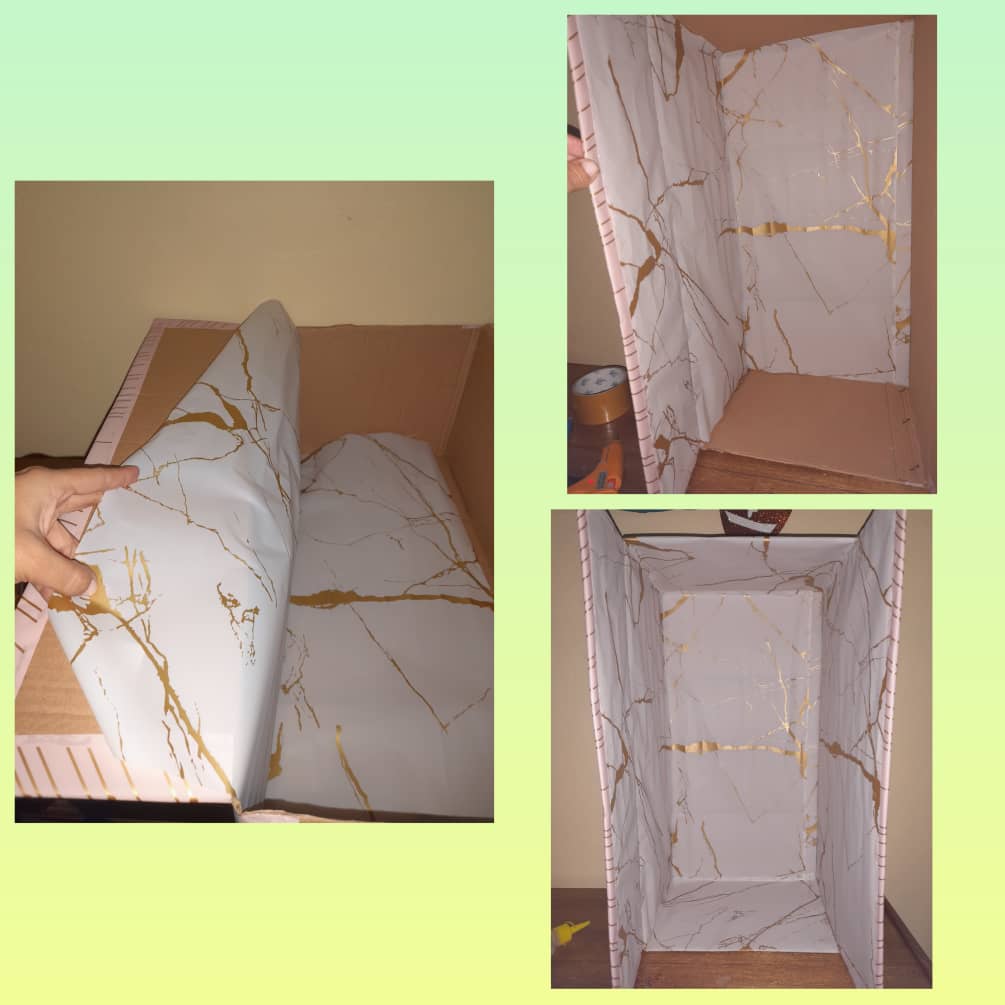
• Con los otros 2 pliegos de papel forramos toda la parte interna primero un lado y luego el otro hasta forrar por completo.
• With the other 2 sheets of paper we cover the entire inside first one side and then the other until completely covered.
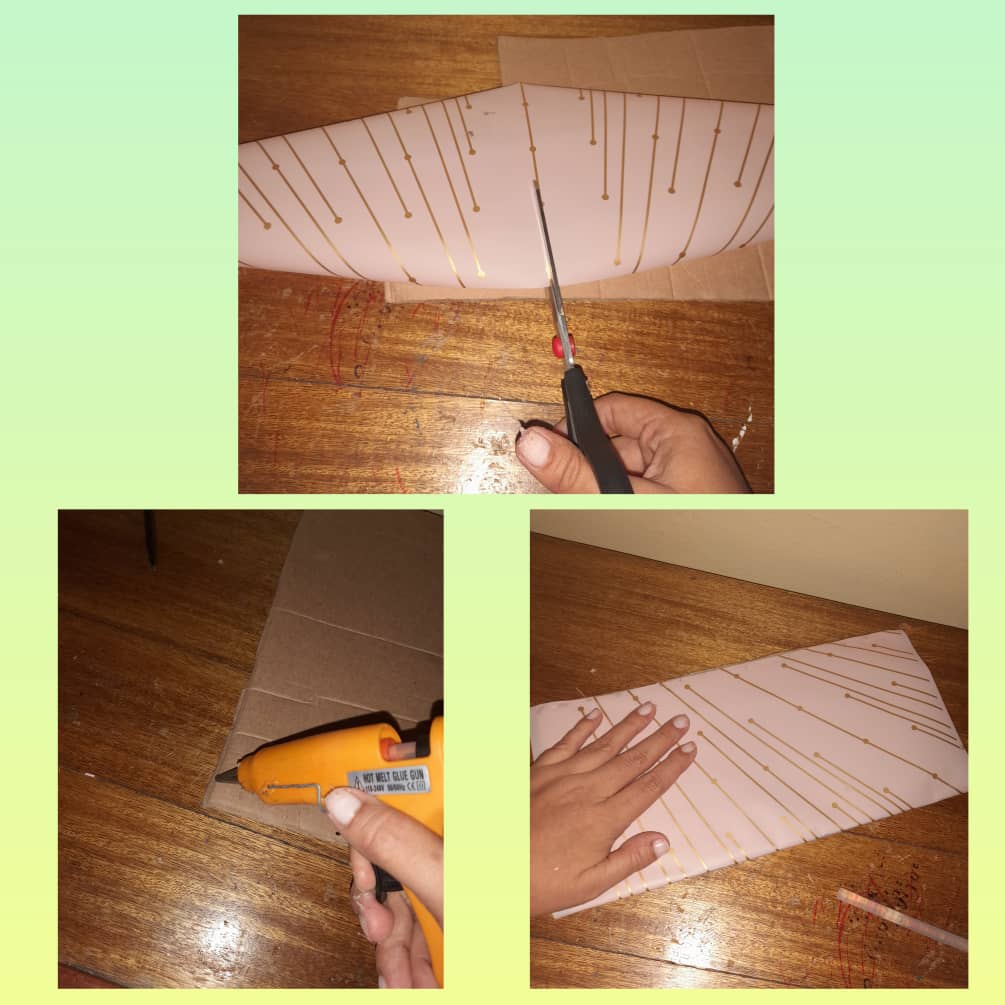
• Tomamos las 2 pestañas de cartón que habíamos reservado y las forramos con el papel rosado que nos habia sobrado, lo picamos a la mitad para que sean de igual tamaño, le echamos silicon caliente por toda la orilla al cartón y le pegamos el papel.
• We took the 2 cardboard tabs that we had reserved and covered them with the pink paper that we had left over, we cut it in half so that they are the same size, we poured hot silicone all over the edge of the cardboard and we glued the paper.
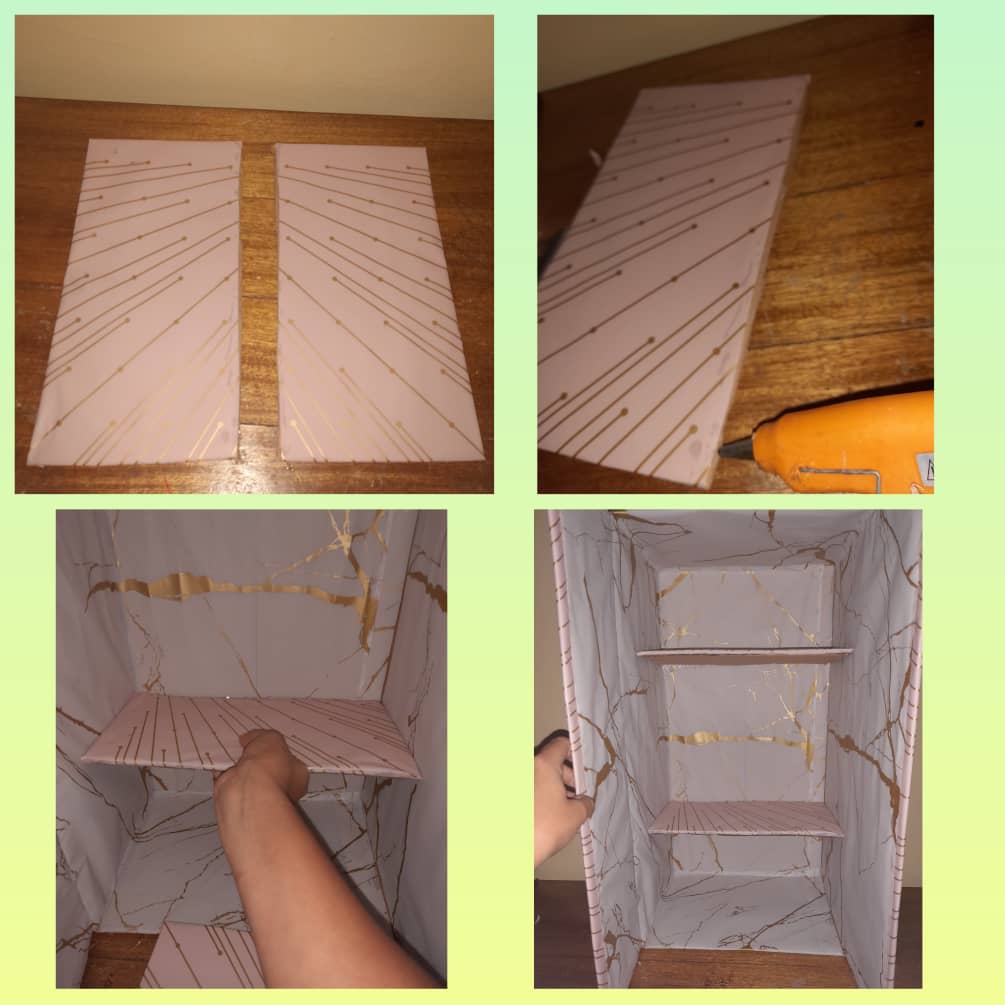
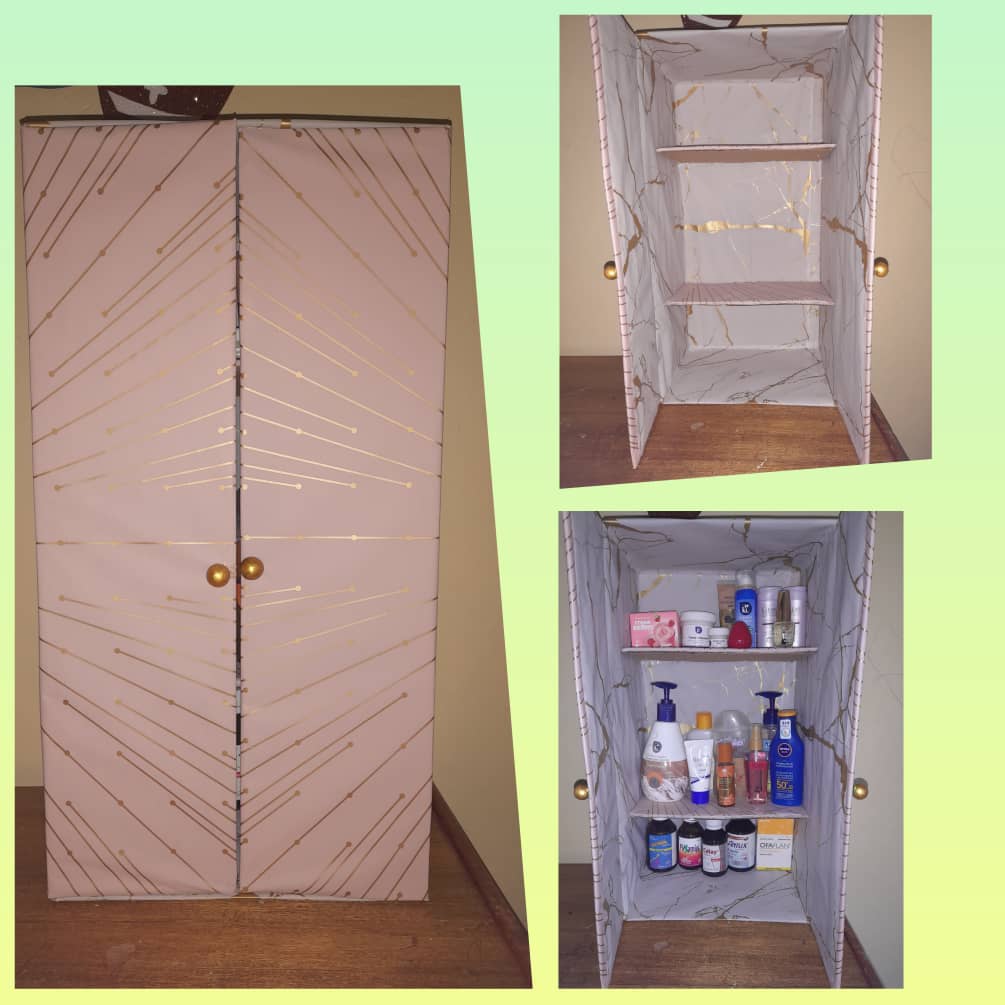
• Una vez forradas le ponemos suficiente silicon caliente y las pegamos en la parte interna de la caja colocando la caja en forma vertical, las pegamos un una distancia entre ellas como te muestro en las imagenes.
• Once they are lined, we put enough hot silicone on them and stick them on the inside of the box, placing the box vertically, we stick them at a distance between them as I show you in the images.
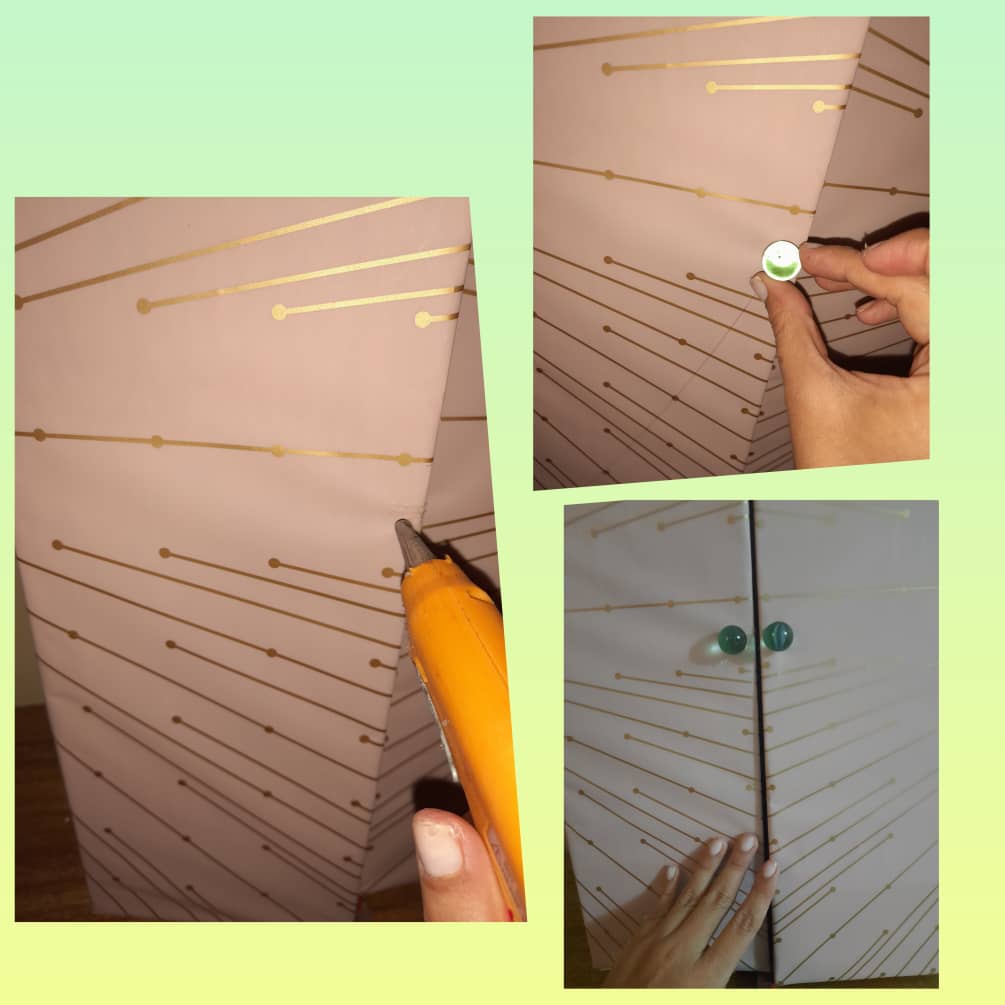
• Ahora le pegamos las canicas una en cada tapa que en este caso serian las puertas del organizador.
• Now we glue the marbles, one on each lid, which in this case would be the doors of the organizer.
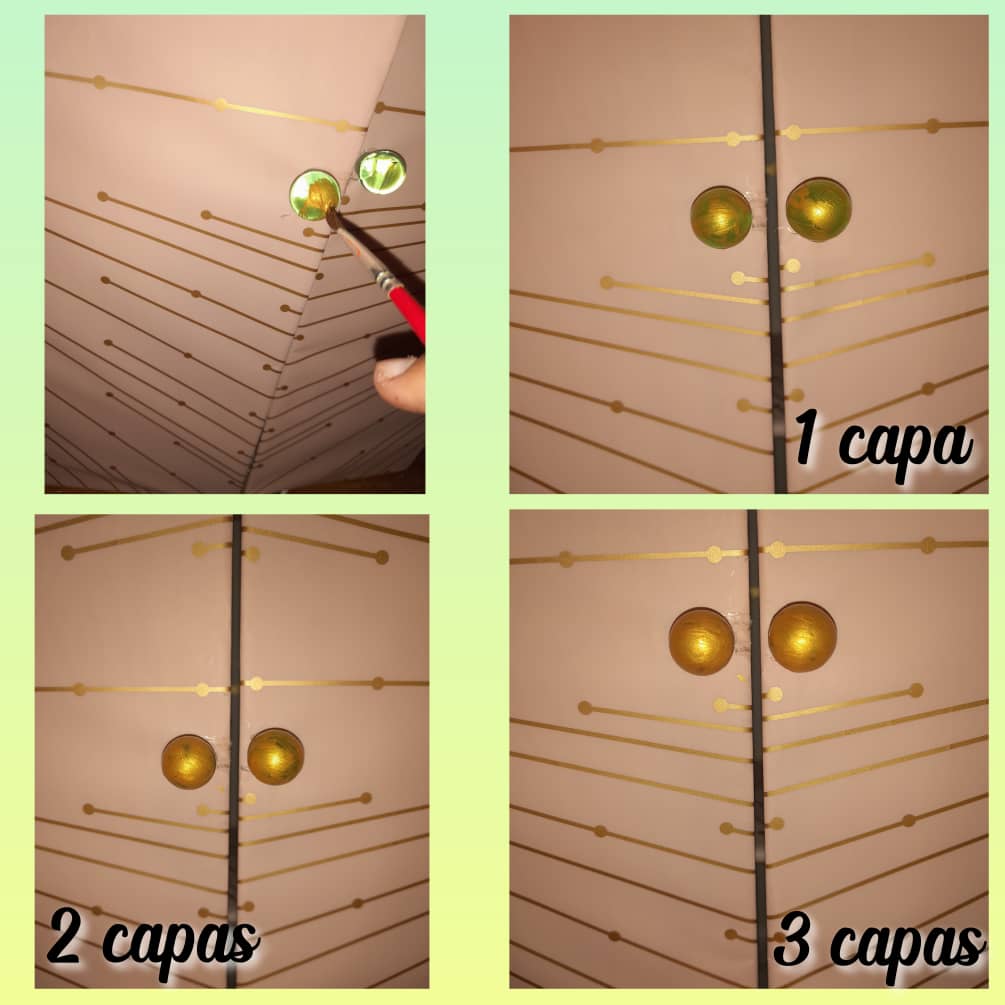
• Por último las pintamos con la pintura dorada echándole 3 capas de pintura para que pudiese cubrir la canica.
• Lastly, we painted them with gold paint, adding 3 layers of paint so that it could cover the marble.
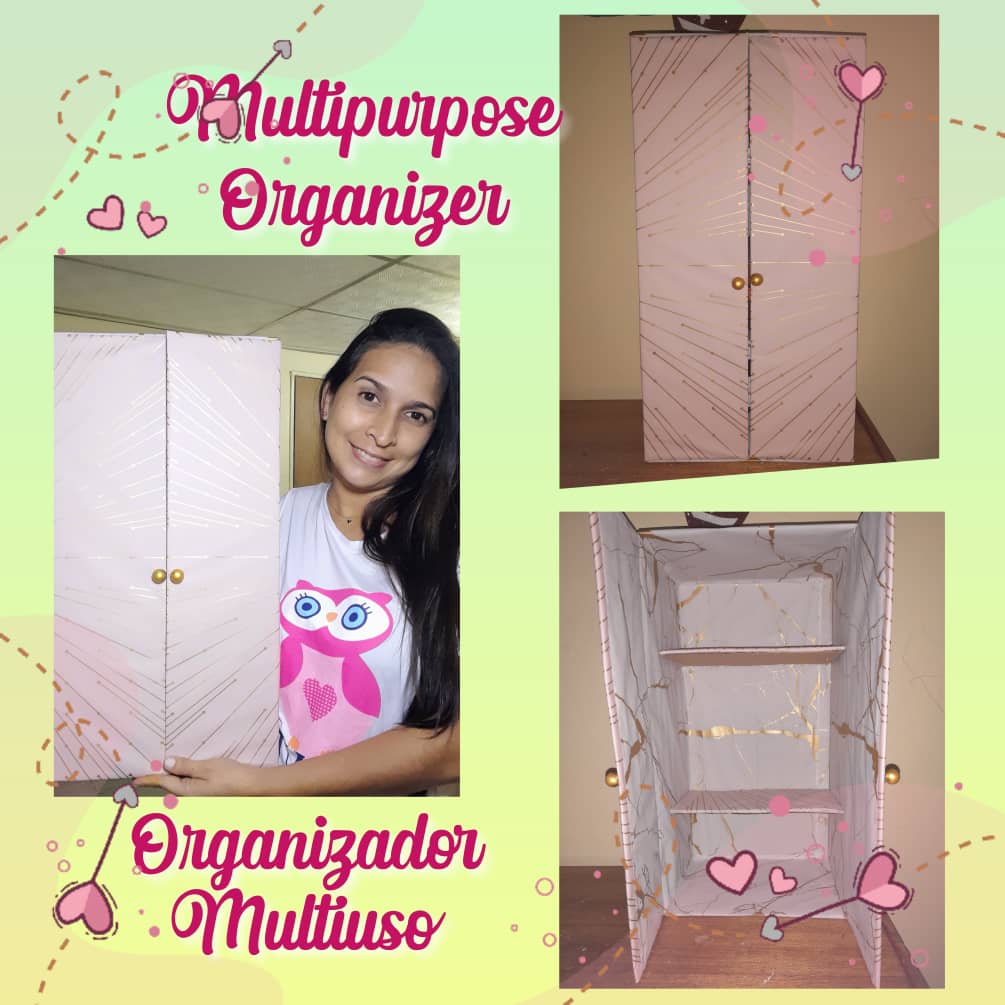
• Y listo! Aquí esta el resultado de mi manualidad un creativo organizador grande con sus respectivas puertas ideal para guardar lo que prefieras y puede ser colocado en cualquier espacio de la casa, se puede pegar a la pared o colocarlo encima de un estante.
• And ready! Here is the result of my craft, a creative large organizer with its respective doors, ideal for storing what you prefer and can be placed in any space in the house, it can be glued to the wall or placed on top of a shelf.
Nos vemos en mi próxima publicación 👋🥰
See you in my next post 👋 🥰
Es un gusto compartir con ustedes mis ideas💡
It is a pleasure to share my ideas with you💡
Dios les bendiga 😇
God bless you 😇