Portalápices Creativos / Creative Pencil Holder
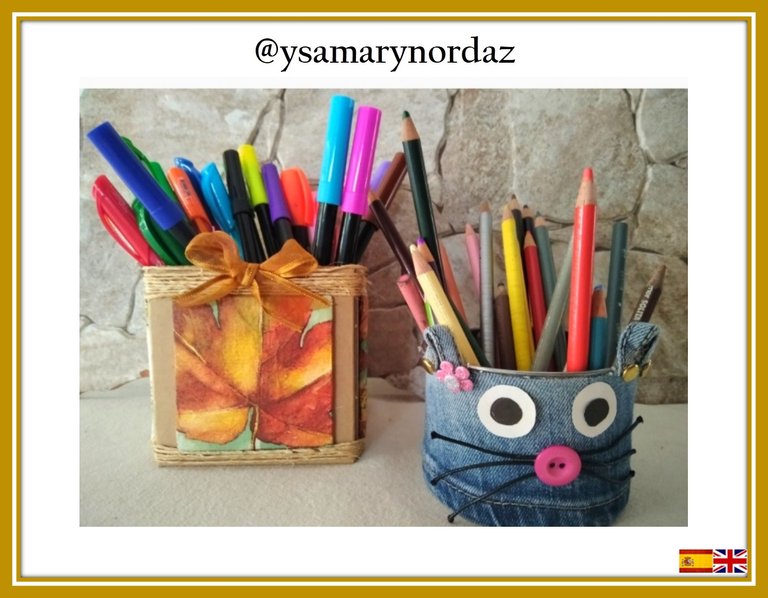
Hola amigos de esta gran comunidad de #Hivediy. Hoy quiero compartir con ustedes dos ideas muy simples de realizar: Portalápices creativos hechos con material de provecho. Estos objetos son de gran utilidad ya que, nos permiten tener a nuestro alcance los útiles necesarios a la hora de realizar ciertas actividades. Por tal motivo, el día de hoy les mostraré como con una simple caja y un envase de aluminio podemos elaborar portalápices de una manera original y lo mejor, con materiales de provecho. A continuación, les presento estos dos paso a paso espero les guste. ¡Vamos a comenzar!
Hello friends of this great community of #Hivediy. Today I want to share with you two very simple ideas to make: Creative pencil holders made with useful material. These objects are very useful since they allow us to have within our reach the necessary tools when carrying out certain activities. For this reason, today I will show you how with a simple box and an aluminum container we can make pencil holders in an original way and, best of all, with useful materials. Next, I present these two step by step I hope you like it. Let's get started!

Materiales:
•Caja de cartón
•2 bandejas de anime
•Servilleta decorativa
•Pega blanca
•Pega silicon frío
•Hilo de yute
•Cinta color bronce
•Pintura de color dorado
•Pincel
•Regla
•Tijera
•Cuter
Materials:
•Carton box
•2 white foam trays
•Decorative napkin
•White glue
•Glue cold silicone
•Jute twine
•Bronze colored ribbon
•Gold color paint
•Brush
•Ruler
•Scissors
•Cutter
Paso 1
Con la ayuda del cuter corta la tapa y los laterales de la caja. Luego, pinta sus bordes con la pintura de color dorado.
Step 1
With the help of the cutter, cut the lid and the sides of the box. Then, paint its edges with the gold paint.

Paso 2
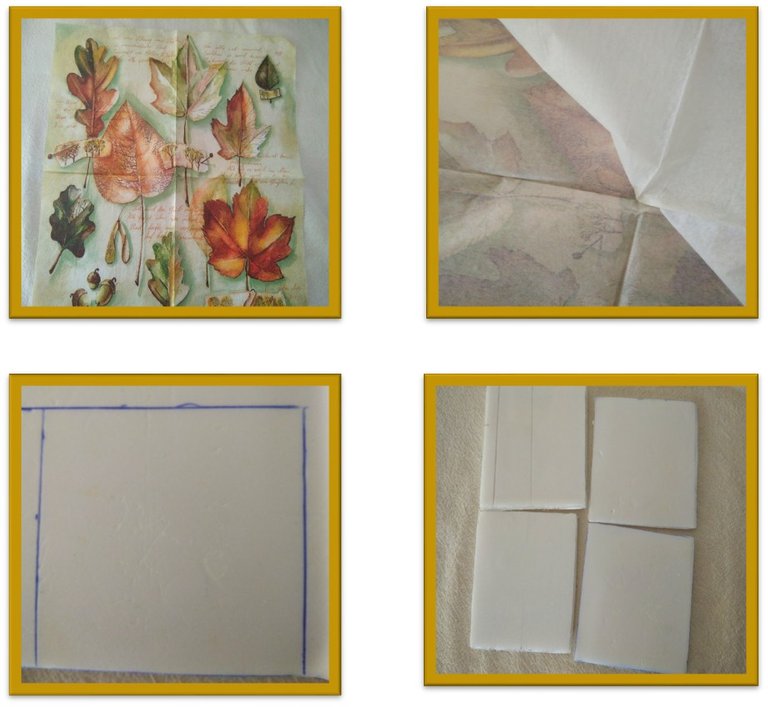
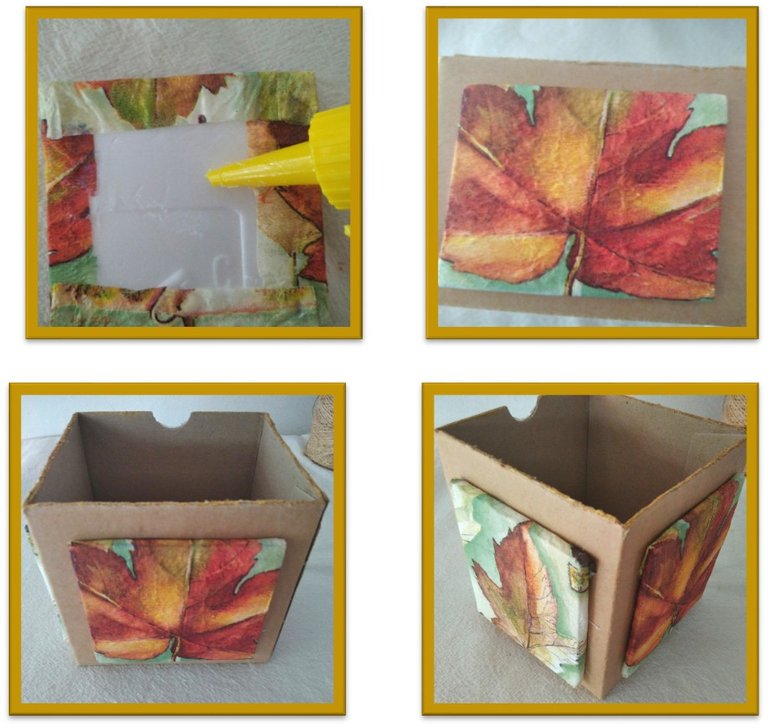
Separa las capas de la servilleta, dejando solamente la que lleva el diseño. Luego, toma las bandejas de anime y corta cuatro cuadrados de 7,5cm x7,5 cm cada uno.
Step 2
Separate the layers of the napkin, leaving only the one with the design. Next, take the white foam trays and cut four 7.5cm x 7.5cm squares.
Paso 3
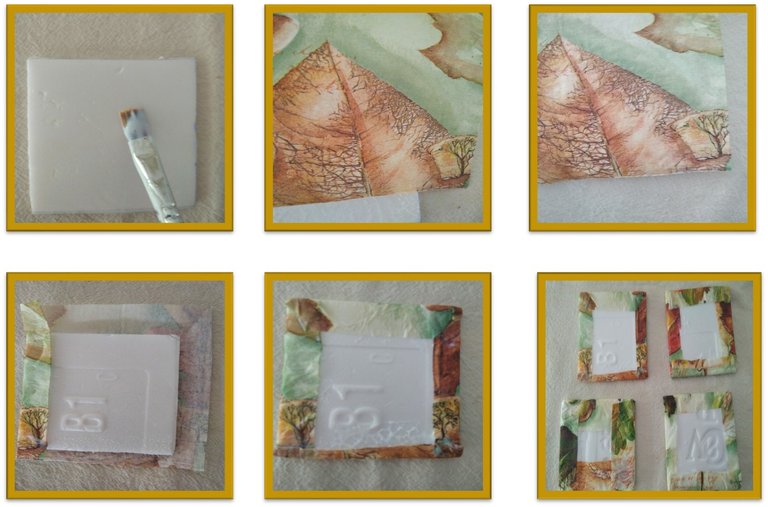
Con la ayuda del pincel, aplica pega blanca sobre los cuadrados de anime y fórralos con las servilletas como se observa en la imagen.
Step 3
With the help of the brush, apply white glue on the white foam squares and cover them with the napkins as shown in the image.
Paso 4
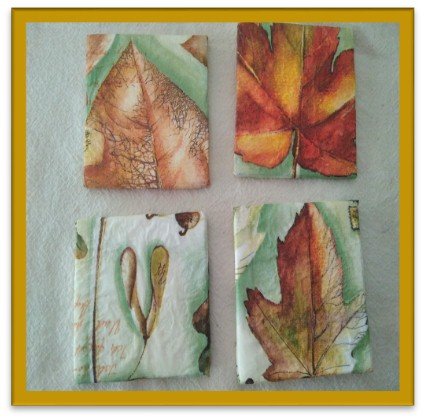
Pega cada cuadro por cada lado de la caja, dejando un espacio de 1cm en la parte superior y ½ cm en la parte inferior.
Step 4
Glue each square to each side of the box, leaving a 1cm gap at the top and ½cm at the bottom.
Paso 5
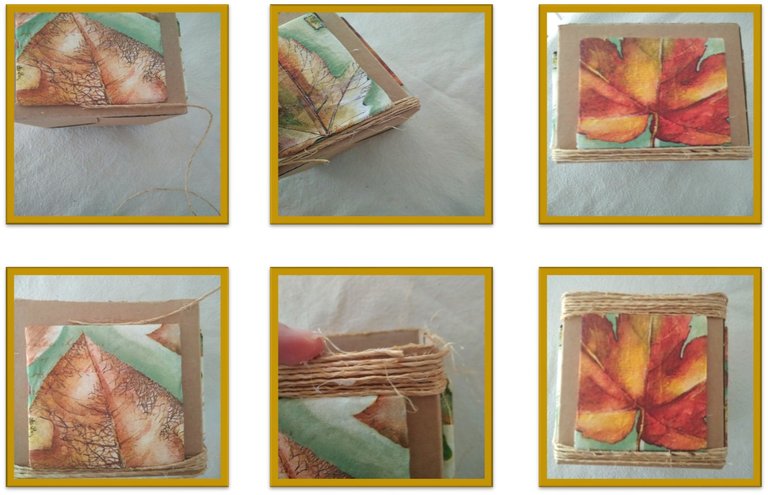
Aplica un poco de pega silicon tanto en la parte superior como inferior de la caja y, cubre con el hilo de yute.
Step 5
Apply some silicone glue to both the top and bottom of the box and cover with the jute thread.
Paso 6
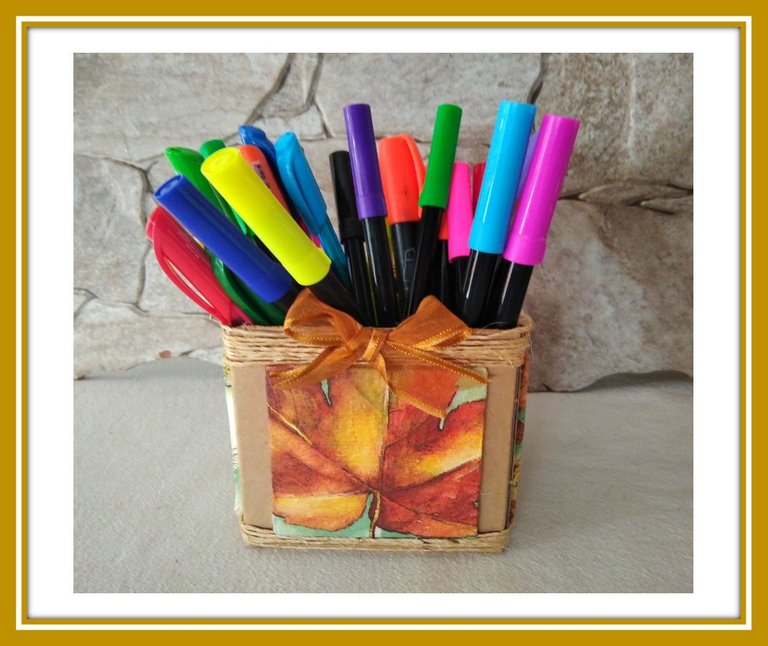
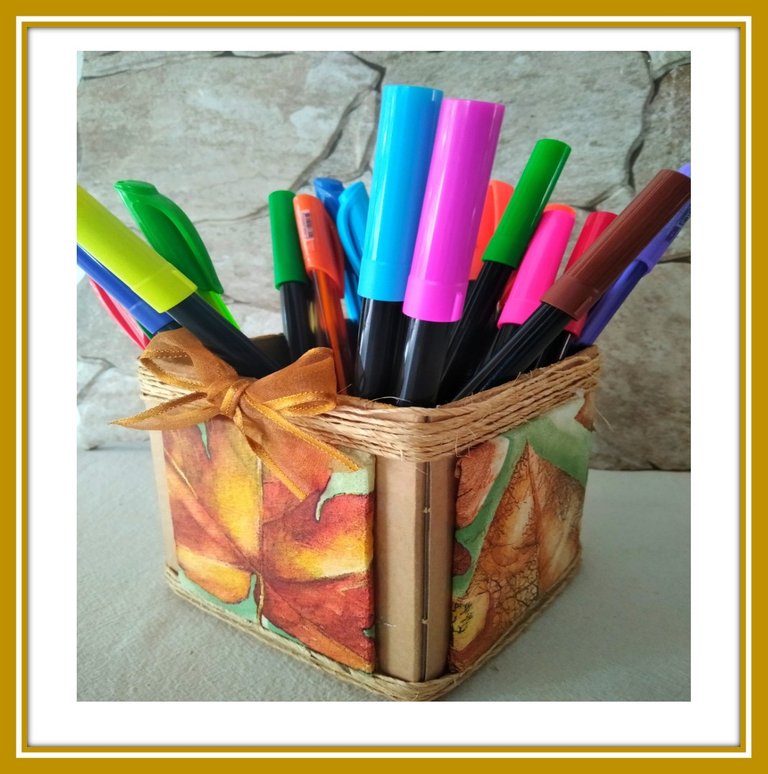
Toma la cinta color bronce y mide 24 cm, luego corta y realiza un lazo. Seguidamente, pega el mismo en el centro de la parte superior de la caja.
Step 6
Take the bronze ribbon and measure 24 cm, then cut and make a bow. Next, paste it in the center of the upper part of the box.

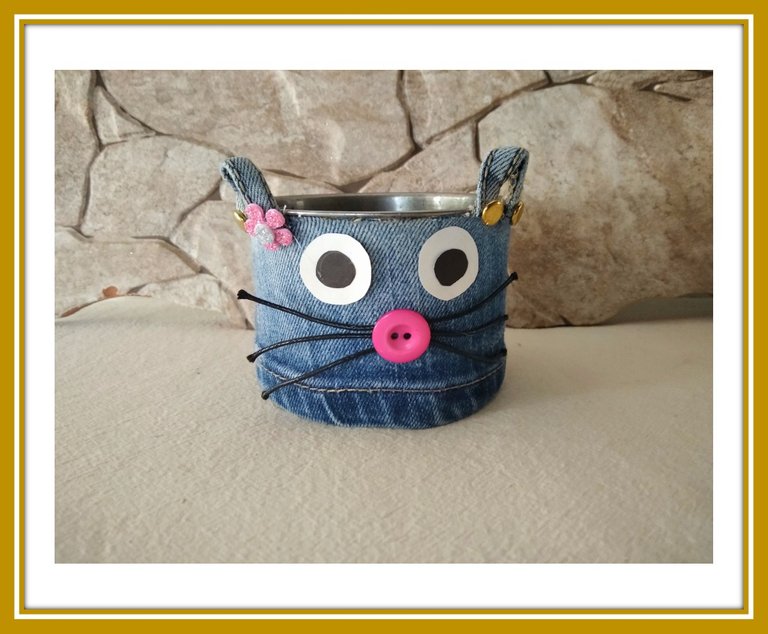
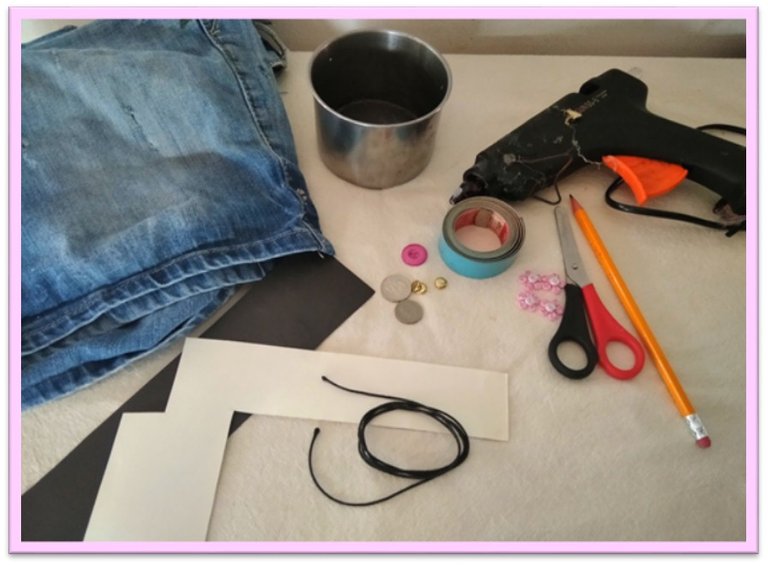
Materiales:
•Lata de metal
•Tela de jeans
•Hilo de cuero de color negro
•Pistola y barra de silicon
•1 botón de color fucsia
•Cartulina de colores blanco y negro
•Tijera
•5 aplique de flor
•Lápiz
•Moldes redondos
•Cinta métrica
•3 tachuelas de metal
Materials:
•Metal can
•Denim fabric
•Black leather thread
•Gun and silicone glue
•Fuchsia button
•Black and white cardboard
•Scissors
•5 flower appliques
•Pencil
•Round molds
•Tape
•3 metal studs round
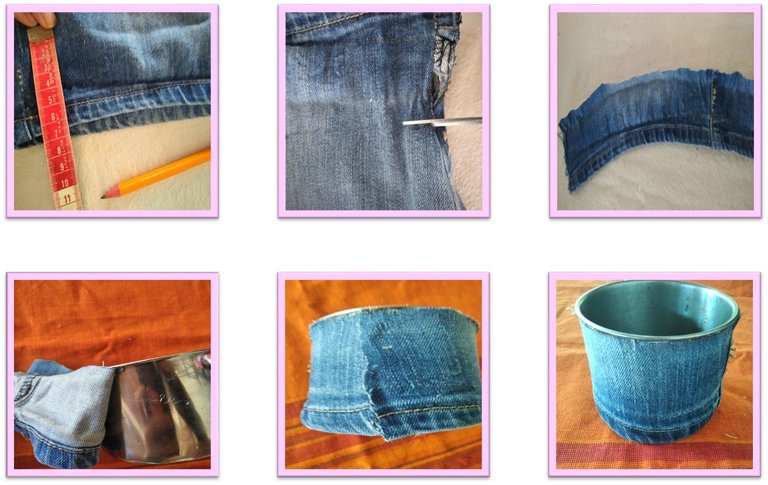
Paso 1
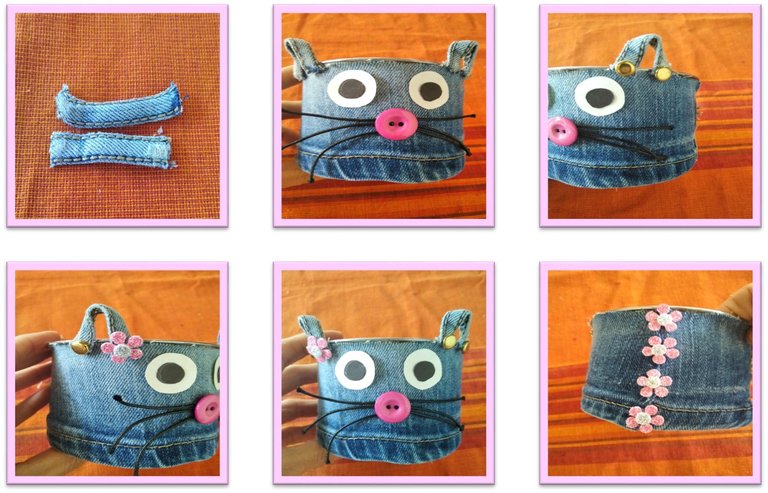
Toma la tela de jeans y mide un rectángulo, las medidas dependerán de la base con que vayas a trabajar. En este caso el rectángulo mide 28cm x 6,5cm. Una vez tengas el mismo, pégalo sobre la base.
Step 1
Take the jeans fabric and measure a rectangle, the measurements will depend on the base with which you are going to work. In this case the rectangle measures 28cm x 6.5cm. Once you have the same, paste it on the base.
Paso 2
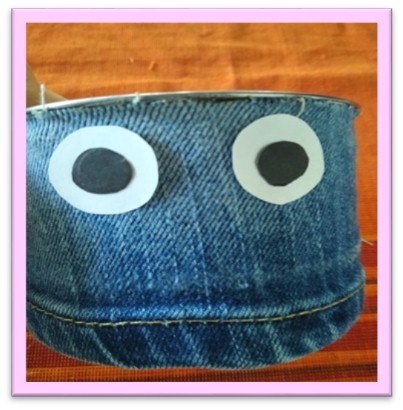
Realiza los ojos de la gatita con ayuda de moldes, en este caso, yo utilicé unas monedas. Dibuja dos círculos sobre la cartulina de color blanco y dos círculos más pequeños sobre la cartulina de color negro. Luego, recórtalos y pégalos en la parte superior de la base como se muestra en la imagen.
Step 2
Make the kitten's eyes with the help of moulds, in this case, I used some coins. Draw two circles on the white card and two smaller circles on the black card. Then cut them out and glue them to the top of the base as shown in the image.

Paso 3
Para hacer los bigotes corta el hilo de cuero en 6 tiras de 5cm. Luego pégalas en el centro y, colócale por encima el botón que será la nariz.
Step 3
To make the whiskers, cut the leather thread into 6 5cm strips. Then paste them in the center and place the button that will be the nose on top.

Paso 4
Para hacer las orejas corta dos trabillas de un pantalón de jeans y pégalas en la parte superior de la base. Luego, decora las mismas con unas tachuelas de metal y un aplique de flor. Y, por último, para tapar la unión de las telas en la parte de atrás, pega los apliques de flores para decorar.
Step 4
To make the ears, cut two belt loops from jeans pants and glue them to the top of the base. Then, decorate them with some metal studs round and a flower appliqué. And finally, to cover the joint of the fabrics on the back, glue the flower appliques to decorate.
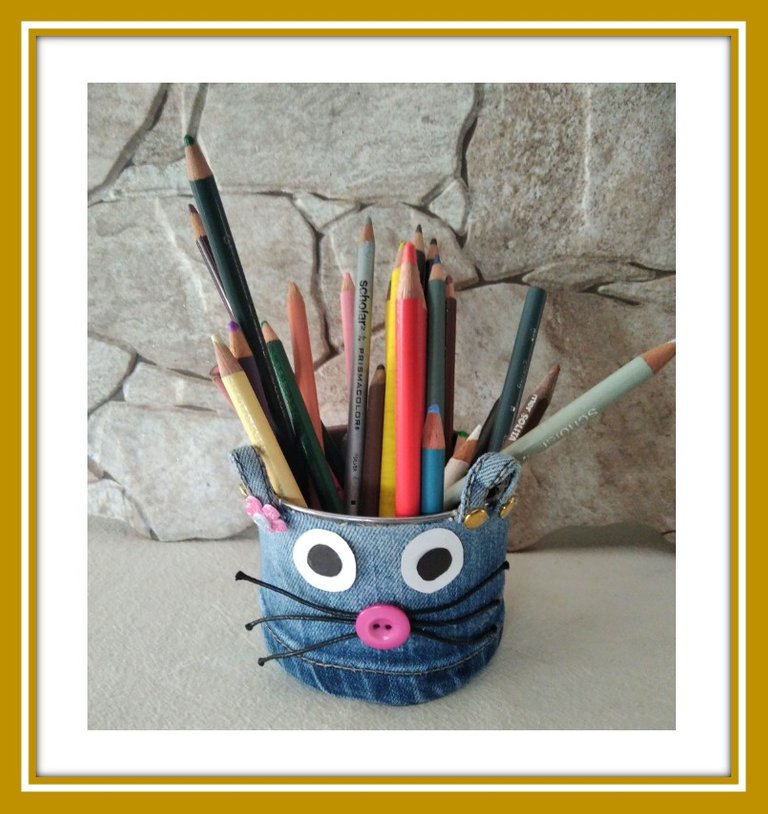
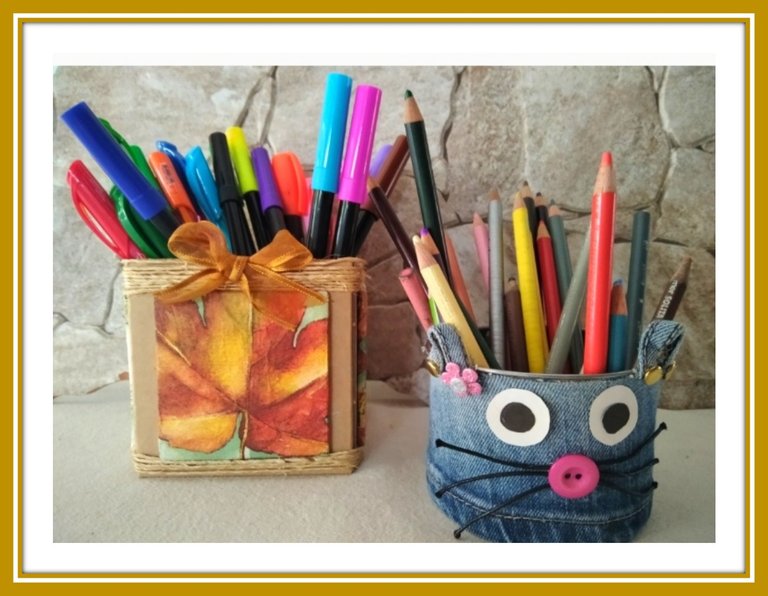
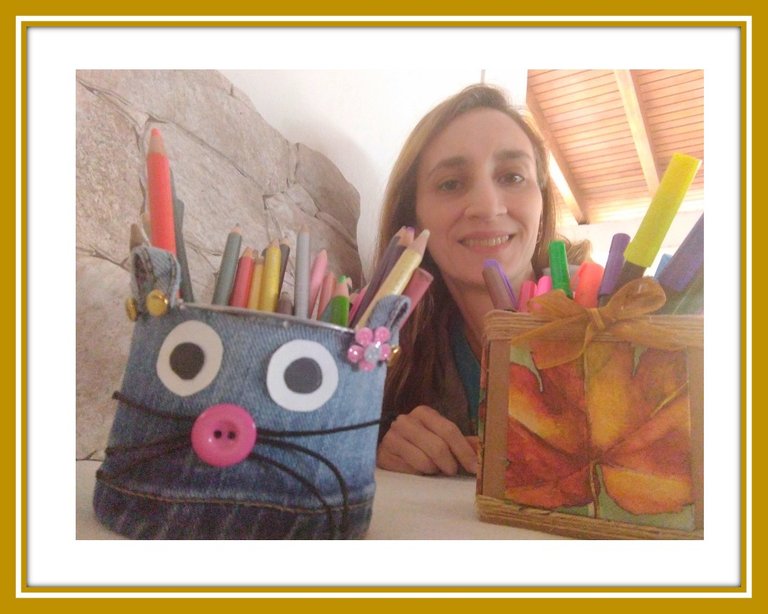
Los portalápices están terminados. Estas dos opciones, como han podido observar, son muy fácil de realizar: un modelo más clásico y un modelo especial para las niñas que aman a las gatitas. Espero que les haya gustado este paso a paso y, puedan crear sus propios portalápices utilizando material de provecho para así, poner siempre en práctica la gran labor de reciclar. ¡Hasta una próxima oportunidad!
The pencil holders are finished. These two options, as you have been able to observe, are very easy to make: a more classic model and a special model for girls who love kittens. I hope you liked this step by step and you can create your own pencil holders using useful material so that you can always put into practice the great work of recycling. See you soon!
Las fotografías fueron tomadas por mi con mi teléfono celular Redmi Note 8.
The photos were taken by myself with my Redmi Note 8 cell phone.

que bello! es una idea muy creativa sobre todo para hacerlo con los niños me gusto mucho
Hola amiga @sarayscristina. Me alegra saber que te gustó este proyecto creativo. ¡Saludos!
¡Felicidades! Esta publicación obtuvo upvote y fue compartido por @la-colmena, un proyecto de Curación Manual para la comunidad hispana de Hive que cuenta con el respaldo de @curie.
Si te gusta el trabajo que hacemos, te invitamos a darle tu voto a este comentario y a votar como testigo por La Colmena.
Si quieres saber más sobre nuestro proyecto, te invitamos a acompañarnos en nuestro servidor de Discord.
Hermoso
Muchas gracias amiga @gislandpoetic.
Congratulations @ysamarynordaz! You have completed the following achievement on the Hive blockchain And have been rewarded with New badge(s)
Your next target is to reach 20000 upvotes.
You can view your badges on your board and compare yourself to others in the Ranking
If you no longer want to receive notifications, reply to this comment with the word
STOPCheck out our last posts:
Support the HiveBuzz project. Vote for our proposal!
https://twitter.com/608922928/status/1622757950703144960
https://twitter.com/1491299868391919620/status/1623415382018035713
The rewards earned on this comment will go directly to the people( @kawsar8035, @baned ) sharing the post on Twitter as long as they are registered with @poshtoken. Sign up at https://hiveposh.com.
Hola amiga gracias por compartir tu publicación, te quedo muy lindo todo un abrazo.
Muchas gracias amigo @theshot2414.
El uso de materiales reciclados me parece muy importante, siempre es una buena opción darle nuevo uso al material de provecho, quedó excelente ❤✨❤❤❤
Hola muchas gracias amiga @sylregne. Me alegra saber que te gustó mi trabajo. ¡Saludos!
Me encanta trabajar con materiales de provecho, u he quedado encantada con el segundo diseño, te quedó muy creativo 😊
Hola amiga @emmaris. Muchas gracias por tu comentario. ¡Saludos!
Son creaciones fascinantes y este post está muy bien redactado y estructurado, además de tener excelentes fotos del paso-a-paso... ¡Creo que hasta yo, que tengo dos manos izquierdas, podría lograrlo siguiendo las instrucciones!... :))
!discovery 30
!PIZZA
I gifted $PIZZA slices here:
@jlinaresp(6/10) tipped @ysamarynordaz (x1)
Send $PIZZA tips in Discord via tip.cc!
This post was shared and voted inside the discord by the curators team of discovery-it
Join our community! hive-193212
Discovery-it is also a Witness, vote for us here
Delegate to us for passive income. Check our 80% fee-back Program
Ha sido un bonito trabajo de reciclaje, felicitaciones.