Cute Origami Flower - step by step [ENG-ESP]
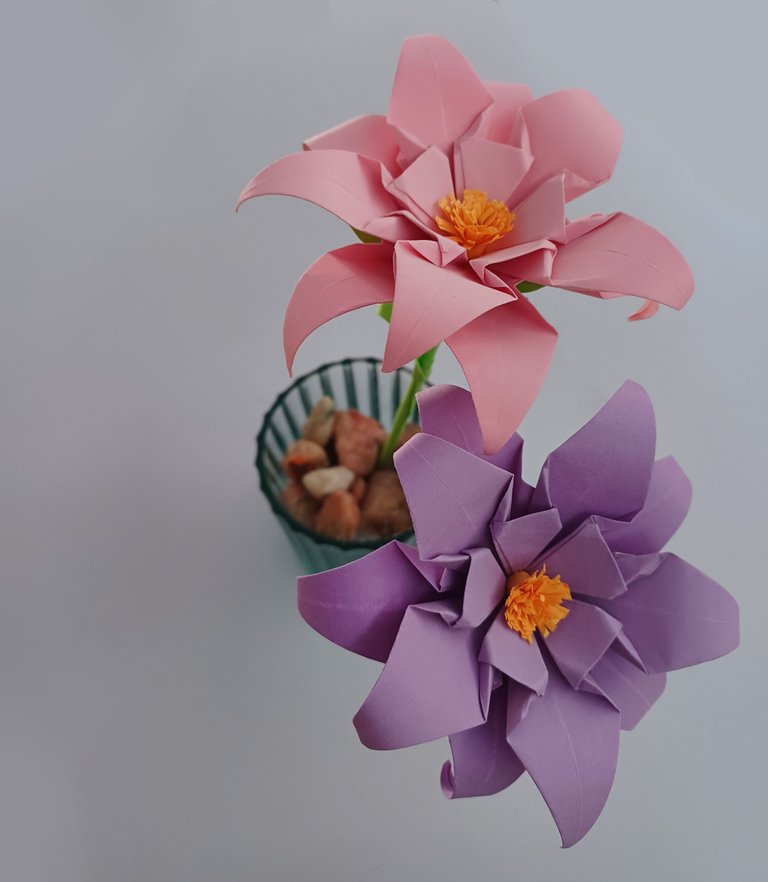
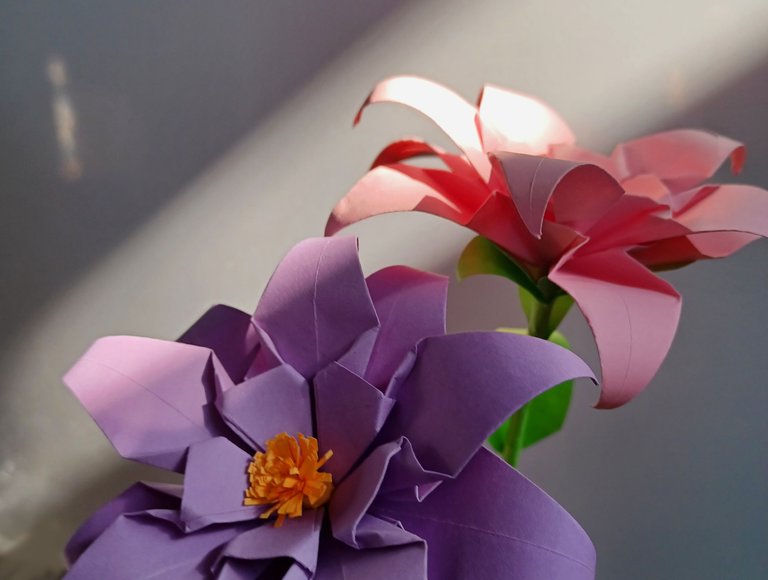
Saludos querida comunidad, espero estén muy bien! Cuando no estoy dibujando tomo un rato de mi tiempo a doblar papel, ayer hice estas bonitas flores que vi por allí y resultó ser mucho más sencillo de lo que creí, te muestro como hacerlas en fotografías paso a paso, espero que te guste y puedas seguir el procedimiento.
Greetings dear community, I hope you are very well! When I'm not drawing I take some of my time to fold paper, yesterday I made these beautiful flowers that I saw over there and it turned out to be much easier than I thought, I show you how to make them in step by step pictures, I hope you like it and you can follow the procedure.
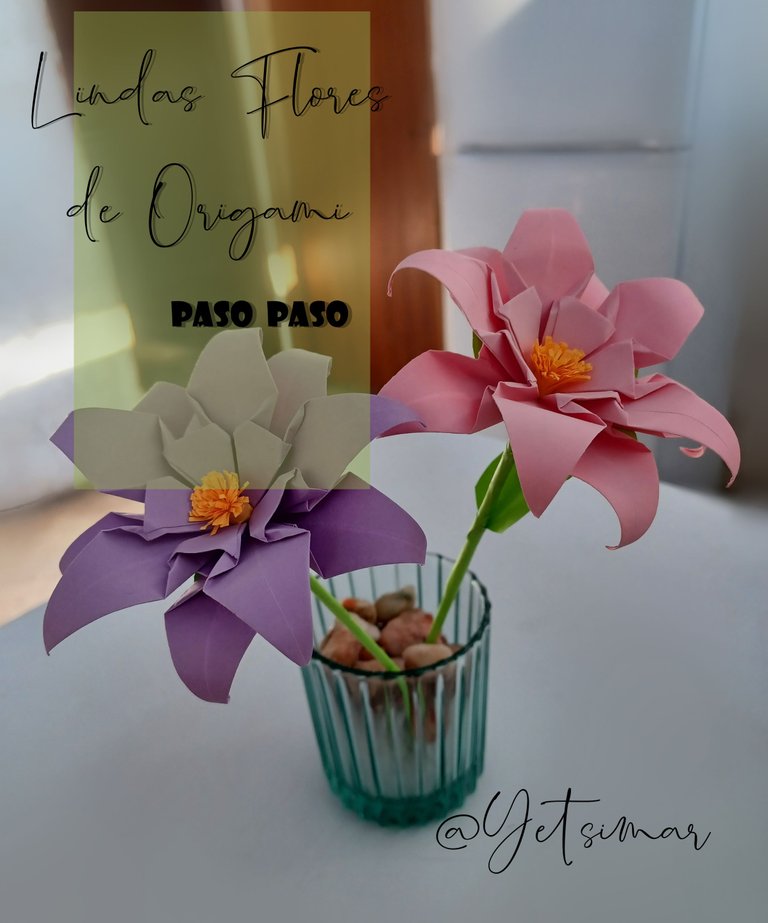
Desde el primer momento que las vi me parecieron muy realistas y sin duda quería intentar solo necesite
- Papeles de colores
- Lápices
- Pega
- Regla
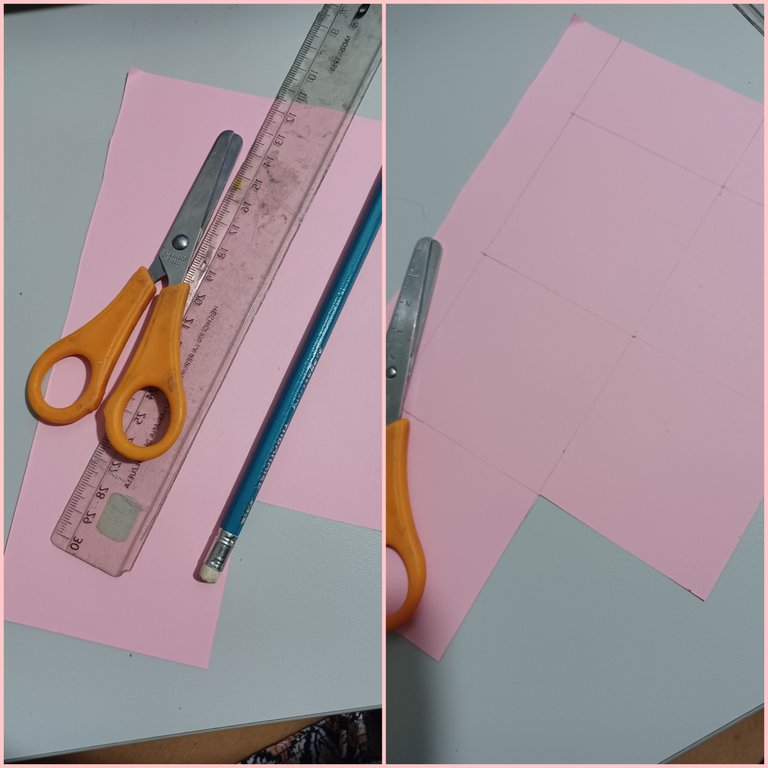
Lo primero fue marcar cuadrados de en el papel rosa para la flor, yo recorte cuadrados de 6×6cm cada uno.
From the first moment I saw them I thought they looked very realistic and I definitely wanted to try them alone.
- Colored paper
- Pencils
- Glue
- Ruler
The first thing was to mark squares of on the pink paper for the flower, I cut out squares of 6×6cm each.
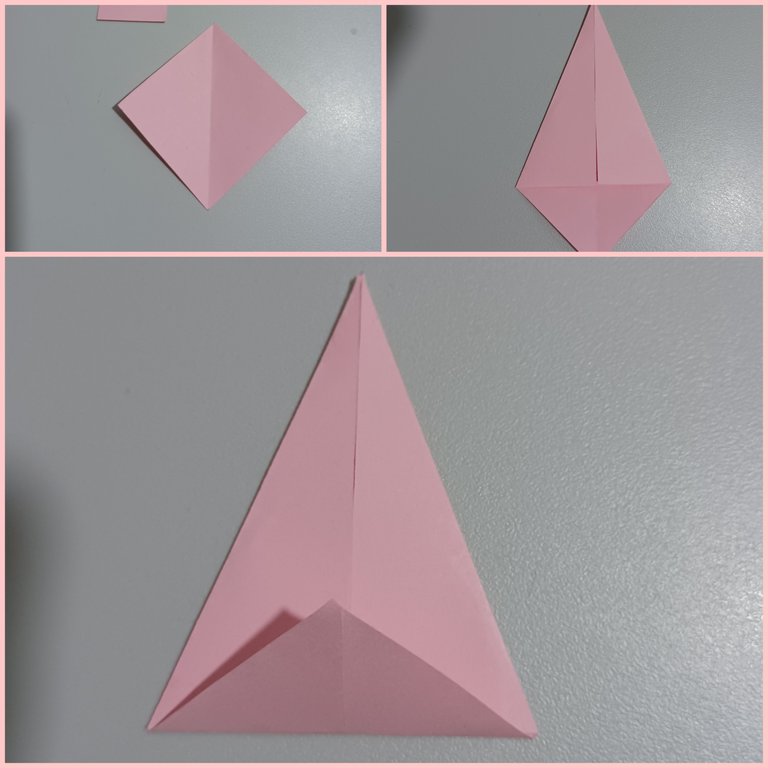
Luego doble a la mitad de forma diagonal y luego de las mitades generadas doble havia adentro las esquinas para obtener el triángulos alargado, la esquina resultante también se dobla hacia adentro como se muestra en la última imagen.
Then fold in half diagonally and then from the generated halves fold inward the corners to obtain the elongated triangle, the resulting corner is also folded inward as shown in the last image.
Luego abro nuevamente los dobleces para dejar la esquina inferior más pequeña por debajo de las otras dos.
Then I open the folds again to leave the smaller bottom corner below the other two.
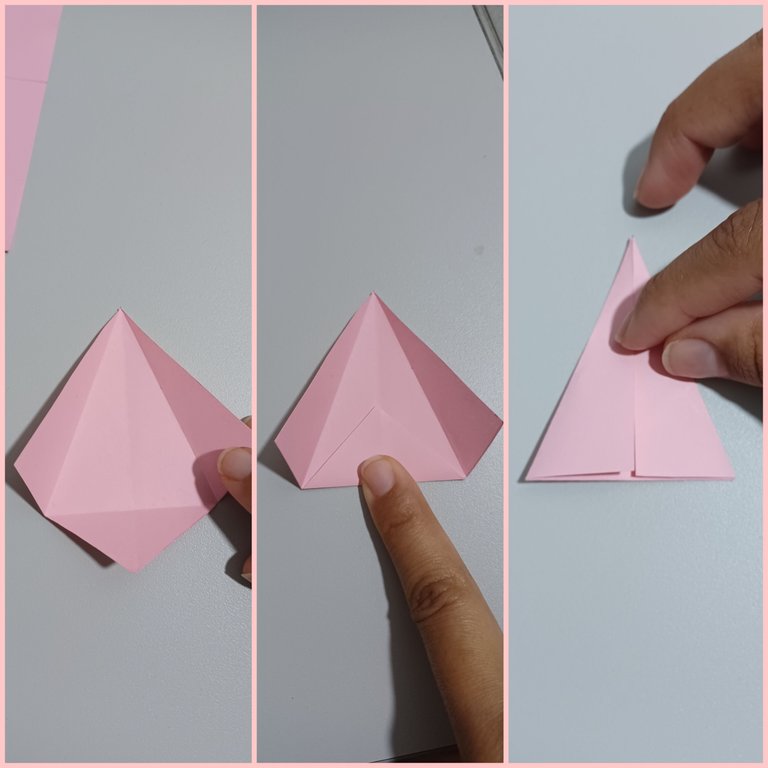
Doble nuevamente hacia el centro las dos esquinas inferiores y gire el papel.
Fold the two bottom corners back to the center and turn the paper over.
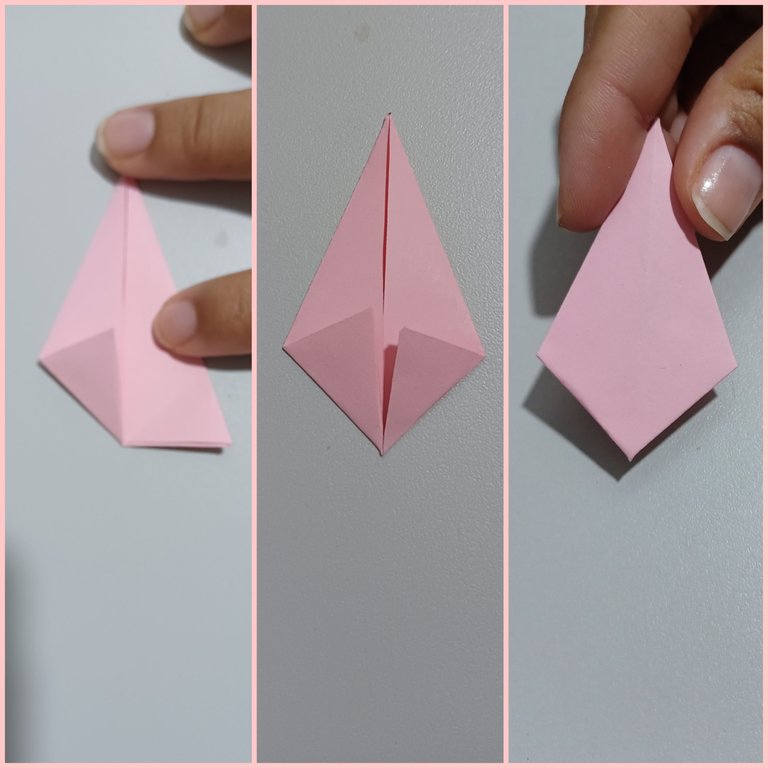
Por este lado vuelvo a doblar hacia adentro ambos lado sin deformar el doblez anterior y resultado será la figura mostrada en la segunda imagen, se repite cuatro veces más, para formar los 5 pétalos de la primera capa de flores, se deben hacer 10 en total para una flor.
On this side I fold both sides inward again without deforming the previous fold and the result will be the figure shown in the second image, repeat four more times, to form the 5 petals of the first layer of flowers, 10 in total should be made for a flower.
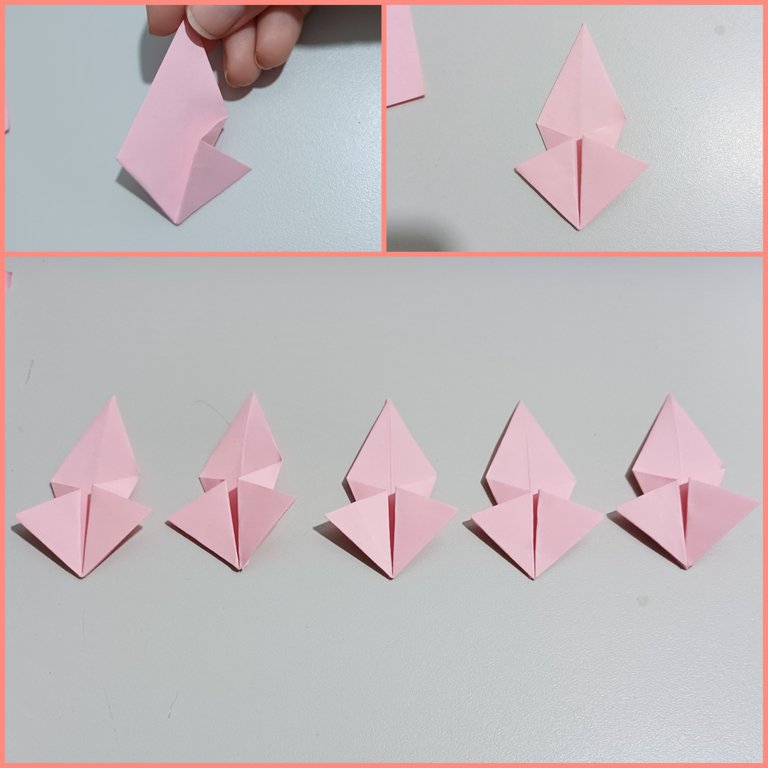
Por medio de la ranura que se genera en los salientes, se inserta el siguiente pétalo hasta juntar los cinco pétalo de la flor, por último doble las esquinas para dar forma de pétalos redondeados.
By means of the groove generated in the projections, insert the next petal until the five petals of the flower are joined together, and finally fold the corners to form rounded petals.
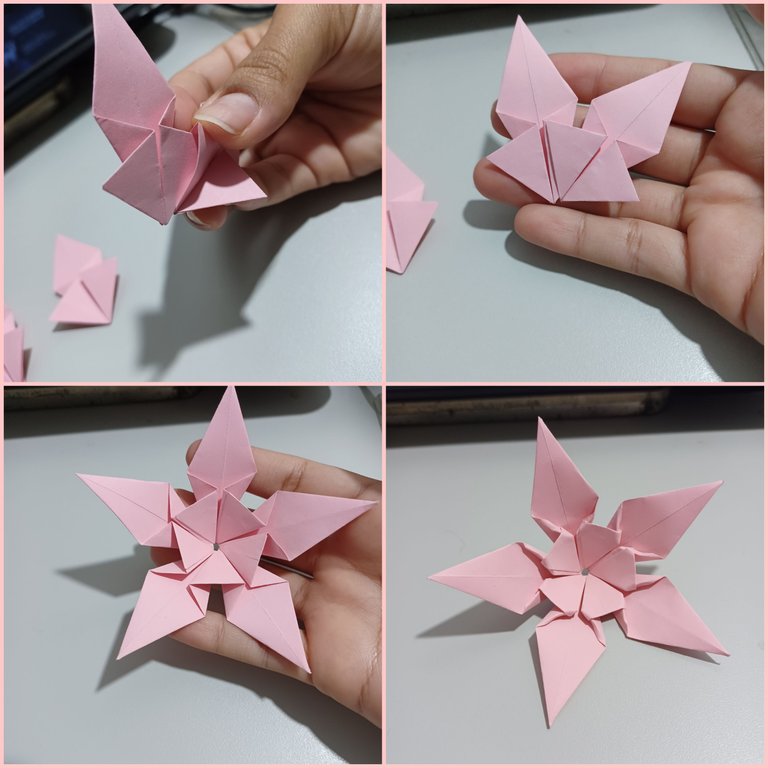
Luego con un pincel le di la forma a cada pétalo enrollando en la base del pincel, luego mejore con los dedos.
Then with a brush I shaped each petal by rolling it around the base of the brush, then enhance with my fingers.
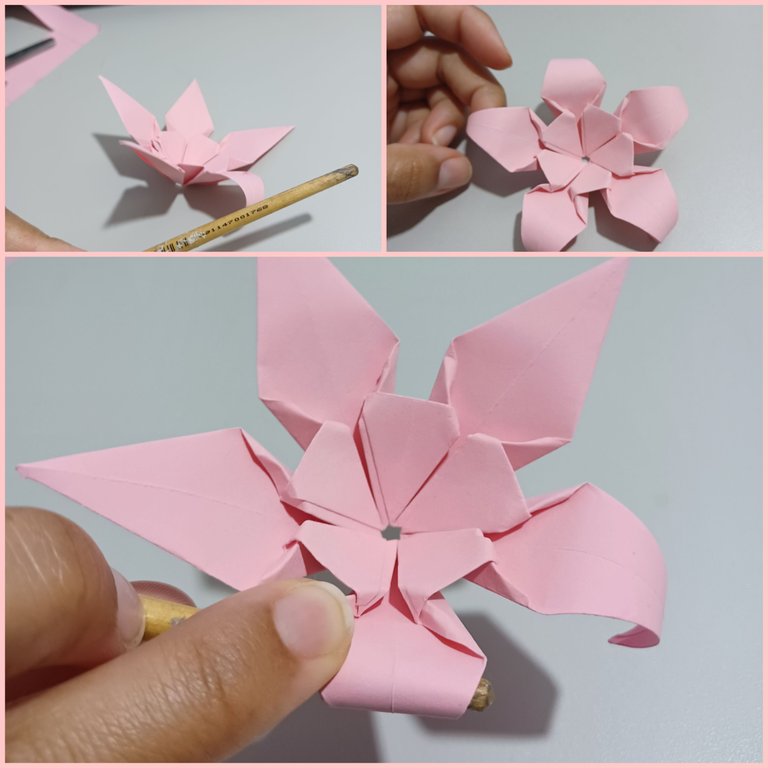
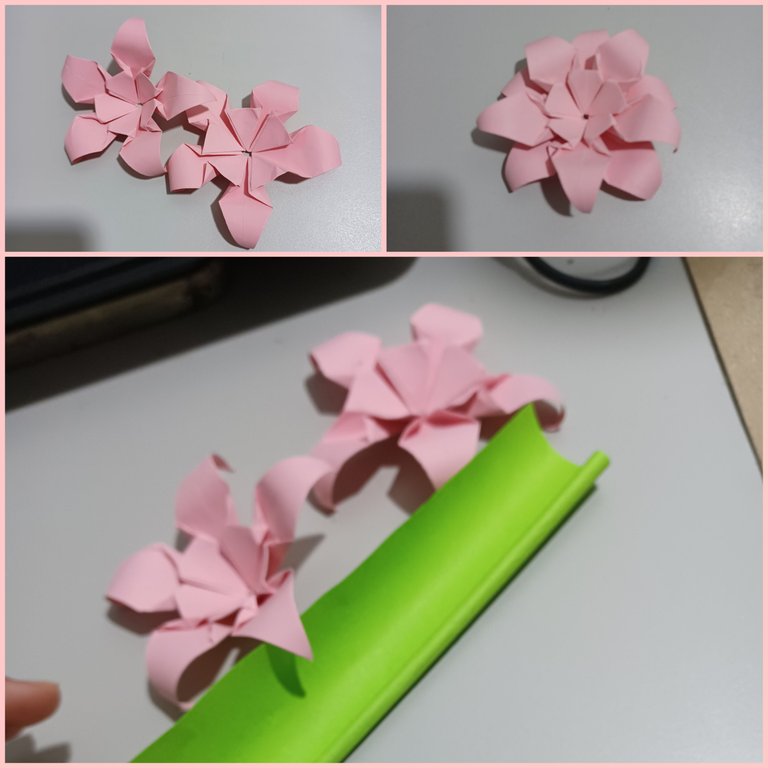
Repeti el proceso una vez más y pegue una sobre otra alternando los pétalos para que se vieran muy bien, luego comencé a hacer el tallo de la flor, use un palillo y lo envolví en papel verde.
Repeat the process one more time and glue one on top of the other alternating the petals so that they look very nice, then I started to make the stem of the flower, I used a toothpick and wrapped it in green paper.
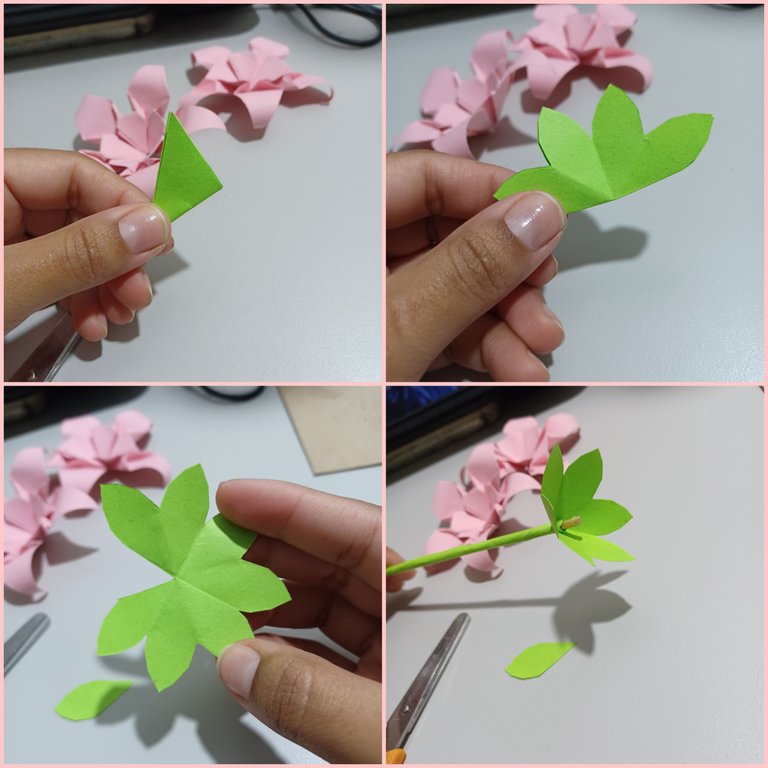
Doble un cuadrado de papel y forme la siguiente florecilla y recorte uno de los pétalos, y pegue junto nuevamente, lo coloque en la parte superior del tallo y luego pegue la flor encima.
Fold a square of paper and form the next little flower and cut out one of the petals and glue together again, place it on top of the stem and then glue the flower on top.
Para el centro de la flor tomé un trozo largo de papel amarillo e hice mucho cortes paralelos en uno de los lados, luego lo enrolle aseguré con pega y coloque en el centro de la flor.
For the center of the flower I took a long piece of yellow paper and made many parallel cuts on one side, then rolled it up, secured it with glue and placed it in the center of the flower.
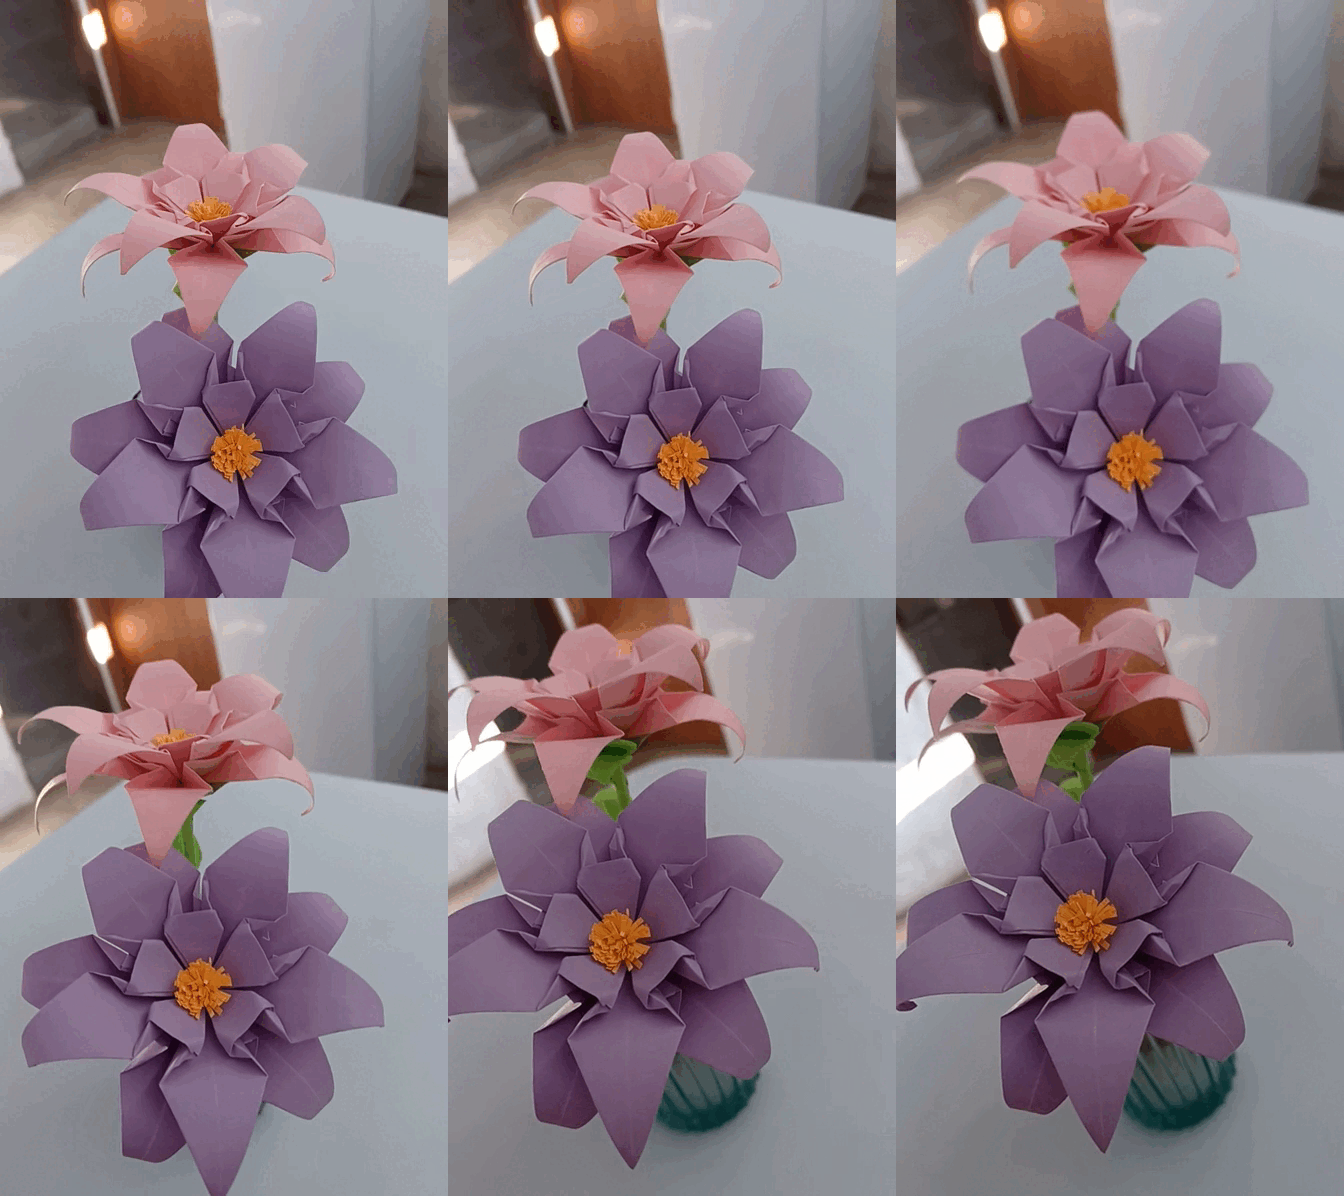
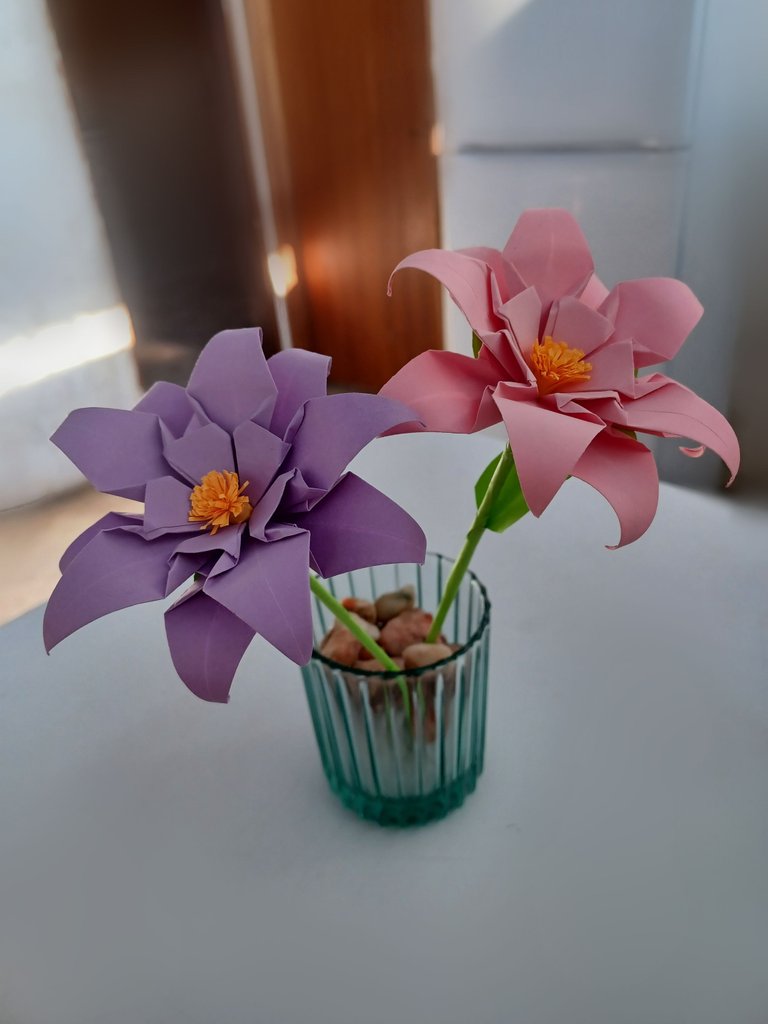
El origami para mi es una terapia de relajación, mientras doblo el papel solo estoy concentrada en el proceso en el paso siguiente y mi mente se relaja de los factores externos que me puedan perturbar es por eso que recurro constantemente a el, este en específico me ha gustado mucho, ame el resultado y es tan sencillo de realizar es una manualidad excelente, muchas gracia a todos los que siguieron el tutorial,
Hasta la próxima!
Origami for me is a relaxation therapy, while folding the paper I'm just focused on the process in the next step and my mind relaxes from external factors that may disturb me that's why I constantly resort to it, this specific one I really liked, love the result and is so simple to perform is an excellent craft, thank you very much to all who followed the tutorial,
See you next time!
Es un hermoso diseño en origami, de verdad se ven fáciles de realizar y lindas para decorar, es cierto el origami ayuda mucho en la relajación, gracias por compartir, saludos 🖖
Si, es una flor realmente bonita, lucirían muy bonitas para decorar un jarrón
https://twitter.com/2774723569/status/1641515906953281537
The rewards earned on this comment will go directly to the people( @kristal24 ) sharing the post on Twitter as long as they are registered with @poshtoken. Sign up at https://hiveposh.com.
Saludos @yetsimar que buena presentación para aprender a crear flores de origami, lucen muy delicadas y hermosas, gracias por compartirlo.
Muchas gracias @naty16 me alegra que te hayan gustado, espero que mi tutorial sea útil
hey querida @yetsimar hace poco comencé a interesarme por el arte con origami, me parece bellísimo y super relajante. por el momento solo me aprendí de memoria a hacer grullas y dragones, asique aprovecharé lo bien explicado de tu post para empezara practicar también flores 💜. excelente y muy bello trabajo!
un abrazo grande.
Hola @calisto24, aprecio mucho tu comentario, has compartido de casualidad los que sabes? Me gustaría verlos! Un abrazo también para ti
Lindo diseño, se ve difícil de hacer, pero al ver el paso a paso no es complicado es fácil de hacer, gracias por compartir, saludos.
Si, el resultado se ve complicado, pero como ves es bastante sencillo y bonito, gracias por comentar, lo aprecio! 🥰
Tiene su proceso laborioso estás bellas flores. Se ven muy bonitas en ese florero. Gracias por compartir tu creación @yetsimar
Es un poco largo pero es bastante sencillo realmente, gracias por comentar
Me encanta el origami, hay tantos diseños para hacer y este me encanto 😍
Muchas gracias! Si hay muchísimo y todos geniales, me alegra que ewñste haya sido de su agrado! Gracias por comentar!
Quedaron verdaderamente preciosas, son muy sencillas y bonitas, el origami es una técnica increíble y valiosa.
Saludos amiga.💜✨
Quede fascinada con estas flores, son verdaderamente hermosas, nunca he realizado origami, no parece tan complicado como yo creía, gracias por compartir