Diy Scrunchies and Scrunchie Holders (Eng-Esp)
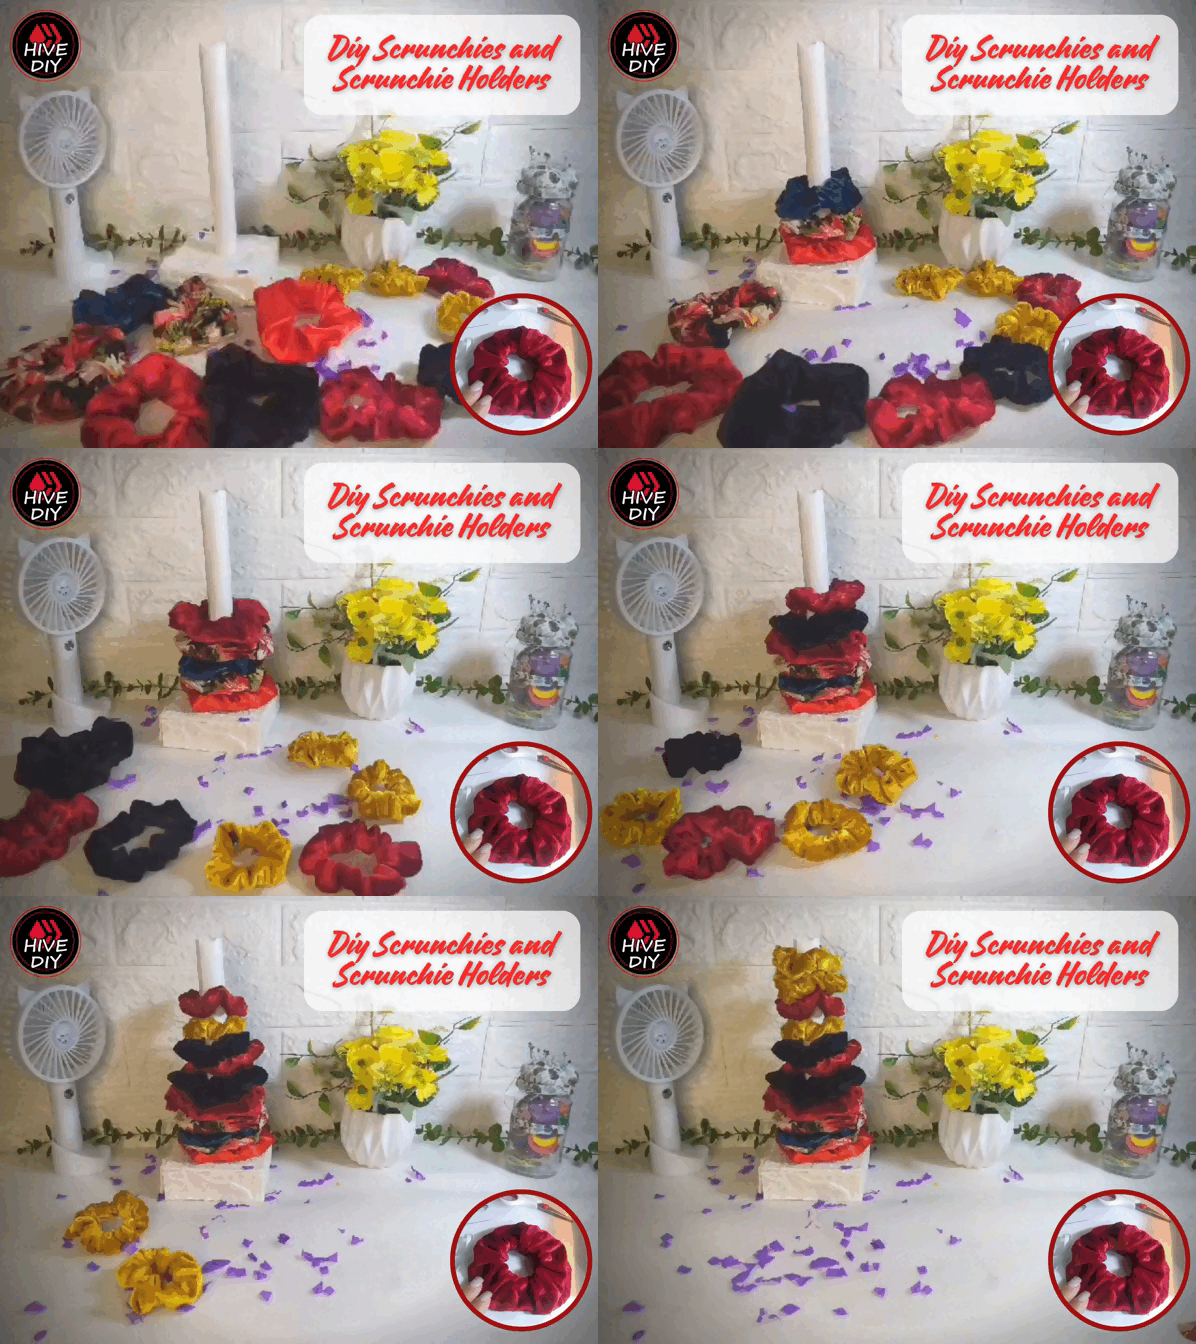
My daughters and my mom asked me to make them Scrunchies, and I definitely had to make them, because I don't know if that's the case, but when one of them wants something they don't stop saying and saying until they get it.
I looked for the fabrics that I had for this project, that were soft so as not to hurt the hair, and certainly I had almost all scraps, especially the velvet fabrics that are the favorites and before even having them made, they had already decided what color they were going to use. be each one's.
Mis hijas y mi mamá me pidieron que les hiciera Scrunchies, y definitivamente tenía que hacerlos, porque no se si sea su caso, pero cuando una de las dos quieren algo no dejan de decir y decir hasta que lo consiguen.
Busqué las telas que disponía para este proyecto, que fuesen suaves para no lastimar al cabello, y ciertamente tenía casi todas retazos, sobre todo las telas de terciopelo que son las favoritas y antes de tenerlas hechas siquiera, ya habían dispuesto de que color iban a ser las de cada una.
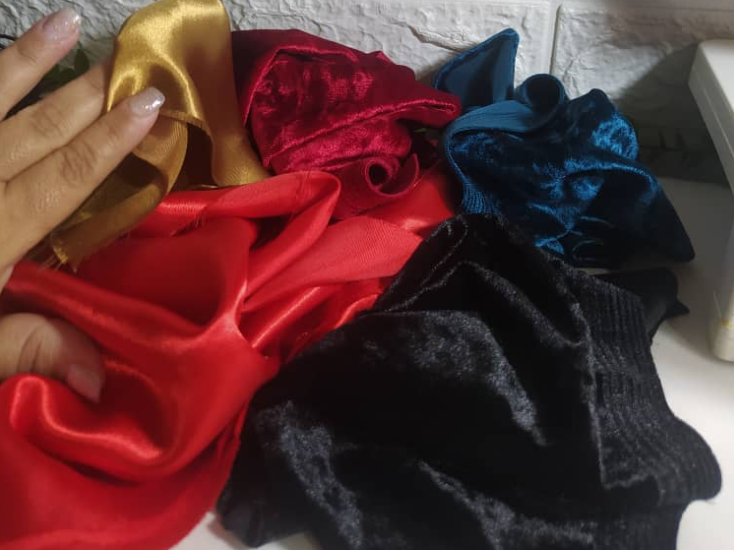
Two years ago I made Diy Scrunchies: Making and Tips for Hive, in detail with a VIDEO my way of making Scrunchies, since there are several ways, but this is my favorite way to make them.
So, in this post I am not going to repeat that entire process, perhaps some tailoring tips, especially with these soft fabrics that can be somewhat difficult to make. In this post I am going to make a Scrunchie Holder, and mention some valuable reasons to use them, in case you are using another way to put up your hair.
Hace dos años hice para Hive el Diy Scrunchies: Confección y Tips, en el detallo con un VIDEO mi forma de elaborar los Scrunchies, ya que hay varias formas, pero esta es mi forma favorita de hacerlos.
Entonces, esta publicación no voy a repetir todo ese proceso, tal vez si algunos Tips de confección sobre todo con estas telas tan suaves que pueden llegar a ser algo difíciles de hacer. En esta publicación voy a realizar un Porta Scrunchies, y a mencionar algunas razones de valor para usarlos, en caso de que estés utilizando otra forma para recoger tu cabello.
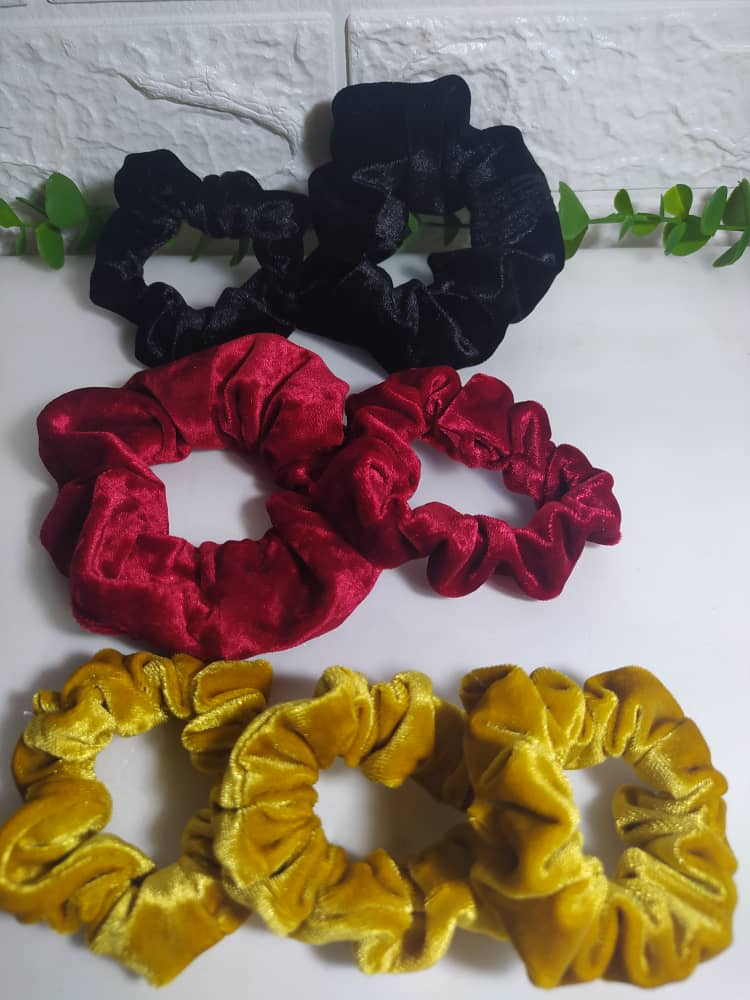
- They do not leave marks on the hair, so they are ideal for its health.
- They are easy to remove, you will no longer have to make those strong pulls that end up detaching your hair, causing pain and making you lose your hair.
- With Scrunchies you can create different hairstyles.
- You can use them as accessories on your hands.
- You can combine them with your outfits and have your favorites according to the size you like.
- Ideal for sleeping with it, since it will not give you headaches.
*They are so easy to make that you could even make them by hand. - They are an excellent entrepreneurship idea.
- No dejan marcas en el cabello, por lo que son ideales para la salud del mismo.
- Son fáciles de retirar, ya no tendrás de realizar esos fuertes halones que terminan desprendiendo tu cabello, causando dolores y haciéndote perder tu cabello.
- Con los Scrunchies puedes realizar diferentes estilos de peinados.
- Puedes utilizarlos como accesorios en las manos.
- Puedes combinarlos con tus outfits y tener tus preferidos de acuerdo al tamaño que te gusten.
- Ideales para dormir con ello, ya que no te darán dolores de cabeza.
- Son tan fáciles de hacer que podrías hacerlos incluso a mano.
- Son una excelente idea de emprendimiento.
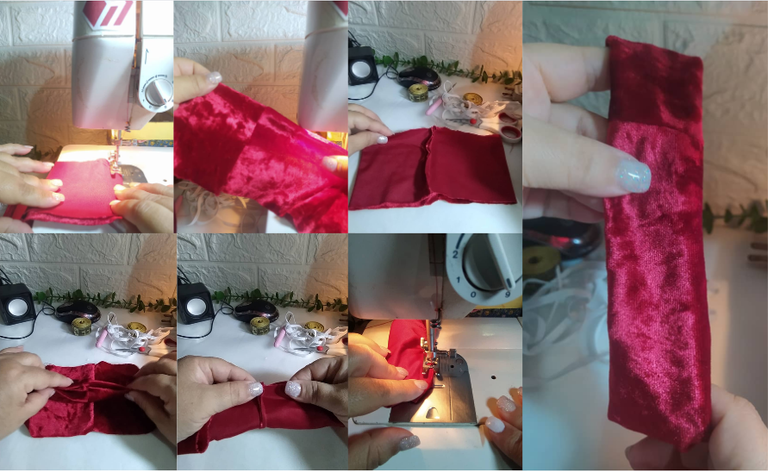
To make these Scrunchies I used the scraps of fabric I had and elastic as the only materials, my sewing machine, scissors, pressure clips to hold and my old pattern to make the medium size. I am not going to delve into the step by step to make the Scrunchies, for this I once again recommend my publication Diy Scrunchies: Confection and Marketing Tips , although I couldn't help but leave a step-by-step infographic of what I did today.
Para realizar estos Scrunchies utilicé los retazos de tela que tenía y elástica como únicos materiales, mi máquina de coser, tijera, clips de presión para sujetar y mi viejo patrón para hacer el tamaño mediano. No voy a profundizar en el paso a paso para realizar los Scrunchies, para ello te vuelvo a recomendar mi publicación Diy Scrunchies: Confeción y Tips de Mercadeo, aunque no pude evitar dejar una infografía del paso a paso de los que hice hoy.
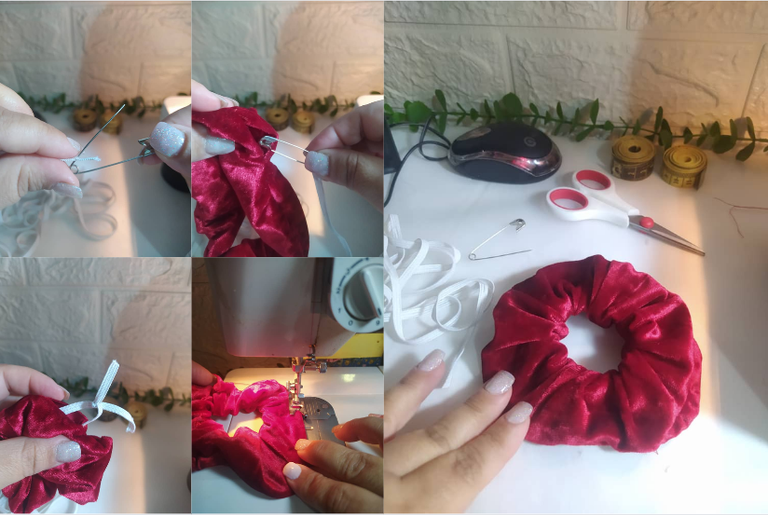
Now yes, let's go with the Scrunchies Holder Tutorial, which is very easy to make, as always improvising with the materials I have available at home, and each of us can adjust our creation to the materials we have.
Ahora si, vamos con el Tutorial del Porta Scrunchies que es muy fácil de hacer, como siempre improvisando con los materiales que tengo en casa disponible, y cada uno de nosotros puede ajustar su creación de a los materiales que tenemos.

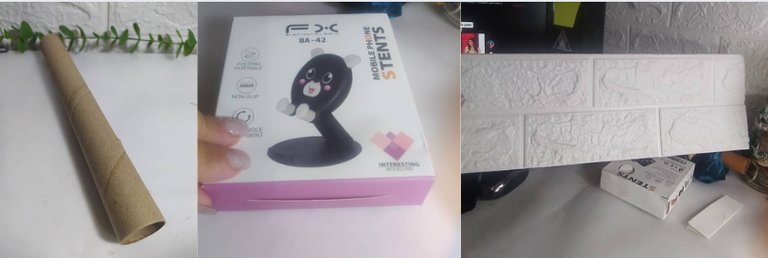
My materials were 3:
- A small cardboard tube, from a package of incense that came with it inside to protect the incense.
- A little box that I had also saved and the size seemed good for this project.
- A piece of decorative sheeting for walls, which I had left over from my wall where I have my PC and sewing machine.
Additionally, a white sheet of paper and my glue gun.
Mis materiales fueron 3:
- Un tubito de cartón, de un paquete de inciensos que venía con él adentro para proteger a los inciensos.
- Una cajita que había guardado también y me pareció bien el tamaño para este proyecto.
- Un trozo de lámina decorativa para paredes, que me quedó de precisamente mi pared donde tengo mi pc y máquina de coser.
Adicionalmente, una hoja blanca y mi pistola de silicón.

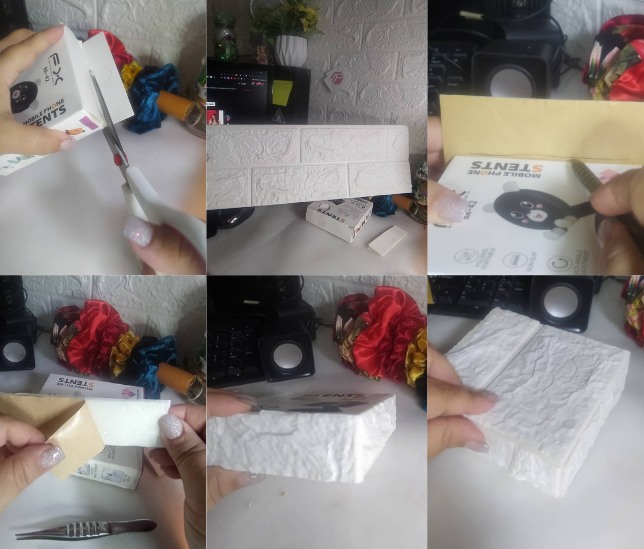
First I removed the tab from the box so that only the structure was left.
Using the contact paper I marked each side of the box to trim to size.
I removed the protective paper and glued on each side of the box.
Like this until each side is finished.
Primero le retiré la pestaña de la cajita para que quedara solo la estructura. Con el papel adhesivo marqué cada lado de la caja para recortar al tamaño. Retiré el papel protector y pegué en cada lado de la caja. Así hasta terminar cada lado.
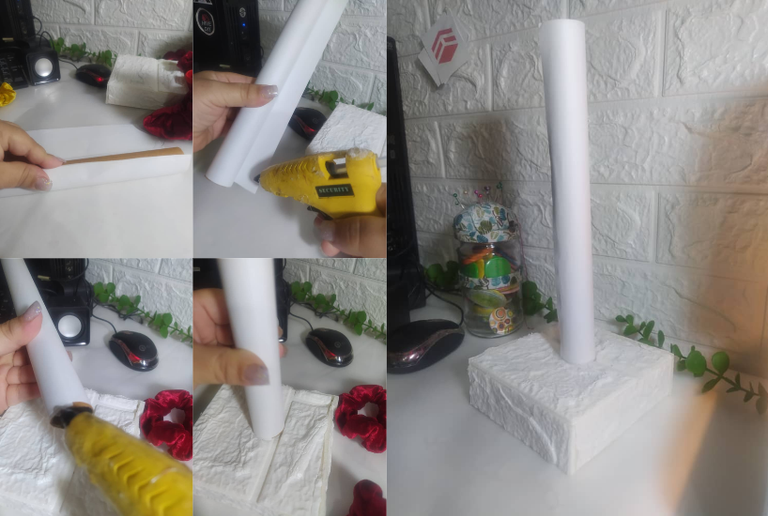
- I line the cardboard tube with the white sheet, fixed with the silicone gun.
- I also place hot silicone on one end of the already lined tube, and stick it in the center of the also already lined box.
These materials stick very well with hot silicone, don't think it will be sensitive to separating. On the contrary, try to fix it very well in its place, since it will not be easy to separate them later.
The tube fits very well.
* Forro el tubito de cartón con la hoja blanca, fijo con la pistola de silicón. * Coloco silicón caliente también en un extremo del tubito ya forrado, y lo pego en el centro de la caja también ya forrada.
Estos materiales se pegan muy bien con silicón caliente, no creas que queda sensible de separarse. Por el contrario, trata de fijarlo muy bien en su lugar, ya que posteriormente no será fácil separarlos.
El tubito queda muy bien.
As I had mentioned, I made this Scrunchies Holder with very simple materials left over from previous projects that I had in my house. Likewise, you can do it with what you have, you can even paint the structures instead of covering them.
Como te había mencionado, este Porta Scrunchies lo realicé con materiales muy simples y restantes de proyectos anteriores, que disponía en mi casa. Igualmente, lo puedes realizar con lo que tengas, incluso puede pintar las estructuras en lugar de forrarlas.
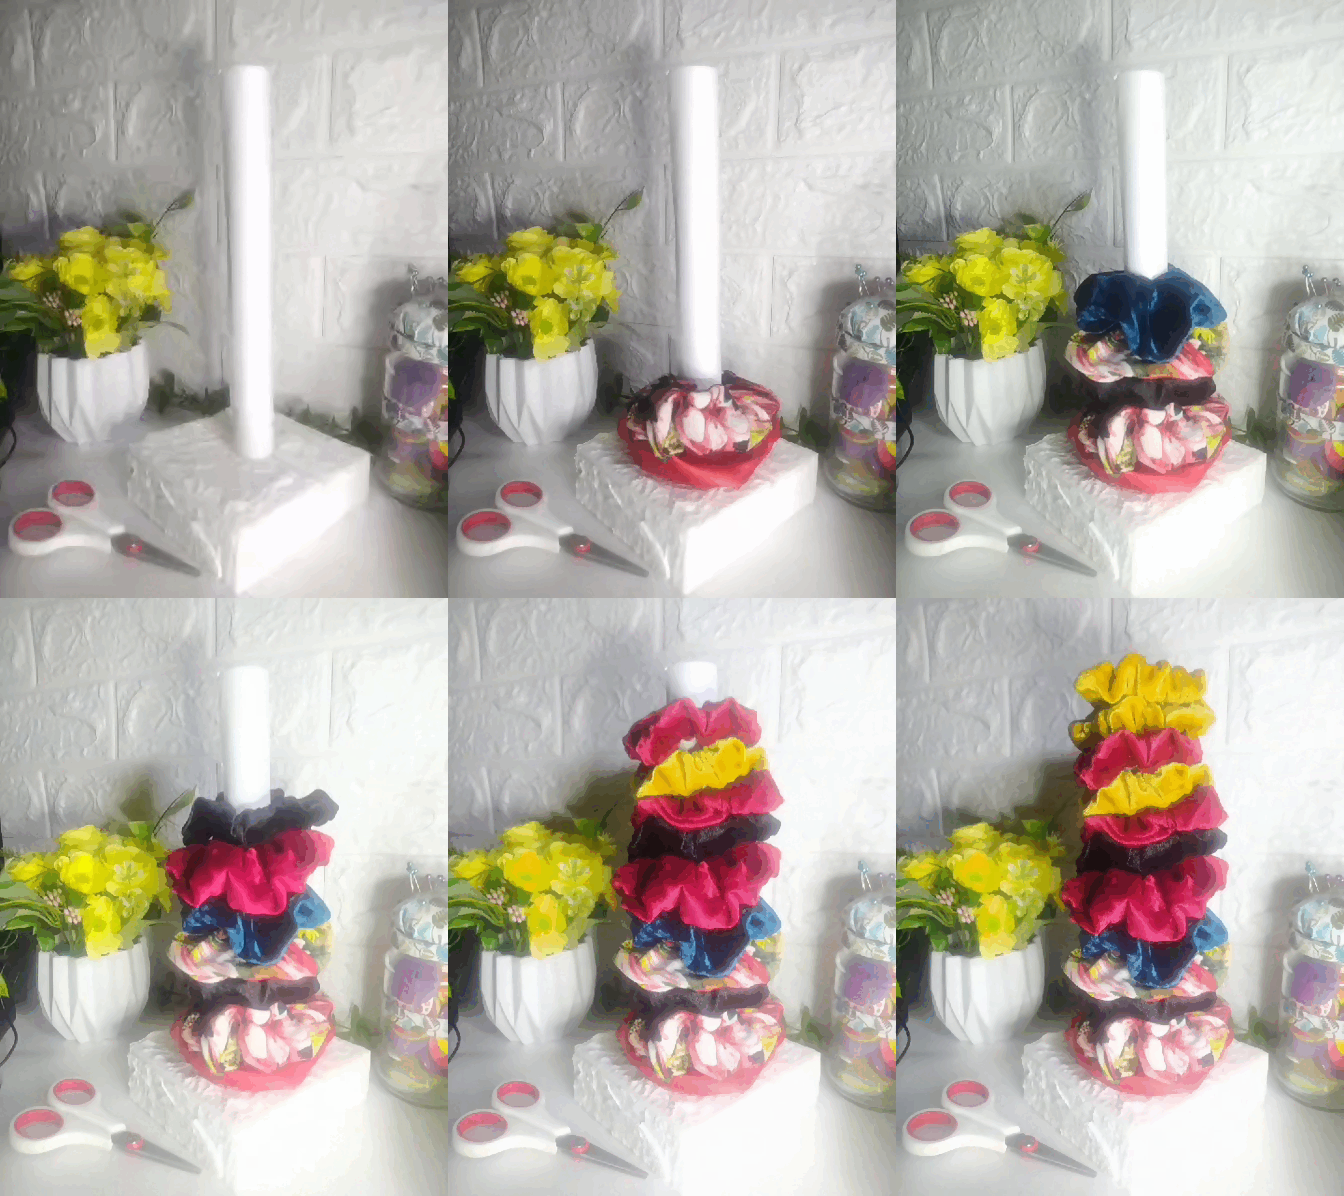
Another detail about Scrunchies is that we all love them, and while I'm making this post, my neighbors who have seen what I'm making on my WhatsApp status have asked me to make them, which they buy from me. So it's always great to have extra money with these types of projects.
Otro detalle de los Scrunchies es que todas los queremos, y mientras hago esta publicación, ya mis vecinas que han visto en mi estado de Whatsapp que estoy haciendo, me han pedido que les haga, que ellas me compran. Así que siempre es genial poder tener un dinero extra con este tipo de proyectos.


I took the photos with my phone Redmi Note 8
Apps I used:
Canva Pro for Cover, Collage and Banner
I used Deepl Translator
My social networks:
Discord: YennysYaneth#0189
Twitter: @yennysferm
Instagram: @yennysyaneth
Las fotos las tomé con mi teléfono Redmi Note 8
Apps que utilicé:
Canva Pro para la Portada, Collage y Banner
Utilicé el Traductor Deepl
Mi redes sociales:
Discord: YennysYaneth#0189
Twitter: @yennysferm
Instagram: @yennysyaneth
Posted Using InLeo Alpha

👏 Keep Up the good work on Hive ♦️ 👏
❤️ @equipodelta suggested sagarkothari88 to upvote your post ❤️
🙏 Don't forget to Support Back 🙏
Oh qué adictivo, para hacer muchísimas!!
Bueno amiga @danigada18 hice muchos ese día, y tengo encargos. Un dato importante es publicar lo que hacemos en Whatsapp y nuestros contactos empiezan a apreciar nuestras creaciones y a encargar para ellas. Gracias por comentar
Que gran idea y sobretodo para regalar a mis chicas de la clase, todas tienen cabello largo y esto les vendrá de maravilla gracias por la idea
Los Scrunchies todas los queremos, y cuando empezamos a querer combinar con nuestros outfis, los queremos en varios colores.
Gracias por comentar @gladymar1973
ya veo
Me enamoran los scrunchied,sobre todo si los haces tú. Los quiero en todos los colores
Los se princesa, ya me los asaltates rapidito. Dios te bendiga
I was totally unaware of the name of this accessory and I also did not know the qualities it has, I just thought it was something else to gather the hair and I think it is perfect to improvise with materials that one has on hand so we are not spending too much and we give a use to those materials that we have abandoned avoiding throwing them away.
Precisely among the advantages of scrunchies is that we can make them with few materials. However, it is important to use good quality materials because they have a huge impact on the final result. For example, velvet is a somewhat expensive fabric, but velvet scrunchies are too beautiful, they are worth the investment. Thanks for commenting @nitsuga12
Me encanta que hayas aprovechado los retazos de tela y materiales que tenías en casa para hacer estos lindos accesorios. Me parece muy creativo el porta-Scrunchies que hiciste con los materiales reciclados. Queda muy lindo y práctico para tener todos los Scrunchies organizados. La combinación del tubo de cartón y la cajita forrada con el papel decorativo le da un toque bonito y artesanal. ❤️
El porta Scrunchies quedó bien firme, aunque es importante ver como se comportan los diferentes materiales que vamos a utilizar.
La tela, podemos ocupar retazos de tela, pero también podemos invertir en telas como terciopelo, porque el resultado se eleva muchísimo. Gracias por comentar @jessuses1381
Que bonitas scrunchies! De verdad que es genial tener de todos los colores. La idea del porta scruchies está muy buena y lo mejor es que es fácil de hacer y que se pueden emplear materiales que tenemos en casa ✨
El porta Scrunchies es buenísimo, generalmente los tenemos en una cestica o algo así, pero podemos hacer algo como lo que propuse y se ve genial en nuestra repisa o peinadora. Gracias por comentar @mavilan30