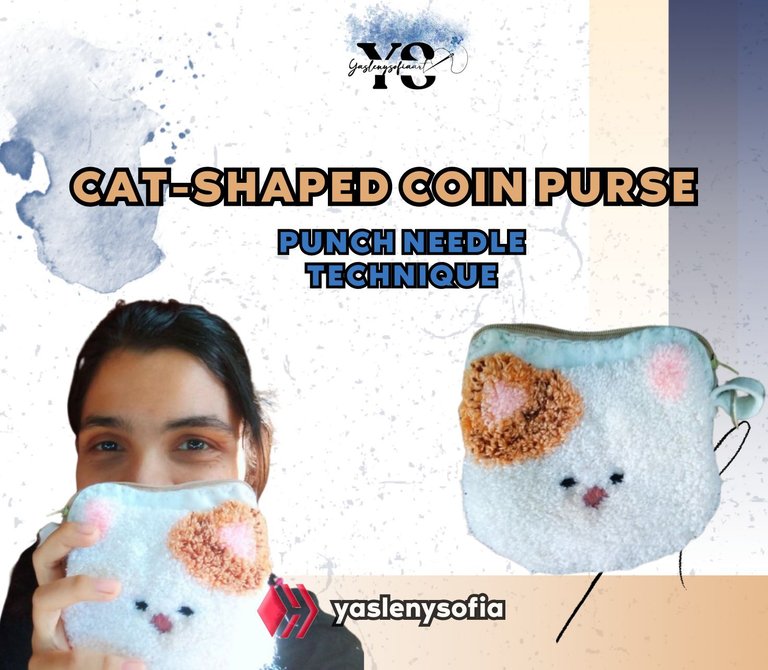
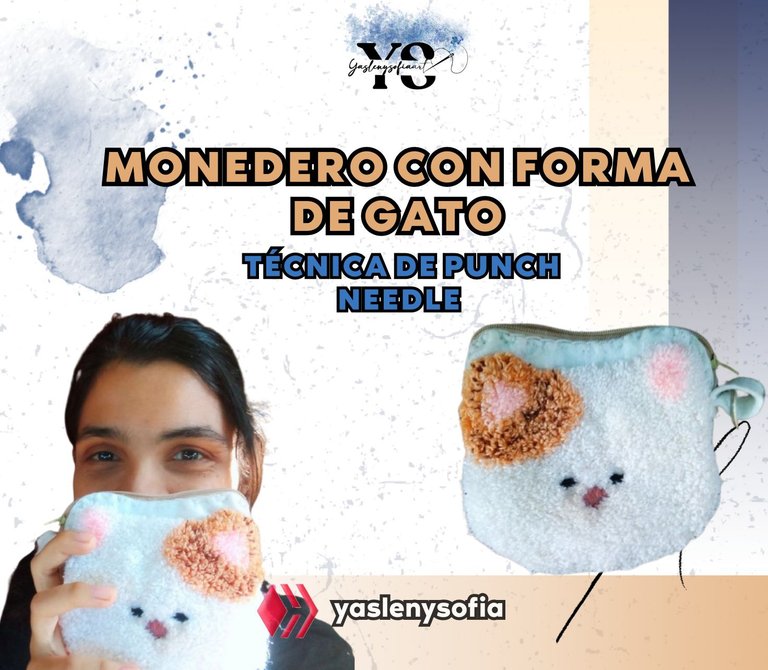
Monedero con forma de gato y la técnica de punch needle [ENG/ESP]

ENGLISH


PARA LAS PORTADAS DE HIVE.jpg


Greetings @needleworkmonday community, today I want to share with you how I made a purse in the shape of a cat, using the technique of the magic needle or Russian embroidery, as you know it better. Anyway, at first I didn't know if I would be able to make it as a purse, but I did it and I really liked the result.

MATERIALES.png


5082663465318985464.jpg


-Magic needle.
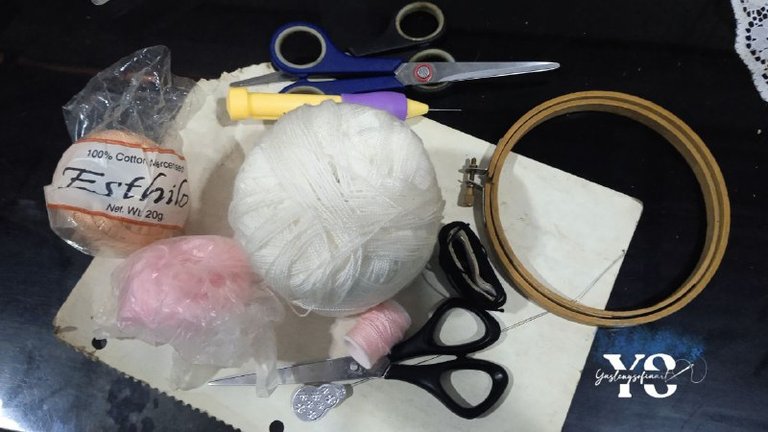
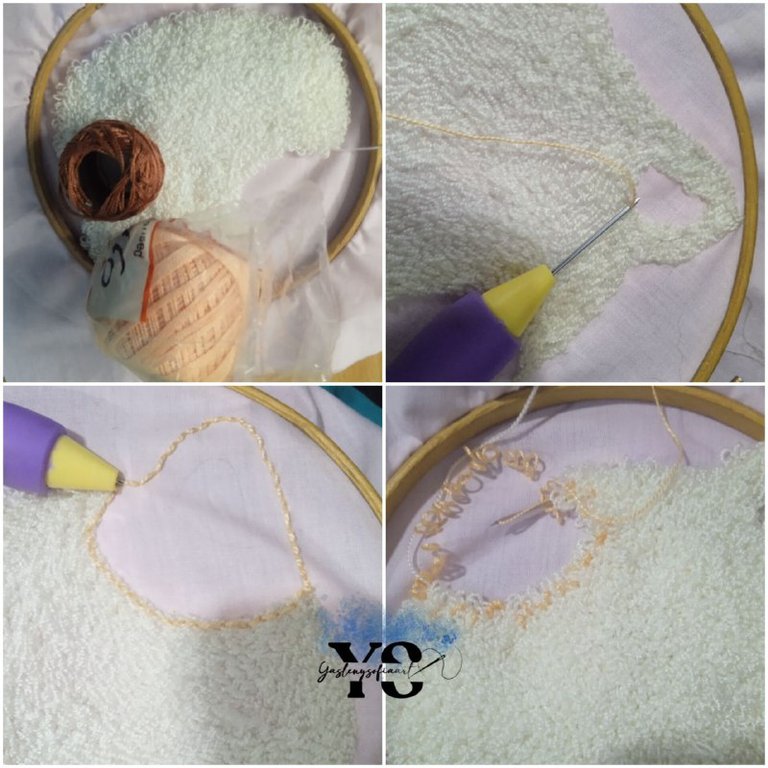
-Cotton thread or ball thread, white, orange, brown and pink colors.
-Black and dark pink embroidery thread or ball thread.
-Hoop or flexi hoops
-Scissors
-Jute fabric
-Cotton fabric or polar blanket.
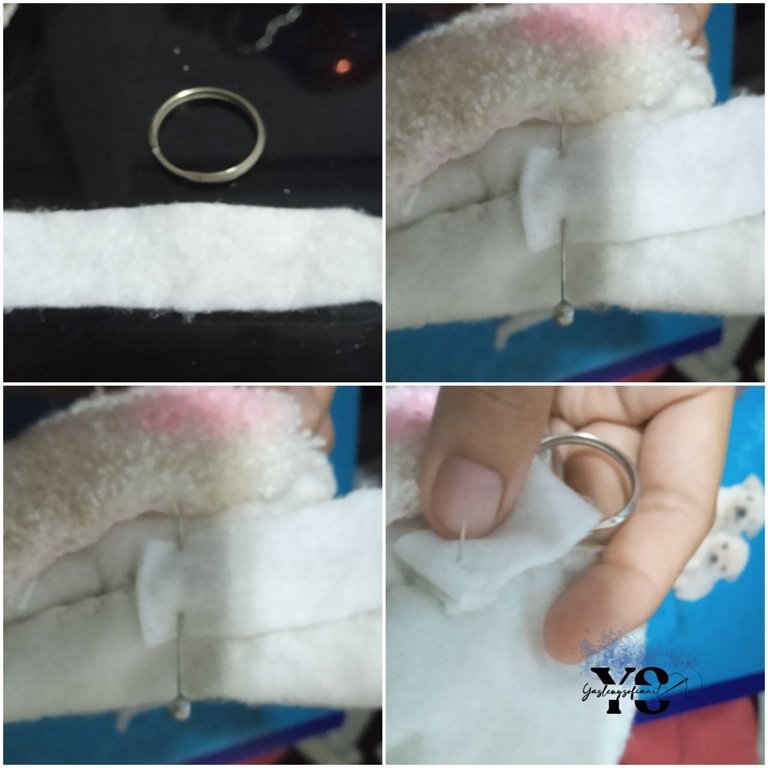
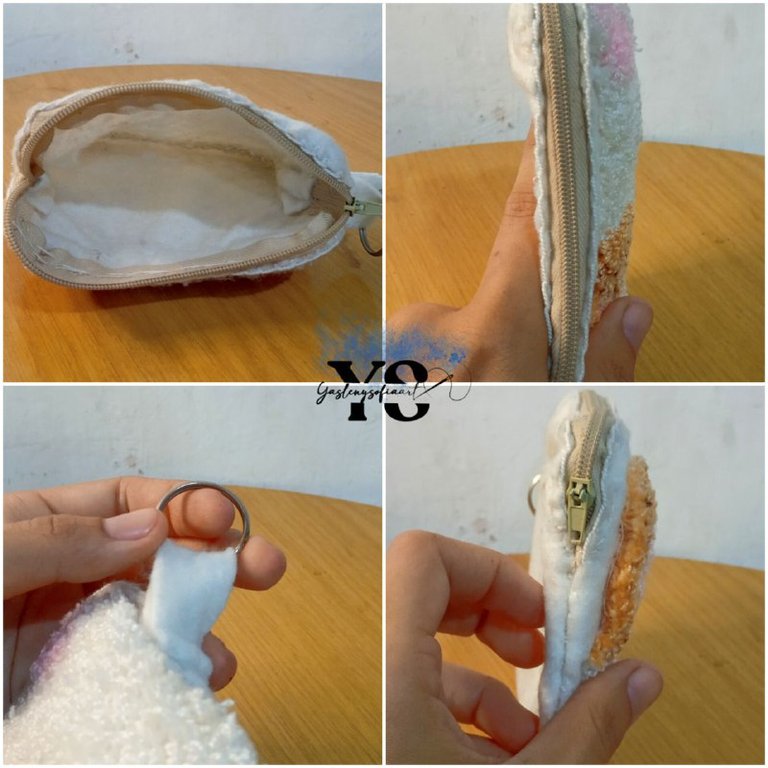
-Metal hoop
-Metallic clasp


PASOAPASO.png


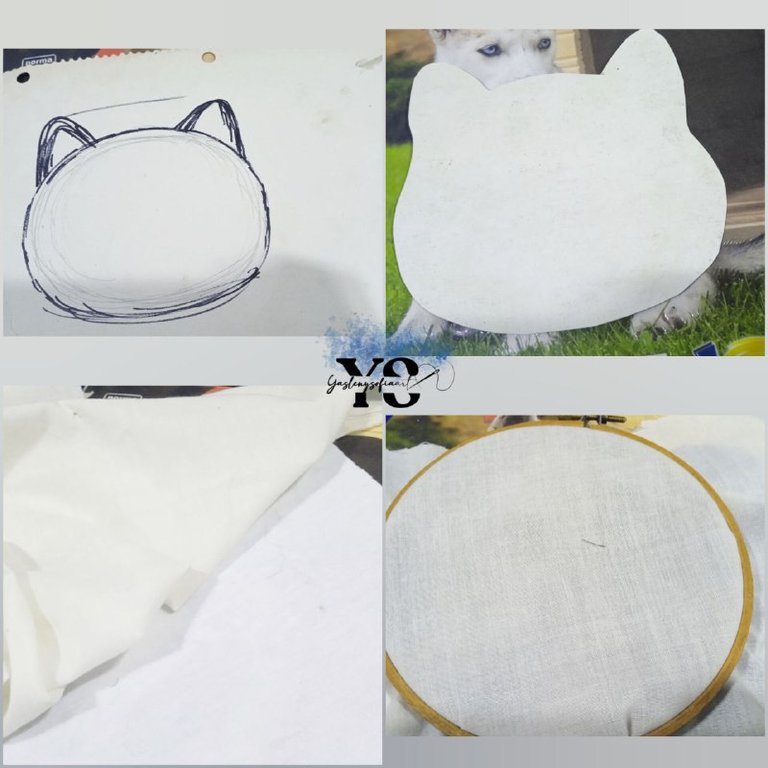
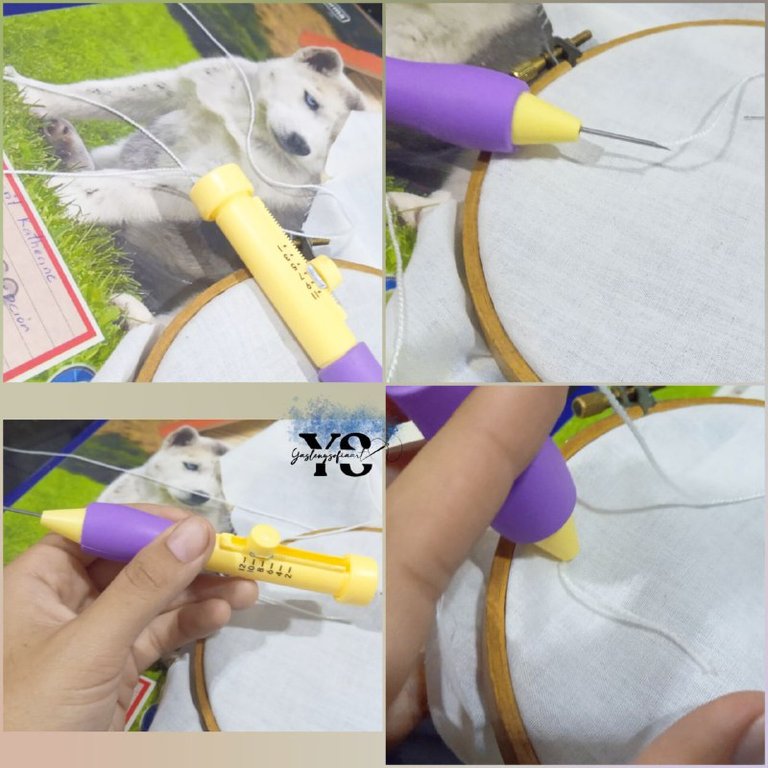
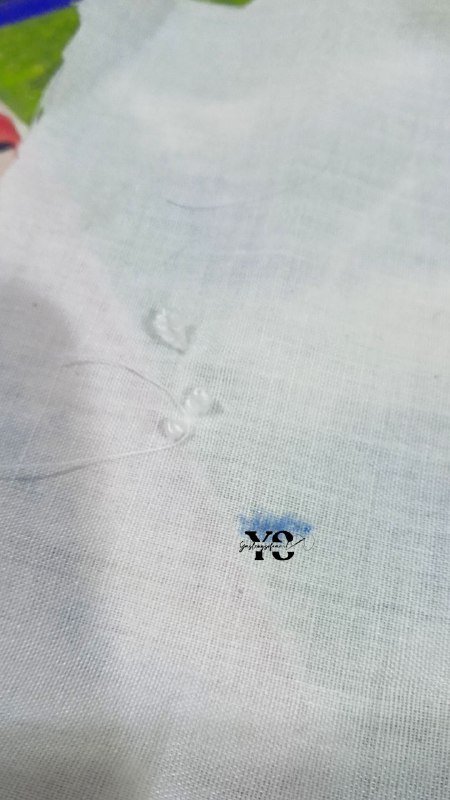
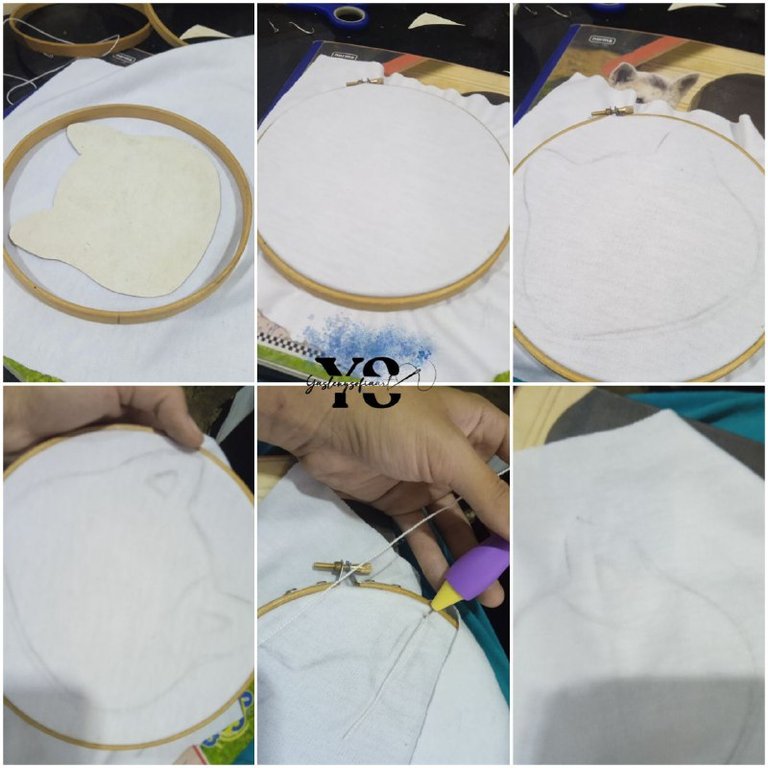
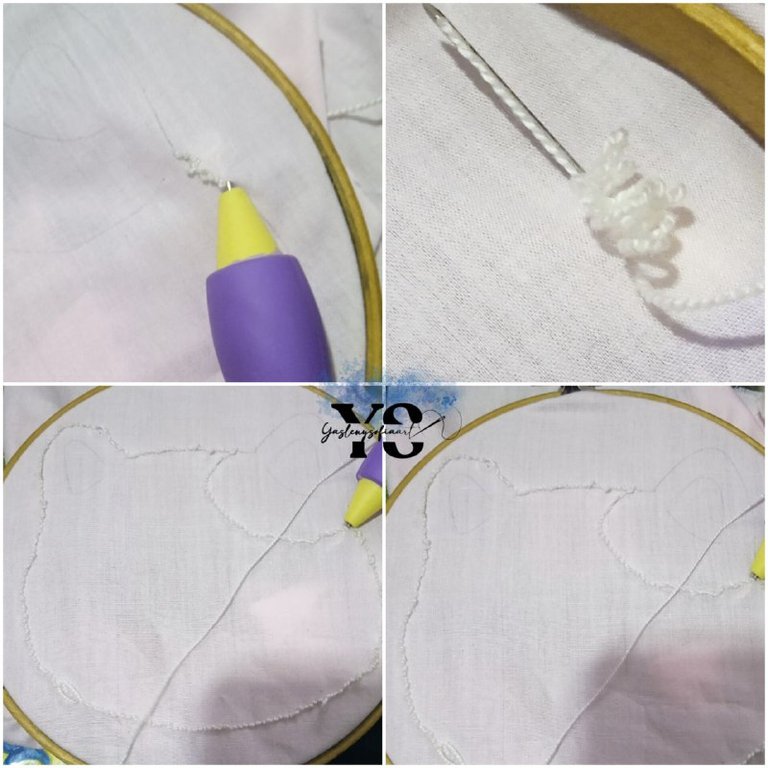
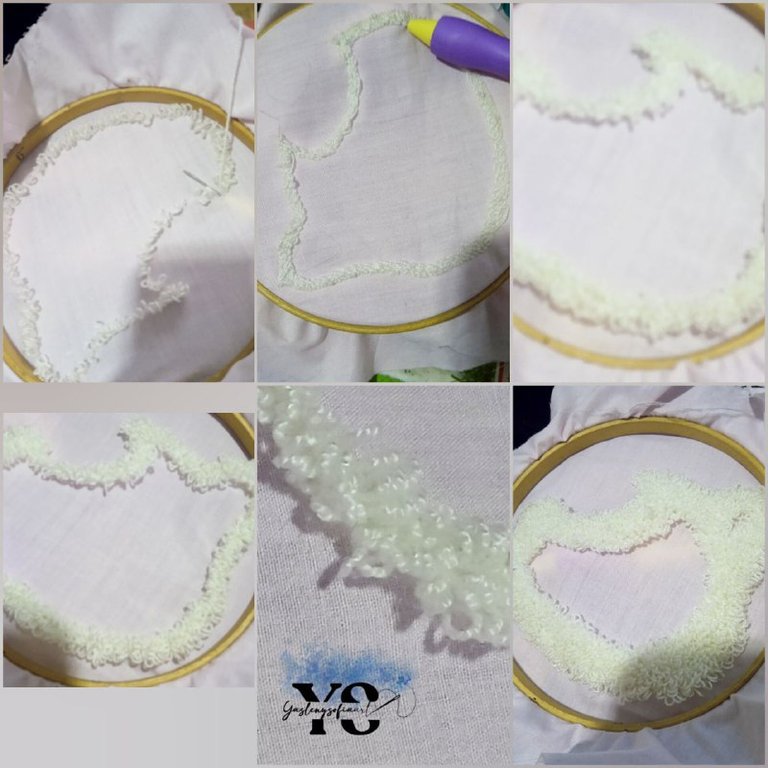
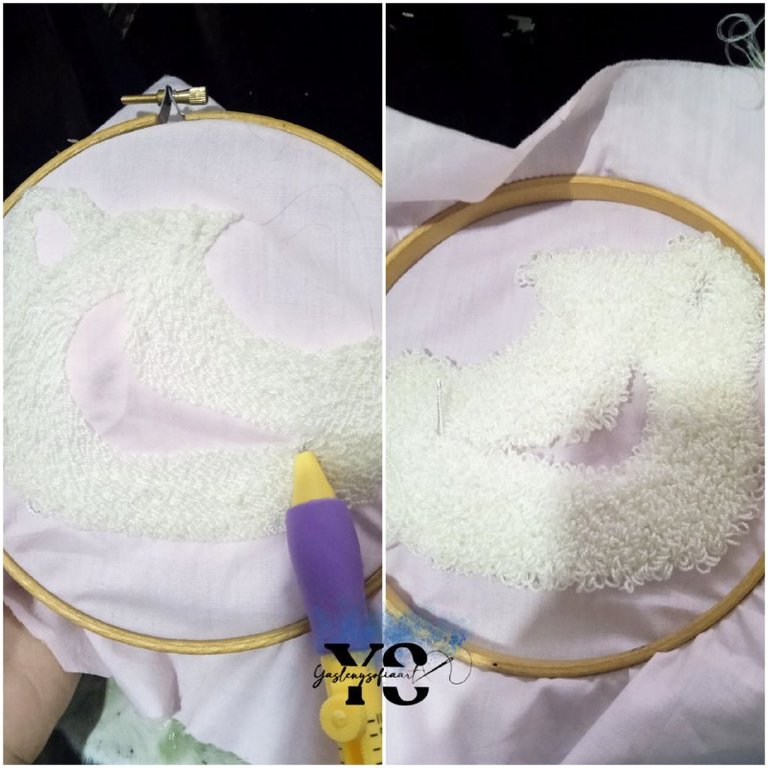
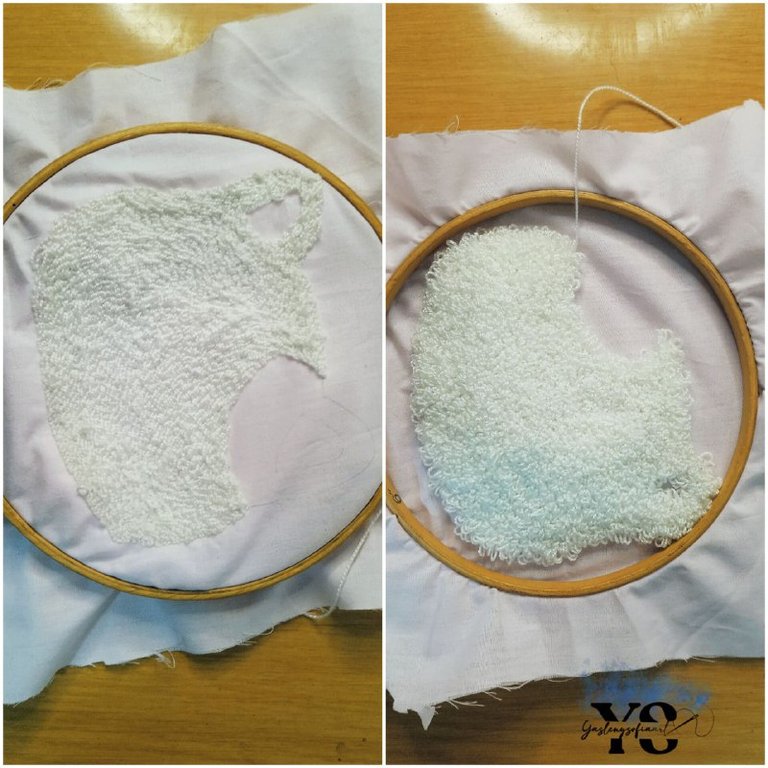
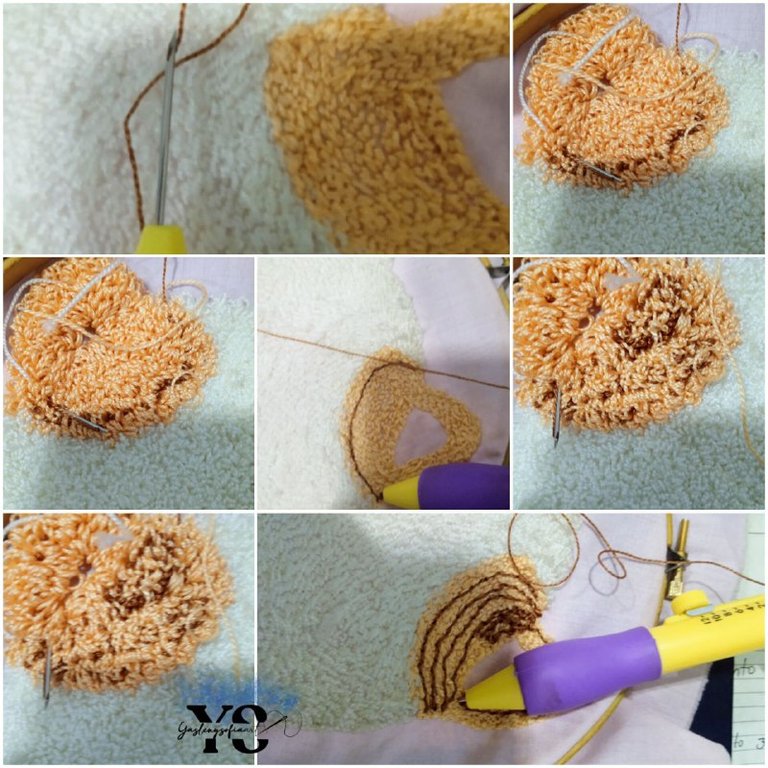
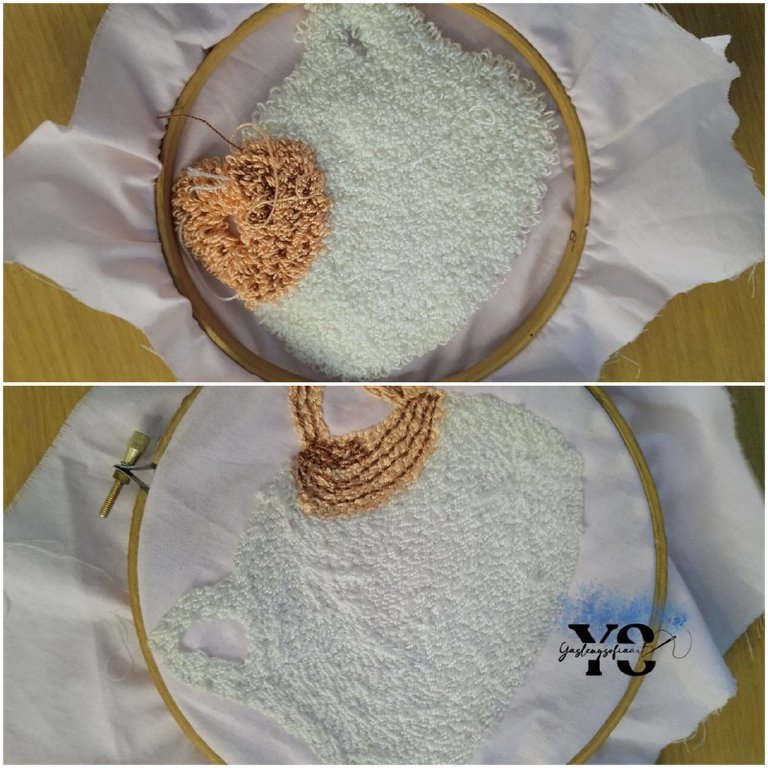
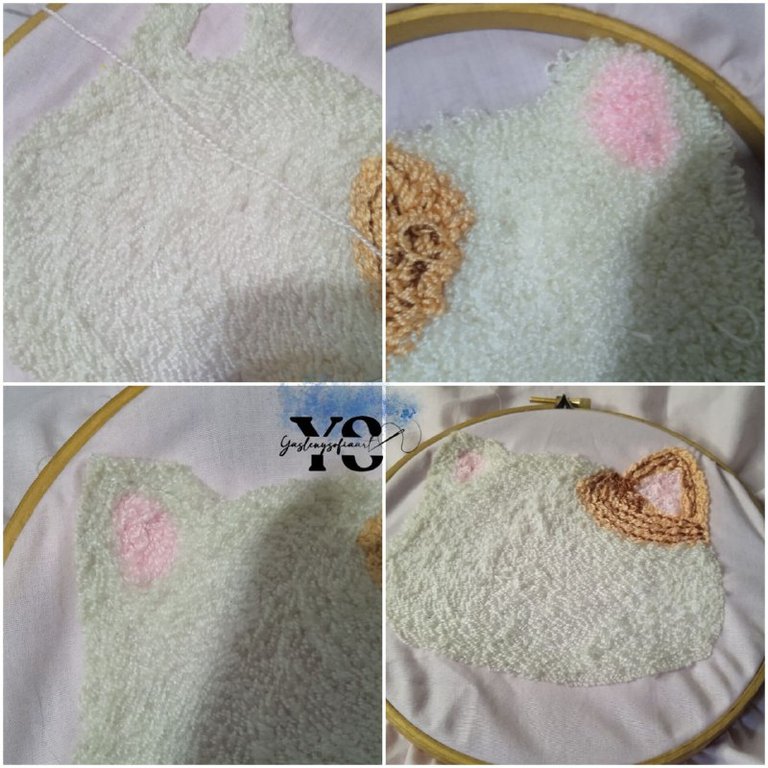
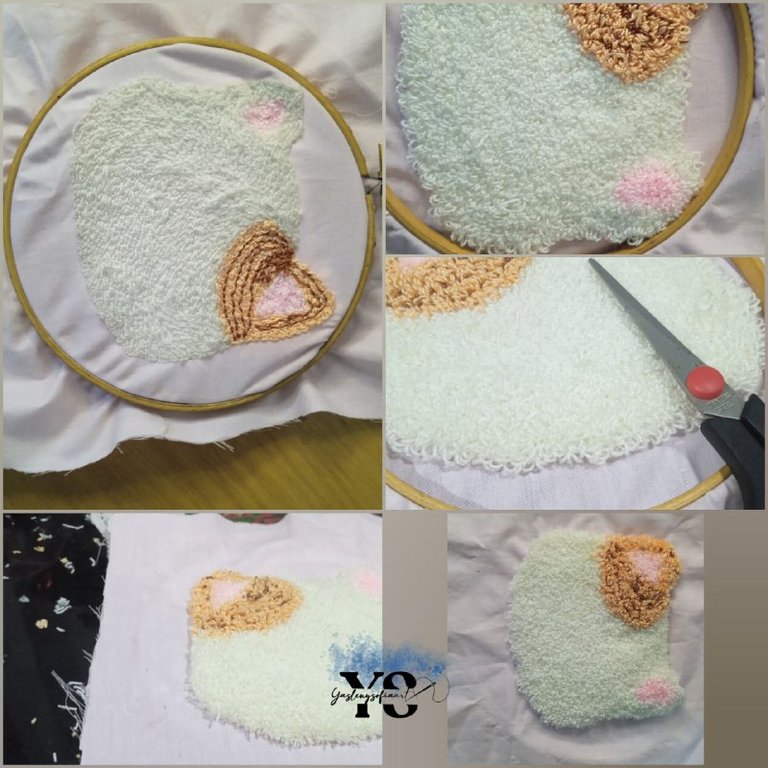
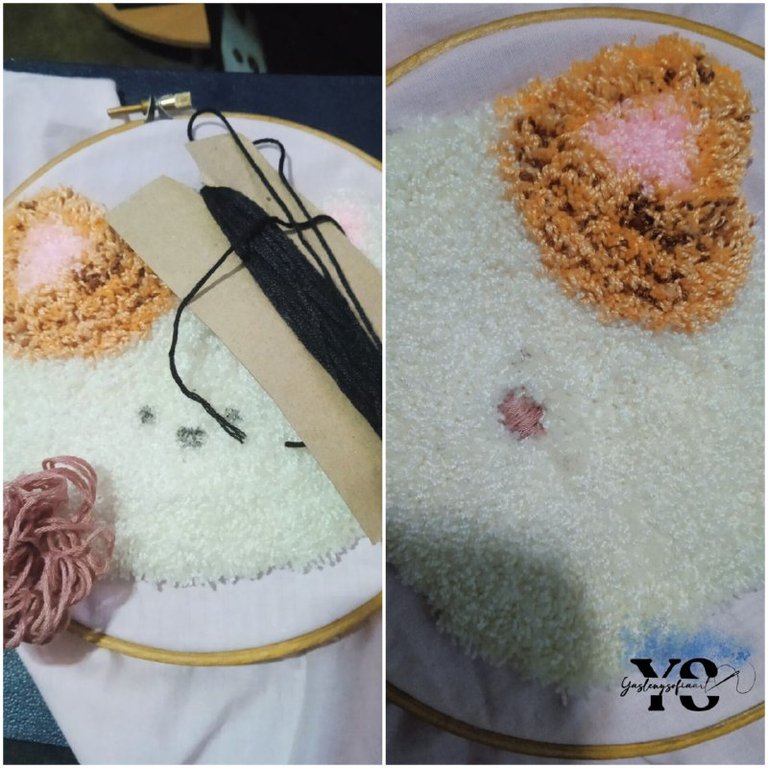
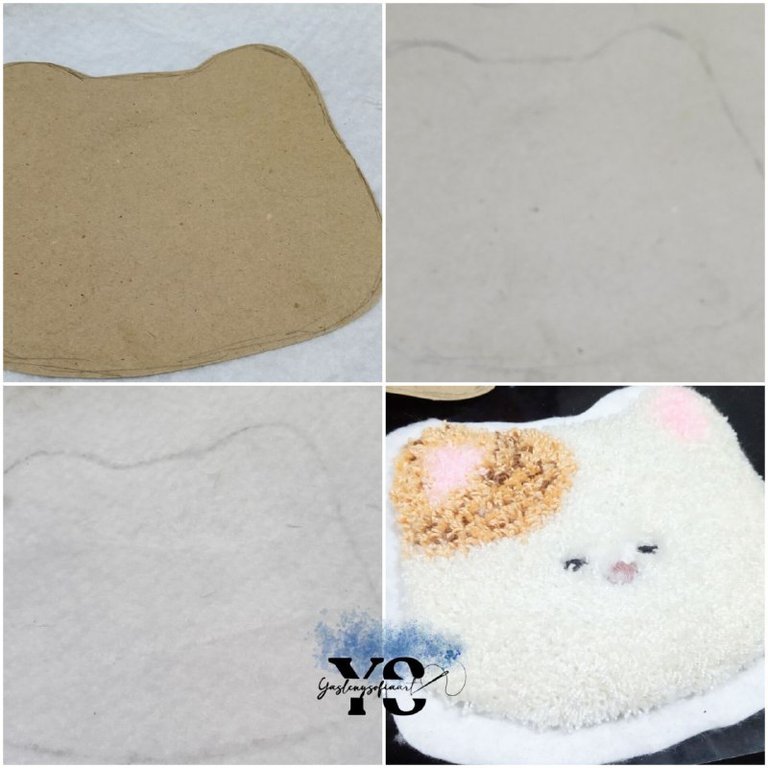
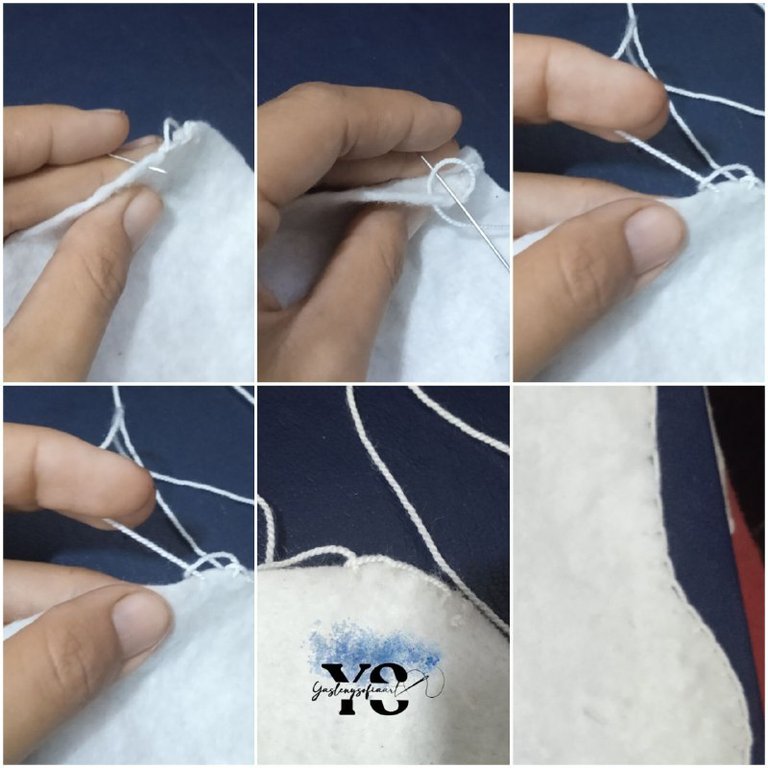
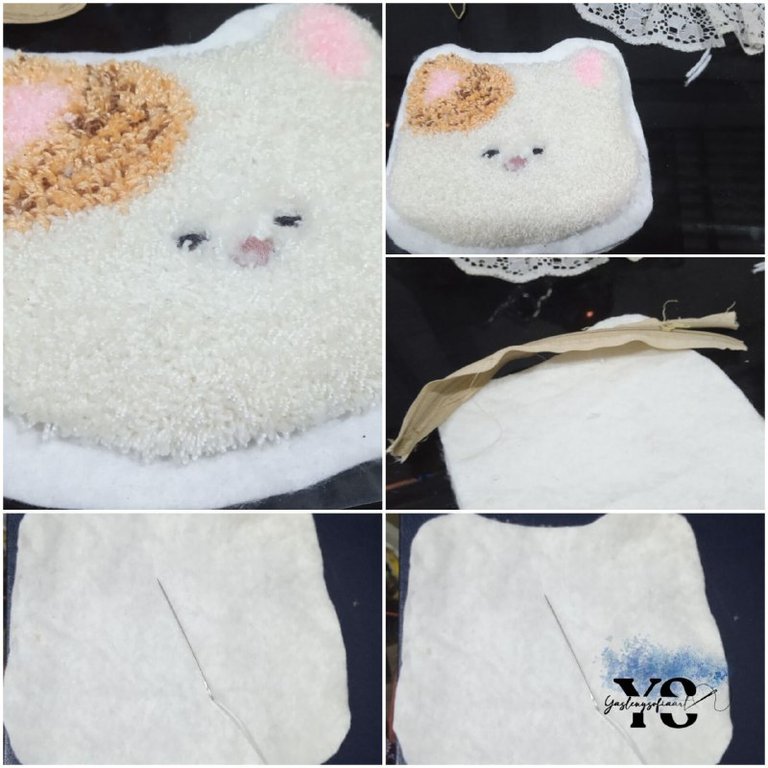
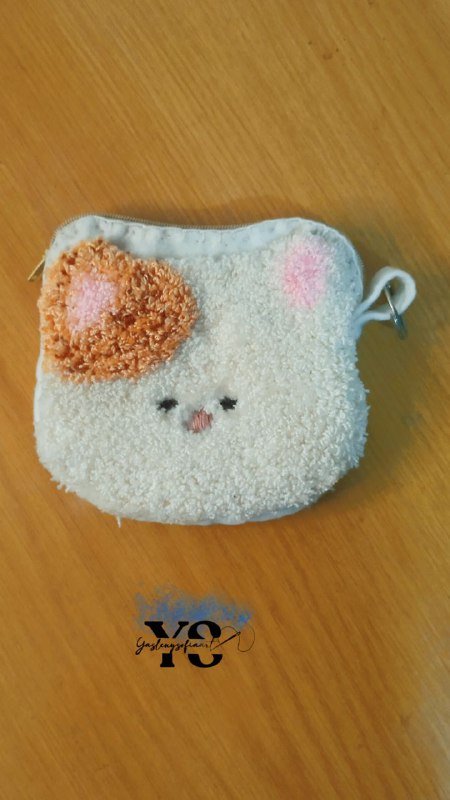
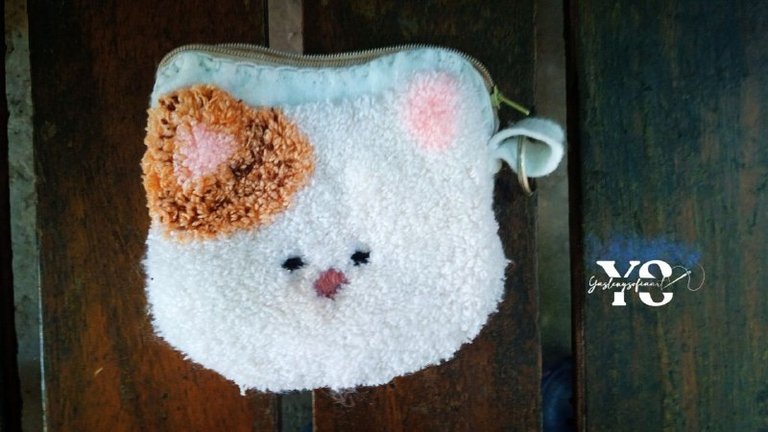
The first thing I did was to make the shape of the face of a kawaii kitten on a cardboard, this would be my pattern, then I took the white fabric (it is not jute, but it is the closest I found) and pressed it with the hoop, passing the pattern to the fabric. Then I threaded the needle, I left it in the last level, the 12, so that the curls were longer; if you want to know what this technique is and how it works I leave you the link of my post explaining all of it.
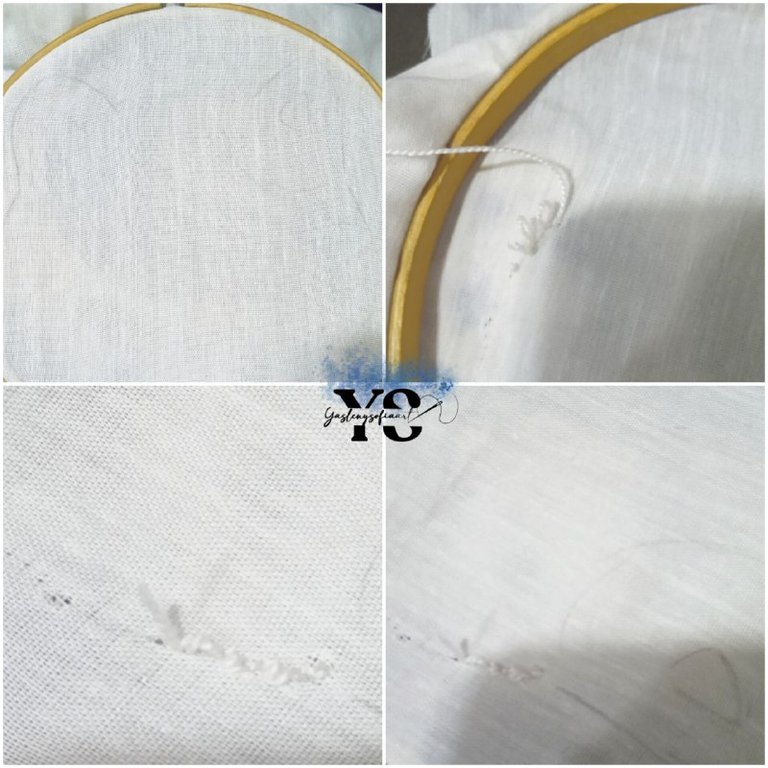
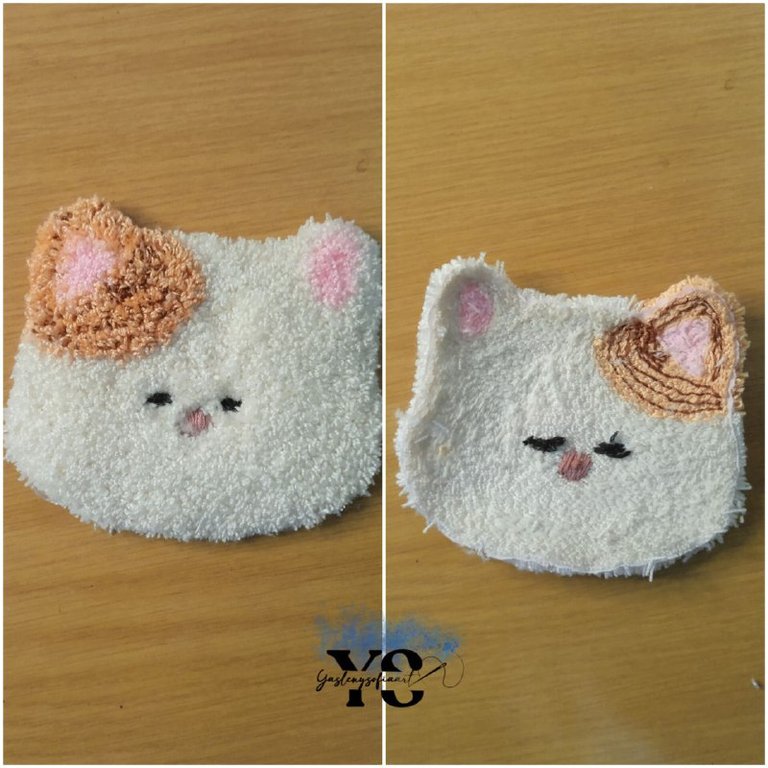
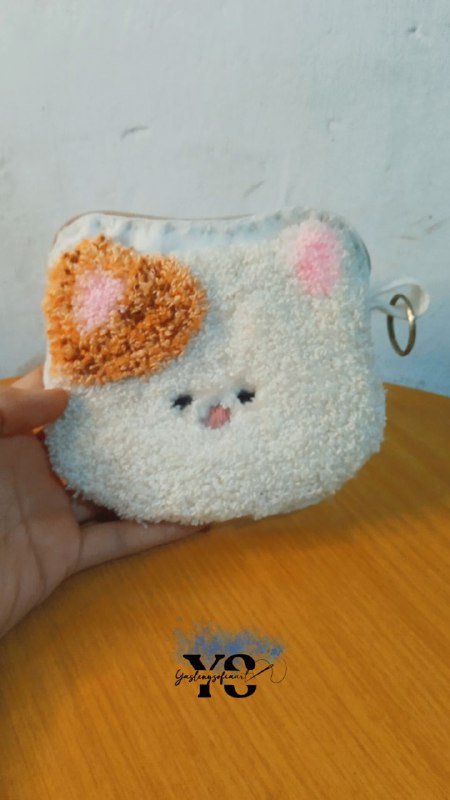

5082663465318985463.jpg


5082663465318985462.jpg


5082663465318985461.jpg


5082663465318985460.jpg


5082663465318985459.jpg


When I went through the needle I realized that I was not doing it right, that the fabric was breaking a lot and the rolls were not as they should be. I took another piece of the same fabric and pressed it as much as I could, but no way, it was the fabric that did not work with the needle, so I looked for another pink color, giving the curls that should result.

5082663465318985458.jpg


The cat I wanted to make is a calico, so it would have a little orange spot on one part of its face, so first I embroidered everything that would be white following the shape of the face and so on.

5082663465318985457.jpg


5082663465318985456.jpg


As you can see in this image, one side is flat and the other side is spongy, both sides work as the main side, it depends on what you want to use it for.

5082663465318985455.jpg


After that, I embroidered the area that was orange, with touches of brown, here if it had been a darker orange, I would not have added the brown. Then, I continued with the pink part of the dark circles.

5082663465318985454.jpg


5082663465318985453.jpg


5082663465318985452.jpg


5082663465318985451.jpg


5082663465318985450.jpg


5082663465318985449.jpg


Now, first I cut the curls, to give that fluffy feeling and with it, I painted with marker, the areas where the eyes and nose would go, but, I didn't like how it was stained, so I cut as much as I could those areas of the threads and embroidered with the pink and black thread.

5082663465318985448.jpg


This was the result of the cat's face, which I finished by cutting off the excess fabric around it.

5082663465318985447.jpg


After that, I made the cat's face in a bigger size, to transfer them then to the polar blanket, one of the sides would have the cat's face stitched and the other would be the back of the purse. Before sewing the embroidery to the polar blanket, I sewed the edges with white thread, to decorate them more than anything else.

5082663465318985446.jpg


5082663465318985444.jpg


5082663465318985443.jpg


Then, I proceeded to sew the metal clasp, but only with base stitches, without a fixed seam, since it would only be the guide to join both pieces. Then, I joined the pieces to the back of the purse, sewing a piece of fabric at the ends of the zipper, as if to give more security to the seam.

5082663465318985445.jpg


5082663465318985442.jpg


Once the joints are ready, I flip the purse over at the zipper and finish adjusting it.

5082663465318985441.jpg


Cut a rectangle of fleece blanket, about 7cm long by 4cm wide, depending on the size you make the purse, sew it at one end of the zipper, insert the metal ring so it can be hung, and finish the seam.

5082663465318985440.jpg


This is the result, I didn't know if it would fit as a purse, but when I saw it I loved it and I want to make some like this to give as a gift for Christmas. This one, in particular, I don't know if I should give it to a neighbor who loves cats and has her birthday in September or leave it for me.

5082663465318985469.jpg


5082663465318985471.jpg


5082663465318985467.jpg


5082663465318985465.jpg


5082663465318985477.jpg
After washing


5082663465318985479.jpg


The images are from my personal archive, taken with my Redmi 9A cell phone. Cover designed in CANVA and collage in the Inshot app. Text translated in DeepL.


SEPARADOR.png


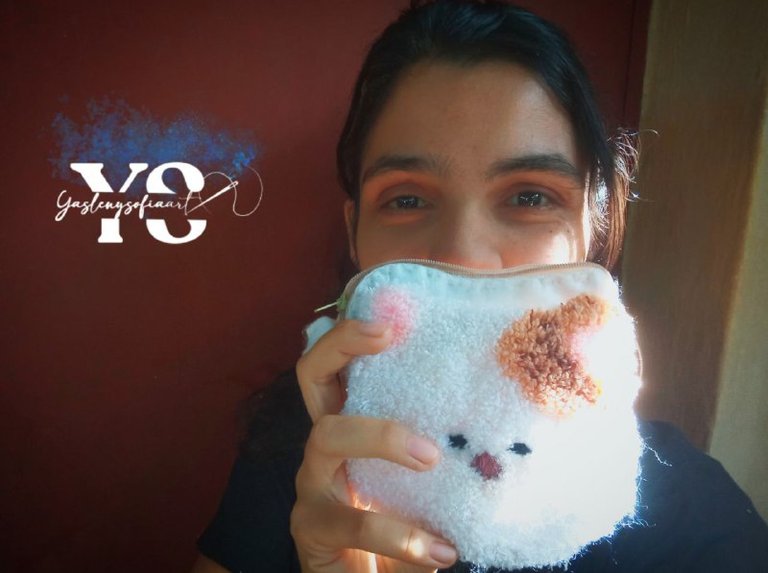
Thank you for reading my post. I hope you liked it. I will be attentive to answer your comments. You can visit my blog, follow my content and social networks.


YaslenySofia.jpg


FACEBOOK / INSTAGRAM / TWITTER


SEPARADOR.png


ESPAÑOL


PARA LAS PORTADAS DE HIVE (1).jpg


Saludos comunidad de @needleworkmonday, el día de hoy les quiero compartir el cómo elaboré un Monedero con la forma de un gato, empleando a demás la técnica de la aguja mágica o bordado ruso, como mejor la conozcan. En fin, al principio no sabía si lograría hacerlo como monedero, pero lo hice y me gustó mucho el resultado.

MATERIALES.png


5082663465318985464.jpg


-Aguja mágica.
-Hilo de algodón o de ovillo, colores blancos, naranja, marrón y rosa.
-Hilo para bordar o de ovillo negro y rosa oscuro.
-Aro o flexi hoops
-Tijera
-Tela Yute
-Tela de algodón o manta polar.
-Aro metálico
-Cierre metálico


PASOAPASO.png


Lo primero que hice fue hacer la forma de la cara de un gatito kawaii en un cartón, este seria mi patrón, luego tomé la tela blanca (no es de yute, pero es la más cercano que encontré) y la prensé con el aro, pasando el patrón a la tela. Luego enhebré la aguja, la dejé en el último nivel, el 12, para que los rulos fueron más largos; si desean saber en qué consiste esta técnica y cómo funciona les dejo el link de mi post explicando todo ello.


5082663465318985463.jpg


5082663465318985462.jpg


5082663465318985461.jpg


5082663465318985460.jpg


5082663465318985459.jpg


Al momento de traspasar la aguja me percaté de que no lo estaba haciendo bien, que se rompía mucho la tela y no quedaban los rollitos como debía ser. Volví a tomar otro retazo de la misma tela y lo prensé lo más que pude, pero que va, era la tela que no funcionaba con la aguja, así que busqué otra de color rosado, dando los rulos que deben resultar.

5082663465318985458.jpg


El gato que quería hacer es un calicó, por lo que llevaría una manchita naranja en una parte de su cara, por lo que primero bordé todo lo que seria en blanco siguiendo la forma de la cara y así sucesivamente.

5082663465318985457.jpg


5082663465318985456.jpg


Como pueden notar en esta imagen, de un lado queda plano y del otro lo esponjado, ambas caras funcionan como la cara principal, es depende para que lo quieras usar.

5082663465318985455.jpg


Posterior a ello, bordé la zona que era naranja, con toques de marrón, aquí si hubiese sido un naranja más oscuro, no le hubiese agregado el marrón. Para así, seguir con la parte rosa de las ojeras.

5082663465318985454.jpg


5082663465318985453.jpg


5082663465318985452.jpg


5082663465318985451.jpg


5082663465318985450.jpg


5082663465318985449.jpg


Ahora bien, primero corte los rulos, para dar esa sensación de esponjoso y con ello, pinté con marcador, las zonas donde iría los ojos y la nariz, pero, no me gustaba como se manchaba, así que corté lo más que pude esas zonas de los hilos y bordé con el hilo rosa y negro.

5082663465318985448.jpg


Este fue el resultado de la carita del gato, el cual lo terminé cortando los excesos de tela a su alrededor.

5082663465318985447.jpg


Posterior a ello, saque la cara del gato en un tamaño más grande, para pasarlas entonces a la manta polar, en una de las caras llevaría cocida esa carita del gato y el otro sería el reverso del monedero. Antes de coser el bordado a la manta polar, cosí las orillas con hilo blanco, para adornarlas más que nada.

5082663465318985446.jpg


5082663465318985444.jpg


5082663465318985443.jpg


Después, procedí a coser el cierre metálico, pero solo con puntadas bases, sin una costura fija, ya que solo sería la guía para unir ambas piezas. Luego, uní al reverso del monedero, las piezas, cosiendo un pedazo de tela en las terminaciones del cierre, como para darle mayor seguridad a la costura.

5082663465318985445.jpg


5082663465318985442.jpg


Al tener las uniones listas, volteo el monedero, por la parte del cierre y termino de ajustar este.

5082663465318985441.jpg


Corte un rectángulo de manta polar, como de 7cm de largo por 4cm de ancho, dependiendo del tamaño en que hagas el monedero, lo coso en unos de los extremos del cierre, introduzco el aro metálico para que se pueda guindar, y termino la costura.

5082663465318985440.jpg


Este es el resultado, no sabía si me quedaría como monedero, pero al verlo me encantó y quiero hacer algunos así para darlos como detalle en navidad. Este, en particular, no sé si regalarlo a una vecina que ama los gatos y cumple ahorita en septiembre o dejarlo para mí.

5082663465318985469.jpg


5082663465318985471.jpg


5082663465318985467.jpg


5082663465318985465.jpg


5082663465318985477.jpg
Después de lavado


5082663465318985479.jpg


Las imágenes son de mi archivo personal, tomadas con mi celular Redmi 9A. Portada diseñada en CANVA y collage en la app Inshot. Texto traducido en DeepL.


SEPARADOR.png


Gracias por leer mi post. Espero que les haya gustado. Estaré atenta a responder sus comentarios. Pueden visitar mi blog, seguir mis contenidos y redes sociales.


YaslenySofia.jpg


FACEBOOK / INSTAGRAM / TWITTER


SEPARADOR.png


0
0
0.000
8 comments
avatar

Te quedó bellísimo el monedero de gatito. Haces ver que es fácil usar la aguja mágica, me han dado ganas de comprarme una y ver que tal me va. Muchas gracias por compartir el paso a paso de esta belleza 🫶🏻✨️

0
0
0.000
avatar

Con la aguja mágica, resulta un bordado muy bonito y es más rápido de hacer. Muchas gracias 😊 y siempre me hace feliz poder compartir el proceso de mis trabajos.

0
0
0.000
avatar

Que hermoso proyecto nos compartes, Con esta técnica de la aguja mágica se logra la textura ideal para el gatito.
Te felicito por el excelente trabajo.
Saludos 🤗

0
0
0.000
avatar

Muchas gracias 😊, si me encanta esta aguja para hacer trabajos así. Saludos 🤗

0
0
0.000
avatar

¡Felicitaciones!


Has sido votado por @entropia

Estás participando para optar a la mención especial que se efectuará el domingo 8 de septiembre del 2024 a las 8:00 pm (hora de Venezuela), gracias a la cual el autor del artículo seleccionado recibirá la cantidad de 1 HIVE transferida a su cuenta.

¡También has recibido 1 ENTROKEN! El token del PROYECTO ENTROPÍA impulsado por la plataforma Steem-Engine.


1. Invierte en el PROYECTO ENTROPÍA y recibe ganancias semanalmente. Entra aquí para más información.

2. Contáctanos en Discord: https://discord.gg/hkCjFeb

3. Suscríbete a nuestra COMUNIDAD y apoya al trail de @Entropia y así podrás ganar recompensas de curación de forma automática. Entra aquí para más información sobre nuestro trail.

4. Visita nuestro canal de Youtube.

Atentamente

El equipo de curación del PROYECTO ENTROPÍA

0
0
0.000
avatar

¡Enhorabuena!


Has recibido el voto de PROYECTO CHESS BROTHERS

✅ Has hecho un buen trabajo, por lo cual tu publicación ha sido valorada y ha recibido el apoyo de parte de CHESS BROTHERS ♔ 💪


♟ Te invitamos a usar nuestra etiqueta #chessbrothers y a que aprendas más sobre nosotros.

♟♟ También puedes contactarnos en nuestro servidor de Discord y promocionar allí tus publicaciones.

♟♟♟ Considera unirte a nuestro trail de curación para que trabajemos en equipo y recibas recompensas automáticamente.

♞♟ Echa un vistazo a nuestra cuenta @chessbrotherspro para que te informes sobre el proceso de curación llevado a diario por nuestro equipo.


🏅 Si quieres obtener ganancias con tu delegacion de HP y apoyar a nuestro proyecto, te invitamos a unirte al plan Master Investor. Aquí puedes aprender cómo hacerlo.


Cordialmente

El equipo de CHESS BROTHERS

0
0
0.000