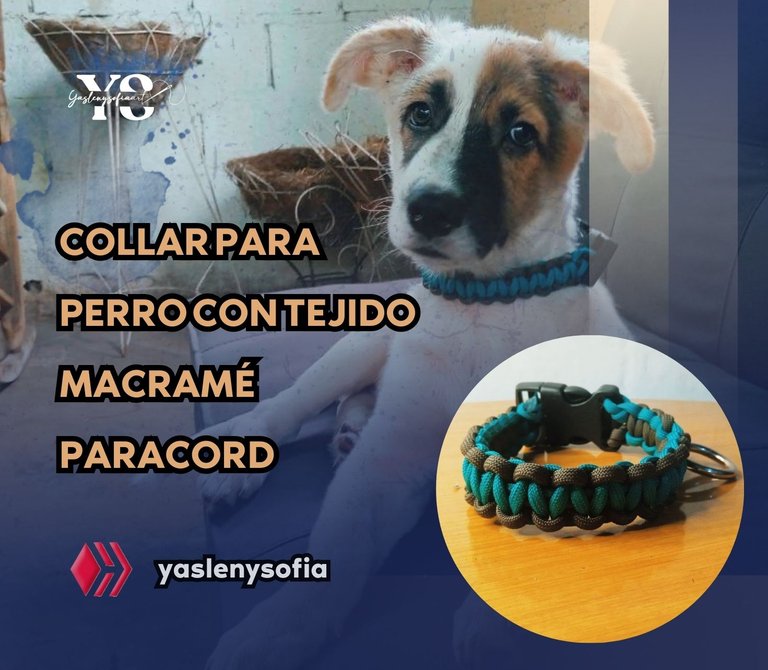
Macrame paracord dog collar with macramé weave / Collar para perro con tejido macramé paracord [ENG/ESP]
ENGLISH
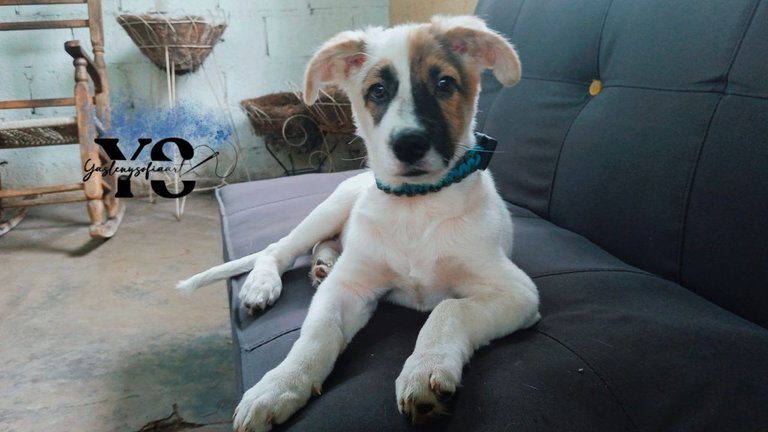
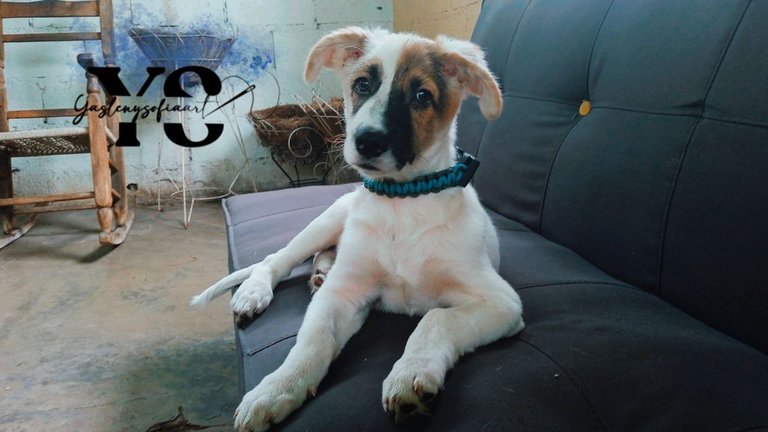
Greetings @hivediy community, taking advantage of my little model that stays still in the photos, has motivated me to do several things and surfing the internet I found this idea of a necklace woven in macramé paracord or parachute (is the rope of the parachutists), the truth looks beautiful and, although I already have the breastplate, this necklace would serve me to put the plaque later, I also want to do it, along with the two dogs I have, but that would be another time and when I have the capital.
EFinally, I will show you the step by step of this necklace I made; as for the measurements of the cords, I will give you both the one I used for my dog, as well as the measurements that should have been correct, plus how to calculate them.
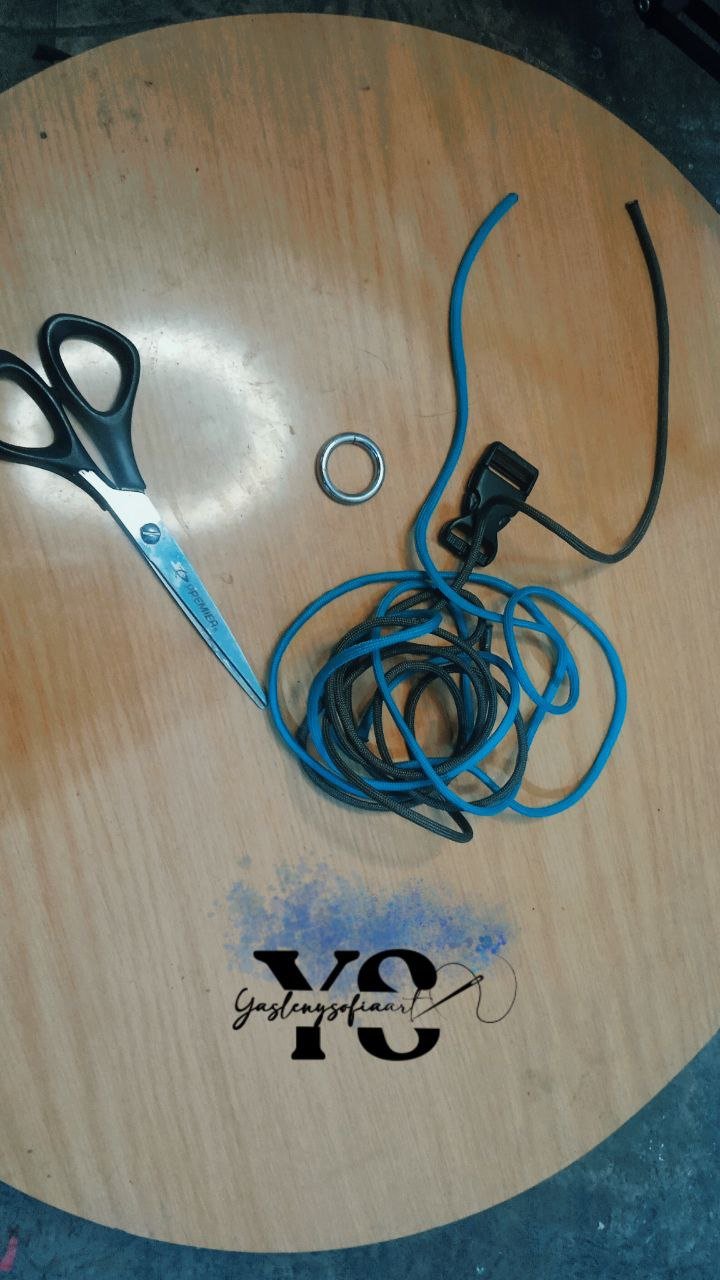

-Lighter
-Two boards with hook
-Scissors
-1 ring
-Measuring tape
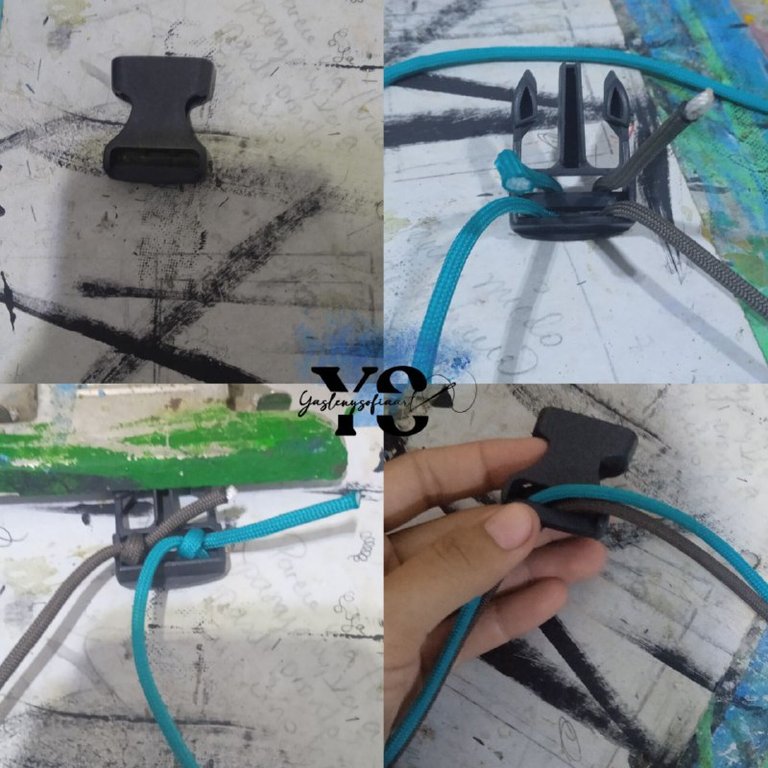
-Broche de Mochilla or tip top. Preferably the 2.5cm, in my case I used one of 3cms, which was the one I had.

STEP 1
The measures…
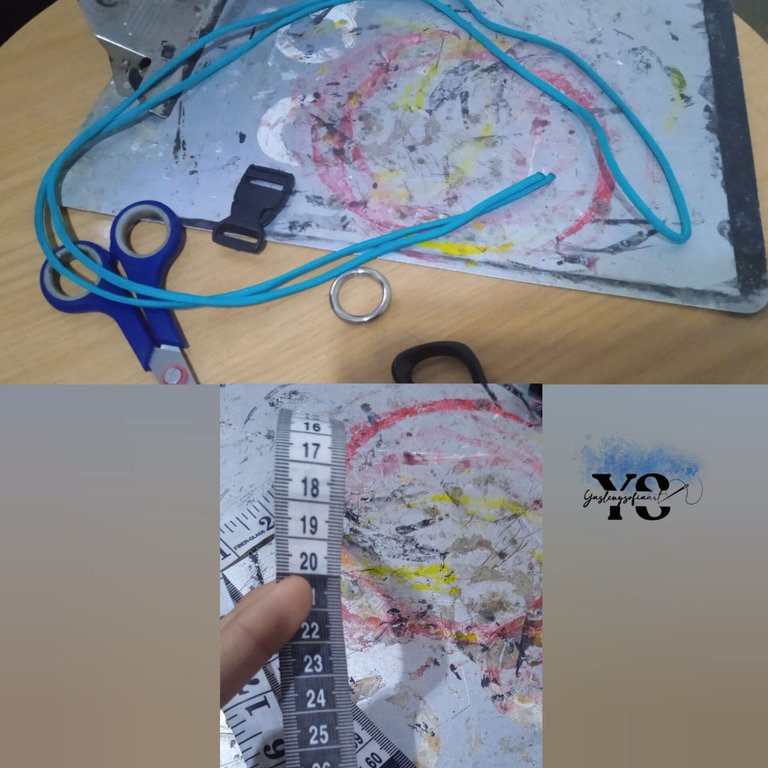
In this first part, we take the measurements of our pet's neck with the tape measure. Oddie's is 27 cm.
In the first tutorial I saw, it was not only a different model, but it indicated that it was the measurement of the neck multiplied by 4, so I bought a meter and a half of each cord, because I said it is better to have too much than too little.
However, when I saw how to make it, I was missing a cord, because it was too short, it did not reach 27 cm, I struggled a lot, I took it apart to see if it was me and no, it was that the measures she said, did not apply that way.
Here are some images of the other model that I did not manage to make.
Searching for other tutorials, I found one that showed how to get the measurements:
• Neck circumference measures= 27 cm
27 – 3 cm= 24 cm
24 * 12= 2,88 mts.
(Image 1)
(Image 2)
- Measurement of the clasp or tip top= 3 cm
24 * 12= 2,88 mts.
In other words, instead of buying 1.50 mts, I had to buy almost all 3 or all 3 in their entirety.
STEP 2
Knotting…
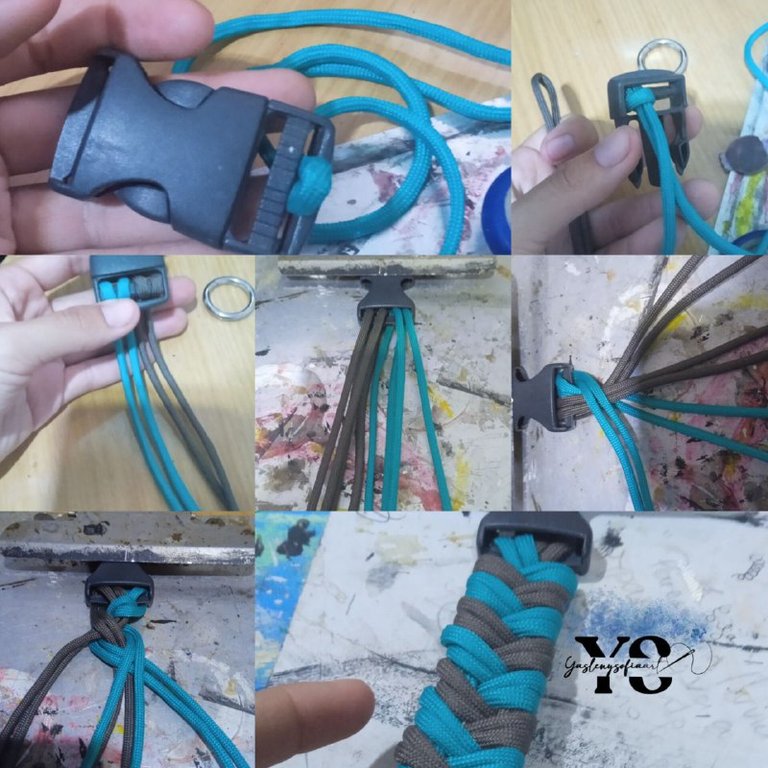
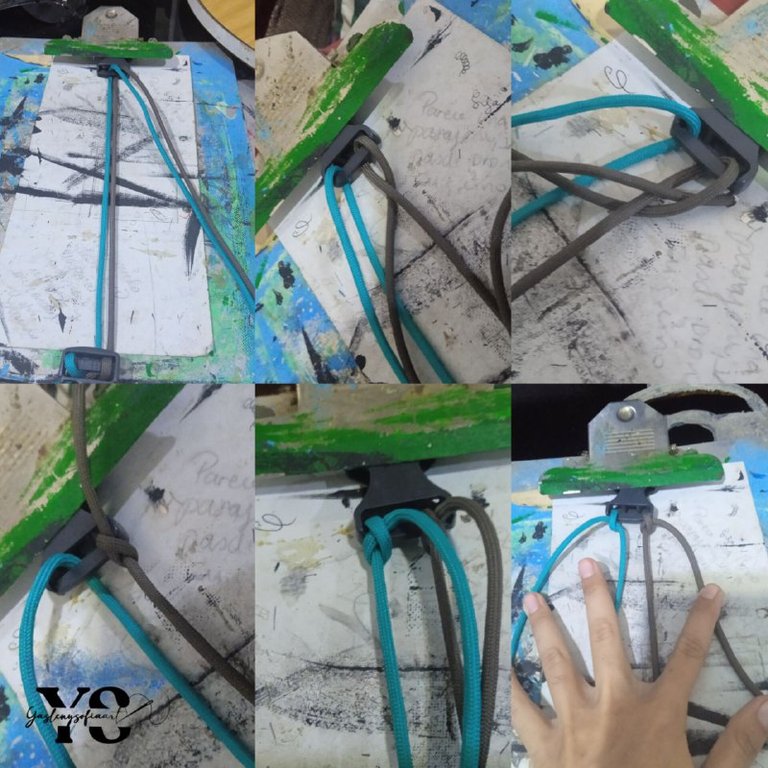
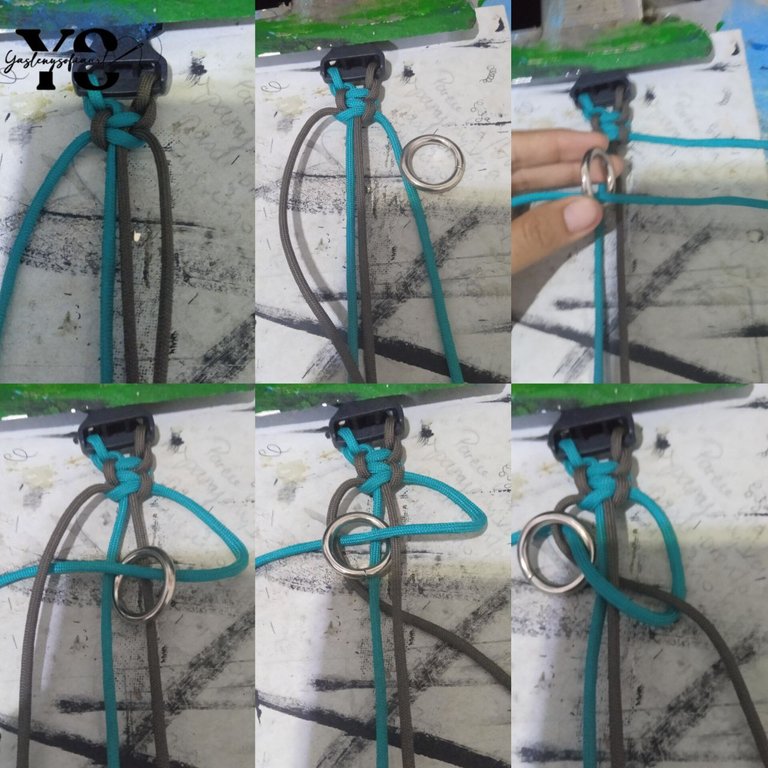
We take the brooch, we open it, both parts on different boards and the distance will be the size of the neck, this will serve to hold them. The part of the brooch that has the teeth, we tie both threads, and the knot will be on the reverse side of it. However, at the moment of intertwining the cords, both parts of the brooch must be on the front side (Image 1).
(Image 1)
The “original” process consists of burning both ends of the two cords and joining them quickly, since when they are burned, they adhere to each other without problems. That union, we pass it through the dientito brooch, it creates a small circle, there we pass the long part of the cords.
Anyway, I will show you this part when I make another one, because I think this necklace will lose it soon, but I still wanted to point it out.
Now, we pass the other ends of the cord through the other part of the brooch. The brown cord that remains loose, we pass it under the brown one that remains taut and in that little ear that forms, we pass the tip of the brown color and pull, so we create a knot to hold. In the same way, we do with the green, loose cord, pass it under the taut one and with the ear formed, we pass the tip of this one (Image 2).
The ends of the loose cords should be on the outside.
(Image 2)
STEP 3
Fabric…
Note: The color that will go in the middle, which in my case is green, should be on the left hand side and it is precisely with this color that the weaving begins.
For a better understanding:
• Loose green cord: I'll call it cord 1
(Image 3)
(Image 4)
(Image 5)
The images are from my personal archive, taken with my Redmi 9A cell phone. Cover designed in CANVA. Text translated in DeepL
-2 Cordones paracord, colores a preferencia, pueden ser diferentes colores o iguales. Cada uno, debe medir 1,50 mts.
-Encendedor
-Dos tablas con gancho
-Tijera
-1 Argolla
-Cinta métrica
-Broche de Mochilla o tip top. Preferiblemente el de 2.5cm, en mi caso usé uno de 3cms, que era el que tenía.
Aquí les dejo imágenes del otro modelo y que no logré hacer.
- Brown cord loose: I'll call it cord 2
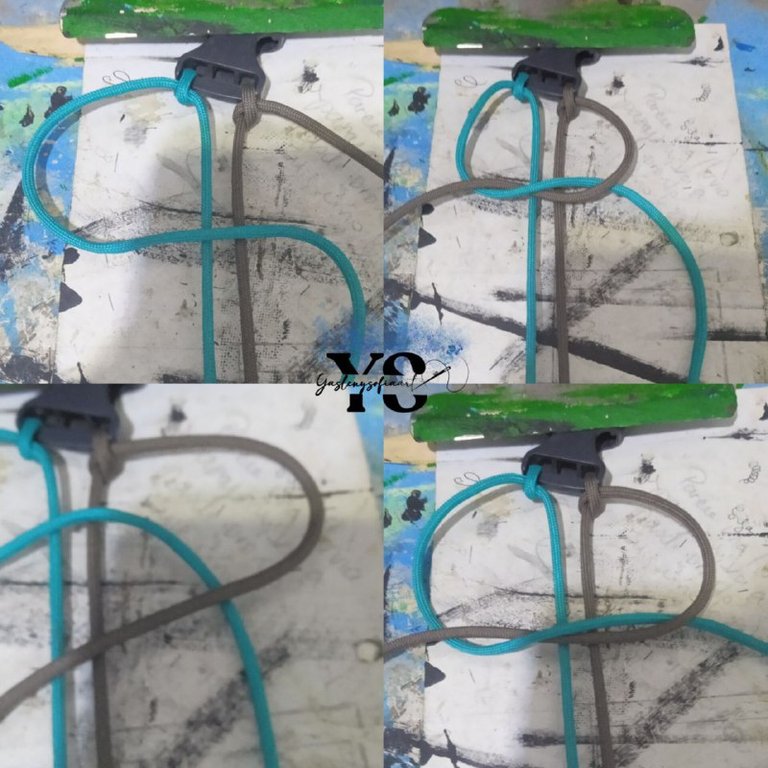
We pass the cord 1 over the two tightened cords, it will form a kind of ear.
The cord 2, pass it over cord 1, then under the two tightened cords and finally, over the small ear left by cord 1. This cord 2 will also leave a small ear, pass cord 1 under this ear (Image 3).
(Image 3)
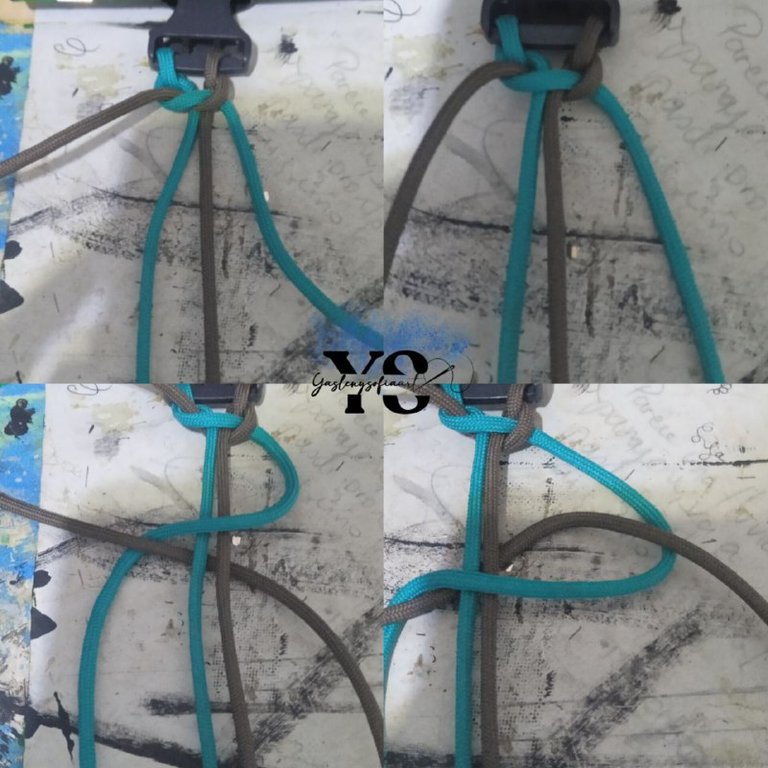
We pull both cords, making the first wave or weave, as shown in picture 4..
After that, cord 2 is passed over the tensioned cords and under cord 1.
This strand 1 is passed over strand 2 and under the tensioned strands and pulled.
(Image 4)
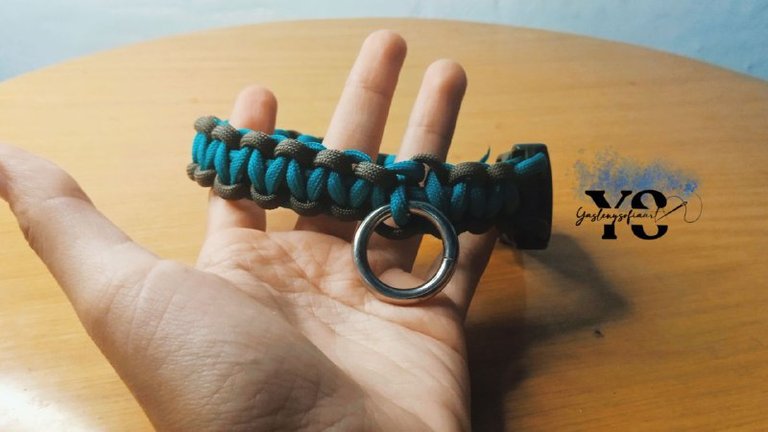
We do the same process again, when you have 3 waves or weaves done, it will be time to put the ring (this part is optional). The cord 1 should be on the right side.
We take the ring, pass cord 1 through it and over the tensioned strands; cord 2 over cord 1 and under the tensioned strands and pull. Here I had to straighten the ring, which will remain in its center and pass another cord again (Image 5).
(Image 5)
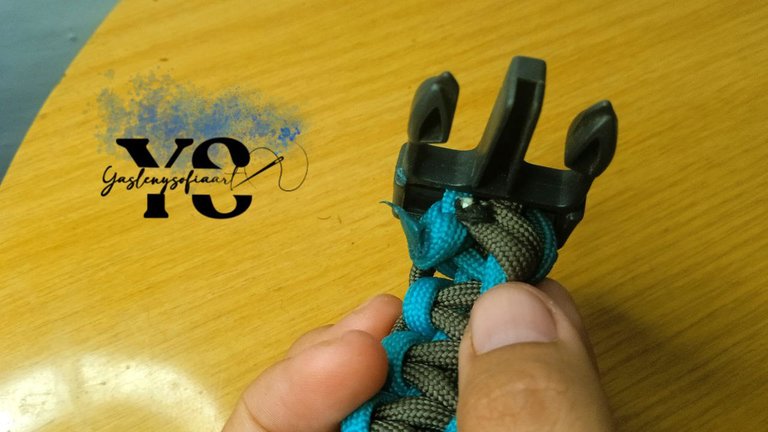
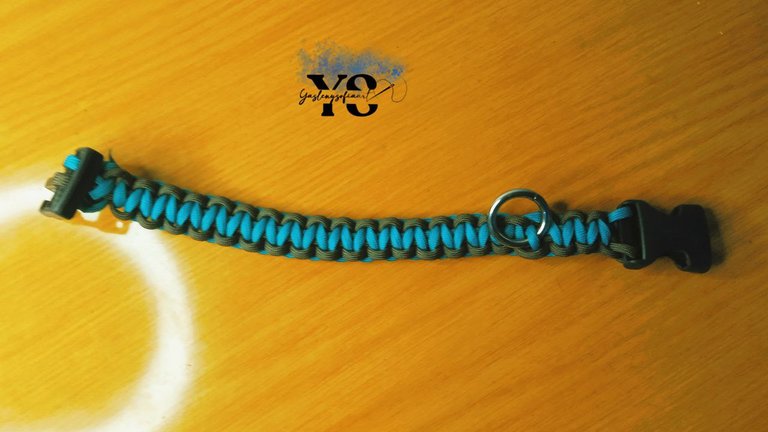
Then we continue weaving until we reach the other part of the brooch; when you get there, if you have some cord left over, cut it, so that there is about 1 finger left over, turn the necklace over, so that it is on the reverse side, burn the tip enough and quickly glue it with a thimble and thus the knot is clean.
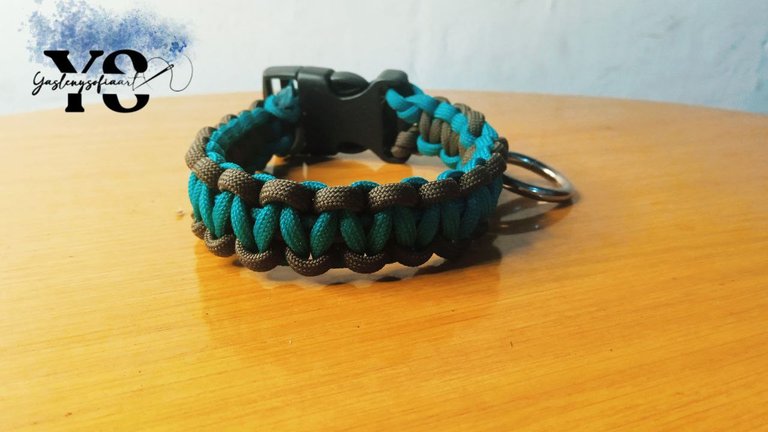
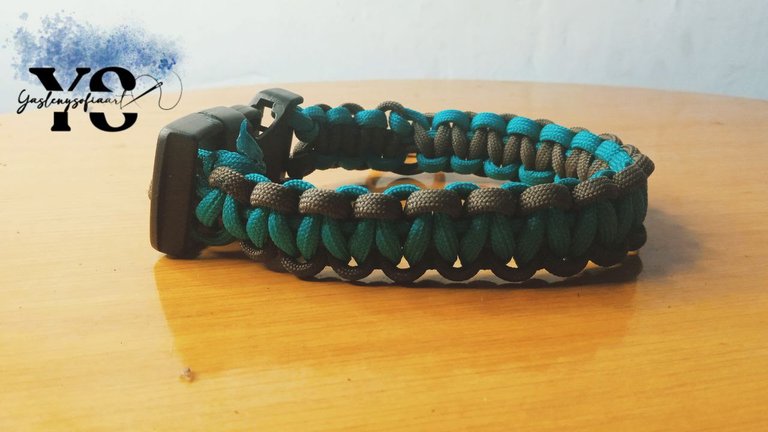
This was the result, I almost didn't have enough cord, but something was done 🤣. You can also make bracelets for yourself with this technique. I hope to bring you again a better explained one, even other models.

Thank you for reading my post. I hope you liked it. I will be attentive to answer your comments. You can visit my blog, follow my content and social networks.
FACEBOOK / INSTAGRAM / TWITTER
ESPAÑOL
Saludos comunidad de @hivediy, aprovechando a mi modelito que se queda quieto en las fotos, me ha motivado en hacerle varias cosas y navegando por internet me encontré con esta idea, de un collar tejido en macramé paracord o parachute (es la cuerda de los paracaidistas), la verdad se ve hermoso y, aunque ya tengo la pechera, este collar me serviría para ponerle más adelante la plaquita, que también se la quiero hacer, junto con los dos perros que tengo, pero eso seria en otra oportunidad y cuando tenga el capital.
En fin, les mostraré el paso a paso de este collar que hice; en cuanto a las medidas de los cordones, les daré tanto el que use para mi perrito, como las medidas que debieron ser correctas, más como sacar calculo.
-Encendedor
-Dos tablas con gancho
-Tijera
-1 Argolla
-Cinta métrica
-Broche de Mochilla o tip top. Preferiblemente el de 2.5cm, en mi caso usé uno de 3cms, que era el que tenía.
PASO 1
Las medidas…
En esta primera parte, tomamos las medidas del cuello de nuestra mascota con la cinta métrica. El de Oddie es de 27 cm.
En el primer tutorial que vi era, no solo un modelo distinto, sino que indicaba que era la medida del cuello multiplicados por 4, por eso compré fue un metro y medio de cada cordón, porque me dije es mejor que sobre a que falte.
Sin embargo, al ir viendo como se hacía, me faltaba cordón, porque quedaba muy corto, no me llegaba a los 27 cm, batallé mucho, lo desarmada a ver si era yo y no, era que las medidas que ella decía, no se aplicaba así.
Aquí les dejo imágenes del otro modelo y que no logré hacer.
Buscando otros tutoriales, encontré uno que indicaba como se sacaba las medidas:
• Medidas de la circunferencia del cuello= 27 cm
27 – 3 cm= 24 cm
24 * 12= 2,88 mts.
(Imagen 1)
(Imagen 2)
• Medida del broche o tip top= 3 cm
24 * 12= 2,88 mts.
Es decir que, en vez de comprar 1,50 mts, tenía que comprar casi los 3 o los 3 en su totalidad.
PASO 2
Anudar…
Tomamos el broche, lo abrimos, ambas partes en distintas tablas y la distancia será la del tamaño del cuello, esto servirá para sujetarlos. La parte del broche que tiene los dientitos, se amarra ambos hilos, y el nudo quedará en la parte reversa de este. No obstante, al momento de entrelazar los cordones, ambas partes del broche, deben estar en su anverso. (Imagen 1)
(Imagen 1)
El proceso “original” consiste en quemar ambas puntas de los dos cordones y unirlos rápidamente, ya que cuando se queman se adhiere al otro sin problemas. Esa unión, la pasamos por el broche de dientito, crea un pequeño circulo, ahí pasamos la parte larga de los cordones.
Igualmente, esta parte se las mostraré cuando haga otro, porque creo que este collar lo perderá pronto, pero igual se las quería indicar.
Ahora bien, pasamos los otros extremos del cordón por la otra parte del broche. La cuerda marrón que queda suelta, la pasamos debajo del marrón que queda tensado y en esa orejita que forma, pasamos la punta del color marrón y jalamos, así creamos un nudo para sostener. De igual forma, hacemos con el verde, cordón suelto pasarlo debajo del tensado y con la orejita formada, pasamos la punta de este. (Imagen 2)
Las puntas de los cordones sueltos deben quedar a las afueras.
(Imagen 2)
PASO 3
Tejido…
Nota: El color que ira en el medio, que en mi caso es el verde, debe quedar a mano izquierda y es justamente con ese, con el que se inicia el tejido.
Para mejor entendimiento:
• Cordón verde suelto: lo llamaré cordón 1
(Imagen 3)
(Imagen 4)
(Imagen 5)
Las imágenes son de mi archivo personal, tomadas con mi celular Redmi 9A. Portada diseñada en CANVA. Texto traducido en DeepL
• Cordón Marrón suelto: lo llamaré cordón 2
El cordón 1 lo pasamos por encima de los dos cordones tensados, se formará como una especie de oreja.
El cordón 2, pasarlo por encima del cordón 1, luego debajo de los dos tensados y de ultimo, por encima de la pequeña oreja que dejo el cordón 1. Este cordón 2 también dejará una pequeña oreja, pasar el cordón 1 por debajo de esta oreja.(Imagen 3)
(Imagen 3)
Jalamos ambos cordones, haciéndose la primera ola o tejido, como se muestra en la imagen 4.
Siguiente a ese, el cordón 2 se pasa encima de los cordones tensados y por debajo del cordón 1.
Este cordón 1 se pasa por encima del cordón 2 y debajo de los tensados y jalamos.
(Imagen 4)
Hacemos el mismo proceso otra vez, cuando ya tengas 3 olas o tejidos hechos, tocará poner la argolla (esta parte es opcional). El cordón 1 debe quedar de lado derecho.
Tomamos la argolla, pasamos el cordón 1 a través de ella y encima de los tensados; el cordón 2 por encima del cordón 1 y debajo de los tensados y jalamos. Aquí me faltó enderezar la argolla, que quedará en su centro y pasarle otro cordón nuevamente. (Imagen 5)
(Imagen 5)
Ya después seguimos tejiendo hasta llegar a la otra parte del broche; cuando lleguen ahí, si les sobra cordón, lo cortan, que quede como 1 dedo de sobra, voltean el collar, que quede al reverso, queman bastante la punta y rápidamente lo pegan con un dedal y así queda limpio el nudo.
Este fue el resultado, casi no me alcanzaba el cordón, pero algo se hizo 🤣. También pueden hacer pulseras para uno mismo con está técnica. Espero traerle nuevamente uno mejor explicado, incluso otros modelos.
Gracias por leer mi post. Espero que les haya gustado. Estaré atenta a responder sus comentarios. Pueden visitar mi blog, seguir mis contenidos y redes sociales
FACEBOOK / INSTAGRAM / TWITTER
0
0
0.000
Excelente idea para nuestras mascotas, pensar que podemos hacerlo nosotros mismos por un bajo costo, los he visto en las tiendas costosísimos, gracias por compartirnos tu excelente tutorial
Si, últimamente me he dicho "¿por qué no intento hacerlo? si tengo la mayoría de los materiales o se consiguen a un bajo costo, prefiero intentarlo. La verdad me encantó hacer este collar y las muchas creaciones que se puedan hacer con los mismos. Muchas gracias 😊
Muchas gracias 😊
What is that cute doggo name 😍😍
Great post btw!
Su nombre es Oddie, se rescató de la calle hace poco y ha formado parte de nuestra familia. Muchas gracias 😊
His name is Oddie, he was rescued from the street recently and has been part of our family. Thank you very much 😊
Bello el collar y el modelo oddie😍
Muchas gracias! 🤗
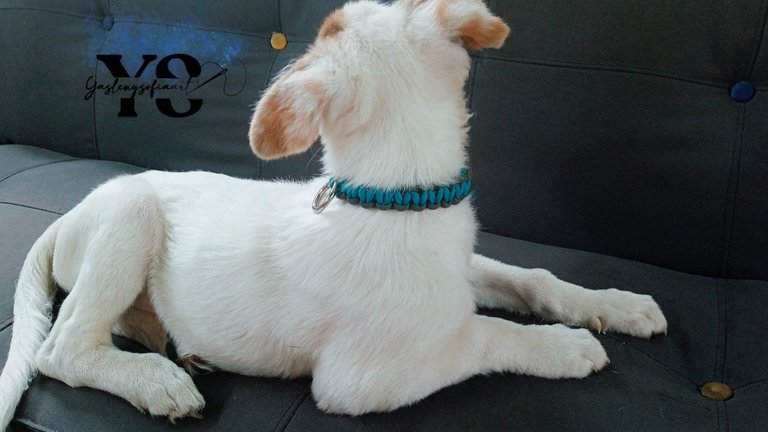
Ese pequeño peludo quedó muy elegante con ese collar. Esos colores le quedan muy bien.
Muchas gracias 😊
Este collar para tu mascota quedó bellísimo, resalta muchísimo en él. El color y el diseño de Paracord son geniales.
Estos collares son hermosos y lo bueno es que uno puede hacer el diseño y combinación que más desee. Muchas gracias 🤗
Un bello collar, amiga, ha quedado muy bien, además se ve resistente, algo que le durará bastante al dueño jjj. Saludos
Si, el material es realmente resistente, aunque creo que lo terminara perdiendo, porque aun es cachorro 😄
Que gran idea a poner en practica precisamente en estos dias ya que mis perras necesitan unos collares, aunque no se si podre hacerlo bien, saludos
Intentalo, no se pierde nada y lo mejor, es que puedes combinarlo con los colores que mejor te guste 😊 Suerte!
Muchas gracias por tus palabras.