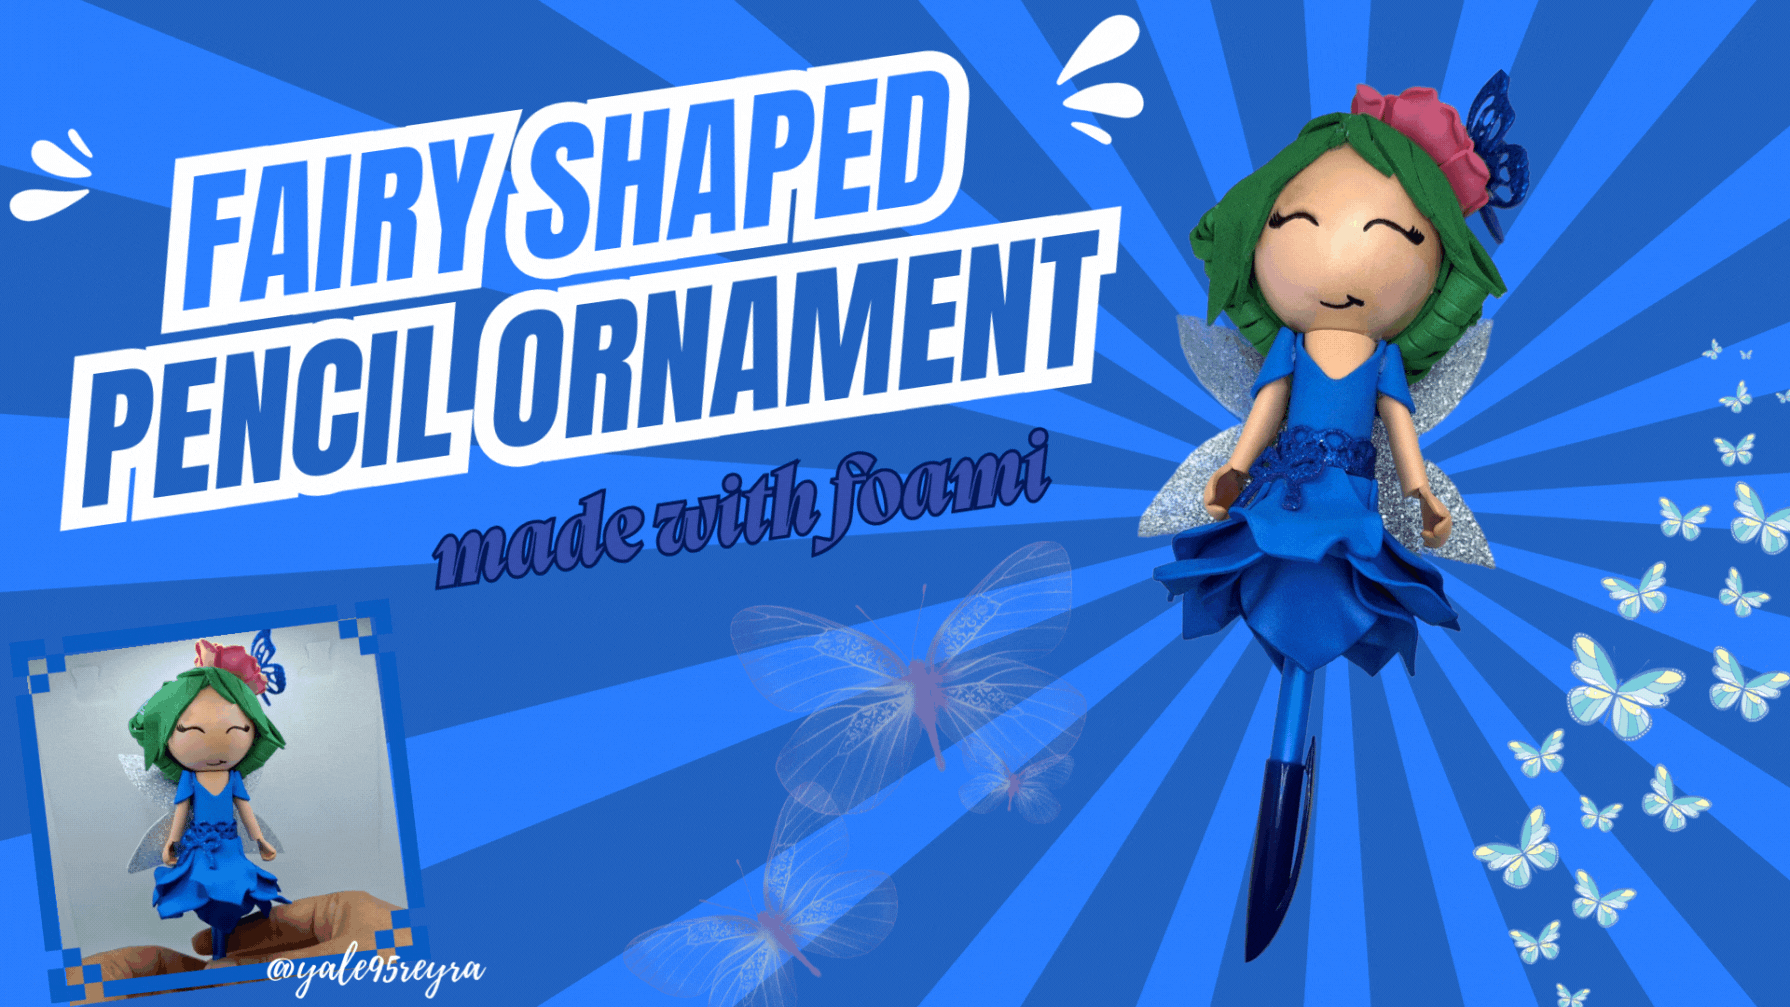
[EN-ES] Fairy shaped pencil ornament // Adorno para lápiz con forma de hada.
Hello, dear friends who love crafts, today I want to show you how to make an ornament for pens and pencils in the shape of fairies. In many places these types of ornaments are known as fofuplumas because they are fofuchas that are made to decorate the pens, they are almost always in smaller size because if they are made very large they are very uncomfortable and heavy when writing. If you do not know what are the fofuchas, they are dolls that are made with polystyrene balls and generally the clothes and accessories are made with foami. There are fofuchas of famous characters, animated and even personalized, so the shapes, sizes and colors that we can find are varied.
Some time ago I was able to buy a package of polyfoam balls to make them, because the foami is easy to get, but the balls are not. The package I bought has several sizes, bigger and smaller to make the shoes. Recently, I bought skin-colored foami, which was the material I needed to get to work with this new project, because before I used deodorant balls and painted the white foami skin color, which is another variant if you do not have these polyfoam balls. Let me show you the materials needed to make this fairy and the step by step of the creative process.
Hola, queridos amigos amantes de las manualidades, hoy quiero mostrarte cómo elaborar un adorno para lápices y bolígrafos con la forma de hadas. En muchos lugares estos tipos de adornos son conocidos como fofuplumas porque son fofuchas que se hacen para decorar los bolígrafos, casi siempre son en menor tamaño debido a que si se hacen muy grandes son muy incómodas y pesan a la hora de escribir. Si no saben lo que son las fofuchas, son muñecas que se hacen con bolas de poliespuma y que generalmente la ropa y accesorios se hacen con foami. Existen fofuchas de personajes famosos, animados y hasta personalizados, así que son variadas las formas, tamaños y colores que podemos encontrar.
Hace un tiempo pude comprar un paquete de bolas de poliespuma para poder hacerlas, pues el foami es fácil de conseguir, pero las bolas no. El paquete que compré tiene de varios tamaños, más grandes y chiquitas como para hacer los zapatos. Recientemente, compré foami color piel, que era el material que me faltaba para ponerme manos a la obra con este nuevo proyecto, pues antes usaba bolas de desodorante y pintaba el foami blanco de color piel, que es otra variante para si no cuentan con estas bolas de poliespuma. No se diga más, a continuación, te muestro los materiales necesarios para hacer esta hada y el paso a paso del proceso creativo.
🦋Materials // Materiales🦋
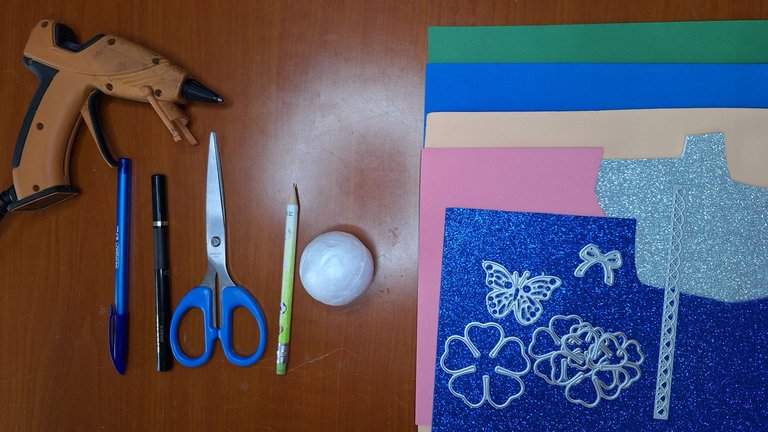
- Foami of various colors / Foami de varios colores
- Dies in the shape of butterfly, rose and lace (optional) / Troqueles con forma de mariposa, rosa y encaje (opcional)
- Polyfoam ball 16 cm in circumference / Bola de poliespuma de 16 cm de circunferencia
- Pencil / Lápiz
- Scissors / Tijera
- Pen / Bolígrafo
- Black marker / Marcador negro
- Silicone / Silicona
🦋Step by step // Paso a paso🦋
 |  |
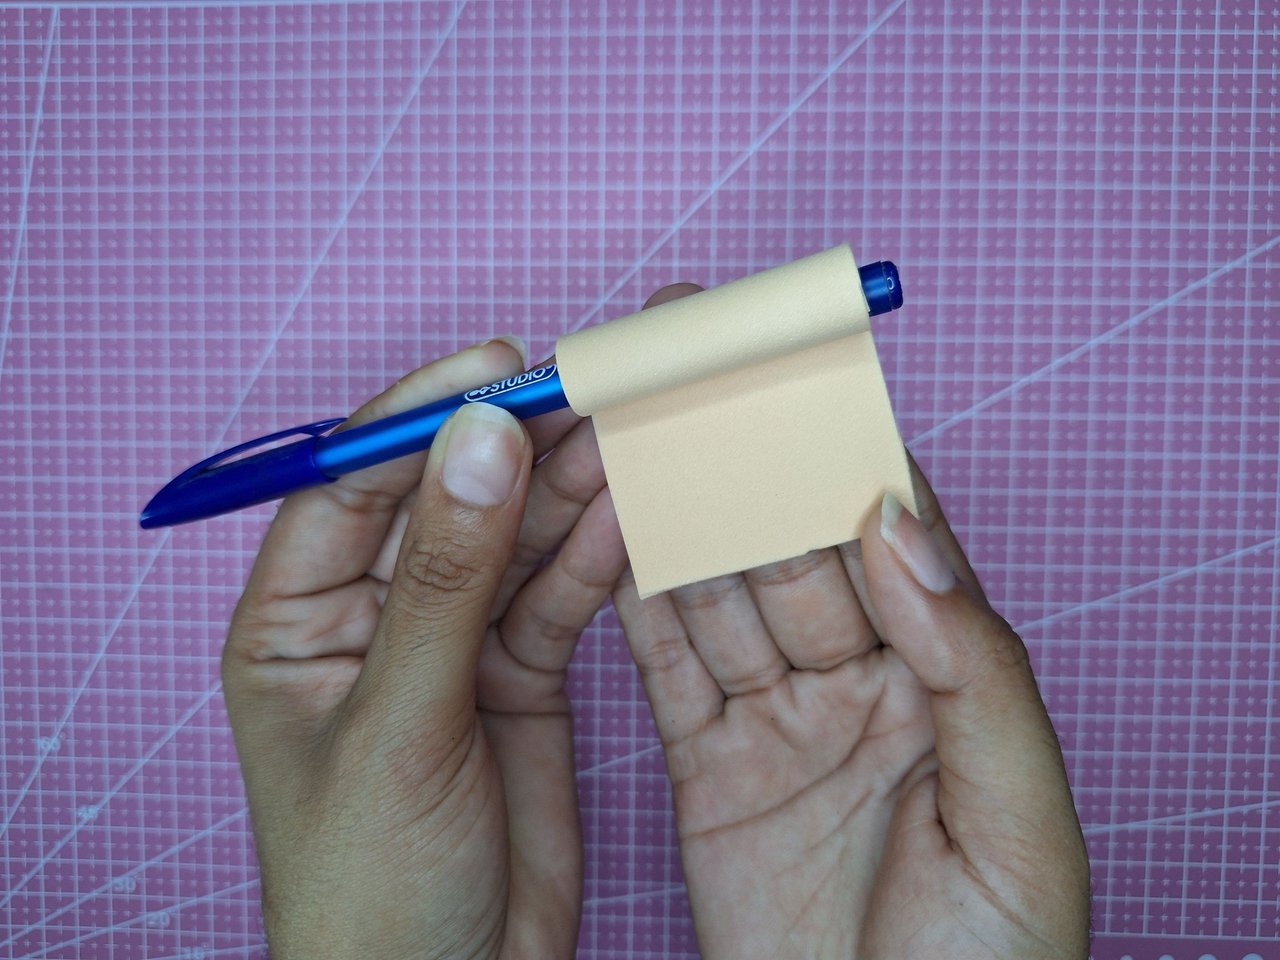 | 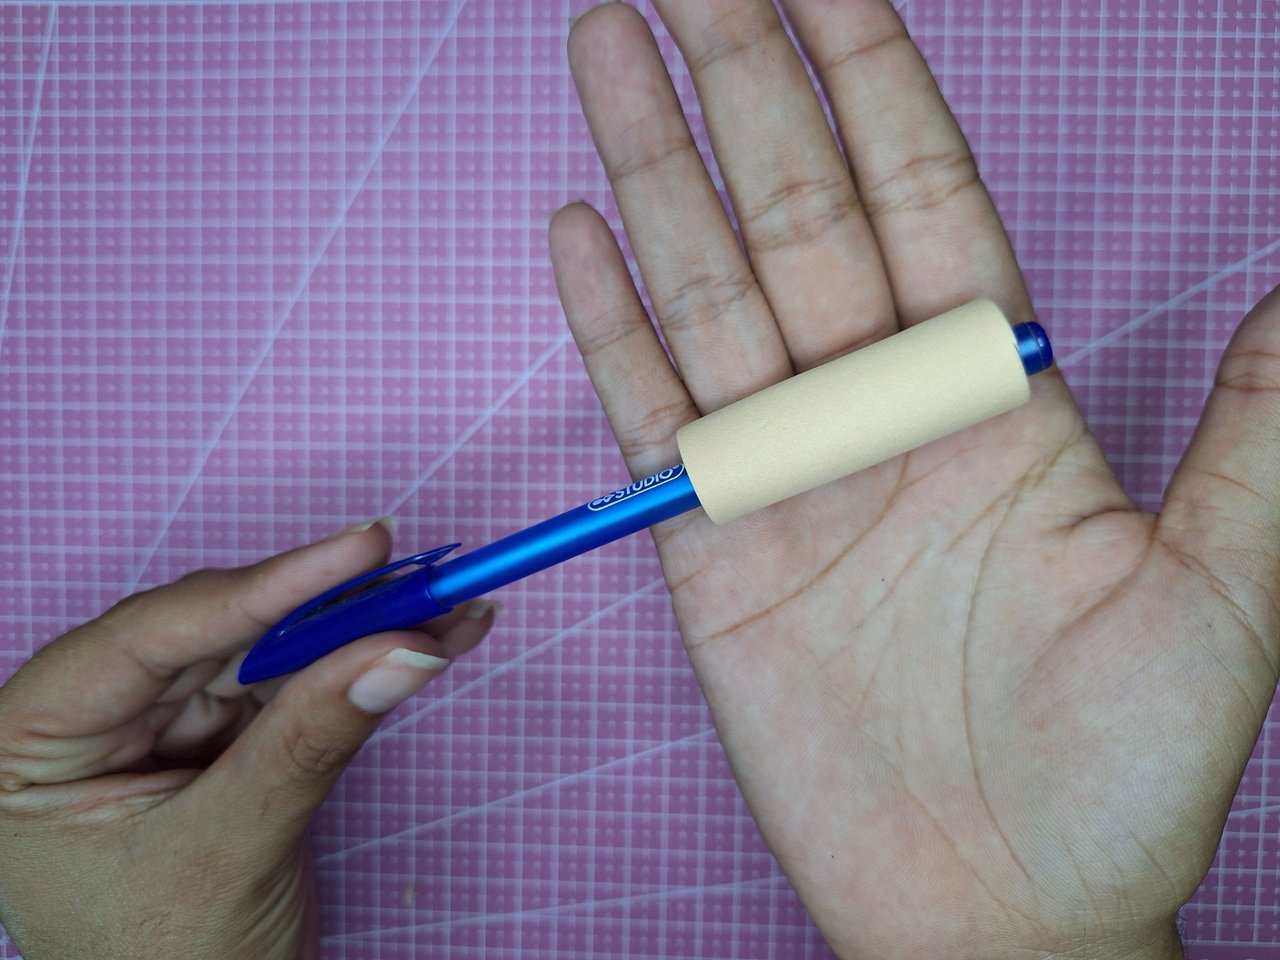 |
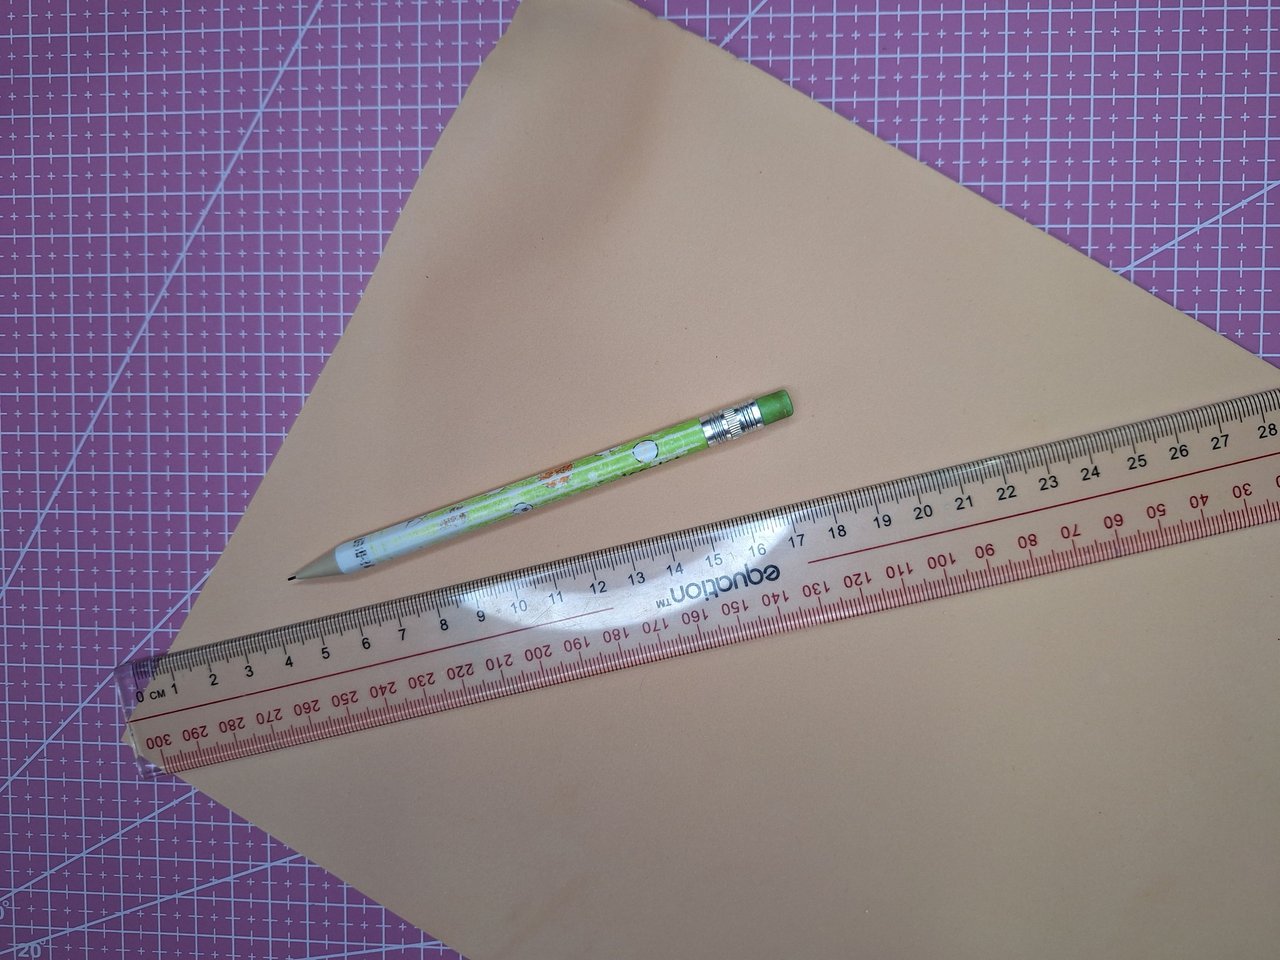
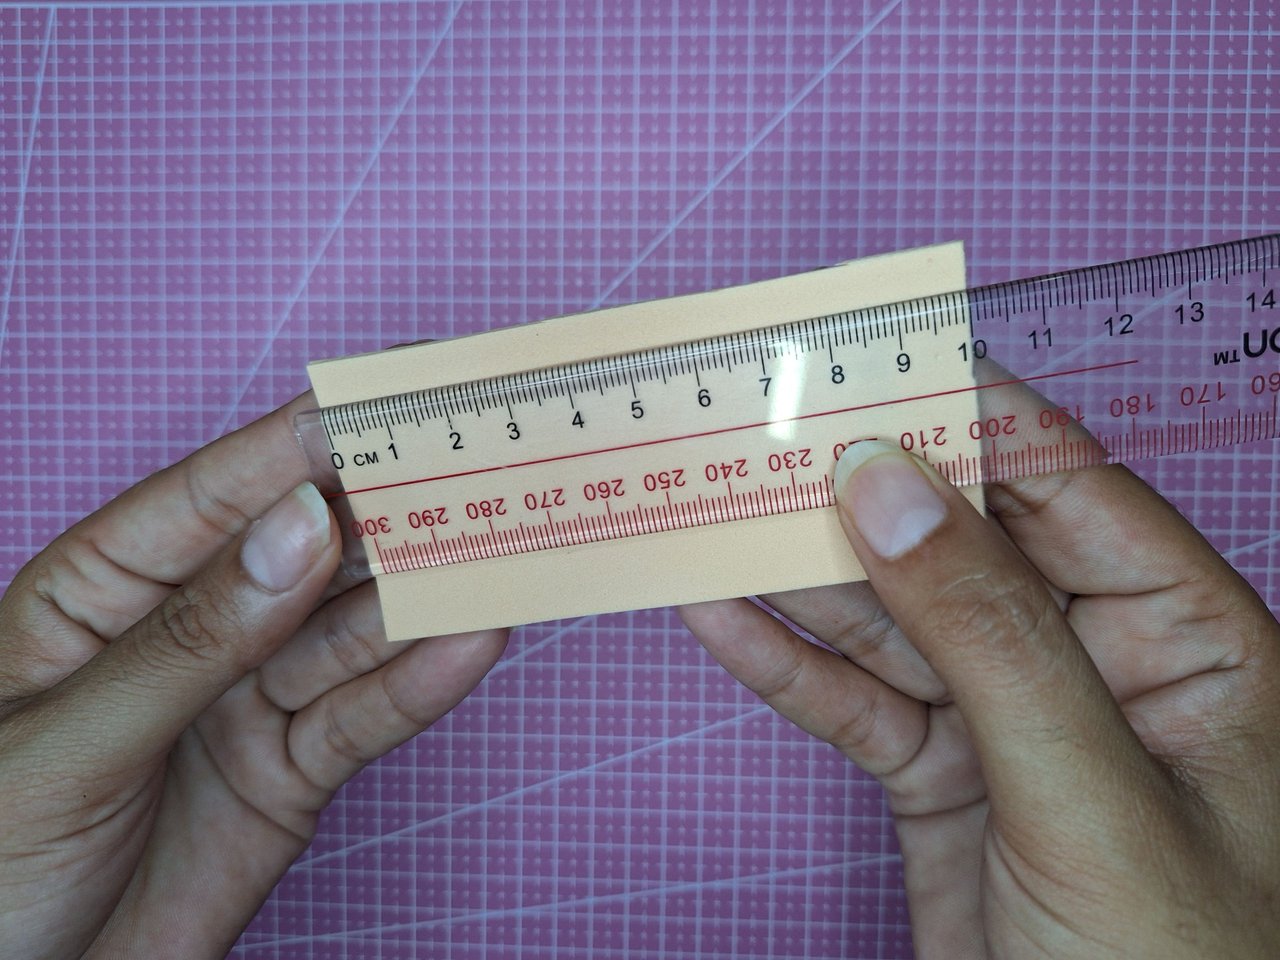
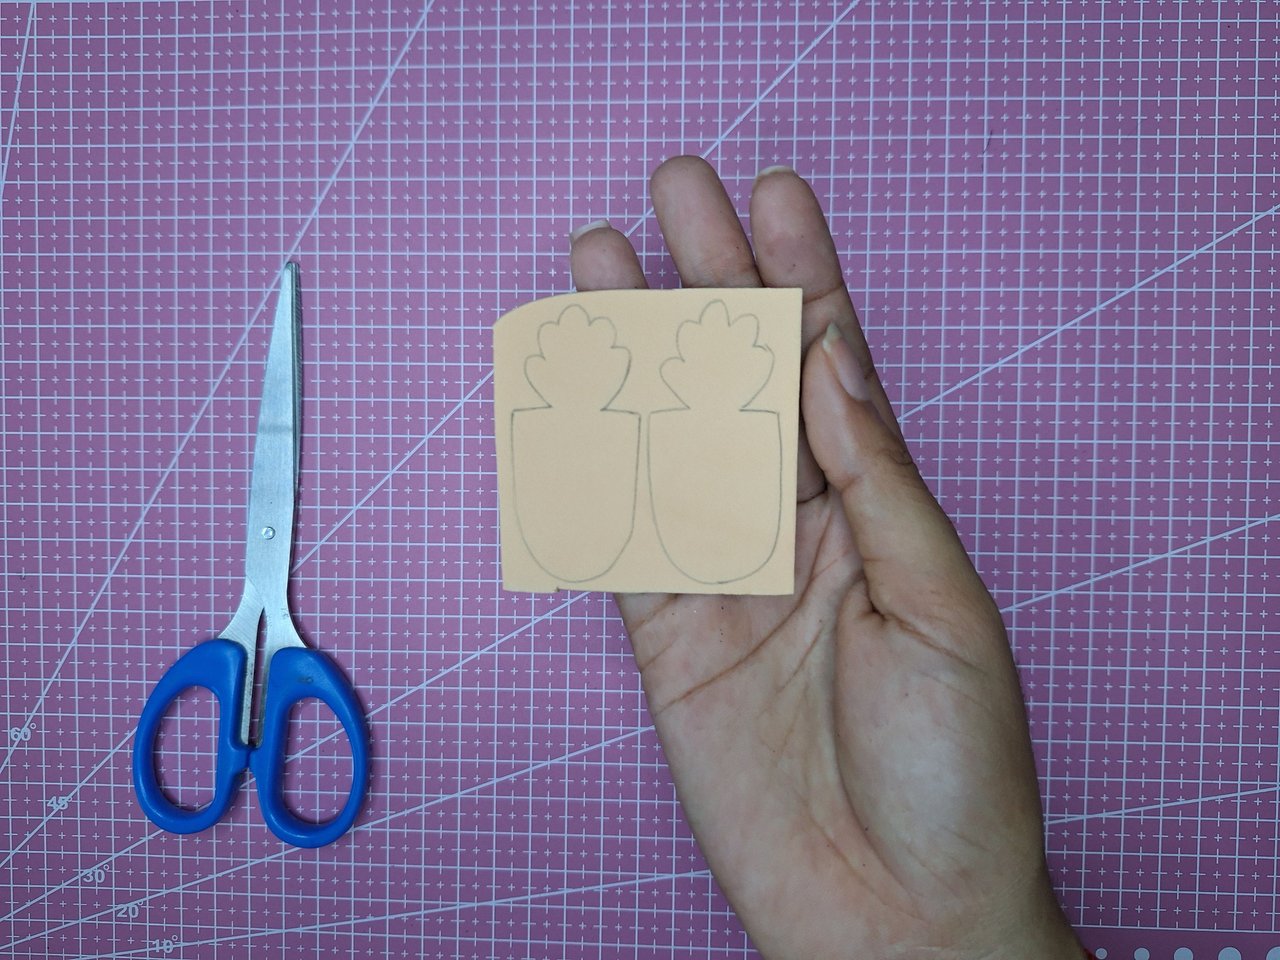
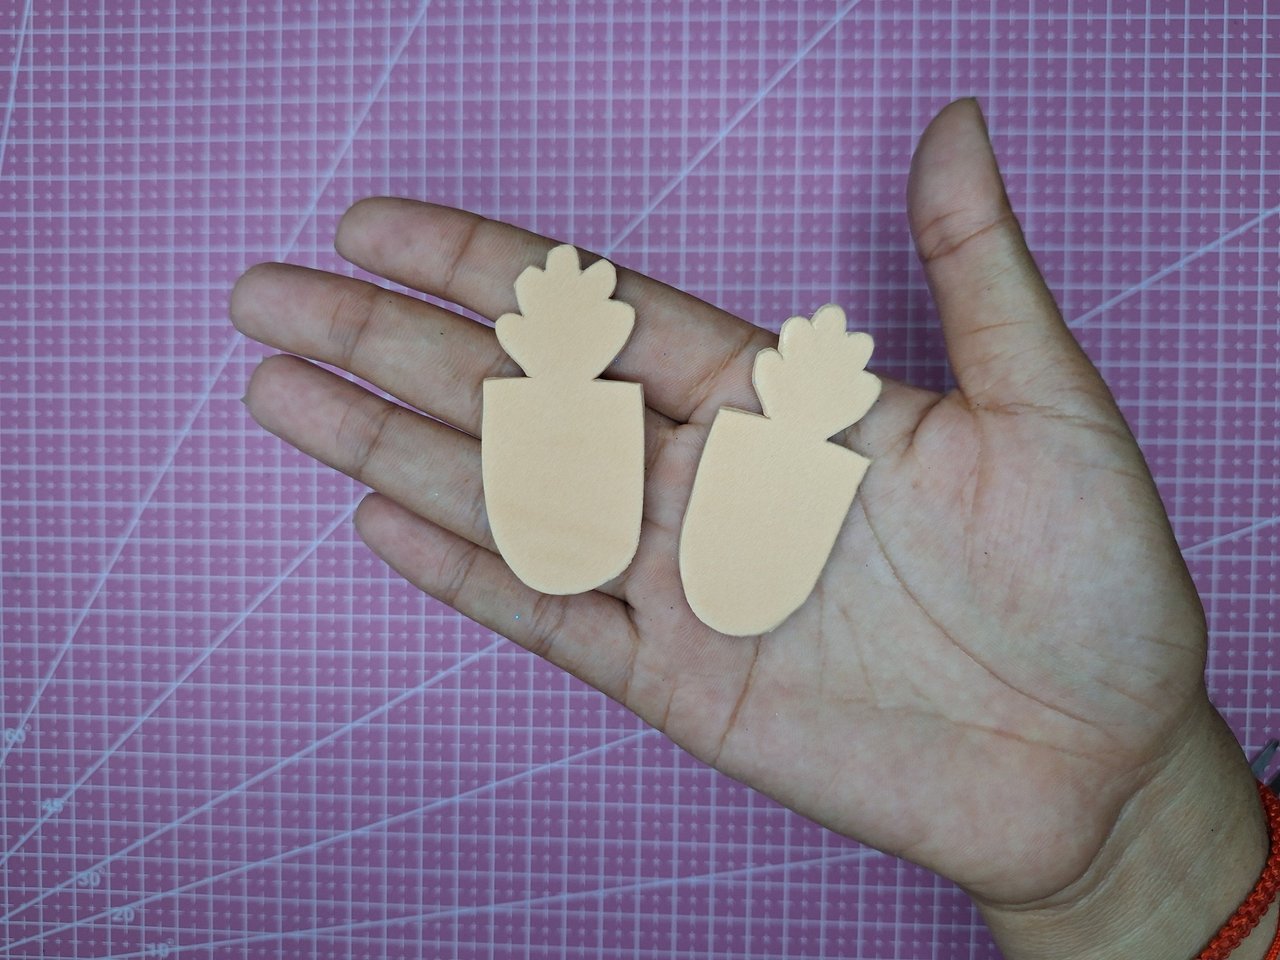
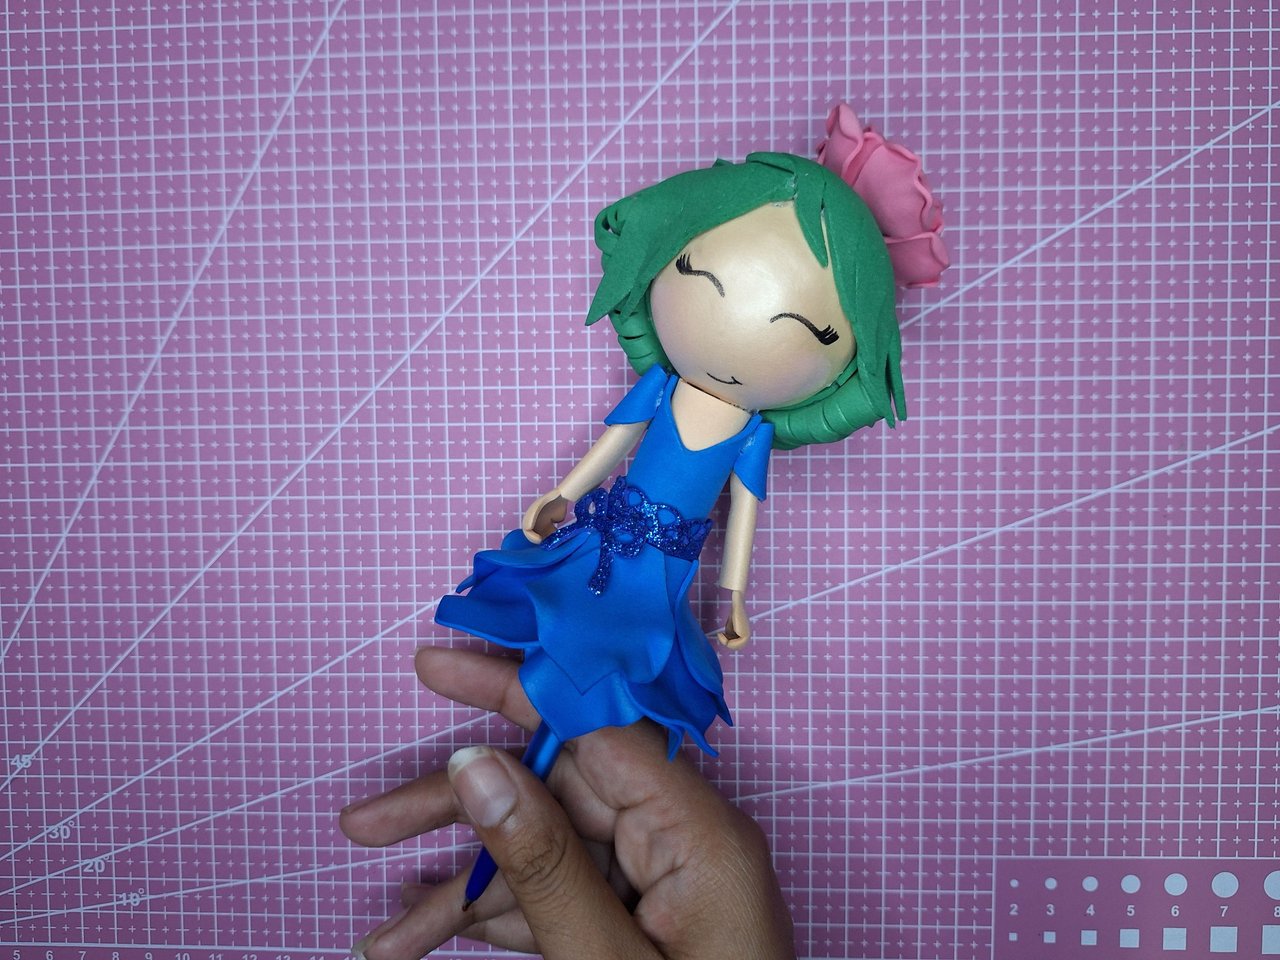
On a sheet of skin-colored foami, mark and cut out a 5 cm x 10 cm piece, which is rolled on top of a pen or pencil. This is the body of the fairy.
En una lámina de foami de color piel, marcar y recortar una pieza de 5 cm x 10 cm, la cual se enrolla en la parte superior de un bolígrafo o lápiz. Este es el cuerpo del hada.
 |  |
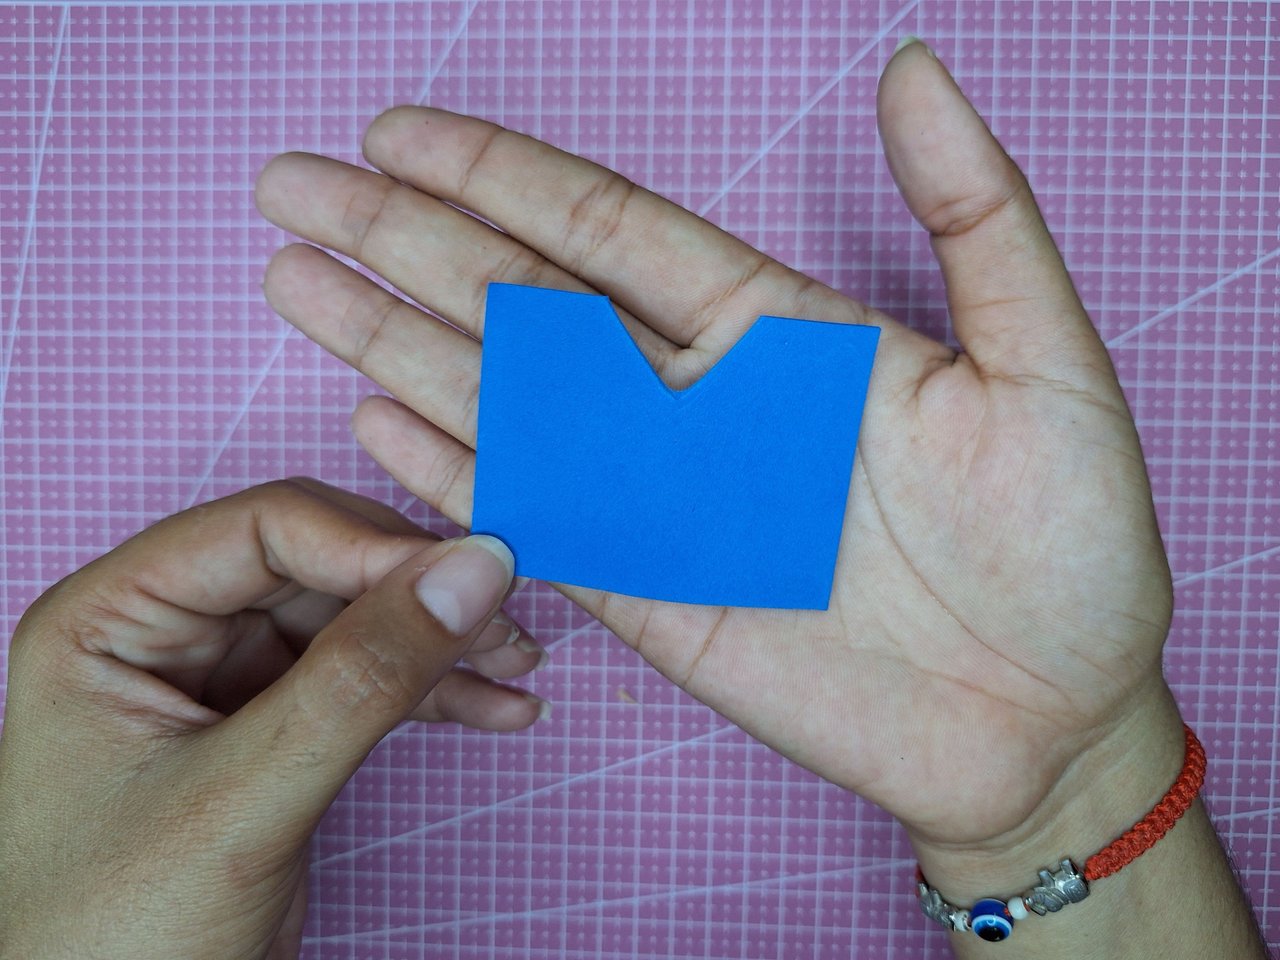 |  |
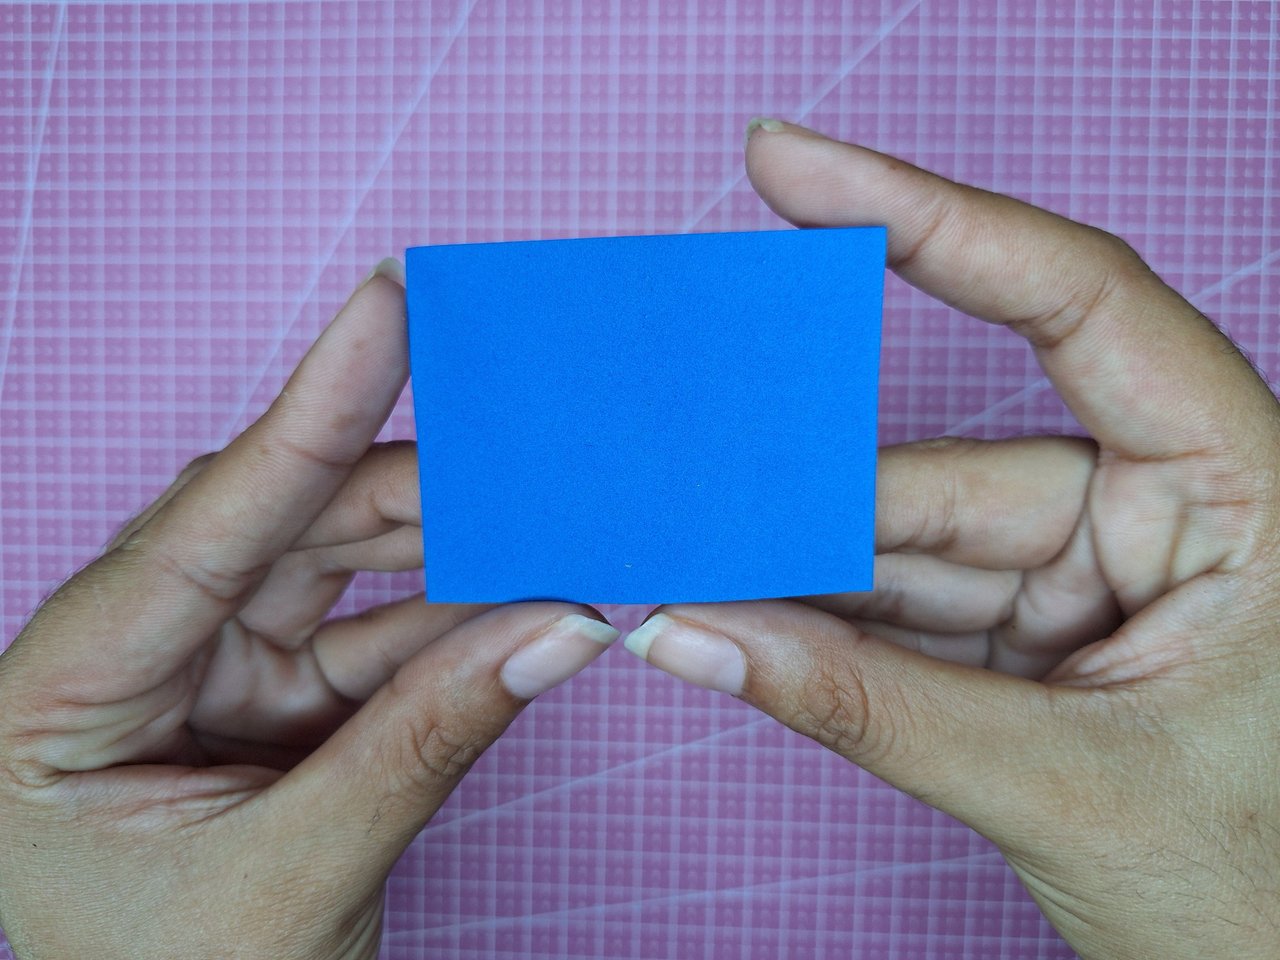
Cut a 5 cm x 6.5 cm piece of blue or the color you want to make the dress. Fold it in half and make a cut in the corner of the fold so that there is a triangle right in the center. Then glue it on top of the body as if it were the upper part of the dress.
Cortar una pieza de 5 cm x 6.5 cm de color azul o el color que desees para hacer el vestido. Se dobla por la mitad y se le hace un corte en la esquina del doblez para que quede un triángulo justo en el centro. Luego se pega encima del cuerpo quedando como si fuera la parte superior del vestido.
 |  |  |
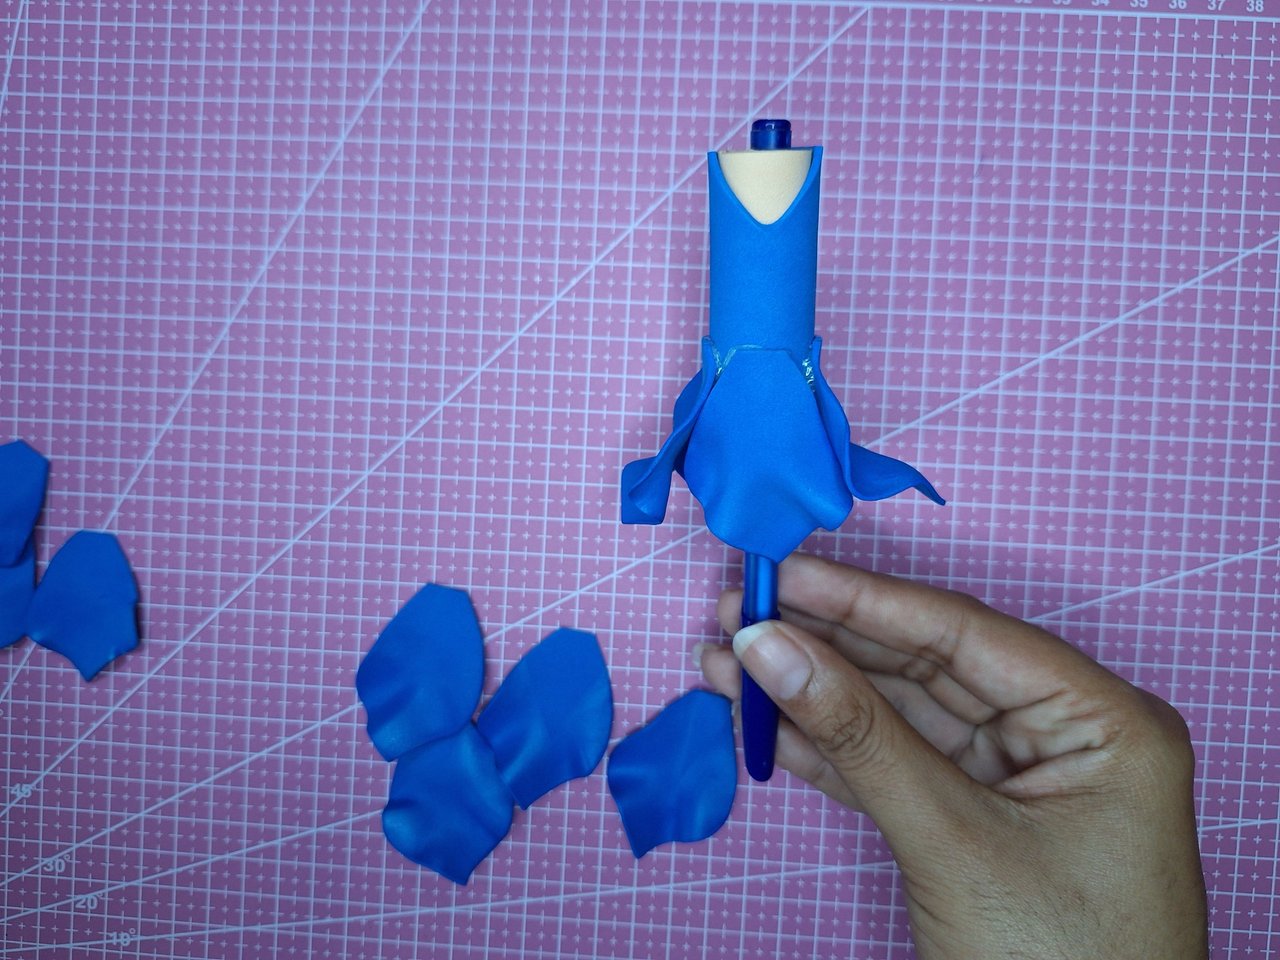 |  |
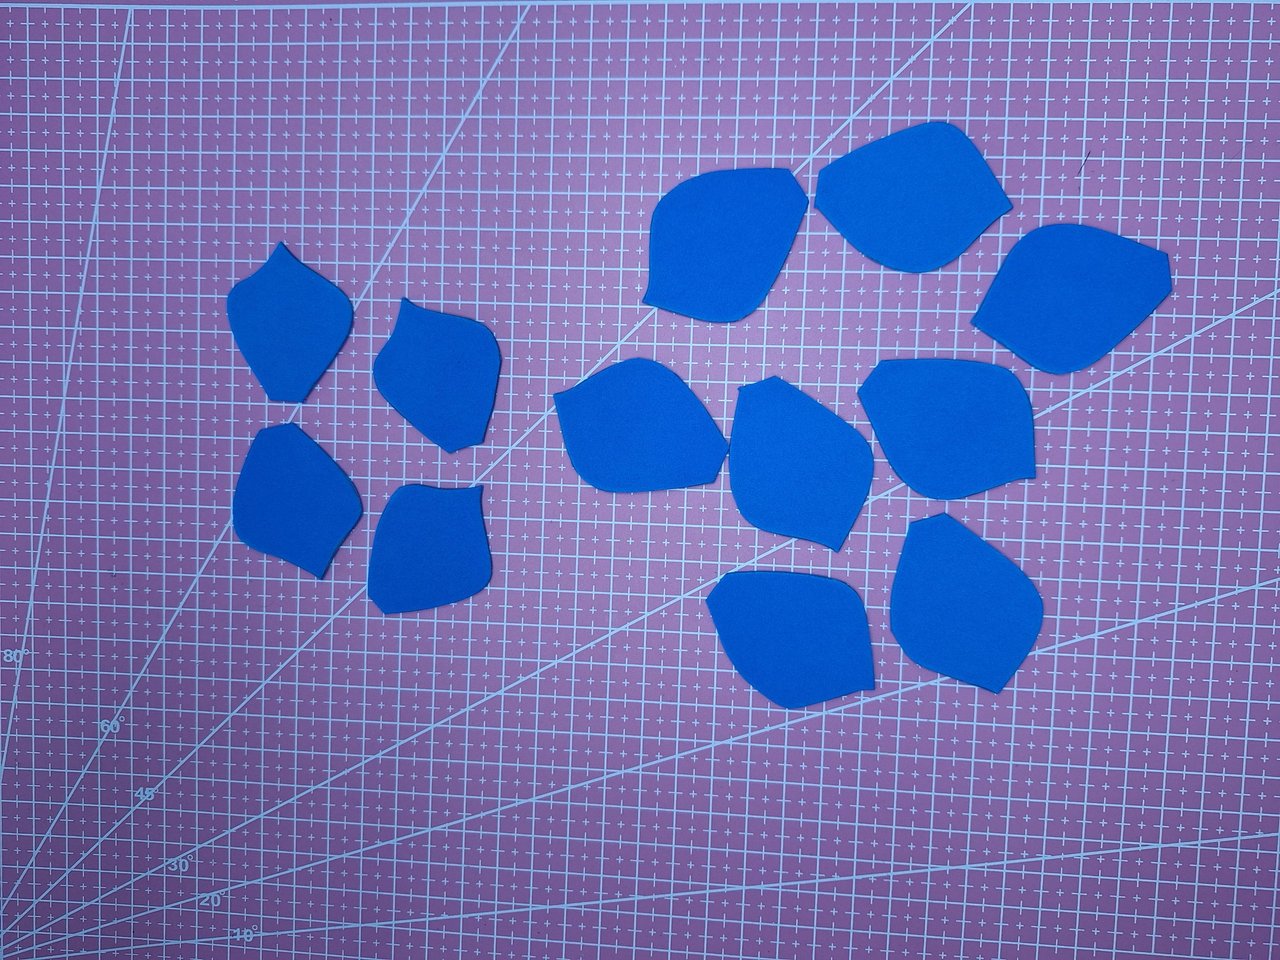
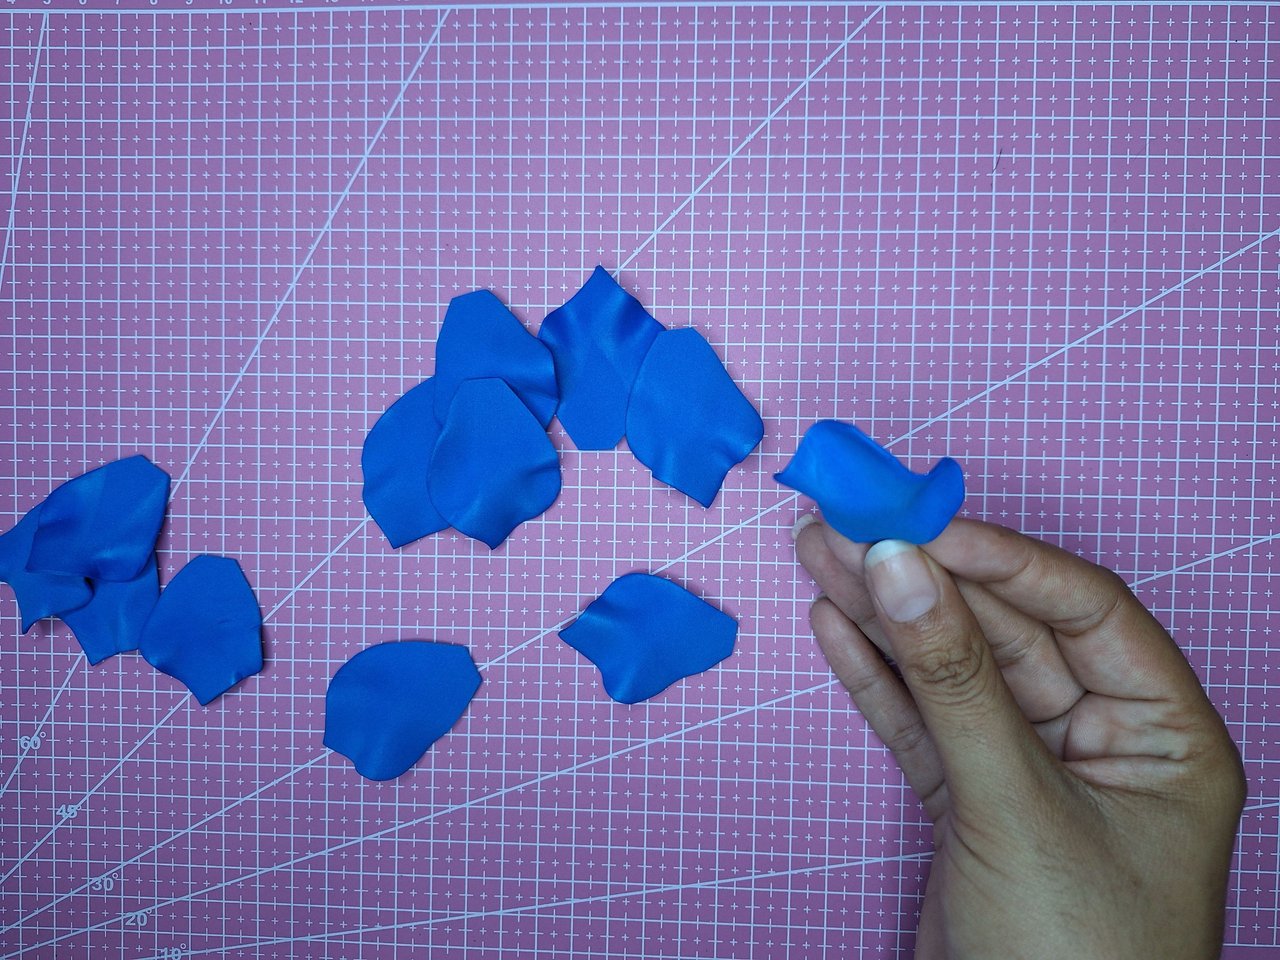
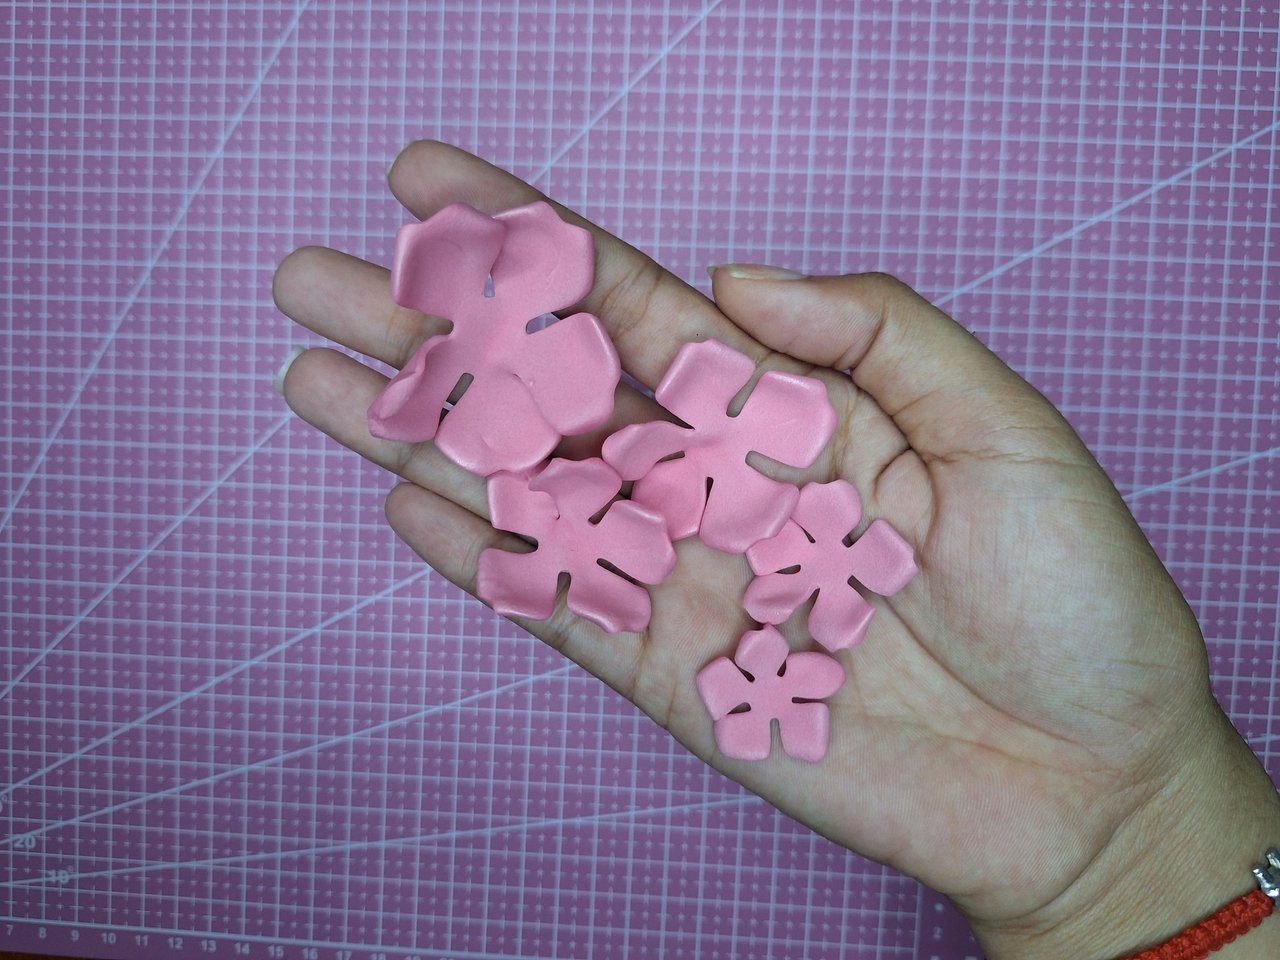
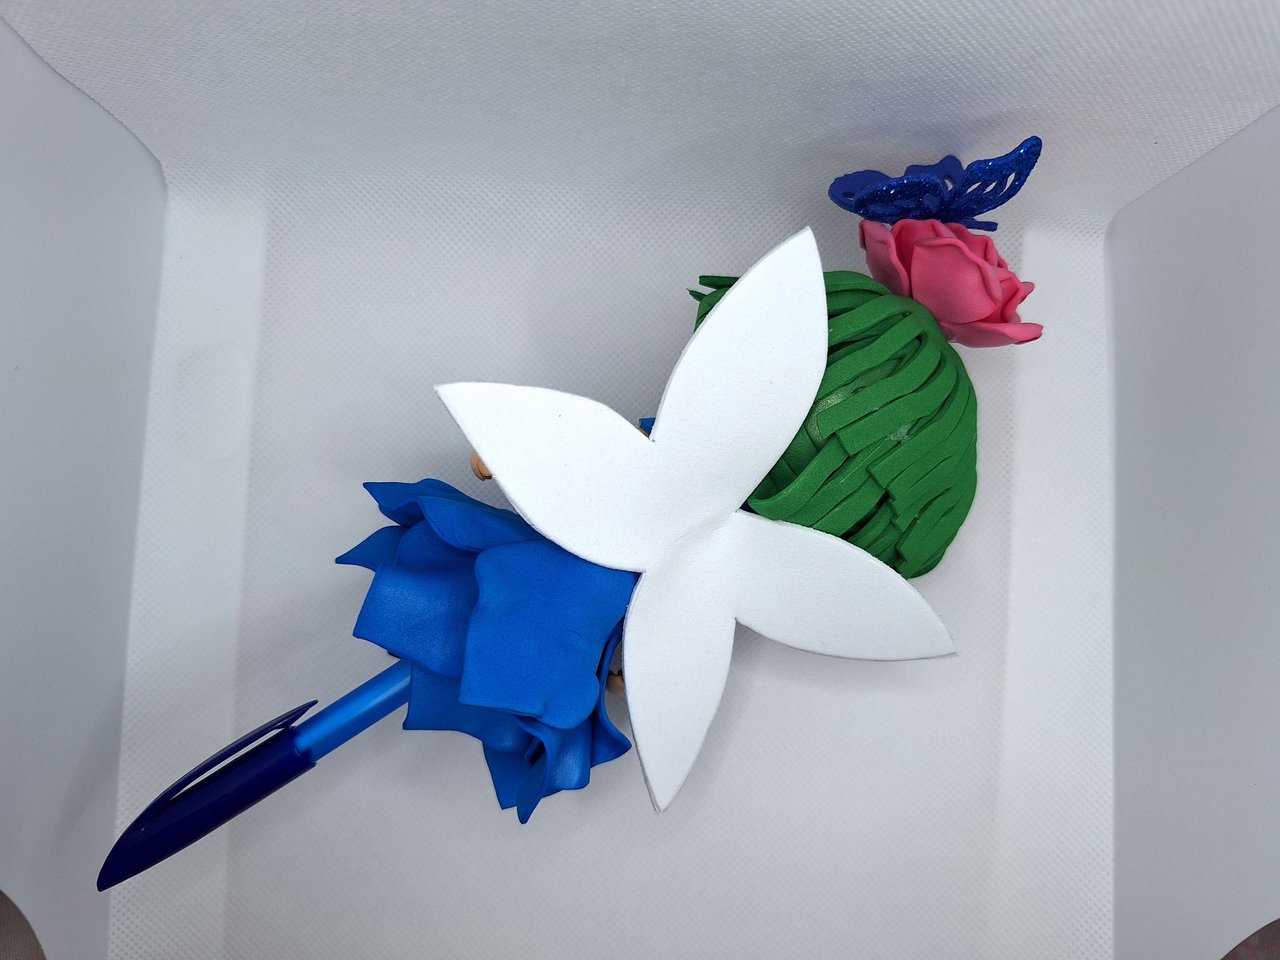
The lower part of the dress will be the petals of a flower. Therefore, you draw on foami of the same color, two petals, but of different sizes, one of 4 cm and the other of 5 cm. When you cut them out, you can use them as molds so that the rest of the petals are the same size. Make 4 pieces of 4 cm and 8 pieces of 5 cm. When they are all ready, heat an iron, either domestic or for hair, and give heat to the sides of the petals to make waves with your fingers. Glue 4 petals of 5 cm, one next to the other, then glue the rest of the same size at the joints. Finally, glue the four smaller petals.
La parte inferior del vestido serán los pétalos de una flor. Por lo tanto, se dibuja en foami del mismo color, dos pétalos, pero de diferentes tamaños, uno de 4 cm y el otro de 5 cm. Al recortarlos, los puedes usar como moldes para que el resto de los pétalos queden del mismo tamaño. Hacer 4 piezas de 4 cm y 8 piezas de 5 cm. Cuando estén todos listos, calentar una plancha, ya sea doméstica o para el cabello, y darle calor a los laterales de los pétalos para con los dedos hacerle las ondas. Pegar 4 pétalos de 5 cm, uno al lado del otro, luego el resto del mismo tamaño pegarlos en las uniones. Por último, pegar los cuatro pétalos más pequeños.
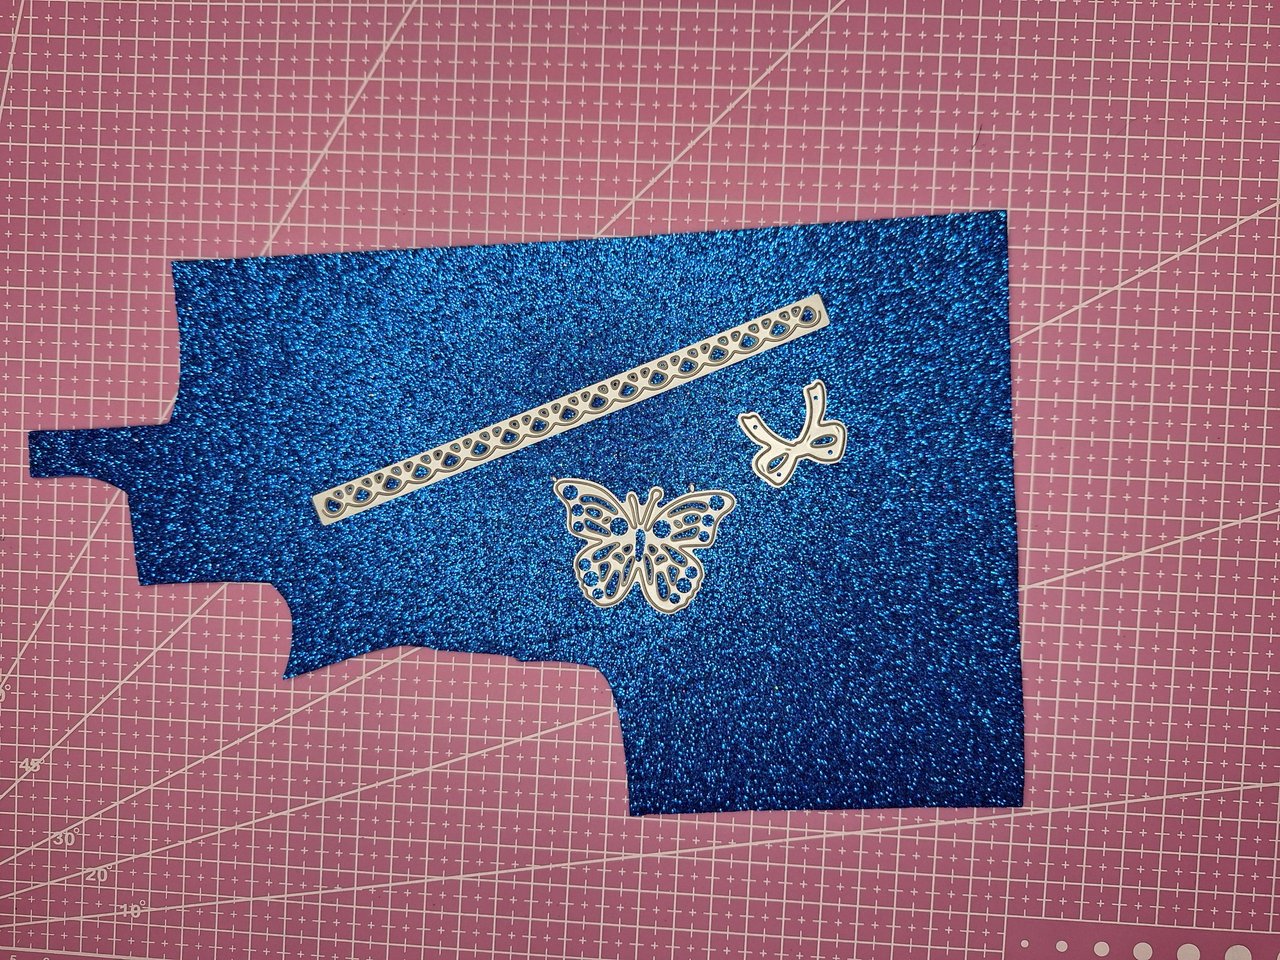 | 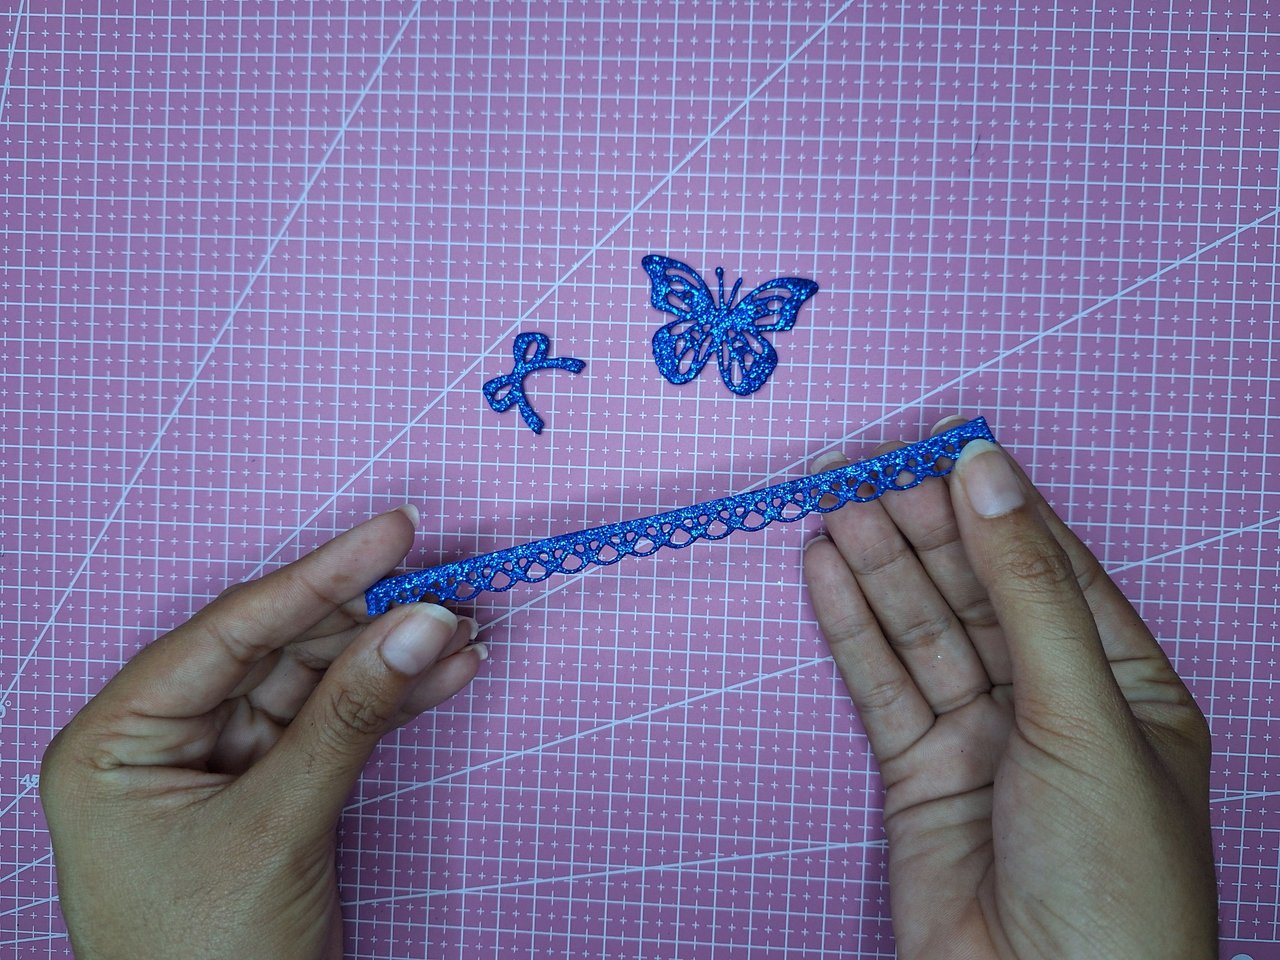 | 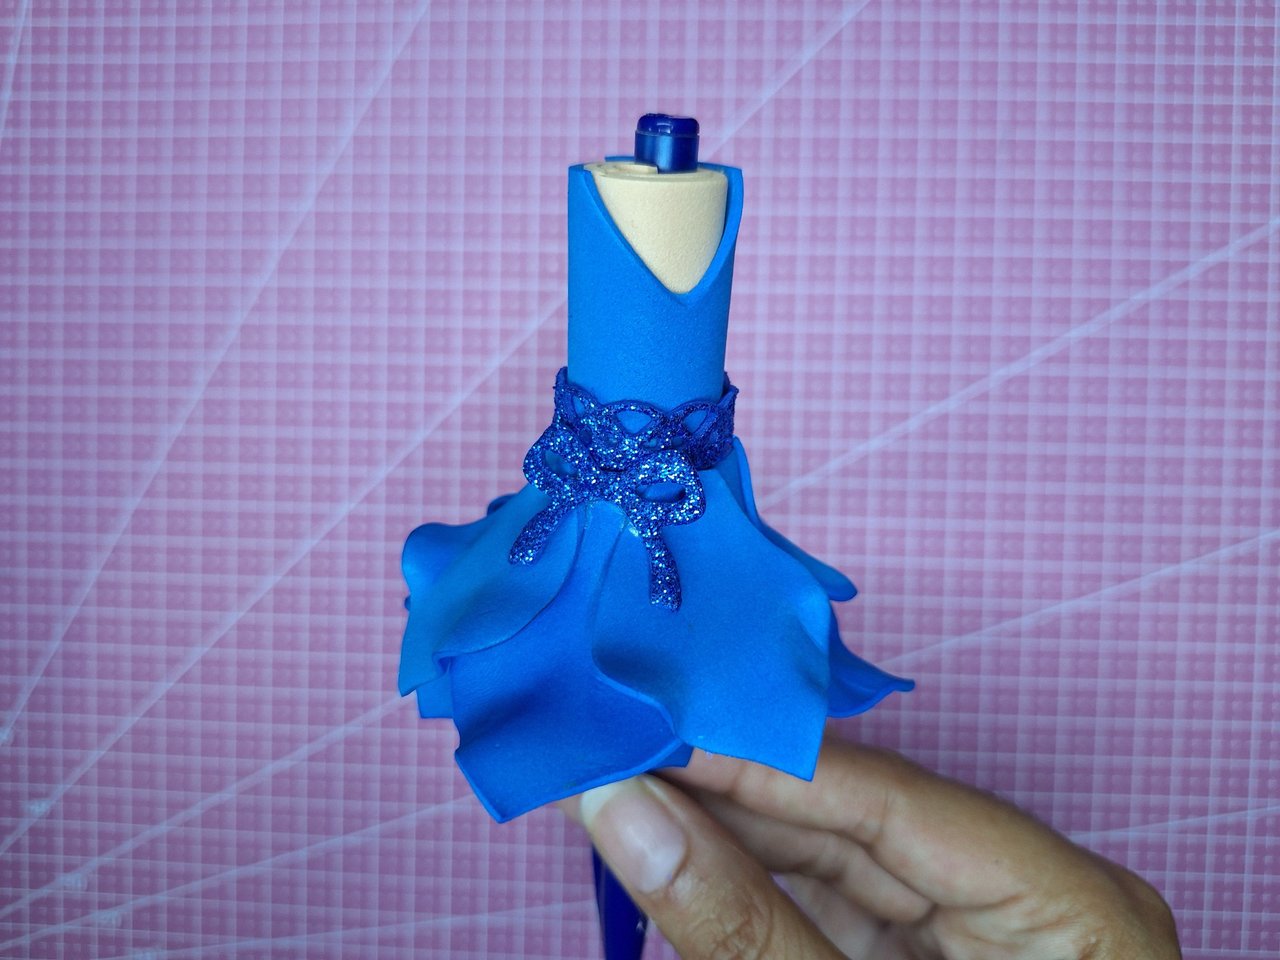 |
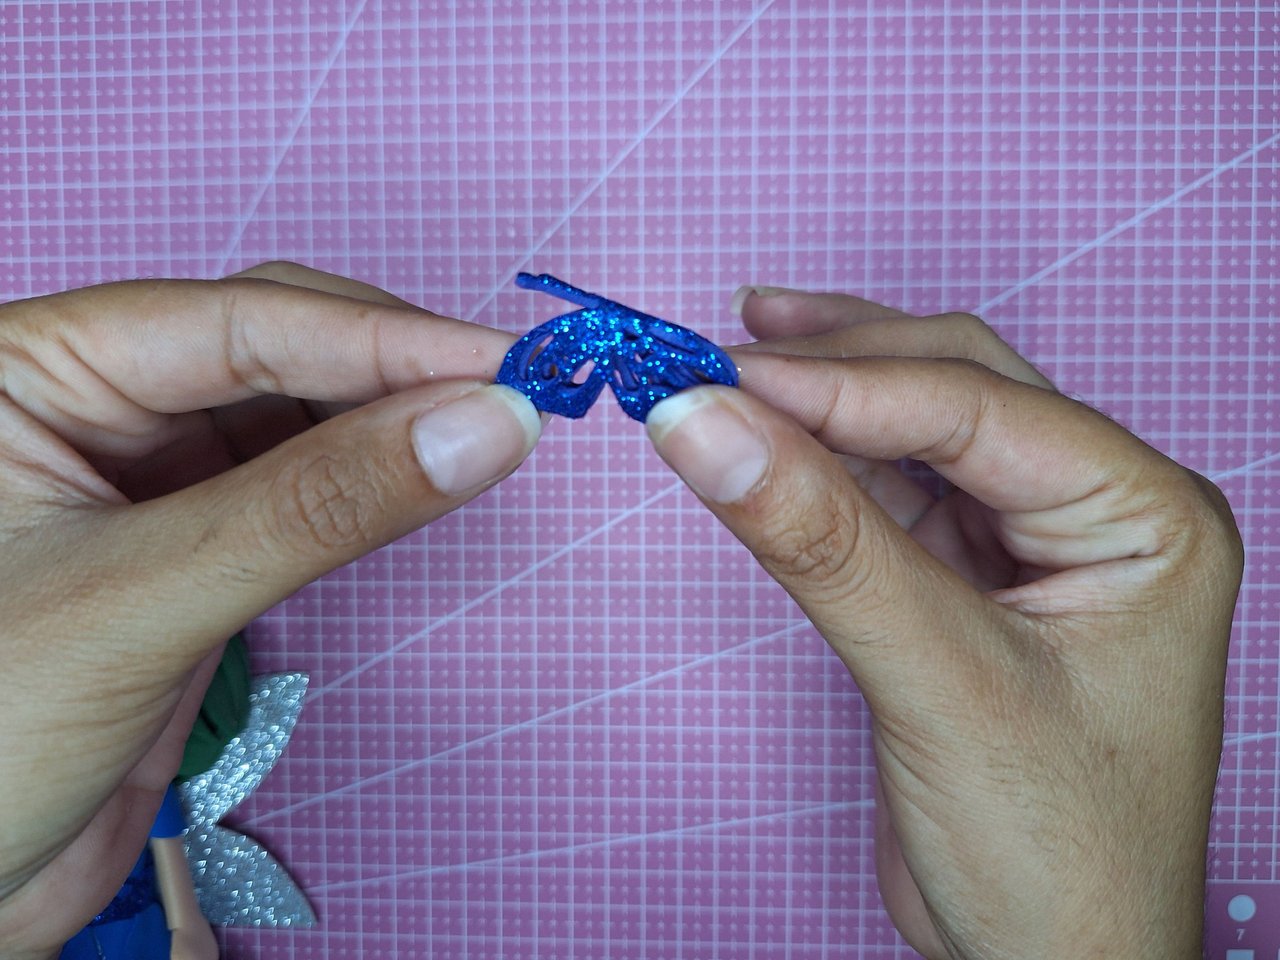
Using cutting dies, cut out a butterfly, bow and lace ribbon in a bright color or one that stands out. If you don't have dies, no problem. Mark the figure on the foami and cut it with the scissors as traditionally done. Then glue the ribbon and bow at the junction of the dress with the petals. The butterfly will be used later.
Con ayuda de unos troqueles de corte, cortar una mariposa, un lazo y una cinta de encaje de un color brillante o que resalte. Si no cuentas con troqueles, no hay problema. Se marca la figura en el foami y se corta con la tijera como se hace tradicionalmente. Luego pegar la cinta y el lazo en la unión del vestido con los pétalos. La mariposa se utilizará más adelante.
 |  |  |
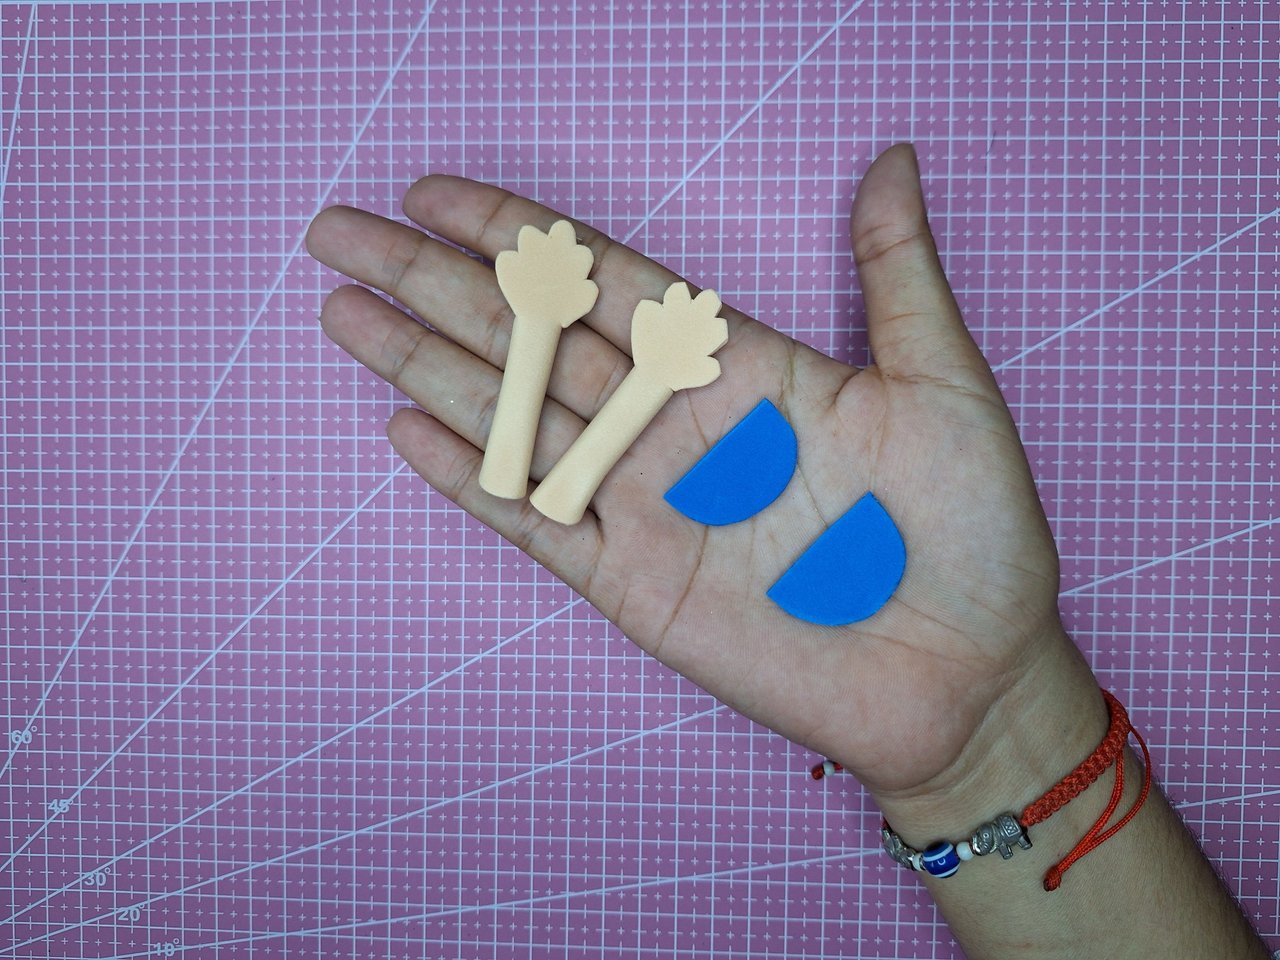 | 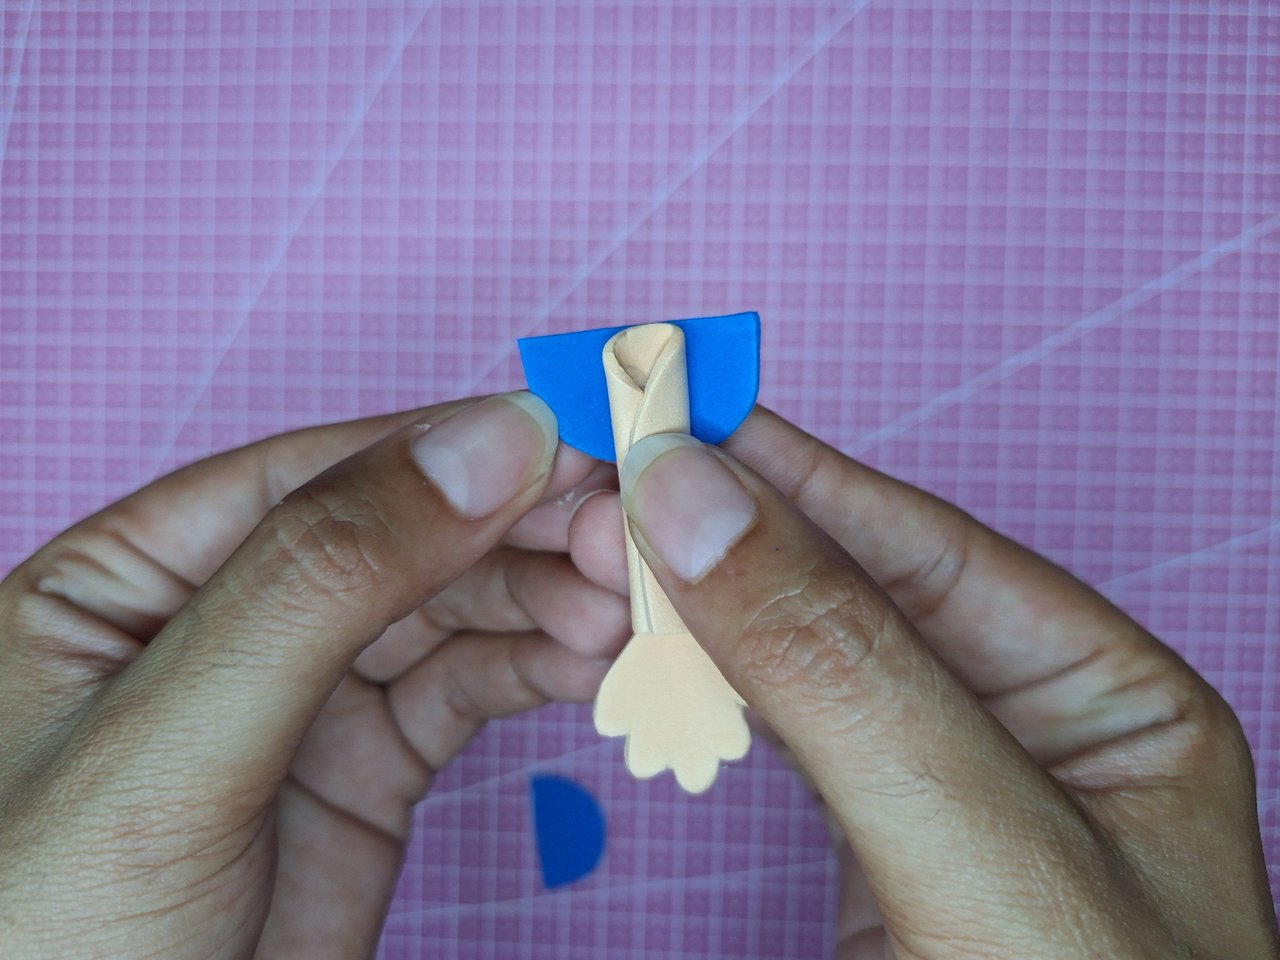 |  |
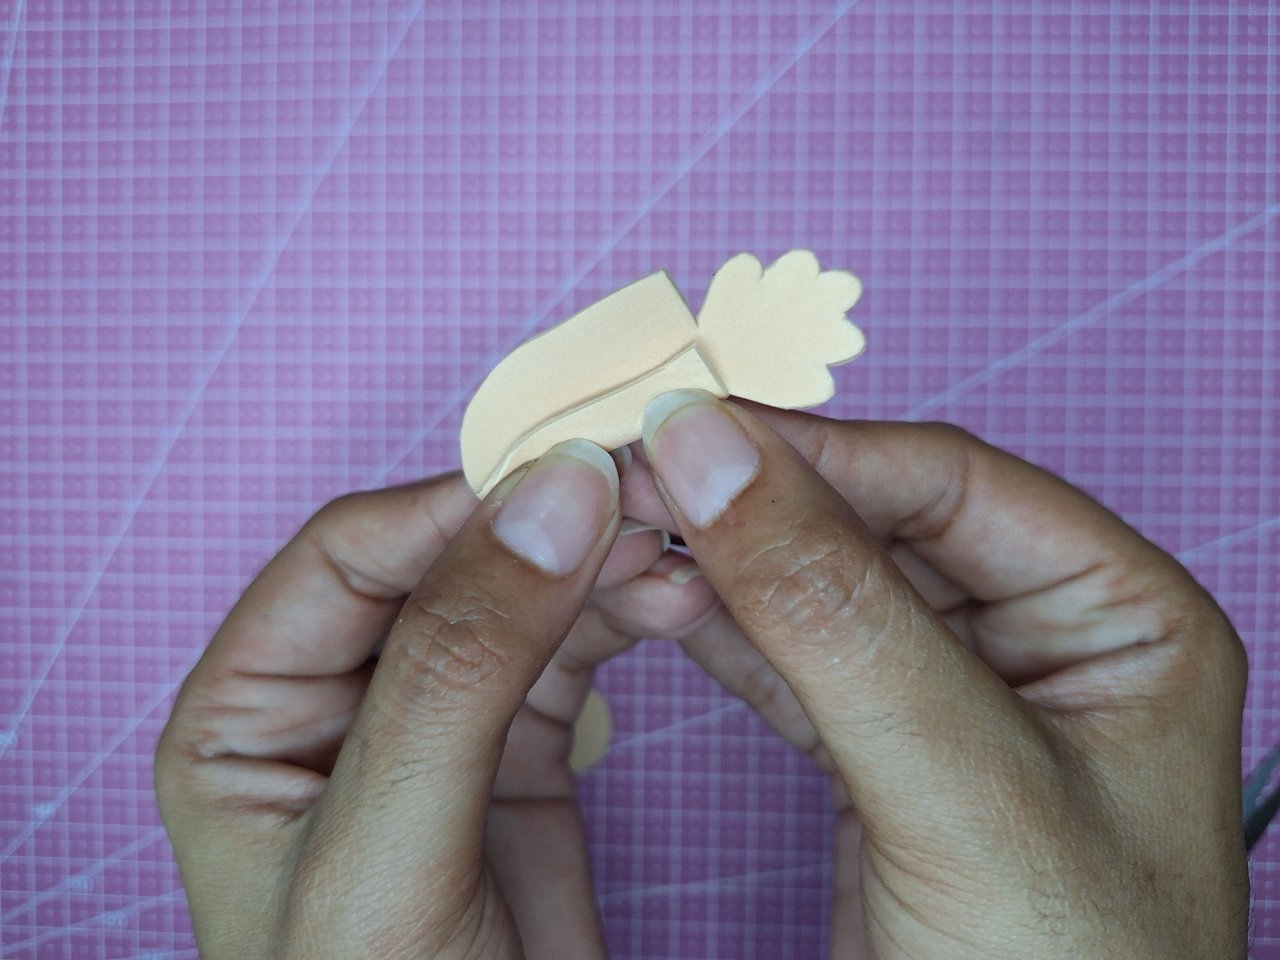
In skin-colored foami, mark the silhouette of two arms, cut them out and glue them together. Make two semicircles of the same color of the dress that will be the sleeves, glue them on the arm right in the middle and then glue the two ends inwards, thus remaining in this way.
En foami color piel, marcar la silueta de dos brazos, se recorta y se pegan. Hacer dos semicírculos del mismo color del vestido que serán las mangas, se pega en el brazo justo en el medio y luego se pegan las dos puntas hacia adentro quedando de esta forma.
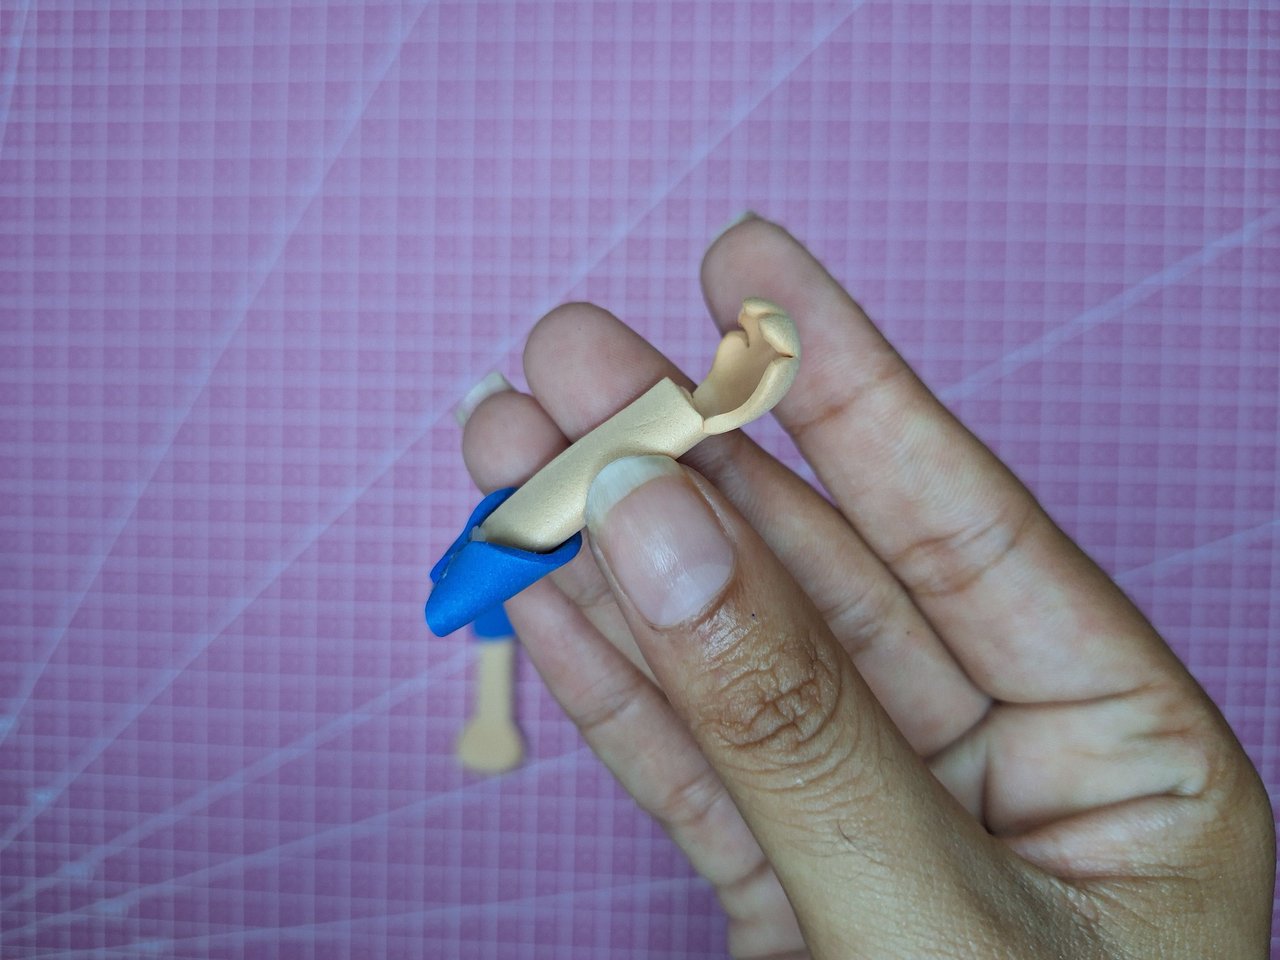 |  |
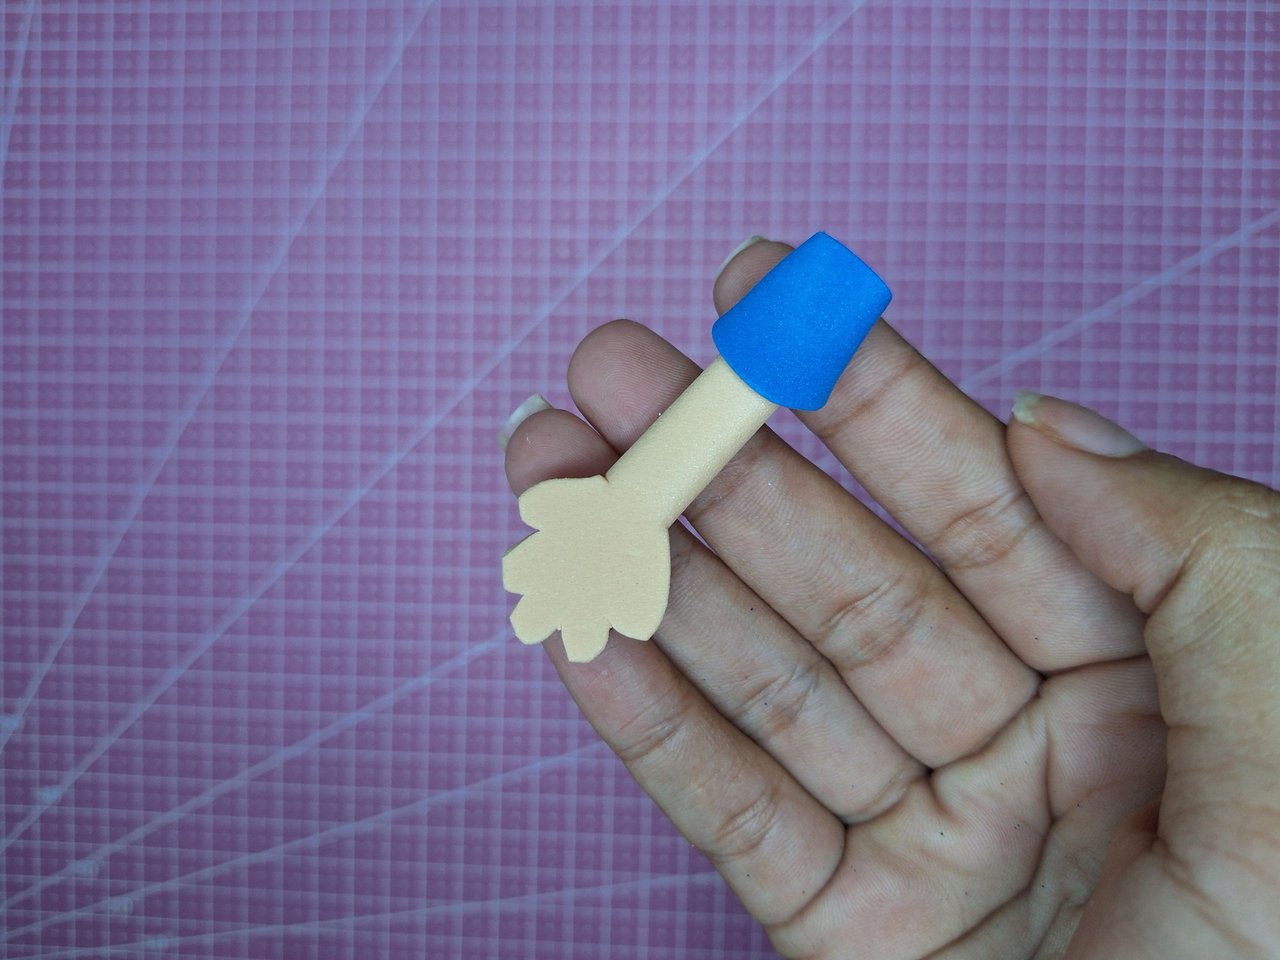
Heat the part of the hands so that the fingers are half closed and do not look so flat. Then glue the arms in place.
Calentar la parte de las manitos para que los dedos queden medio cerrados y no se vean tan planos. Luego pegar los brazos en su lugar.
 |  |  |
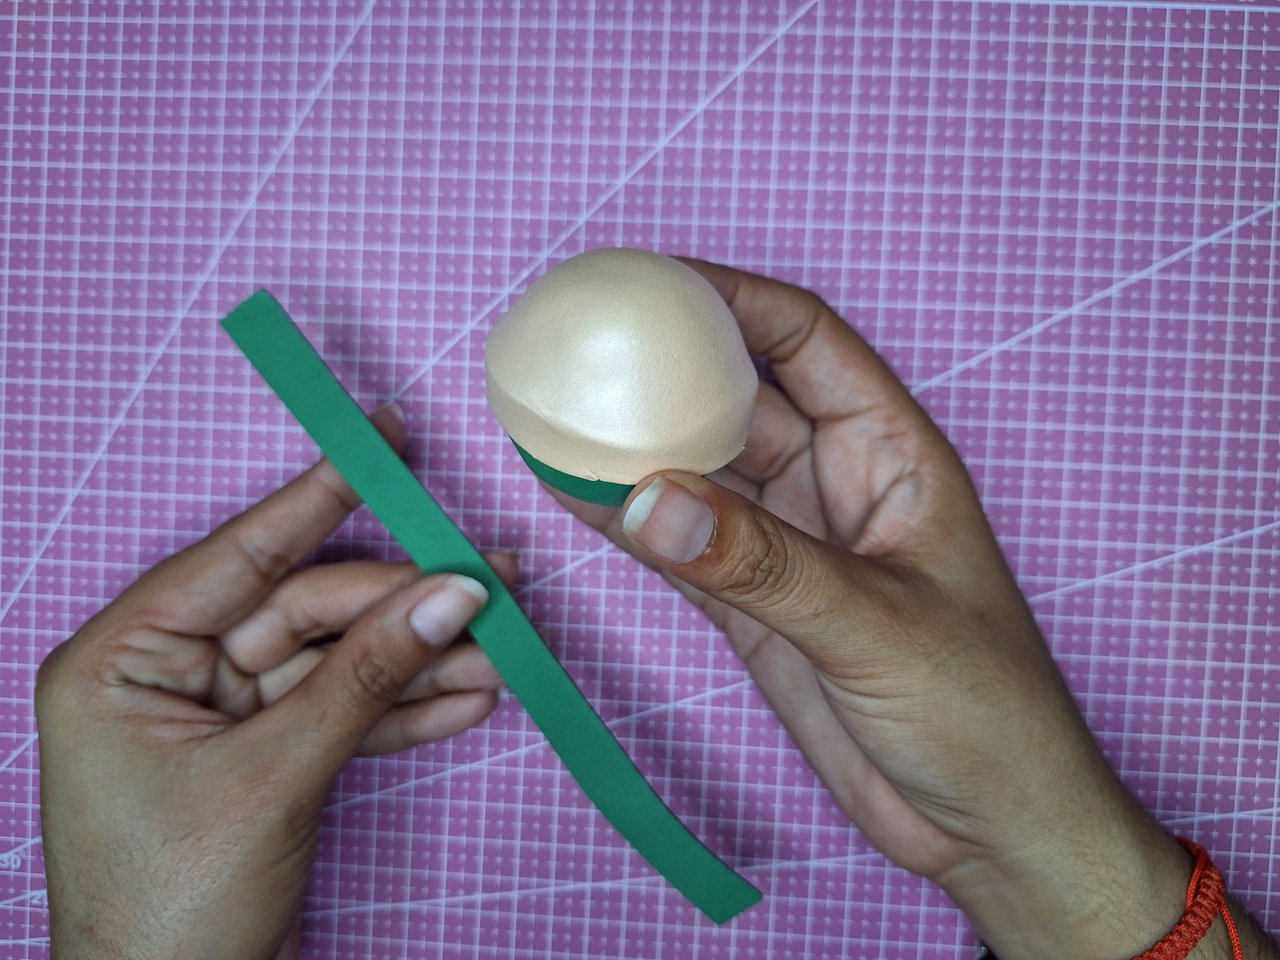 | 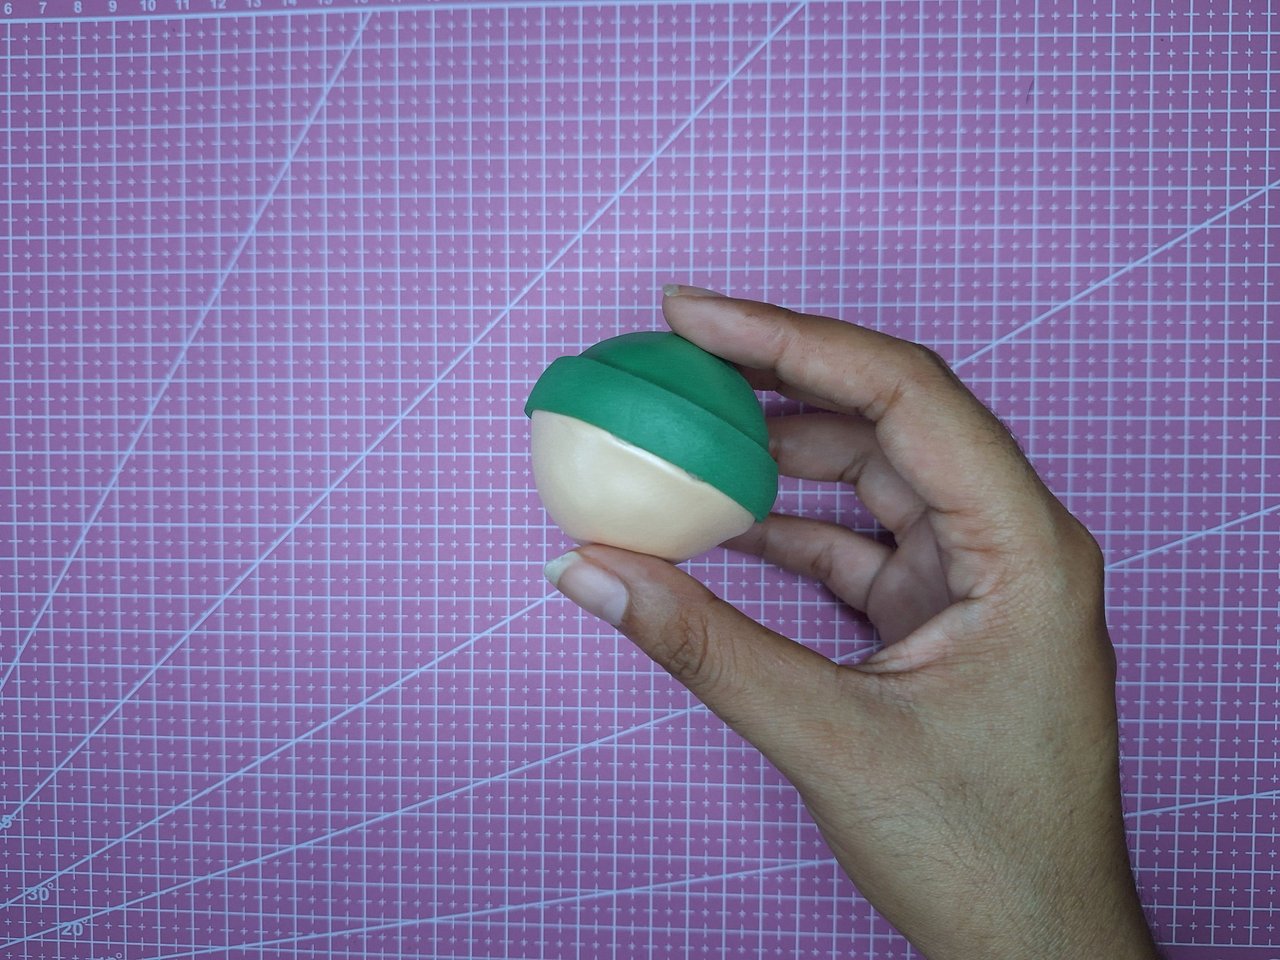 |
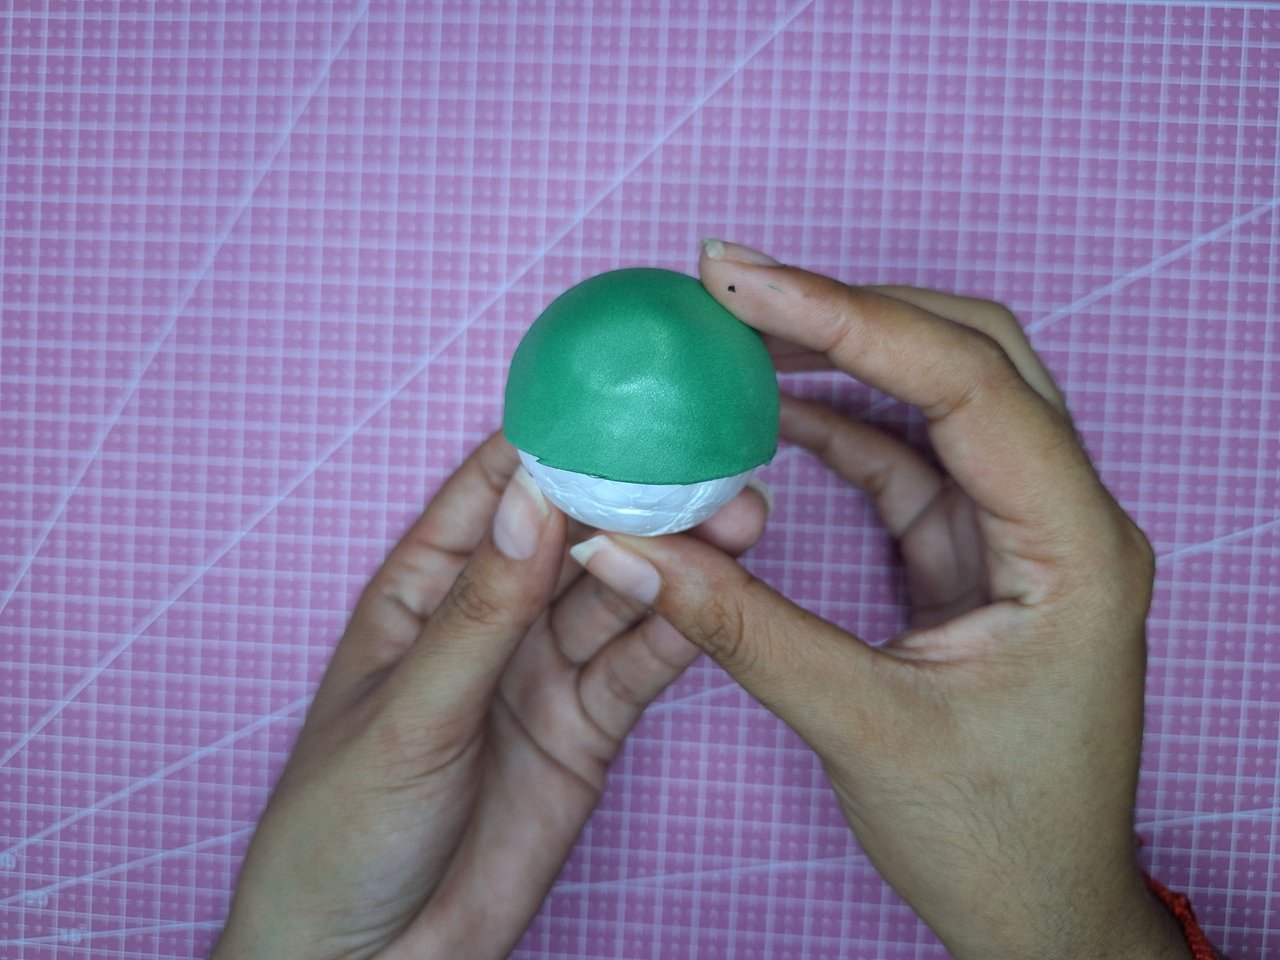
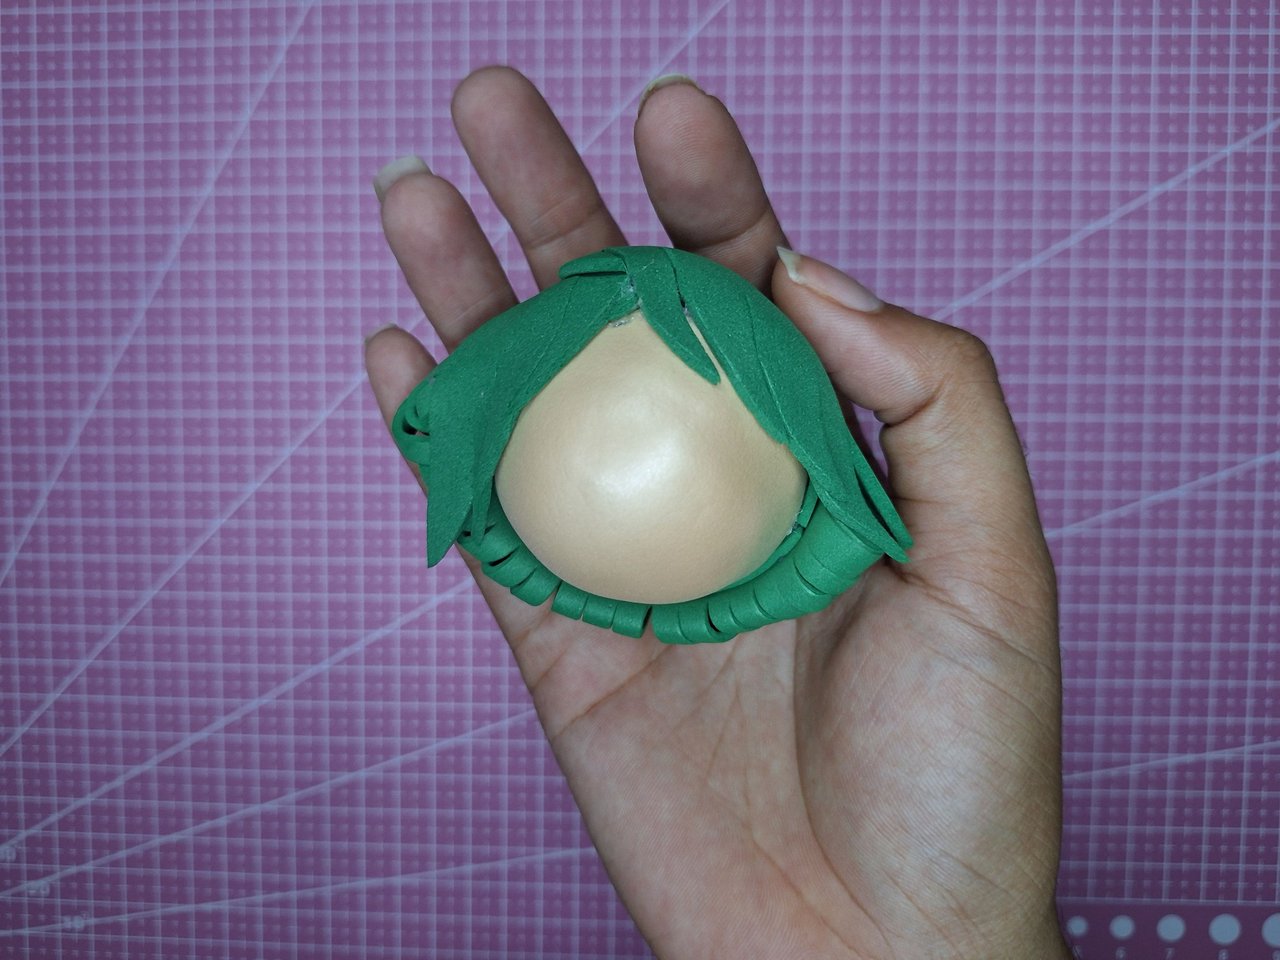
For the head I used a polyfoam ball with a circumference of 16 cm. It is thermoformed with skin-colored foami and the color of the hair. Then I glued a thin strip of one of the two colors in the center to cover the joints.
Para la cabeza utilicé una bola de poliespuma con una circunferencia de 16 cm. Se termoforma con foami color piel y el color del cabello. Luego se pega una tira fina de uno de los dos colores en el centro para tapar las uniones.
 |  |
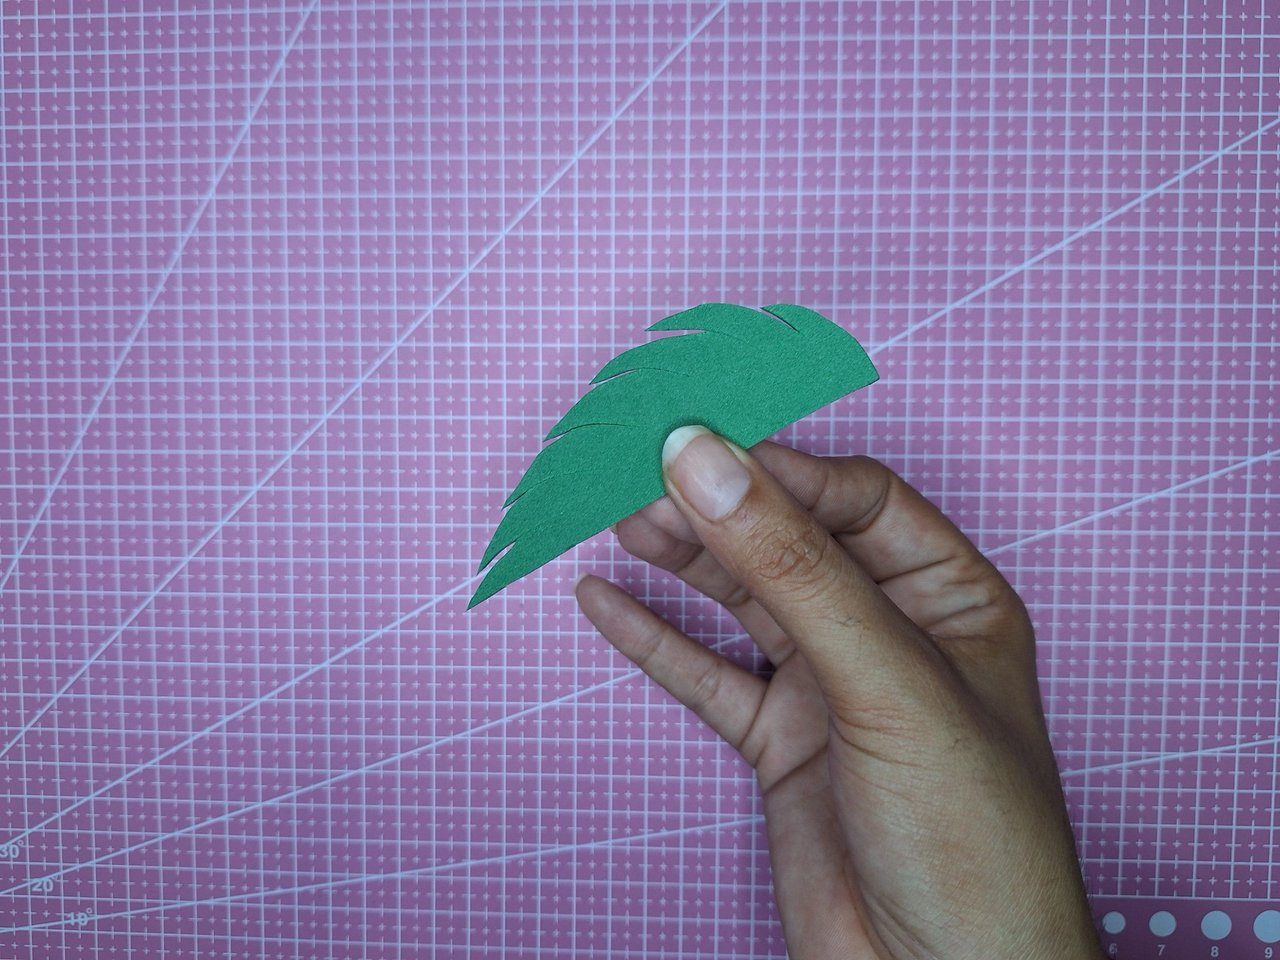 |  |
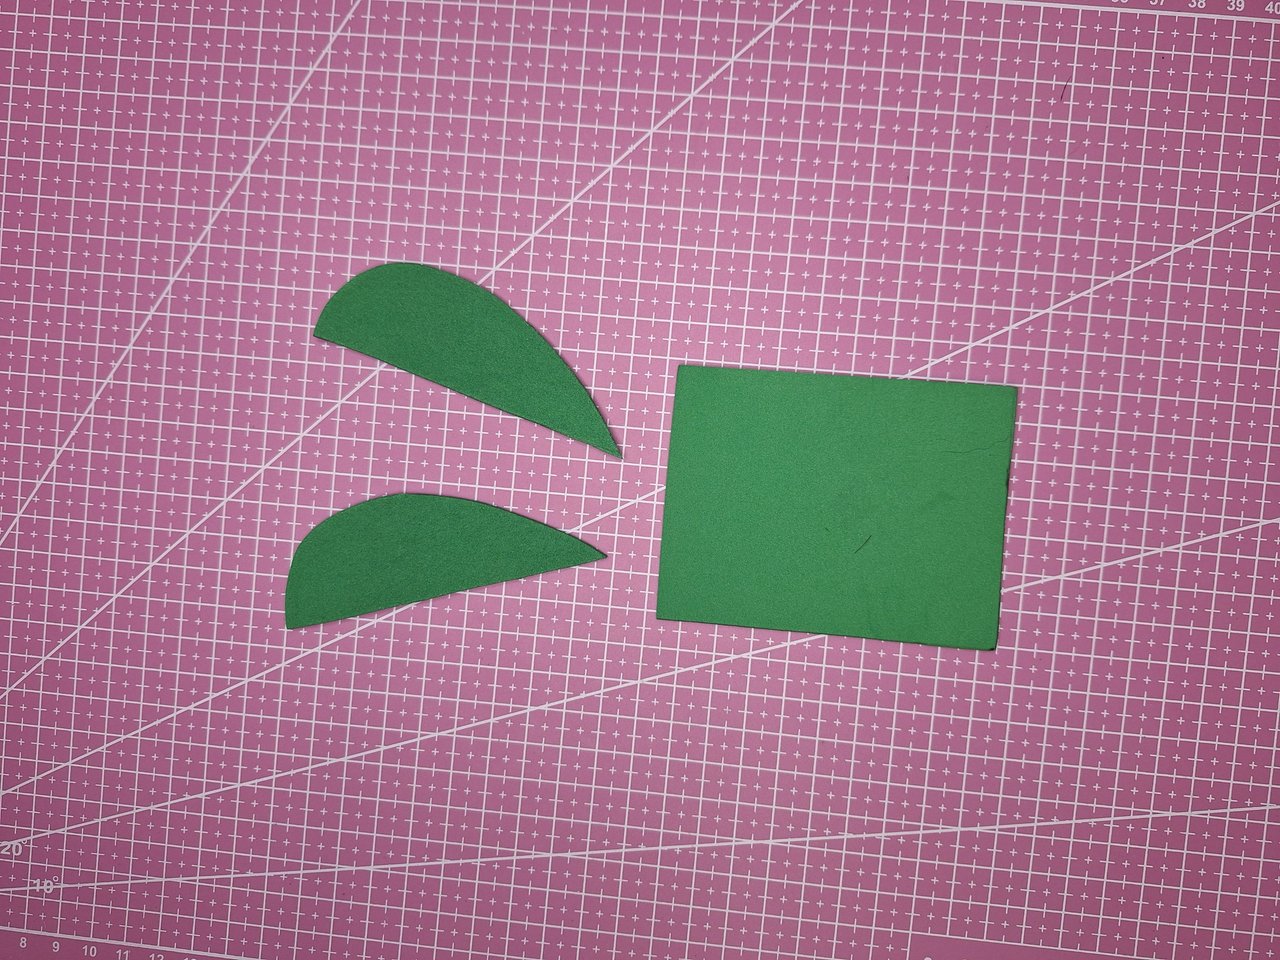
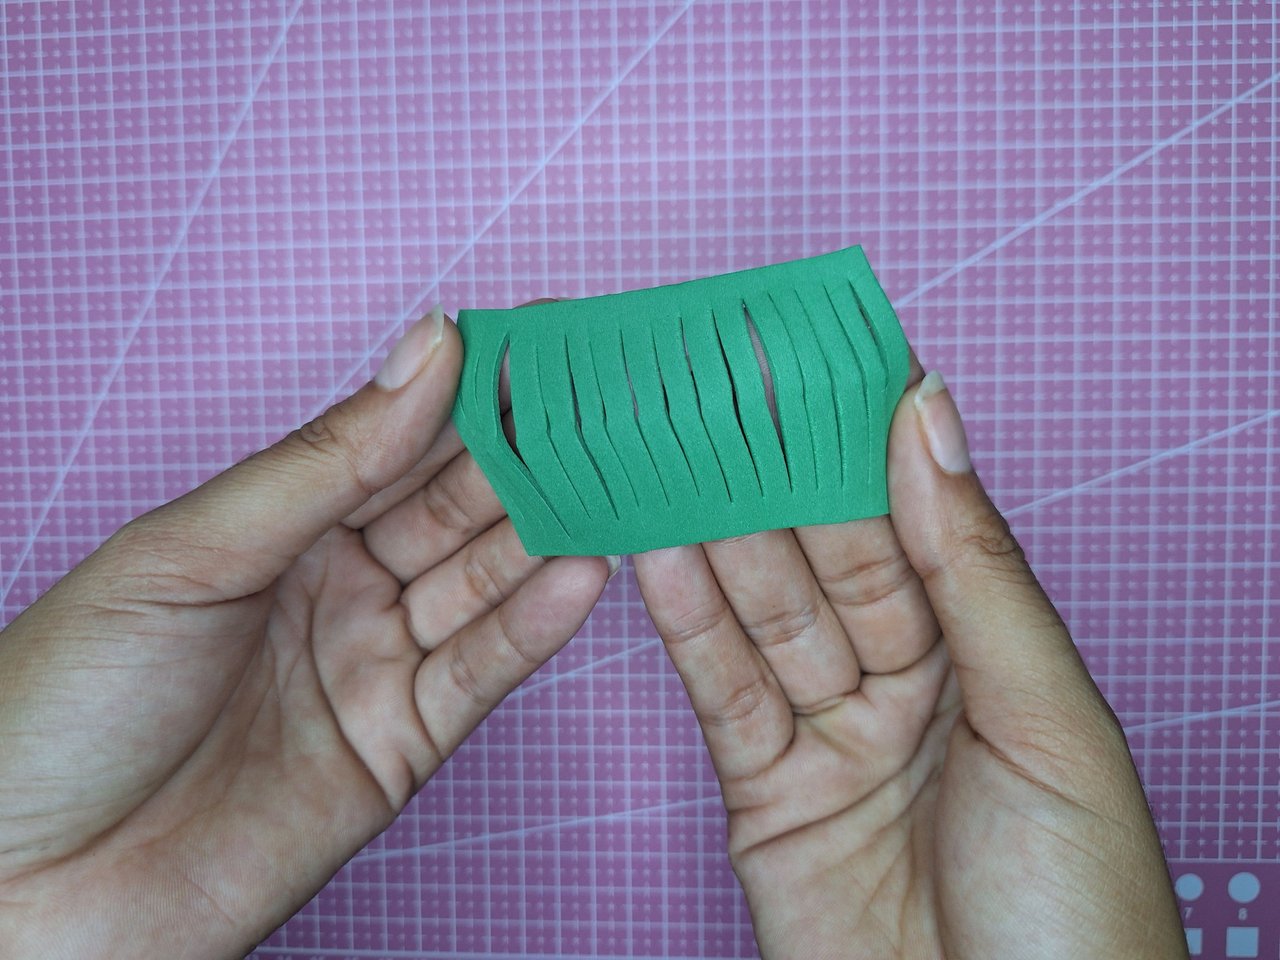
Take a square piece and fold it in half to make cuts of about half a centimeter, but without cutting it completely at the ends. The other two pieces will be like bangs for the hair. First place the square piece by gluing it at the bottom and folding it upwards, glue it in the middle of the head. Then glue the two bangs on top, one for each side.
Tomar una pieza cuadrada y doblarla por la mitad para hacer cortes de medio cm aproximadamente, pero sin llegar a cortarla completamente en los extremos. Las otras dos piezas serán como unos flecos para el cabello. Se coloca primeramente el cuadrado pegándolo en la parte de abajo y se dobla hacia arriba, se pega en el medio de la cabeza. Luego pegar encima los dos flecos, uno para cada lado.
 | 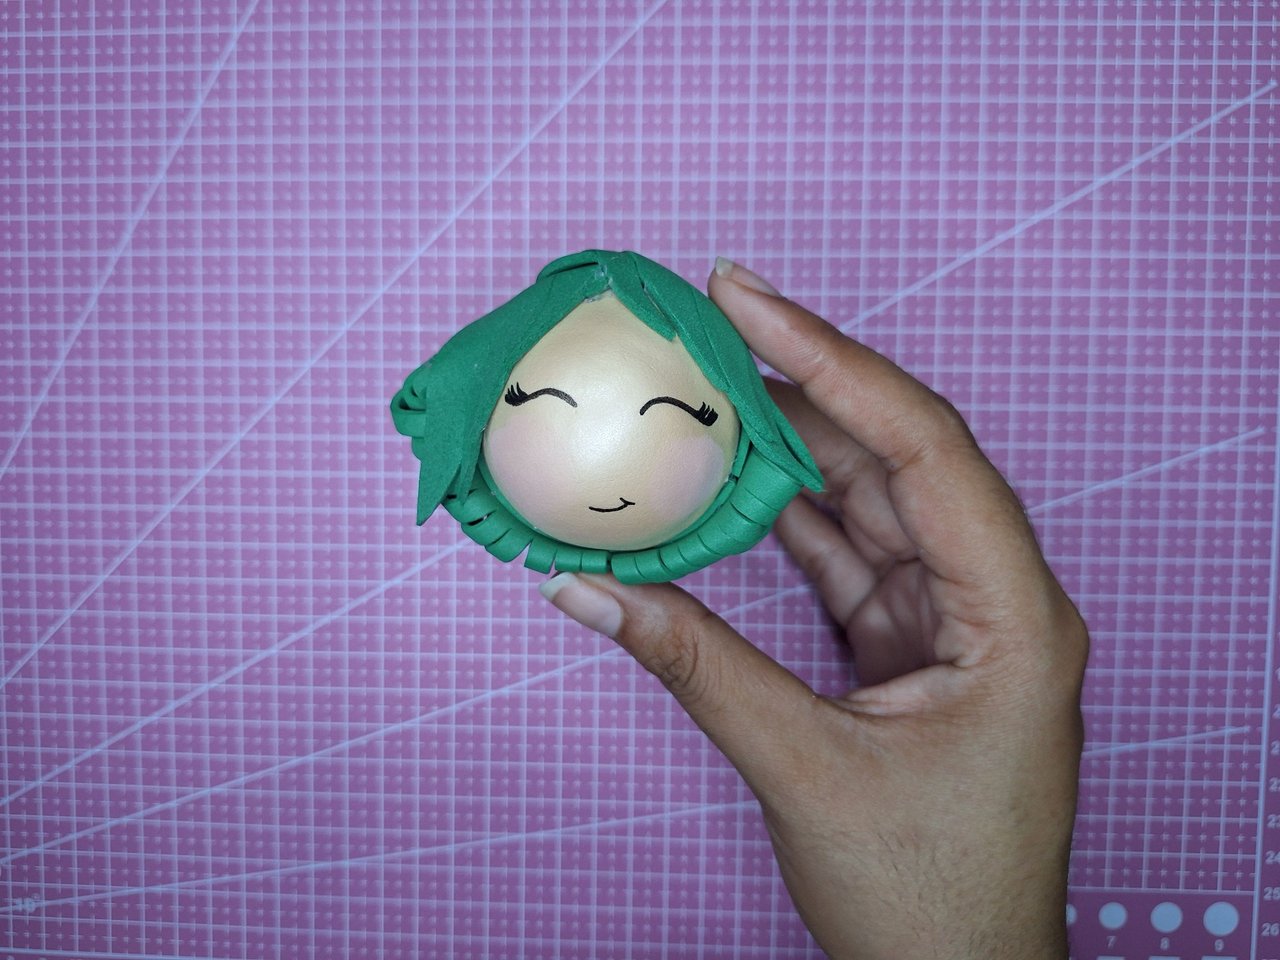 |
With a black marker she paints the eyes and mouth and with eye shadow she makes the blush.
Con un marcador negro pinta los ojitos y la boca y con sombra de ojos se le hace el rubor.
 |  |  |
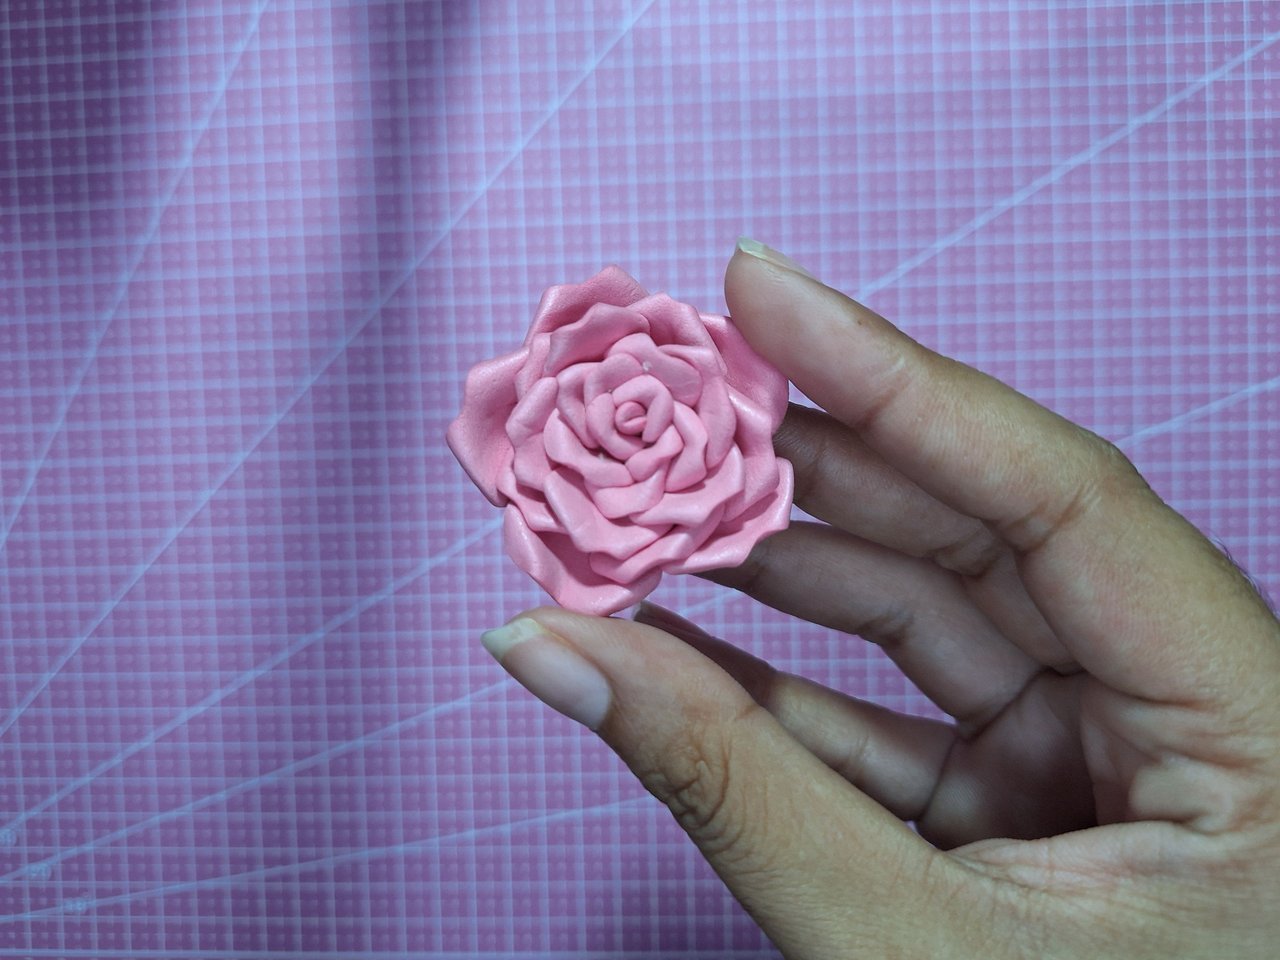 | 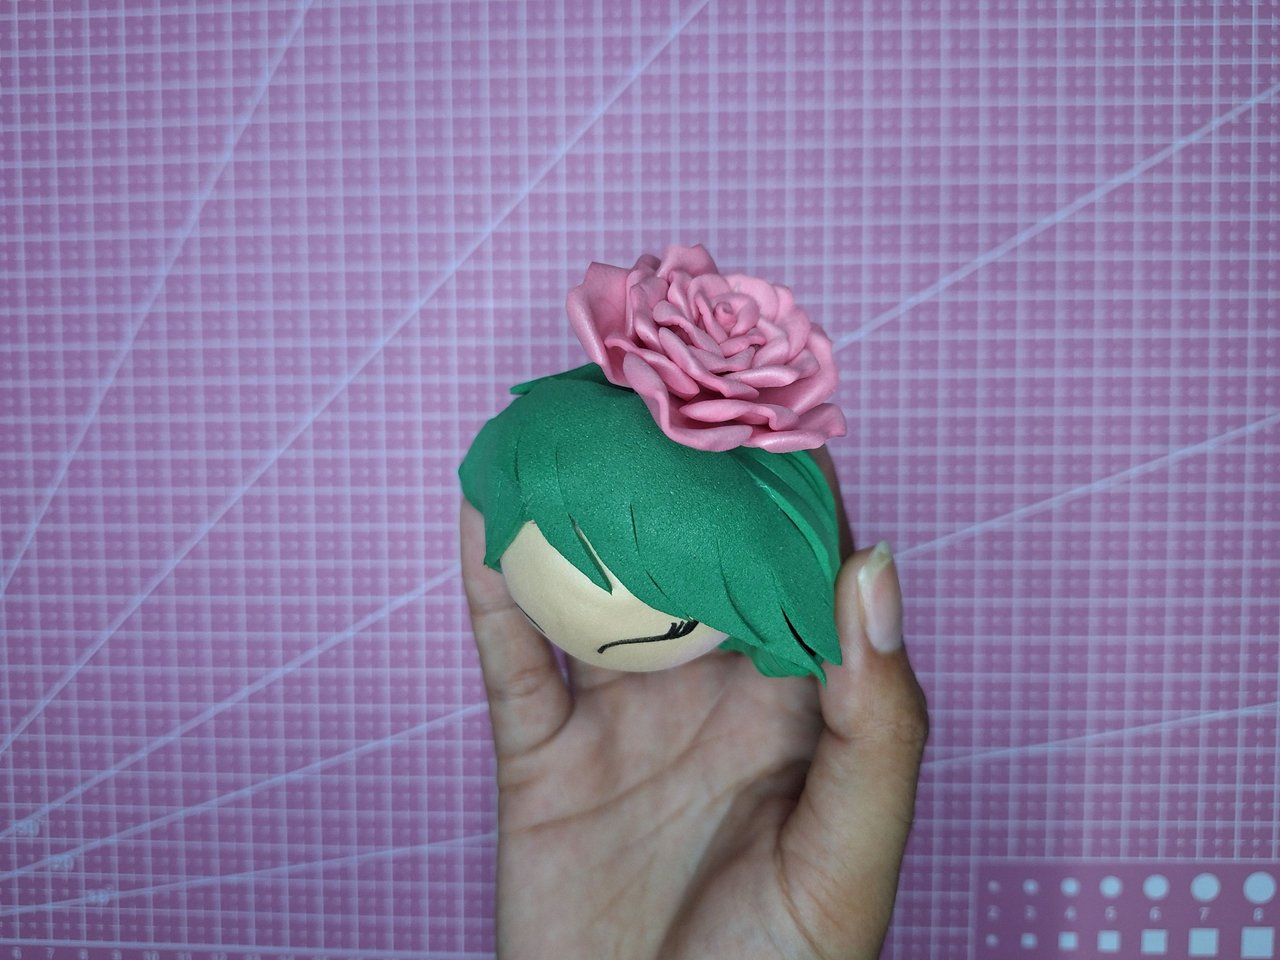 |  |
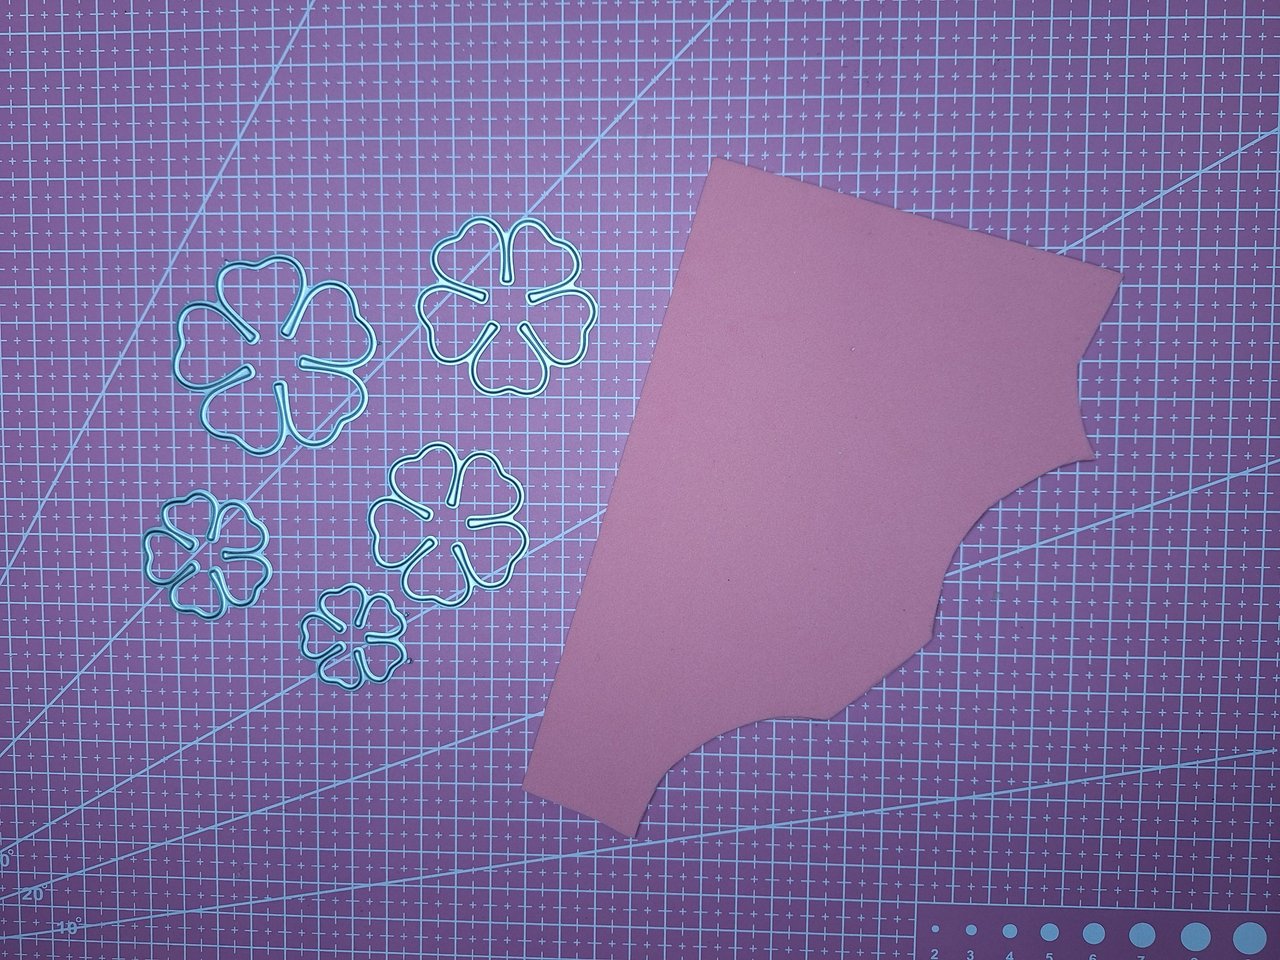
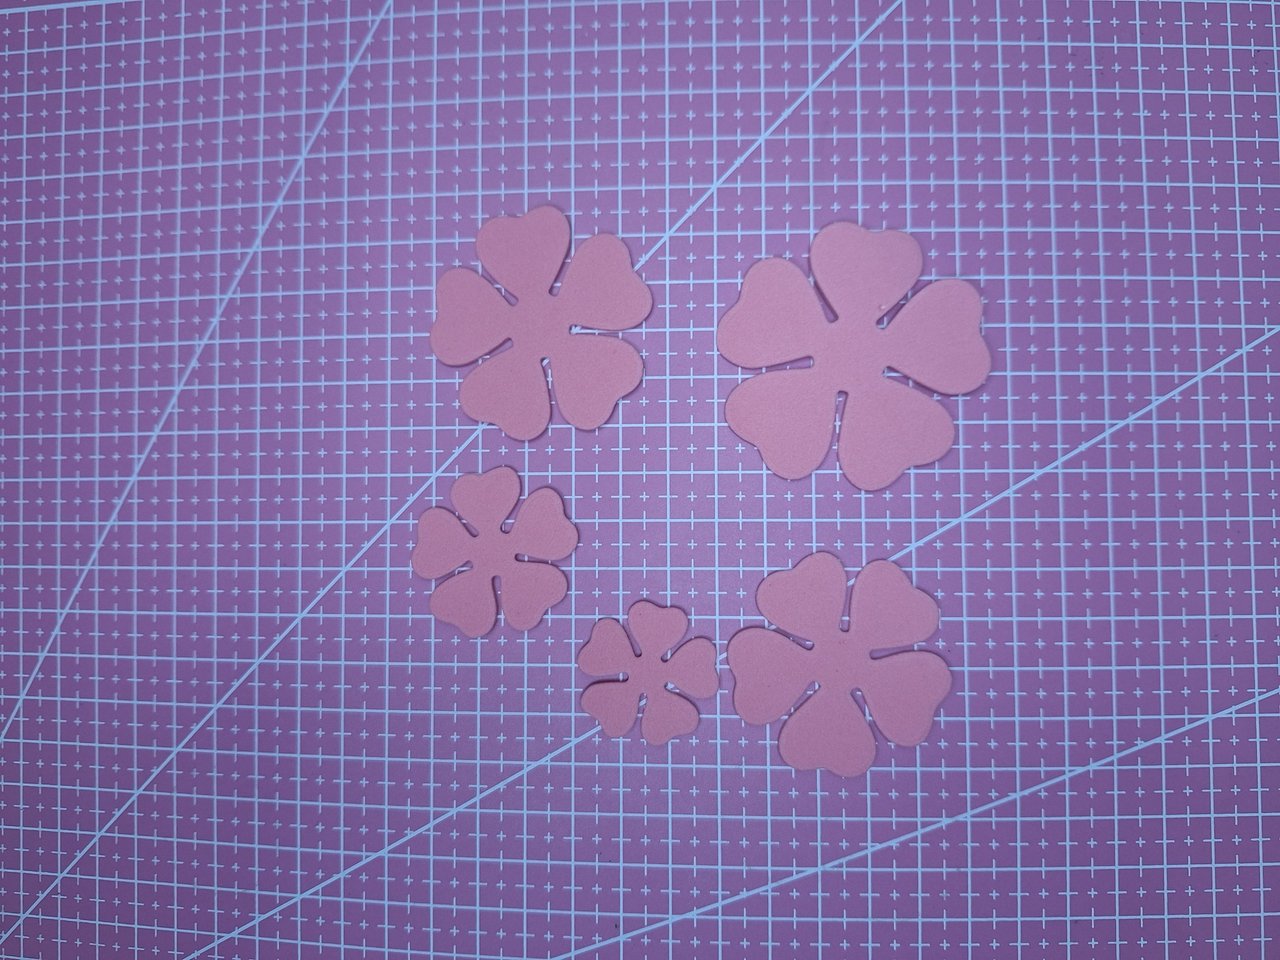
To make the rose, cut 5 flowers of 5 petals increasing the size, then thermoform the petals to make them more realistic and to be able to bend the tips. Glue, starting with the smallest one from the inside. Place on the head of the fairy and then glue the head on the body.
Para hacer la rosa, cortar 5 flores de 5 pétalos aumentando el tamaño, luego se termoforman los pétalos para que queden más realistas y poder doblarle las puntas Pegar, comenzando por la más pequeña desde el interior. Colocar en la cabeza del hada y luego pegar la cabeza en el cuerpo.
 |  |  |
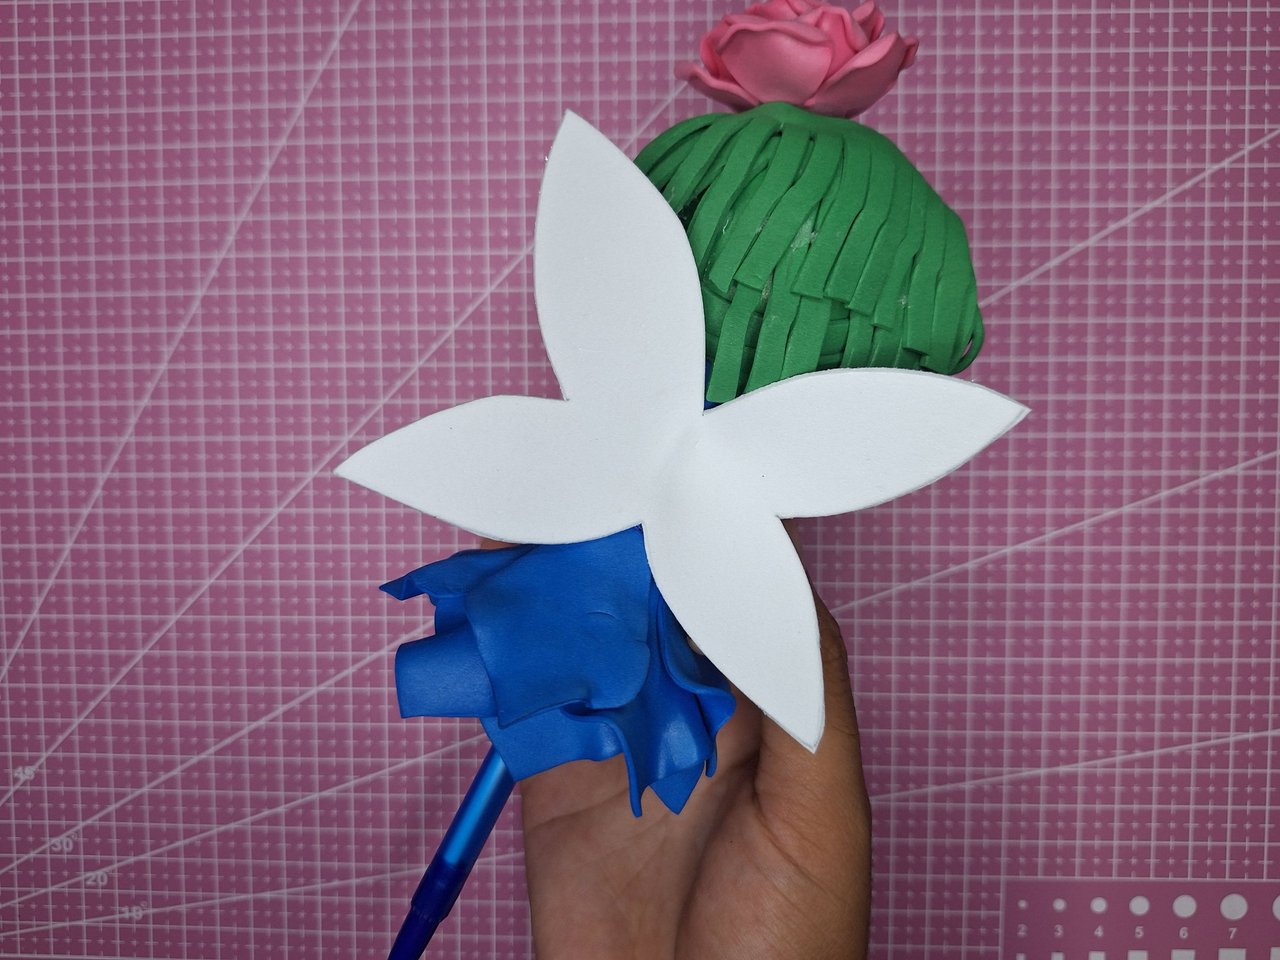 |  | 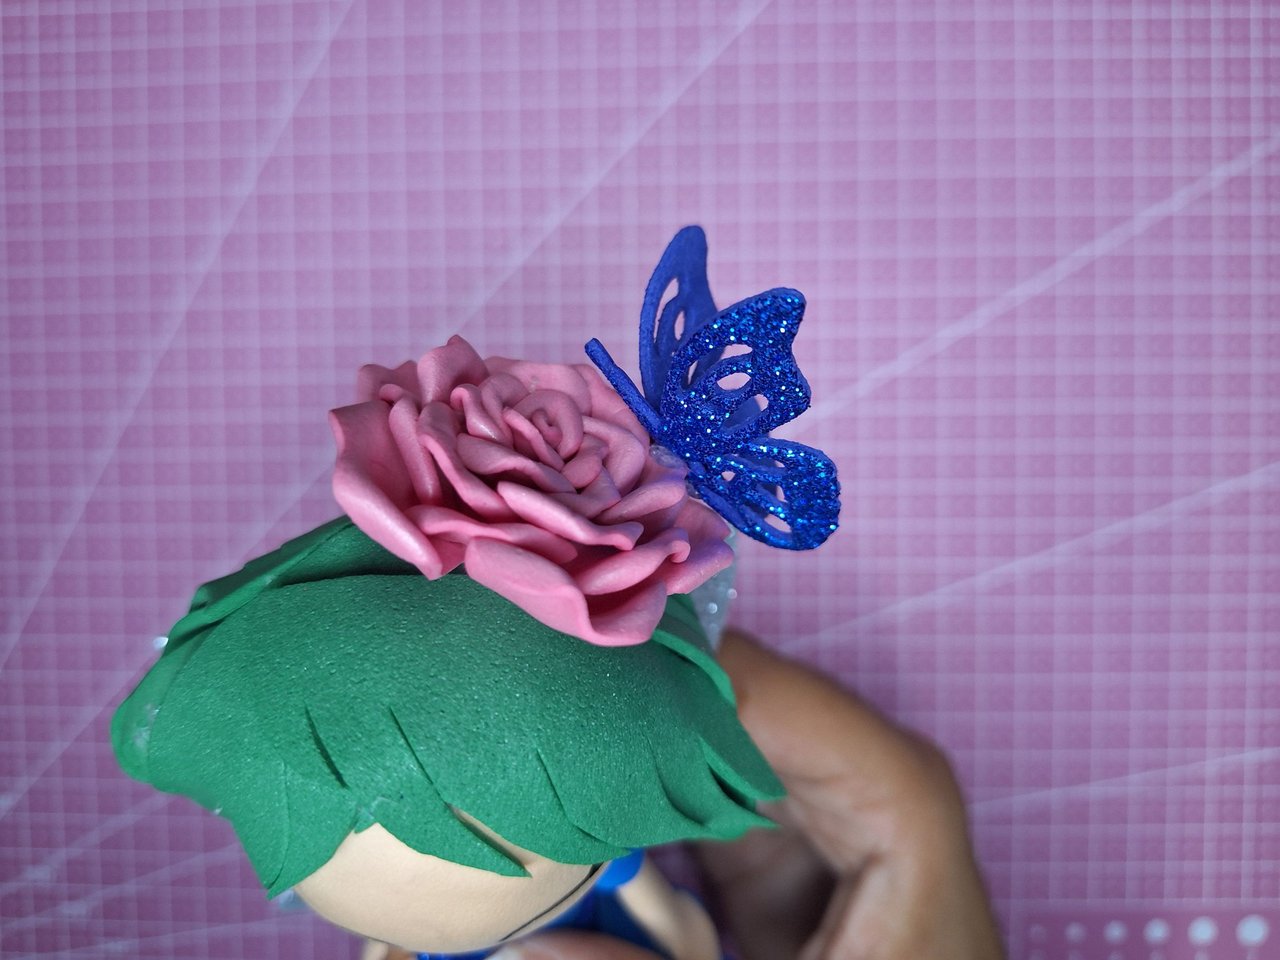 |
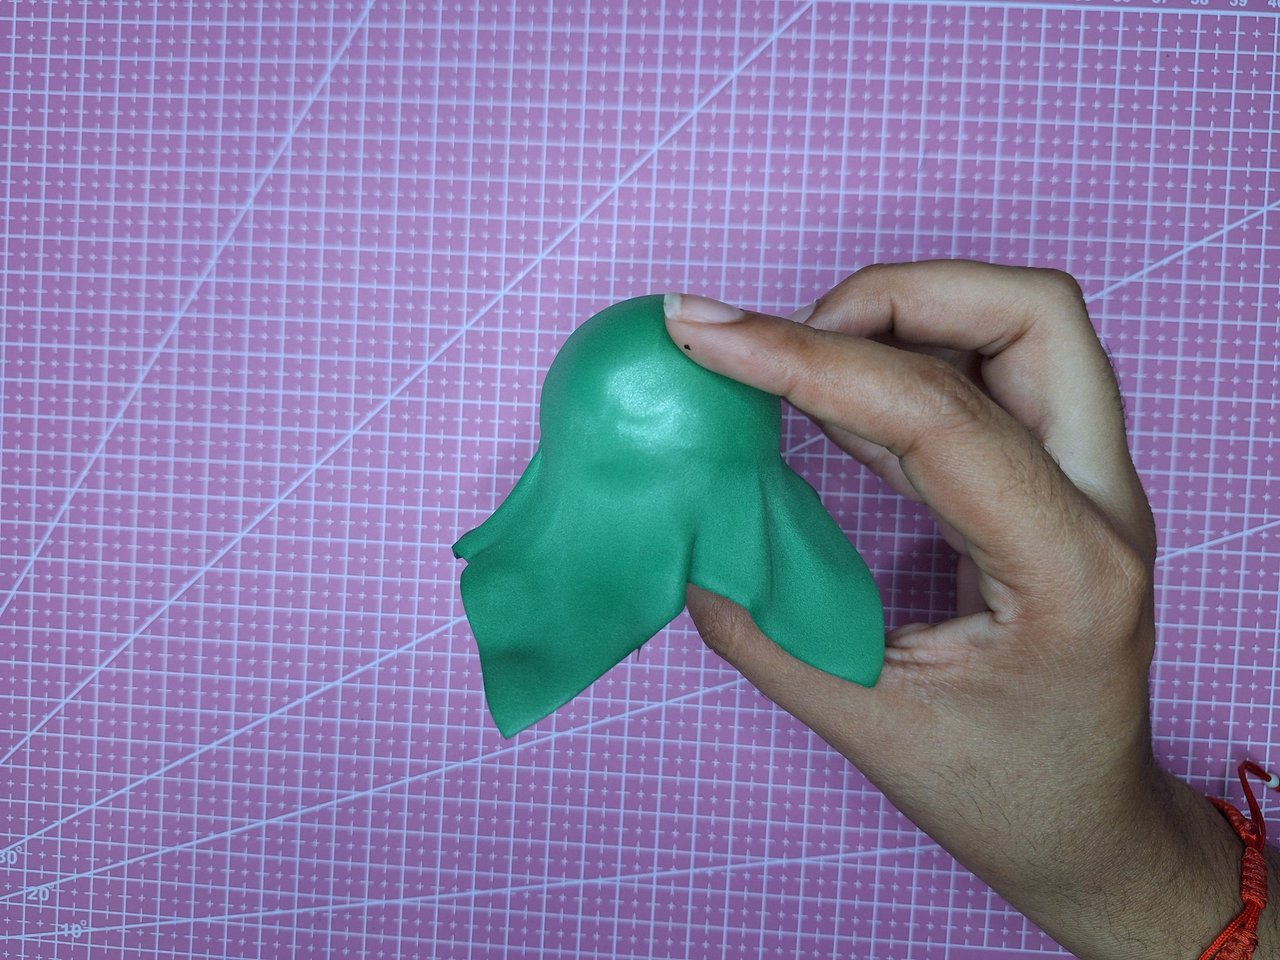
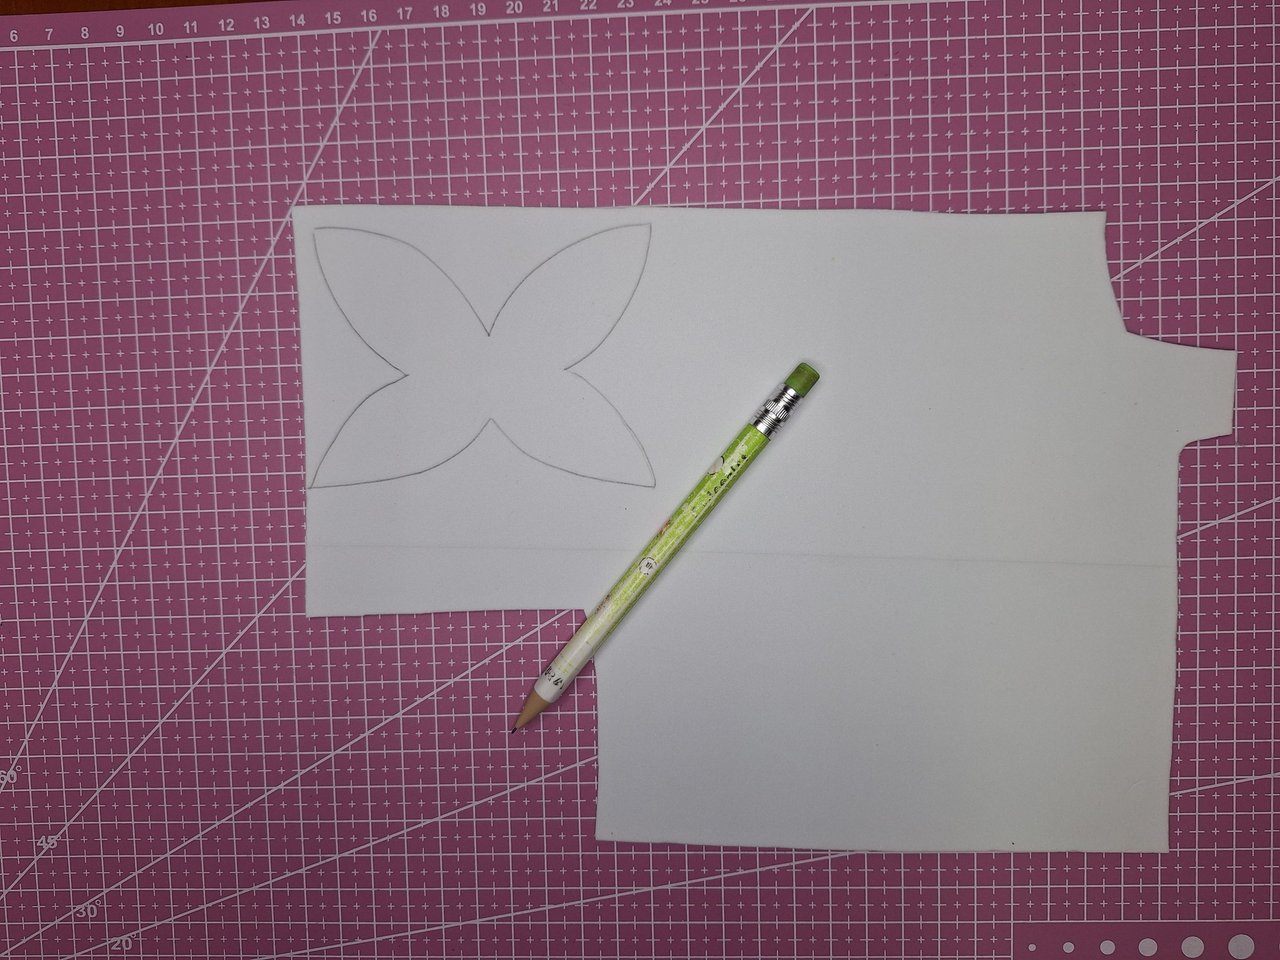
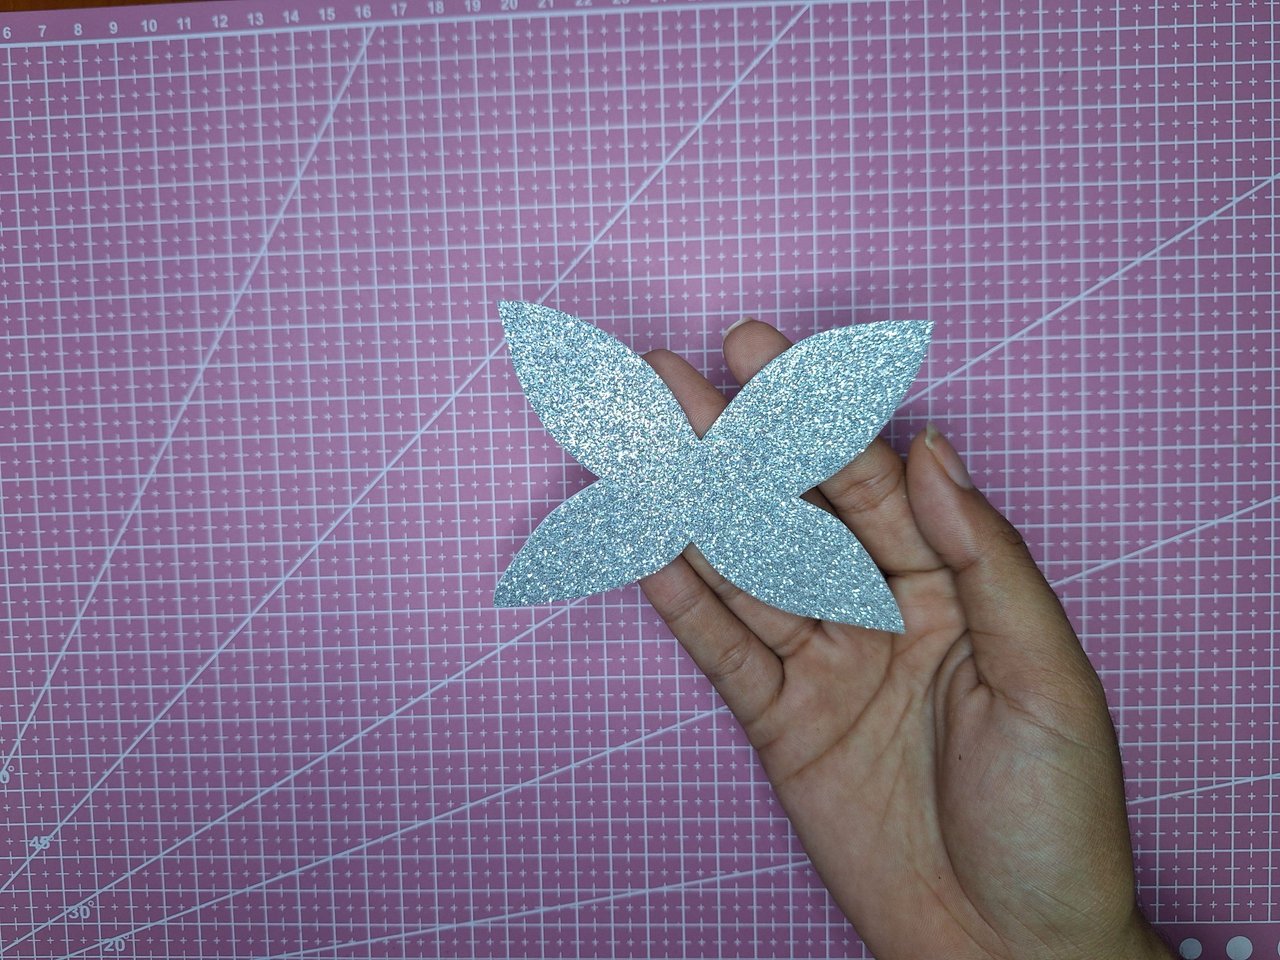
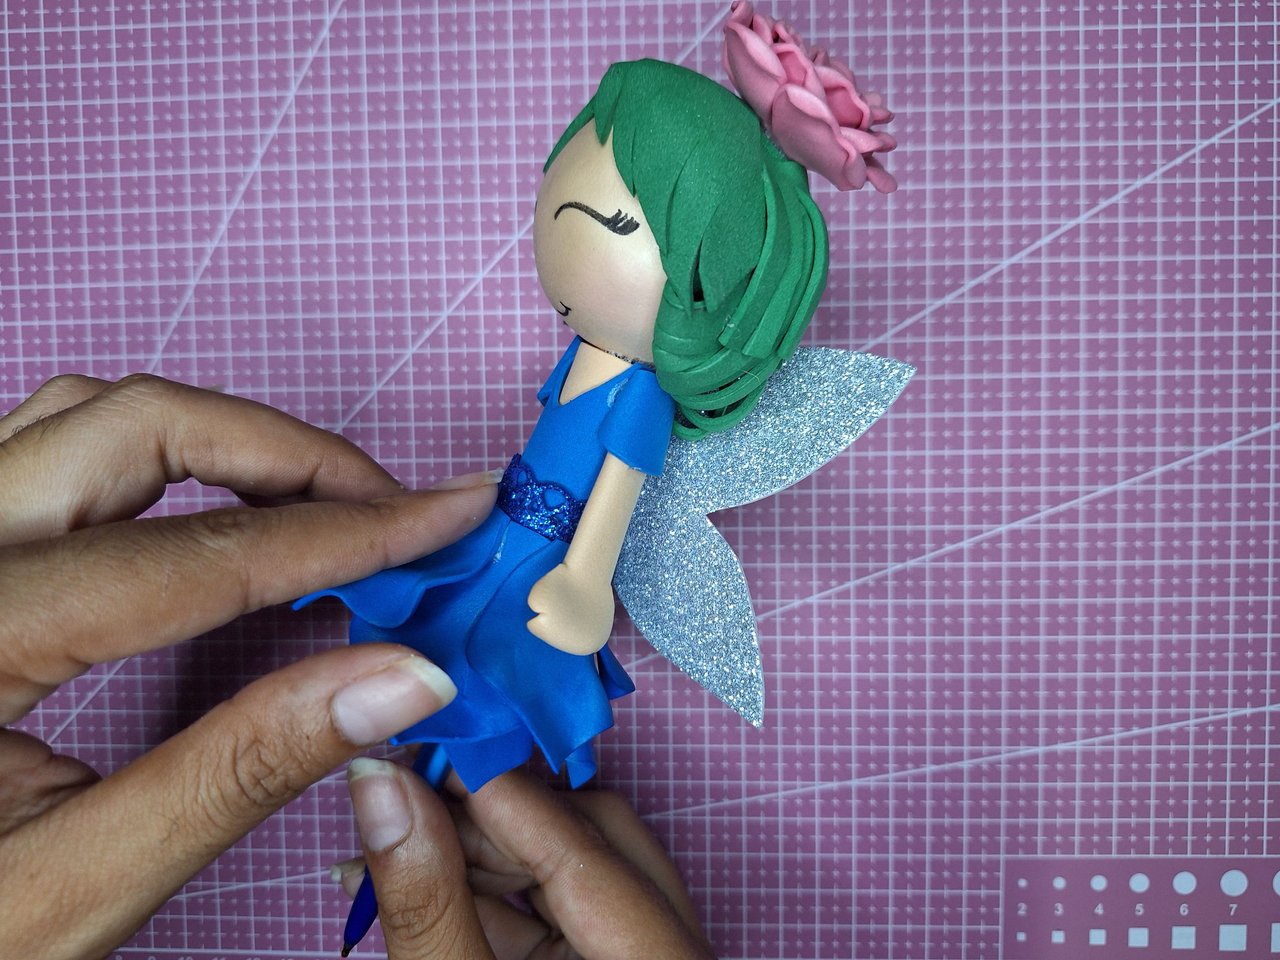
On a sheet of silver-colored frosted foami, mark and cut out the silhouette of the wings, fold it in half and glue it on the back of the body. The butterfly we had made, fold it in half and glue it on top of the rose.
En una lámina de foami escarchado de color plateado, marcar y recortar la silueta de las alas, doblarla por la mitad y pegarla en la parte de atrás del cuerpo. La mariposa que habíamos hecho, doblarla por la mitad y pegarla encima de la rosa.
 |  |  |
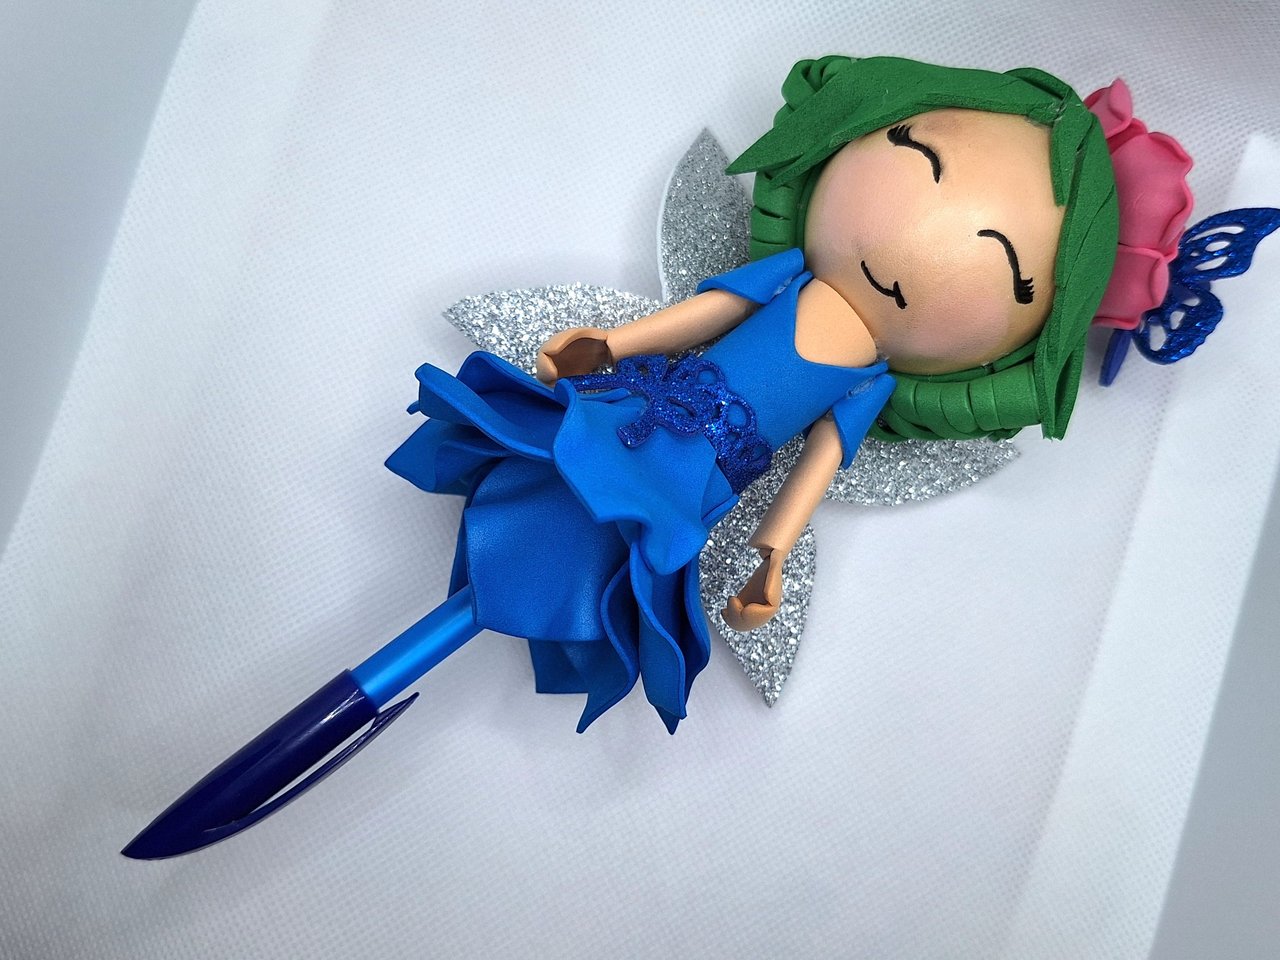 |  |
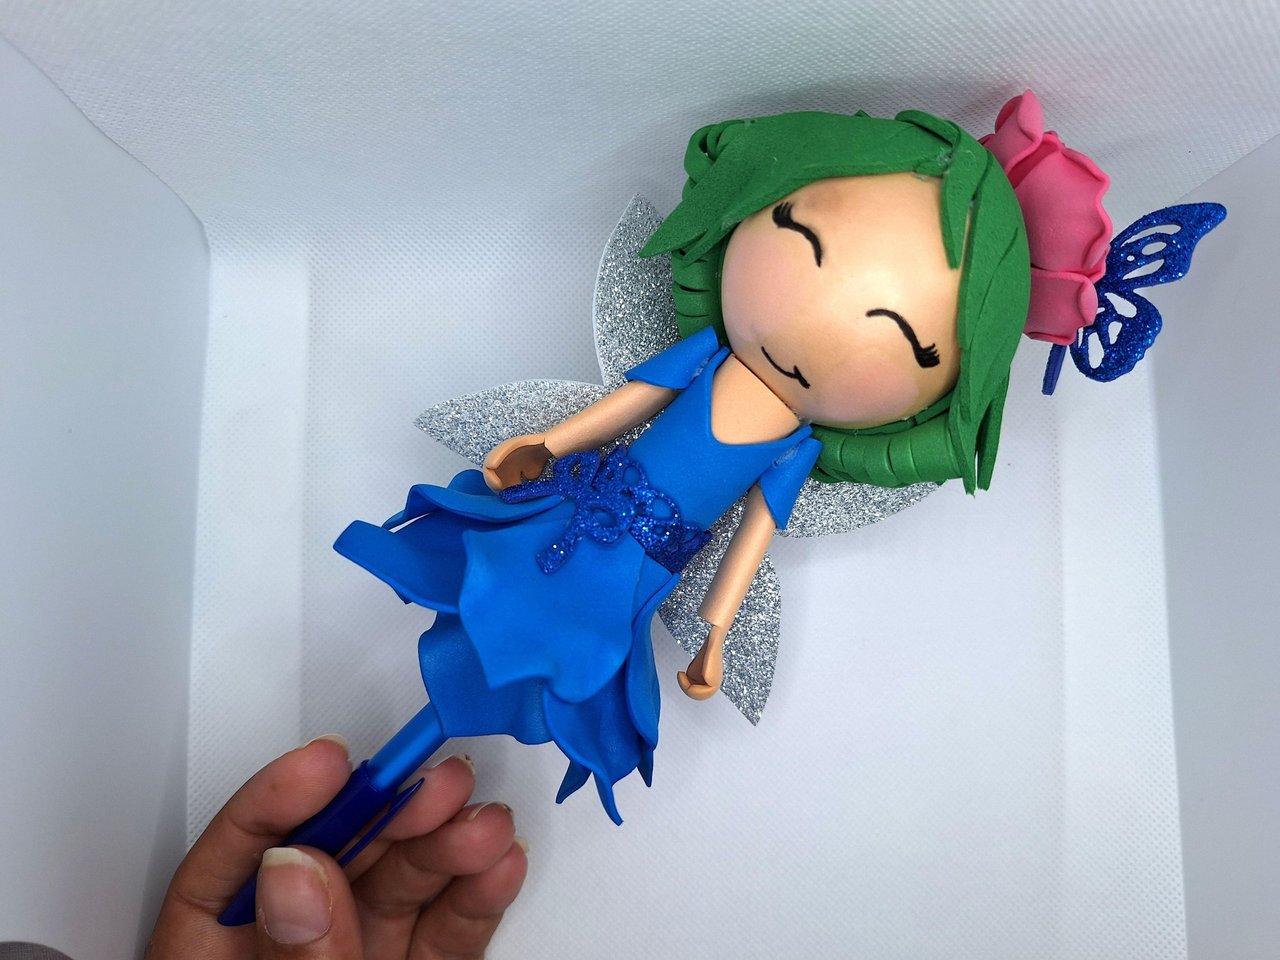
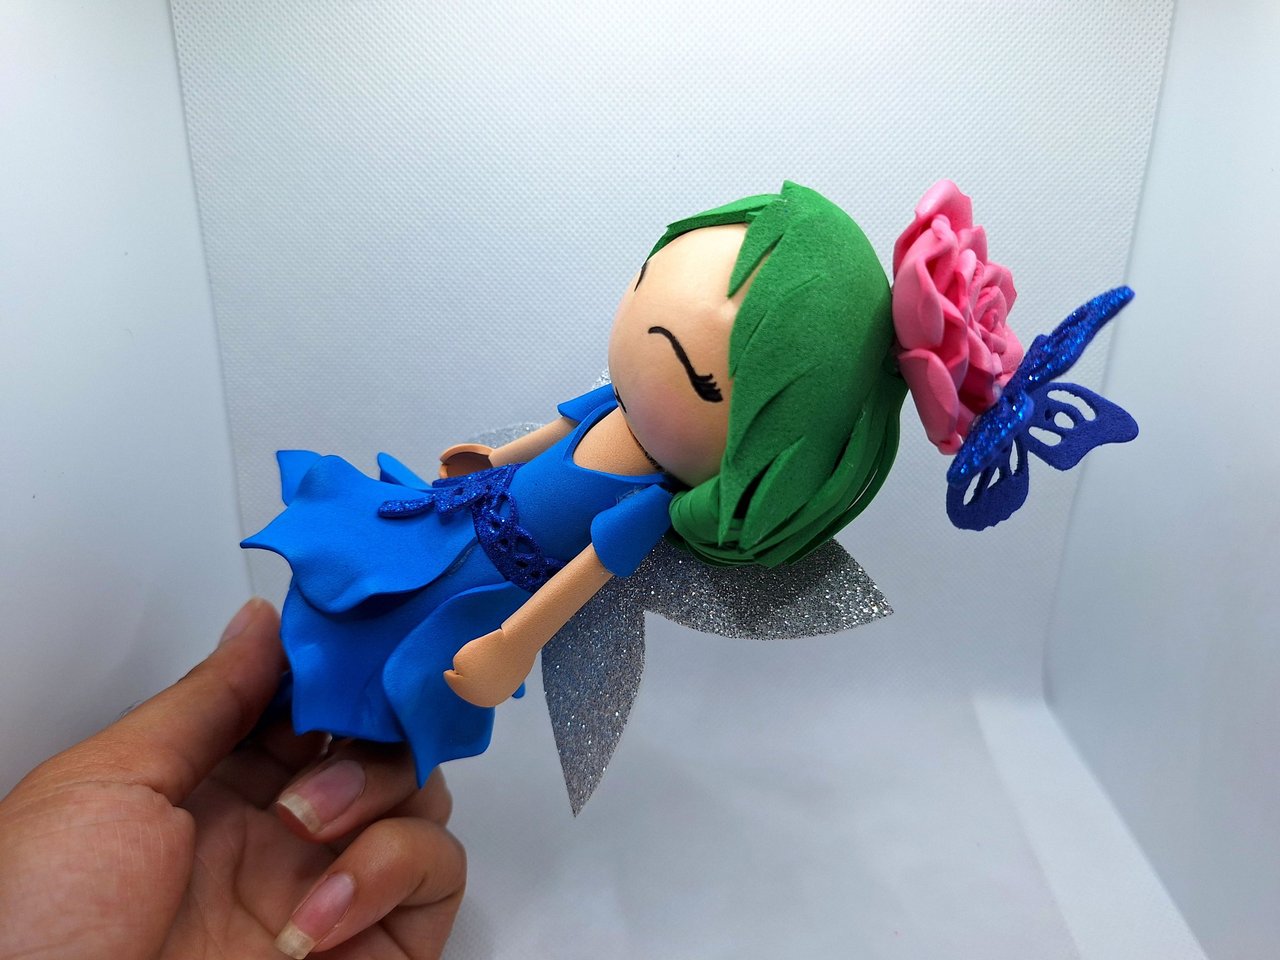
And thus is finished this beautiful ornament for pens and pencils in the shape of fairies. A design that you will love if you like the world of magic and fantasy. I'm sure many girls would be excited and wanting to use a pencil with this decoration at school, so don't think twice and please a princess. I hope you liked it, leave me in the comments what you thought and new suggestions. Best regards.
Y de esta forma se encuentra terminado este hermoso adorno para lápices y bolígrafos con forma de hadas. Un diseño que te encantará si te gusta el mundo de la magia y la fantasía. Estoy segura de que muchas niñas estarían ilusionadas y queriendo usar en la escuela un lápiz con esta decoración, así que no lo pienses más y complace a una princesa. Espero que te haya gustado, déjame en los comentarios qué te pareció y nuevas sugerencias. Un saludo.

Cover made in Canva
English is not my native language, translated by DeepL
Reference
Posted Using INLEO
Te quedó precioso mimi, me encantó y miy bien explicado el paso a paso.
Muchas gracias 🥰
Dios mio, que bella, me encanta porque soy amante de las hadas.
Tú haces ver tan fácil el proceso, pero se ve que requiere meticulosidad. Me gusto mucho los adornos de la rosa y la mariposa que pusiste, son perfectos para el hada. Y el vestido es lo más bello, esa idea de pétalos de flor es preciosa, un vestido así en la vida real debe ser muy hermoso.
Algo que también me gustó fue el detalle de que lo hagas con materiales no tan pesados, porque tan pronto como vi la publicación, pensé que estaban hechos de masa flexible o algo así, y eso no permitiría escribir bien, porque como dices, pesa mucho.
En fin, qué bello trabajo, me encantó esa hadita. 🧚🏻🩷✨ !DIY
Muchas gracias por tan halagador comentario, me alegro de que te haya gustado 🤗, precisamente lo ideal es usar materiales que no pesen para su fácil manejo, a mi también me encantan las hadas y todo ese mundo de fantasía, se ven hermosas. Es fácil, lo que más demora es termoformar las partes que lo requieran como los pétalos del vestido y la rosa, pero lo demás se hace súper rápido. Saludos y lindo día 🙌
You can query your personal balance by
!DIYSTATSThank you 🤗
Your fairy shaped pencil ornament looks really nice as your fairy looks so cute and real. Well done.
Thank you very much 🥰🤗
Te quedó bellísima esta hadita😍 el nivel de detalles que tiene y todos preciosos, que buen trabajo✨
Muchas gracias 🥰
the design is attractive, the color combination is also very suitable. cool👍
Thank you very much 🤗
You're welcome
Que cosa tan bella esta adita, cada detalle es perfecto amiga. Excelente trabajo! Bendiciones 🤗😊😘.
Muchas gracias 🥰