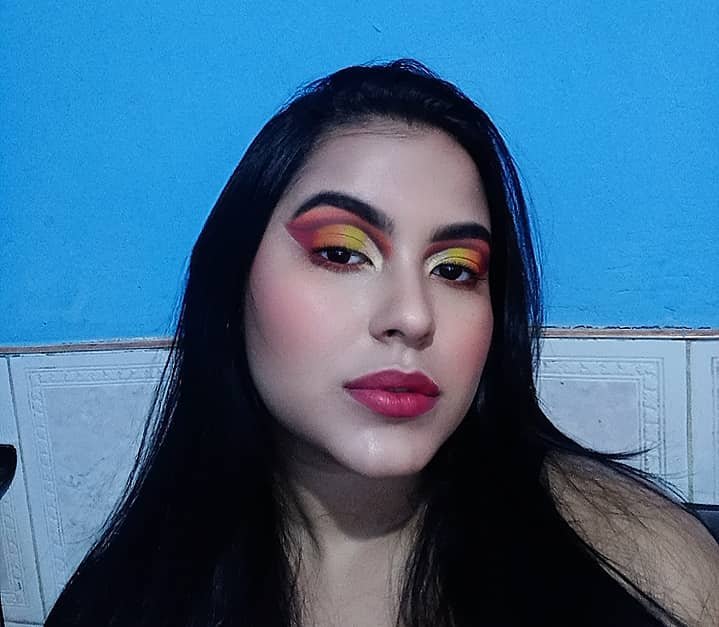
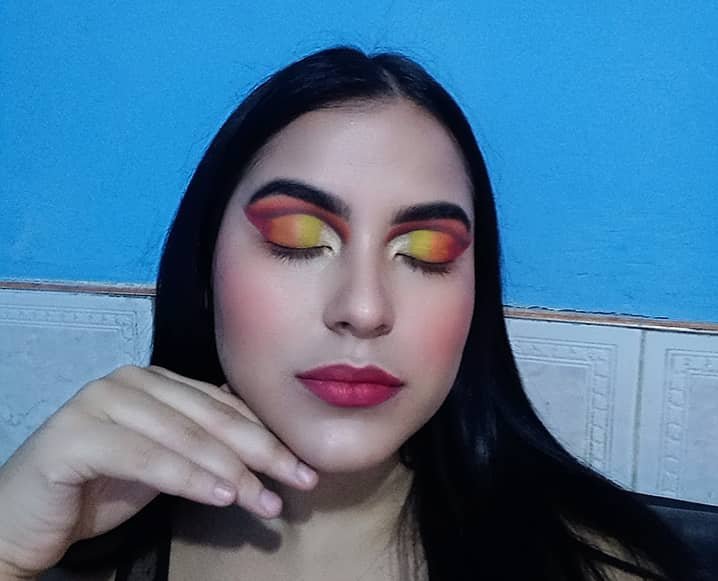
Makeup in tan colors and black eyeliner in the eye socket. [ESP/ENG]

”ESPAÑOL”

Hola Comunidad de Makeup Power🖌️🎨
Un grato saludo a todos mis queridos amigos, en especial a los lectores de la comunidad de makeuppower, espero que tengan un excelente viernes, y puedan disfrutar de un gran fin de semana, yo por mi parte lo haré 🤗.
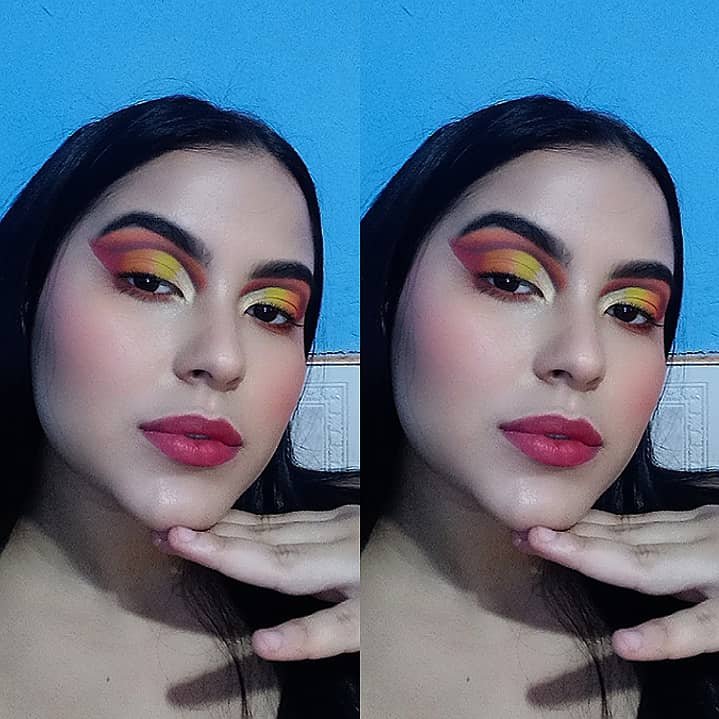
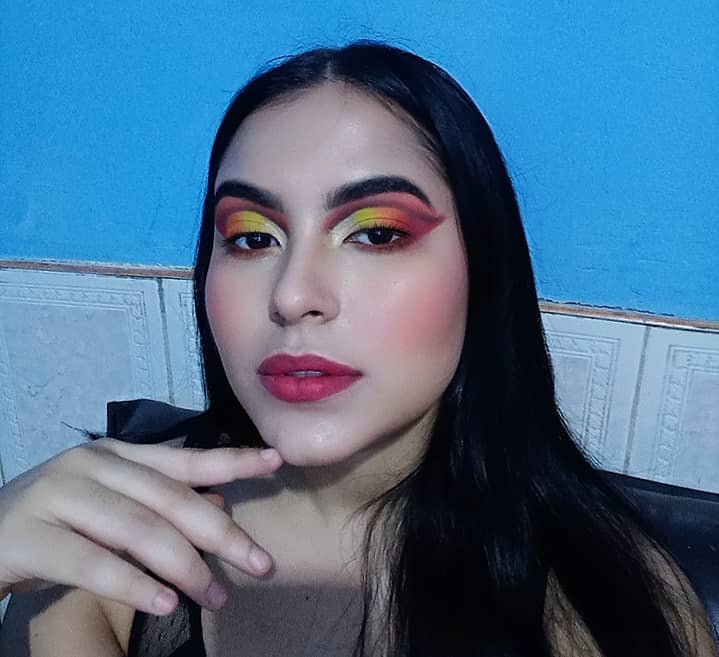
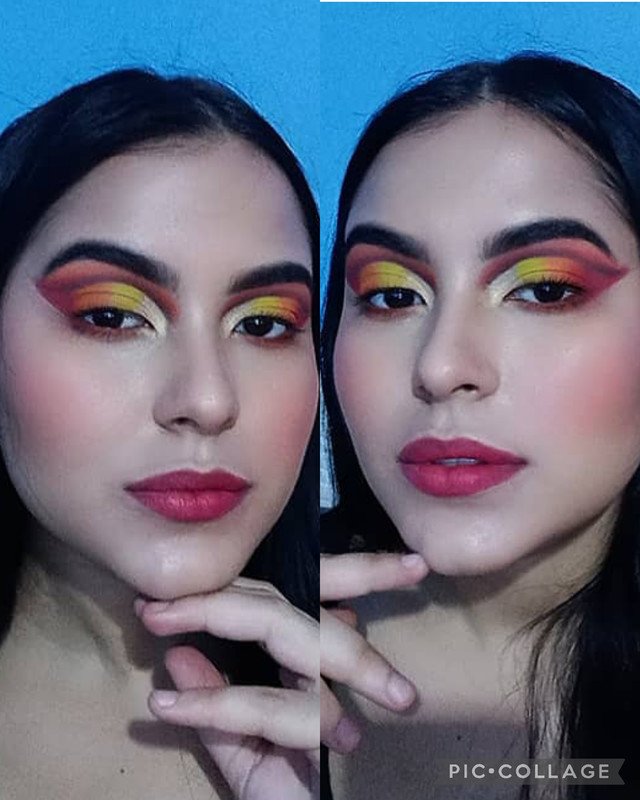
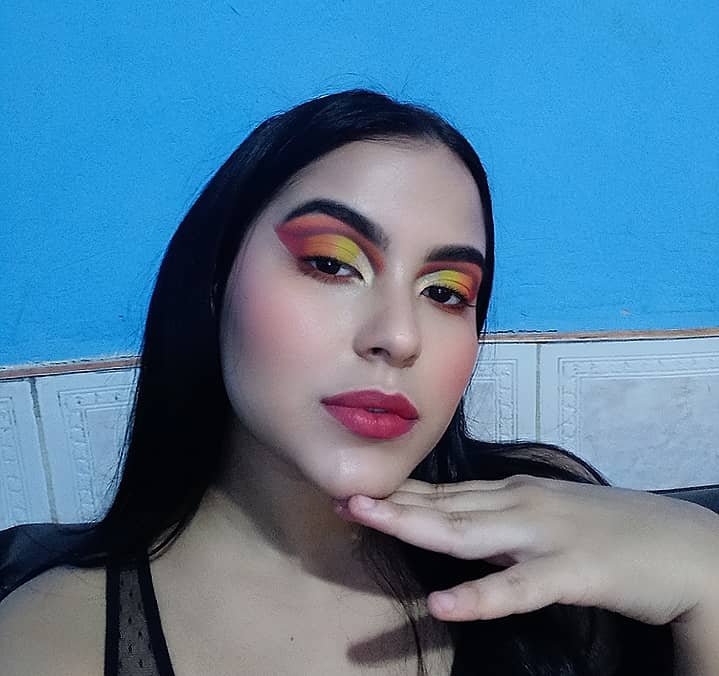
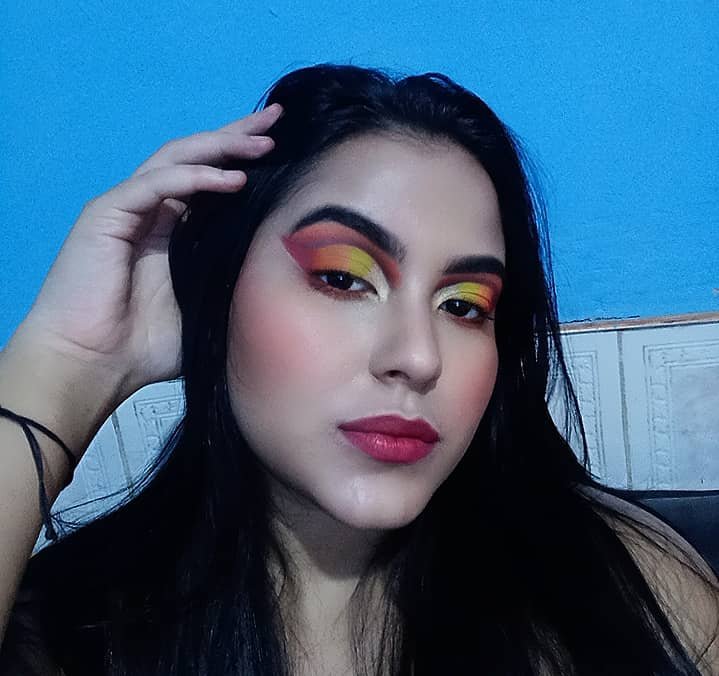
El día de Hoy quiero compartir con ustedes este hermoso maquillaje, que de verdad quedé encantada con el resultado y con el hermoso difuminado de los tonos, quise hacer algo diferente con una combinaciones de colores fuertes o más bien en tonos fuego como lo son el rojo, naranja, amarillo y con un toque de negro.
Por tal motivo te invito a que continúes con la lectura y estar al tanto del paso a paso realizado , para que tú también puedas recrearlo.


Espero Disfrutes este Tutorial de Maquillaje 🖌️🎨
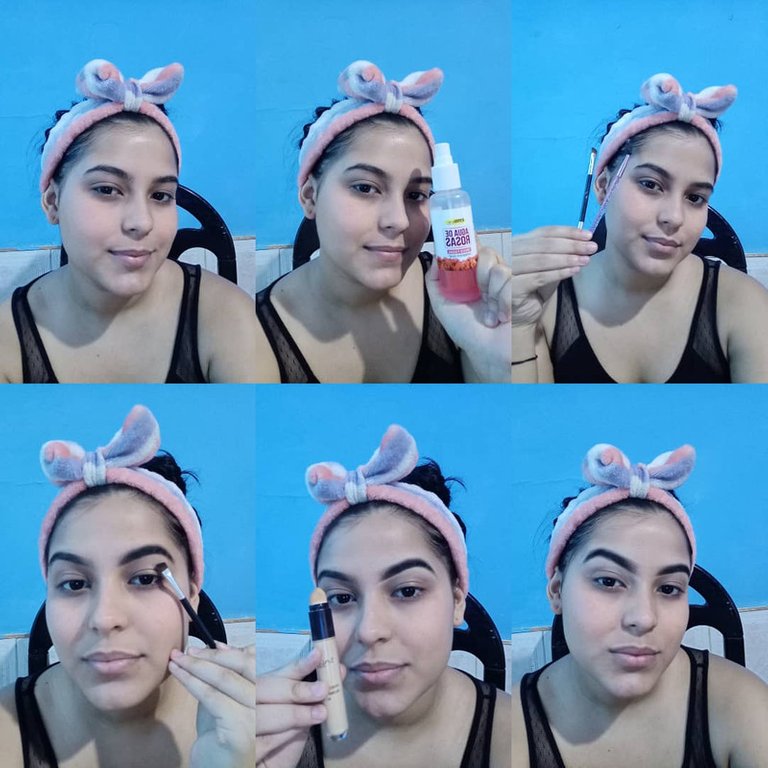
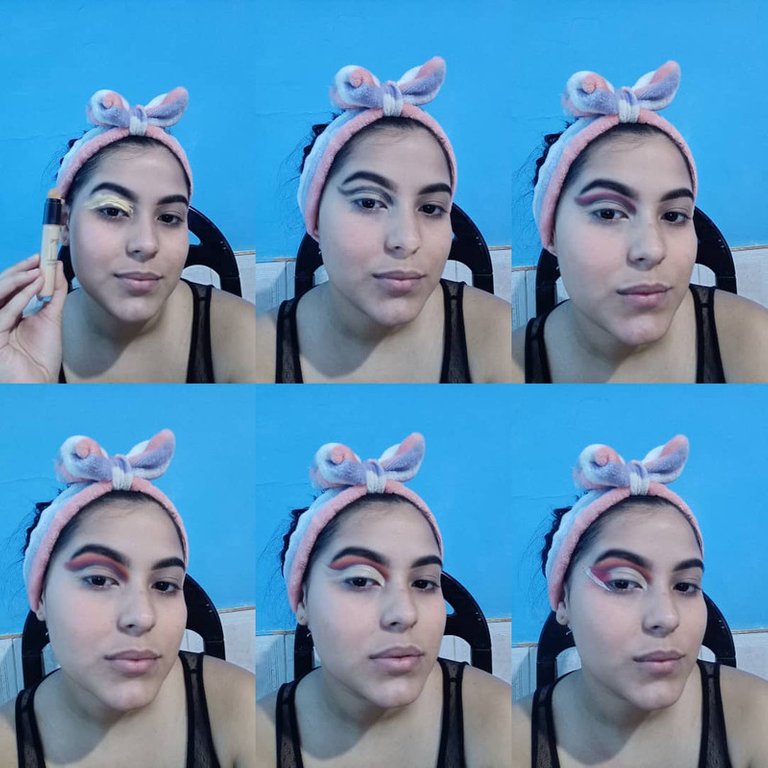
Para iniciar con este maquillaje, me agrego un tónico fácil de agua de rosas como siempre ya que he explicado lo fundamental que es y lo mucho que me ayuda mucho hidratar mi rostro, luego siempre comienzo por la parte de mis cejas, en este paso lo que hago es rellenar con sombra toda esa área con ayuda de un pincel en diagonal, rellenamos y difuminamos a la vez, para finalizar este paso con el corrector nos ayudamos para perfeccionarlas. Ese será siempre el marco de nuestro rostro y el enfoque de nuestra mirada por eso debemos ser meticulosos con ese paso.
Para este hermoso maquillaje de ojos, lo primero que hacemos es agregar corrector por todas nuestras área del párpado ,tanto el móvil como el inmóvil , ya que es un truco muy eficaz para que los tonos de las sombras pigmenten mucho mejor y el maquillaje prrmanezca por mucho más tiempo.
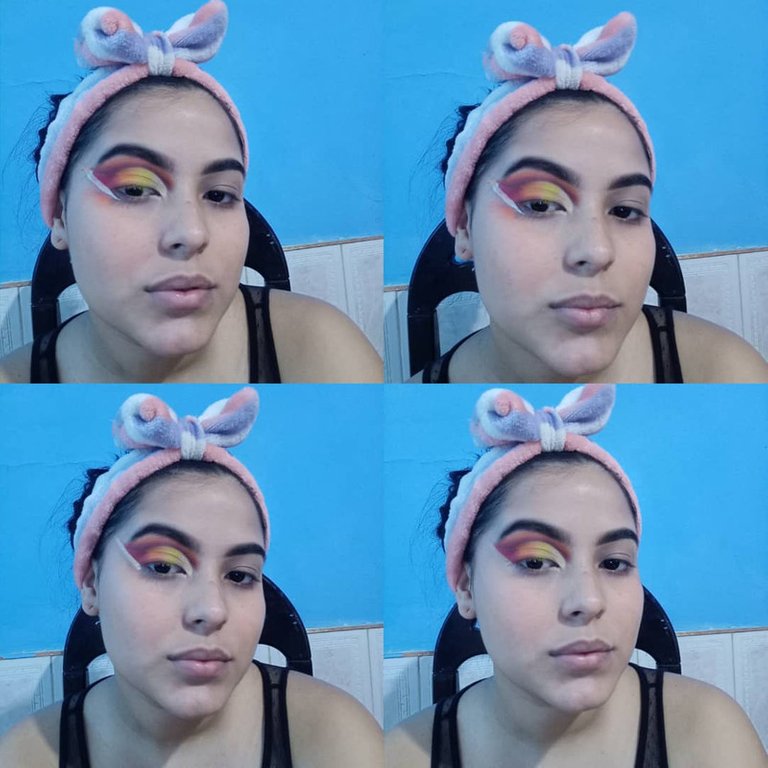
Esperamos que seque y penetre muy bien nuestro corrector e iniciamos con el tono negro y lo colocamos en forma de arco por encima de nuestro pliegue, continuamos difuminando con el tono rojo y finalizamos con el naranja todo bien difuminado, siempre esparciendo el color.
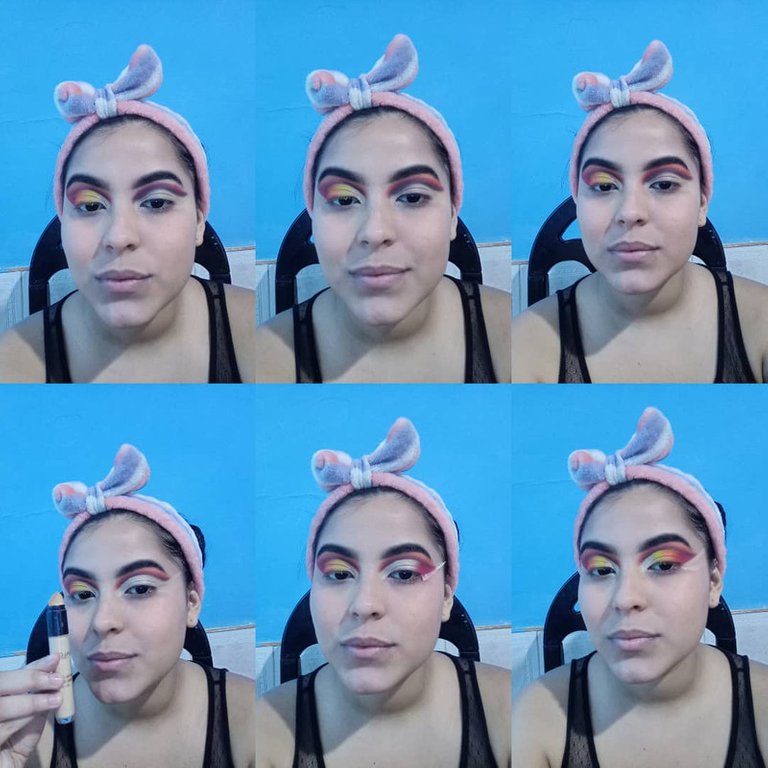
Luego para nuestro corte, yo me ayudo mucho con agua desmaquillante y un hisopo o con una toallita húmeda desmaquillante, luego de hacer el corte aplicamos o mejor dicho limpiamos toda esa zona con nuestro corrector. Y empiezo agregando desde mi esquina el tono rojo, luego lo difumino con el naranja y termino con el despampanante amarillo.
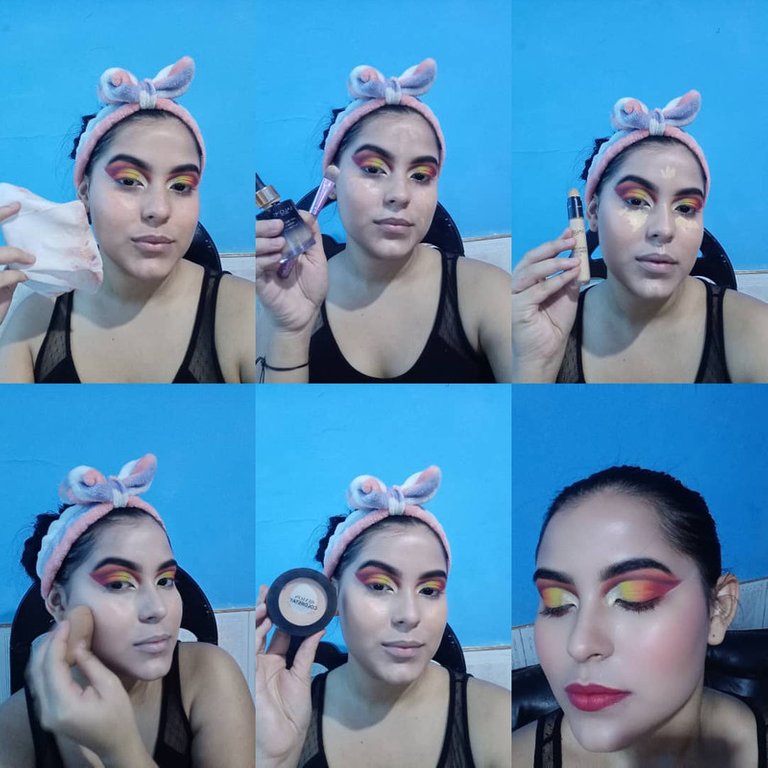
Para la parte de mi rostro, es muy importante preparar tu piel e hidratarla con tu mejor crema, luego lo que hago es agregar mi base, mi corrector lo difumino todo muy bien para luego sellarlo con mi polvo , paso a agregarme el rubor, iluminador y un buen labial. Bueno si más que agregar creo que este hermoso maquillaje quedaría espectacular con unas hermosas pestañas.
Espero que les haya gustado este maquillaje, me despido hasta unan pronta ocasión.
.


”ENGLISH”


Hello Makeup Power Comunity 🖌️🎨
A warm greeting to all my dear friends, especially to the readers of the makeuppower community, I hope you have a great Friday, and can enjoy a great weekend, I for one will 🤗.
Today I want to share with you this beautiful makeup, I was really delighted with the result and with the beautiful blurred tones, I wanted to do something different with a combination of strong colors or rather in shades of fire such as red, orange, yellow and a touch of black.
For this reason I invite you to continue reading and be aware of the step by step, so you too can recreate it.

I hope you enjoy this Makeup Tutorial🖌️🎨
To start with this makeup, I add an easy tonic of rose water as always since I have explained how fundamental it is and how much it helps me a lot to moisturize my face, then I always start with the part of my eyebrows, in this step what I do is to fill with shadow all that area with the help of a brush diagonally, we fill and blur at the same time, to finish this step with the concealer we help us to perfect them. This will always be the frame of our face and the focus of our look, that's why we must be meticulous with this step.
For this beautiful eye makeup, the first thing we do is to add concealer to all our eyelid area, both the mobile and immobile, as it is a very effective trick for the shades of the shadows pigment much better and makeup prrmanezca for much longer.
We wait for our concealer to dry and penetrate very well and we start with the black shade and place it in an arc above our crease, we continue blending with the red shade and finish with the orange shade, all well blended, always spreading the color.
Then for our cut, I help myself a lot with makeup remover water and a cotton swab or a wet makeup remover wipe, after making the cut we apply or rather clean the entire area with our concealer. And I start by adding the red shade from my corner, then I blend it with the orange and finish with the stunning yellow.
For the part of my face, it is very important to prepare your skin and moisturize it with your best cream, then what I do is add my foundation, my concealer I blend it all very well and then seal it with my powder, then I add my blush, highlighter and a good lipstick. Well if more to add I think this beautiful makeup would look spectacular with beautiful eyelashes.
I hope you liked this makeup, I'll say goodbye until next time.


Les doy las gracias por visitar mi blog, sus comentarios son muy valiosos para mi.
I thank you for visiting my blog, your comments are very valuable to me.
Me despido, hasta una próxima oportunidad.
I bid you farewell, until a future opportunity.
The translator used in my publication is :Translated with www.DeepL.com/Translator (free version)

Todo lo escrito es de mi autoría @virgi2001
Everything written is of my authorship @virgi2001
Las fotografías son de mi propiedad, capturando el momento con la cámara de mi teléfono Realme 6.
The photographs are my own, capturing the moment with my Realme 6 phone camera.

Te quedó realmente estupendo😍🤗✨
Gracias amiga hermosa 😘