[Esp/Eng] ✨Decoration for the switch inspired by Miu.✨
🔸Sin más que añadir, a continuación los dejo con el paso a paso:
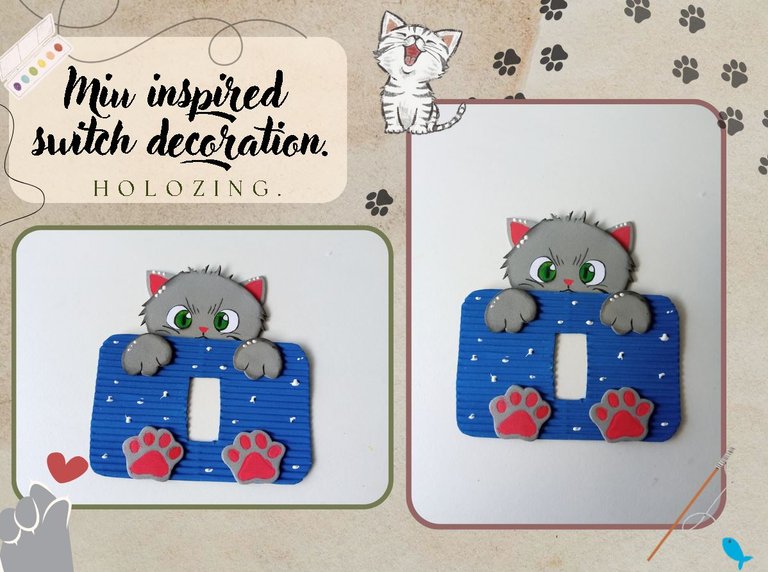
Good afternoon, holozing friends! I hope you are feeling pretty well, I'm happy to stop by here again to share an idea to decorate the Miu-inspired switch. Finally I can share with you a nice idea with my favorite character Miu, obviously in foam. It took me a long time to make the decision to make it because I was a little afraid that it wouldn't turn out as pretty and cute as I wanted, you know that I usually make all my characters as cute as possible haha.
It's been a long time since I made a switch and I really don't know why, I have to include it in my list of creations to make it more often, because it seems like a pretty striking and colorful decoration for the children's room.
🔸Without more to add, then I leave you with the step by step:
♥️ESPERO QUE TE GUSTE,
¡Empecemos!
♥️I HOPE YOU LIKE IT,
Let's start!

✂️ MATERIALES | ✂️ MATERIALS

- Cartulina corrugada.
- Foami gris.
- Hoja blanca.
- Marcadores.
- Pinturas.
- Pegamento.
- Tijeras.
- Regla.
- Lápiz.
- Corrugated cardboard.
- Gray foam.
- White sheet.
- Markers.
- Paintings.
- Glue.
- Scissors.
- Ruler.
- Pencil.

✨ PROCEDIMIENTO | ✨ PROCESS

- ✨ PASO 1:
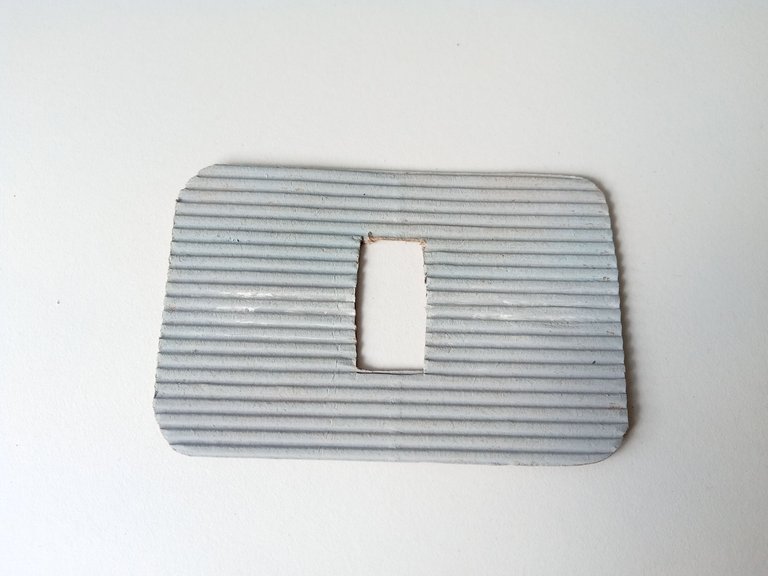
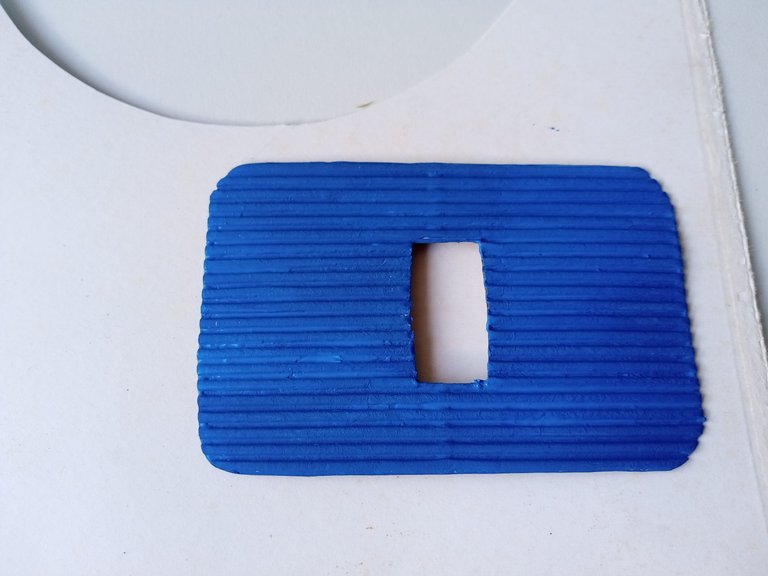
Lo primero que hice fue trasferir el diseño de mi interruptor a la cartulina corrugada, en algunos casos pueden retirar el frente del interruptor y utilizarlo directamente como una plantilla o también pueden tomar las medidas e ir dibujando la forma en una hoja blanca y luego calcar en la cartulina. En mi caso, no me gustaba el color de la cartulina corrugada, así que tomé pintura azul, la cual me parece que combina muy bien con el tono gris de Miu y pinté la base para el interruptor.
- ✨ STEP 1:
The first thing I did was transfer the design of my switch to the corrugated cardboard, in some cases you can remove the front of the switch and use it directly as a template or you can also take the measurements and draw the shape on a white sheet and then trace on The cardboard. In my case, I didn't like the color of the corrugated cardboard, so I took blue paint, which I think matches very well with Miu's gray tone, and painted the base for the switch.


- ✨ PASO 2:
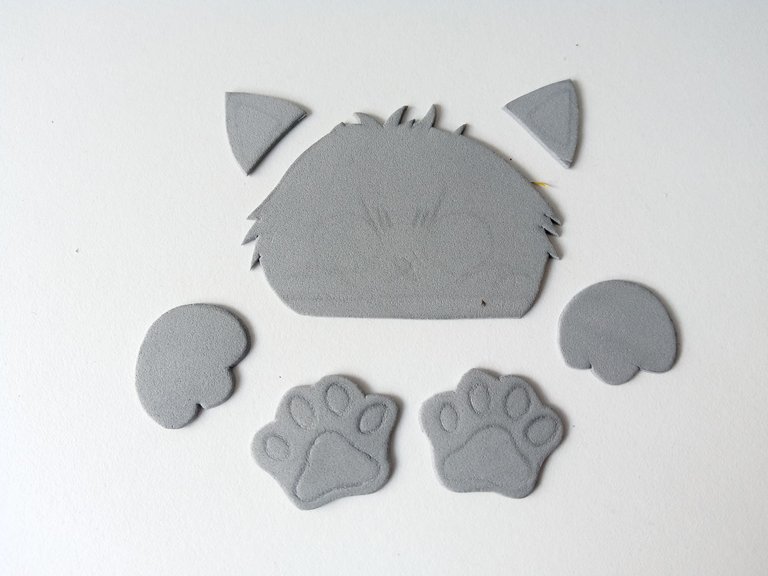
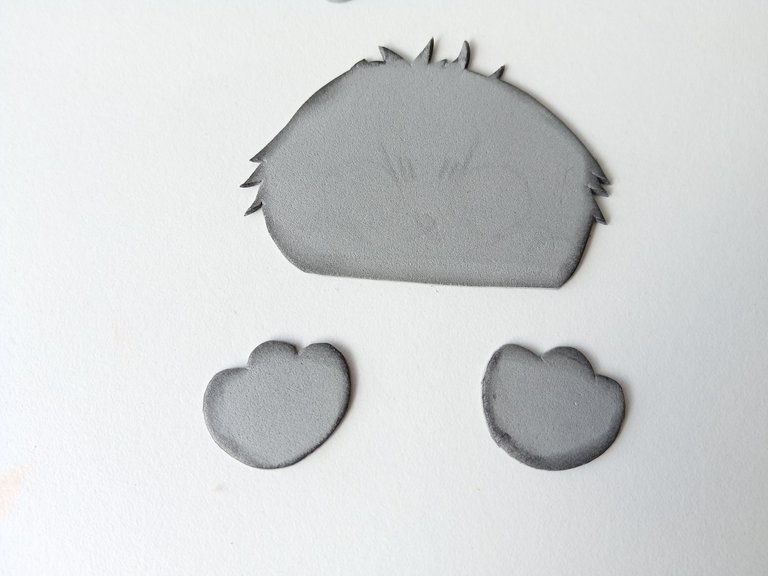
Mientras la base se secaba, comencé a dibujar parte de la cabeza de Miu, las patitas que irán agarradas de la parte superior y las patas de la parte inferior, donde se aprecia la parte interna de las patas y los ojos. Luego de tener todas las piezas dibujadas, las transferí al color correspondiente de foami que en este caso fue el color gris.
- ✨ STEP 2:
While the base was drying, I began to draw part of Miu's head, the legs that will be attached to the top and the legs at the bottom, where you can see the inner part of the legs and the eyes. After having all the pieces drawn, I transferred them to the corresponding color of foam, which in this case was gray.


- ✨ PASO 3:
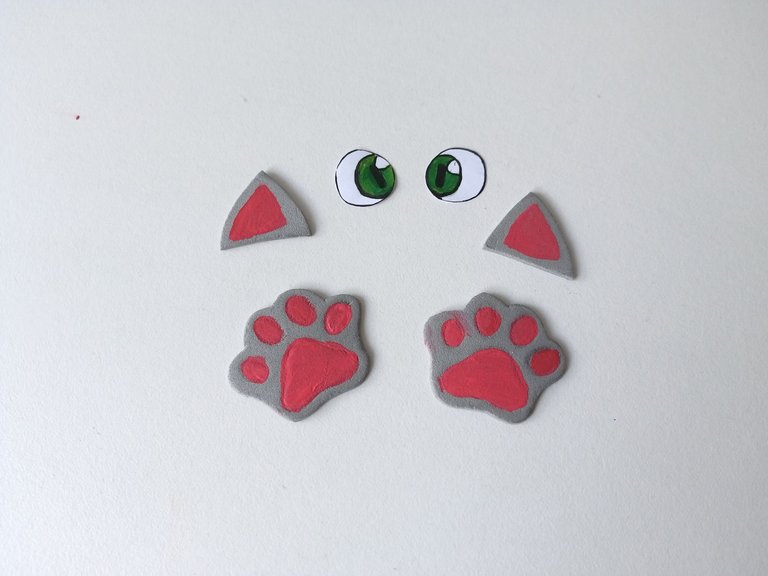
A continuación, me dispuse a dar color a los bordes de cada una de las piezas con ayuda de un pañito y pintura negra. En cuanto a las patas, pinté la parte interna con pintura rosa, al igual que la parte interna de las orejas, y en cuanto a los ojos los pinté con marcadores y remarqué con marcador delgado negro.
- ✨ STEP 3:
Next, I started to color the edges of each of the pieces with the help of a cloth and black paint. As for the legs, I painted the inside with pink paint, as well as the inside of the ears, and as for the eyes, I painted them with markers and highlighted them with a thin black marker.


- ✨ PASO 4:
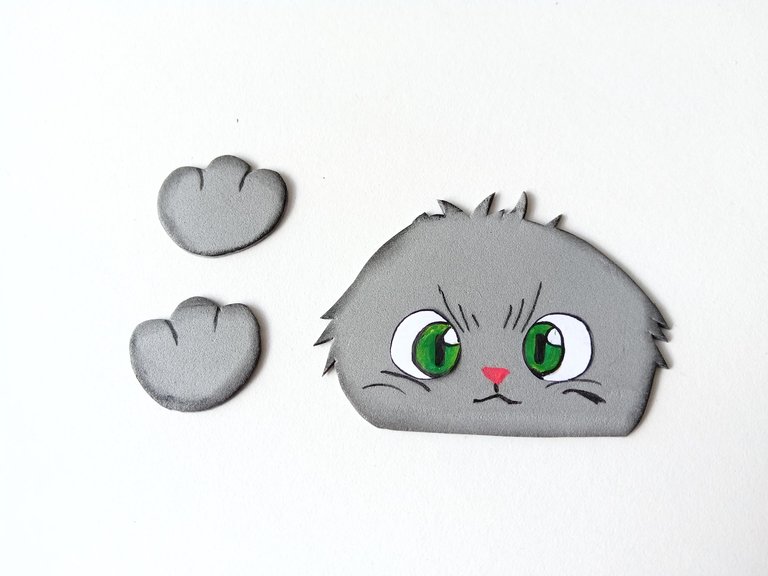
Seguidamente, pinté la nariz en rosado, pegué los ojos, di detalles con marcador negro a las patas, rostro y expresiones.
- ✨ STEP 4:
Next, I painted the nose in pink, glued the eyes, and gave details with black marker to the legs, face and expressions.


- ✨ PASO 5:
Al estar todas las piezas secas, comencé a pegar las piezas a la base del interruptor, de la siguiente manera: pegué la cabeza de Miu en la parte superior del interruptor, las patas sobre la base, pero justo en el borde dando la idea de que se está sosteniendo, las orejas y las otras patas en la parte baja, justo en la misma posición de las anteriores. Para finalizar, di puntos de luz por toda la base y en algunas partes de Miu, como orejas, cabeza y patas.
- ✨ STEP 5:
Once all the pieces were dry, I began to glue the pieces to the base of the switch, in the following way: I glued Miu's head on the top of the switch, the legs on the base, but right on the edge giving the idea of that is being held, the ears and the other legs at the bottom, exactly in the same position as the previous ones. To finish, I gave points of light throughout the base and in some parts of Miu, such as ears, head and legs.

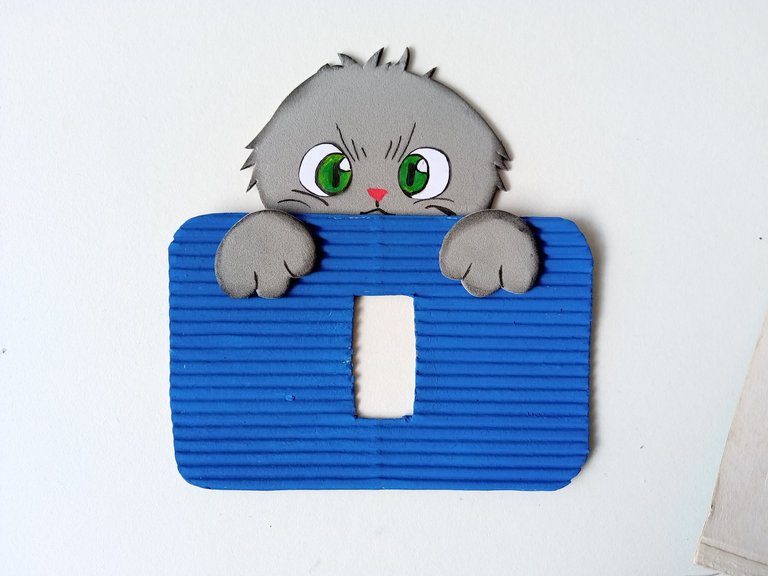
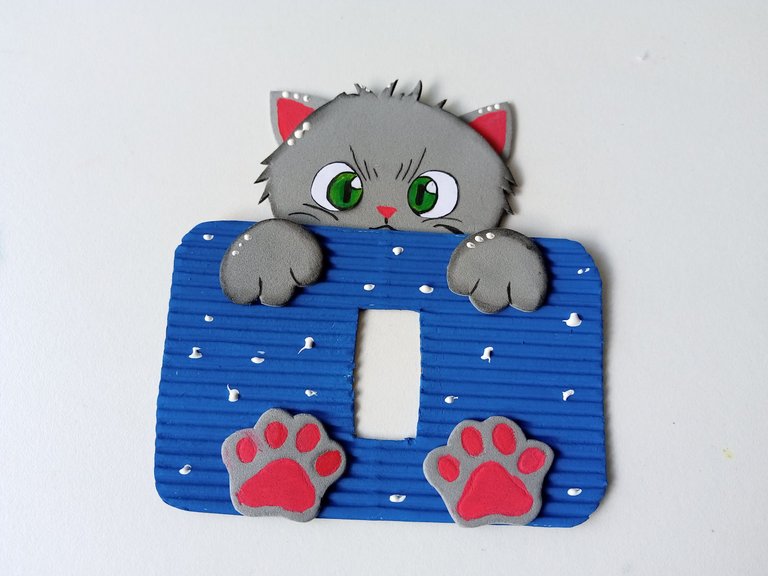

✨¡And ready!✨ This is how you can come up with a cute and tender idea to decorate the switches in the little one's room. I used very few materials, so I hope you are encouraged to try to make this idea. I hope you liked it, because I was eager to share this step by step with you.
❤️Until the next post.

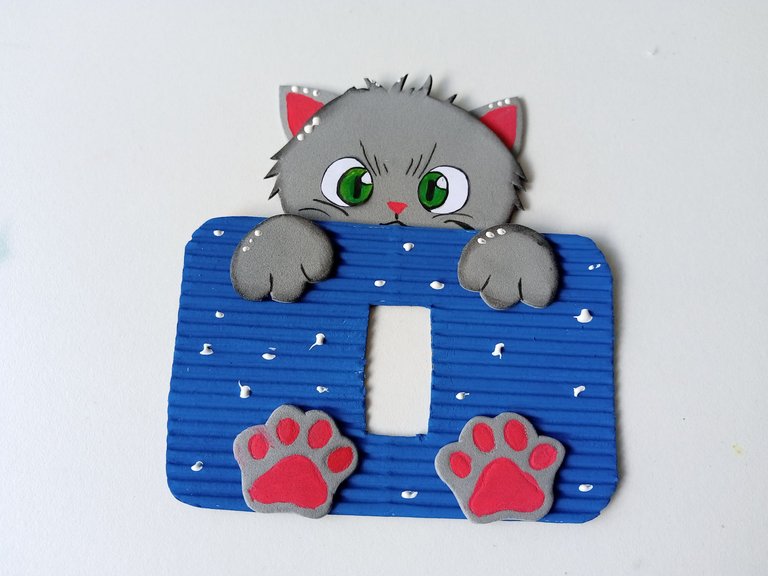
❤️ Hasta la próxima publicación.
❤️ Until the next post.


Todas las fotografías son de mi propiedad.
Separador y Fotos editadas en Canva
All photographs are my property.
Photos edited in Canva
Ami te quedó precioso. Mucha creatividad y habilidad junta, definitivamente
Bueno amiga, usted no se queda atrás, haces cosas realmente preciosas y tienes un talento increíble 💕
Que cuchiii
Gracias Ely 💕
Es un bonito trabajo sin duda, los ojos quedaron muy tiernos!!
Saludos
Muchísimas gracias! Me alegra mucho que te haya gustado 🤭💕
Que hermoso se veran esos interruptores😍😍 te quedó demasiado cuchi ese gatico amii😍
Gracias Mili hermosa, si pudiera se los regalará a tus bebés jaja. 💕
Que lindo te quedó 🥺 lo haces ver tan fácil de hacer JAJA tienes muchísimo talento, Dios bendiga tus manitos ✨
Ay! Que bella amiga, amén y amén 🙏🏻. Bueno amiga, yo pensaba lo mismo, pero con la practica uno va mejorando y consiguiendo materiales que te facilitan mas el trabajo 🤭💕
Muchas gracias bella 💕
Que bellooo, esa carita de enojado jajaja, que tierno te quedó mi Valen ❤️
Jaja Muchas gracias mi Vane, a mí también me da risa y ternura 😄
!PIZZA
Muchas gracias por el apoyo amigos ✨
$PIZZA slices delivered:
@danzocal(8/10) tipped @valenpba