[Esp/Eng] ✨Decoraciones para lápiz. // Decorations for pencil. ✨
✨✏️¡Hola amigos amantes de la creatividad! Espero que hayan pasado un muy buen comienzo de semana.✏️✨
🔸Sin más que añadir, a continuación los dejo con el paso a paso:
✨✏️¡Hello friends who love creativity! I hope you had a very good start to the week.✏️✨
Good afternoon friends. I hope you are having a great week. Today I share with you the step by step to make some ideas for pencil decoration. I haven't shared decorations for pencils or pens with you in a while and it's about time. I admit that I love making this type of decoration, since you can get creative and make it with the theme of your choice, even making a personalized doll and, the best thing is that it does not require a large amount of materials.
Usually, I make decorations with different themes, but this time I wanted to make an idea for a boy and another for a girl. Of course, if you are an adult, you can also use these cute decorations.
🔸Without more to add, then I leave you with the step by step:
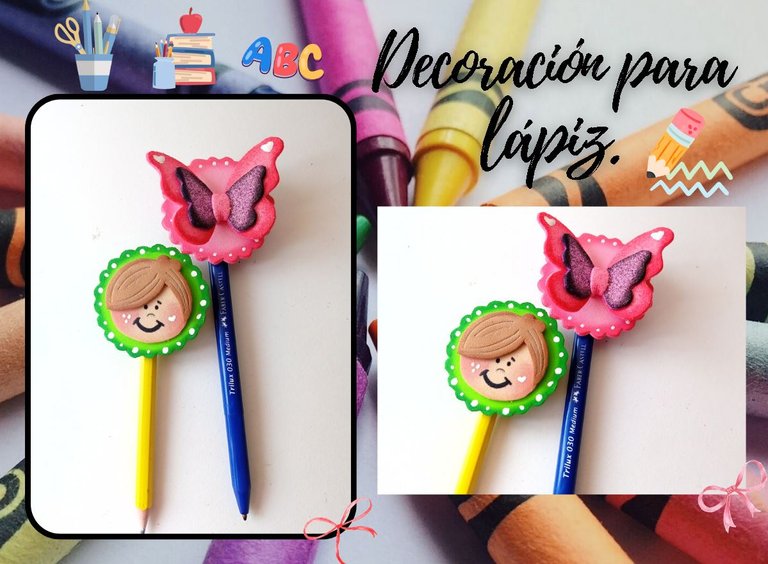
♥️ESPERO QUE TE GUSTE,
¡Empecemos!
♥️I HOPE YOU LIKE IT,
Let's start!

✂️ MATERIALES | ✂️ MATERIALS

👦🏻 Decoración del niño:
- Foami marrón, piel y verde.
- Foami metalizado dorado.
🦋Decoración de mariposa:
- Foami escarchado morado y rosa.
- Foami metalizado dorado.
- Foami rosa.
✂️General:
- Hoja blanca.
- Pegamento.
- Pinturas o marcadores.
- Lápiz.
- Regla.
- Tijeras.
👦🏻 Boy's decoration:
- Brown, skin and green foami.
- Gold metallic foam.
🦋Butterfly decoration:
- Purple and pink frosty foam.
- Gold metallic foam.
- Pink foam.
✂️General:
- White sheet.
- Glue.
- Paints or markers.
- Pencil.
- Ruler.
- Scissors.

✏️ PROCEDIMIENTO | ✏️ PROCESS

- PASO 1:
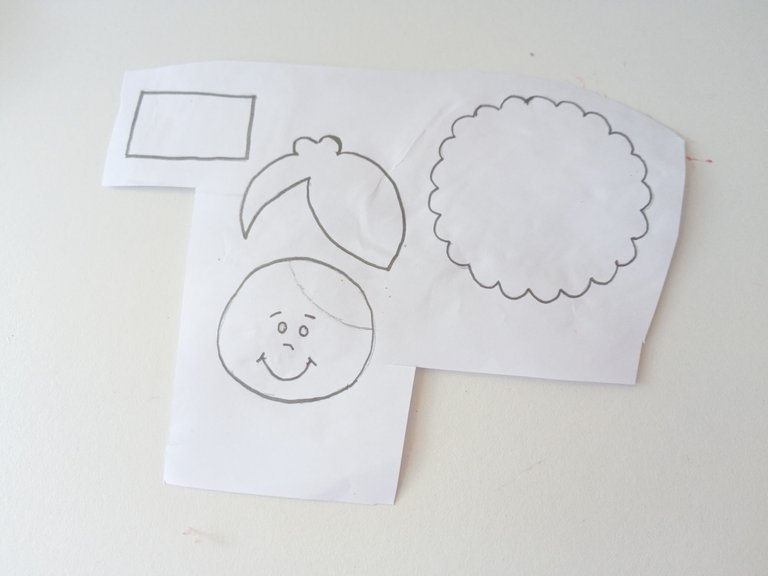
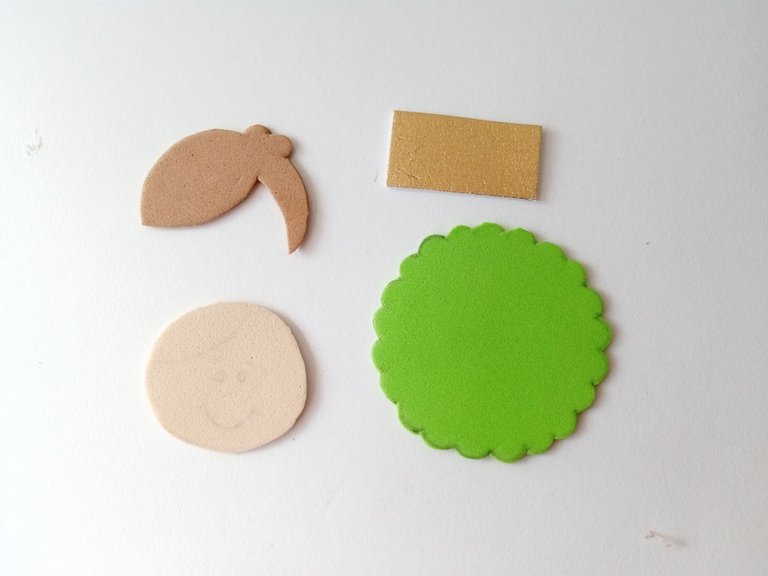
Como son dos ideas decidí comenzar por el del niño, así que comencé dibujando el patrón en una hoja blanca y luego lo transferí a los colores correspondientes de foami, como a continuación: para la cabeza de 3.5 cm en color piel, para el cabello marrón, para el fondo circular de 5.5 cm en color verde y para forrar el lápiz un rectángulo de 2 cm en foami metalizado dorado. Recorté todas las piezas y continuamos.
- STEP 1:
Since there are two ideas, I decided to start with the child's, so I started by drawing the pattern on a white sheet and then transferred it to the corresponding colors of foam, as a continuation: for the 3.5 cm head in skin color, for the brown hair, for the 5.5 cm circular background in green and to cover the pencil a 2 cm rectangle in gold metallic foam. I cut out all the pieces and we continued.


- PASO 2:
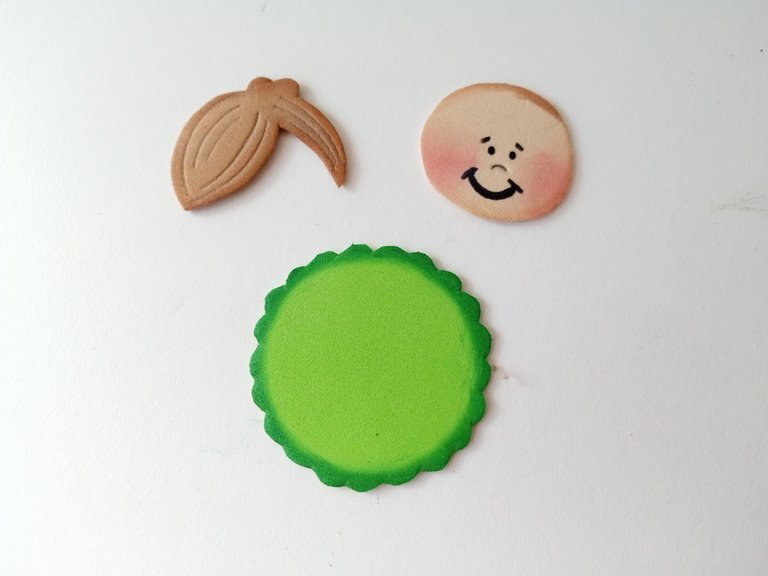
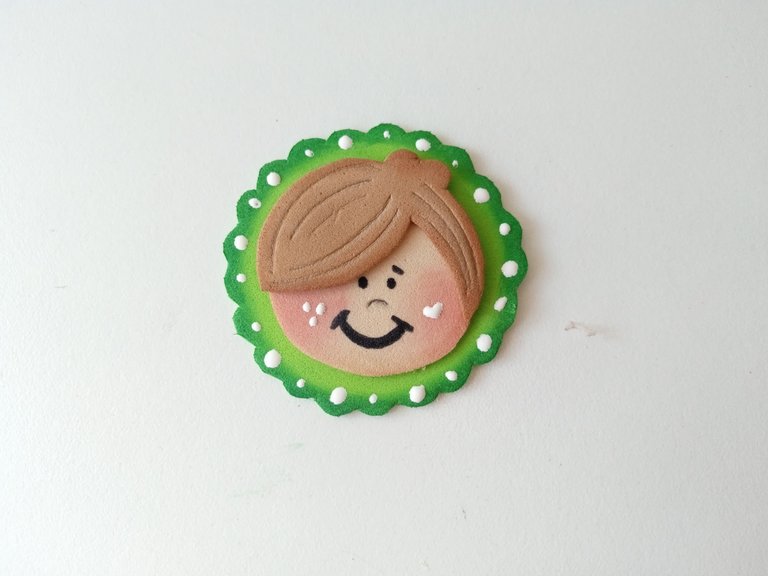
Al tener todas las piezas listas, tomé un color de pintura líquida más oscura que cada uno de los colores y envolviendo un pañito en mi dedo índice, lo pasé por todo el borde. Luego, di detalles al cabello con el lápiz, dibujé el rostro y pinté las mejillas. Luego, armé las piezas y las pegué al fondo verde. También, hice puntos blancos al fondo y a las mejillas.
- STEP 2:
Having all the pieces ready, I took a color of liquid paint darker than each of the colors and wrapping a cloth around my index finger, I ran it along the entire edge. Then, I gave details of the hair with the pencil, drew the face and painted the cheeks. Then, I put the pieces together and glued them to the green background. Also, I made white dots on the bottom and cheeks.


- PASO 3:
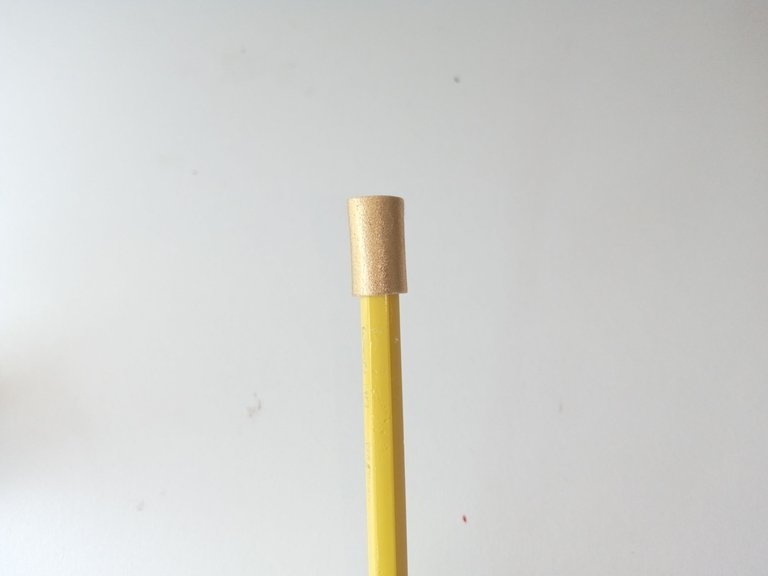
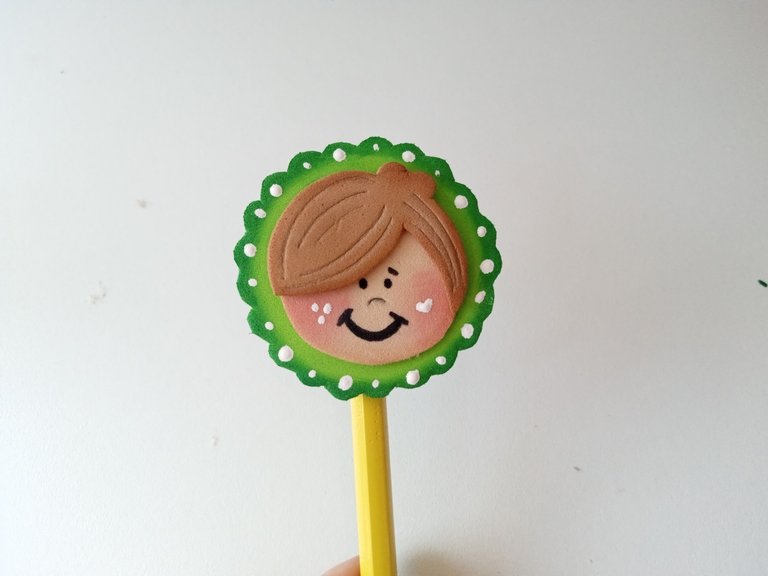
Por último, forré la parte superior del lápiz con el rectángulo metalizado dorado y para cubrir la unión pegué en el centro la decoración del niño.
- STEP 3:
Finally, I lined the top of the pencil with the gold metallic rectangle and to cover the joint I glued the child's decoration in the center.


- PASO 4:
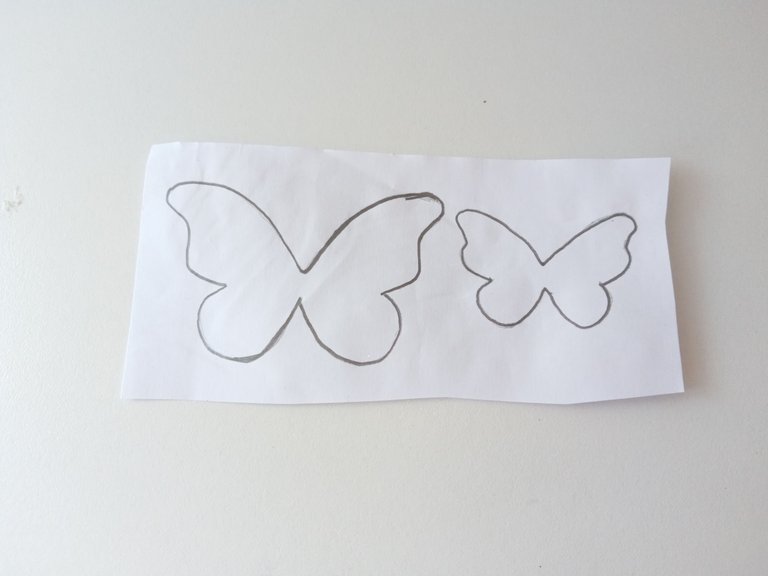
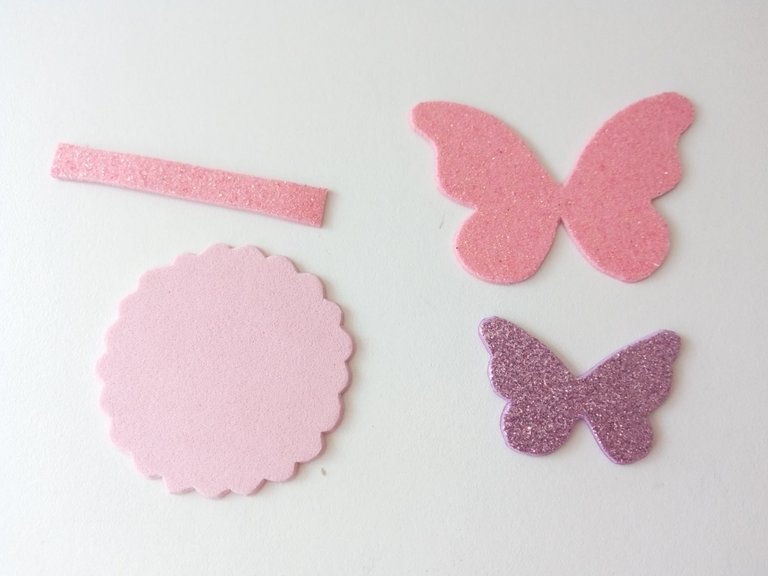
Ahora vemos con la mariposa que a la vez es un lazo jeje. Dibujé el patrón en una hoja blanca y luego lo transferí a los colores correspondientes de foami, utilizando los siguientes colores y medidas: la mariposa más grande de 6.5 cm en foami rosa escarchado, la mariposa más pequeña de 4.5 cm en foami escarchado morado, para el fondo circular de 5.5 cm en color rosado, para unir las piezas una tira delgada en foami rosa escarchado y para forrar el lápiz un rectángulo de 2 cm en foami metalizado dorado. Recorté todas las piezas y seguimos.
- STEP 4:
Now we see with the butterfly that it is also a bond hehe. I drew the pattern on a white sheet and then transferred it to the corresponding colors of foami, using the following colors and measurements: the largest butterfly of 6.5 cm in frosty pink foami, the smallest butterfly of 4.5 cm in frosty purple foami, to the 5.5 cm circular background in pink, to join the pieces a thin strip in frosty pink foam and to cover the pencil a 2 cm rectangle in gold metallic foam. I cut out all the pieces and we continued.


- PASO 5:
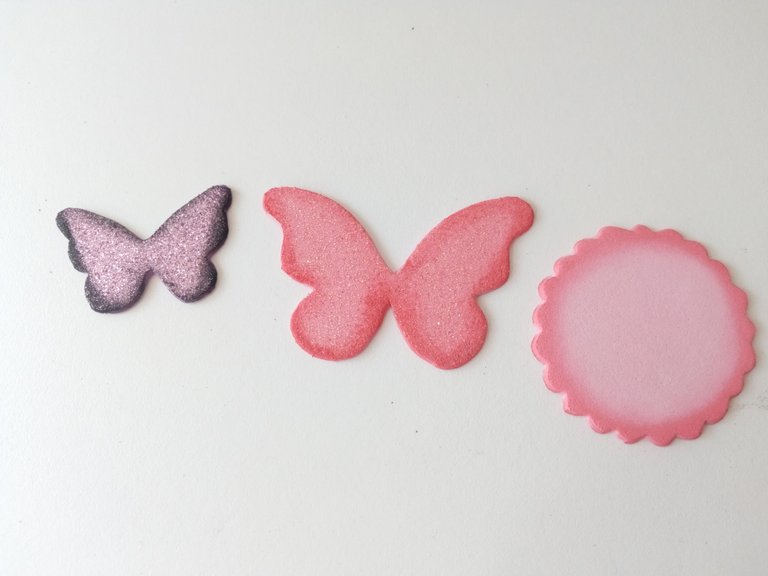
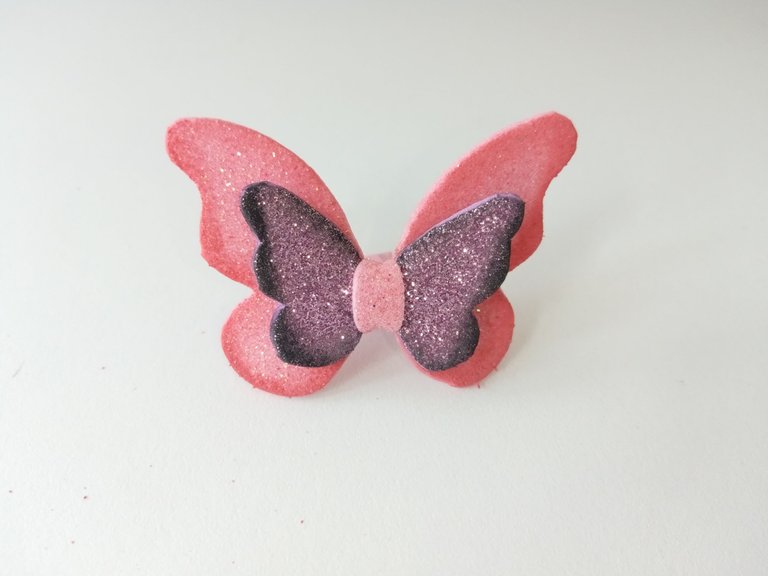
Tomé los colores de pintura un tono más oscuro que cada pieza y la pasé por el borde de cada una de las piezas, menos la tira del centro y el forro del lápiz. Luego, uní las mariposas y en medio pegué la tira delgada.
- STEP 5:
I took the paint colors one shade darker than each piece and ran it along the edge of each of the pieces, minus the center strip and the pencil liner. Then, I joined the butterflies and glued the thin strip in the middle.


- PASO 6:
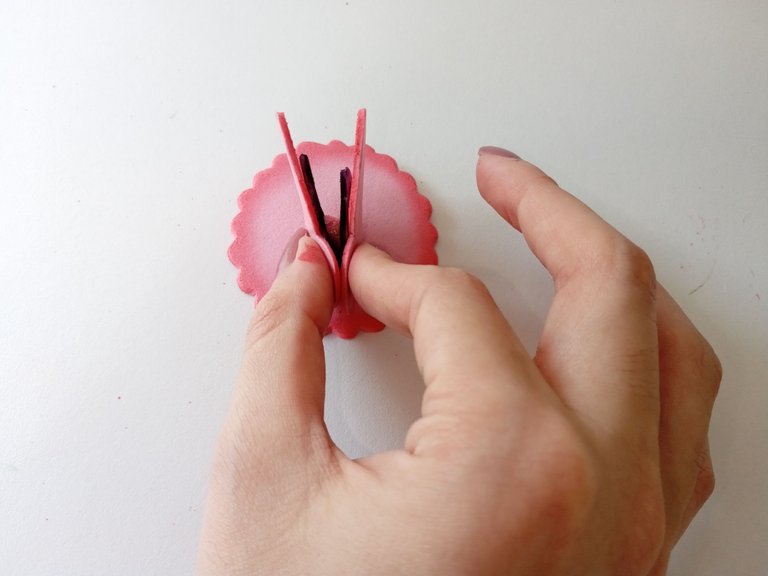
Después, pegué las mariposas en medio del fondo rosado, mientras juntaba las alas para que, al soltarlas, estas se quedaran un poco abiertas. Por último, di detalles al fondo con puntos blancos y a las alas más grandes les hice un corazón en las puntas. Forré el lápiz con el rectángulo dorado y pegué la decoración en medio.
- STEP 6:
Then, I glued the butterflies in the middle of the pink background, while putting the wings together so that, when released, they would remain a little open. Finally, I gave details to the background with white dots and I made a heart on the tips of the largest wings. I lined the pencil with the gold rectangle and glued the decoration in the middle.

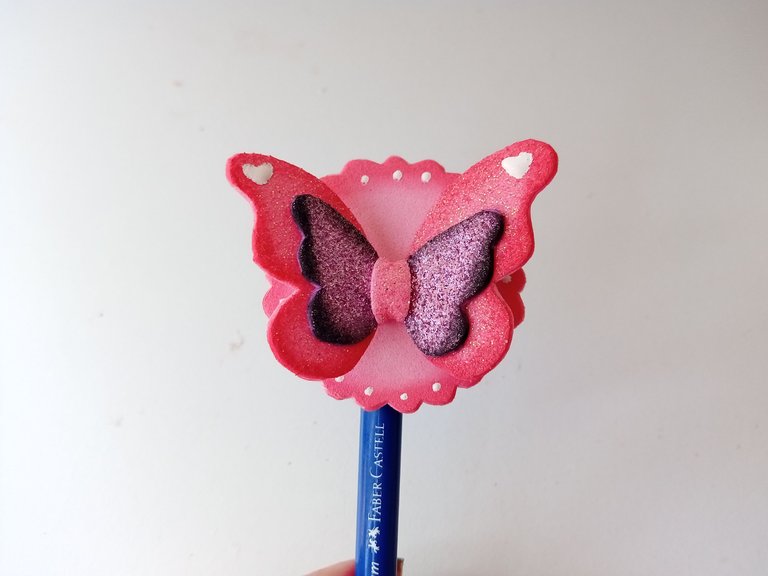

✨✏️🦋¡And ready!✏️🦋✨This is how you can make these decorations for your pencils or pens. Also, you can take the idea, get inspired and create the decoration you want. I love making this type of decorations because they are very small and I see them as much more tender. I hope you liked the step by step and are encouraged to make it.
❤️Until the next post.

✨RESULTADO: | ✨RESULT:

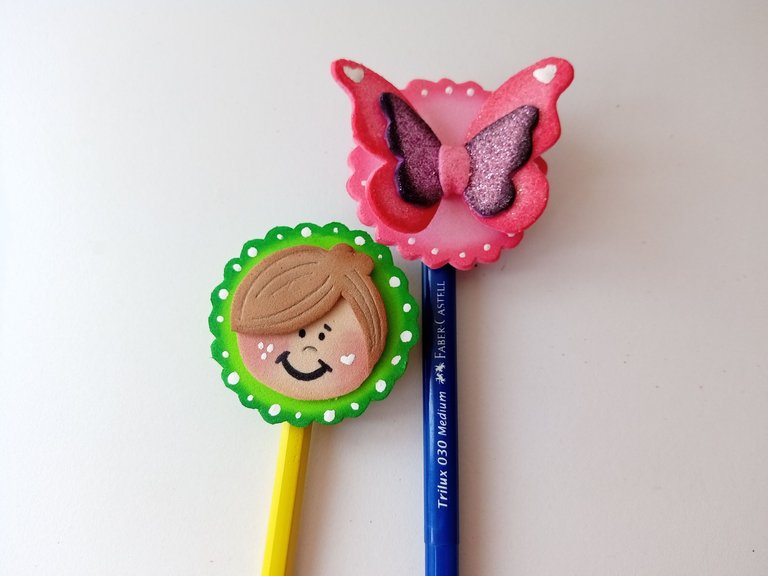


Todas las fotografías son de mi propiedad.
Separador y Fotos editadas en Canva
All photographs are my property.
Photos edited in Canva
Ami, Miranda sería feliz con esos adornos para sus lápices!!
A mi me sorprende con los puntos de luz con el blanco provocan un gran cambio.
Demasiado bellos. La mariposa es mi favorita
Aimssss pero que cuchitura DioooosMiooo🥹
Los quiero, me encantó cada detalle y es que como no? Si mi amiga hace solo bellezas💞💞💞
Ayy! Siempre me dejas unos comentarios tan lindos amiga! Gracias por esas palabras tan bellas, tu también haces cositas preciosas. 🥰💕
Wow! Ambos están hermosos mi Valen, pero sin duda el de la mariposa me atrapó muchísimo, me encantaría uno así pero en azul 😍
Muchas gracias mi Vane! Es verdad, justo pensé en hacerlo azul , pero no tenía los materiales 🤭 hubiera quedado muy lindo.
Gracias por pasarte amiga bella 🥰
Están hermosos!!
Muchas gracias!! 💕
Que lindos esos detalles para decorar los lápices amiga, te quedaron muy lindos. Gracias por compartir tu paso a paso! 😍
Muchas gracias por tu comentario mi Kerit! Me alegra mucho que te haya gustado 💕
Preciosos. Y por el material que usaste han de quedar bien livianos. Es una grandiosa idea para regalar.
Muy hermosos me haces recordar los que mande elaborar para obsequiarles a mis compañeras de curso, gran trabajo.
!discovery 35
Si? Pues ese es un lindo obsequio 🥰 Muchas gracias por comentar y me alegra mucho que te haya gustado.💕
Si, tienes potencial !!!! podrias hacerlos para vender como detallitos para amistades, cuando me entreguen los que encargué te publico la fotico por aquí.
This post was shared and voted inside the discord by the curators team of discovery-it
Join our Community and follow our Curation Trail
Discovery-it is also a Witness, vote for us here
Delegate to us for passive income. Check our 80% fee-back Program
Están muy bonitas esas ideas que nos das para hacer los detalles de los lápices. Con cualquier figura podemos hacer lindos detalles y obsequiar ya sea de cumpleaños, también en poco tiempo celebraremos el día de las madres y para las maestras del colegio sería un regalo perfecto. Gracias por compartir están hermosos
Así es, sería un bonito obsequio para las maestras, los pequeños o el que desee darle un toque original a sus lápices. Me alegra que te haya gustado, muchas gracias.💕✨
Totalmente hermoso! pensé que era foami moldeable? no sé si se dice así.. pero cuando vi que era foami normal quedé totalmente impactado, gracias por compartir estos lindos diseños tienes mucho talento, un saludo <3
Wow! Que bonito comentario, muchas gracias. Quizá te referías a la masa flexible 🤭 no lo sé. Me alegra mucho que te haya gustado. Saludos!! ✨✨
Toda una belleza amiga,se ven muy cuchis🥰
Muchas gracias mi Yage bella!! 💕
Congratulations, your post has been upvoted by @dsc-r2cornell, which is the curating account for @R2cornell's Discord Community.
Enhorabuena, su "post" ha sido "up-voted" por @dsc-r2cornell, que es la "cuenta curating" de la Comunidad de la Discordia de @R2cornell.
Que preciosura ami 🥰 Te quedaron muy cuchis ambos adornitos, me encantan los detalles y colores de cada uno. Te cuento que tengo tiempo con ganas de hacer decoraciones para lápices también pero aun no las he hecho, sigo pensando en ideas jaja, las tuyas me ayudan a inspirarme porque están bellas 😍
Que bella mi Mary! Muchas gracias por tu lindo comentario 🥰💕. Ay Ami, a mí me encanta hacer estás decoraciones porque puedes hacerlas de lo que desees; algún personaje famoso, floral, de animalitos , etc.
Espero ver pronto ese post 💕💕
Que bonitos son me gustan mucho más que todo la mariposa está muy bonita
Muchas gracias Miri bella!! Me alegra que te haya gustado. El de la mariposa también me gusta mucho. Saludos✨
Como siempre haciendo cositas hermosas ami😍😍😍 no se como haces algo tan pequeño asi de perfecto jaja mis dedos no sirven pa eso vale 😂😂
¡¡¡Buen trabajo!!! Gracias por publicar tu excelente contenido en Hive Diy, me gusto mucho el acabado final que le agregaste a tus lápices, se ven muy brillantes y tiernos.
Tu comunidad artesana ahora es testigo
