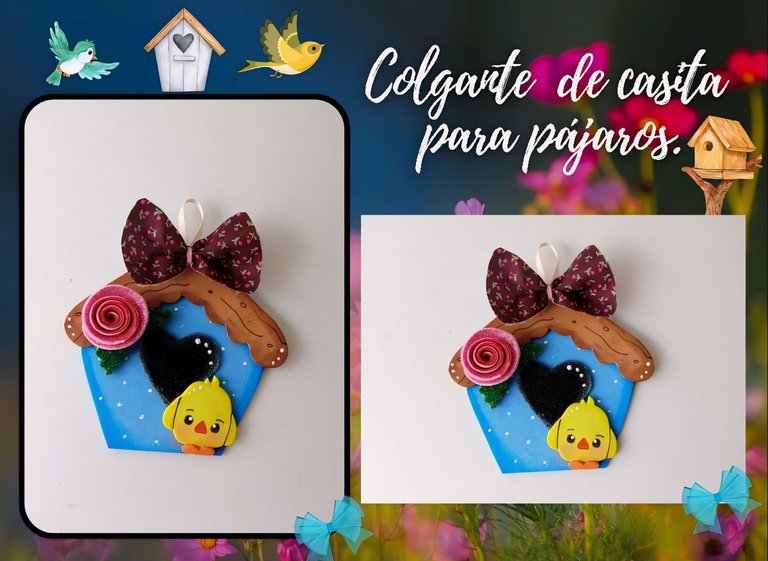
[Esp/Eng] ✨Colgante con temática de casita para pájaros. // Birdhouse themed pendant.✨
✨¡Hola amigos amantes de la creatividad! Espero que estén todos bien.✨
🔸Sin más que añadir, a continuación los dejo con el paso a paso:
✨¡Hello friends who love creativity! I hope you are all well.✨
Good afternoon, friends. I hope you are having a great week. For my part, quite well, thank God. On this occasion I share with you the step by step to make a beautiful pendant with a birdhouse theme. Since I was little, one of my favorite creations has always been houses, creating little houses with relief, with cardboard or different materials, and decorating them with small details, for me it is like going back to my childhood and playing in my dollhouse, or when my brother had to make models of houses, for me it was incredible.
That is why, due to time, I try to share these ideas, whether for Christmas or pendants, so that you can decorate your home a little with some of these beauties.
🔸Without more to add, then I leave you with the step by step:
♥️ESPERO QUE TE GUSTE,
¡Empecemos!
♥️I HOPE YOU LIKE IT,
Let's start!

✂️ MATERIALES | ✂️ MATERIALS
- Foami escarchado negro.
- Foami escarchado rosa.
- Foami escarchado verde.
- Foami marrón.
- Foami amarillo.
- Foami azul.
- Pinturas y marcadores.
- Pegamento.
- Hoja blanca.
- Lazo.
- Cinta.
- Tijeras.
- Lápiz.
- Black frosted foam.
- Pink frosted foam.
- Green frosted foam.
- Brown foam.
- Yellow foam.
- Blue foam.
- Paints and markers.
- Glue.
- White sheet.
- Bow.
- Ribbon.
- Scissors.
- Pencil.
🌟 PROCEDIMIENTO | 🌟 PROCESS
- PASO 1:
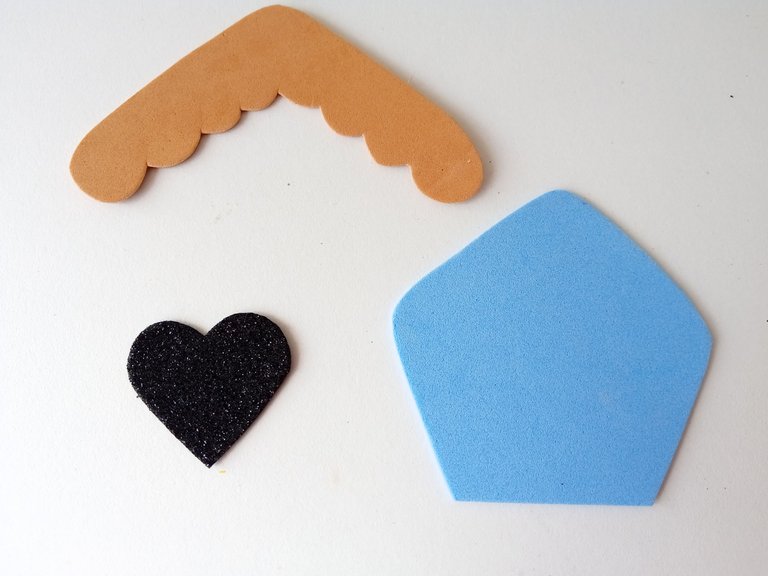
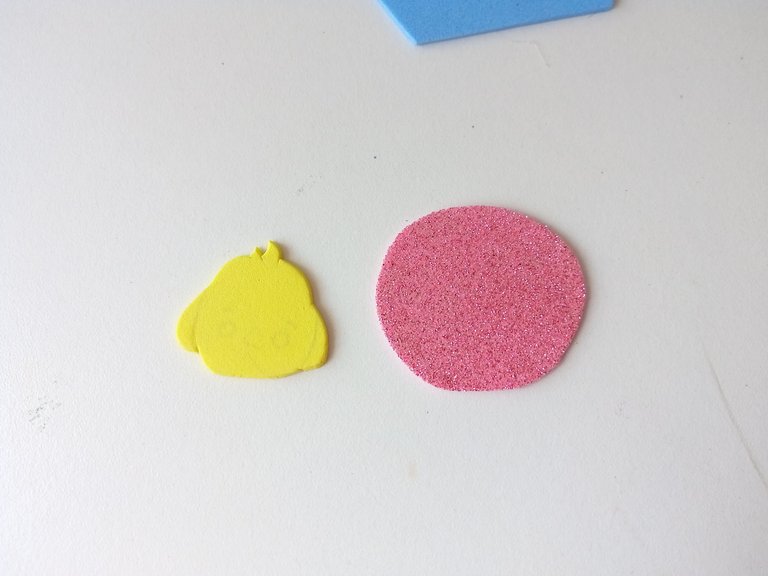
Lo primero que hice fueron los patrones para el diseño que quería para la casa de pájaros, al igual que dibujé al pájaro. Luego de tener los patrones listos, transferí los diseños a los colores correspondientes de foami, como les explico a continuación: la base de la casa en foami azul, el tejado en foami marrón, la entrada en foami escarchado negro y el pajarito en foami amarillo. Además, dibujé y recorté un par de hojas en foami escarchado verde y un círculo en foami escarchado rosa.
- STEP 1:
The first thing I did was the patterns for the design I wanted for the birdhouse, as well as drawing the bird. After having the patterns ready, I transferred the designs to the corresponding colors of foam, as I explain below: the base of the house in blue foam, the roof in brown foam, the entrance in black frosted foam and the little bird in yellow foam. In addition, I drew and cut out a couple of leaves in green frosted foam and a circle in pink frosted foam.
- PASO 2:
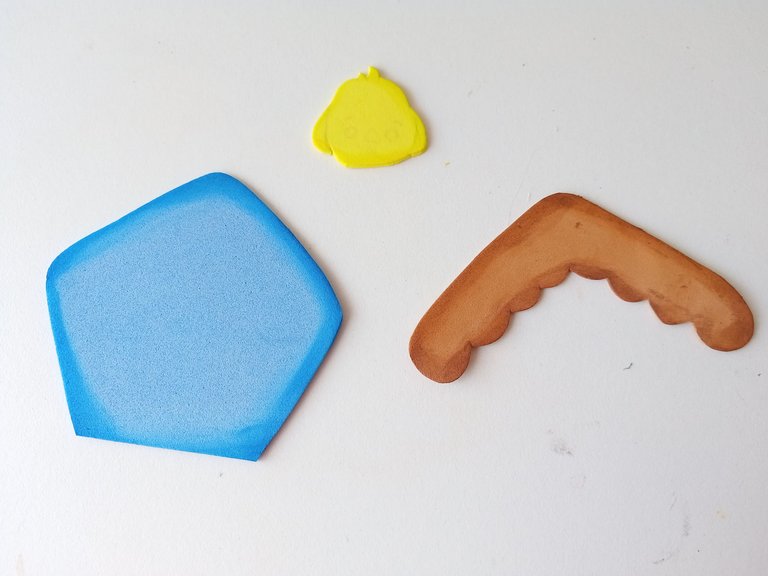
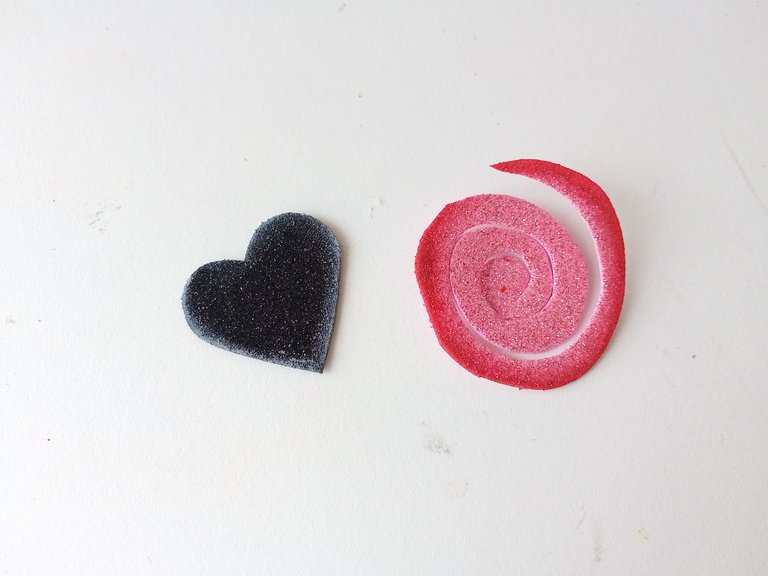
Una vez recortadas todas las piezas, comencé a dar color a los bordes con ayuda de un pañito y pinturas de tonos que hicieran contraste o un tono más oscuro que cada una de las piezas. Generalmente, solo pinto los bordes de piezas en foami liso, pero a veces me gusta agregar este toque al escarchado para que resalte un poco más. Además, recorté el círculo en espiral.
- STEP 2:
Once all the pieces were cut out, I began to color the edges with the help of a cloth and paints in contrasting tones or a darker tone than each of the pieces. Generally, I only paint the edges of pieces in plain foam, but sometimes I like to add this touch to the frosting so it stands out a little more. In addition, I cut out the spiral circle.
- PASO 3:
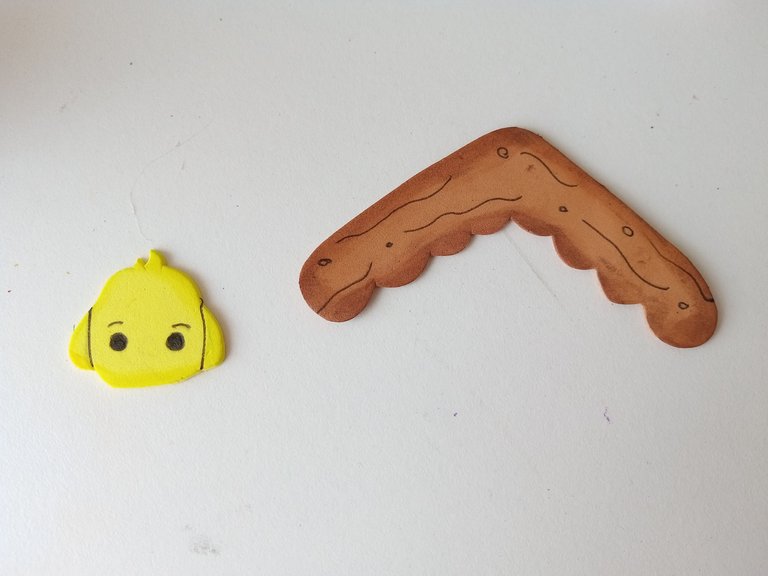
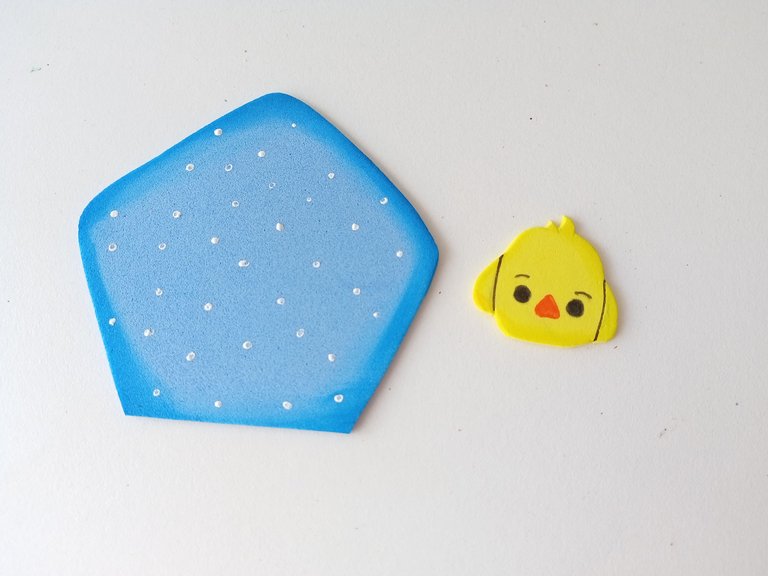
Al estar totalmente seco, di detalles con marcador al tejado para que parezca madera, al rostro y cuerpo del pájaro. Por otra parte, pinté algunos puntos blancos en toda la base de la casa y el pico del pájaro con pintura naranja.
- STEP 3:
Once it was completely dry, I gave details with a marker to the roof to make it look like wood, and to the face and body of the bird. On the other hand, I painted some white dots on the entire base of the house and the beak of the bird with orange paint.
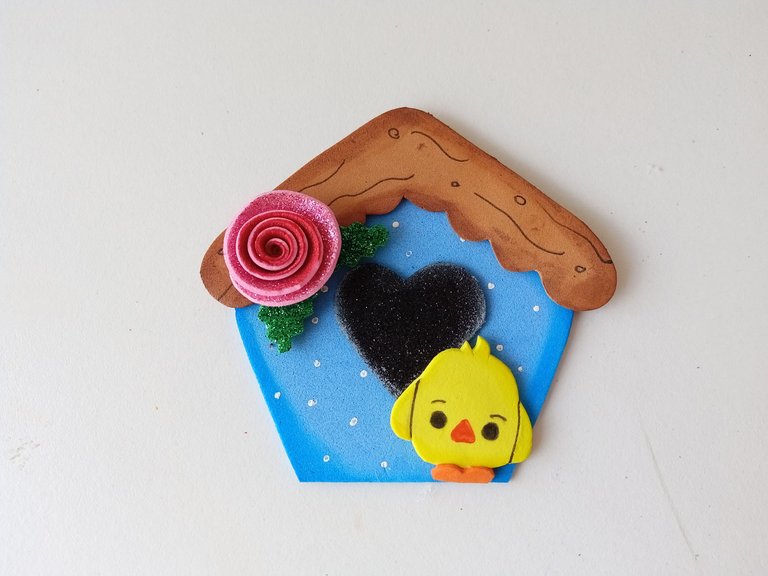
- PASO 4:
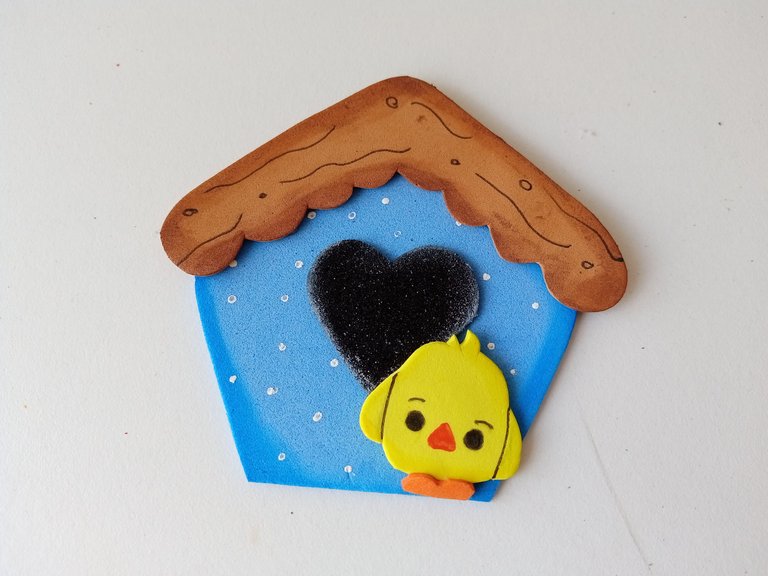
Una vez listo y seco, comencé a pegar cada una de las piezas; primero la base, el techo y la entrada de la casa, luego el pájaro en la parte inferior derecha, al cual le agregué unas patitas de último momento en foami naranja. Además, enrollé el espiral para formar una rosa y pegué las hojas a los costados de la parte inferior y esta la pegué en la parte superior izquierda, justo en el tejado.
- STEP 4:
Once it was ready and dry, I began to glue each of the pieces; first the base, the roof and the entrance of the house, then the bird on the lower right side, to which I added some last minute legs in orange foam. In addition, I rolled the spiral to form a rose and glued the leaves to the sides of the lower part and this one on the upper left side, right on the roof.
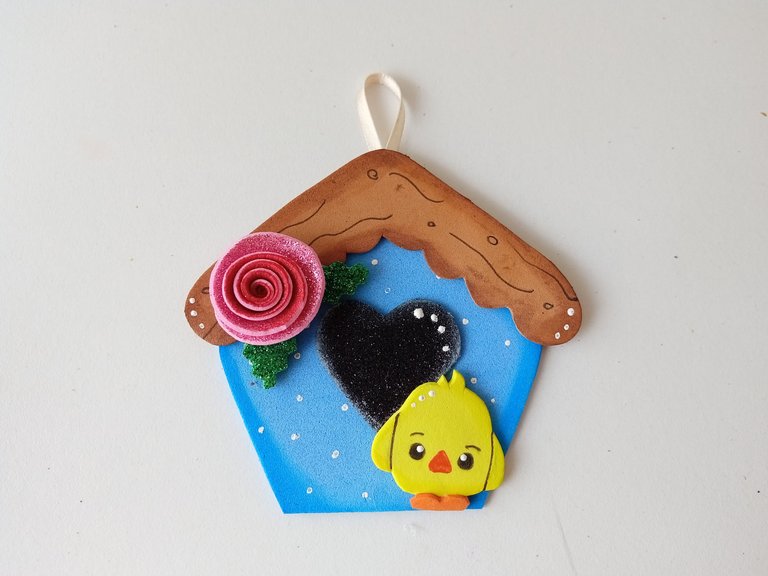
- PASO 5:
Para finalizar, di puntos de luz en algunas zonas como el tejado, la entrada y al pájaro. Al estar seco, pegué la cinta en la parte trasera para poder colgar y como toque final, pegué un lazo justo en medio del tejado.
- STEP 5:
To finish, I gave points of light in some areas such as the roof, the entrance and the bird. Once it was dry, I glued the ribbon on the back so I could hang it and as a final touch, I glued a bow right in the middle of the roof.
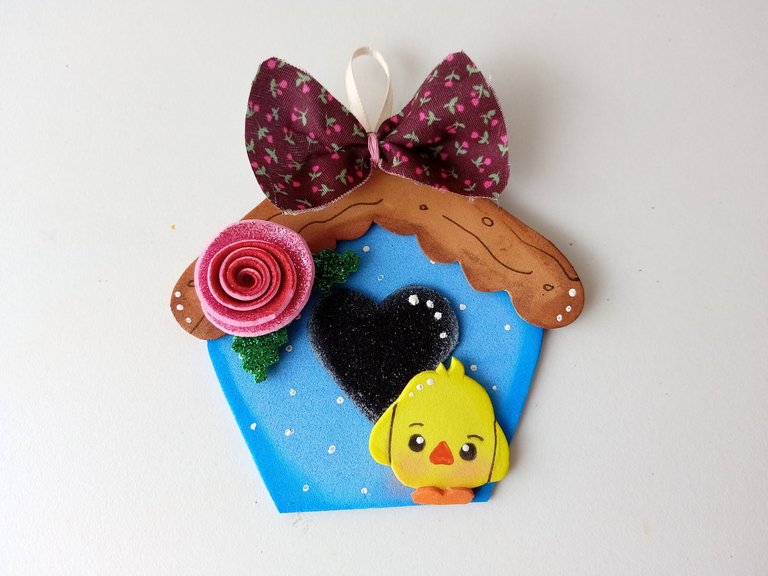
✨¡And ready!✨ This is how you can make this or any other hanger with the desired theme, whether for the kitchen, for the entrance of the house or any empty wall to which we want to give a touch of color. I hope you liked the step by step and are encouraged to make it.
❤️Until the next post.
✨RESULTADO: | ✨RESULT:


Todas las fotografías son de mi propiedad.
Separador y Fotos editadas en Canva
All photographs are my property.
Photos edited in Canva
This pendant is so beautiful. It looks a tad big but lovely and creative design. Bravo 👏🏿
Thank you very much friends! I'm glad you liked it. Thank you very much for taking my content into account 💕
Muy bello y tierno 😍
Muchas gracias amiga 💕
Lo amé! Quedó muy hermoso 😍
Muchas gracias mi Eve 💕
Muy tierno y adorable, se vería muy bien en las terrazas de nuestros hogares, pues allí casi siempre tenemos plantas naturales, sería un lindo contraste.
Es verdad, se vería muy bonito en espacios abiertos con plantitas. Muchas gracias amiga! ✨
¡Felicidades! Esta publicación obtuvo upvote y fue compartido por @la-colmena, un proyecto de Curación Manual para la comunidad hispana de Hive que cuenta con el respaldo de @curie.
Si te gusta el trabajo que hacemos, te invitamos a darle tu voto a este comentario y a votar como testigo por La Colmena.
Si quieres saber más sobre nuestro proyecto, te invitamos a acompañarnos en nuestro servidor de Discord.
Muchas gracias por el apoyo 💕💕
Me encanta como te quedan los colgantes Ami🤩🤩
Muchas gracias Yage! Me alegra que te haya gustado 🤭💕
Muchas gracias, amigos! ✨
Que bello mi Valen, se ve todo tierno 😍
Muchas gracias mi Vane bella 🤭💕
Amiga que lindo detalle, me gusto mucho el pajarito amarillo!! 😍
Gracias, amiga! Me alegra que te haya gustado 🤭
Hermoso amiga.