DIY Cannabis/Herbal Dry Rack!
What's up everyone! Unfortunately, this post is a little late in being published, but here recently I decided it was time to go ahead and start working on a dry rack for my "After Hours" Gardening Project!
While this I am making this dry rack for my cannabis, it could be used to dry various herbs like thyme, rosemary, oregano, or parsley as well! Personally, I don't have any garden herbs like that growing right now, but it is definitely something worth looking in to! (Especially to help combat the smell of the cannabis plants themselves!)

This DIY Dry Rack will be a great addition to my "Growing Essentials" Arsenal, and will allow me to dry my freshly harvested cannabis plants once they have finished growing! (Which at this point in time, they already have - told you I was late getting this posted lol)
Since I am on an extremely budgeted grow, I don't have the spare funds to be able to buy a professional dry rack - like this one from Vivosun (which even includes a pair of trimmers) - so I decided to gather up some spare materials I had around the house I've been saving!
I could have achieved the same results by using a coat hanger and wire ties, but I wasn't sure how much I'd be harvesting at a time, and didn't know exactly where else to put the dry rack besides inside the tent itself. So, I figured making one out of mesh might help block a little bit of the light coming from the growing side!

The Materials
- I started out, and dried my first grow with, this divider that came with our dog kennel. We didn't need it for the kennel, so I decided to put it to use elsewhere! I originally just tied the branches to the divider with twine, and had that hanging inside a closet! It worked alright, but I've since moved my project to another room, so I had to figure out a new drying spot anyways!
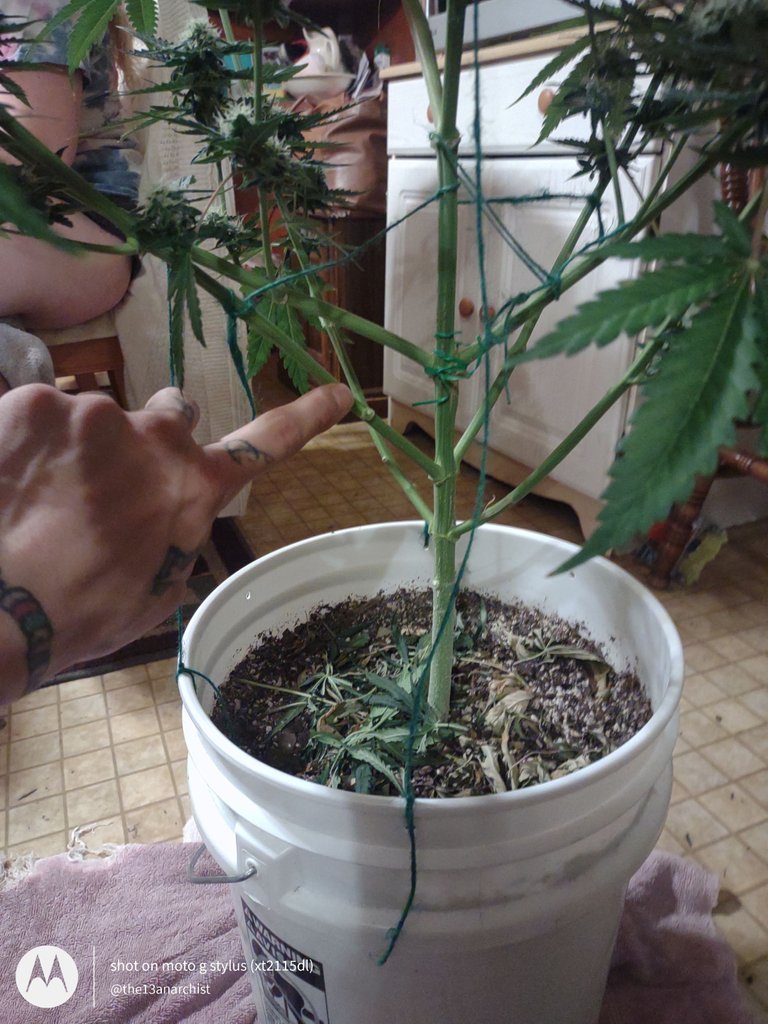
Even though the divider worked decently well, I have a really good feeling that this harvest will produce a substantially larger yeild! I also have more plants than I did on my first run, and I do hope to get a nice cycle going moving forward, so I knew I would need a larger drying area at some point!
- In an attempt to make a similar dry rack to the one linked above, I saved this mesh netting that came from my daughters' bunk bed (which we don't use anymore)! I kept all the parts and pieces, but instead of trying to sell it, I figured I could eventually utilize the metal framework for another makeshift tent at some point, but I'm nowhere near ready for that yet!
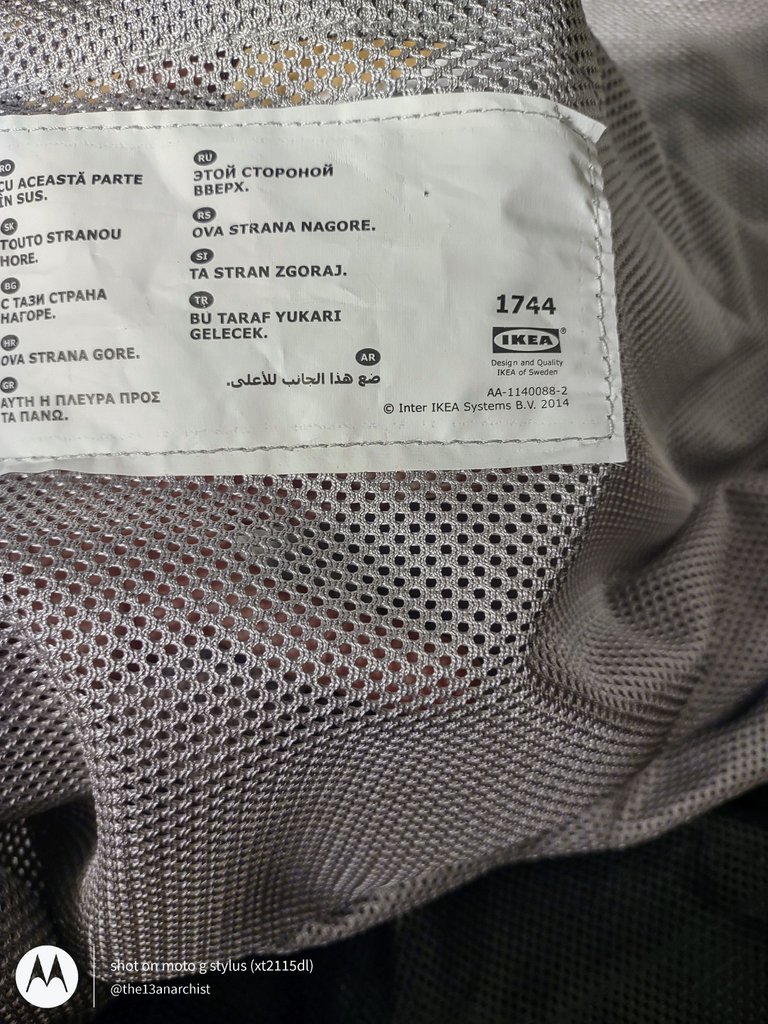
The bunk bed originally came from IKEA, and I'm not really sure what exactly the mesh on a professional dry rack is made from, but I figured this would work just fine for what I need!
We also had a collapsible curtain rod laying around the house in a spare closet, so I thought this would work well to give the drying rack some structure, hopefully a little bit of stability, and some overall support!
I found a few extra wire hangers (we keep them around for poking our one-hitters 🤣), and although I wasn't sure exactly what I would need them for, I figured I could utilize them somehow!
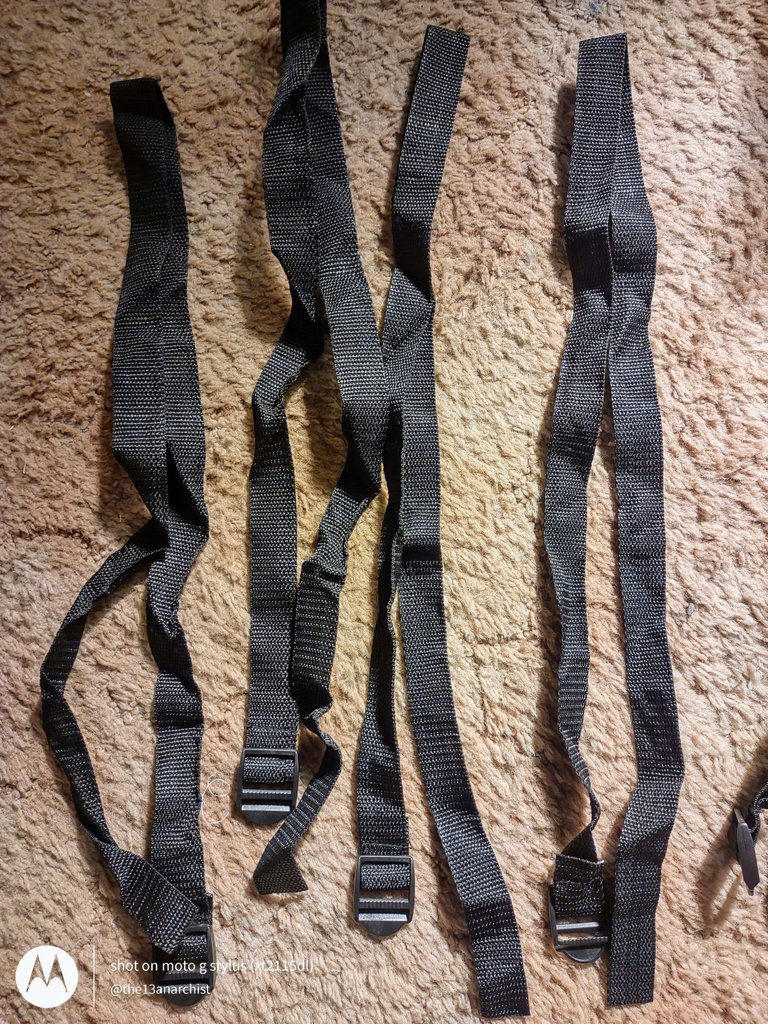
Also in my bag of tricks was a bag of zip ties (which I got from my old job, many years ago, and have been coming in handy inside the tent!), a few backpack straps that came with the tent, a roll of electrical tape, and a small amount of foam padding that I saved! I can't remember exactly what the foam came from, but I knew I would be able to use it for something! 🤣
The Process
I started out with attaching the larger two sections of netting to the kennel divider, which I decided to use as the top of my rack! Using this as the top would provide a sturdy foundation, allow me to move it fairly easily if needed, band it would also provide me with a spot to hang my buds if I needed to!
The divider had looped ends on opposing sides (for holding it into place inside the kennel), and was smooth on the other sides. I quickly decided to feed these loops through the netting, which held in place quite nicely, and also allowed me to get an idea of how to position everything before securing it all!
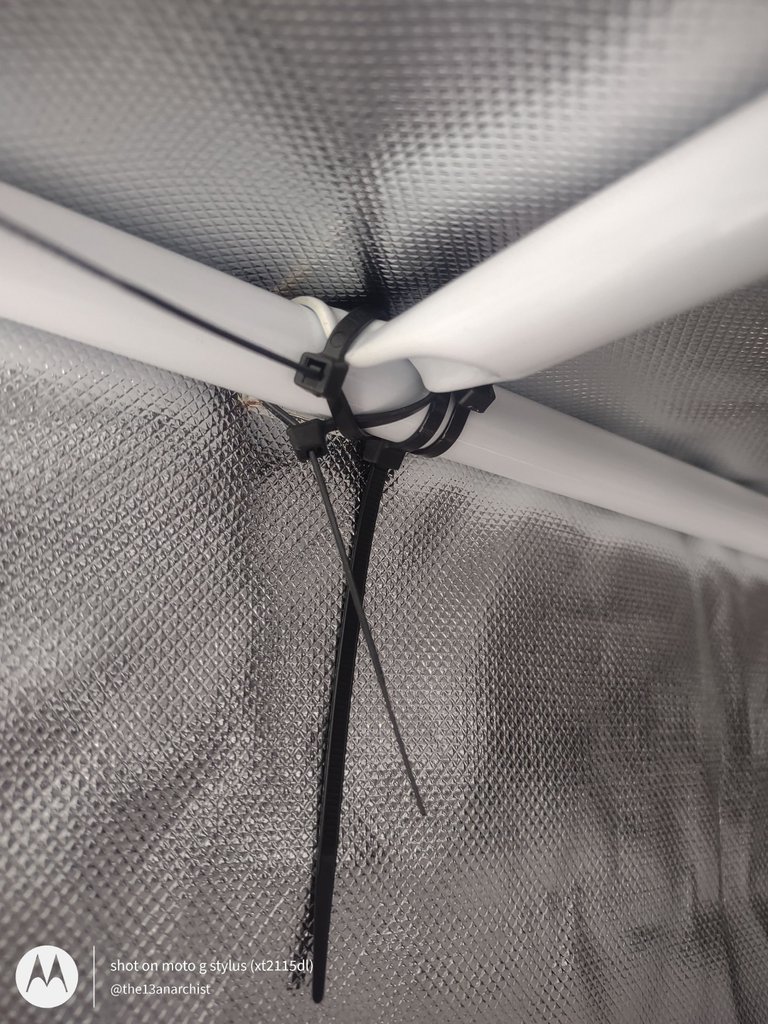
Once everything was in place, I used my handy dandy zip ties to hold it all together and keep everything tight! I made sure the netting on the corner folded well, and everything was pretty even across the top. Then, I took a zip tie and secured the end that wasn't held in place by the loop on the frame!
Once the ends we're secured, I went along the sides and corner, attempting to secure the netting as best I could to the divider!
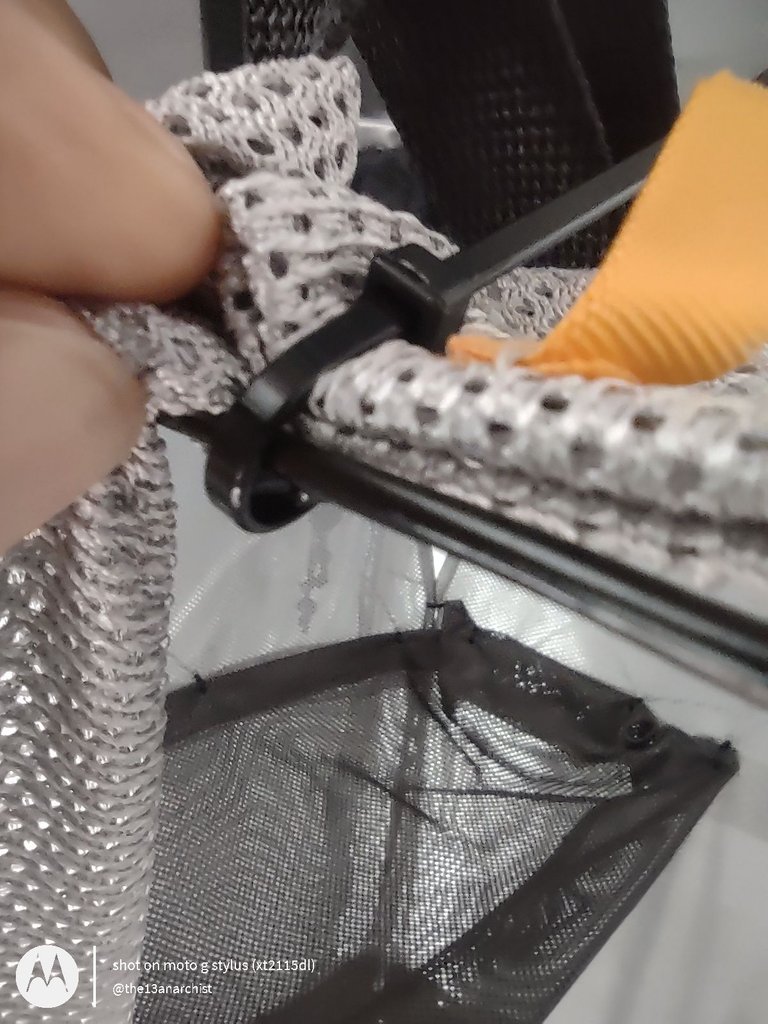
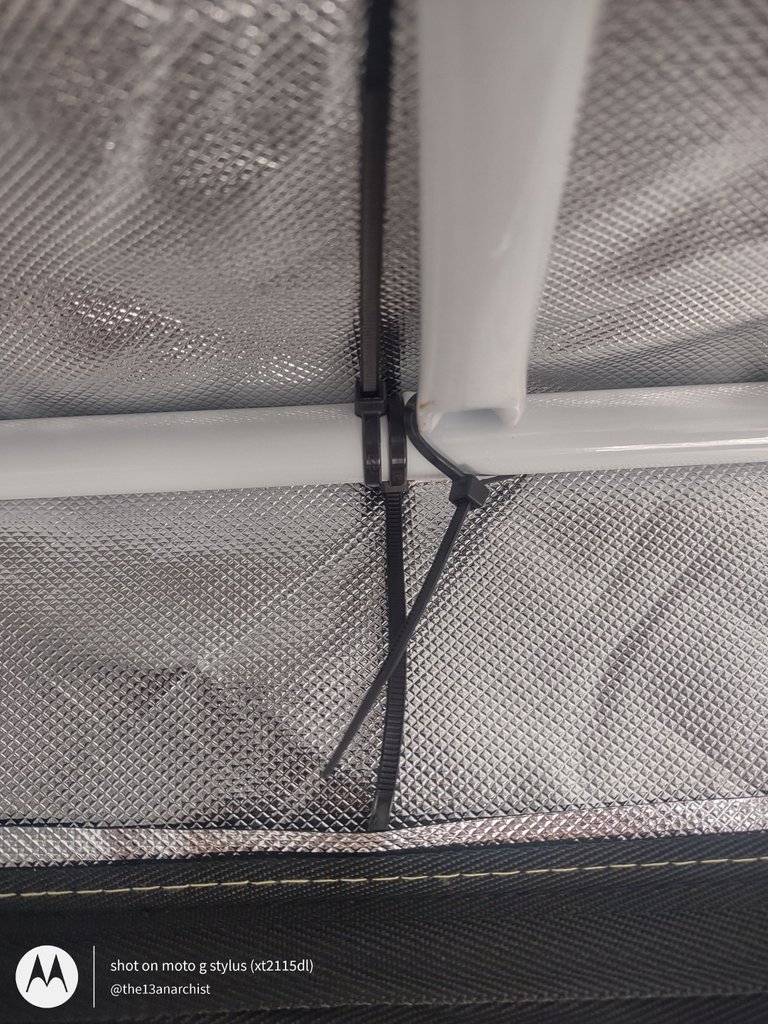
Once that was done, I had to get the tent poles lined up and in place to be able to hold the rack in the back corner! I started by placing one strap around the frame and held one corner of the rack in place, then adjusted the support pole to where I needed it to support the opposite corner.
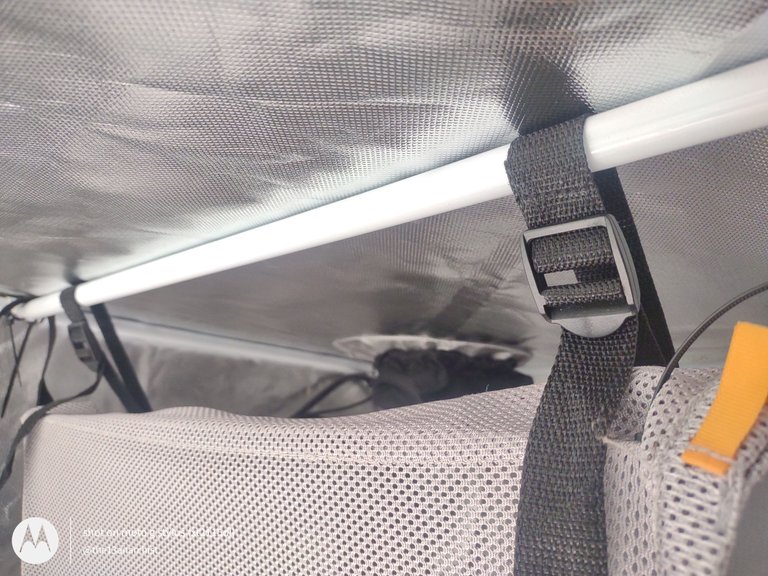
After the other two corners we're finished, I used more zip ties to hold the ends of the support pole in place, so there wouldn't be any slack once I put some weight onto it! This really didn't work as well as I had hoped or thought it would, but it does work fairly well for temporary purposes!
So, this is when things started to get interesting; to be honest, this was the most stressful and time-consuming part of the whole set-up!
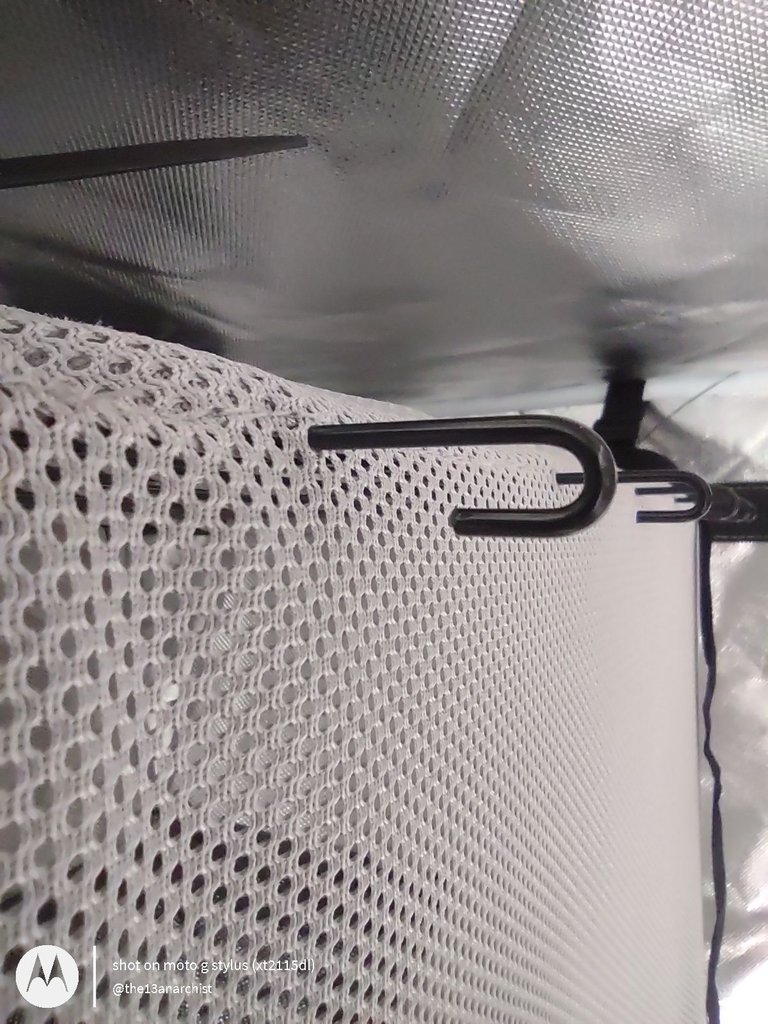
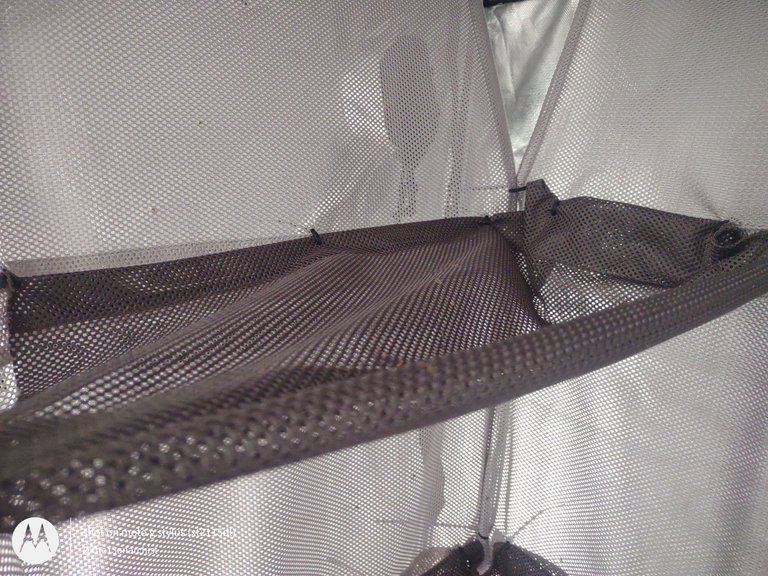
The mesh itself was too long to leave hanging where it was, and I wanted a "bottom" anyways, so I had to figure out a way to make a "frame" to match the top as much as possible! Which, I decided would be a good use for the collapsible curtain rod and a wire hanger!
Separating the curtain rod, I decided to use it for the front corner and sides! I figured since the back corner was in the corner of the tent itself (not completely, but close enough), I wouldn't need as much support as the front, which had a larger possiblity of being hit and moved when I was working!
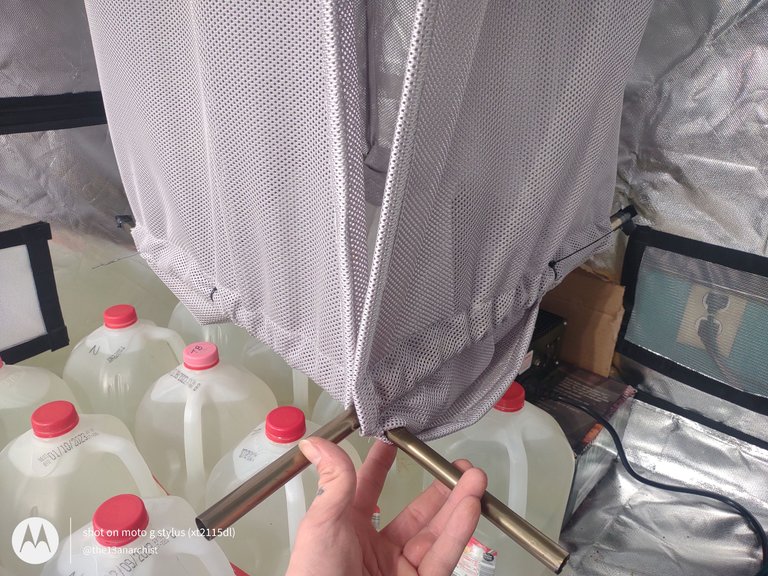
So, I straightened out one wire hanger as much as I could, and bent it to match the the top frame, making a 90 degree angle right around the middle of the wire! I fed both pieces of the curtain rod and wire hangers through the "support slat" openings, which left almost a foot left over at the bottom!
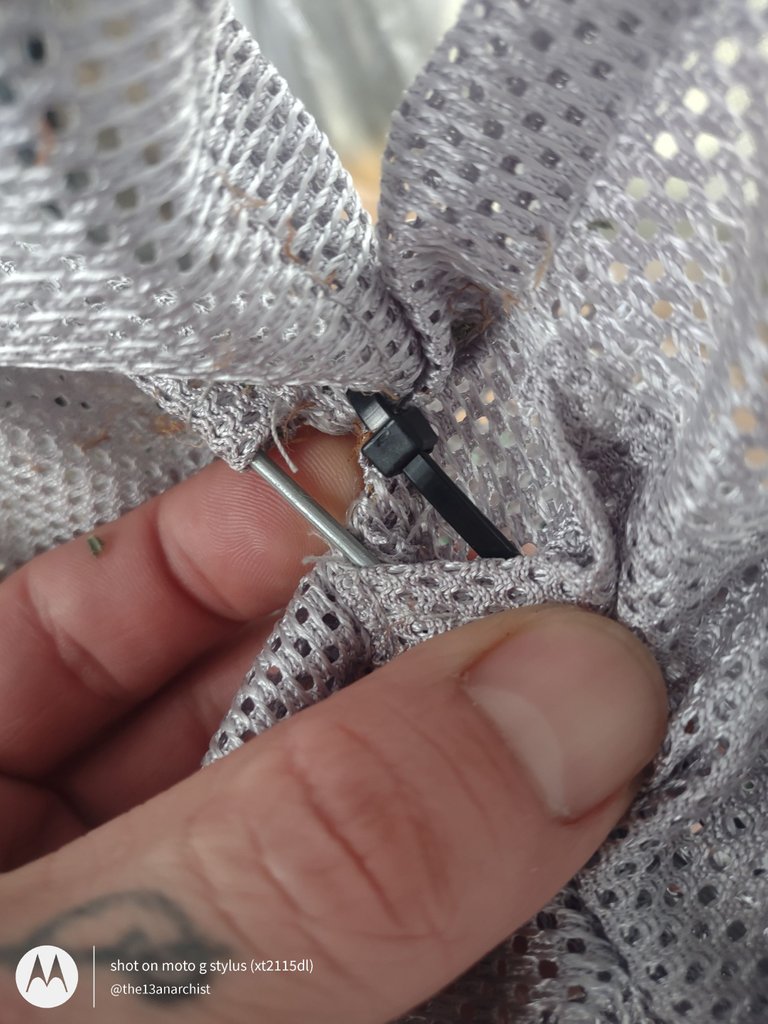
I did have to make slits in the netting to make room for the curtain rod framing, which didn't take too long, but was a little difficult it accomplish in the confinement of the tent!
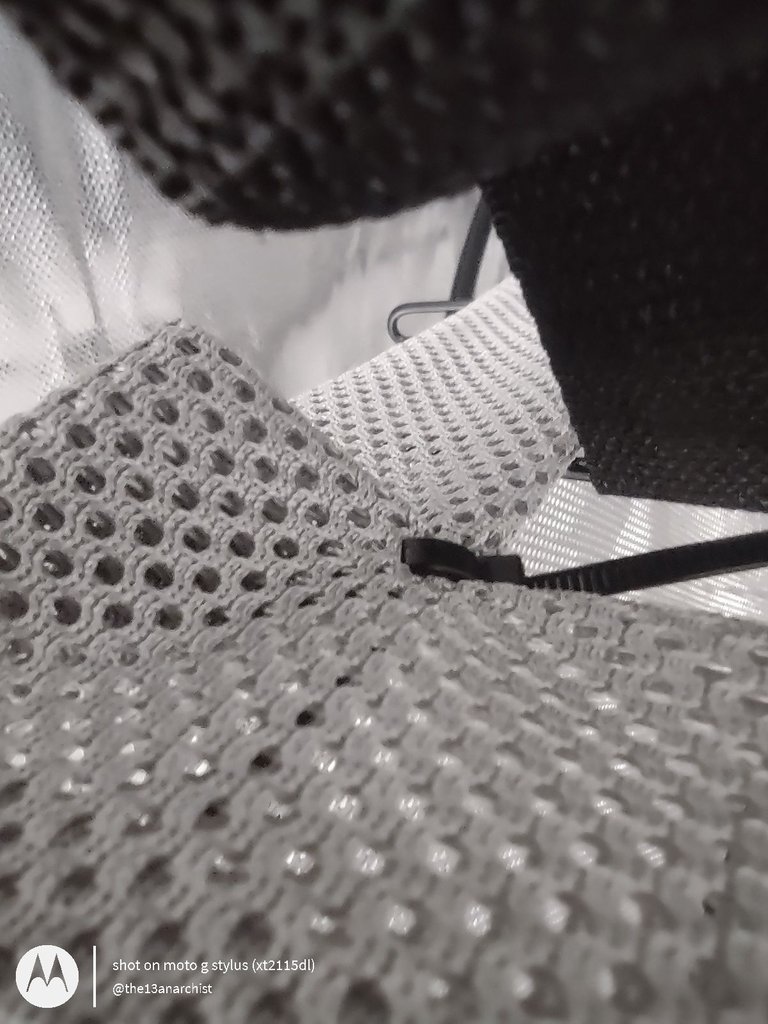
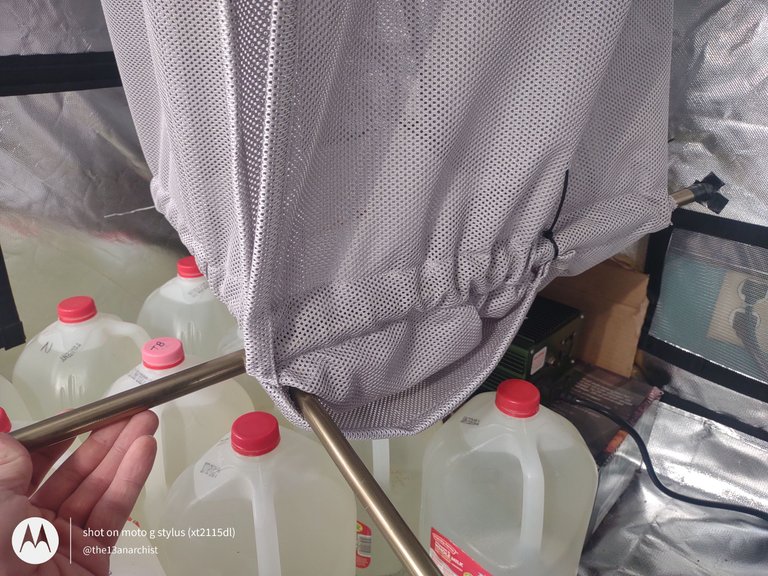
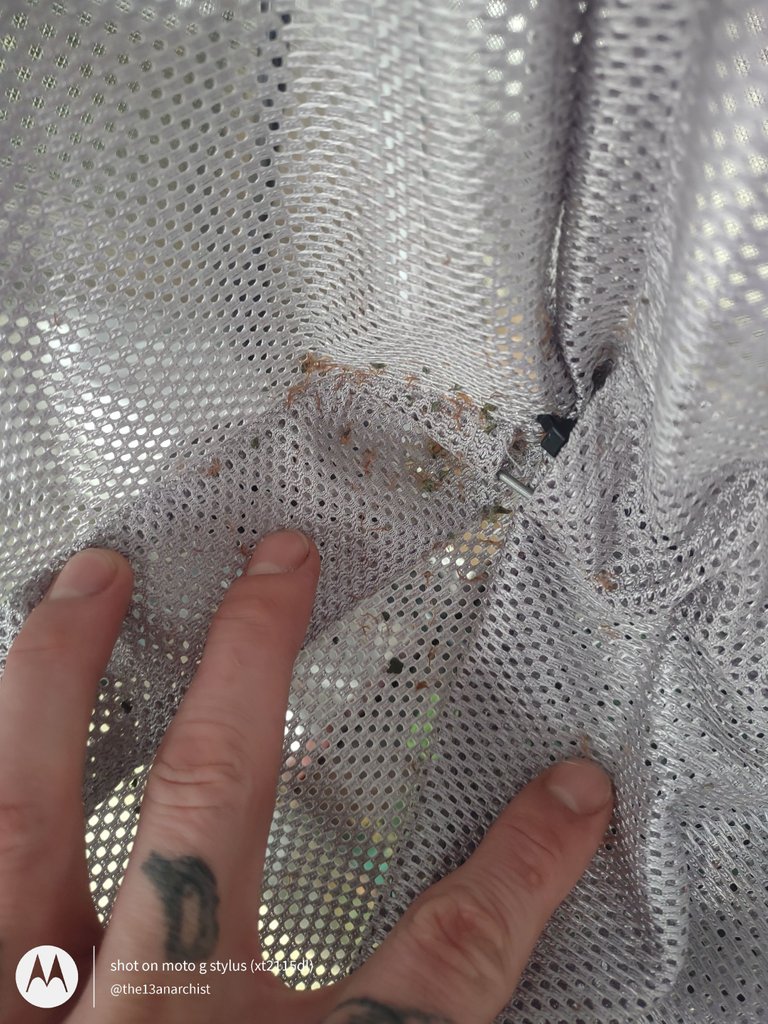
This next part took quite a bit of time, but I was able to fold the mesh and zip tie it in a way that made a bottom shelf to my rack! I'm not sure if I'll need to use it, but at least I have the option!
Originally, I thought this would be a lot easier, and work out a lot better, than what it actually did. The hanging bit of netting wasn't quite long enough to make it all the way across to the other side, so it was a struggle (to say the least) to get everything to hold in place when I removed my hand!
After finagling a few more zip ties into the netting, I finally got my "desired" results and decided to step away from it at that point - I was getting a little overwhelmed and needed to take a few hits to gather my thoughts!
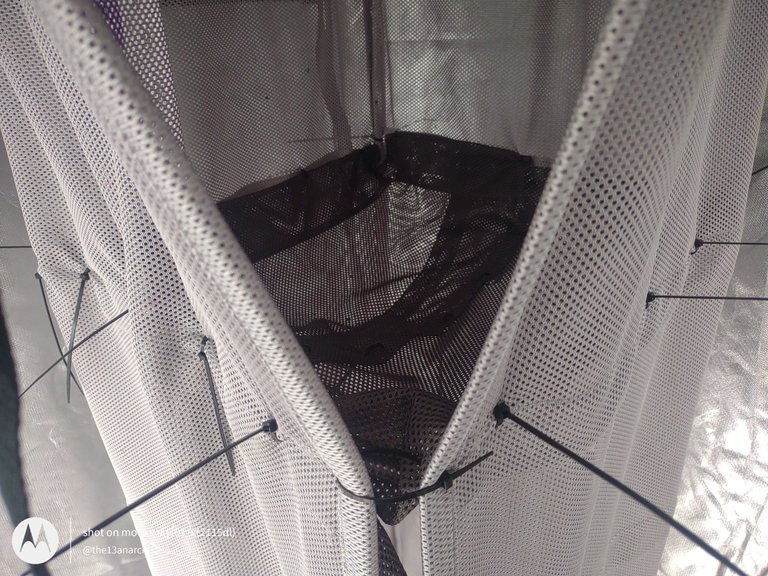
After taking a few one-hitters to the dome, I realized I had a pretty decent frame to my design at this point, and I figured it would work for what I needed, so I decided to jump to the "shelves"! If you haven't seen a professional dry rack, they have multiple zippered openings for drying your herb, so I wanted to create a similar design!
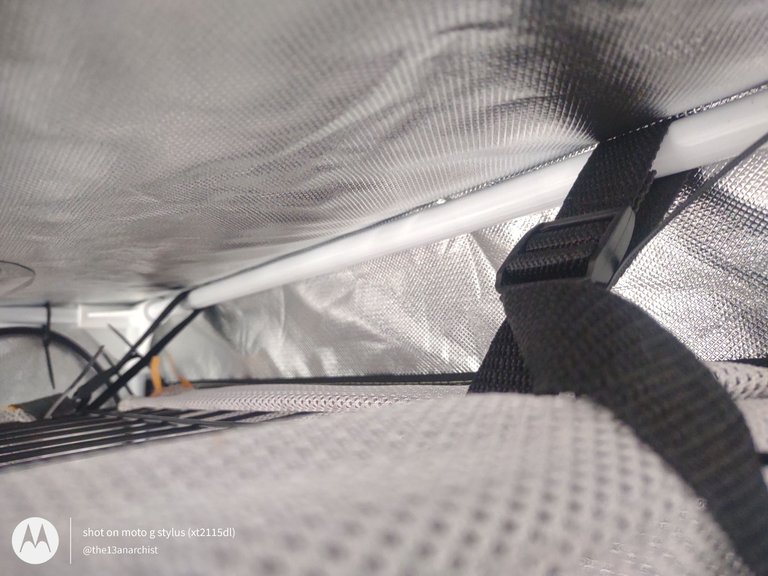
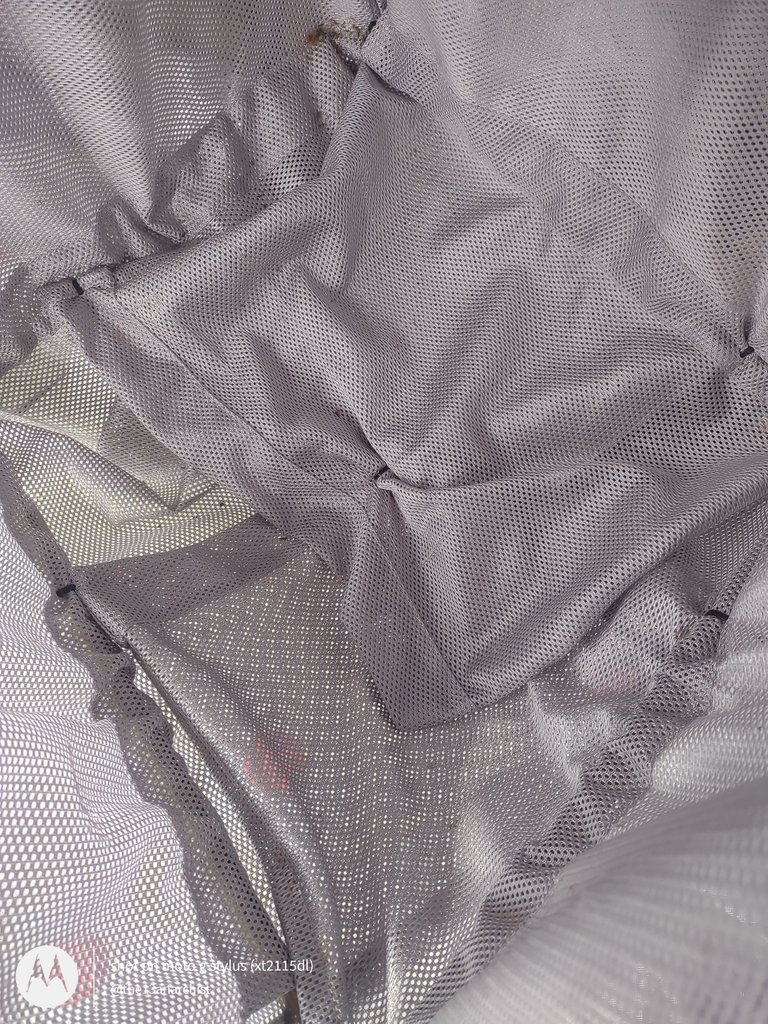
Luckily, I had a few different sizes of mesh from the bunk bed! The top of the bunk bed had about 10 inches or so of the netting around it as a railing of sorts, so I figured if I positioned this correctly, I could use it for my shelves! I had a small section that was about 2 foot or so in length, and I was able to cut it in half to create two shelves!
I placed the top shelf about a foot or so away from the divider top frame, with the though that I could hang some branches if I needed to as well!
After I zip-tied that in place, I got to work on the second shelf, which was only about 10 inches or so below the first! I ended up cutting a piece off of a longer section of the mesh "railing". This allowed me to make a shelf across the entire dry rack. I used a few zip-ties right in the middle to pull it as tight as I wanted it to be and left her be.
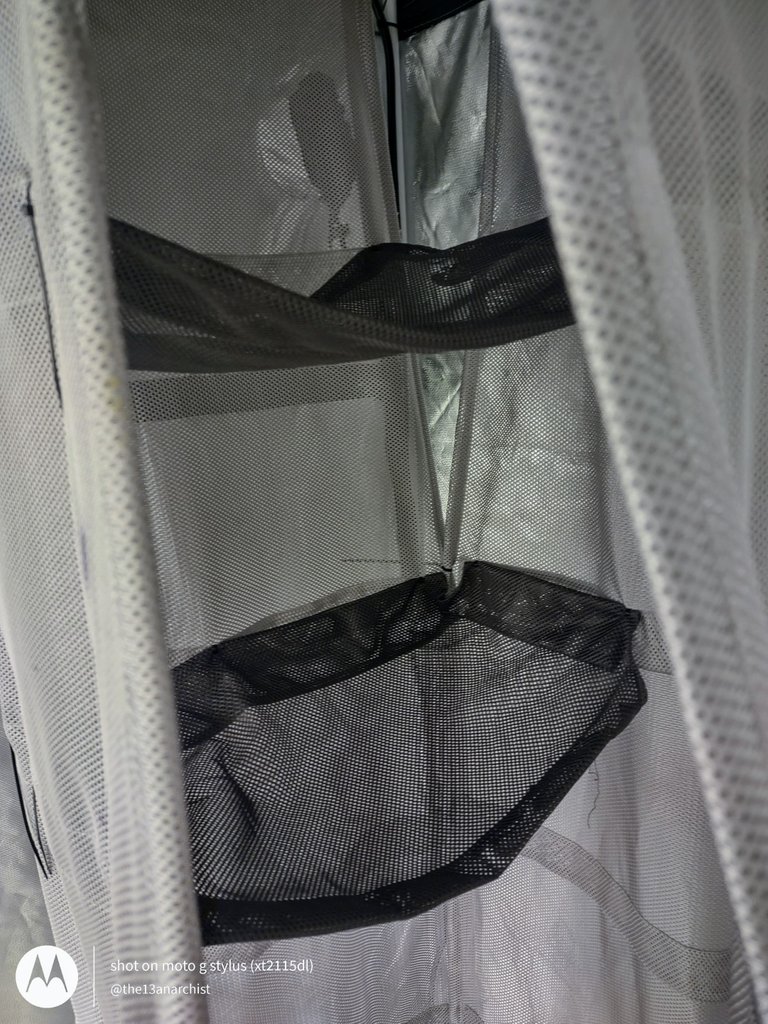
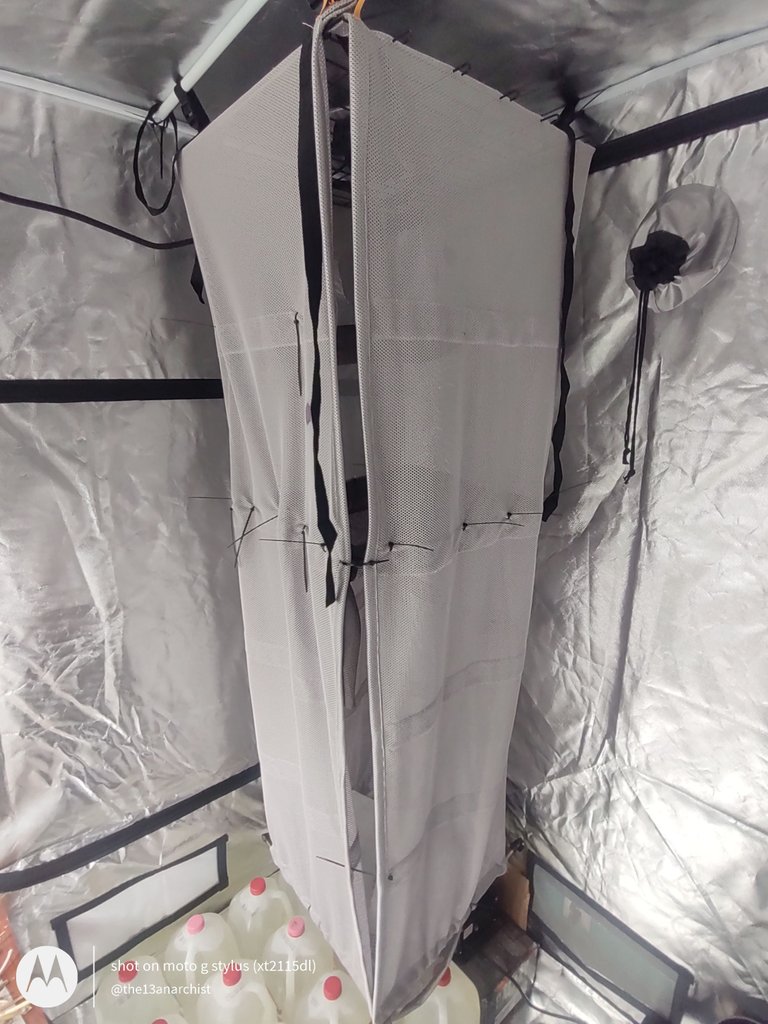
Finished Product
Functionality Testing!
This is when I decided to call it quits for the night on design, and attempted a test on the functionality of the design.
I cut 3 small branches from one of the bigger tester plants - these were buds that were fully formed yet, and would have produced maybe 2 or 3 grams worth of low quality bud in comparison to the rest of the plant.
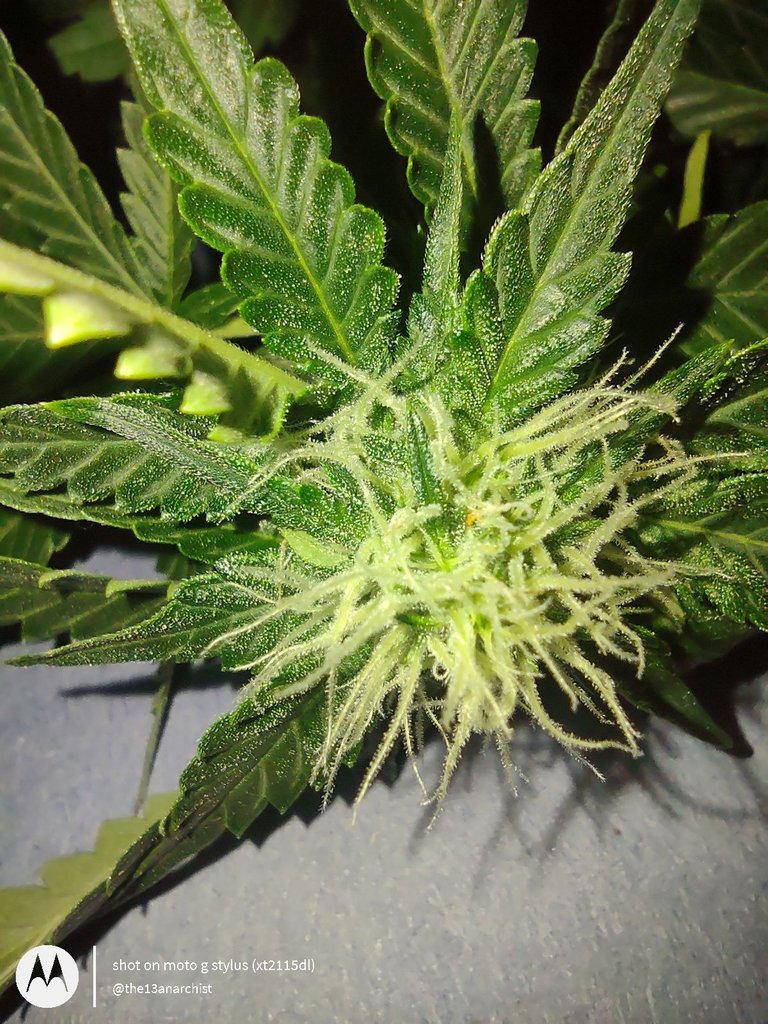
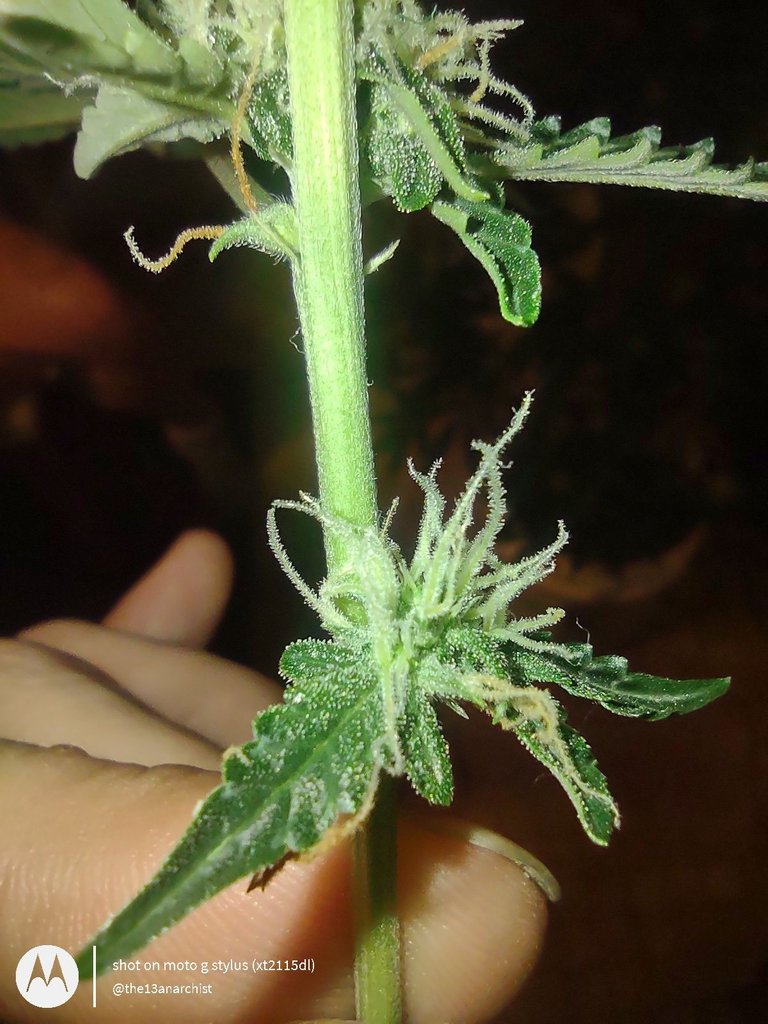

This is a good technique to practice if you don't mind wasting a few bud sites on your plants, and will allow the main bud sites to utilize more nutrients from the plant itself!

Unfortunately enough, I thought I took pictures of this initial functionality test, but as I look through my photos, I can't seem to find any!
So, I took those 3 small branches and trimmed them up, which is something I could definitely use the practice at as well, and then placed them into the second shelf of my rack. I had to reposition my box fans, and will most likely have to continue doing so until I find the right airflow throughout the tent! But, I did find a suitable positioning for the test, and left them to dry!
I checked back in on them frequently, and would do a squeeze test to see how they were going! After a day, you could tell that they were in fact drying, but we're still squishy, so I decided to hang them from the netting! Of the top shelf and see how that went!
After another 24 hours, they had pretty much all dried up, and we're pretty crackly sounding during my squish test! So, I went ahead and took them down, harvested the buds, and started "curing" them in an airtight, and child resistant plastic medicine jar (from a previous dispensary strain)!
Personally, the only thought I have now is airflow, and how to manipulate it in a better way to prevent the buds from drying too quickly (Macronut's similar method takes approximately 3-5 days), and from drying to slowly, which could cause mold to form!
While I understand these buds are smaller and not fully developed, which is most likely why they only took around 48 hours to dry, I'm still curious as to how the bigger buds will dry after harvest - which I will definitely make an update on! ☺️
Unfortunately, that's where we'll end this post! But don't forget to tune-in next time for another "After Hours" Grow Log Update! I hope you all have a great weekend! Stay Trippy My Little Hippies! ✌🏼💚


If you enjoyed this update, and would like to support my growth as a new content creator outside of the Hive Blockchain, please don't forget to subscribe to my Social Media Accounts via Linktree, or even by checking out the communities and company affiliates that I have listed below!


If you happen to be looking for grow tent or grow equipment upgrades, then look no further than Vivosun, which has just about everything a home grower needs to start your very own indoor garden! (Just ask @futuremind with his indoor tomato and pepper plants! 💚)
If you haven’t heard of VivoSun before, they happen to be one of the leading manufacturers of cannabis grow equipment and accessories - including tents, ventilation systems, and even various accessories to be used during harvest! All of which are specially designed to help you grow the healthiest plants possible - and with their commitment to quality, you know that you are getting some of the best products available on the market!
Plus, if you’ve never shopped through VivoSun before, they offer an extra 15% off of your very first purchase! But even if you have made a purchase from VivoSun before, don’t worry - they frequently offer discounts and promotions throughout the year! I'm also inquiring about a unique affiliate discount code, to see if I can offer you all a permanent discount 💚
All Brothers-In-Farms Genetics (BIF/BIFBeans.com) Logos/Breeder Information used with permission by the awesome BIFBeans.com Team!
Hive Logo created by Grimdank
Banners and Blog Dividers custom created using Canva, using BIFBeans.com Logos by permission.
Vivosun Banner and Links provided by Vivosun Affiliate Marketing Program Advertisment includes affiliate links!
Signature provided by @doze, stop by his blog to see his newest Hive inspired creations!
"Saturday Savers Club" banner provided by the @eddie-earner and @susie-saver's Saturday Savers Club blog!
All photos used were taken on my trusty old Motorola Moto G Stylus!
https://twitter.com/1521534040242855939/status/1627715957744406529
The rewards earned on this comment will go directly to the people( @the13anarchist ) sharing the post on Twitter as long as they are registered with @poshtoken. Sign up at https://hiveposh.com.
Thank you for sharing this post in the DIYHUB Community!
Your content got selected by our fellow curator sharminmim & you just received a little thank you upvote from us for your great work! Your post will be featured in one of our recurring compilations which are aiming to offer you a stage to widen your audience within the DIY scene of Hive. Stay creative & HIVE ON!
Please vote for our hive witness <3
I like the design, I have to start thinking about a dry rack soon too :)
Very clever man!
Nice detailed photos!
!ALIVE !PIZZA !PGM
Posted using WeedCash Network
BUY AND STAKE THE PGM TO SEND A LOT OF TOKENS!
The tokens that the command sends are: 0.1 PGM-0.1 LVL-0.1 THGAMING-0.05 DEC-15 SBT-1 STARBITS-[0.00000001 BTC (SWAP.BTC) only if you have 2500 PGM in stake or more ]
5000 PGM IN STAKE = 2x rewards!
Discord
Support the curation account @ pgm-curator with a delegation 10 HP - 50 HP - 100 HP - 500 HP - 1000 HP
Get potential votes from @ pgm-curator by paying in PGM, here is a guide
I'm a bot, if you want a hand ask @ zottone444
@the13anarchist! You Are Alive so I just staked 0.1 $ALIVE to your account on behalf of @hankanon. (3/10)
The tip has been paid for by the We Are Alive Tribe through the earnings on @alive.chat, feel free to swing by our daily chat any time you want.

I gifted $PIZZA slices here:
@hankanon(2/5) tipped @the13anarchist (x1)
Send $PIZZA tips in Discord via tip.cc!
Congratulations @the13anarchist! You have completed the following achievement on the Hive blockchain And have been rewarded with New badge(s)
Your next target is to reach 6000 upvotes.
You can view your badges on your board and compare yourself to others in the Ranking
If you no longer want to receive notifications, reply to this comment with the word
STOPCheck out our last posts:
Support the HiveBuzz project. Vote for our proposal!