(ENG/ESP) Sewing a bag from "Mammon, the king of Greed" / Cosiendo un bolso de "Mammon, el rey de la Codicia" 💚🤡🤑
ENGLISH CONTENT
Hello all sewing lovers! Recently I became active again with the use of the sewing machine and was able to make some clothing items for my personal use and along with that, I also decided to make a bag that I could use to match one of those items of clothing.
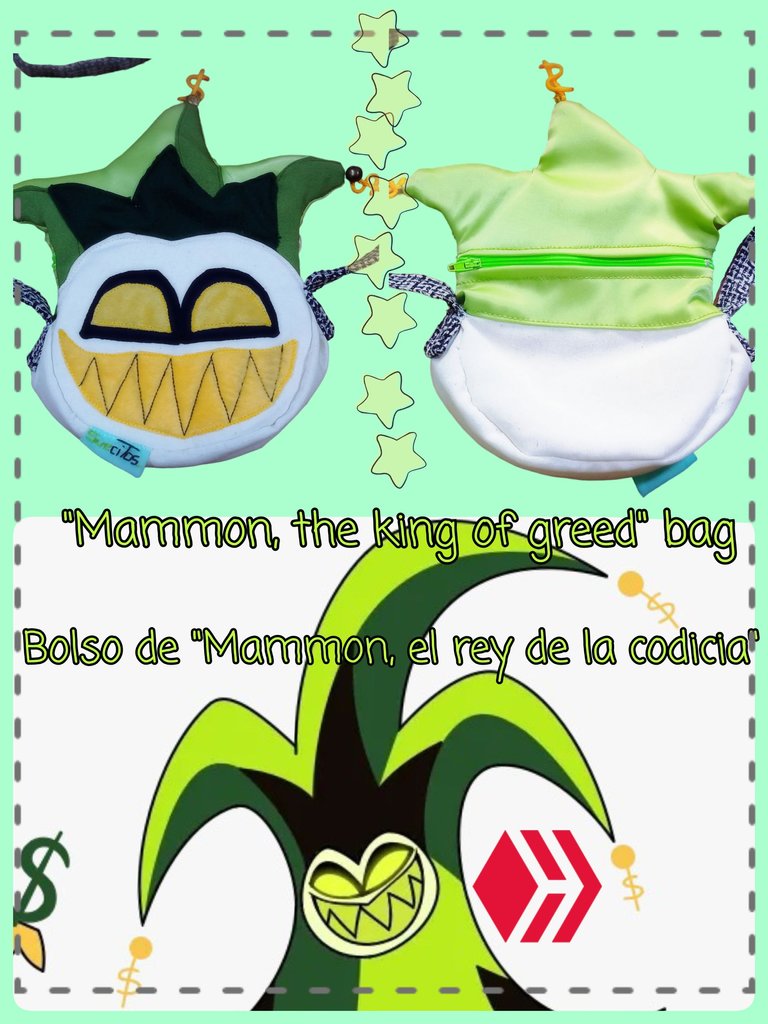
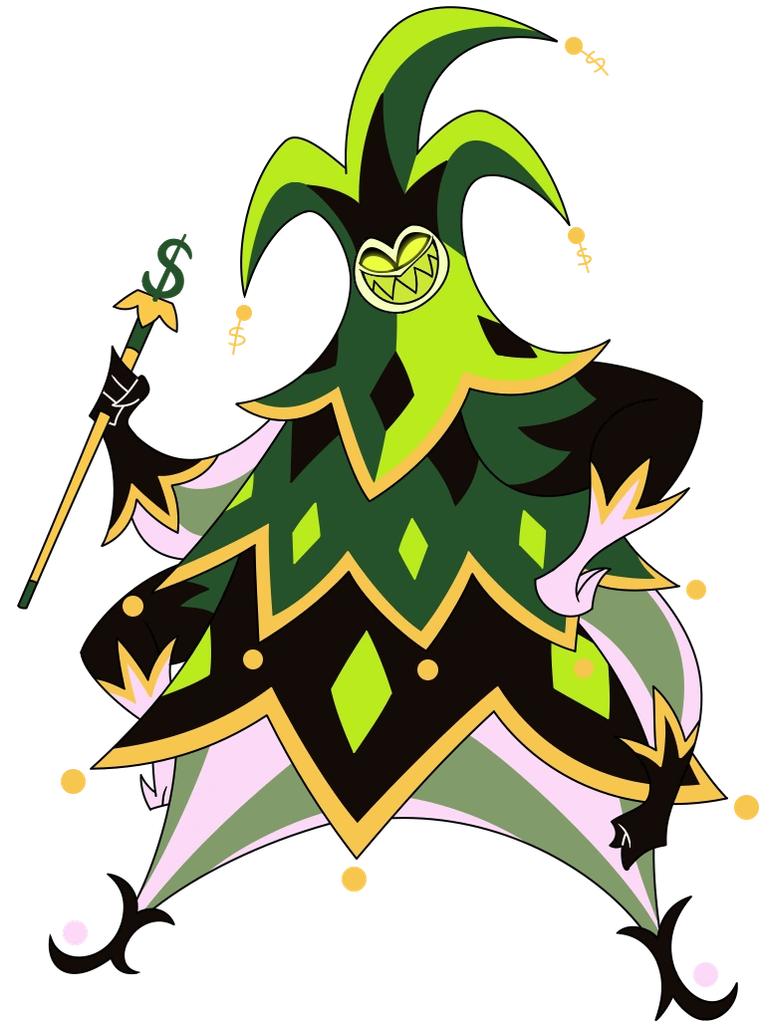
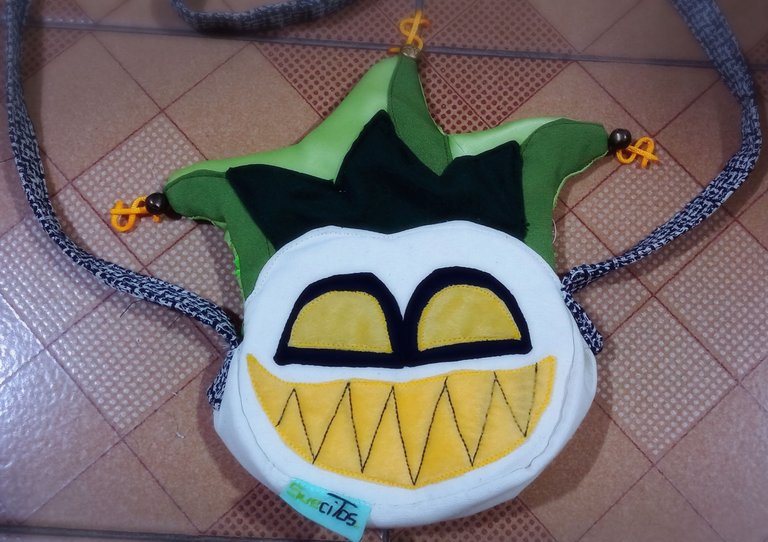
First of all, I will tell you about the character that the bag is based on. This is Mammon, a character from the adult YouTube series "Helluva Boss". Mammon, is a capital sin and represents greed. I really liked the character at first because I love the color green and it is the color that best represents him. So, as a cosplayer (a person who dresses like a character from an animated series or fictional character), I thought about making an outfit inspired by this character and the bag was the main detail.
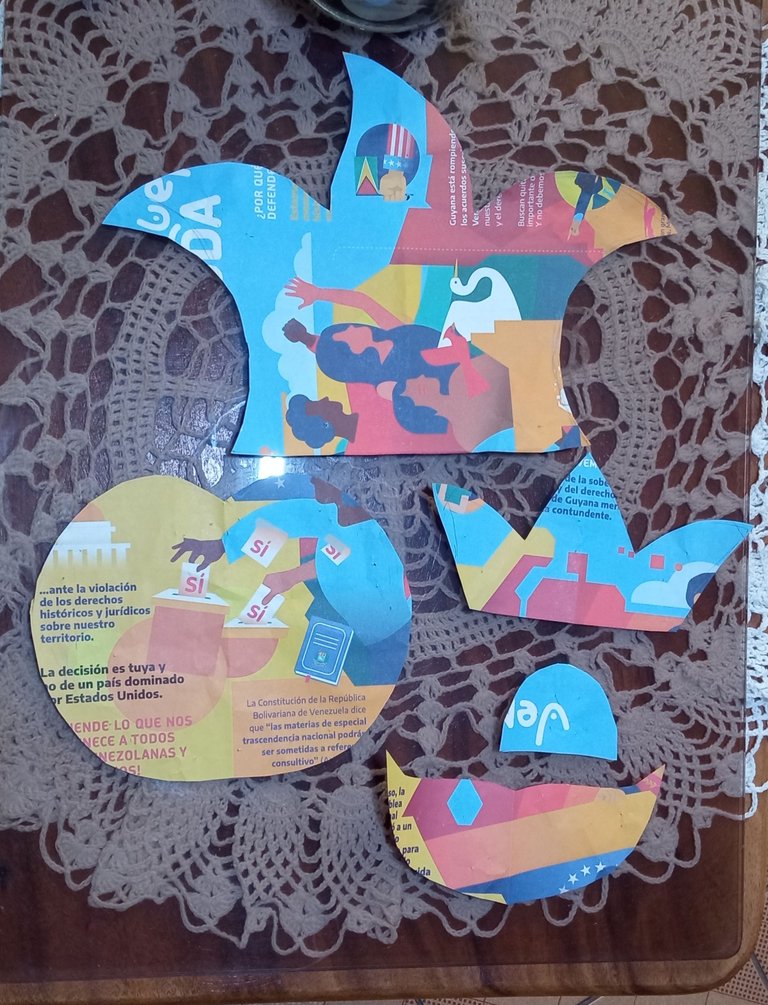
It's not the first time I've made bags based on animated characters, so I was pretty confident in myself. Since I only had pieces of fabric, I didn't look for any tutorial but preferred to make the piece with my knowledge of sewing and my ability to improvise ha ha The first thing I did after realizing that I had some pieces of green fabric (the essential one) , was to develop the pattern. The good thing about knowing how to draw is that I can make the patterns at my convenience. I drew the pieces how I wanted them and making sure they were feasible when transferred to the fabric. Since I had already made another bag of one of the characters from said series, I had an idea of how I could make this one.
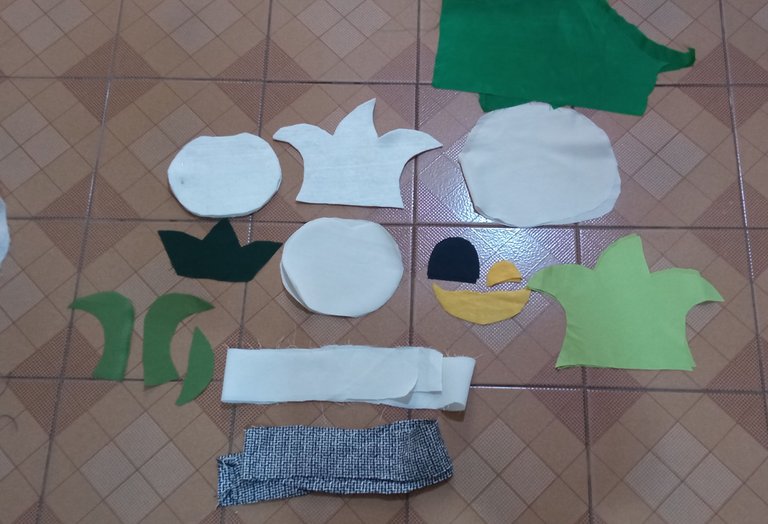
Then, I went on to cut all the pieces made up of: front and back of the face (both double because the fabric was very thin); front and back for the hat; fabric cutouts for details of the hat, eyes and mouth; one strap for the base of the bag and another for the strap of the bag; the piece corresponding to the lining, as well as a felt piece for the face and hat, to give strength to the bag.
Note: As I was making the bag, I discarded and changed some pieces, such as, I eliminated the felt piece for the back of the bag, as well as changing the green lining for a beige one.
When I went to the machine, the first thing I did was sew the pieces corresponding to the details of the hat to the front piece, to try to make it look like the character's. I used a straight seam for this.
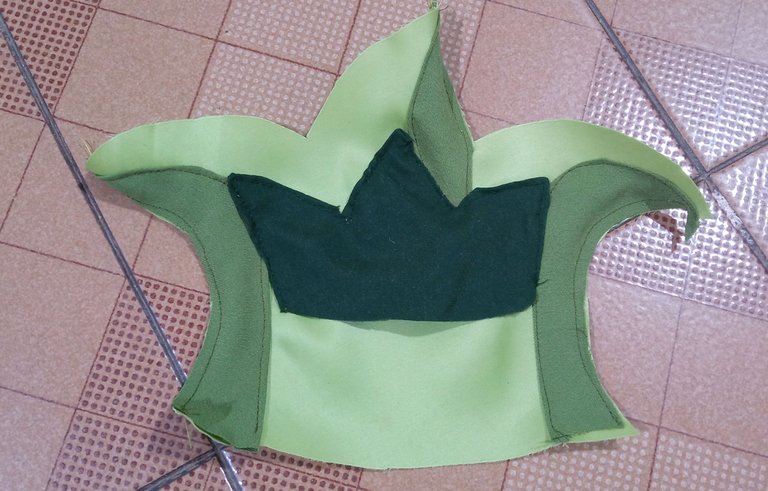
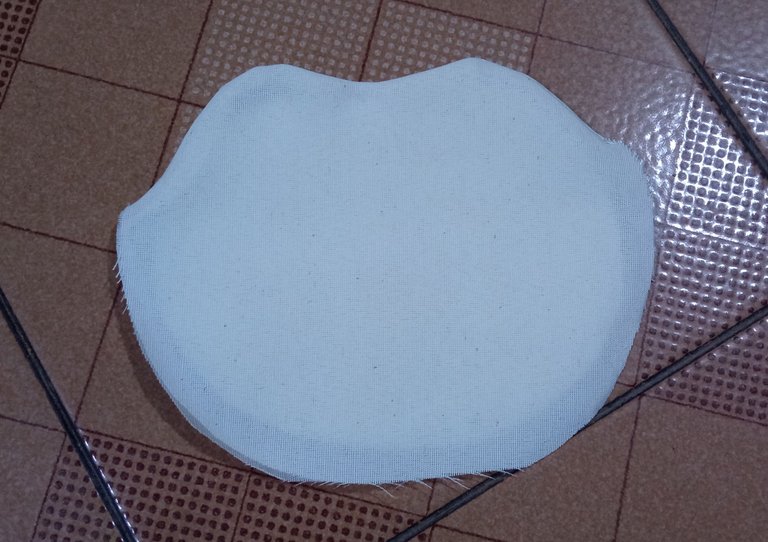
Then, I sewed the two front pieces (remember I double cut them because the fabric was thin), turned them inside out, and placed the felt piece inside to hold its shape.
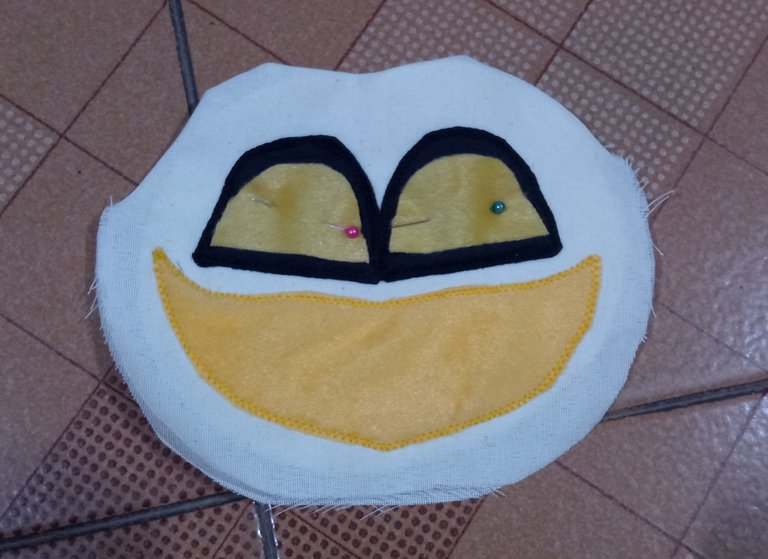
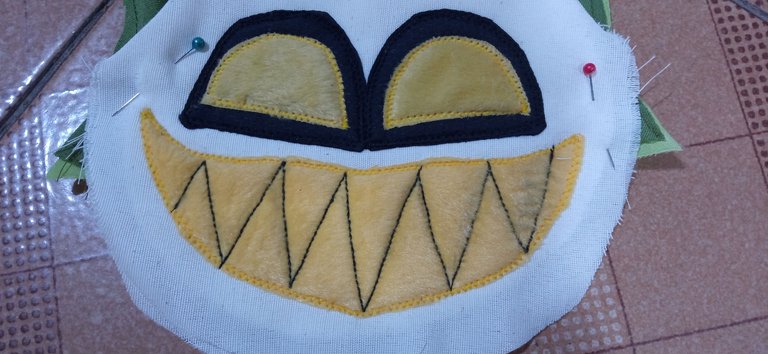
To sew the eyes and mouth of the character, I used a zigzag seam, since it is the one I like the most for this type of pieces, looking like a kind of embroidery. And for the teeth details, I used a tighter seam which is called "triple straight stitch" on my machine. I like how with it, I can make thick lines that allow me to define straight figures, like in this case, the sharp fangs. Once this was done, I glued the piece corresponding to the character's head to the front piece of the hat.
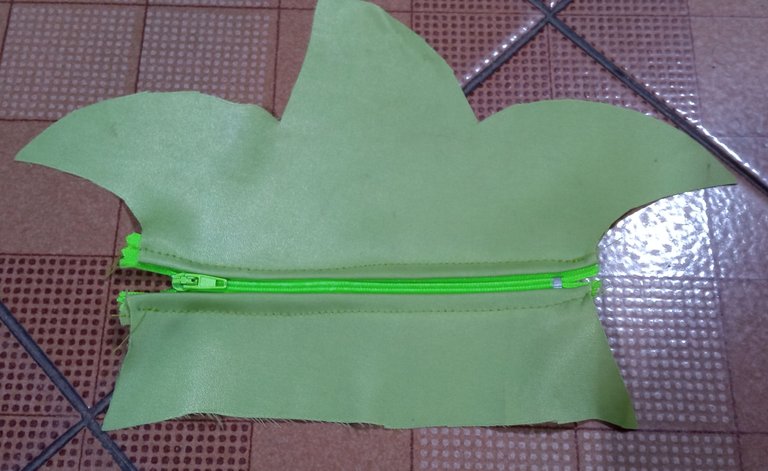
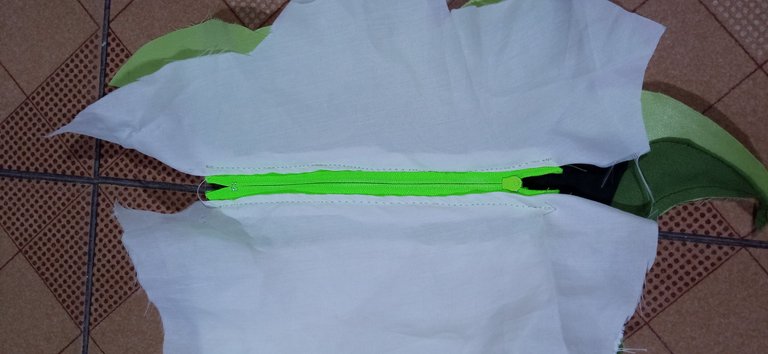
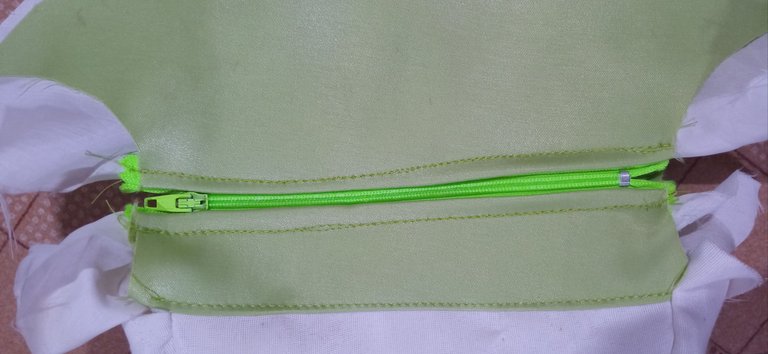
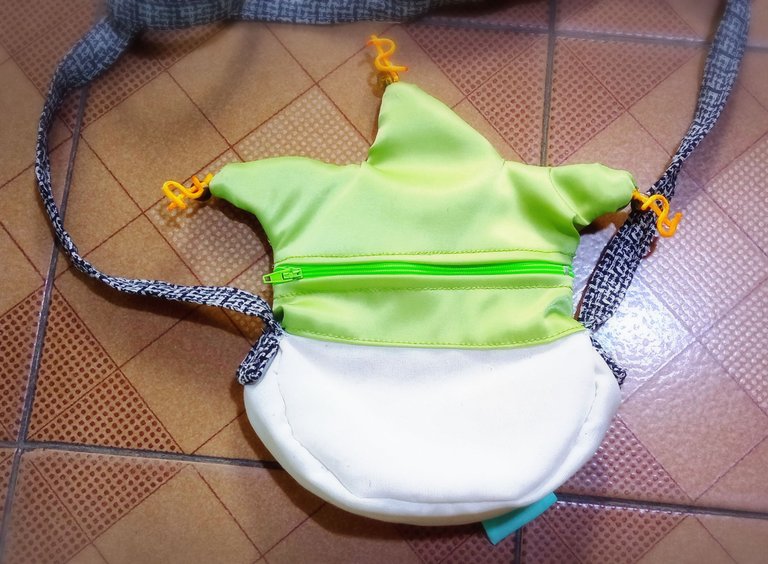
In this part, it would have been appropriate to have sewn the lining pieces to the front and back pieces... but I forgot and continued sewing haha anyway... To locate the closure, I thought that it was best to place it on the part middle of the back piece of the hat, taking as a reference the indicated height to be able to insert my phone or purse. So, I cut the piece in the middle and sewed the 15 cm closure (for the size of the bag, I based it specifically on the size of this closure, since it was the only one I had in that color). Then, I attached the back piece of the character's head to the bottom and in this way I had the two lids of the bag assembled.
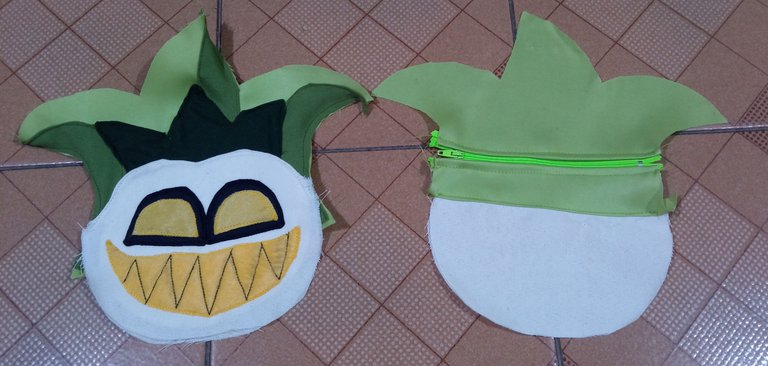
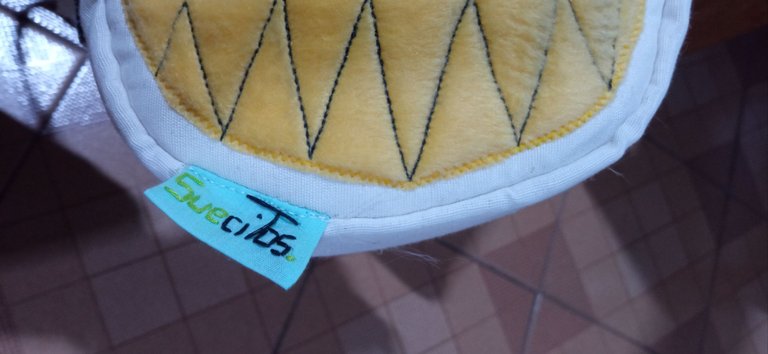
At this point, my confidence was maintained, since at least I knew that the design looked good or, at least, was to my liking. I then joined these lids together from the bottom, through the strip that I had cut to be the base of the bag; also double in shape due to the thinness of the fabric, with a straight seam and another zig zag safety seam on the edge. I didn't put an extra strip of felt on this part and now that I think about it, it would have been a good idea, maybe I'll add it later. Oh and of course, I took the opportunity to attach the label corresponding to my brand "Suecitos", because nothing like placing our "signature" on our creations 😉 he he.
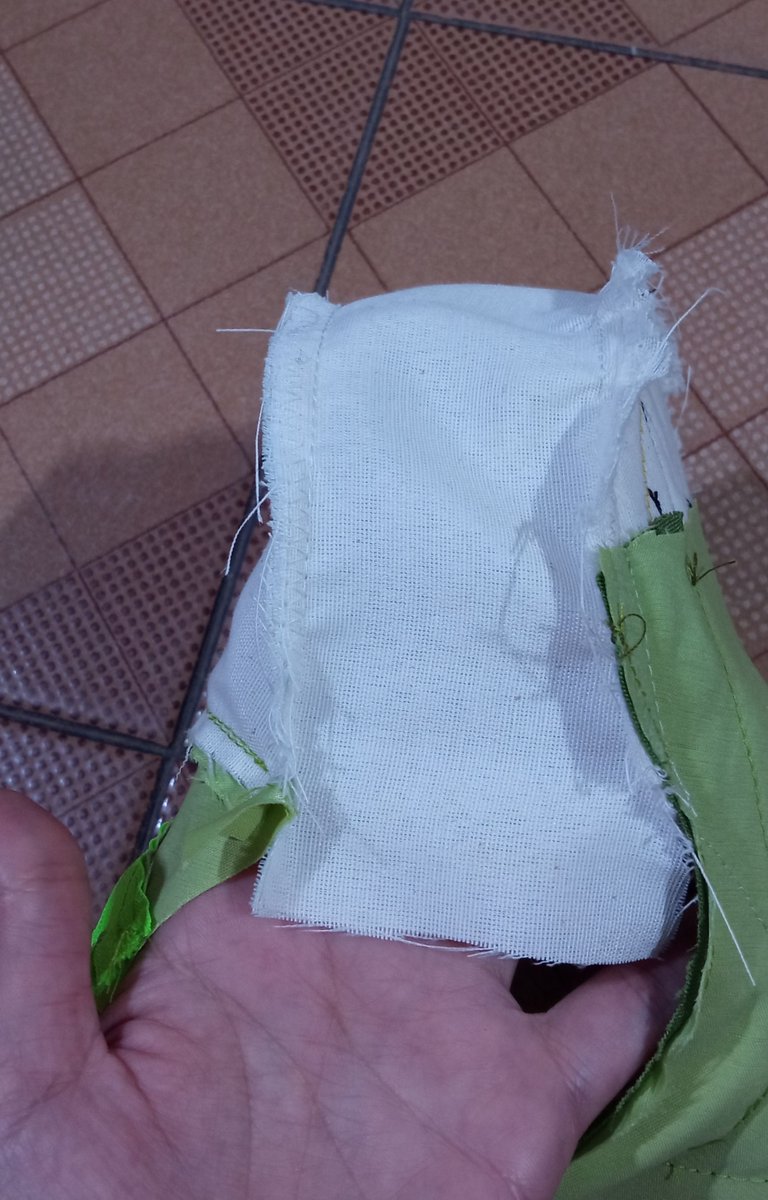
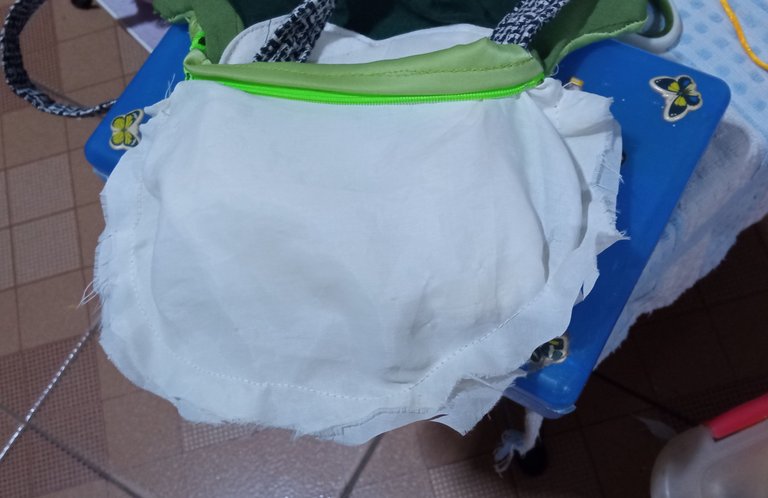
Remember how I forgot the lining existed? Well, I had to figure out how to sew the lining on the back without unstitching the closure, which I miraculously managed to do haha, also being able to locate the lining on the front of the bag, sewn only on the top part, since I needed the lower opening. to be able to continue working. Similarly, attach the felt piece for the front hat.
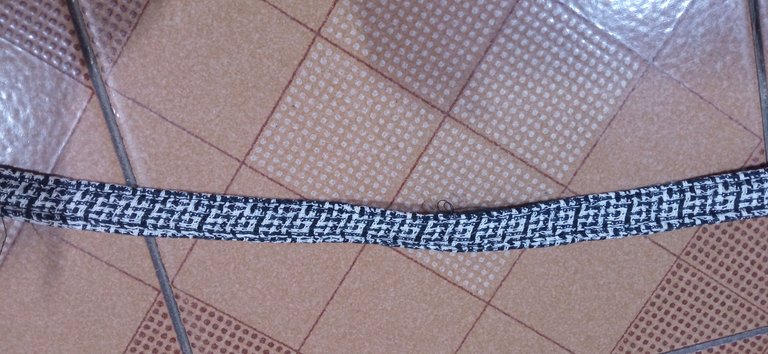
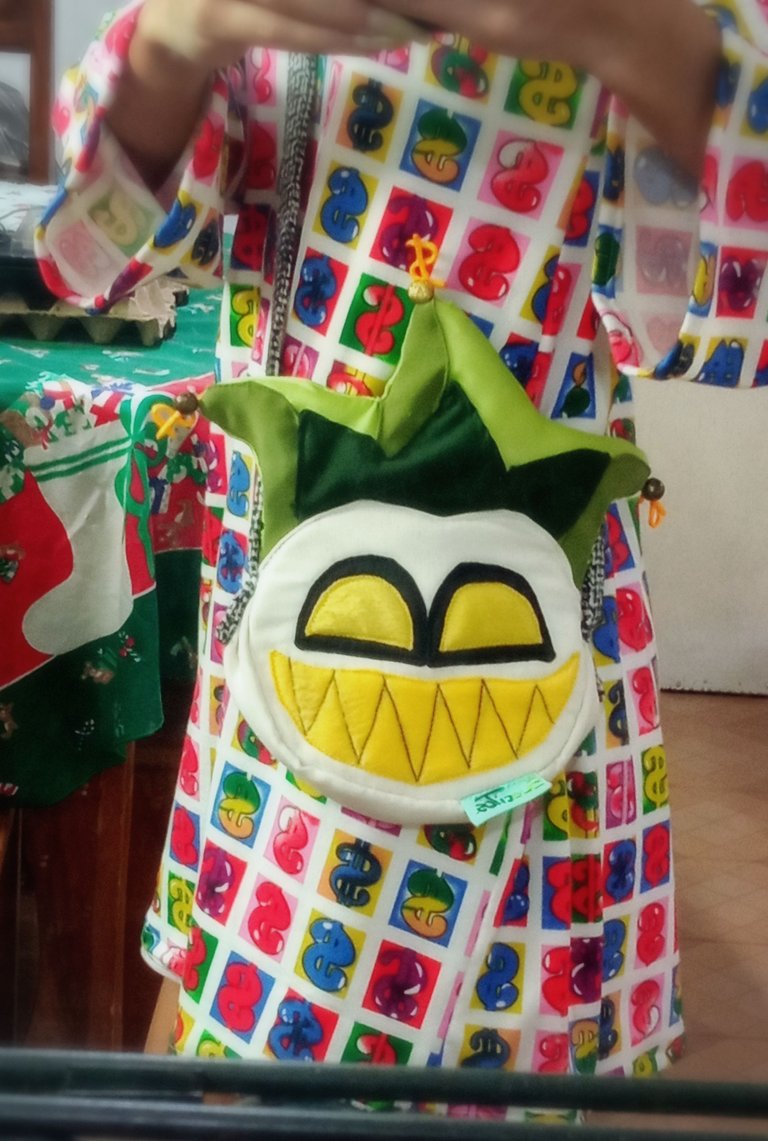
The fabric I cut for the bag strap is quite strong but soft to sew. So I folded it and made two side seams on both sides. I made sure it was the right length for my height. Then, I sewed the edges of said ribbon to both sides of the bag, with a straight seam.
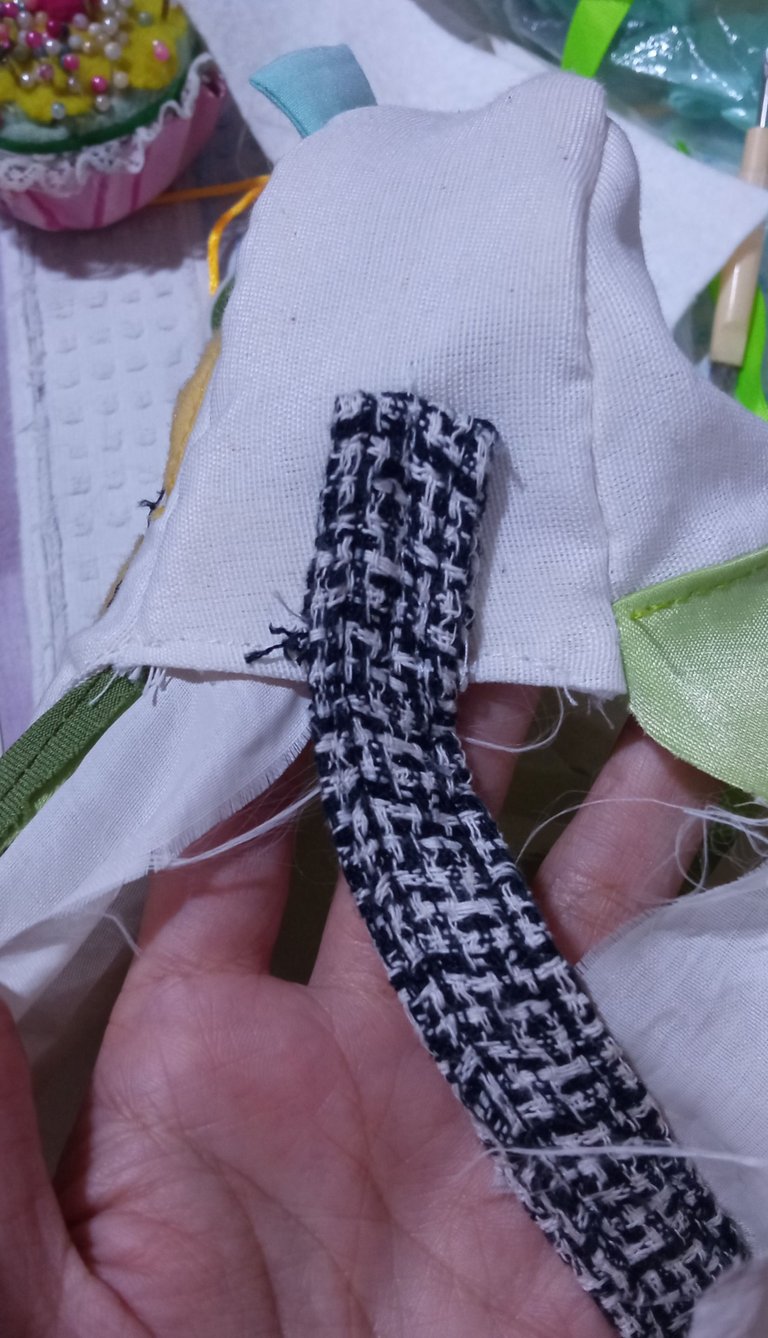
After I had the strap sewn, I was able to finish closing the bag, as well as the lining, and proceed to turn it over.
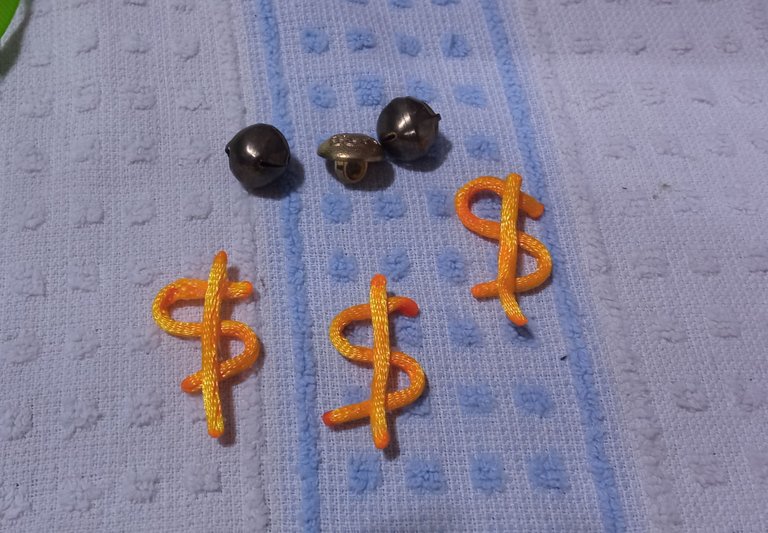
For the details of the hat, I only got two bells, so I had to replace the third with a gold button and for the dollar signs, I made them with a strip that is called "mouse tail" here, giving it shape thanks to hot silicone . I sewed them by hand and to reinforce them, I placed a little silicone on them.
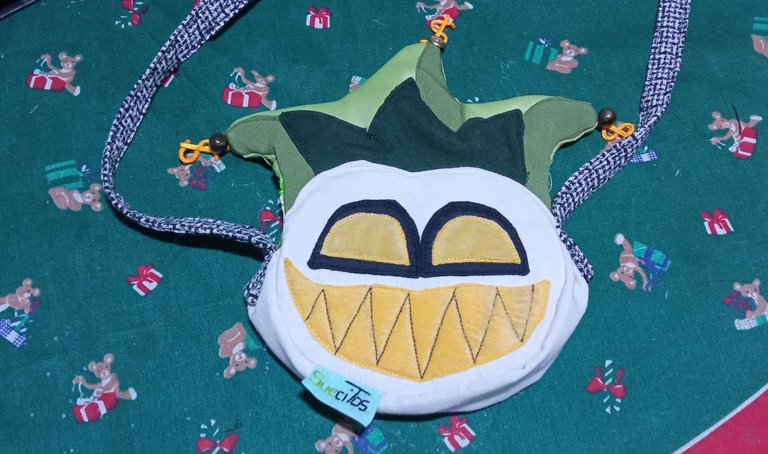
And in this way, I had my "Mammon, the representation of greed" bag, completely finished.
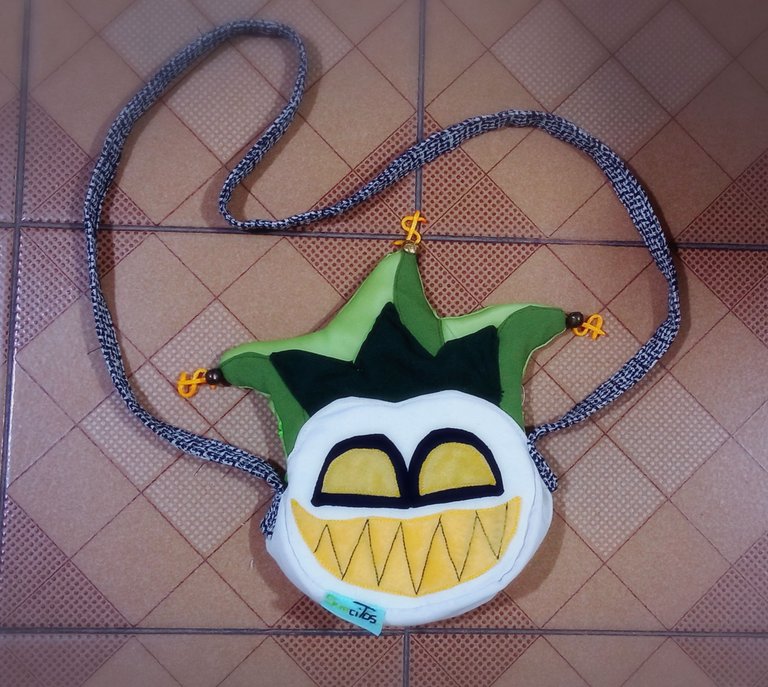
I am very happy with the result, since not only did it turn out as expected, but some friends wanted to buy it after seeing it ha ha but as I mentioned, it is a prototype, since for sale, I would like to use more resistant materials and that had a better finish. Even so, doing these kinds of projects comforts me, because even though I cannot have access to purchasing imported items of the things that I like, that does not mean that I cannot do something equally or more interesting ha ha And what about you? do you think? Are they like me when they like something? Because if I can't buy something and I can do it, then let's get to work!
 |  |  |
|---|
Thank you very much for visiting my publication. I hope you found it interesting.
Until next time!

CONTENIDO EN ESPAÑOL
¡Hola a todos los amantes de la costura! Hace poco volví a activarme con el uso de la máquina de coser y pude elaborar unas prendas para vestir para mi uso personal y junto a ello, me animé a realizar también un bolso que pudiera usar a juego con una de esas prendas.

Primero que nada, les hablaré acerca del personaje del cual está basado el bolso. Se trata de Mammon, un personaje de la serie para adultos de Youtube "Helluva Boss". Mammon, es un pecado capital y representa la codicia. Me gustó mucho el personaje al principio porque me encanta el color verde y es el color que más lo representa. Así que, como cosplayer (persona que se viste al igual que un personaje de alguna serie animada o personaje ficticio), pensé en hacer un outfit inspirado en éste personaje y el bolso, era el detalle principal.

No es la primera vez que elaboro bolsos basados en personajes animados, así que tenía bastante confianza en mi misma. Como no tenía más que trozos de tela, no busqué ningún tutorial sino que preferí hacer la pieza con mi conocimiento en costura y mi habilidad para improvisar ja ja Lo primero que hice luego de constatar de que tenía algunos pedazos de tela verde (la primordial), fue elaborar el patrón. Lo bueno de saber dibujar es que puedo realizar los patrones a mi conveniencia. Dibujé las piezas cómo las deseaba y procurando que fueran factibles a la hora de ser trasladadas a la tela. Como ya había hecho otro bolso de uno de los personajes de dicha serie, tenía una idea de cómo podría realizar éste.

Luego, pasé a cortar todas las piezas compuestas por: delantero y trasero del rostro (ambas dobles porque la tela era muy delgada); delantero y trasero para el gorro; recortes de tela para detalles del gorro, los ojos y la boca; una tira para la base del bolso y otra para la tira del bolso; la pieza correspondiente al forro, así como una pieza en fieltro del rostro y el gorro, para darle dureza al bolso.
Nota: A medida que iba realizando el bolso, descarté y cambié algunas piezas, como por ejemplo, eliminé la pieza de fieltro para la parte trasera del bolso, así como cambié el forro de color verde por uno de color beige.

Al pasar a la máquina, lo primero que hice fue coser las piezas correspondientes a los detalles del gorro a la pieza delantera, para tratar de que luciera como el del personaje. Utilicé para ello una costura recta.

Luego, cosí las dos piezas delanteras (recuerden que las corté doble porque la tela era delgada), las volteé y dentro, coloqué la pieza de fieltro para mantener su forma.

Para coser los ojos y la boca del personaje, utilicé una costura en zigzag, ya que es la que más me gusta para éste tipo de piezas, luciendo como una especie de bordado. Y para los detalles de los dientes, utilicé una costura más cerrada que en mi máquina se llama "triple punto recto". Me gusta como con ella, puedo realizar líneas gruesas que me permitan definir figuras rectas, como en éste caso, los colmillos afilados. Una vez hecho esto, pegué la pieza correspondiente a la cabeza del personaje, a la pieza delantera del gorro.


En ésta parte, hubiese sido adecuado haber cosido las piezas del forro a las piezas delantera y trasera... pero se me olvidó y seguí cosiendo jaja en fin... Para ubicar el cierre, pensé en que lo mejor era colocarlo en la parte media de la pieza trasera del gorro, tomando como referencia la altura indicada para poder introducir mi teléfono o monedero. Así que, corté la pieza en el medio y cosí el cierre de 15 cm (para el tamaño del bolso, me basé específicamente en el tamaño de éste cierre, dado que era el único que tenía de ese color). Luego, le anexé en la parte inferior la pieza trasera de la cabeza del personaje y tuve de éste modo, las dos tapas del bolso armadas.


En éste punto, mi confianza se mantuvo, ya que al menos sabía que el diseño se veía bien o que al menos, era de mi agrado. Uní entonces estas tapas entre sí desde la parte inferior, a través de la tira que había cortado para que fuera la base del bolso; igualmente de forma doble por lo delgado de la tela, con una costura recta y otra costura de seguridad en zig zag, en el borde. No le coloqué una tira extra de fieltro en ésta parte y ahora que lo pienso, hubiera sido una buena idea, a lo mejor luego se la añado. Oh y por supuesto, aproveché para anexarle la etiqueta correspondiente a mi marca "Suecitos", porque nada como colocar nuestra "firma" en nuestras creaciones 😉 je je


¿Recuerdan que me olvidé que el forro existía? Pues bueno, tuve que ingeniármelas para coser el forro en la parte trasera sin descoser el cierre, cosa que milagrosamente logré ja ja pudiendo ubicar también el forro de la parte delantera del bolso, cosido únicamente en la parte superior, ya que necesitaba la abertura inferior para poder seguir trabajando. De igual modo, coloque la pieza de fieltro del gorro delantero.


La tela que corté para la tira del bolso, es bastante resistente pero suave para coser. Así qué la doblé y le hice dos costuras laterales en ambos lados. Procuré que fuese del largo adecuado a mi estatura. Después, cosí los bordes de dicha cinta a ambos lados laterales del bolso, con una costura recta.


Luego de que ya tenía la tira cosida, pude pasar a terminar de cerrar el bolso, así como el forro y proceder a voltearlo.

Para los detalles del gorro, conseguí solamente dos cascabeles, así que tuve que suplanté el tercero por un botón dorado y para los signos de dólar, los elaboré con una tira que aquí se llama "cola de ratón", dándole forma gracias a silicón caliente. Los cosí a mano y para reforzar, les coloqué un poco del silicón.

Y de ésta forma, tuve mi bolso de "Mammon, la representación de la codicia", completamente terminado.

Estoy muy contenta con el resultado, ya que no solamente quedó como esperaba, sino que unos amigos querían comprarlo después de verlo ja ja pero como les mencioné, se trata de un prototipo, dado que para la venta, me gustaría usar materiales más resistentes y que tuviera un mejor acabado. Aún así, hacer ésta clase de proyectos me reconforta, pues a pesar de que no pueda tener acceso a compra de artículos importados de las cosas que me gusten, eso no significa que no pueda hacerme algo igual o más interesante ja ja Y ustedes ¿Qué opinan? ¿Son cómo yo cuando algo les gusta? Porque si algo no puedo comprarlo y puedo hacerlo, pues ¡Manos a la obra!
 |  |  |
|---|

Muchas gracias por haber visitado mi publicación. Espero que les haya parecido interesante.
¡Hasta una próxima oportunidad!
ESTO ES TAN GENIAL A TANTOS NIVELES, ¡¡hiciste un bolso de Mammon desde ceroooo!!, Dios mío amo cuando la gente craftea cosas poco peculiares y tan especificas, de verdad espero te voten mucho y este post reciba mucho mucho love, porque no solo te quedo bien ejecutado sino que se ve funcional (bravo por ese cierre) o7o)b ✨
Awww~ 💚 Me alegro mucho de que hayas visto la publicación y que te gustase 😊 Me he enganchado con el personaje desde el último episodio y a pesar de su carácter, le he agarrado cariño ja ja en cuanto tuve la idea de hacerle el bolso y me di cuenta de que tenía algunos materiales, no me detuve hasta verlo terminado. Estoy muy satisfecha con el resultado y me he animado con ello a seguir cosiendo las cosas que se me lleguen a ocurrir. Muchas gracias por tus buenos deseos y por tu encantador comentario 🤗💚 Po cierto, hace un tiempo también hice el de Ozzie y también lo subí por acá, en hive:
Espero poder hacer algunos peluches de los personajes o más bolsos también 😉💚