Repairing led lamp source [Eng+Spa]
English
A sincere and cordial greeting to the DIY community, as always wishing that they are in the best possible situation, that they have a lot of encouragement to continue carrying out projects and creating solutions to the problems that arise.
I have been busy in several repairs to the house where I live, it is a very old house, it was built in the fifties, and they did not follow all the rules to erect the structure. So I have to solve various filtration and pipe problems that are occurring over time.
I've also been busy trying to practice the Splinterlands lineups, I recreated the game physically and when I can make time for the game, I usurp the table for hours.
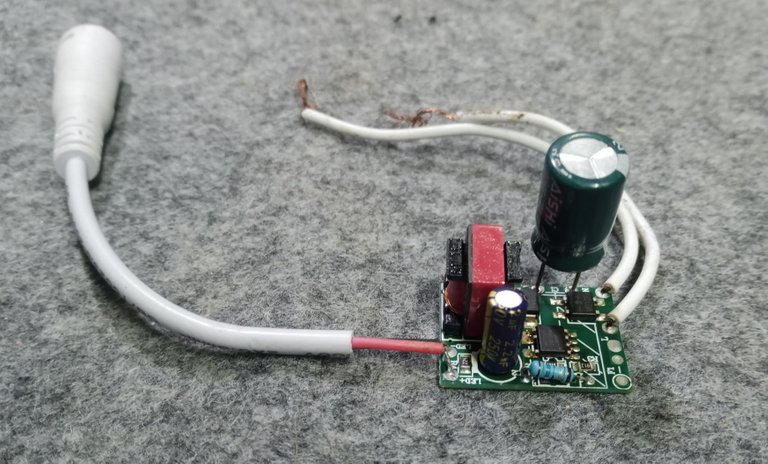
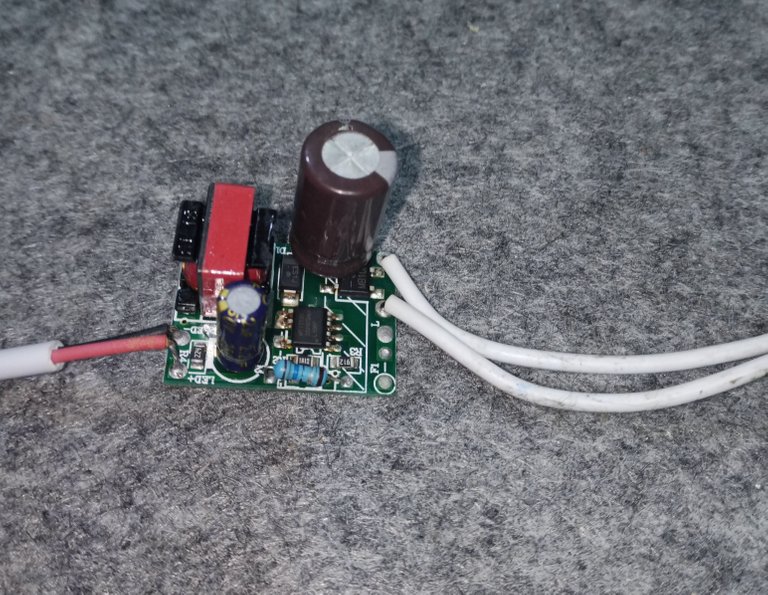
The repair of the source that provided the working voltage to the led strip had been pending, since the previous publication, (in which I repaired a led lamp). That the source did work, but after being in use for a while, it had some flickering that indicated a possible power failure.
The most common fault in these circuits, almost always, is the capacitor, which is generally deteriorated. But it is not always the exact fault, so to verify, we use the bulb to discharge circuits that we made in the previous posts, then we can work with the security that we will not damage the tester.
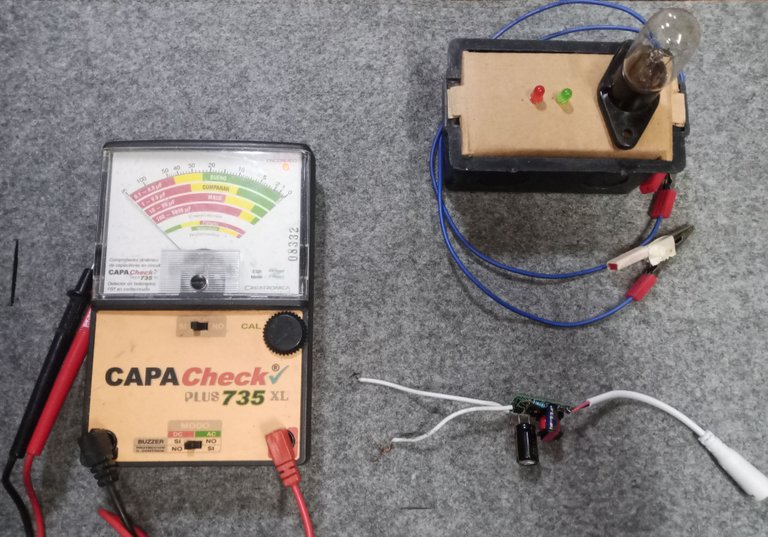
First of all, I usually use an ESR meter, which allows me to measure the capacitors, without having to desolder them from the circuit board, which is something that saves me a lot of time in card repairs. And it's not that it's a card that has a lot, it's only about three resistors, a couple of capacitors and little else, but I follow the rule that says: “if it's not damaged, don't damage it”.
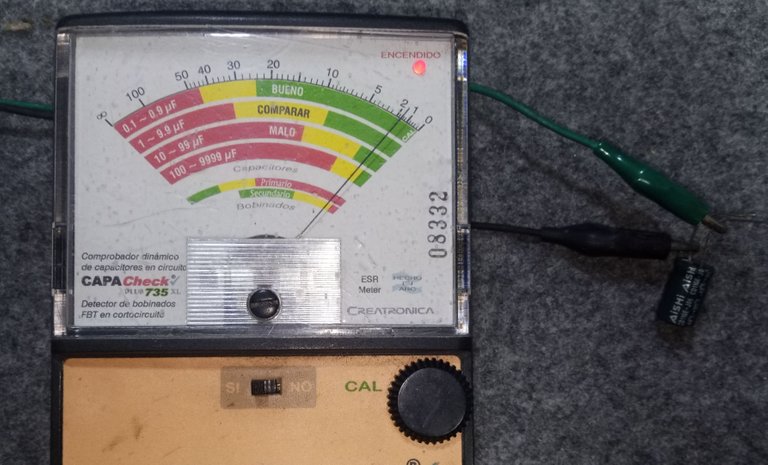
The meter has a very simple scale, red is bad, yellow check and green is that the capacitor is good. When I measured the main capacitor it was 10 microfarads (the power or input source is always the largest capacitor on all cards), the scale measurement indicated the yellow zone that is to check.
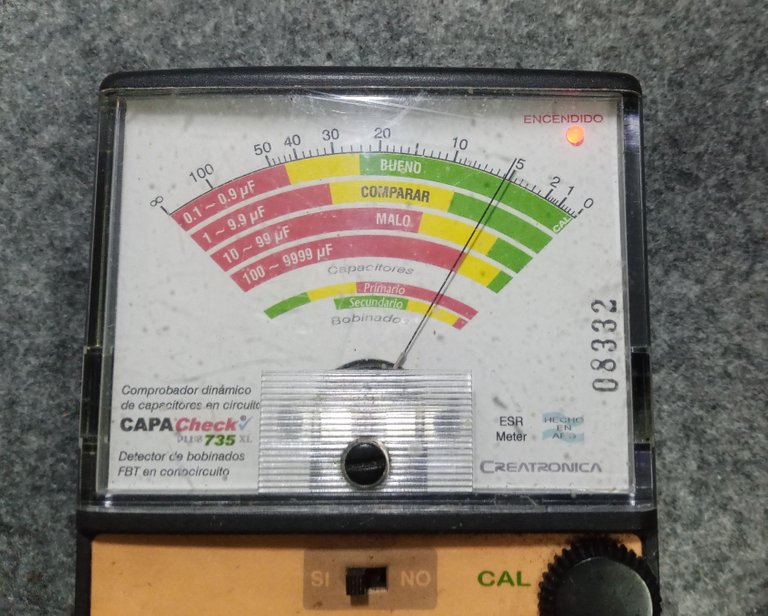
Capacitors are usually very treacherous, very tricky when you measure them. When measuring with the capacitor meter, it indicates the correct value 10 microfarads, but when measuring again with the ESR meter it continues to mark in the yellow zone.
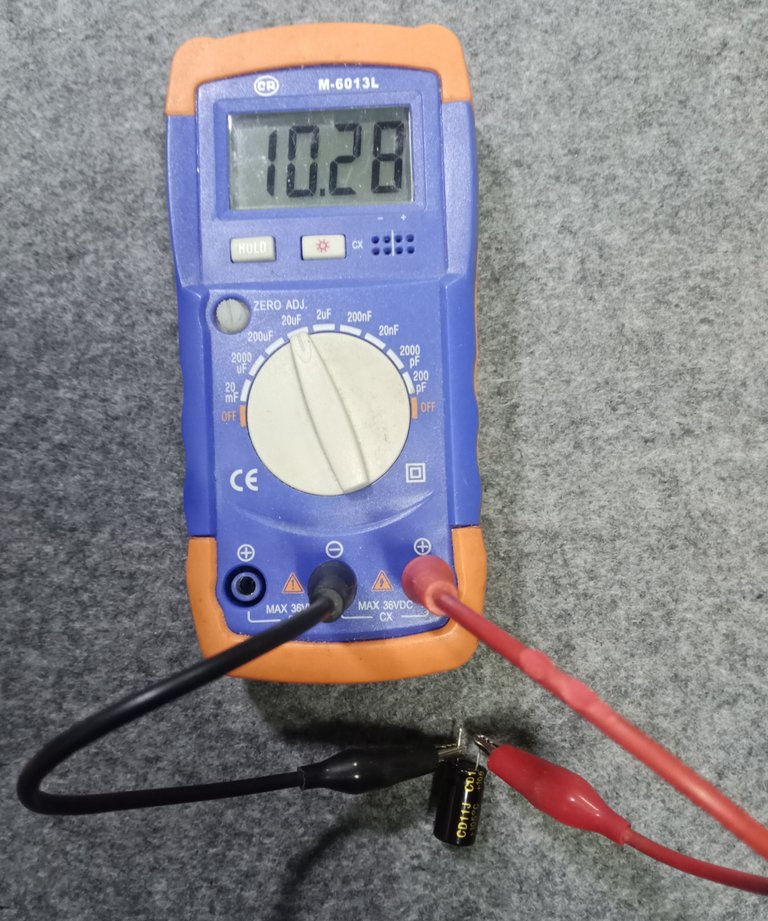
I check with another 10 microfarad capacitor from the spare parts box that the ESR meter is working well, and with a new unused one that I am going to use as a replacement, in these jobs you always have to put a new capacitor.
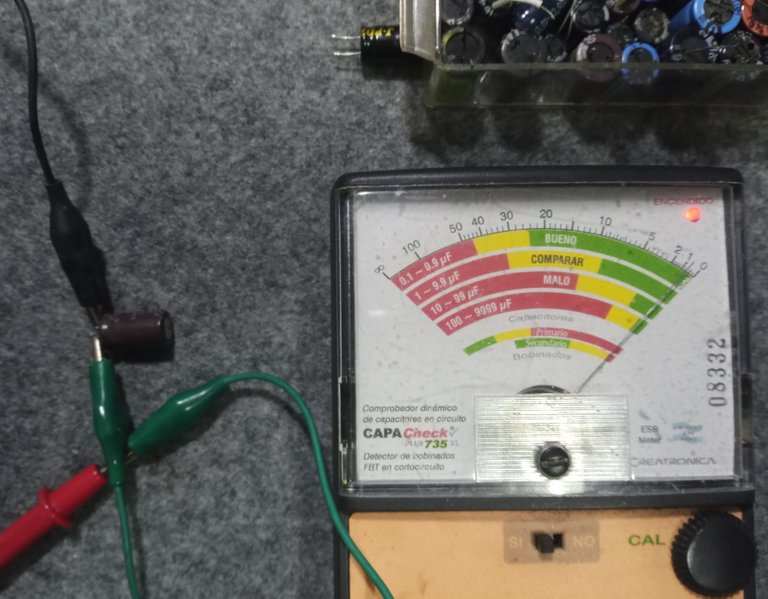
It is not recommended to use recycled capacitors, you can use it for tests or an emergency repair, but not to deliver a job, you could not cover the guarantee.
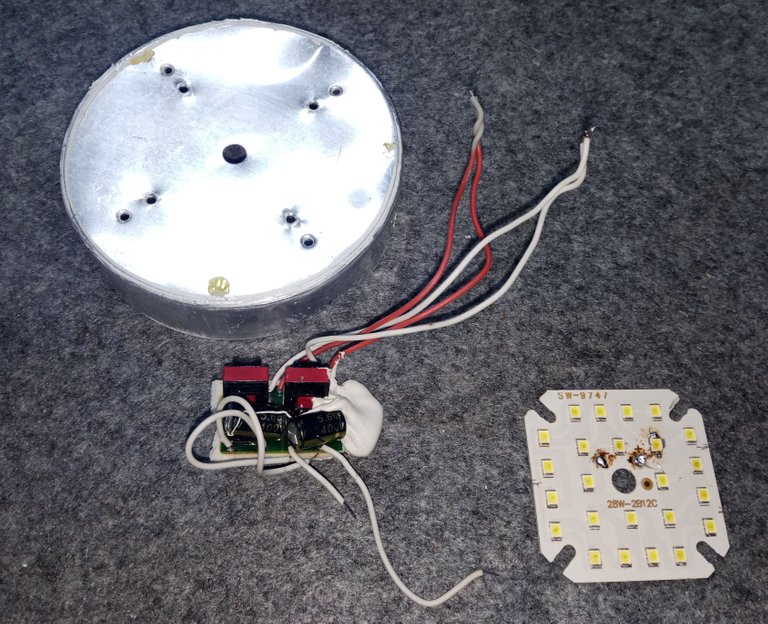
Since I was already checking the circuit, I changed a resistor that was right next to the transformer (red) next to the output wires for the lamp, since it wasn't giving me the correct value when I measured it, since I didn't have the SMD type, I used a conventional one.

I also took advantage of using a 30-watt bulb that I had in the warehouse that had several damaged leds (when it has more than three damaged leds, I leave the bulb as a spare) and I tried the 18-watt lamp (as long as the source with which you test is higher than the lamp source, can be used)
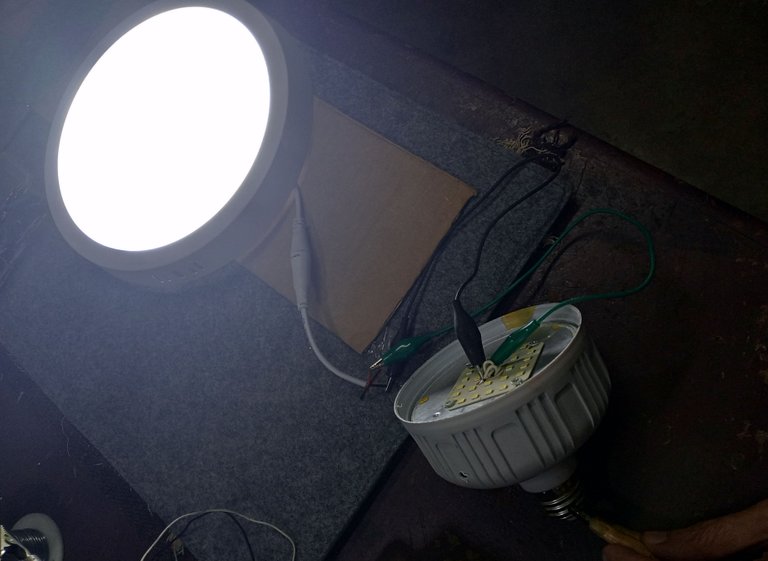
Take advantage of setting up a test source, for the next time another similar lamp arrives at the workshop, you can easily test it, the circuit is small, it fits without problems in a casing used by the sources of these lamps.
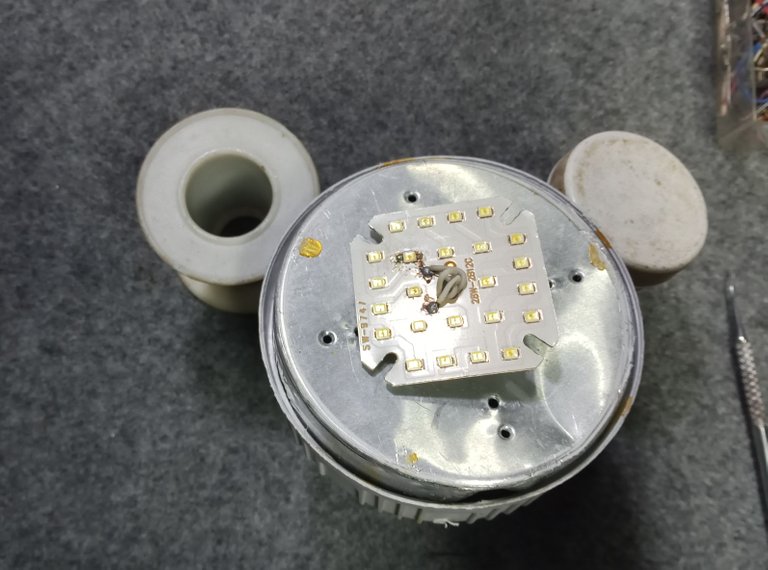

Check the operation and be satisfied.
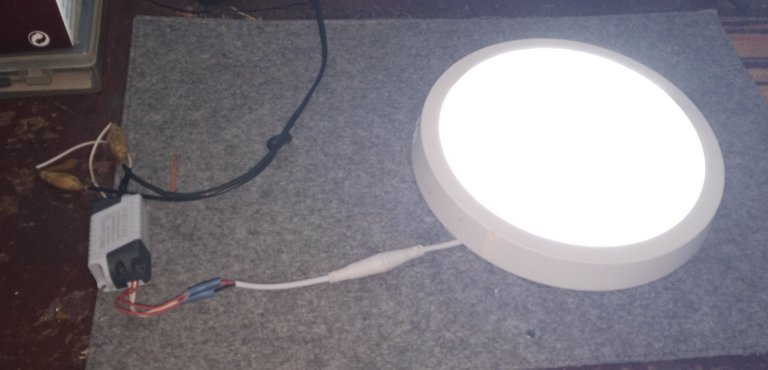
We had some small interruptions from the cat feeding and supervision department.

This is how I end up with the circuit being repaired with the replacement components.

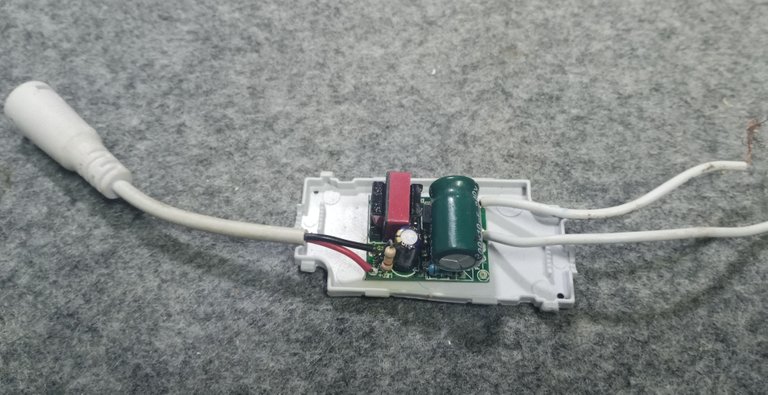
With this we finish the work of this lamp.
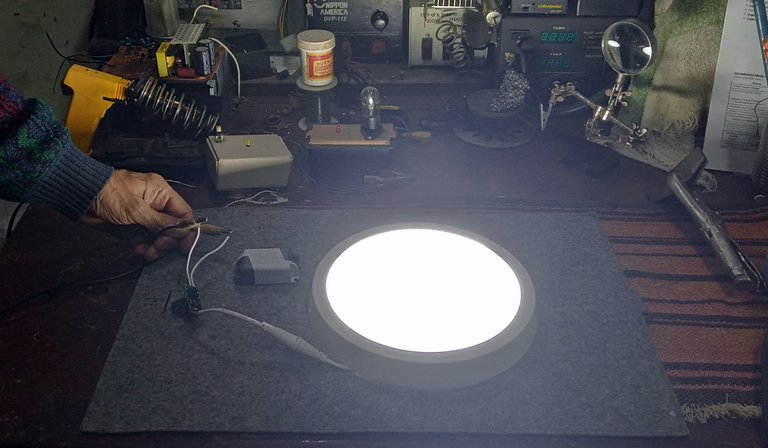
Thank you very much for stopping by and reading.
I hope you have an excellent week.
Peace.

I have used Google translate for English. (for some reason Deepl gives me failures)
The images are captures of my workshop work.
Español

Un franco y cordial saludo para la comunidad DIY, como siempre deseando que estén en la mejor situación posible, que tengan mucho ánimo para seguir realizando proyectos y creando soluciones a los problemas que se nos presenten.
He estado atareado en varias reparaciones de la casa en donde vivo, es una casa muy vieja, fue construida por los años cincuenta, y no siguieron todas las normas para levantar la estructura. Así que tengo que ir resolviendo varios problemas de filtración y tuberías, que se están presentando por el paso del tiempo.
También he estado entretenido tratando de practicar las alineaciones del Splinterlands, recree el juego en físico y cuando puedo sacar tiempo para el juego, usurpo la mesa por horas.


Había quedado pendiente, desde la publicación anterior, (en que repare una lámpara de leds) la reparación de la fuente que le proporcionaba el voltaje de trabajo a la tira de leds. Que la fuente sí funcionaba, pero al rato de estar en uso, presentaba un cierto parpadeo que me indico una posible falla de alimentación.
La falla más común en estos circuitos, casi siempre, es que el capacitor, que por lo general se halla deteriorado. Pero no siempre es la falla exacta, así que para verificar, usamos la bombilla para descargar circuitos que fabricamos en las publicaciones anteriores, entonces podemos trabajar con la seguridad de que no dañaremos el tester.

Suelo primero que nada, usar un medidor ESR, lo que me permite medir los capacitores, sin tener la necesidad de desoldarlos de la placa de circuitos, eso es algo que me ahorra mucho tiempo en las reparaciones de tarjetas. Y no es que sea una tarjeta que tenga mucho, solo son unas tres resistencias, un par de capacitores y poca cosa más, pero sigo la norma que dice: “si no está dañado, no lo dañes”.

El medidor tiene una escala muy simple, rojo es dañado, amarillo revisar y verde es que el capacitor está bien. Cuando medí el capacitor principal era de 10 microfaradios (la alimentación o entrada de la fuente, es siempre el capacitor más grande en todas las tarjetas), la medida de la escala indicaba la zona amarilla que es revisar.

Los capacitores suelen ser muy traicioneros, muy engañosos cuando los mides. Al medir con el medidor de capacitores, indica el valor correcto 10 microfaradios, pero al volver a medir con el medidor ESR sigue marcando en la zona amarilla.

Verifico con otro capacitor de 10 microfaradios de la caja de repuestos que el medidor ESR, esté trabajando bien, y con uno nuevo sin usar que voy a usar como reemplazo, en estos trabajos siempre tienes que colocar un capacitor nuevo.


No se aconseja usar capacitores reciclados, puedes usarlo para hacer pruebas o una reparación de emergencia, pero no para entregar un trabajo, no podrías cubrir la garantía.
Como ya estaba verificando el circuito, cambie una resistencia que estaba justo al lado del transformador (rojo) junto a los cables de salida para la lámpara, ya que no estaba dándome el valor correcto cuando la medí, como no tenía del tipo SMD, use una convencional.

También aproveché usar un bombillo de 30 vatios que tenía en el depósito que tenía varios leds dañados (cuando tiene más de tres leds dañados dejo el bombillo como repuesto) y probé la lámpara que es de 18 vatios (mientras la fuente con que pruebas sea mayor que la fuente de la lámpara, se puede usar)

Aproveche de armar una fuente de pruebas, para la próxima vez que llegue otra lámpara igual al taller tener como probarla fácilmente, el circuito es pequeño, cabe sin problemas en una carcasa que usan las fuentes de esas lámparas.


Verifique el funcionamiento y quede conforme.

Tuvimos algunas pequeñas interrupciones del departamento de supervisión y alimentación gatuna.

Así termino quedando el circuito reparado con los componentes de reemplazo.


Con esto terminamos el trabajo de esta lámpara.

Muchas gracias por pasar y leerme.
Espero que tengan una semana excelente.
Paz.

He usado el traductor de Google para el inglés. (por algún motivo el Deepl, me da fallas)
Las imágenes son capturas de mi trabajo de taller.
Yay! 🤗
Your content has been boosted with Ecency Points, by @soltecno.
Use Ecency daily to boost your growth on platform!
Support Ecency
Vote for new Proposal
Delegate HP and earn more
My gratitude for the support. Have a great weekend to all of you.
Congratulations!
Your post has been manually curated and reblogged.
You can follow our curation trail on Hive.Vote
If you want to support us and the authors we vote for you can upvote this comment or delegate some Hive Power to our account. Thanks!
Propose a worthy post by mentioning us in the post or in a comment.
We reblog curated posts, follow us if you wish to see them in your feed.
Thank you very much for supporting my publication, I hope you have a good weekend.
Esa supervición de la gata de la casa es bastante graciosa, ella tiene una cara de reclamo que es hasta cómica :)
#Cat #Photo
#Electric #Electronic
Stay !ALIVE
!Gif cute cat
!LOLZ
!PGM
!LUV
Via Tenor
@soltecno! You Are Alive so I just staked 0.1 $ALIVE to your account on behalf of @pedrobrito2004. (5/10)
The tip has been paid for by the We Are Alive Tribe through the earnings on @alive.chat, feel free to swing by our daily chat any time you want, plus you can win Hive Power and Alive Power delegations and Ecency Points in our chat every day.

BUY AND STAKE THE PGM TO SEND A LOT OF TOKENS!
The tokens that the command sends are: 0.1 PGM-0.1 LVL-0.1 THGAMING-0.05 DEC-15 SBT-1 STARBITS-[0.00000001 BTC (SWAP.BTC) only if you have 2500 PGM in stake or more ]
5000 PGM IN STAKE = 2x rewards!
Discord
Support the curation account @ pgm-curator with a delegation 10 HP - 50 HP - 100 HP - 500 HP - 1000 HP
Get potential votes from @ pgm-curator by paying in PGM, here is a guide
I'm a bot, if you want a hand ask @ zottone444
This post has been manually curated by @bhattg from Indiaunited community. Join us on our Discord Server.
Do you know that you can earn a passive income by delegating to @indiaunited. We share more than 100 % of the curation rewards with the delegators in the form of IUC tokens. HP delegators and IUC token holders also get upto 20% additional vote weight.
Here are some handy links for delegations: 100HP, 250HP, 500HP, 1000HP.
100% of the rewards from this comment goes to the curator for their manual curation efforts. Please encourage the curator @bhattg by upvoting this comment and support the community by voting the posts made by @indiaunited.
Thank you very much, very grateful for the continued support.
Have a nice day.
No viene mucho al caso mi comentario con tu post pero te lo cuento para que te rías un poco conmigo, repare un ventilador de una de mis impresoras 3D pensando que el ventilador debía ser de 12v cuando realmente tenia que ser de 24v JAJAJAJ ese ventilador funciono al 150% de su capacidad y luego comenzó a calentar, no entendía porque hasta que caí que necesitaba uno de 24v y yo pensando que el ventilador vino defectuoso. Te he fallado maestro JAJAJA
A cualquier persona le pasa alguna vez. No hay perfección en este mundo.
Amigo, muchas gracias por pasar a ver y comentar.
Que tengas una excelente semana.
Puedes adaptar el voltaje, si no consigues el ventilador de 24volt.
Con la escasez de repuestos por aquí o los costos exagerados, he tenido que montar un ventilador de 12 dónde había uno de 24, de una máquina de soldar.
o.o desconocía esa posibilidad, esta bueno saberlo para salir del paso en algún momento
!PIZZA
Muchas gracias por pasar a ver la publicación.
Que tenga un buen día.
!BEER
View or trade
BEER.Hey @soltecno, here is a little bit of
BEERfrom @nupulse for you. Enjoy it!Learn how to earn FREE BEER each day by staking your
BEER.$PIZZA slices delivered:
@nupulse(1/15) tipped @soltecno