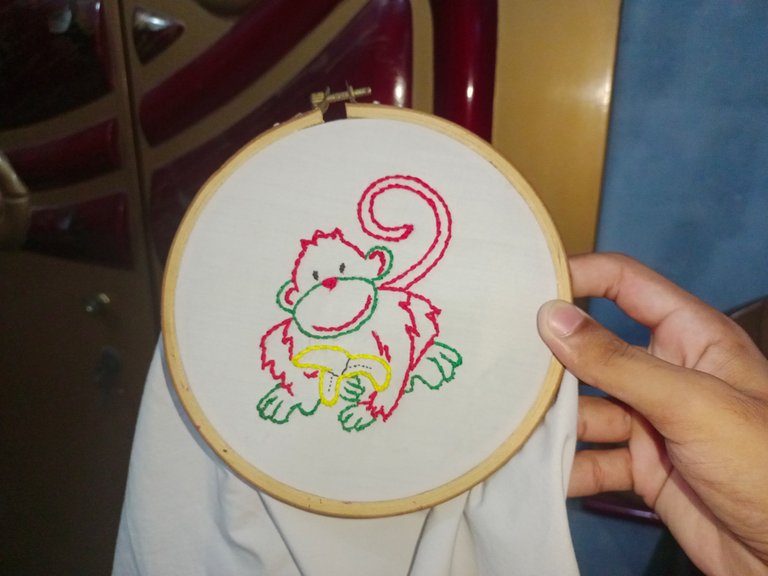
Monkey embroidery design
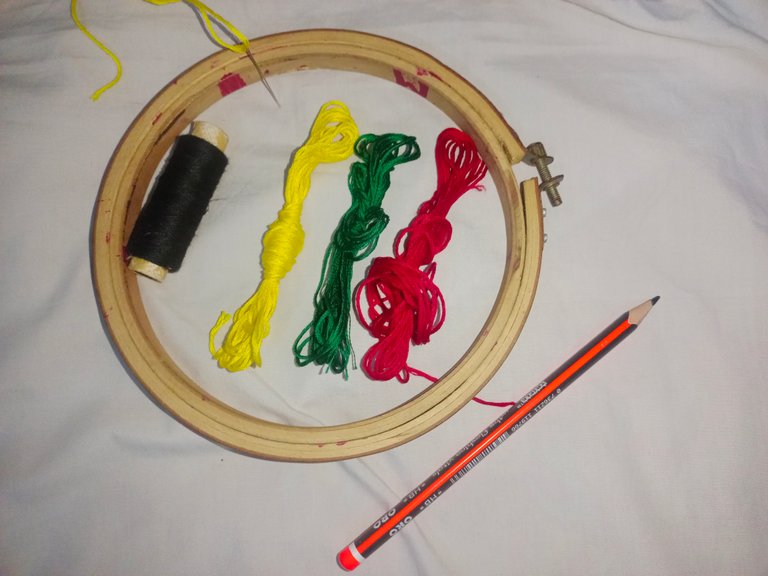
Things to Use
- Pencil
- Threads(black,green,yellow,red)
- White cloth
- Frame
- Needle
- Paper board
Process of Making
Step one
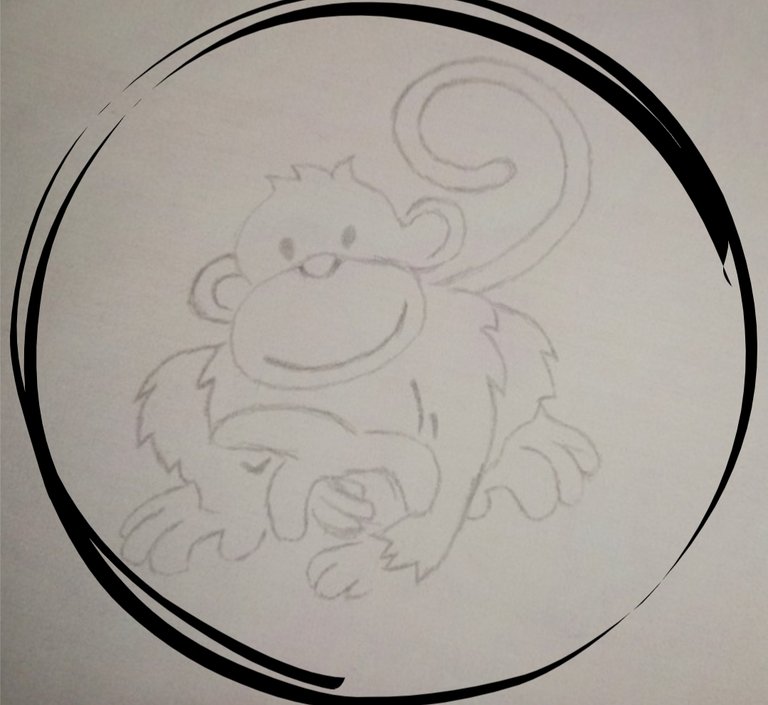
In the first step we have to set the white cloth on paper board to start the process.First we have to start drawing the monkey by using pencil then the embroidery will be start.

Step two
In the step two we have to complete the drawing of the monkey with the pencil.So the base for the embroidery is ready and we have to start it in next step
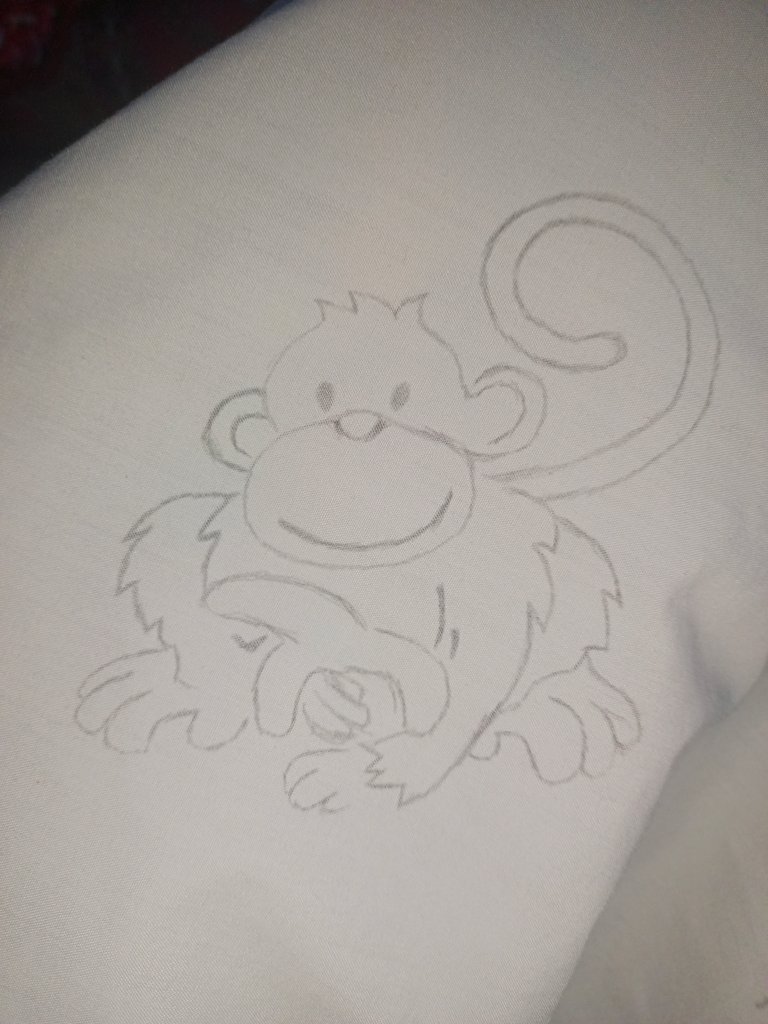
Step three
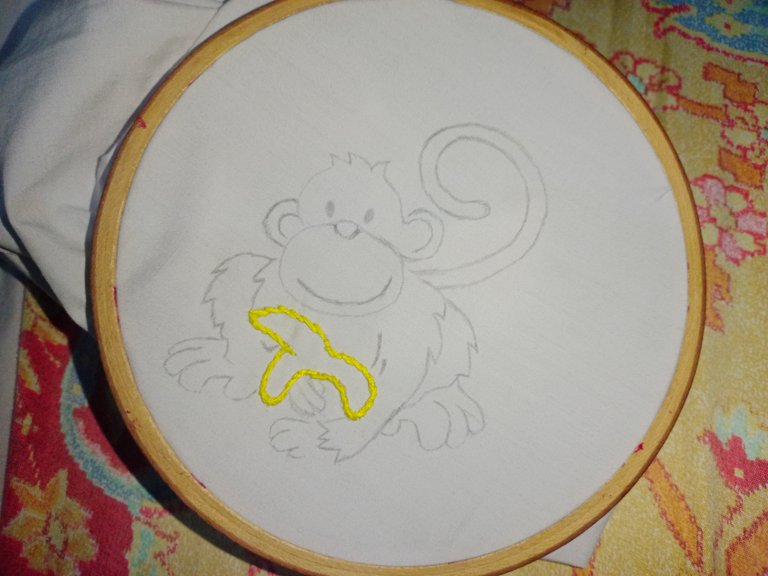
In this step we have to first set the drawn picture of monkey with pencil on the frame to start the embroidery of the monkey design.
Step four
In the fourth step we have to start the embroidery of the banana in the monkey's hand with the use of yellow thread.
Step five
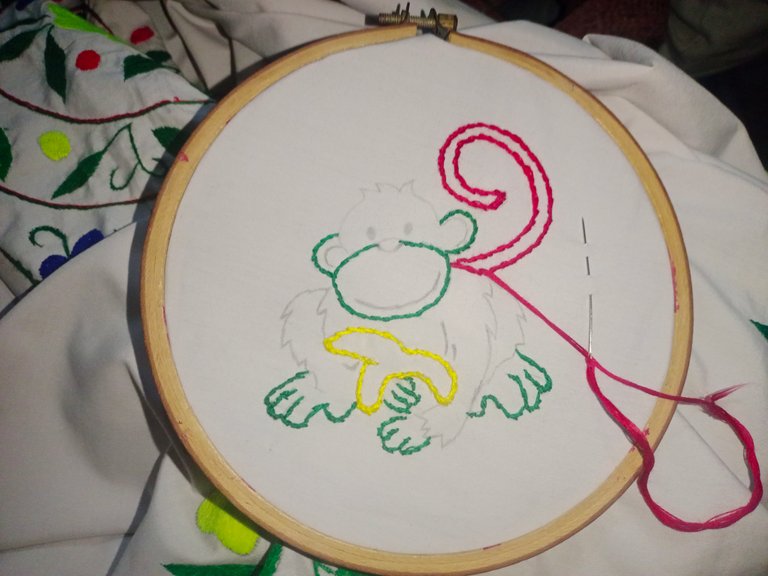
In the fifth step we have to start the needle work on the hands,feet and face of the monkey by using the green thread.

Step six
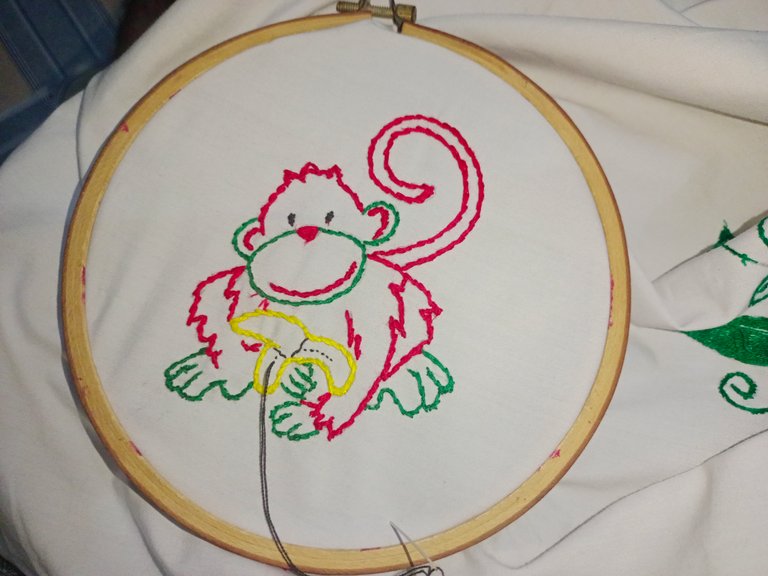
In the sixth step we have to start the work on the tail of the monkey using the red thread as shown in the picture.
Step seven
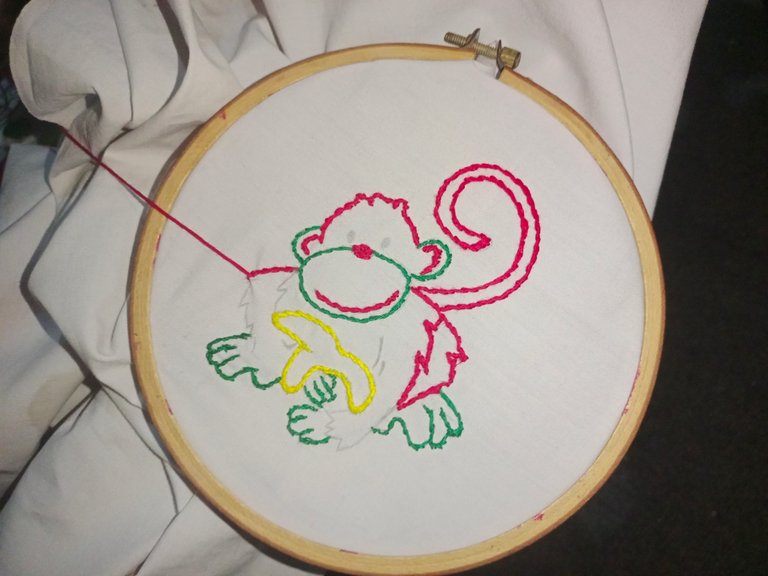
In the seventh step we have to work on the head and body of the monkey design using the red thread.
Step eight
In the step eight we have to complete the work on the monkey with the red thread so that the whole seems to be completing soon.
Final step
In the final step we have to work on the nose using red thread and then black thread on the eyes and then the black thread in the banana design.Thus,after all this finishing our needle work design of monkey is completed.
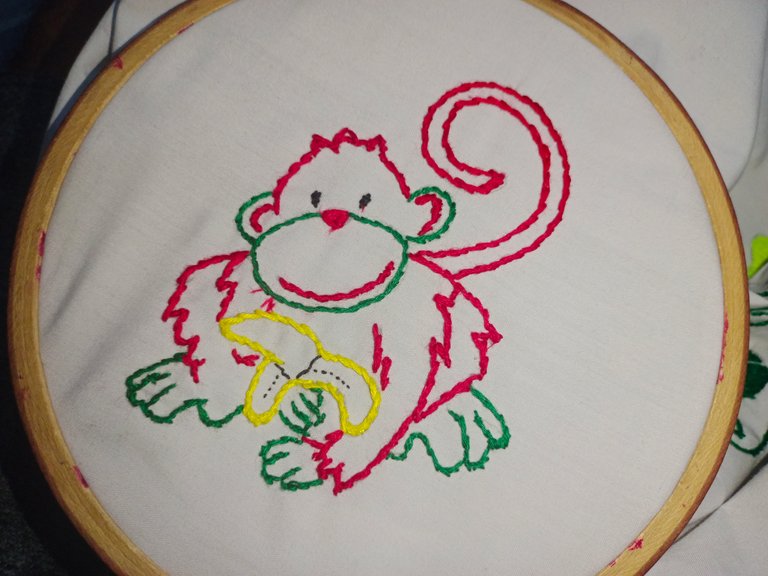
This is a beautiful embroidery design which took a lot of hard work to be completed.But the completion of the design give a spirit of encouragement to do more hard work on contents as this one.
Thanks for watching.
This is very creative of you to make. Thanks for sharing your process with us, do well to engage with other hivers in their blogs.
wow that's amazing
"Sending you an Ecency curation vote''
Please vote for the Ecency Proposal.👇
https://ecency.com/proposals?filter=team
This is creative, you did an amazing job.