Getting to know Windows Firewall
Hello community, the idea of this post is that users can learn and use the Windows 10 Firewall with its features.
We must keep in mind that the use of a Firewall is important, and it is our first line of defense, as it acts as a barrier between our computer and the networks we connect to, allowing or blocking connections according to established rules. This is essential to protect us from cyber threats. As far as I am concerned I have always used in Windows 10 its own firewall with its advanced options.
The first thing to understand is the default behavior of our firewall in Windows 10:
- Block all incoming traffic, unless a rule is created where traffic is allowed.
- Outbound traffic is allowed, traffic is only blocked if a rule is created that allows this.
Additionally there is the possibility of blocking both incoming and outgoing traffic and creating rules to allow applications to go out to the internet, which is what I do thanks to the advanced options of the Windows firewall.
The second is to understand what firewall rules are:
The firewall rules are going to determine how network traffic is going to be managed by allowing or blocking it according to a series of conditions to make this possible. In Windows 10 a large selection of conditions are offered to achieve this, among which are:
- Application, service or program name.
- Source and destination IP addresses.
- Protocol types and ICMP traffic types.
The third thing to understand is the concept of network profiles used by the Firewall.
Profiles are a feature that allow a lot of flexibility when configuring different scenarios, where different behaviors of our firewall are needed.
For example: We may need to connect to a public network and therefore need the firewall to be more restrictive, but we may also need to be connected to a private network or at home and do not need such a strict behavior. Therefore, we achieve these behaviors depending on the network profiles used by the firewall.
The Windows Firewall has three network profiles to work with, domain, private and public.
Below, I describe the profiles:
Domain network:
The domain network profile is automatically designated to a computer that is joined to
a Domain Controller in Windows. This profile cannot be set manually.
Private Network:
The Private Network profile is created to connect to networks that are trusted.
Public Network:
The Public Network profile is for networks where more security is required.
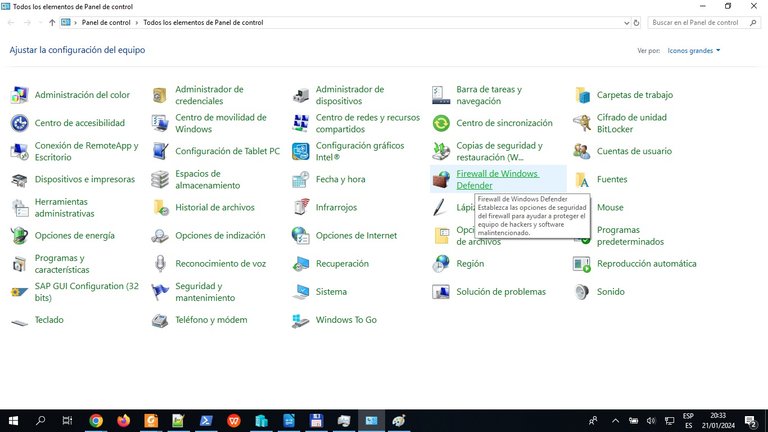
In the following illustration we can see how to access the Windows 10 firewall, all we have to do is go to the control panel and search for Windows Firewall.
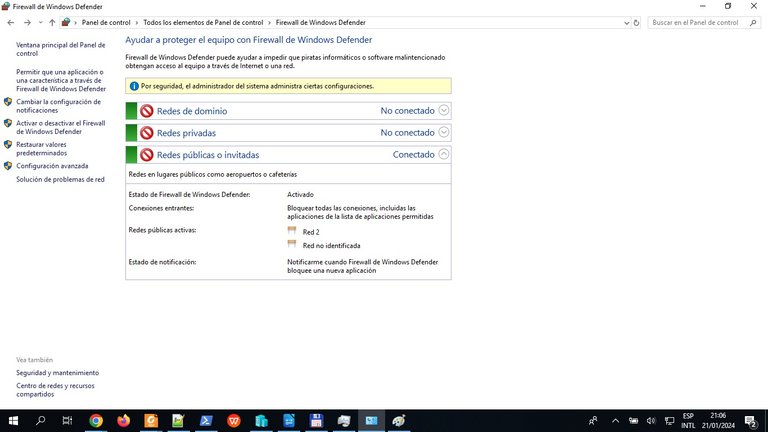
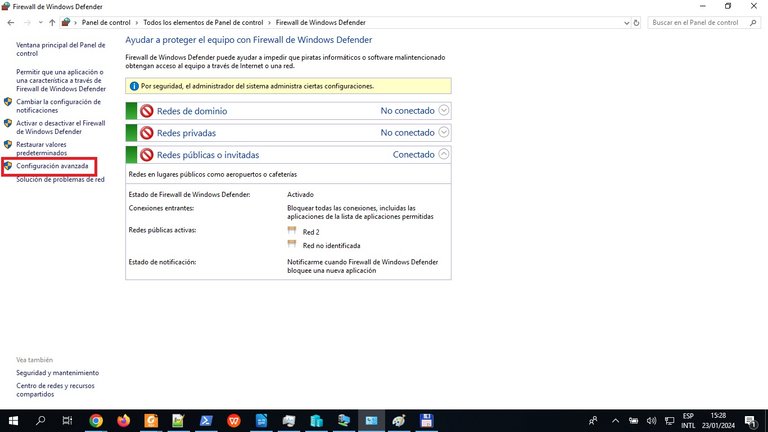
Next a window opens where we can see at a very basic level the main options that Windows offers with its firewall.
Here the firewall status is shown (green active, red deactivated) in my case it is active for each type of network profile such as Domain Networks, Private Networks and Public or Guest Networks.
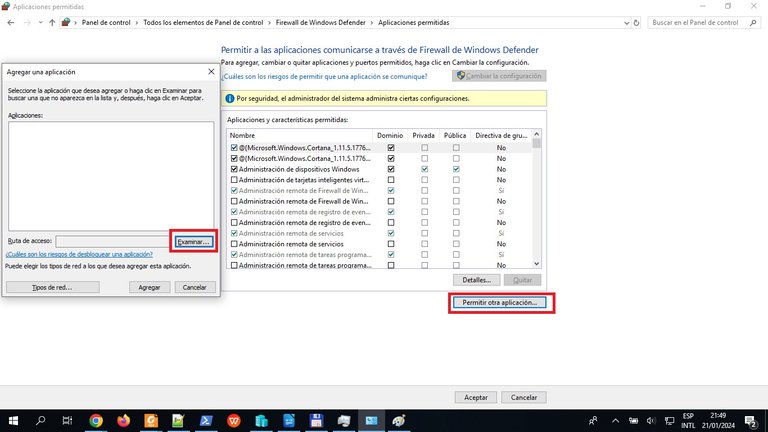
Next, you can see the option 'Allow Applications to communicate through Window Firewall', where you can easily grant Internet access to the Applications.
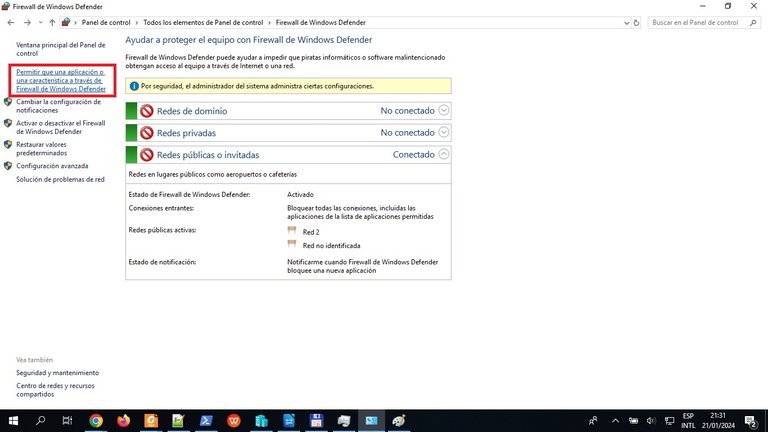
When entering and clicking on the Change Configuration button, you can add or change the access rules for each application, and then the window on the left will pop up where we look for the path of the program to allow.
Now we are going to see the options of advanced configurations of the Windows firewall.
Here we click on Advanced Settings.
Below we can see the 'Advanced Configuration' window where all the entry and exit rules are defined.
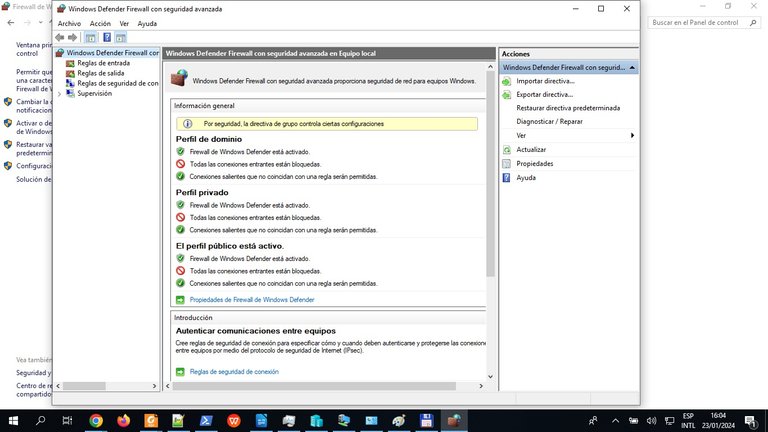
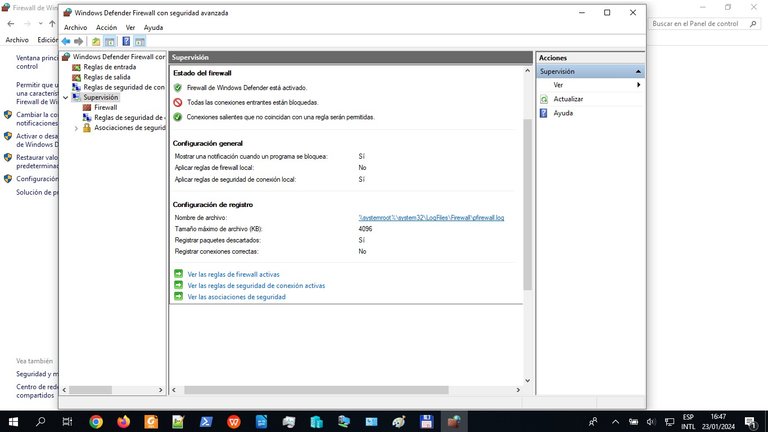
You can view the default policies for the three network profiles, Domain Profile, Private Profile and Public Profile. Network traffic permissions on the firewall are defined by the profile that is running and the firewall rules associated with the profile.
As I said before the Windows firewall has by default the policy of blocking all incoming traffic and allowing outgoing traffic this can be seen in the Advanced configuration window.
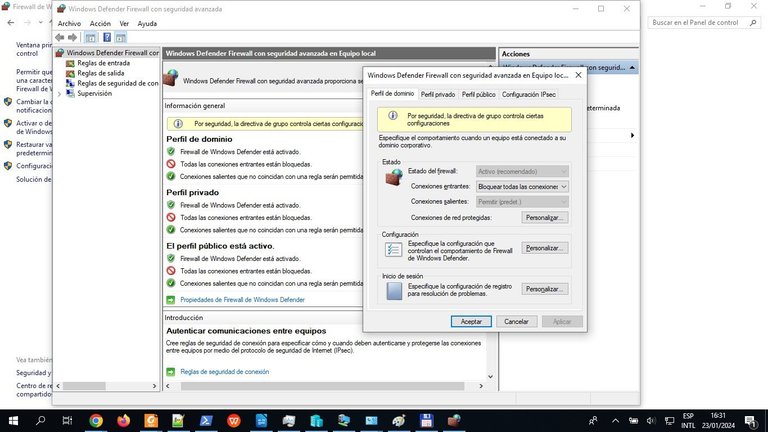
In 'Windows Defender Firewall Properties' you can change (allow or block) incoming and outgoing network traffic. We can also enable or disable the firewall for a selected profile, and other actions can be performed such as detecting protected network connections where it is possible to select the installed network interfaces, configure firewall notifications, and define the path on the hard disk of the logs that our Firewall registers.
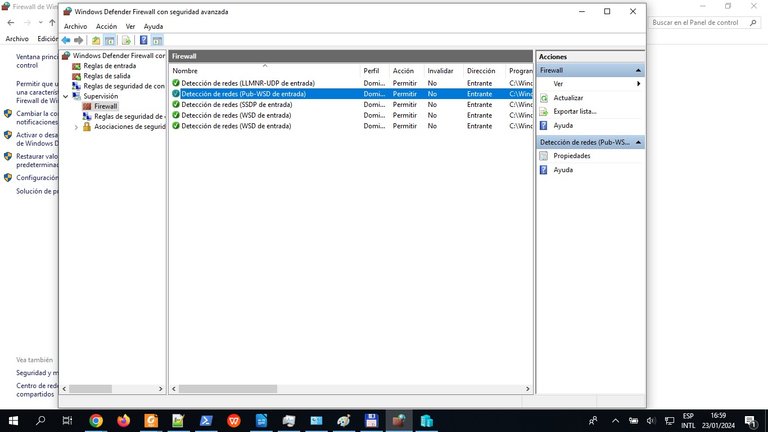
In the 'Supervision - Firewall' option you can see all the active rules we have and their detailed configuration.
Working with the Firewall Rules
In the advanced options we have the Inbound Rules and Outbound Rules, here we have the rules that are working. Only those with a green check mark are enabled, the rest are disabled.
If we were to create new rules we should carefully consider where we define them, if we need to allow traffic from outside to our PC, for example, we define it in “Inbound Rules”. And if we need to block some traffic originating from the PC, we do it in “Outbound Rules”.
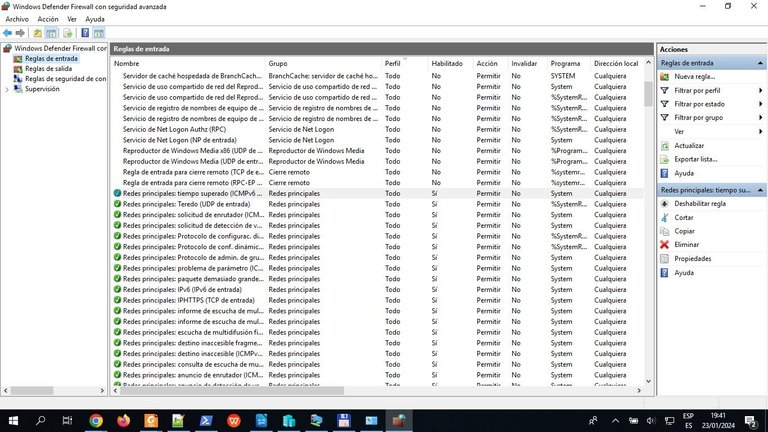
With the Windows firewall we will be able to create four types of rules:
Program: This Rule allows us to control the connections of a program running on our computer.
Port: rule that controls connections associated with TCP and UDP protocols.
Predefined: You can choose rules already created related to Windows services.
Custom: This is a group of rules that can be created and configured with various parameters.
Now we will see the procedure to create rules in our Firewall.
In order to create new rules, right click on 'Inbound Rules' or 'Outbound Rules' and then on 'New Rule'. As shown in the image.
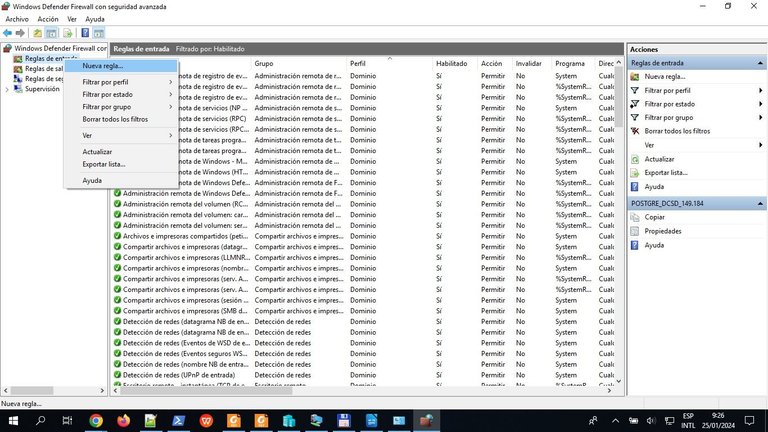
Then in each case depending on the type of rule we select is to follow the steps in the wizard until the creation of the rule is completed.
This is the end of my explanation, I hope it has been useful to the readers and they have learned something beneficial. On the internet there is information about this that you can read to go deeper into the subject.
Congratulations @rainerlester8308! You have completed the following achievement on the Hive blockchain And have been rewarded with New badge(s)
Your next target is to reach 3250 upvotes.
You can view your badges on your board and compare yourself to others in the Ranking
If you no longer want to receive notifications, reply to this comment with the word
STOPCheck out our last posts:
Thank you
Keep aiming higher @rainerlester8308, there's no limit to what you can achieve.
BTW, we noticed we miss your support for our proposal. Mays we ask you to check it out and consider supporting it?
All you need to do is to click on the "support" button on this page: https://peakd.com/proposals/248.
Thank you!
Thanks for your contribution to the STEMsocial community. Feel free to join us on discord to get to know the rest of us!
Please consider delegating to the @stemsocial account (85% of the curation rewards are returned).
You may also include @stemsocial as a beneficiary of the rewards of this post to get a stronger support.
Thank you for the support