Let's DIY a organizer for my room
Hello to everyone in this community. How you all are doing. I hope you are doing good and enjoying mental peace.
It's been a while since i last posted in this community. That's because i was too busy with my crochet stuff and university and couldn't find time. But I realized I need a organizer for my room badly and I have to diy it myself. Making DIYs are really therapeutic. You totally forget about your worried and your pending tasks. You just focus on making your project beautiful and during the process you find many ways like, how can this be more beautiful, how can this be more strong and lasting,which colors should I use so that It compliments the room. You really forget about everything else. So I made a organizer.

MATERIAL REQUIRED
1.Glue gun 🔫
2.Glue sticks
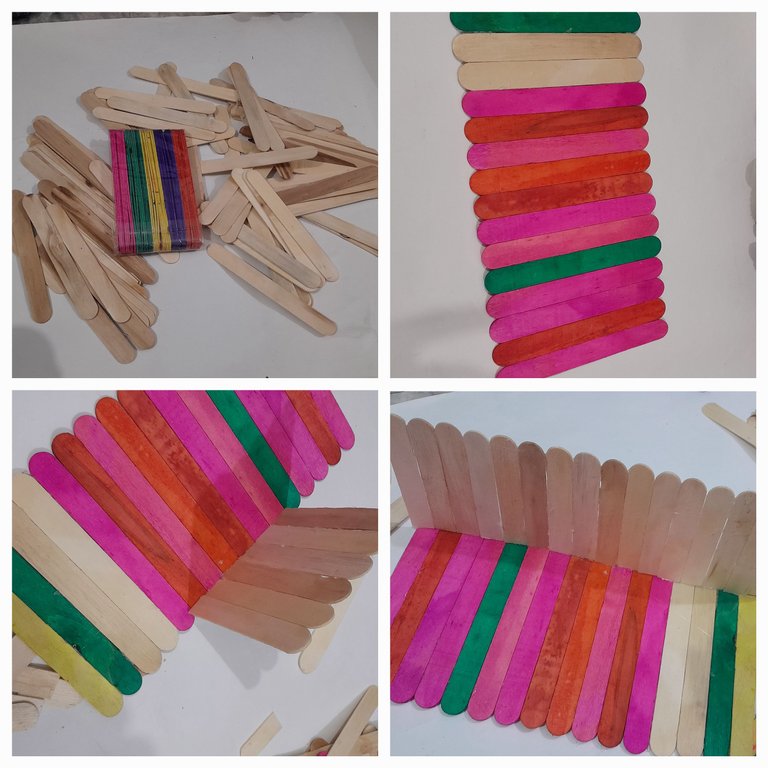
3.ice cream sticks
I made this using ice cream sticks. At first I bought two packs containing 50 sticks each but when I find out what I was going to make I bought another one.so in total i bought 150 ice cream sticks. But I do not use them all. And also I bought new glue gun for this project because I mostly used UHU for my crochet projects but these sticks are wood and it is not a good thought to use UHU because it is not that strong. glue gun is way more stronger than UHU.
These are the steps I followed to make this project.
PROCESS
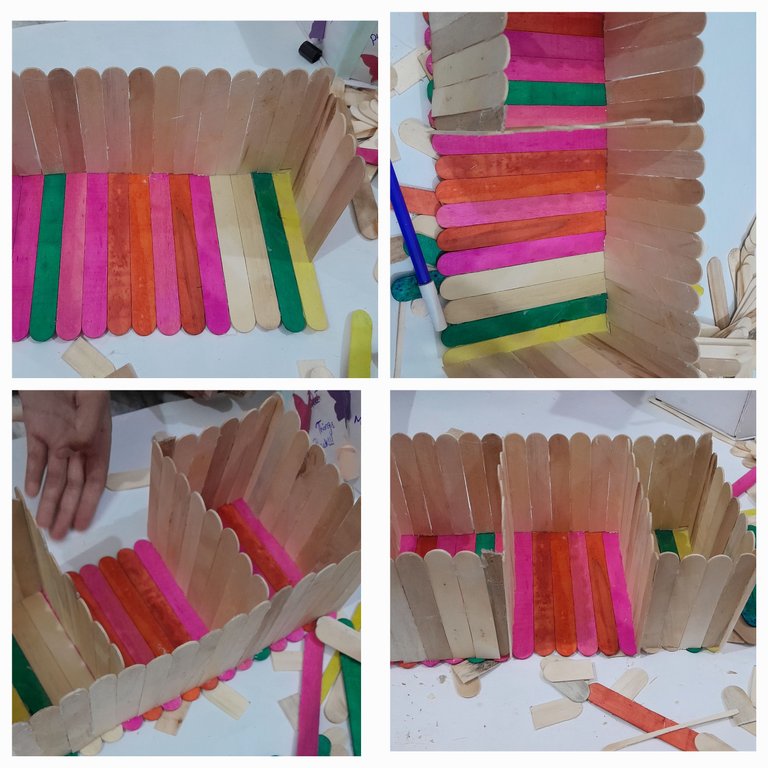
1-First of all I made the base using colored sticks.25 sticks were used.
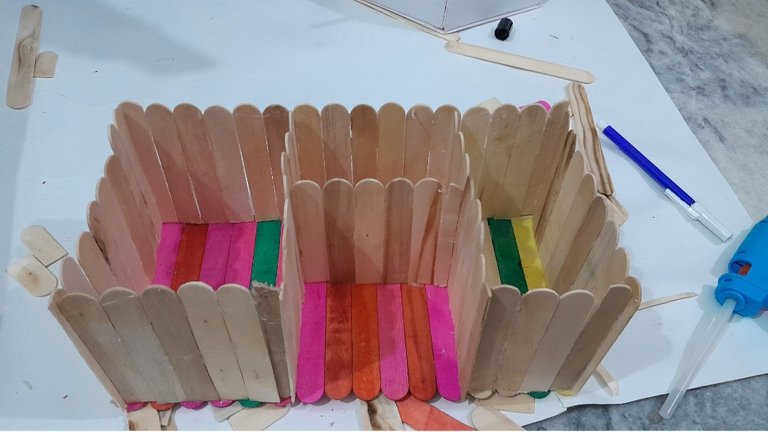
2-After that I put bar of sticks around three sides of the base.
3-After that I made two square boxes on the corners. Here is funny story. I only bought one glue stick for this project because I have never used glue gun before so I was not aware how much of glue is required. But that glue stick end as soon as I made base and put like 7-8 sticks on it.so I had to go and buy more glue sticks. And I bought 3 sticks and used two of em.
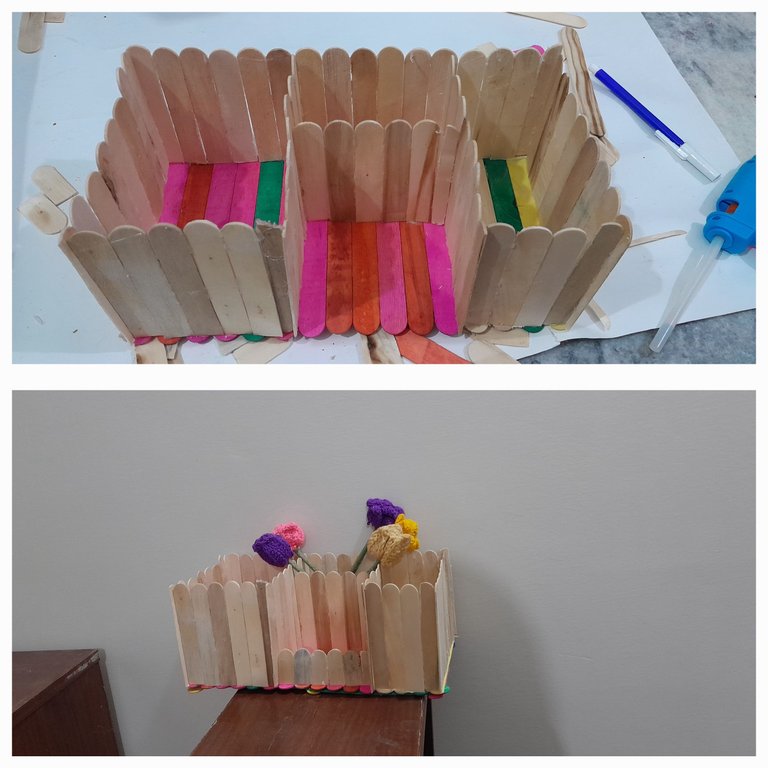
4-Then i put a bar of sticks between the two squares to make another box let's say.
5-At the end I put the small sticks that were cut from the bigger once because they should have a flat base to attach with base. So I put these small pieces at front to make a little fence which was a really good idea. Because it was looking so perfect.
This was all about the process.
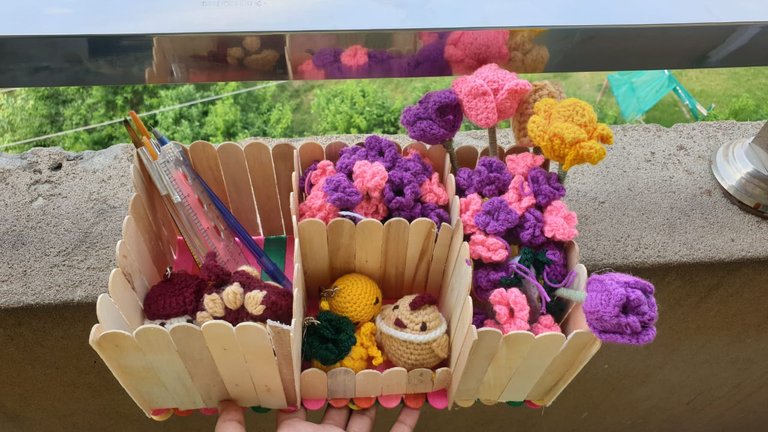
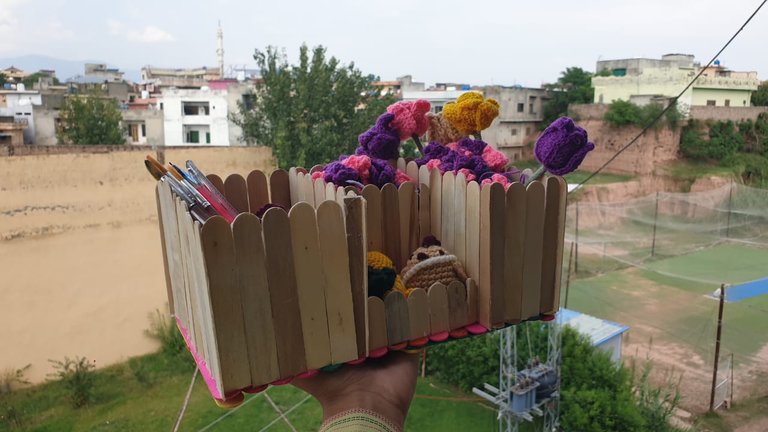
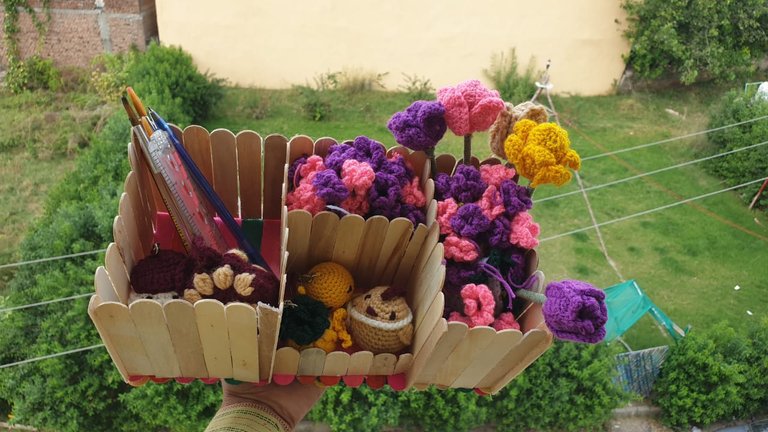
It is really spacious. I put my crochet flowers and amugrumis in it.They were looking very cute 😍.
I hope you like the project.
Make sure to drop your opinions in comments.
See you again 😊 😘.
Bye bye 💞 👋.
I'm glad you were able to find some time to do such a nice project. Crafts are good for that, to relieve our stress and make nice things. Good job! 🤗
I am glad i did too. Thanks for compliment ☺️
Wow, the end result looks so so good!🥰
 Follow Eceny's curation trail to earn better APR on your own HP. : )
Sending Love and Ecency Curation Vote!
Congratulations @rabail-khan! You have completed the following achievement on the Hive blockchain And have been rewarded with New badge(s)
Your next target is to reach 8000 upvotes.
You can view your badges on your board and compare yourself to others in the Ranking
If you no longer want to receive notifications, reply to this comment with the word
STOPCheck out our last posts:
Wow, this work is beautiful and exemplary my friend, congratulations and thank you for sharing it on DIYHub, you grace our community with your genius.
Thank you for nice comment 👍.
Quedo bien lindo y muy útil para tener varias cosas organizadas.
Graćious
Looks so good
☺️☺️💞
está lindo, sencillo y bueno para mantener más acomodado
it's nice, simple and good to keep more comfortable
Thank you for compliment ☺️ 😊.
Wow this can be very useful at home especially for organizing some smaller items .
Weldone.
Yes!it really is spacious. And very useful for organising stuff. Thanks 😊