Tutorial: This is how I made these beautiful and colorful earrings with the wire technique, peacock design.// [Esp-Eng]
Saluditos mis Artistas Creadores de las Manualidades y la Joyería, feliz y bendecido Domingo de Pascua; espero que estos días se los hayan disfrutado en paz reunidos en familia.
Según la tradición cristiana en estos días se conmemoran la pasión crucifixión y muerte de Jesús en el calvario , es donde su madre sufre y llora de angustia al verlo cargar su propia cruz; pero que después a través de ella nos trae la salvación y perdón de nuestros pecados con lo cuál nos da la oportunidad de tener vida eterna. Es por eso que debemos agradecer a Dios por tanto sacrificio para librarnos de todo mal.
Este Domingo de resurrección constituye una gran fiesta en la religión cristiana ; ya que es una esperanza de luz, alegría, paz y esperanza , La resurrección de Cristo viene a confirmar el origen santo como hijo de Dios y también su naturaleza divina.
Y continuando con mis tutoriales para elaborar prendas usando la técnica del Alambrismo, aquí les dejo el paso a paso de estos coloridos y hermosos Aretes que realice ocupando alambre y mostacillas de varios colores para simular la cola de esa ave majestuosa e imponente como lo es el Pavo Real; Ave Nacional de la India.
Sigan leyendo y vean como los hice:
Greetings my Artists Creators of Crafts and Jewelry, happy and blessed Easter Sunday; I hope you enjoyed these days in peace together as a family.
According to Christian tradition, these days commemorate the passion, crucifixion and death of Jesus on Calvary, where his mother suffers and cries in anguish as she watches him carry her own cross; but later through it it brings us salvation and forgiveness of our sins, which gives us the opportunity to have eternal life. That is why we must thank God for so much sacrifice to free us from all evil.
This Easter Sunday is a great holiday in the Christian religion; Since it is a hope of light, joy, peace and hope, the resurrection of Christ comes to confirm his holy origin as the son of God and also his divine nature.
And continuing with my tutorials to make garments using the Wire Wrapping technique, here I leave you the step by step of these colorful and beautiful Earrings that I made using wire and beads of various colors to simulate the tail of that majestic and imposing bird such as the Peacock; National Bird of India.
Keep reading and see how I made them:
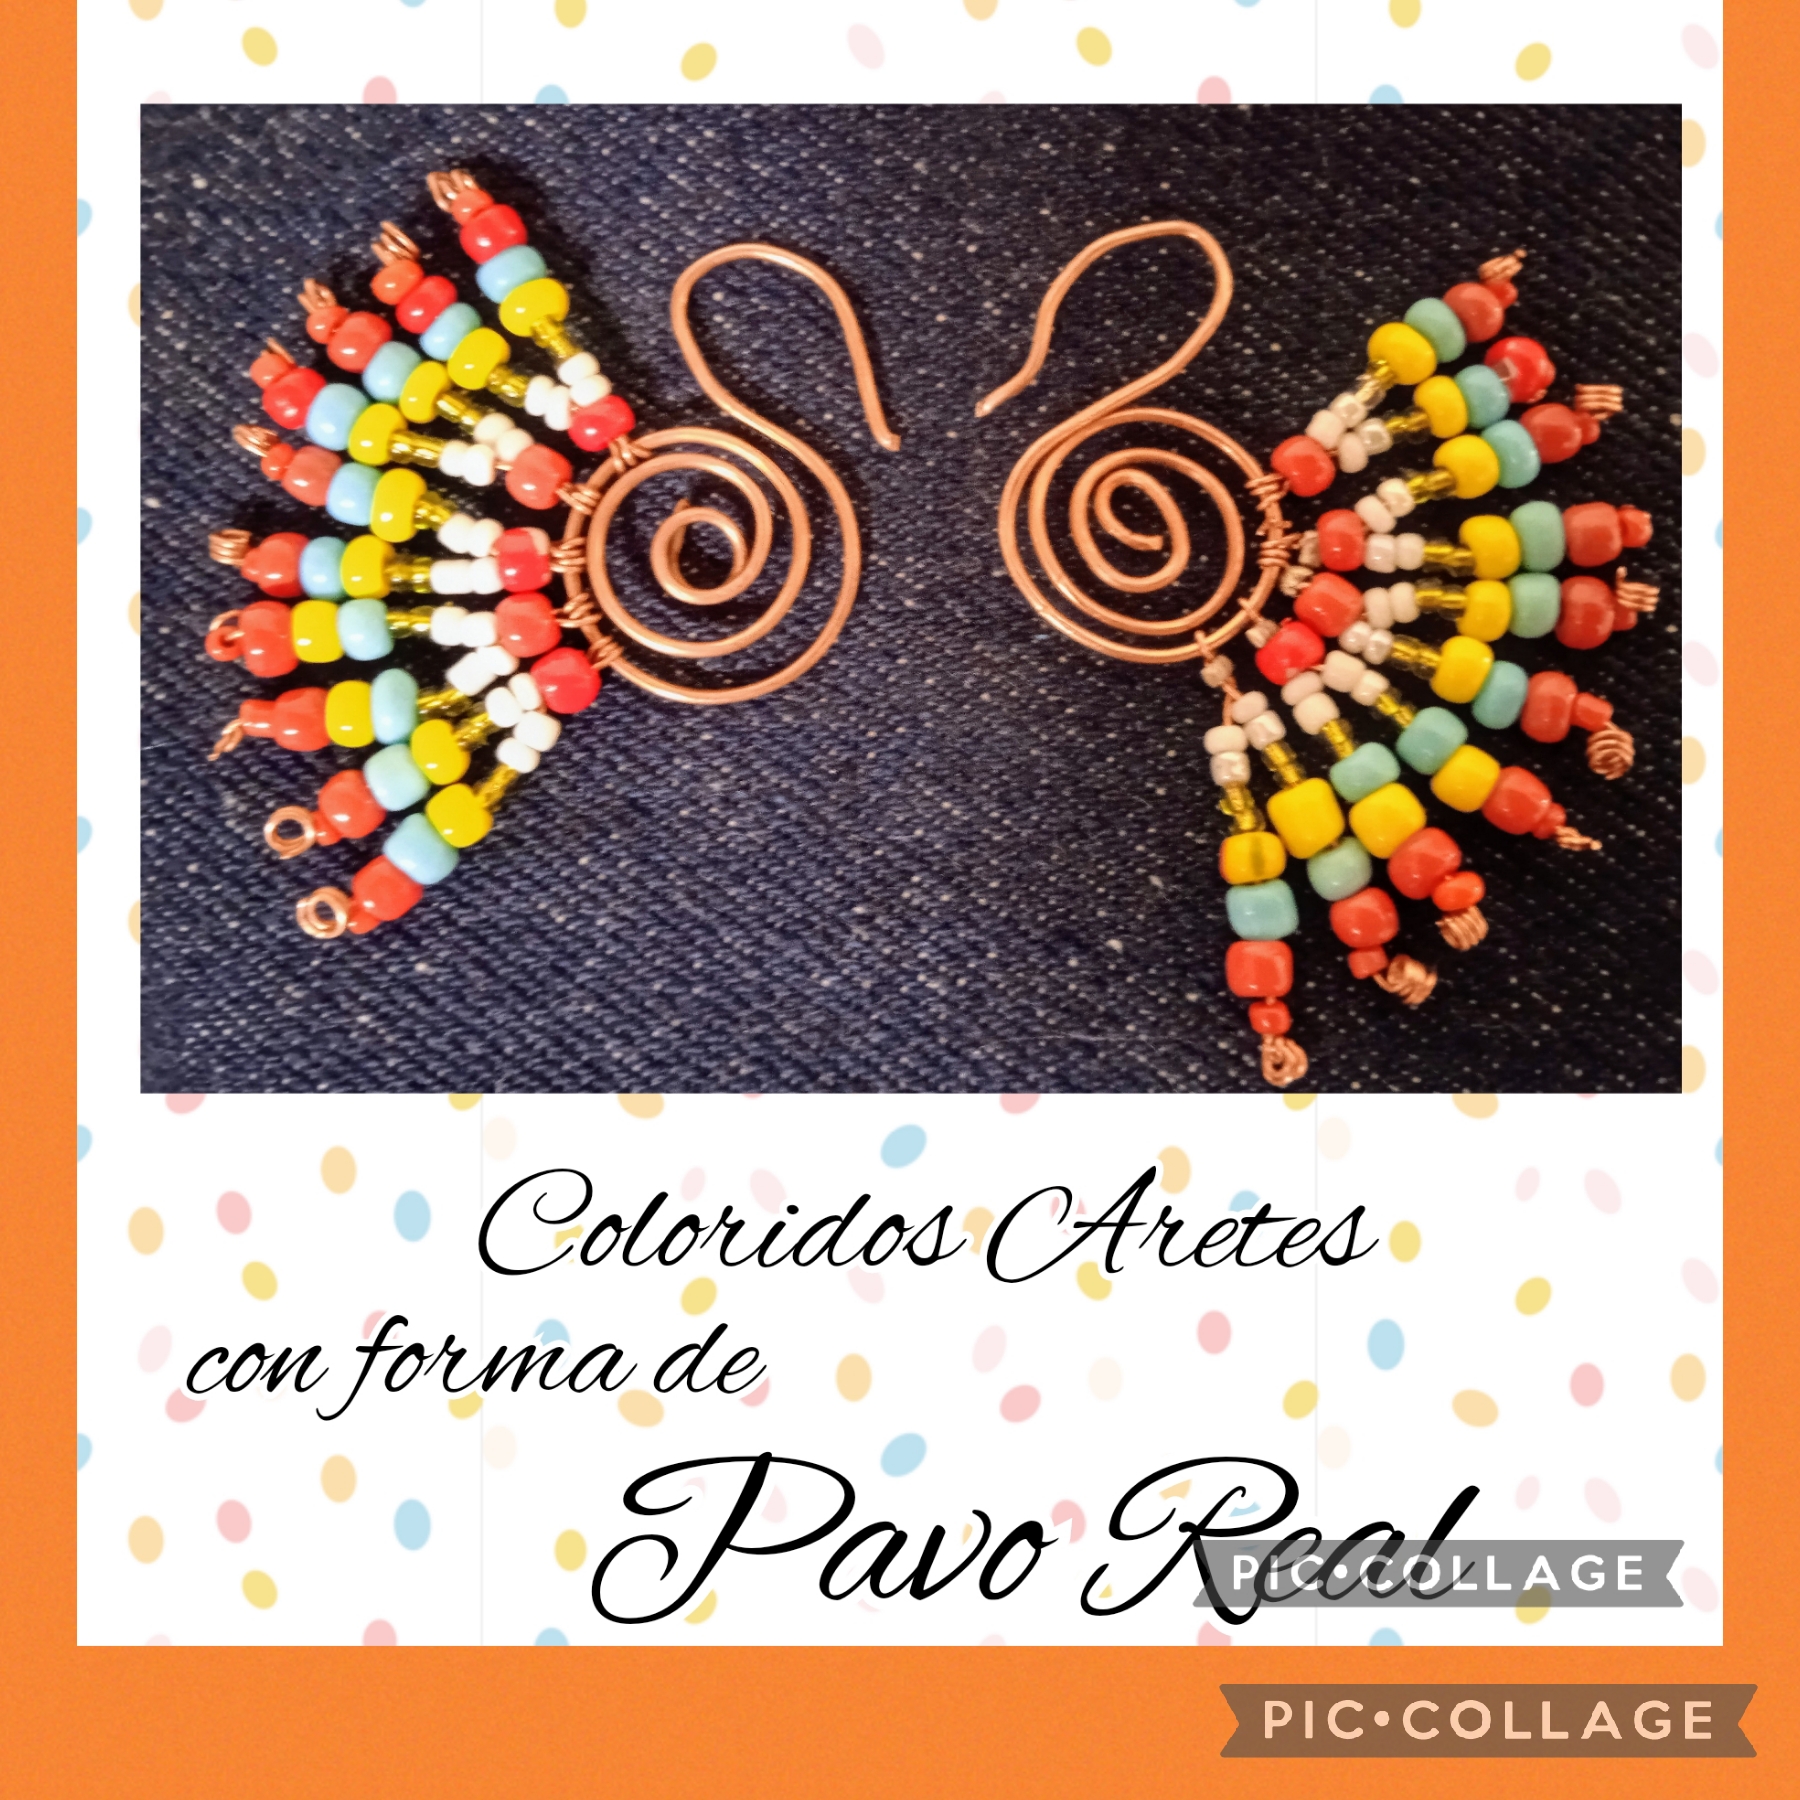
MATERIALES QUE USE EN LA ELABORACIÓN DE ESTOS COLORIDOS ARETES:
✓ Alambre de cobre calibre 24".
✓ Alambre de cobre calibre 26".
✓ Mostacillas rojas.
✓ Mostacillas blancas.
✓ Mostacillas verdes.
✓ Mostacillas amarillas.
✓ Mostacillas azules.
✓ Pinza punta redonda.
✓ Pinza punta plana.
✓ Pinza de corte.
✓ Regla.
MATERIALS USED IN THE PREPARATION OF THESE COLORFUL EARRINGS:
✓ 24" gauge copper wire.
✓ 26" gauge copper wire.
✓ Red beads.
✓ White beads.
✓ Green beads.
✓ Yellow beads.
✓ Blue beads.
✓ Round tip tweezers.
✓ Flat tip tweezers.
✓ Cutting clamp.
✓ Rule.
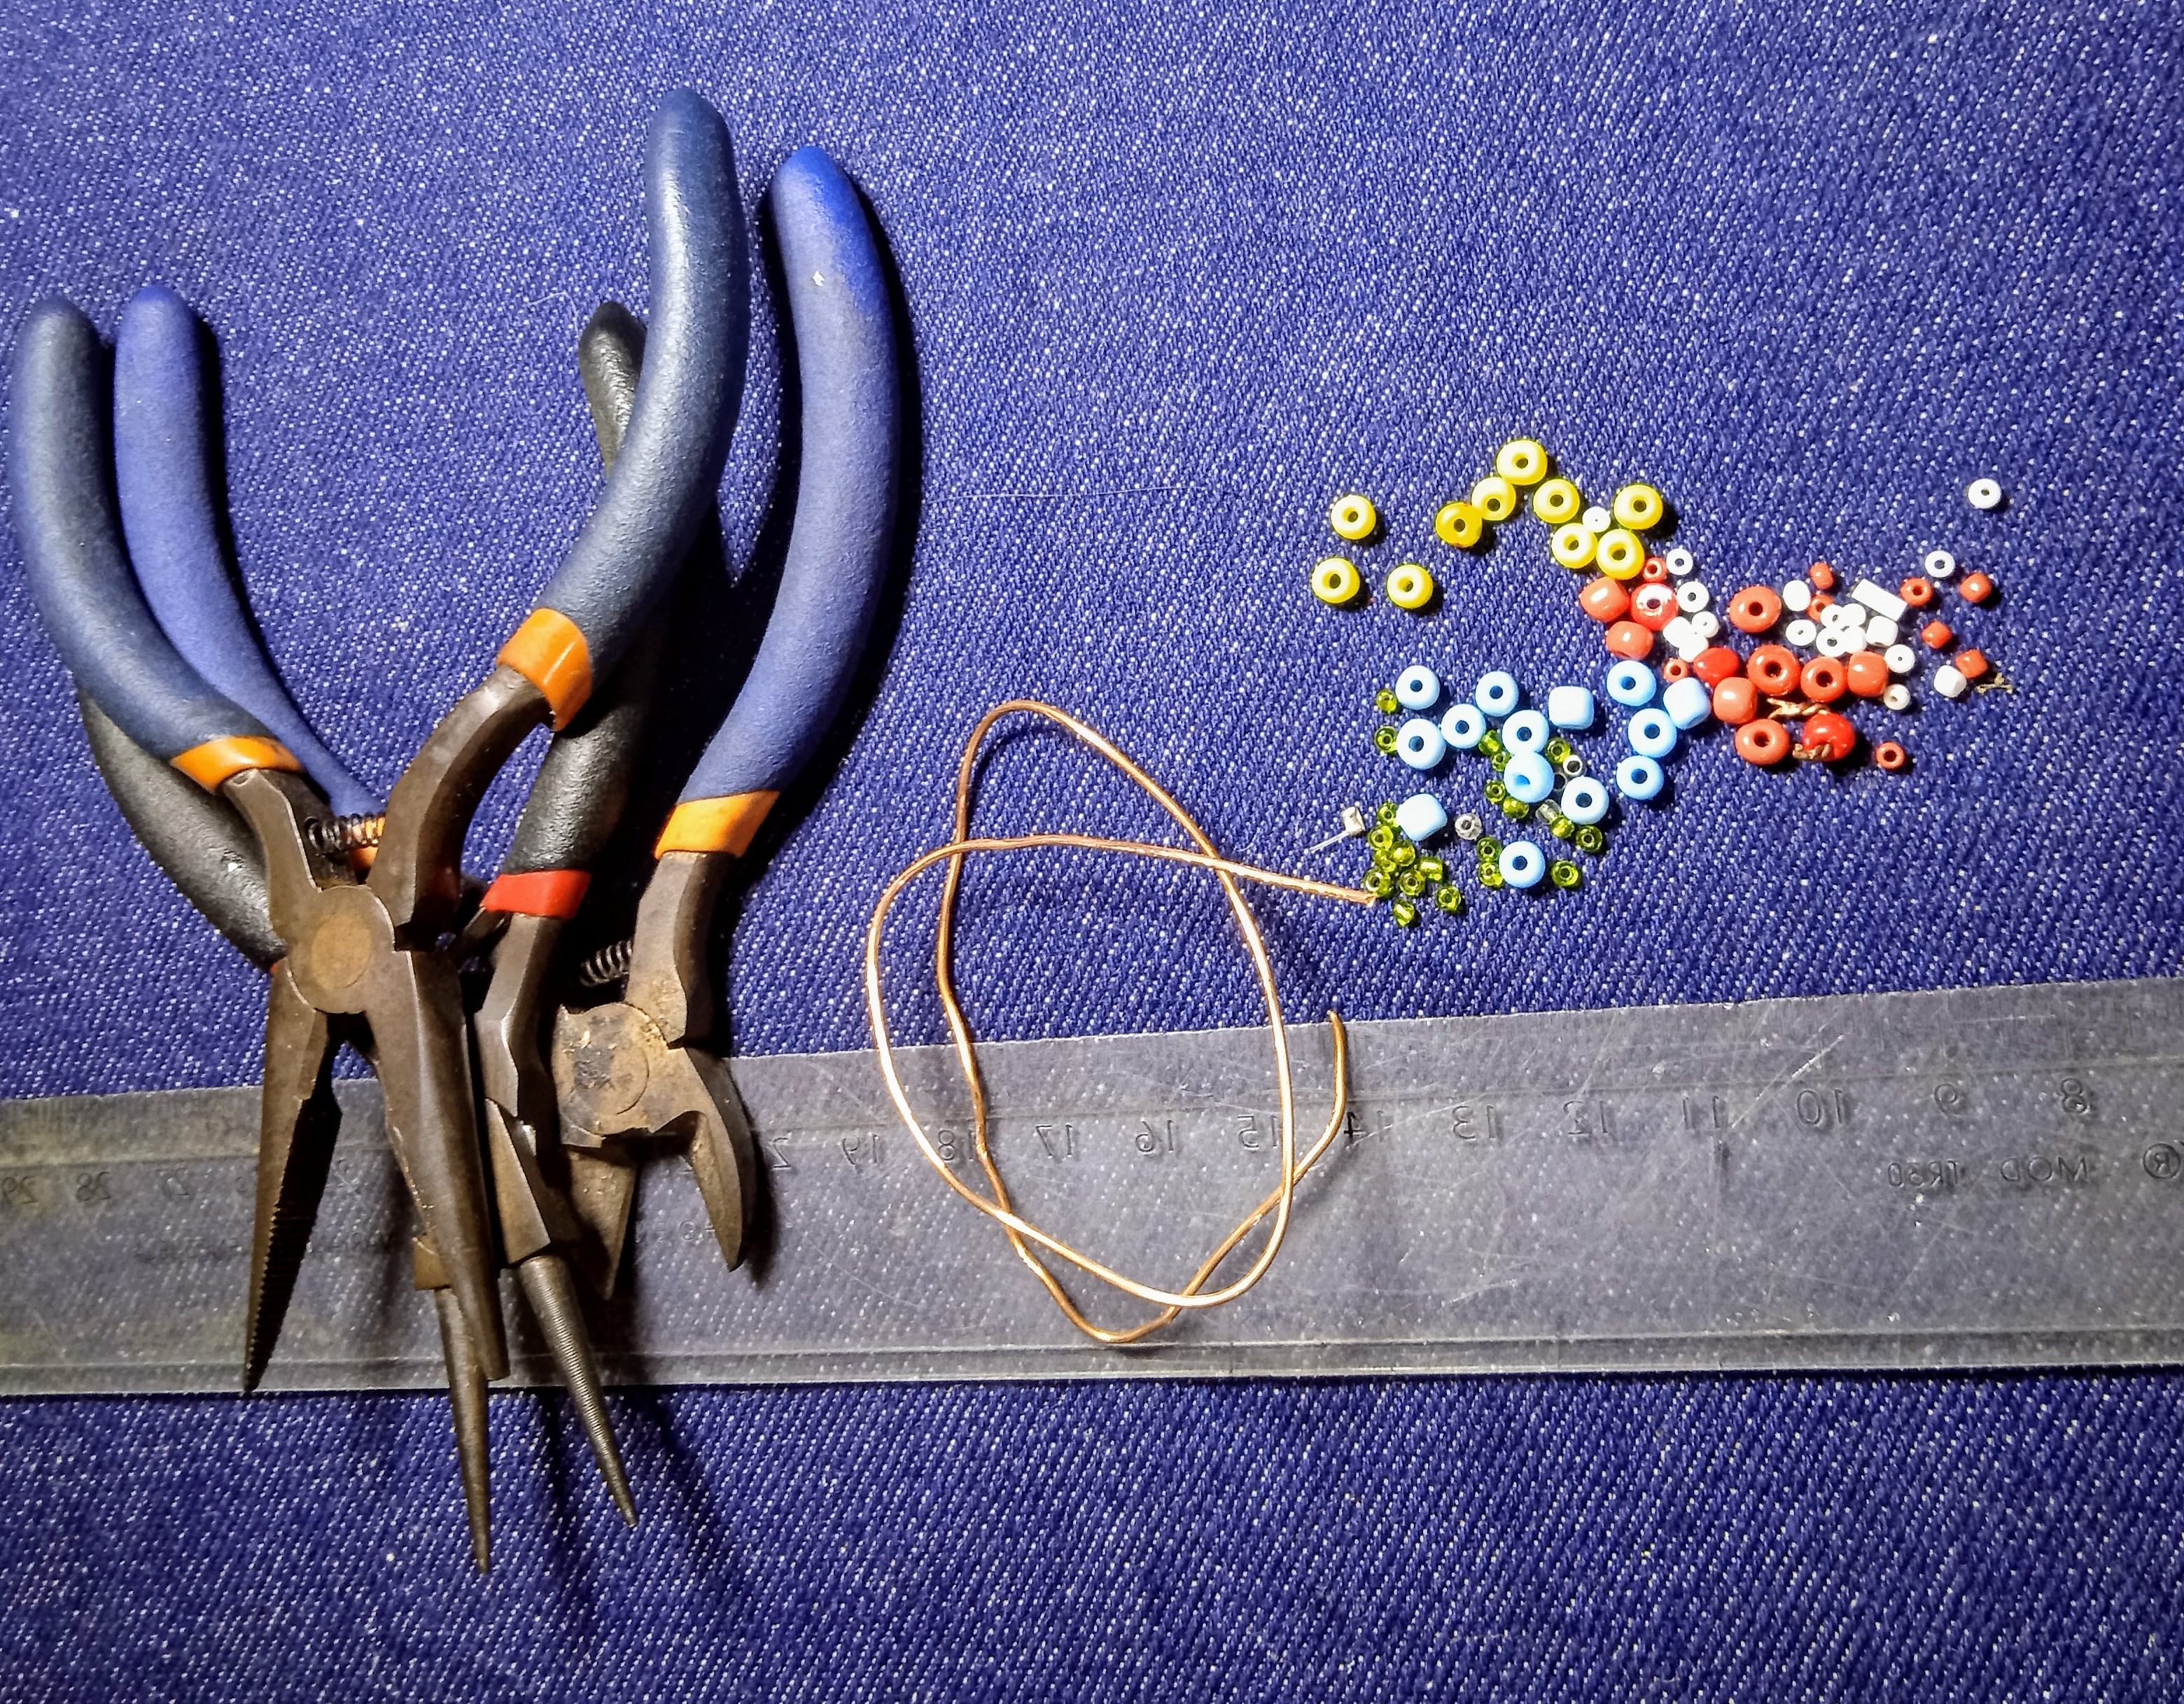
CON ESTOS SENCILLOS PASOS ELABORÉ MI PROYECTO CREATIVO DE ESTA MANERA.
PRIMER PASO:
Voy a comenzar ocupando alambre de cobre calibre 24" en una medida de doce centímetros que verifico con la regla, para formar una especie de espiral plano y que usaré para el cuerpo del ave (ver las imágenes)
WITH THESE SIMPLE STEPS I PREPARED MY CREATIVE PROJECT THIS WAY.
FIRST STEP:
I am going to start by using 24" gauge copper wire measuring twelve centimeters, which I check with the ruler, to form a kind of flat spiral that I will use for the body of the bird (see the images).

SEGUNDO PASO:
Cómo muestra la imagen anterior use la cola de un pincel por su forma parecida al mandril (pues aquí en el taller no tengo esa herramienta, tratamos de que todo sea lo más artesanal) ahora lo voy moldeando con las manos y me ayudó con la pinza punta redonda dejo unos cuatro centímetros para elaborar el cuello y la cabeza, hago una pequeña argolla para evitar se salgan los alambres donde voy a insertar las mostacillas pero que al final de la labor las elimino.
SECOND STEP:
As shown in the previous image, I used the tail of a brush because of its shape similar to the mandrel (because here in the workshop I do not have that tool, we try to make everything as artisanal as possible) now I am molding it with my hands and he helped me with the tweezers round tip I leave about four centimeters to make the neck and head, I make a small ring to prevent the wires from coming out where I am going to insert the beads but at the end of the work I eliminate them.
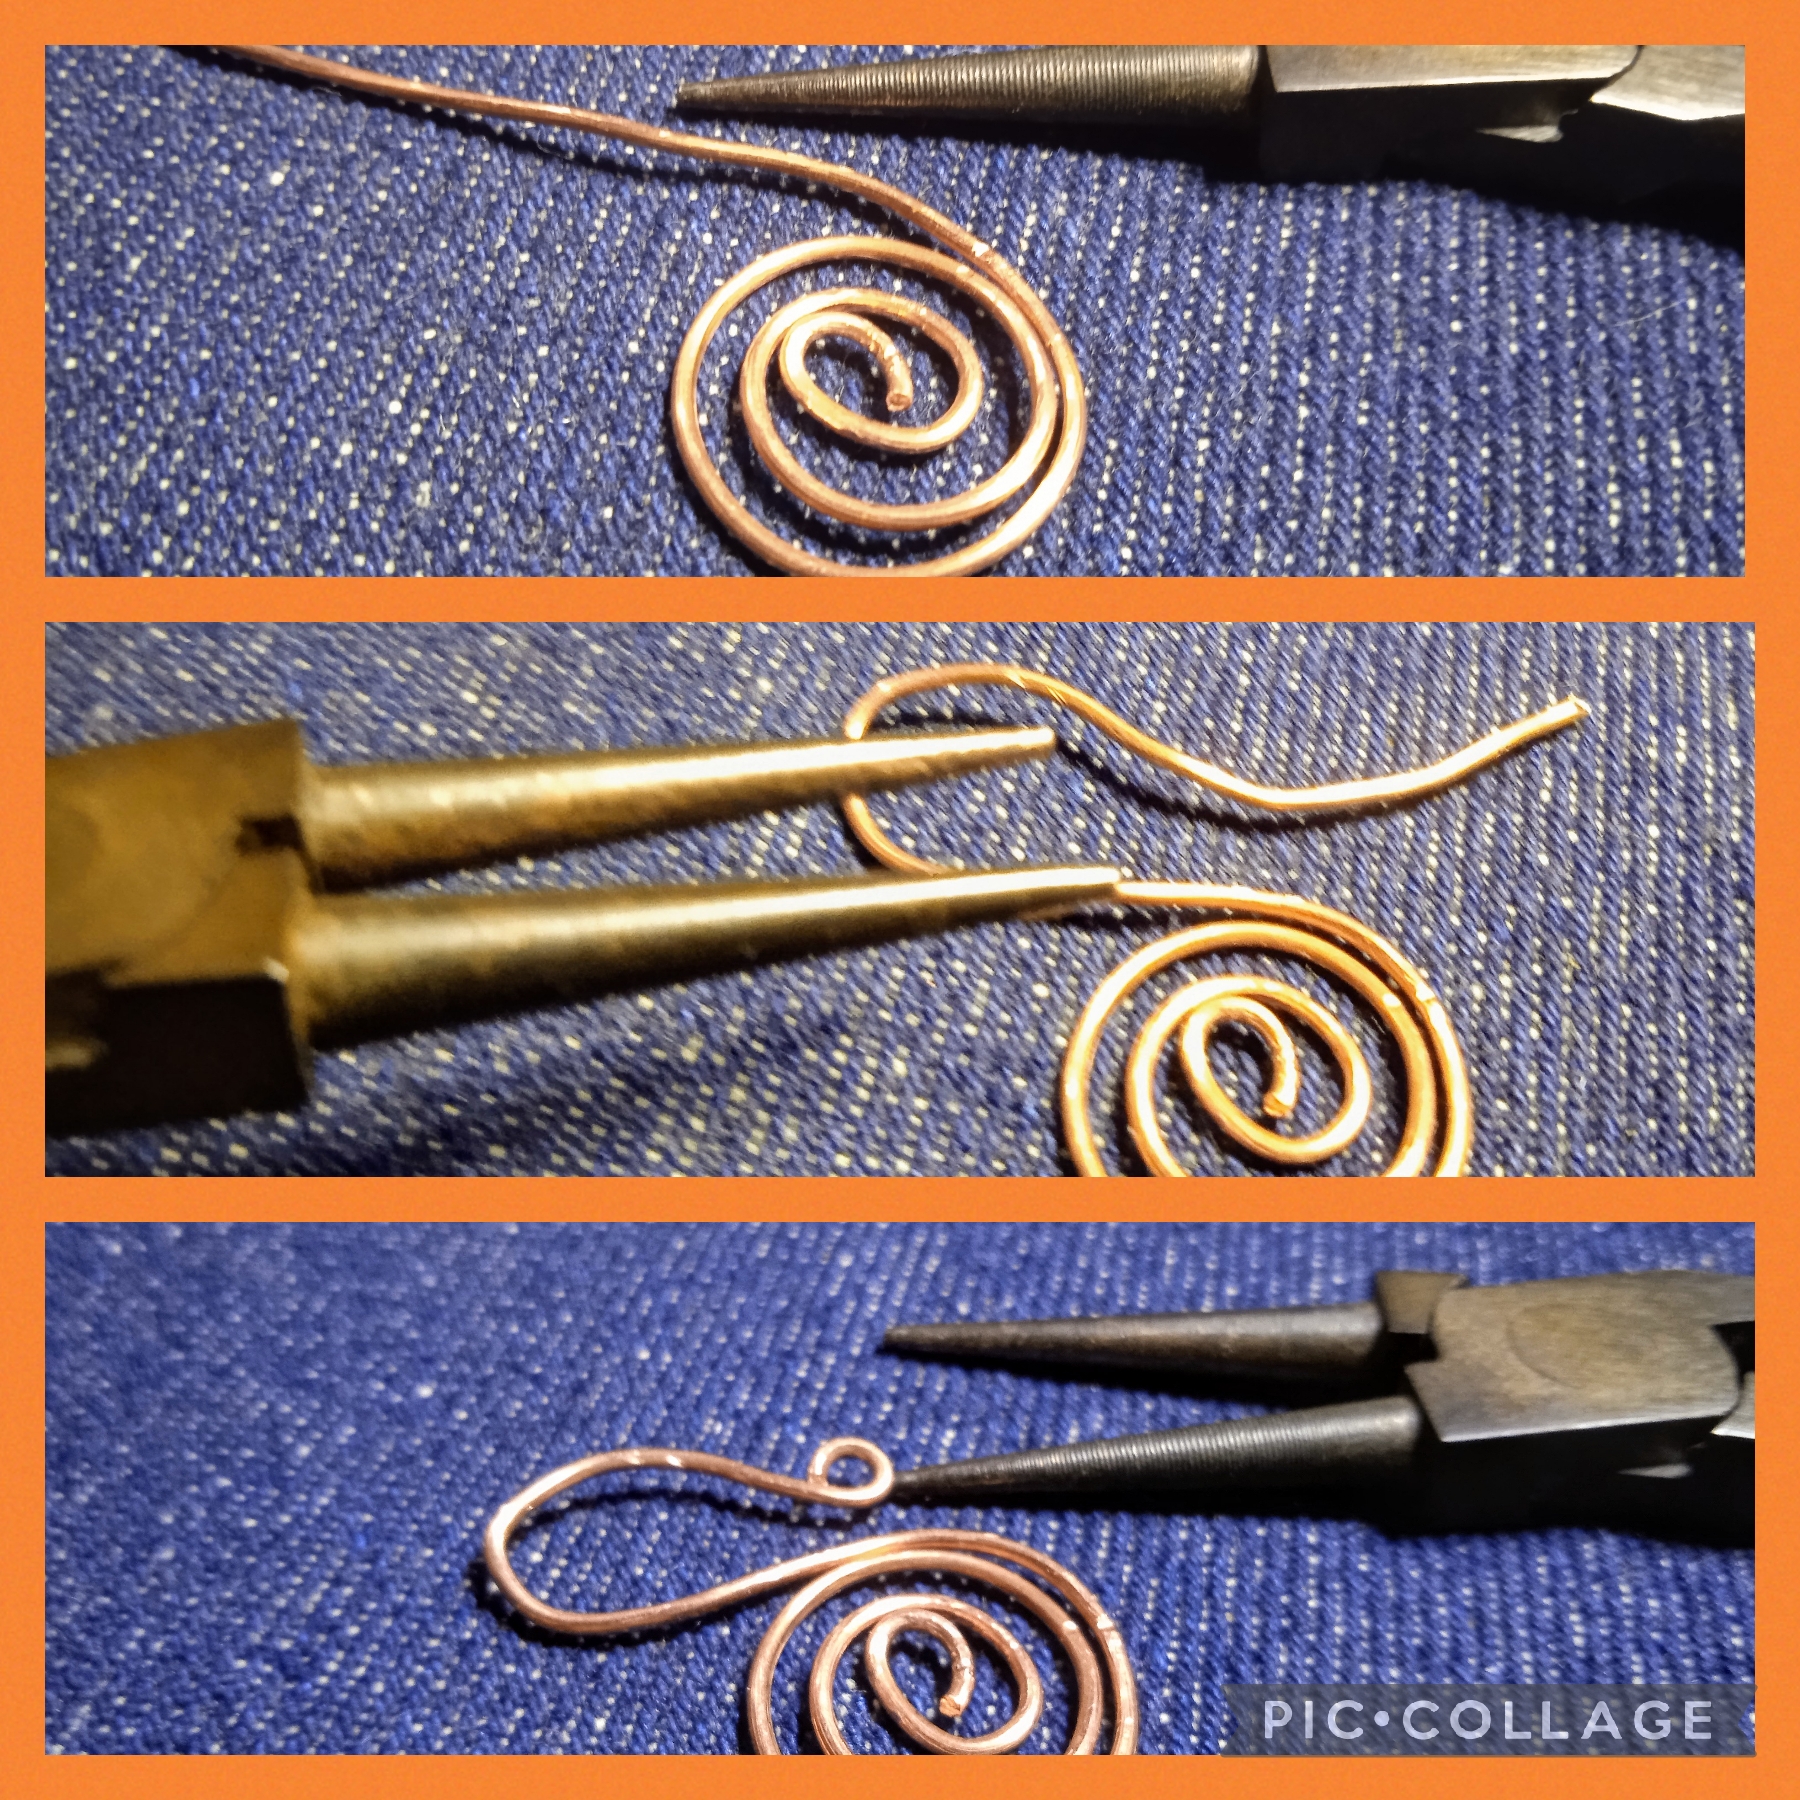
TERCER PASO:
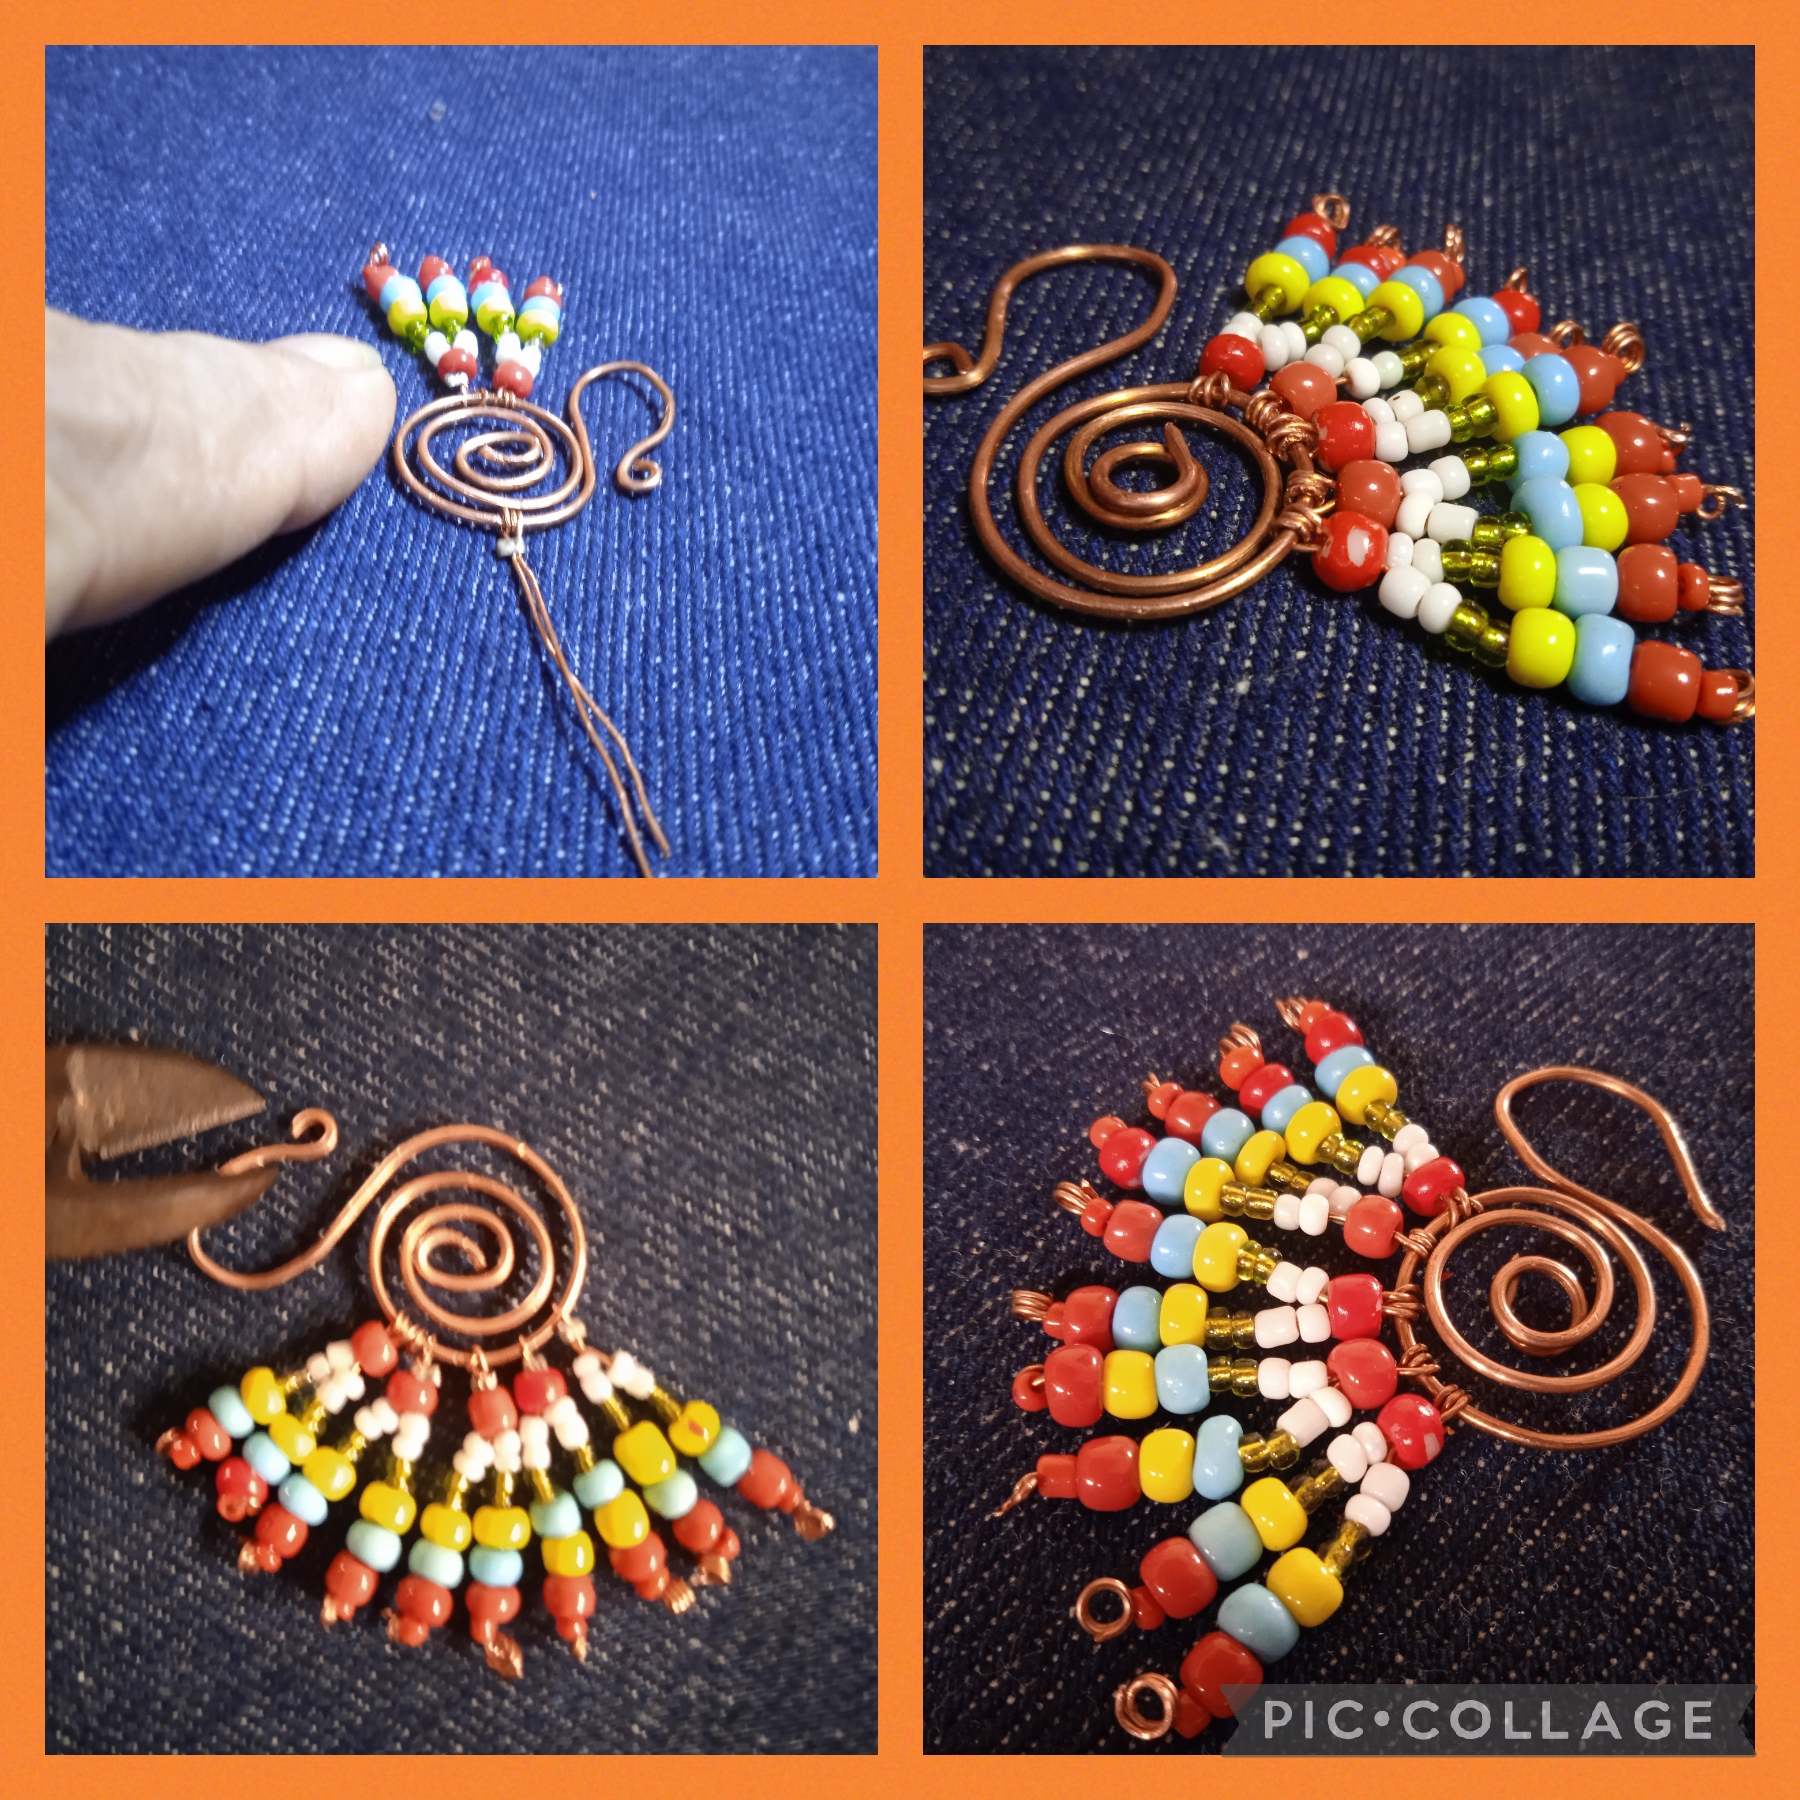
Ahora uso de nuevo la regla y mido cinco trocitos de alambre calibre 26 " en una medida de cuatro centímetros cada uno, los voy a ir insertando en la primera vuelta del espiral doblado a la mitad y fijando con dos vueltas de resorte , ahora uno las puntas e inserto una mostacilla roja, abro las puntas del alambre y en un lado inserto dos mostacillas blancas pequeñas, luego dos verdes de igual tamaño, ahora una mostacilla grande amarilla, una azul y una roja para terminar con una roja pequeña y usando la pinza punta redonda hago un anillo triple que ajusto y corto con la pinza plana, este procedimiento lo realizó en el otro alambre y queda como en la foto; hago lo mismo con los otros cuatro alambres y ya tengo formada la cola del majestuoso Pavo Real. Ahora con la pinza punta redonda doy forma a la cabeza y el cuello y asi va quedando, (ver imágenes)
THIRD STEP:
Now I use the ruler again and measure five pieces of 26" gauge wire measuring four centimeters each, I am going to insert them into the first turn of the spiral folded in half and fix with two turns of spring, now I join the tips and insert a red bead, I open the ends of the wire and on one side I insert two small white beads, then two green beads of equal size, now a large yellow bead, one blue and one red to finish with a small red one and using the tweezers round tip I make a triple ring that I adjust and cut with the flat pliers, I did this procedure on the other wire and it looks like in the photo; I do the same with the other four wires and I already have the tail of the majestic Peacock formed. Now With the round tip tweezers I shape the head and neck and this is how it looks (see images)
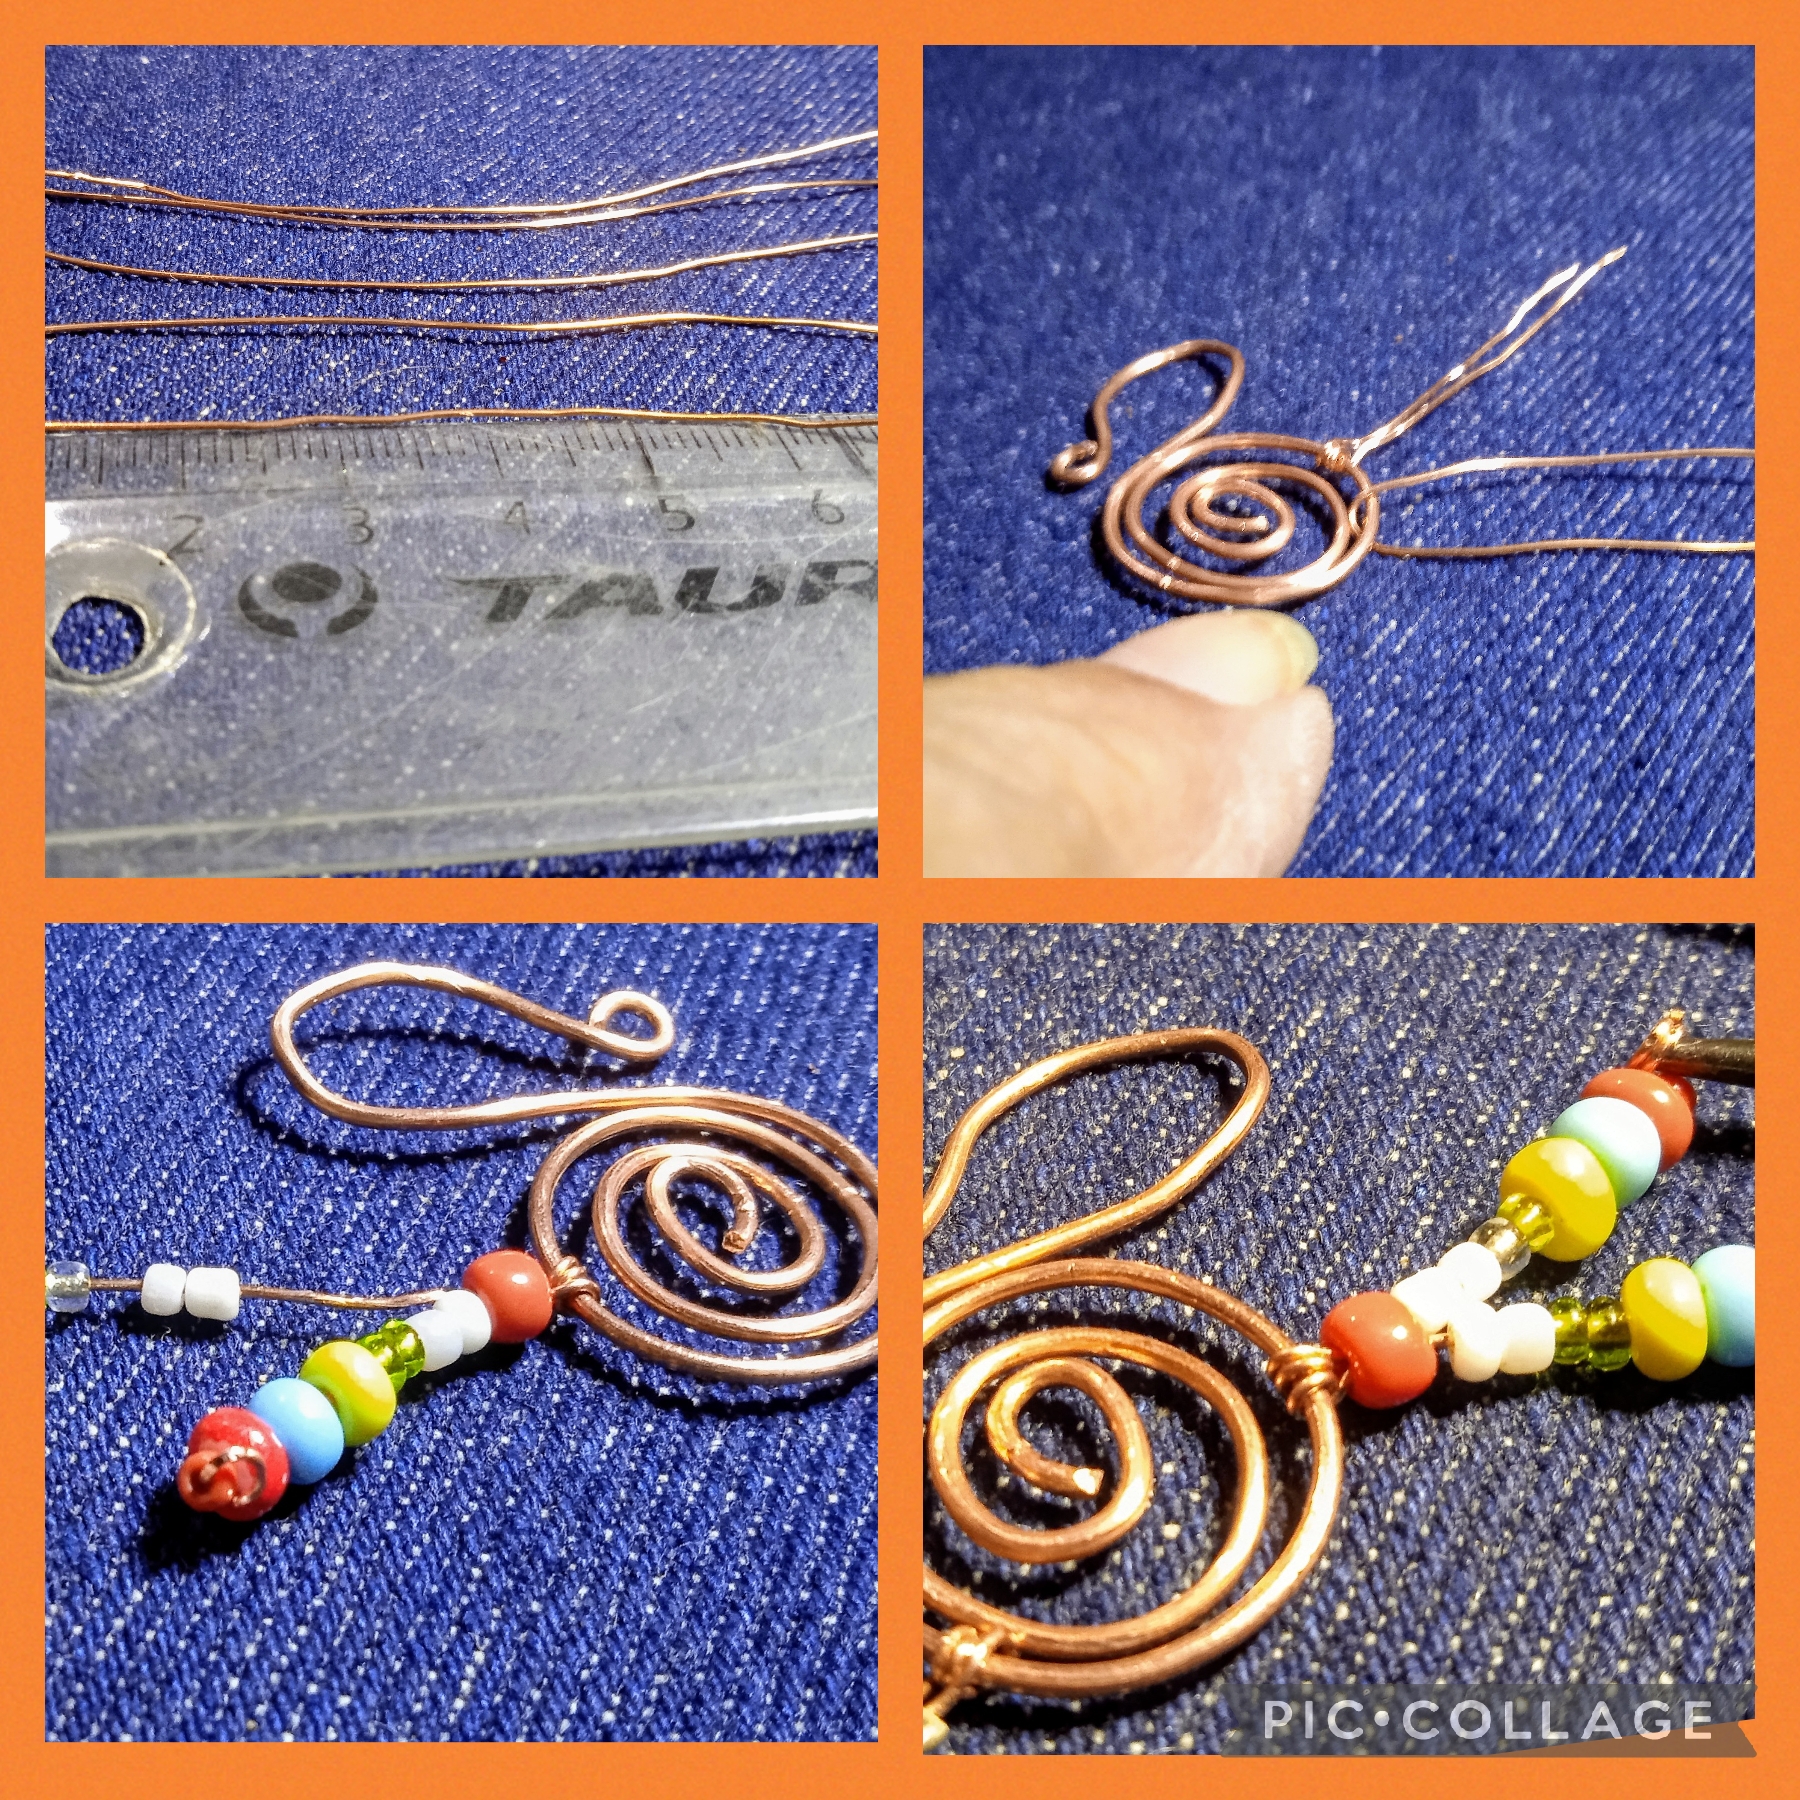
CUARTO PASO:
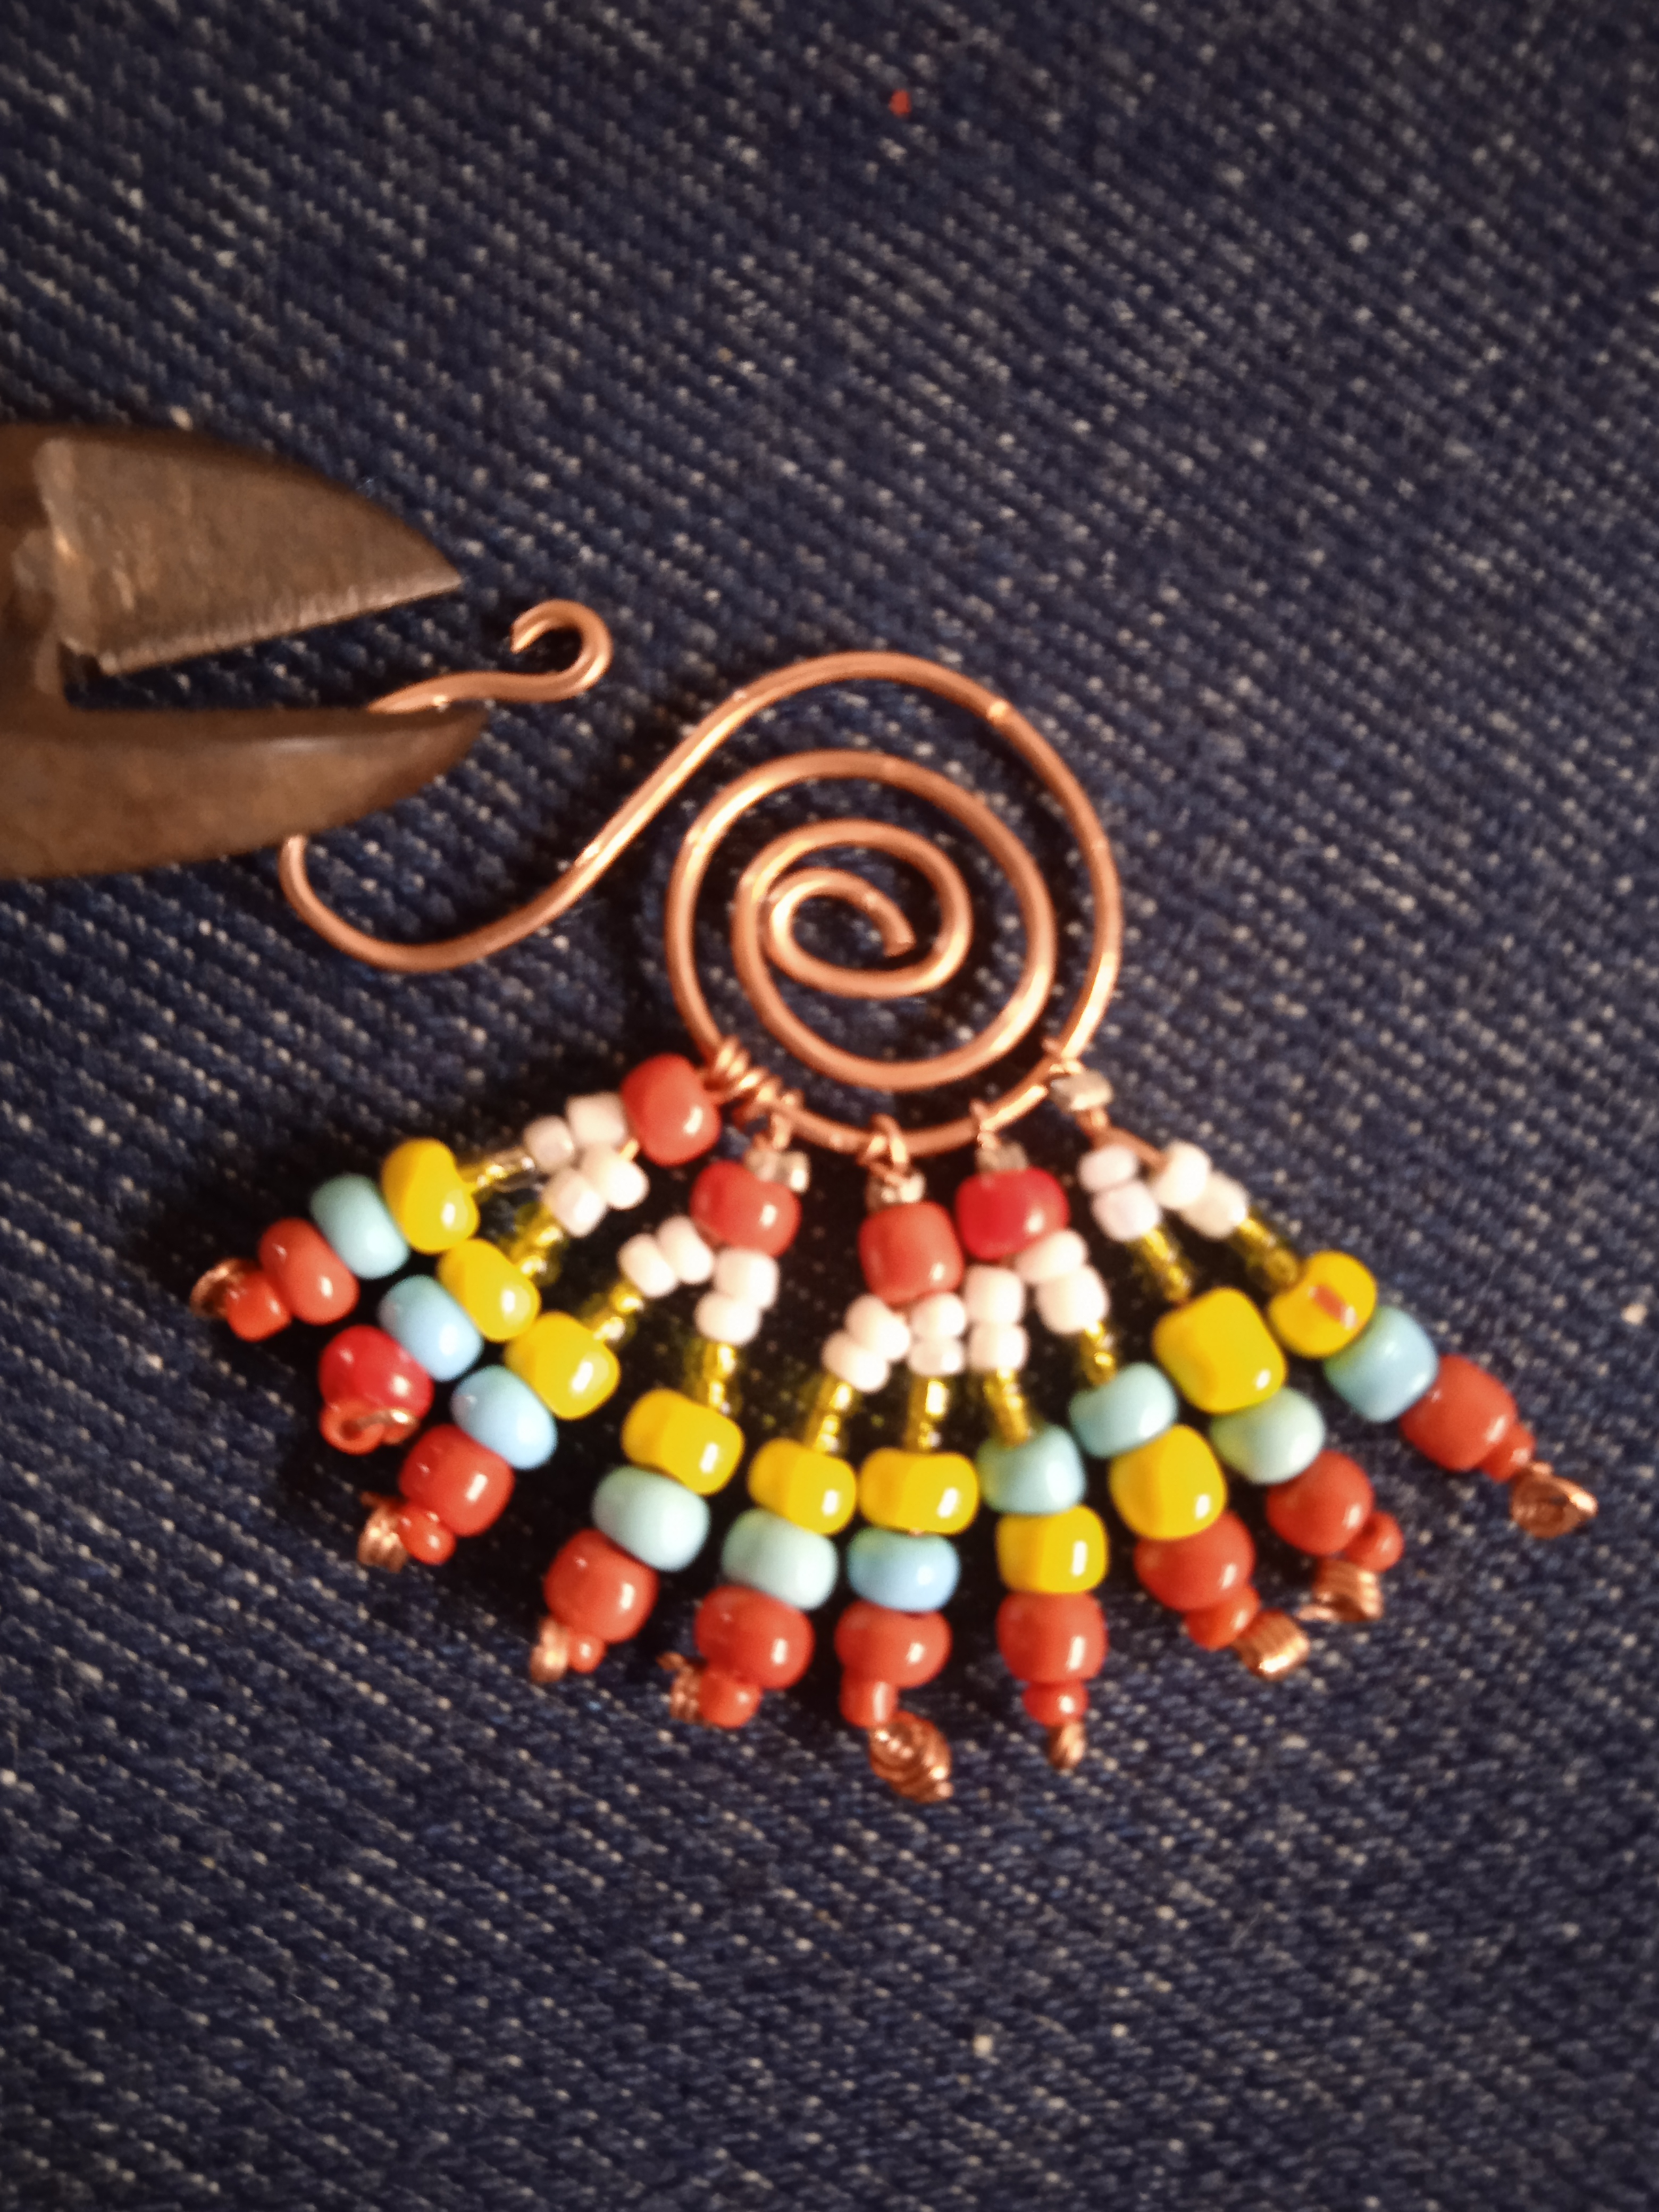
Cómo muestra la imagen usando la pinza de corte retiro la pequeña argolla que había usado para retener el alambre con las mostacillas, doy dos vueltas de alambre y fijo con la pinza así.
FOURTH STEP:
As the image shows, using the cutting pliers, I remove the small ring that I had used to retain the wire with the beads, I make two turns of wire and secure with the pliers like this.
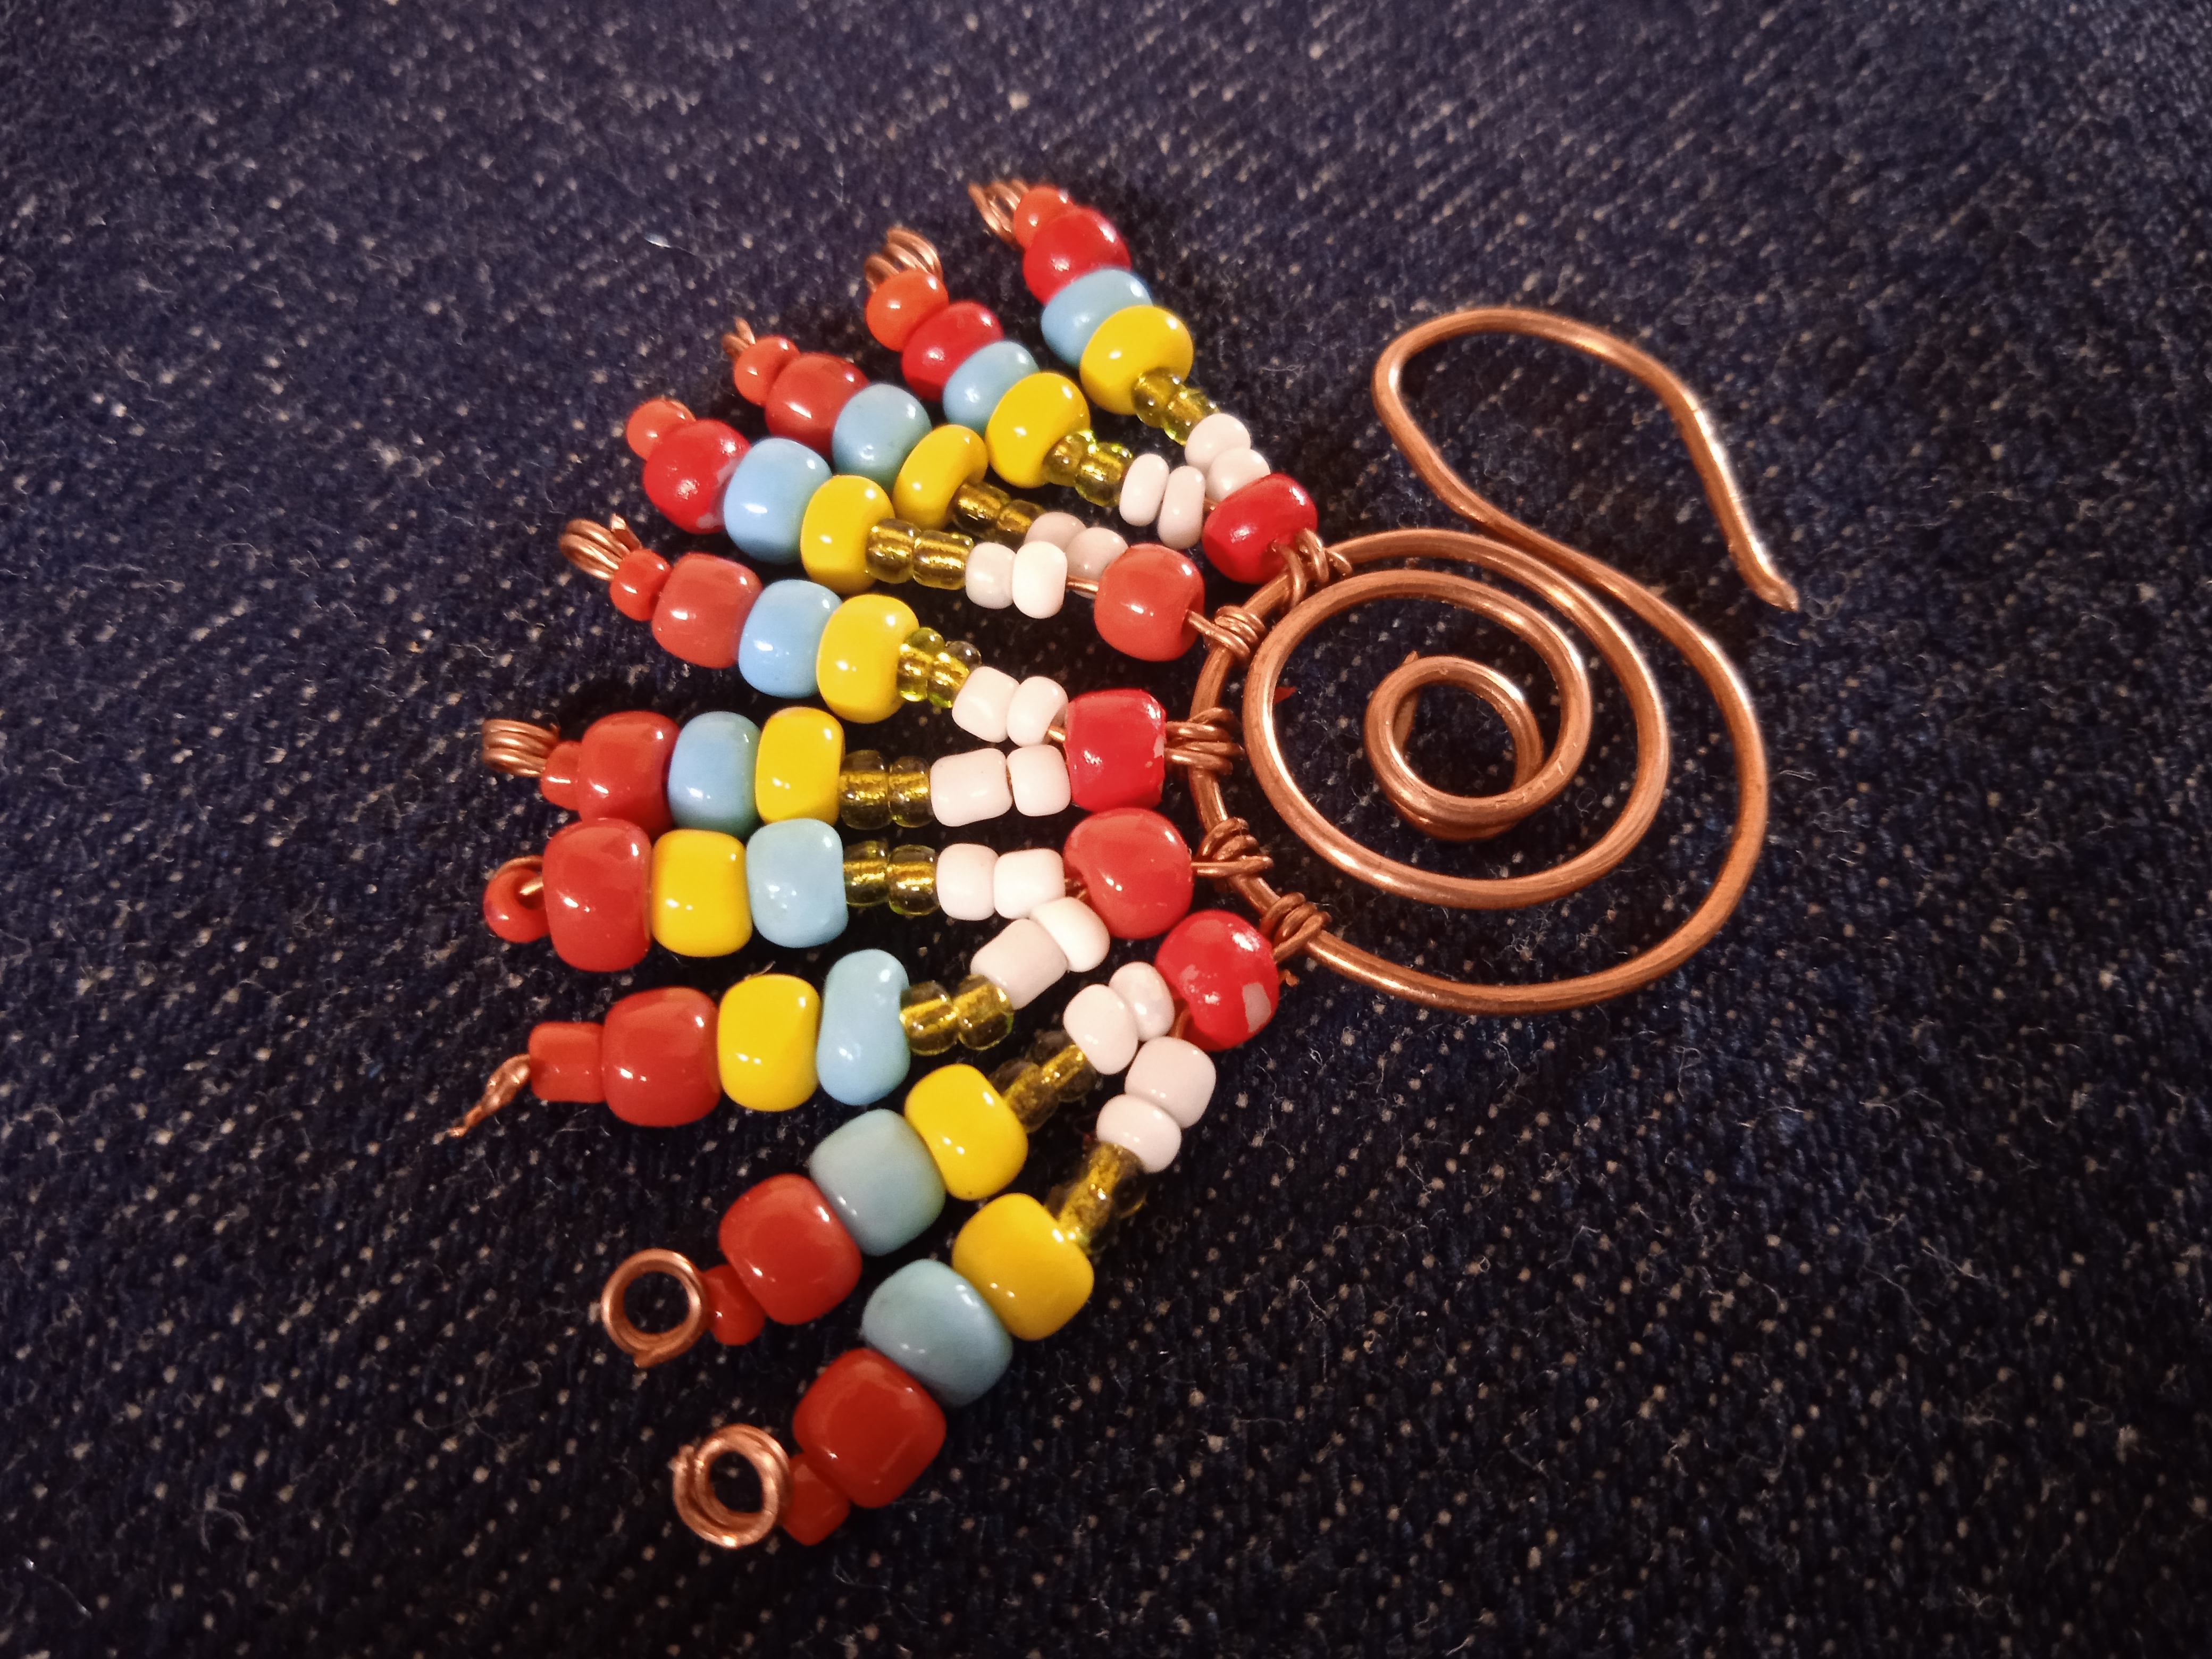
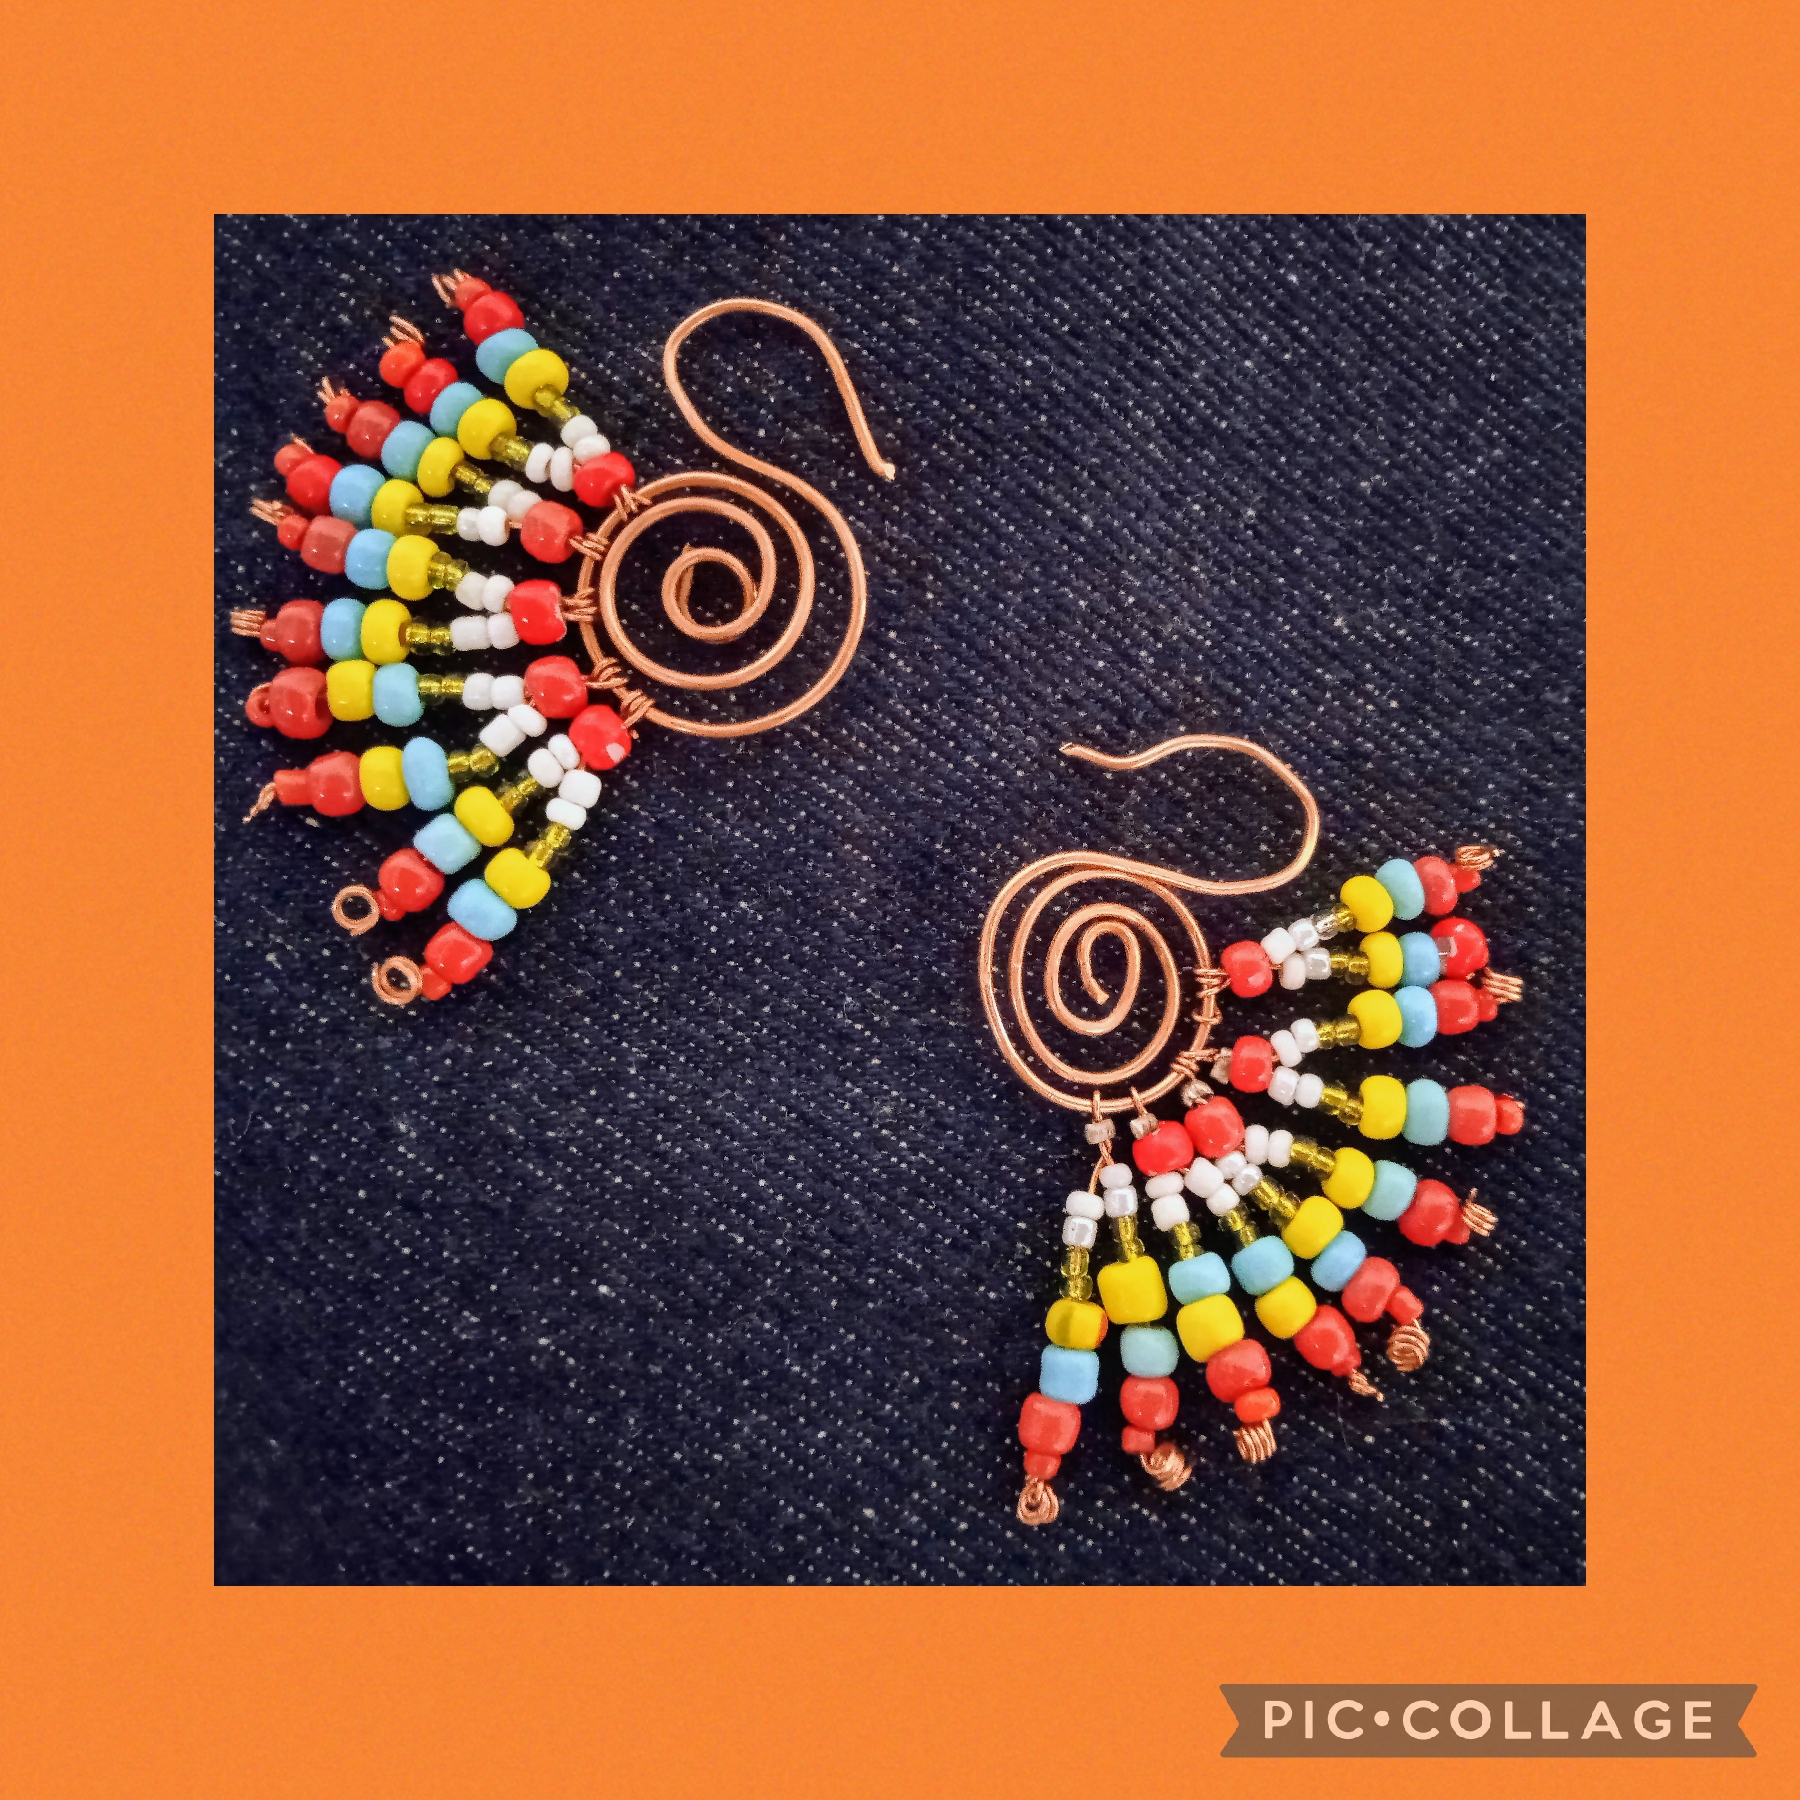
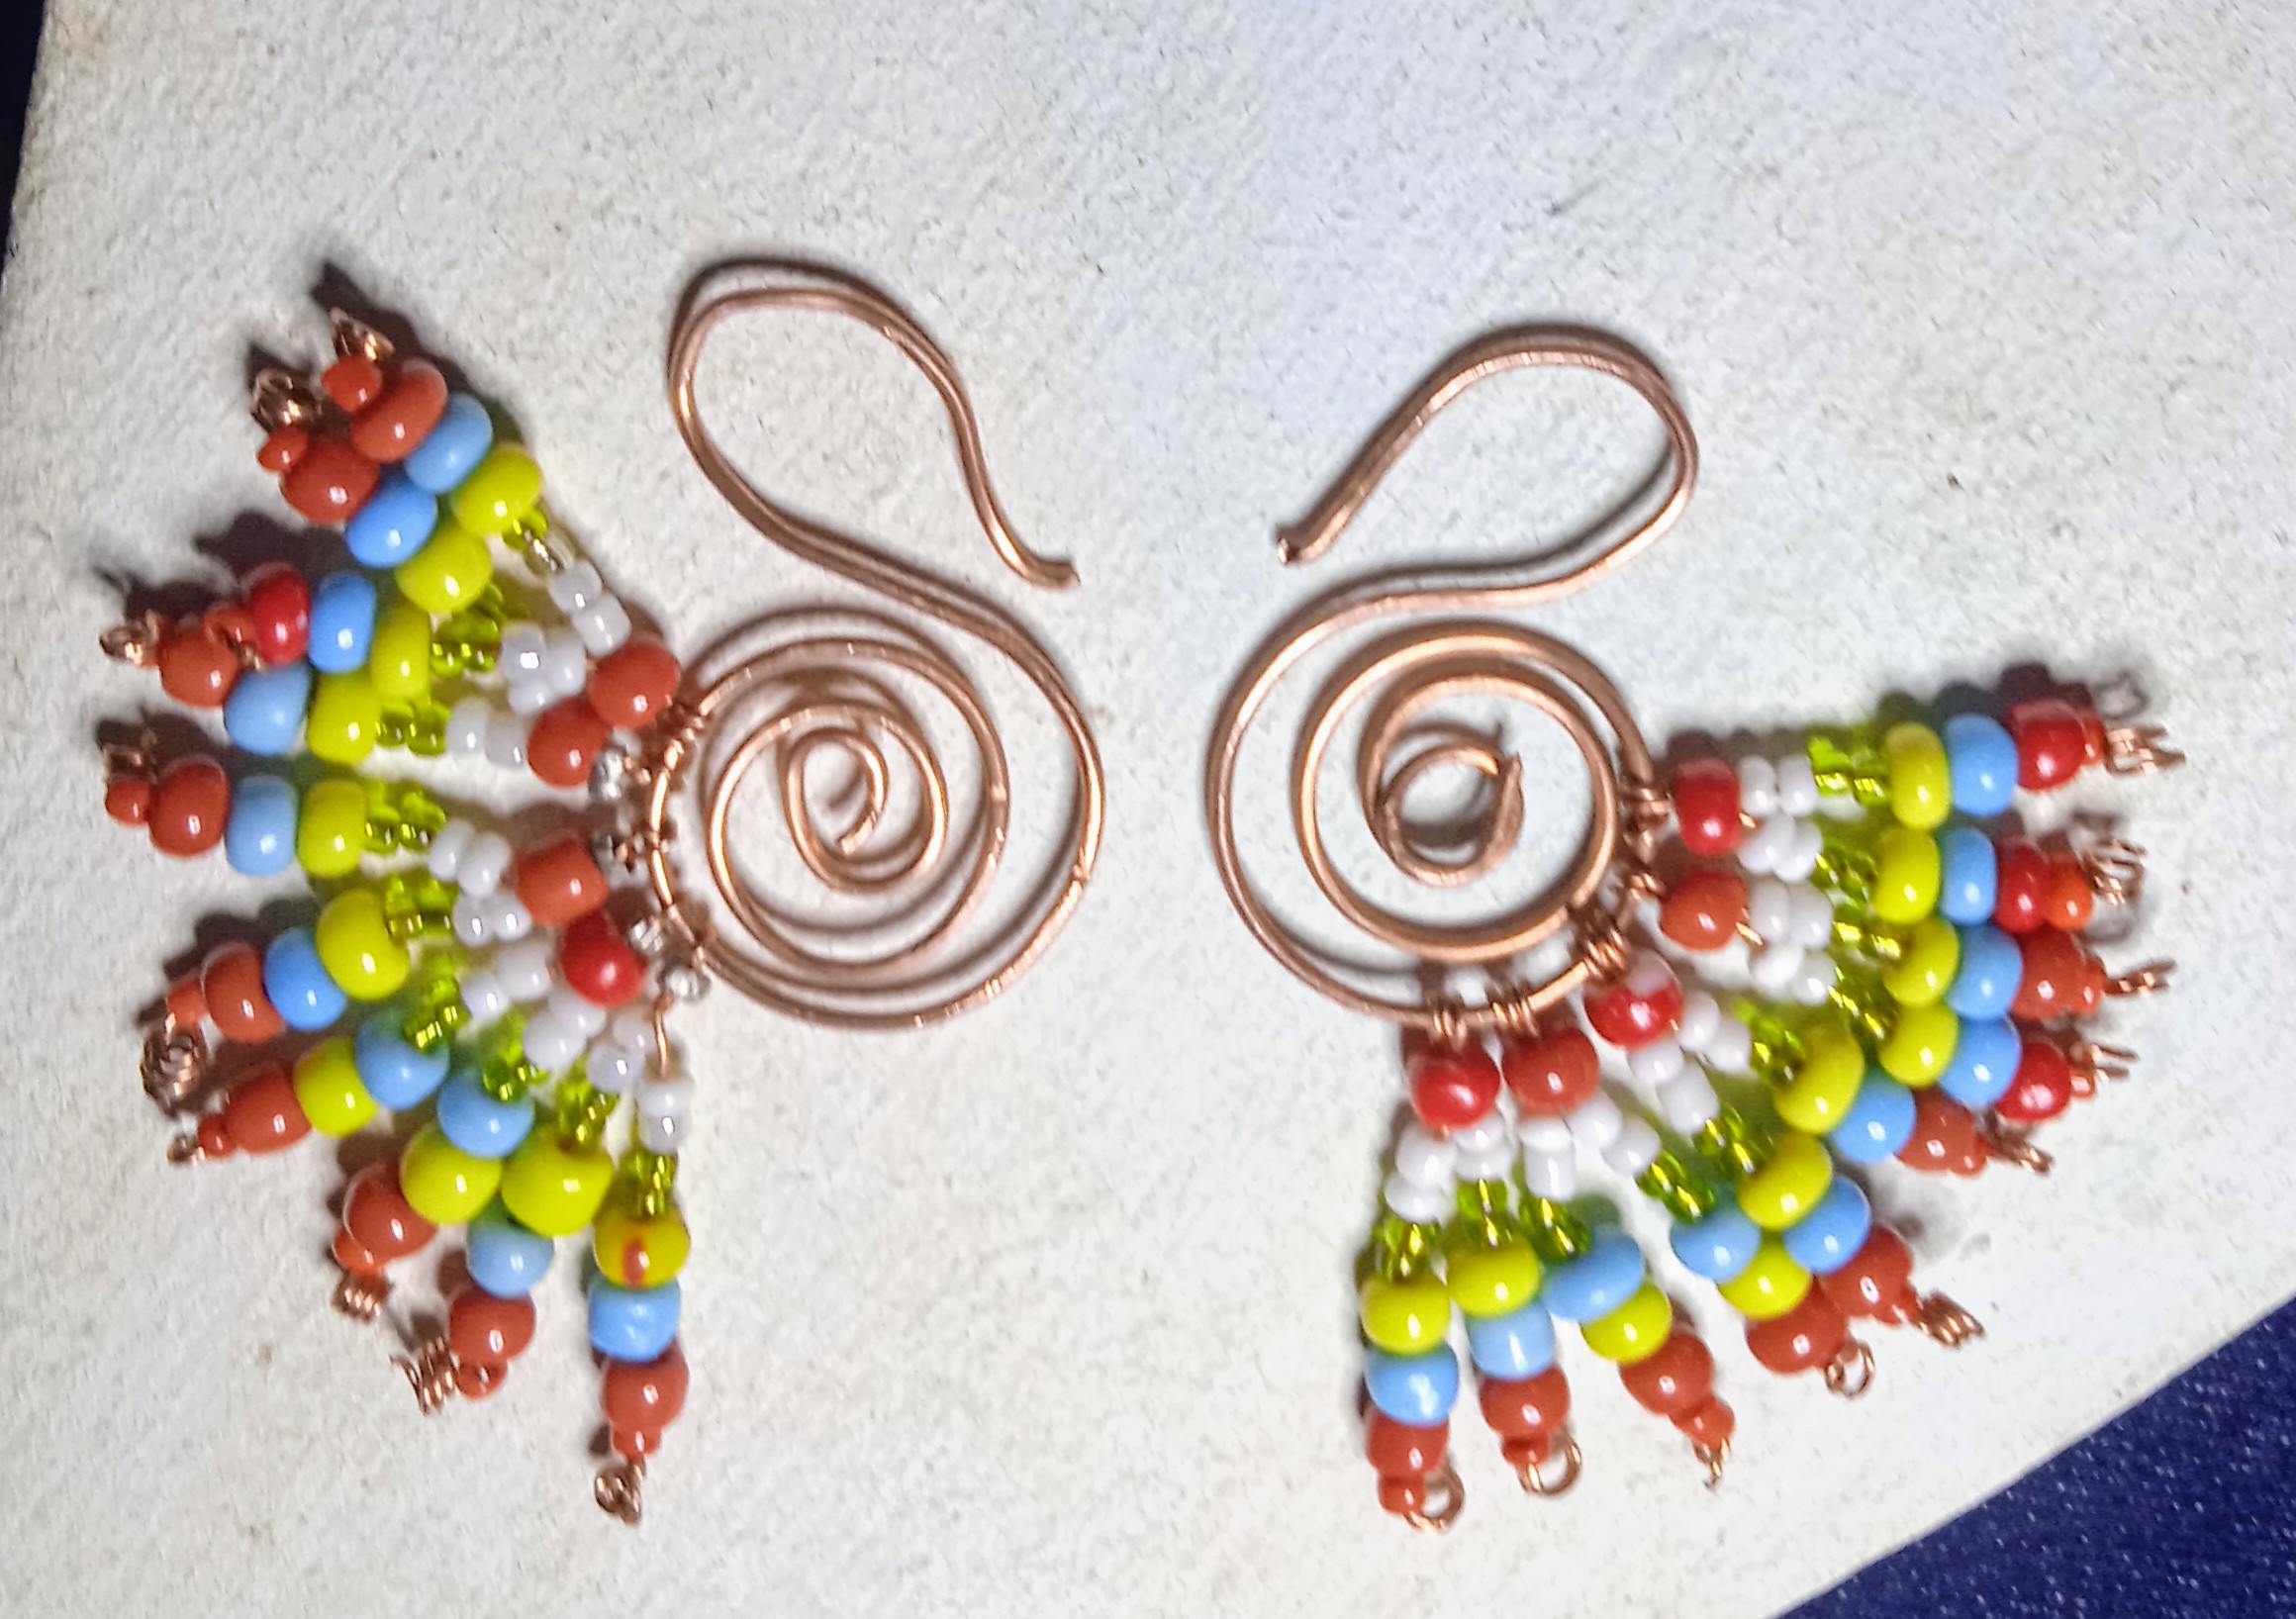
Artistas Creativos de la Joyería y las Manualidades este es el resultado final de mi proyecto para este día, con el mismo procedimiento realicé otro Arete igual para formar el par como muestra la imagen; espero que les guste está bonita manualidad y como siempre me dejen sus valiosos comentarios, gracias a todos por leerme y visitar mi blog, que tengan un excelente inicio de semana y nos vemos en la próxima manualidad, bye, bye.
Creative Artists of Jewelry and Crafts this is the final result of my project for this day, with the same procedure I made another similar Earring to form the pair as shown in the image; I hope you like this beautiful craft and as always leave me your valuable comments, thank you all for reading me and visiting my blog, have a great start to the week and see you in the next craft, bye, bye.
Las imágenes y redacción de este tutorial son de mi propiedad, las fotos fueron tomadas con mi teléfono celular redmi 9 y las edité con una aplicación gratis del mismo.
Para traducir texto use Google traductor.
The images and writing in this tutorial are my property, the photos were taken with my Redmi 9 cell phone and I edited them with a free application.
To translate text use Google translator

Que lindos quedaron, se ven muy bien 😊 buen trabajo amiga 😉
Gracias @marile21, tu siempre tan gentil, saluditos 🌹
¡Felicidades! Esta publicación obtuvo upvote y fue compartido por @la-colmena, un proyecto de Curación Manual para la comunidad hispana de Hive que cuenta con el respaldo de @curie.
Si te gusta el trabajo que hacemos, te invitamos a darle tu voto a este comentario y a votar como testigo por La Colmena.
Si quieres saber más sobre nuestro proyecto, te invitamos a acompañarnos en nuestro servidor de Discord.
Gracias @la-colmena por el apoyo a esta publicación, me honra.