Tutorial: This is how I made a Mini Desk Organizer with Wooden Beads. [Esp-Eng]
Hola , holaaa ! Cómo se encuentran mis Vecinos Creadores que compartimos contenidos en esta maravillosa comunidad Diyhub?, espero que todos estén muy bien ; me siento muy animada de poder estar de nuevo por aquí y aprovecho para desearles que las mejores bendiciones se hagan presente en todos bañándolos con mucha paz, amor, salud y todas esas energías positivas que nos brinda la madre naturaleza por la gracia de Dios.
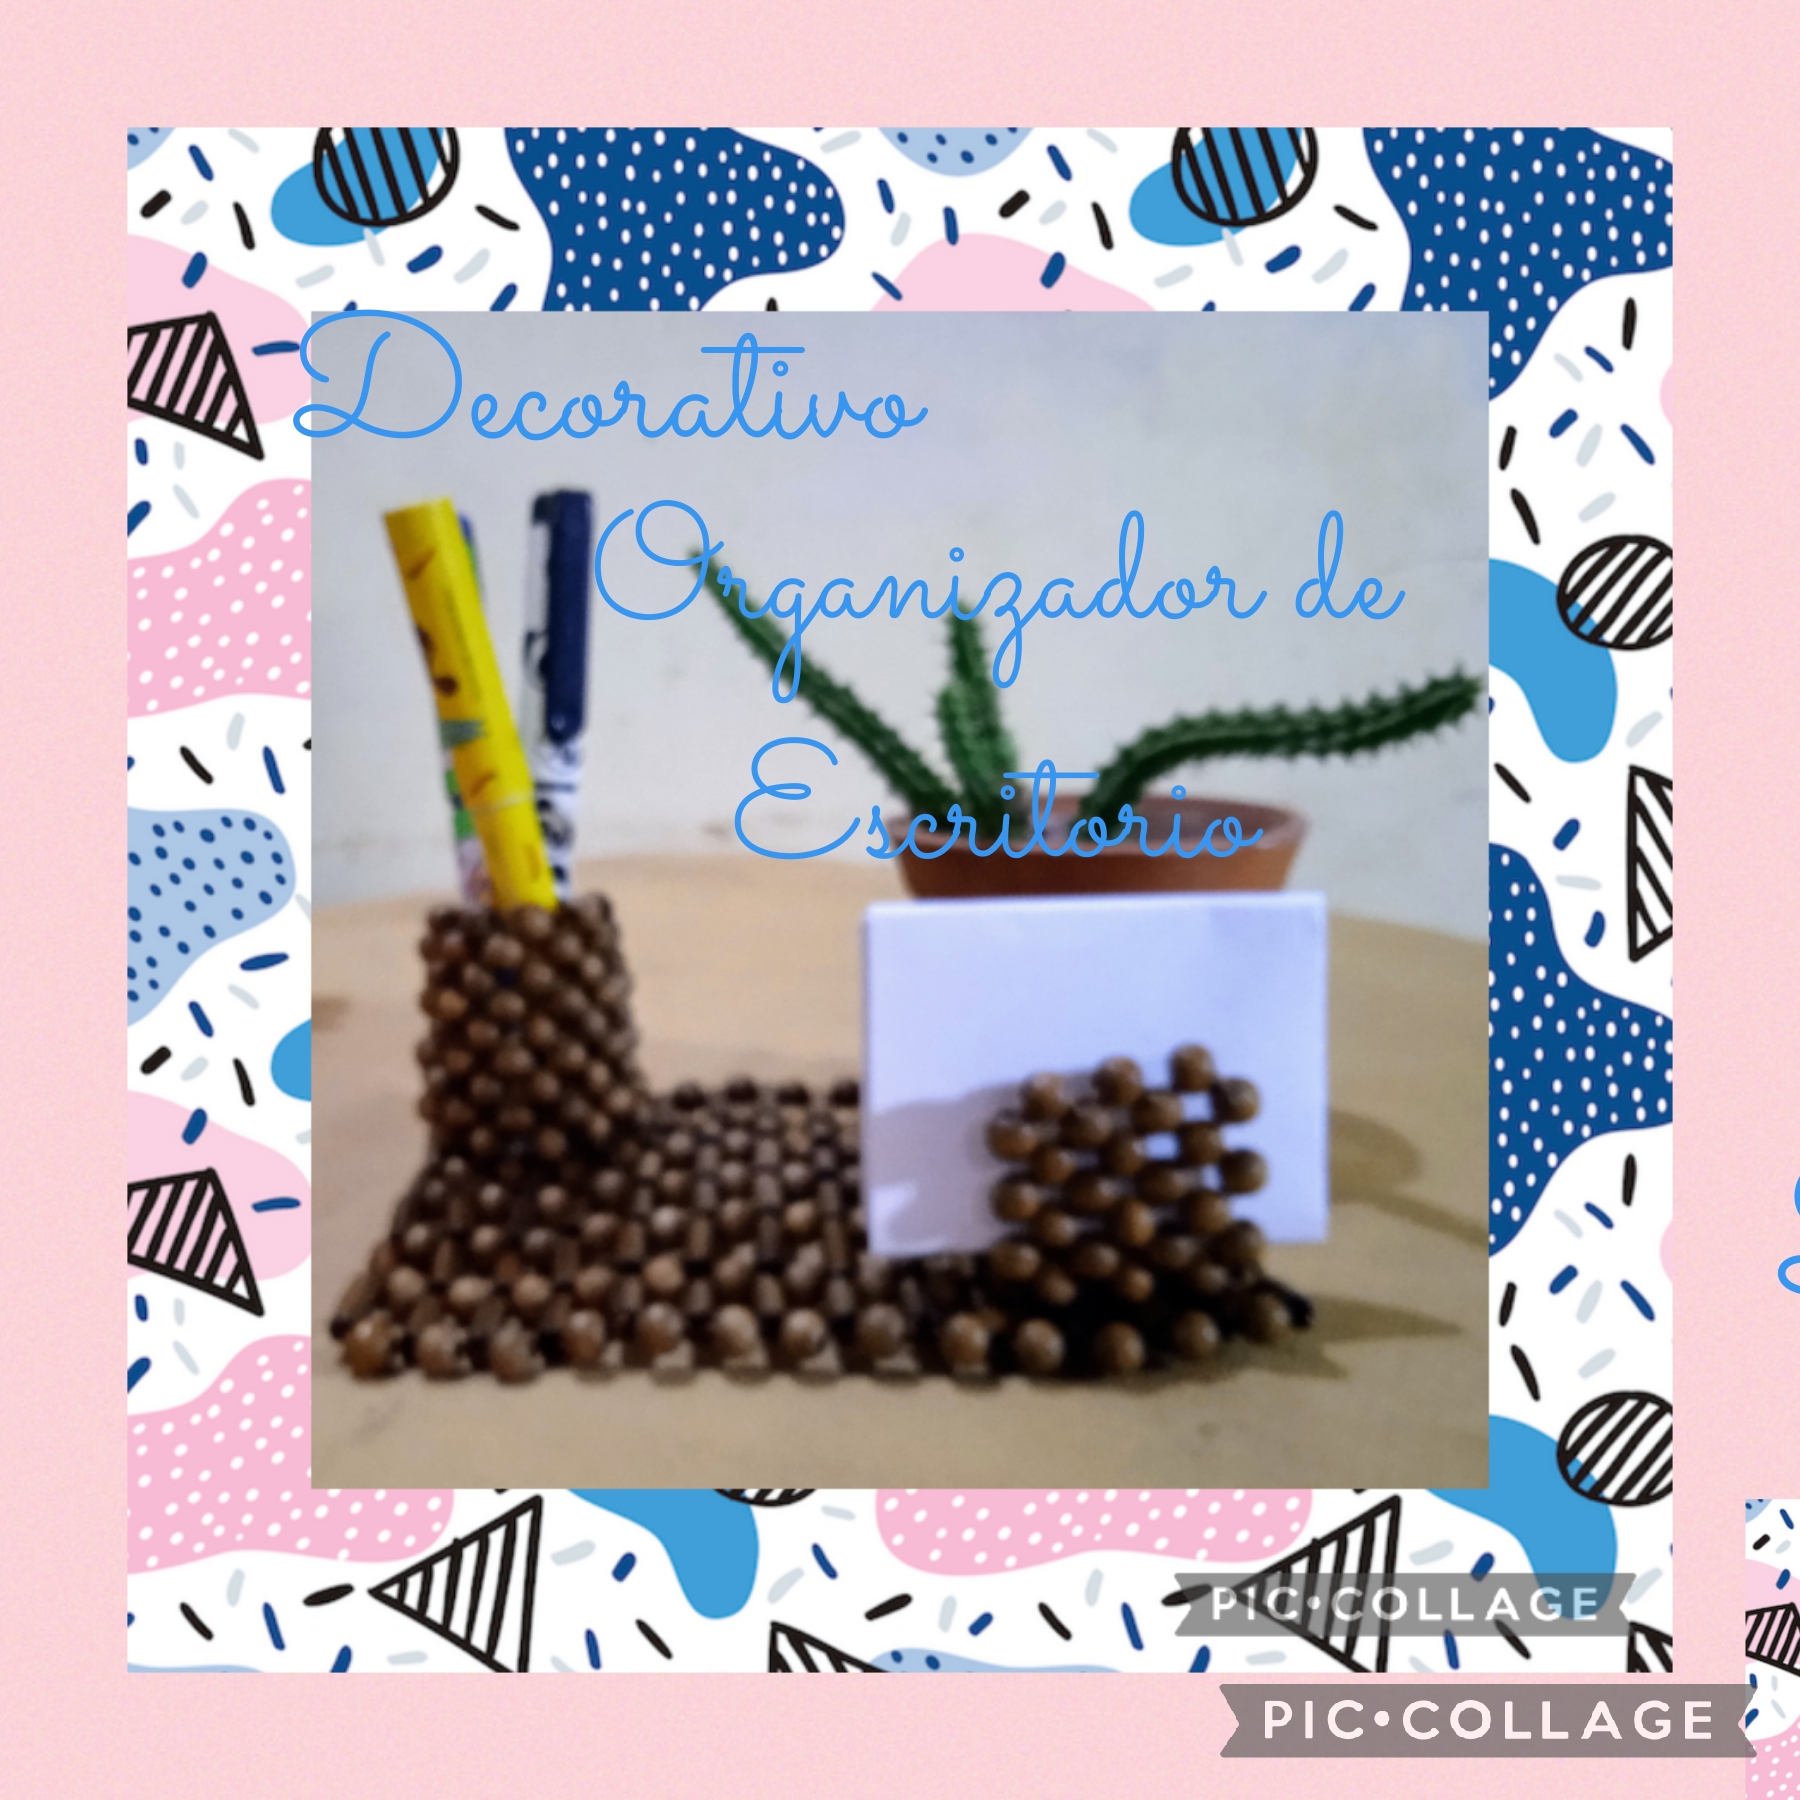
El Proyecto que realizaré en este día es un Original y Decorativo Mini Organizador de Escritorio, lo hice con cuentas de madera y sigan leyendo para que vean el paso a paso de como lo hice:
Hello, hello! How are my Neighbor Creators who share content in this wonderful Diyhub community? I hope everyone is doing well; I feel very encouraged to be here again and I take this opportunity to wish you that the best blessings are present in all of you, bathing you with a lot of peace, love, health and all those positive energies that Mother Nature gives us by the grace of God.
The Project that I will do today is an Original and Decorative Mini Desk Organizer, I made it with wooden beads and keep reading so you can see the step by step of how I did it:
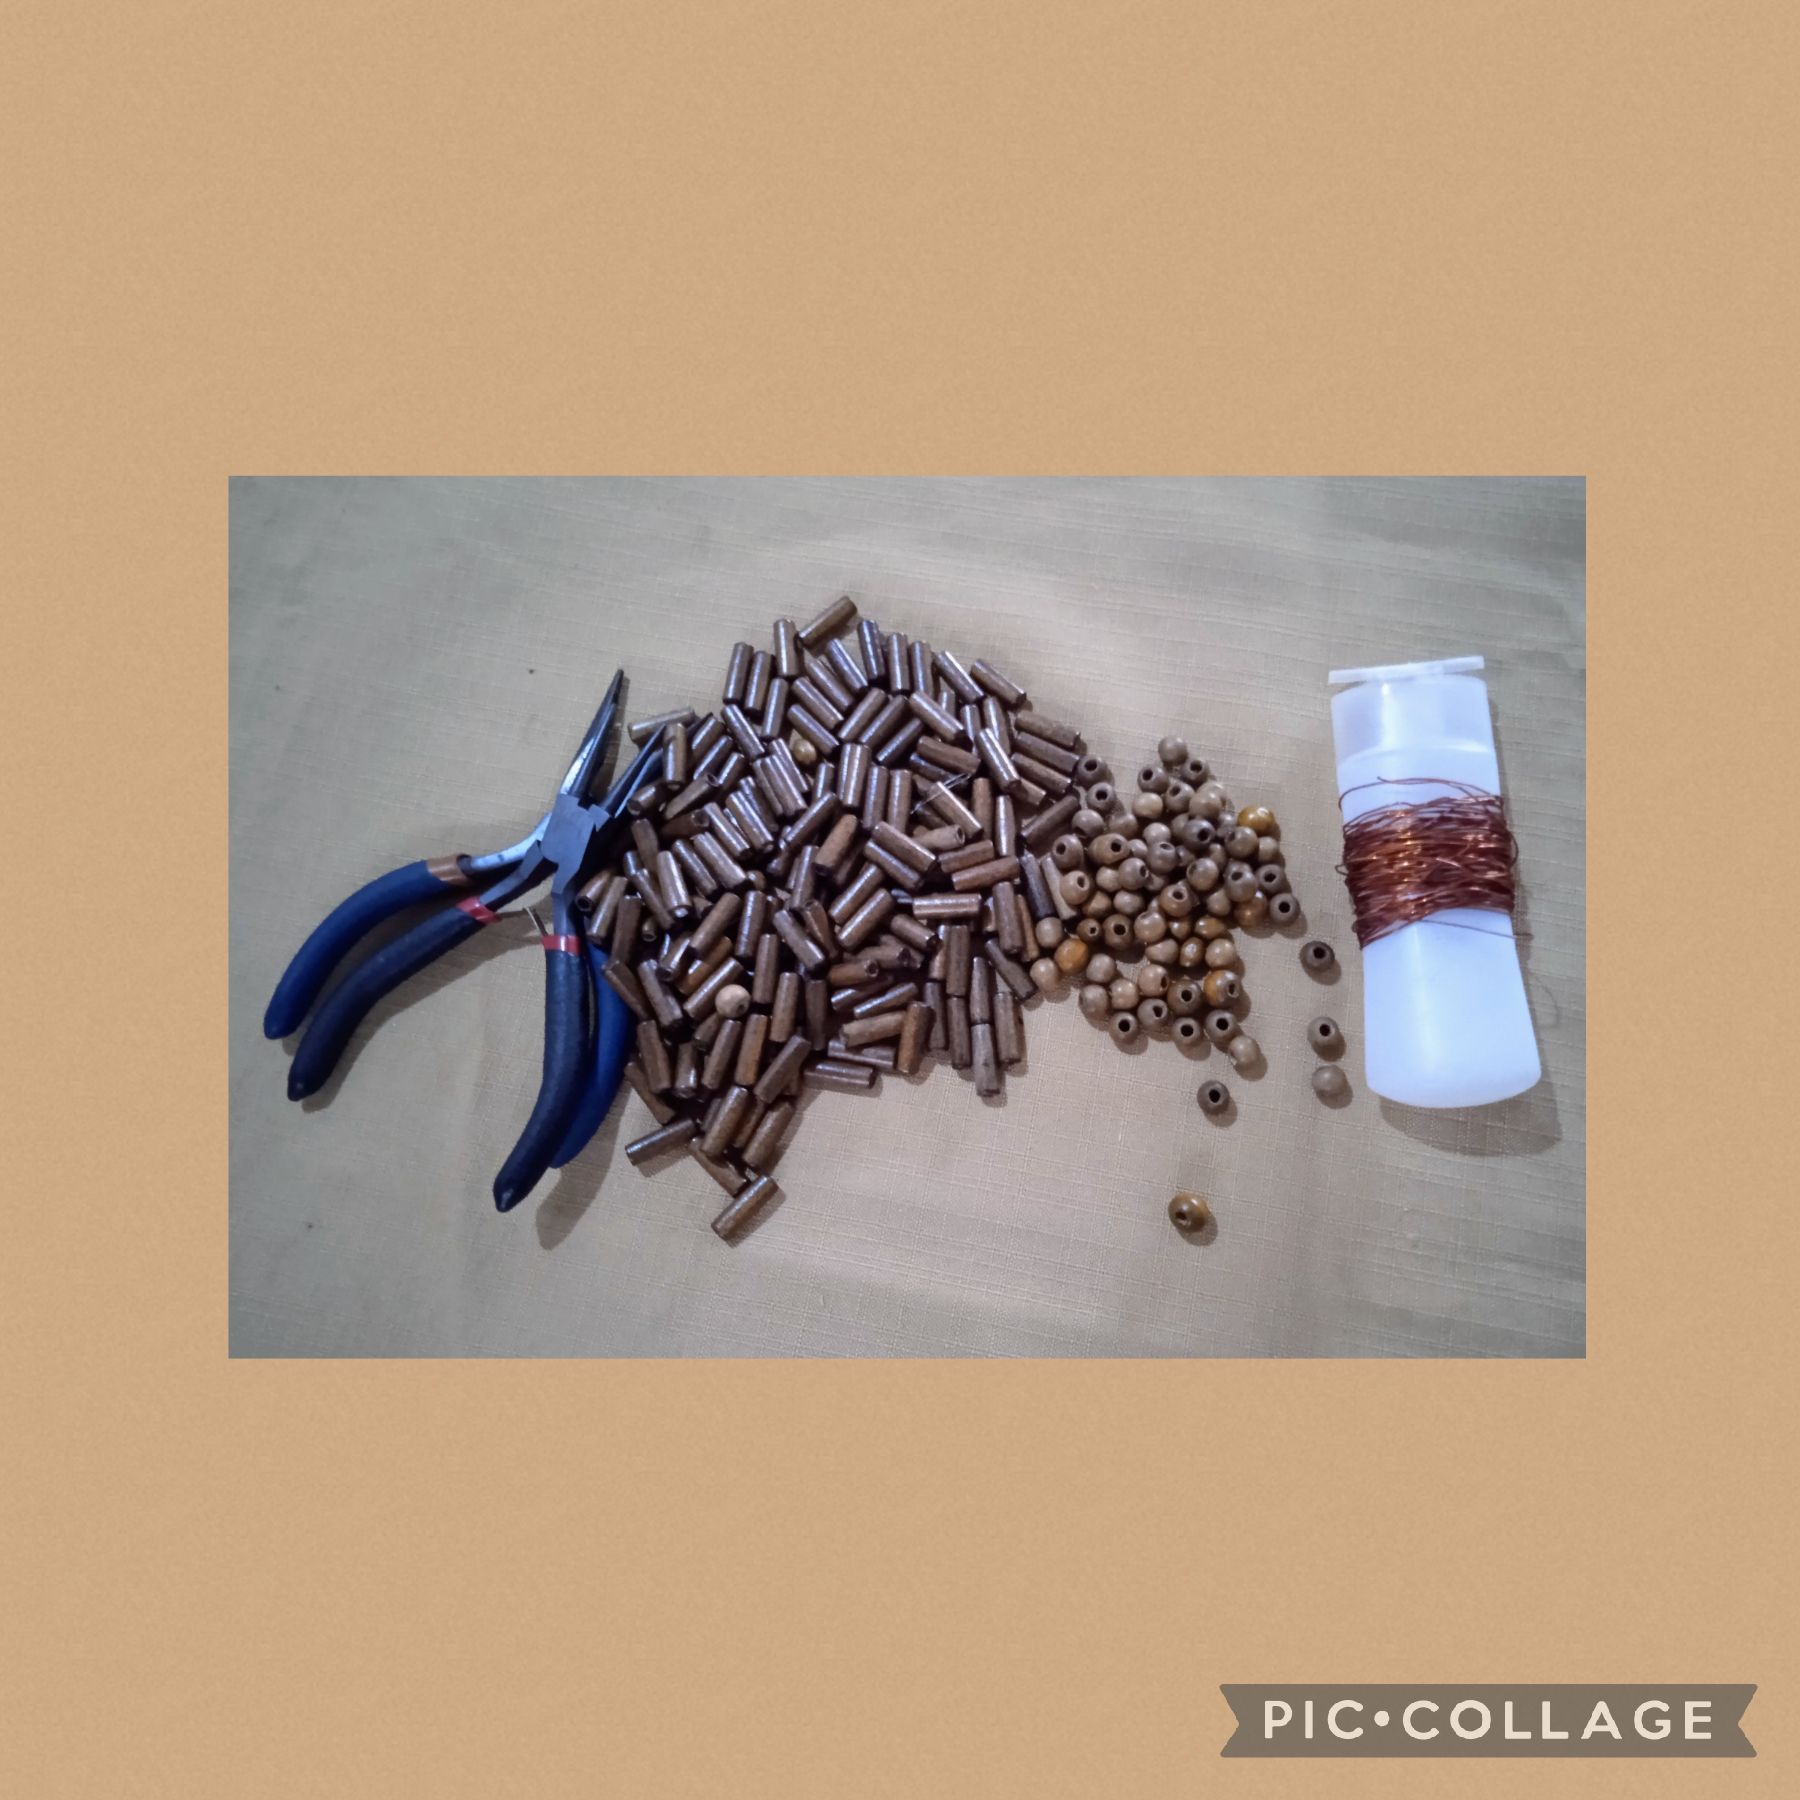
MATERIALES QUE USE PARA REALIZAR ESTE PROYECTO.
- Cuentas cilíndricas de madera.
- Cuentas redondas de madera.
- Alambre de cobre de 26".
- Hilo de naylon.
- Pinza plana.
- Tijeras.
- Accesorios.
MATERIALS USED TO CARRY OUT THIS PROJECT.
- Cylindrical wooden beads.
- Round wooden beads.
- 26" copper wire.
- Nylon thread.
- Flat clamp.
- Scissors.
- Accessories.
CON ESTOS SENCILLOS Y POCOS PASOS HICE LA ELABORACIÓN DE ESTE PROYECTO:
PRIMER PASO:
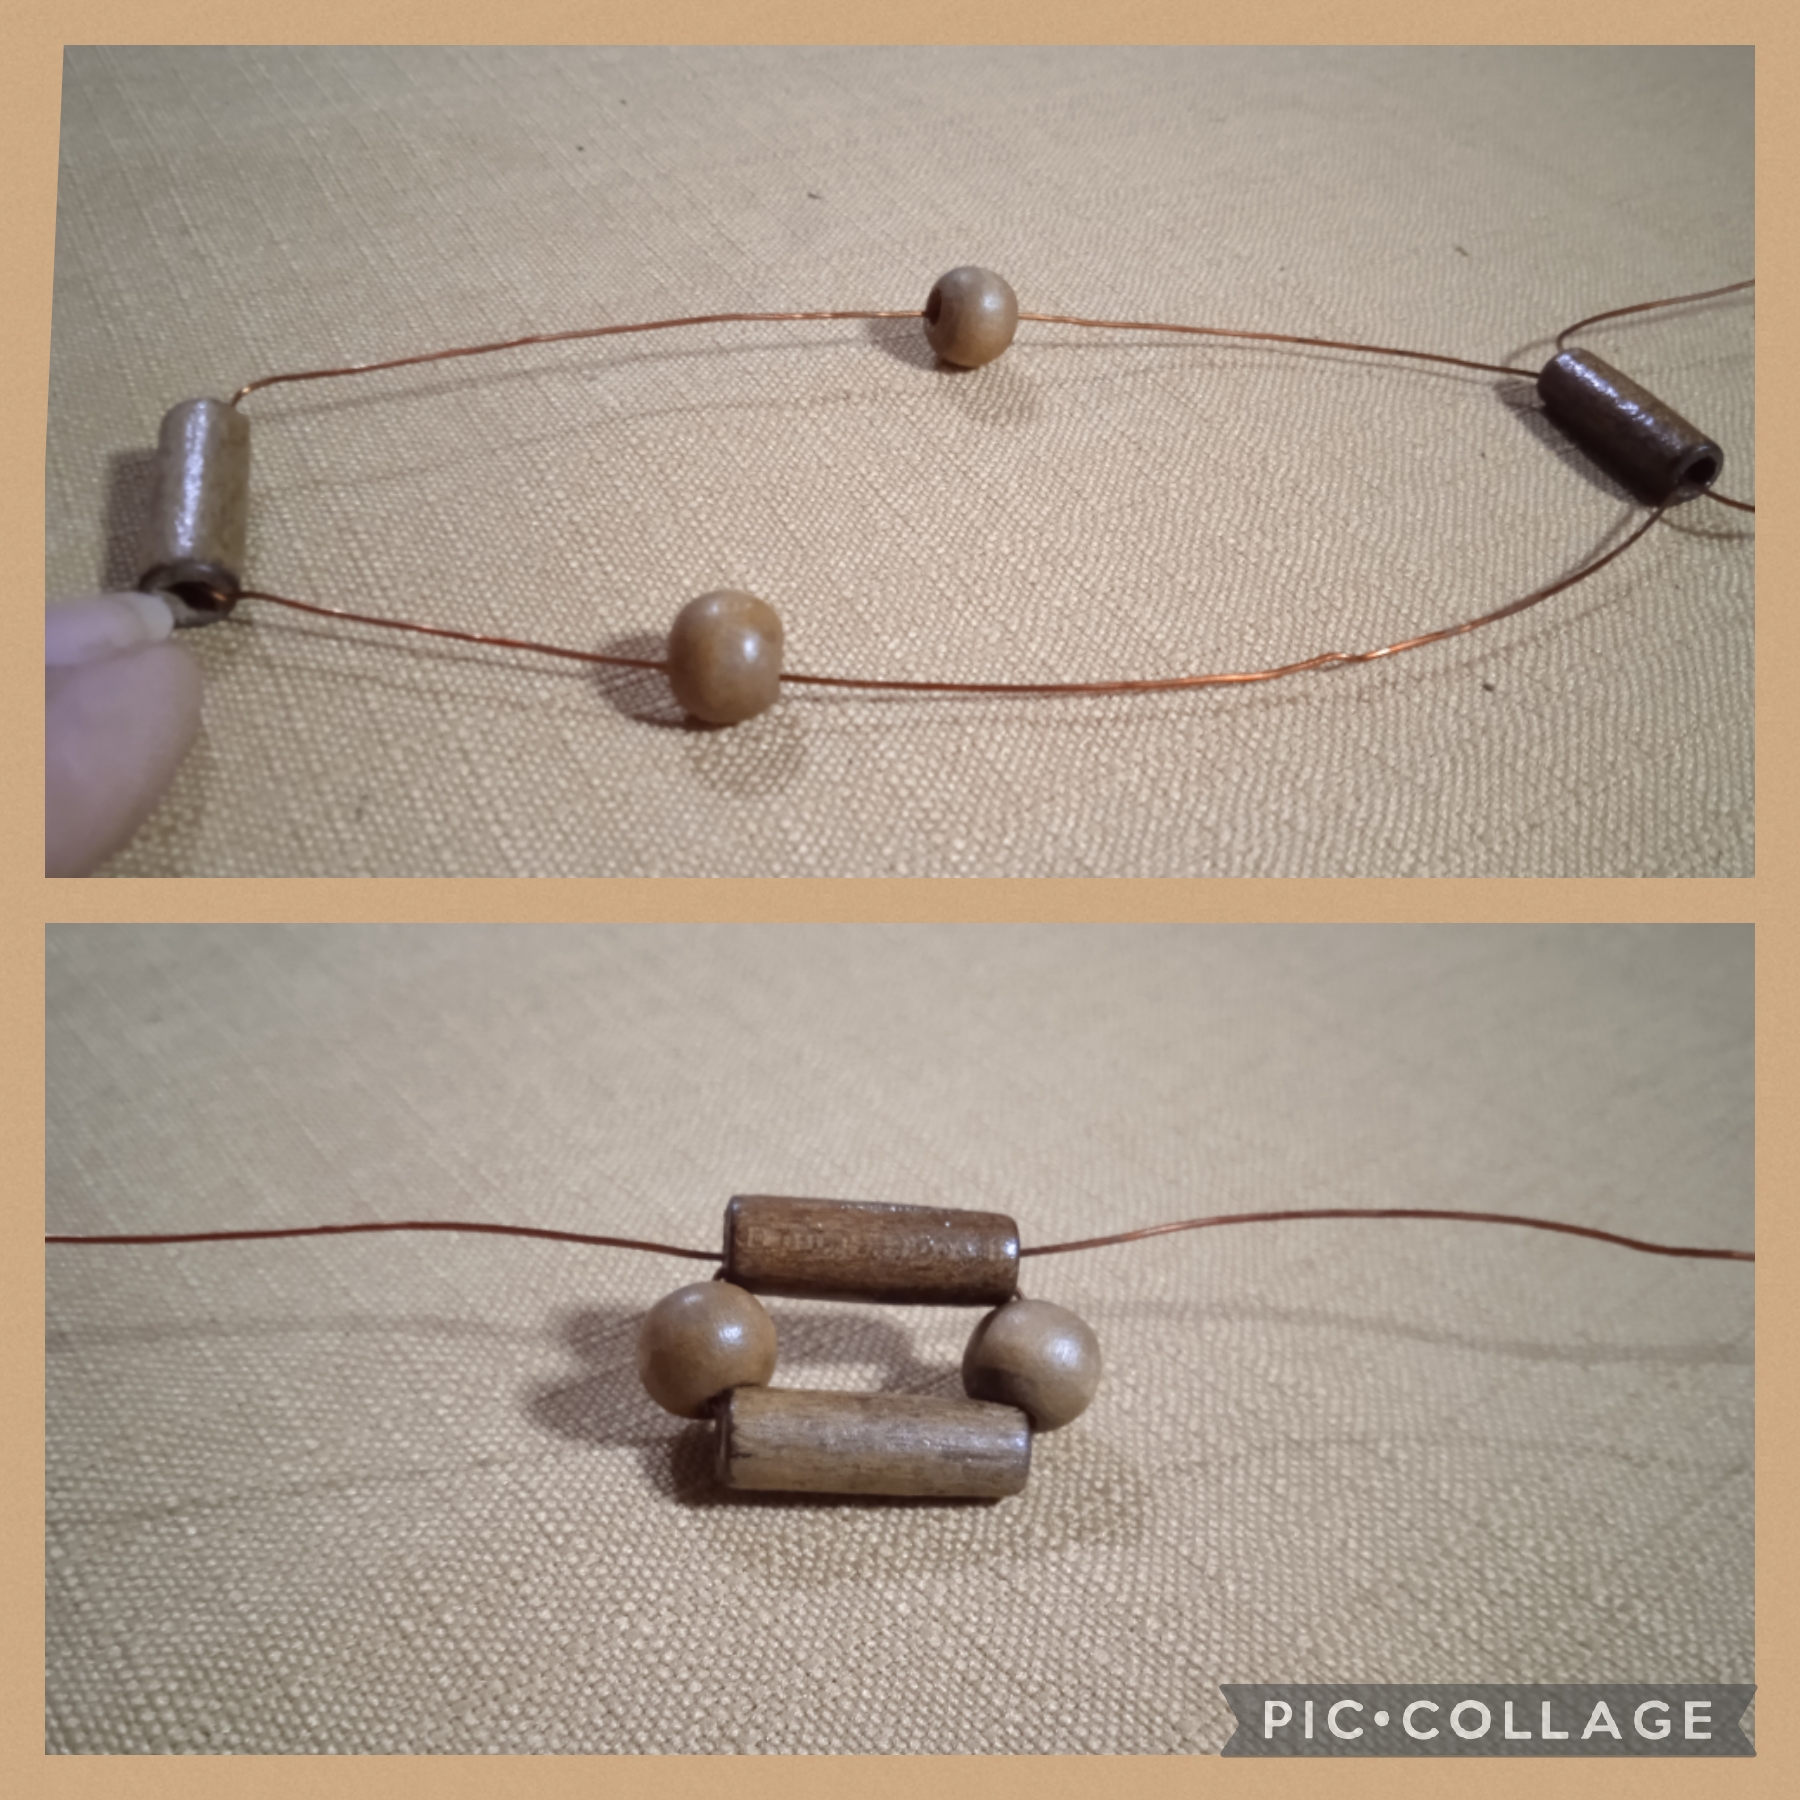
Voy a comenzar usando dos metros de alambre de cobre calibre 26", dos cuentas cilíndricas de madera y dos cuentas redondas de madera para diseñar el punto, con el que elaboraré la base del organizador; así de esta manera: inserto una pieza cilíndrica en el alambre, luego una redonda, otra cilíndrica y otra redonda, las bajo a la mitad del alambre , junto las puntas para igualar, cruzo el alambre por una de las piezas cilíndricas y así queda un módulo de cuatro.
WITH THESE SIMPLE AND FEW STEPS DRAW UP THIS PROJECT:
FIRST STEP:
I am going to start by using two meters of 26 gauge copper wire, two cylindrical wooden beads and two round wooden beads to design the point, with which I will make the base of the organizer, like this: I insert a cylindrical piece into the wire, then one round, another cylindrical and another round, I lower them to the middle of the wire, join the tips to match, I cross the wire through one of the cylindrical pieces and thus there is a module of four.
PASO DOS:
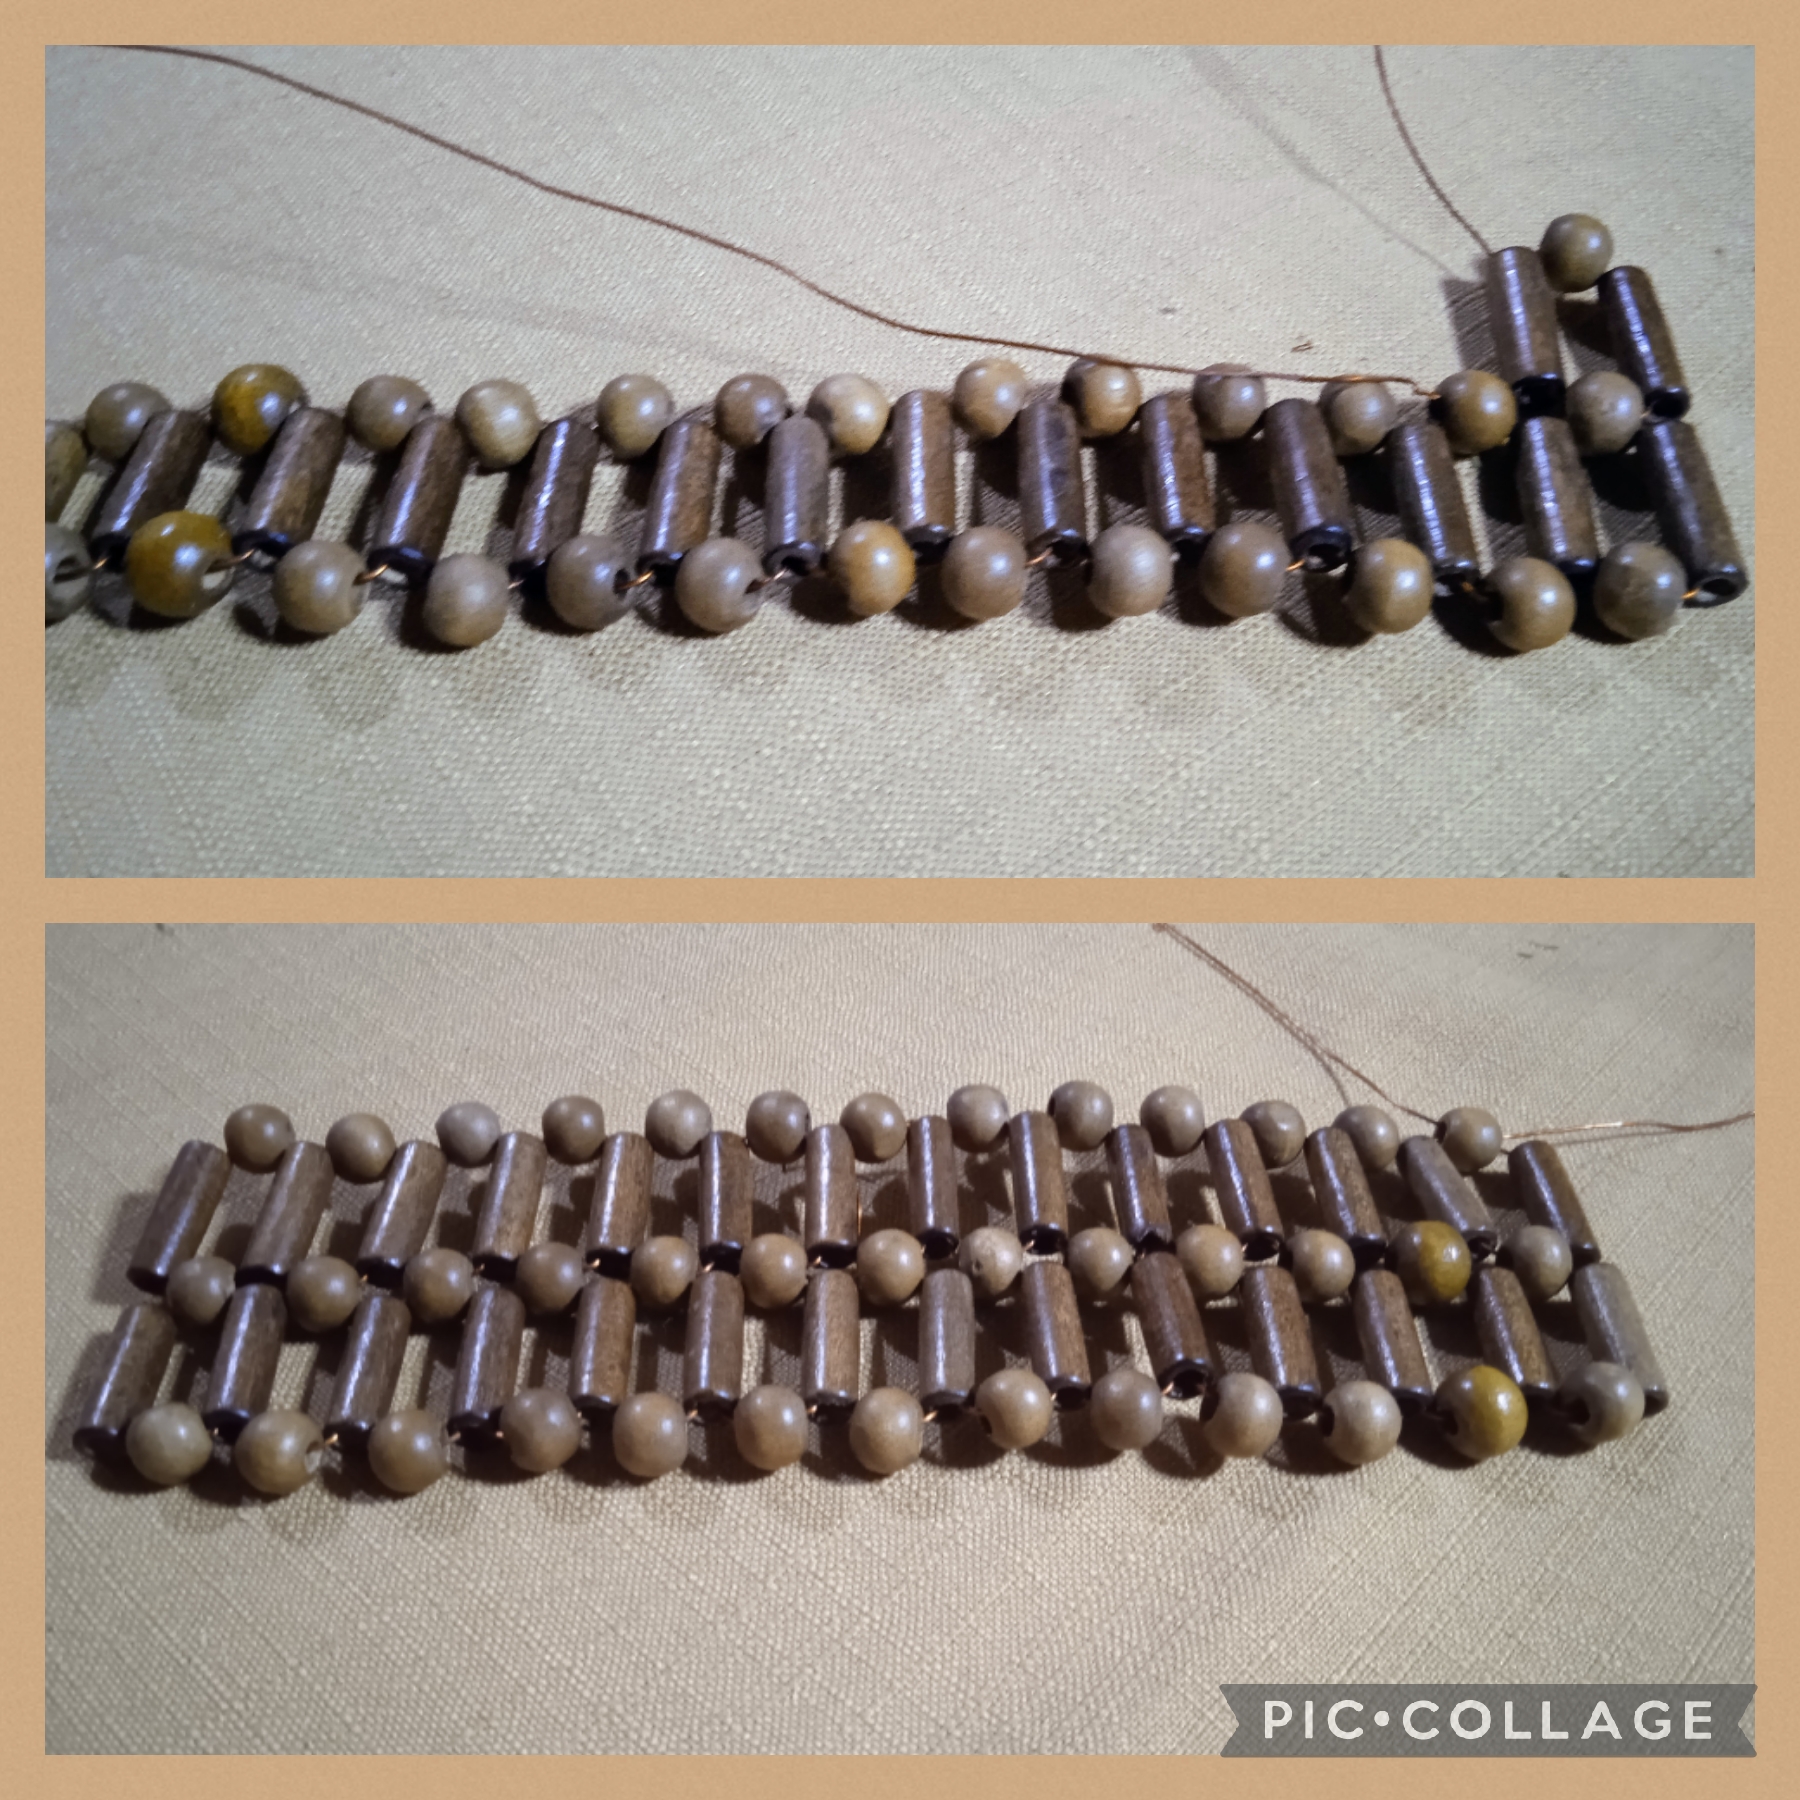
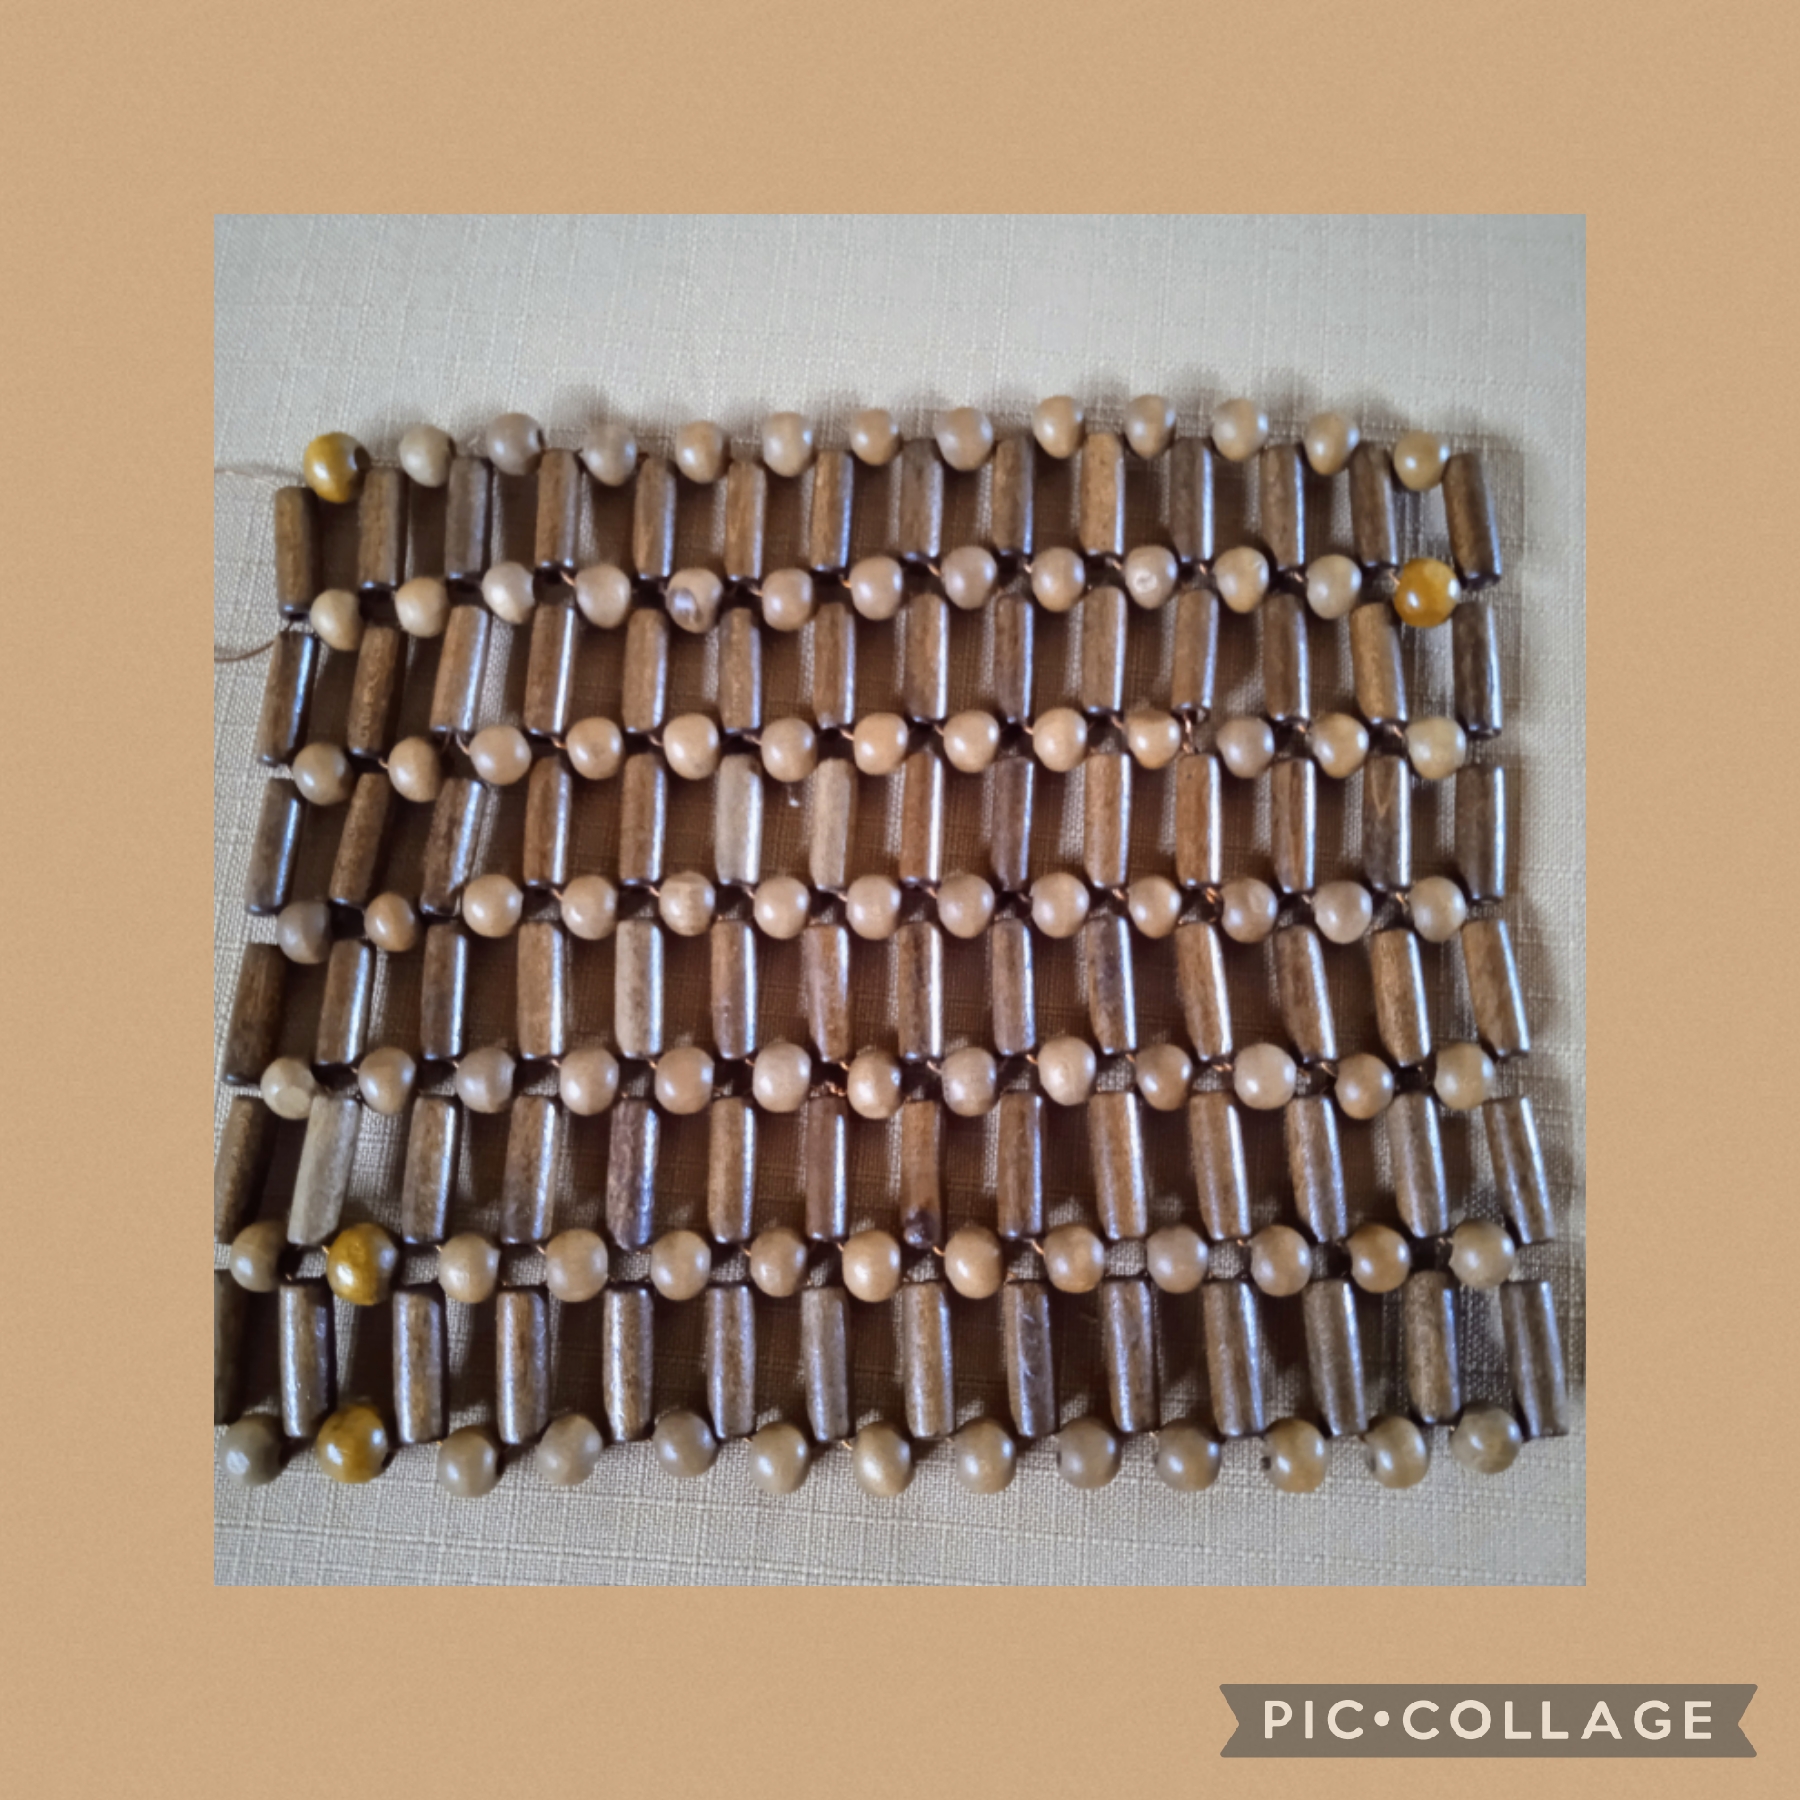
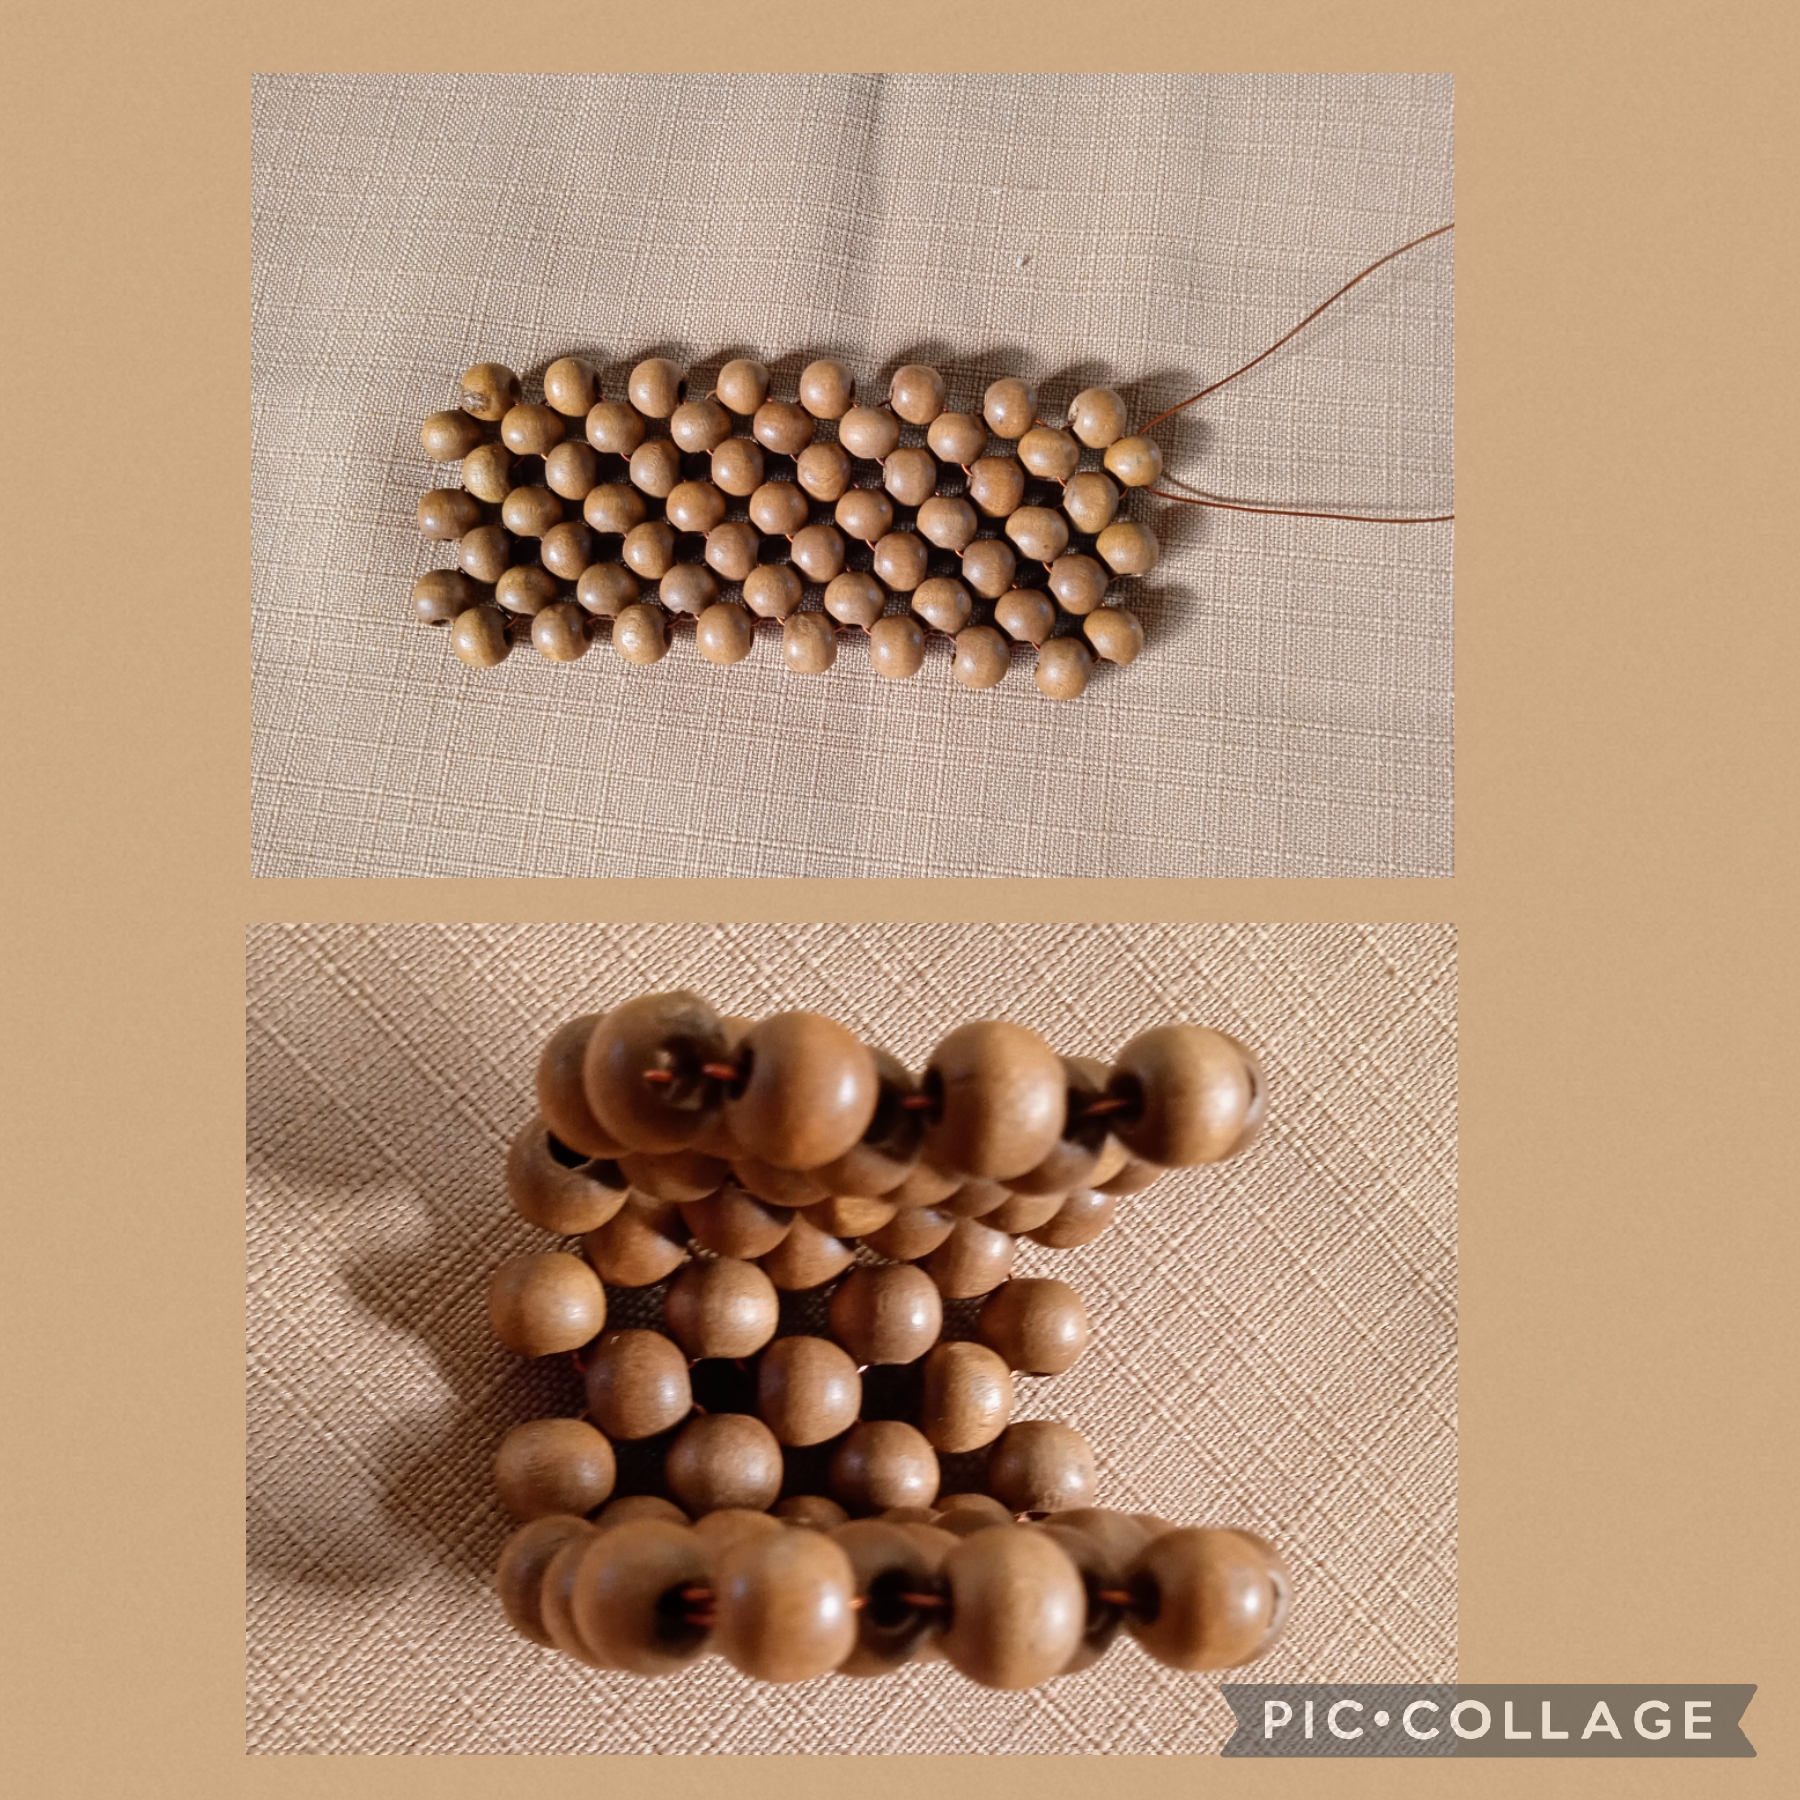
Voy a realizar el módulo siguiente usando solo tres cuentas tomo como base la pieza cilíndrica dónde crucé para formar el anterior módulo y coloco una cuenta redonda de cada lado del alambre luego inserto por uno de los alambre otra pieza cilíndrica y cruzo ahora por una de las cuentas redondas que va a quedar en la parte de arriba y es ahí donde comienzo la segunda vuelta , voy hacer este procedimiento trece veces, como muestra la imagen y realizó seis vueltas de trece módulos cada una para un total de setenta y ocho módulos que forman la base del organizador.
STEP TWO:
I am going to make the following module using only three beads. I take as a base the cylindrical piece where I crossed to form the previous module and I place a round bead on each side of the wire, then I insert another cylindrical piece through one of the wires and now cross through one of the round beads that will be at the top and that is where I start the second round, I am going to do this procedure thirteen times, as the image shows and made six rounds of thirteen modules each for a total of seventy-eight modules that form the base of the organizer.
PASO TRES
Voy a elaborar el depósito donde colocar los lápices, boligrafos, marcadores, etc.
Aquí uso hilo de naylon para unir las cuentas y darle una forma cilíndrica que no sea tan rígida.
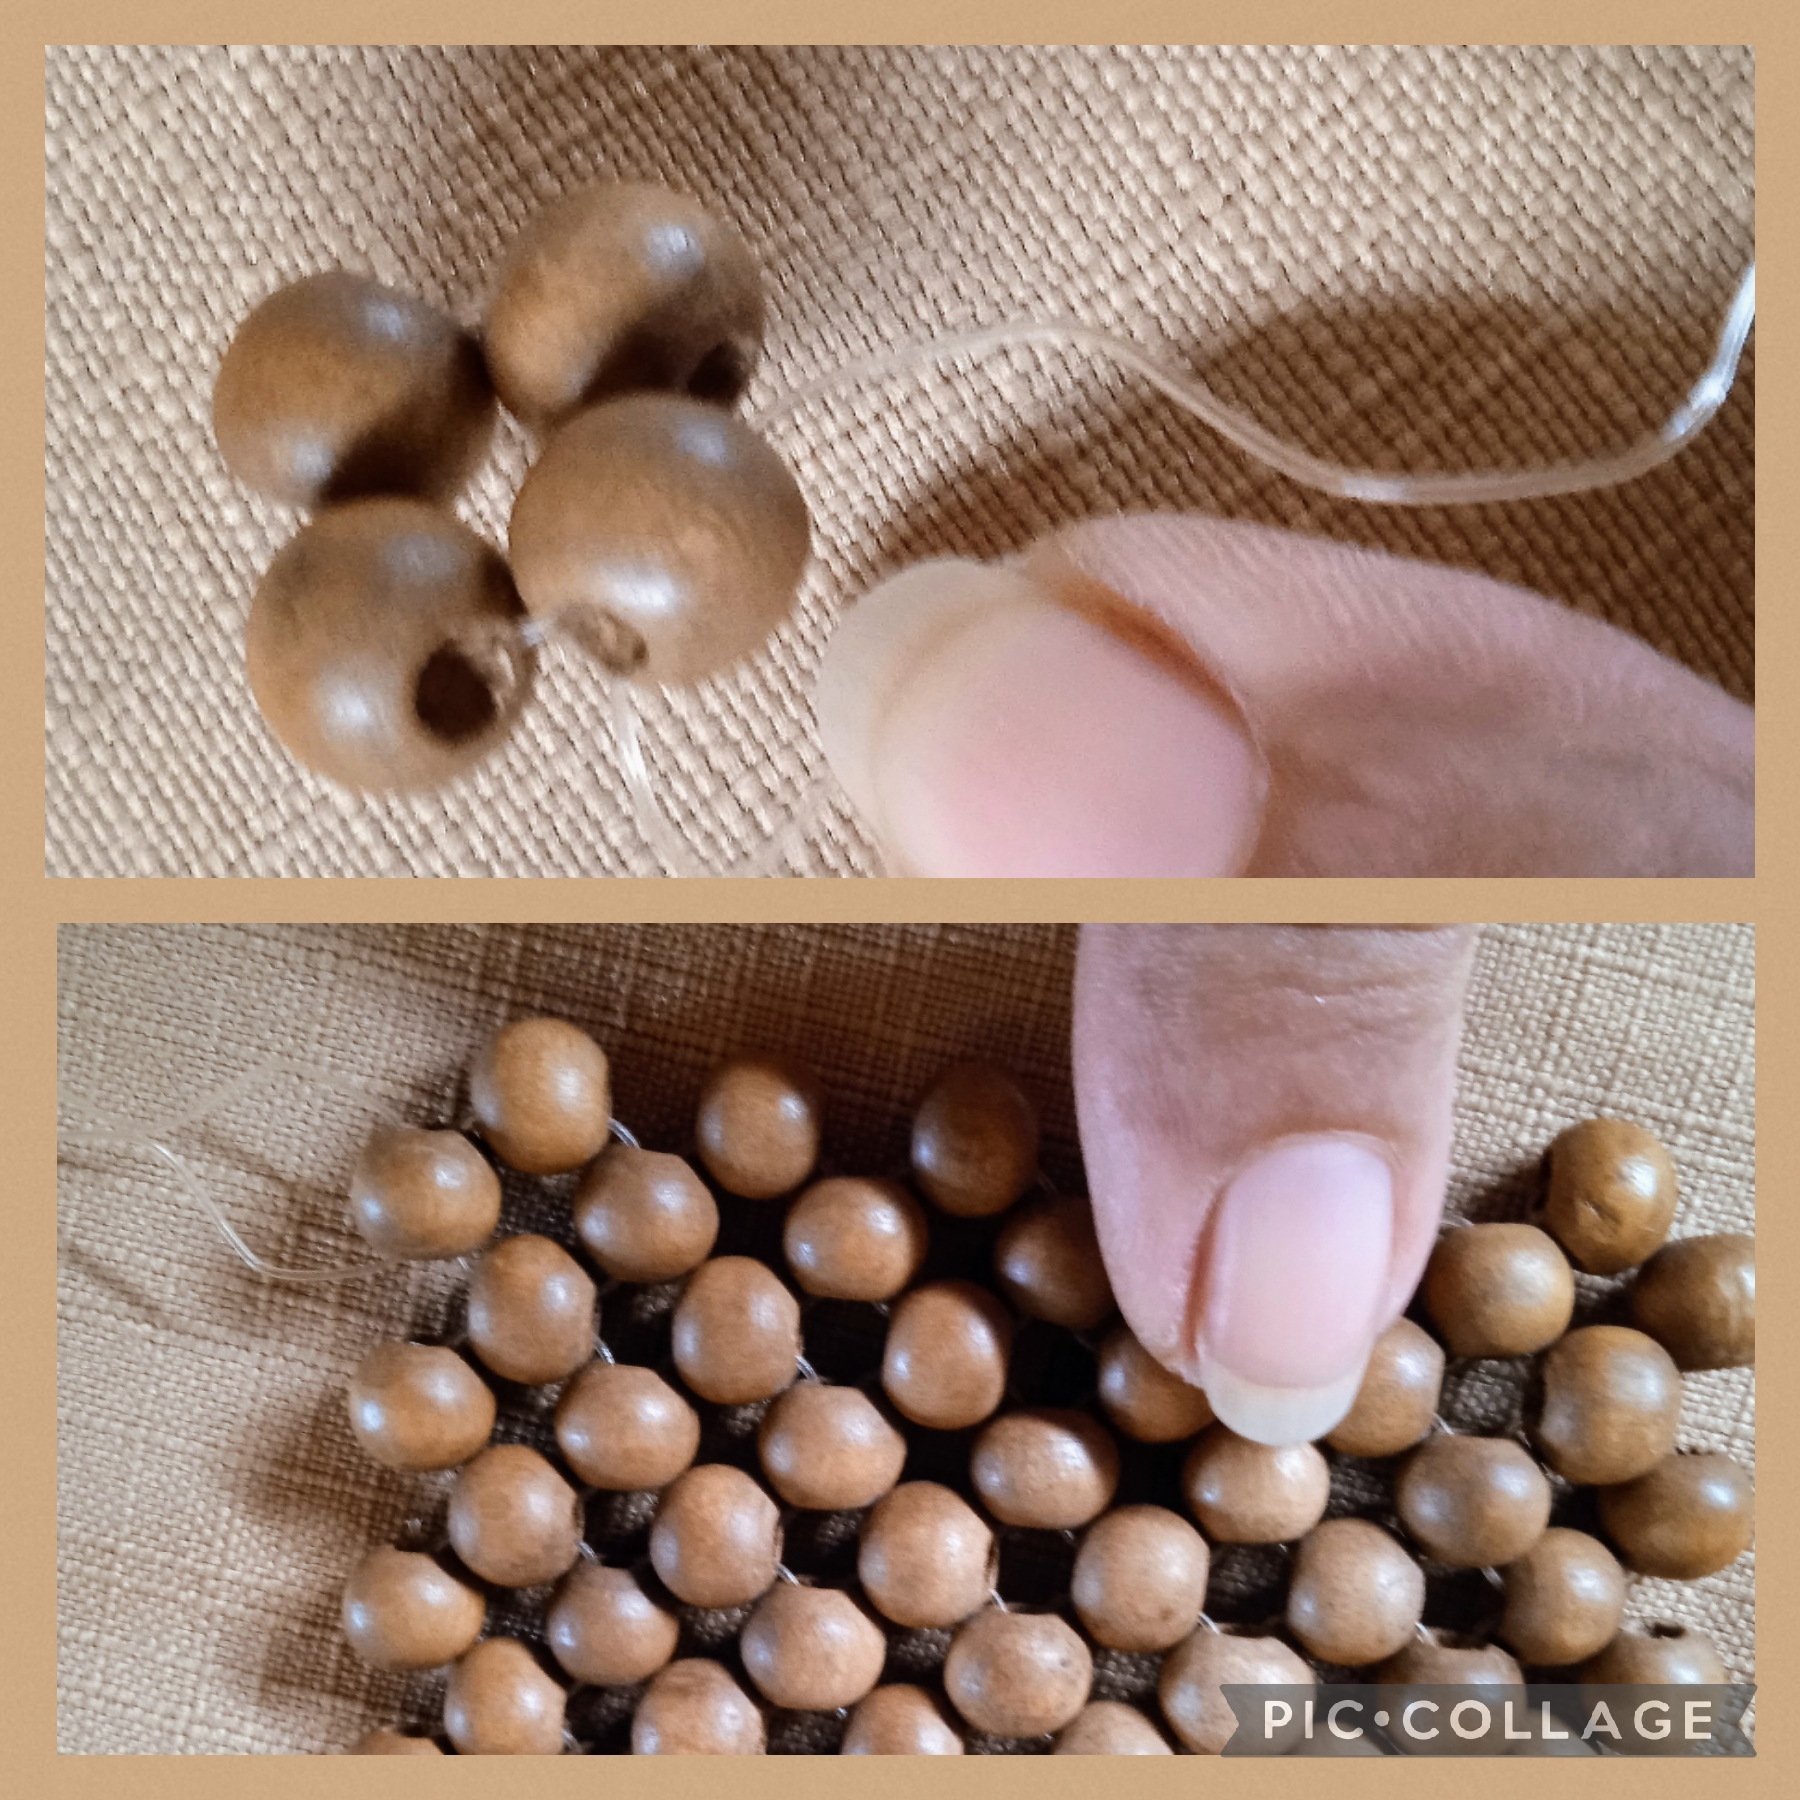
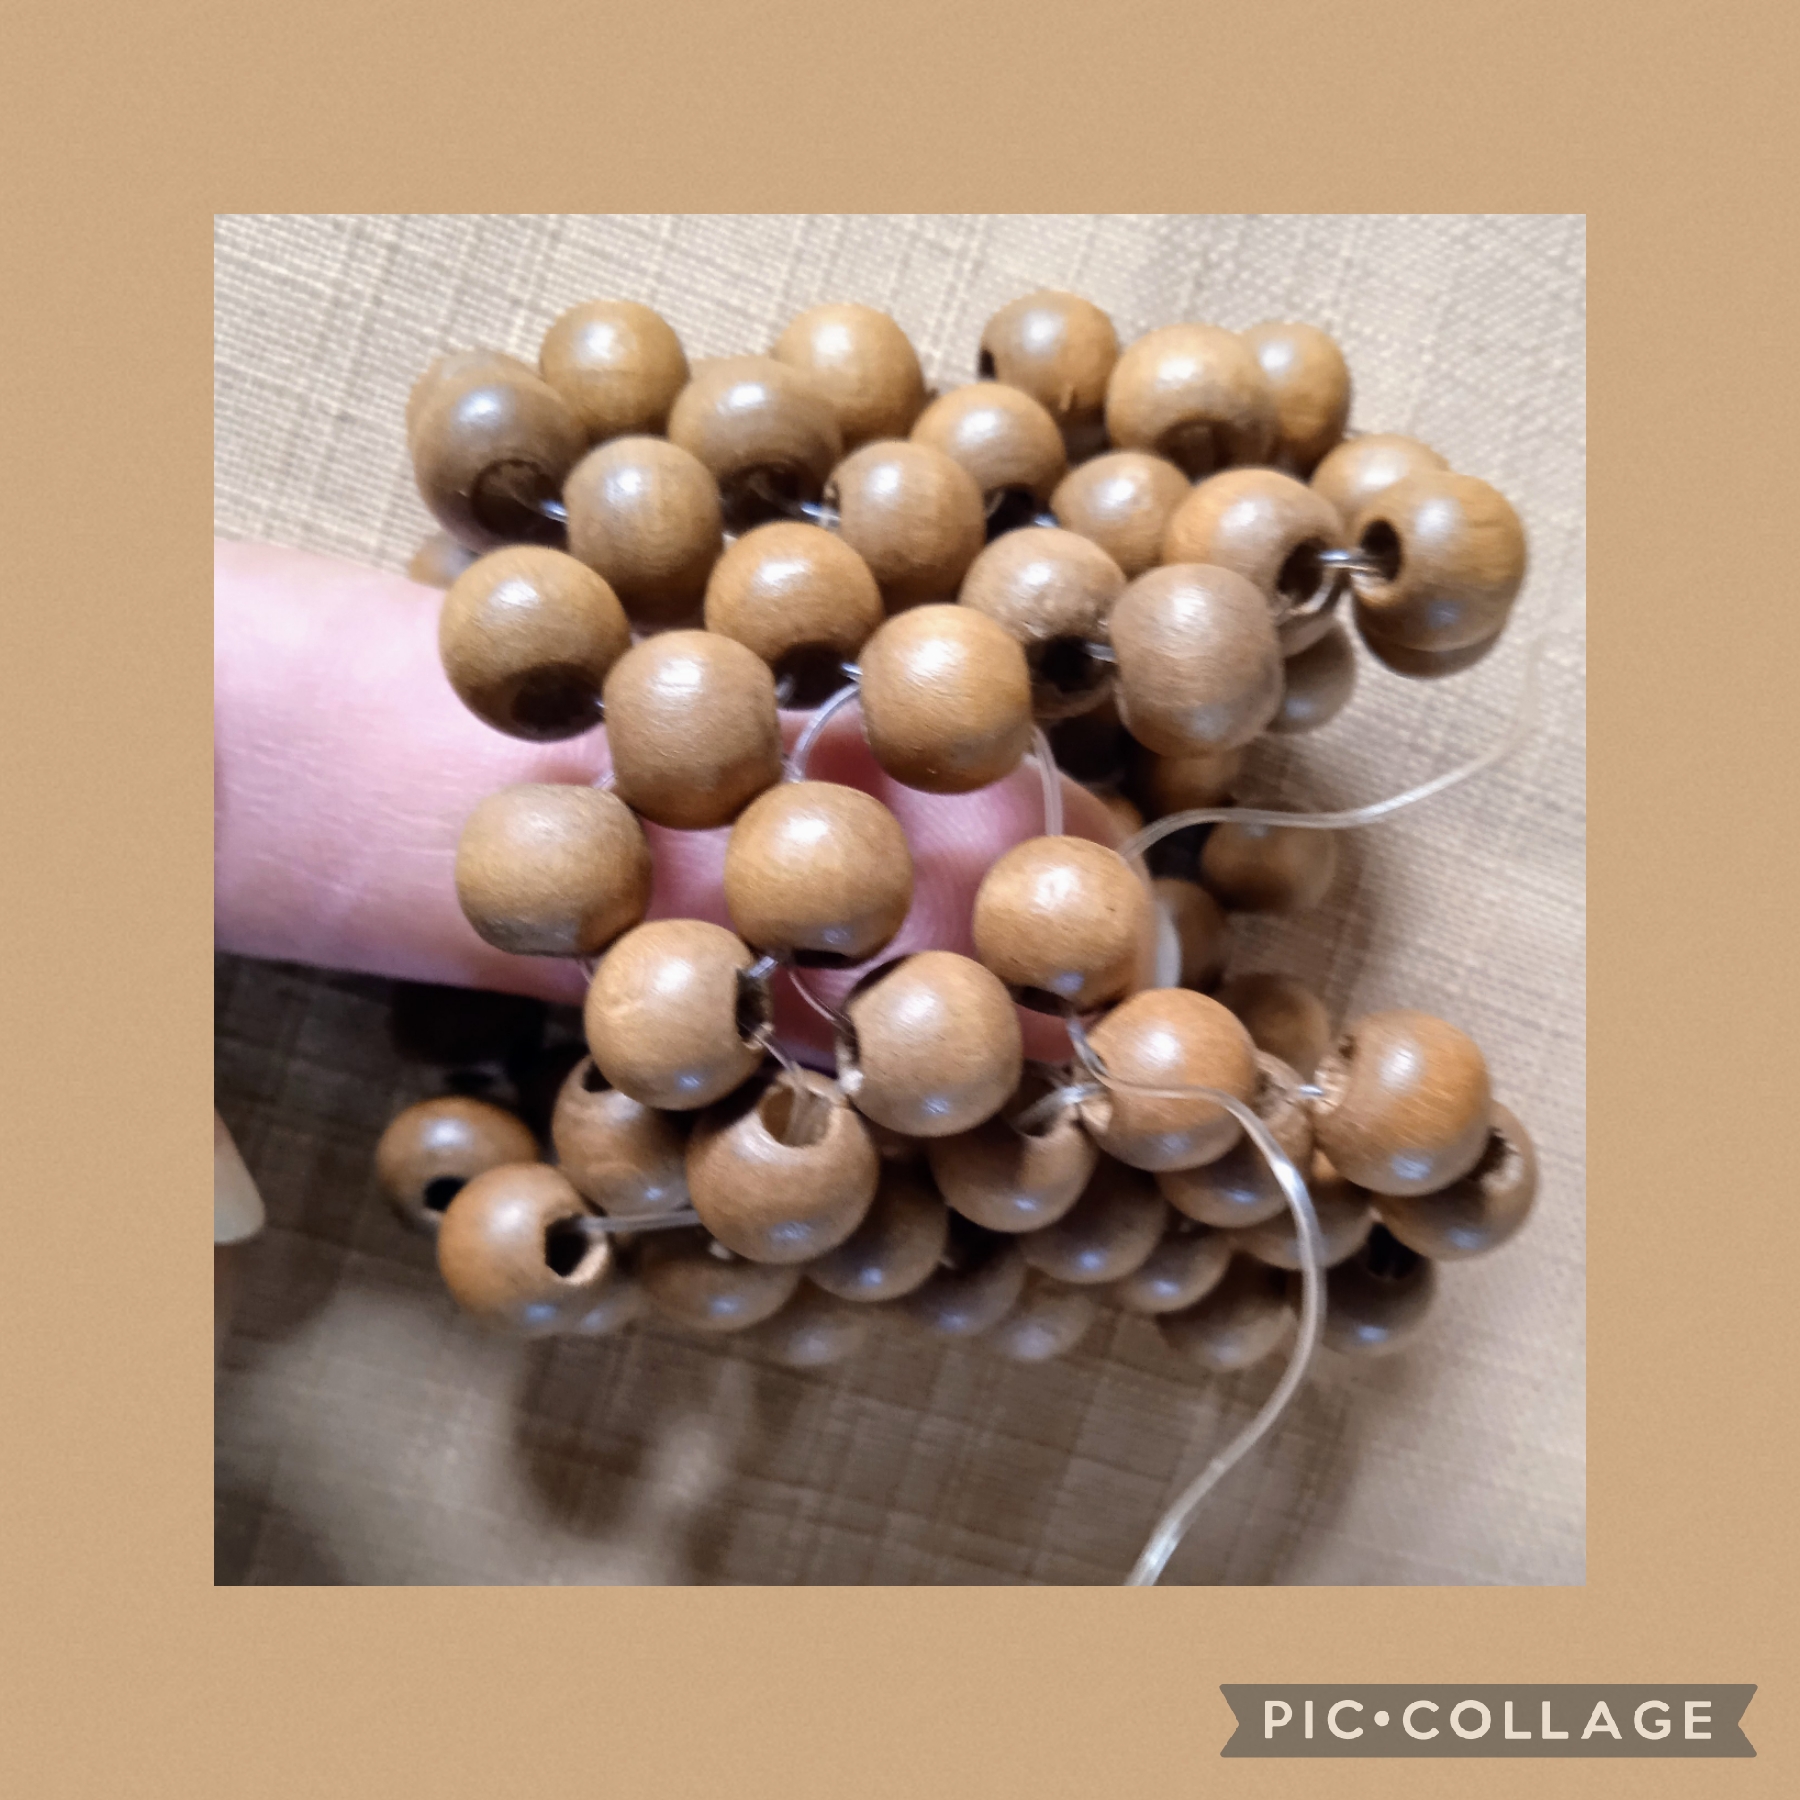
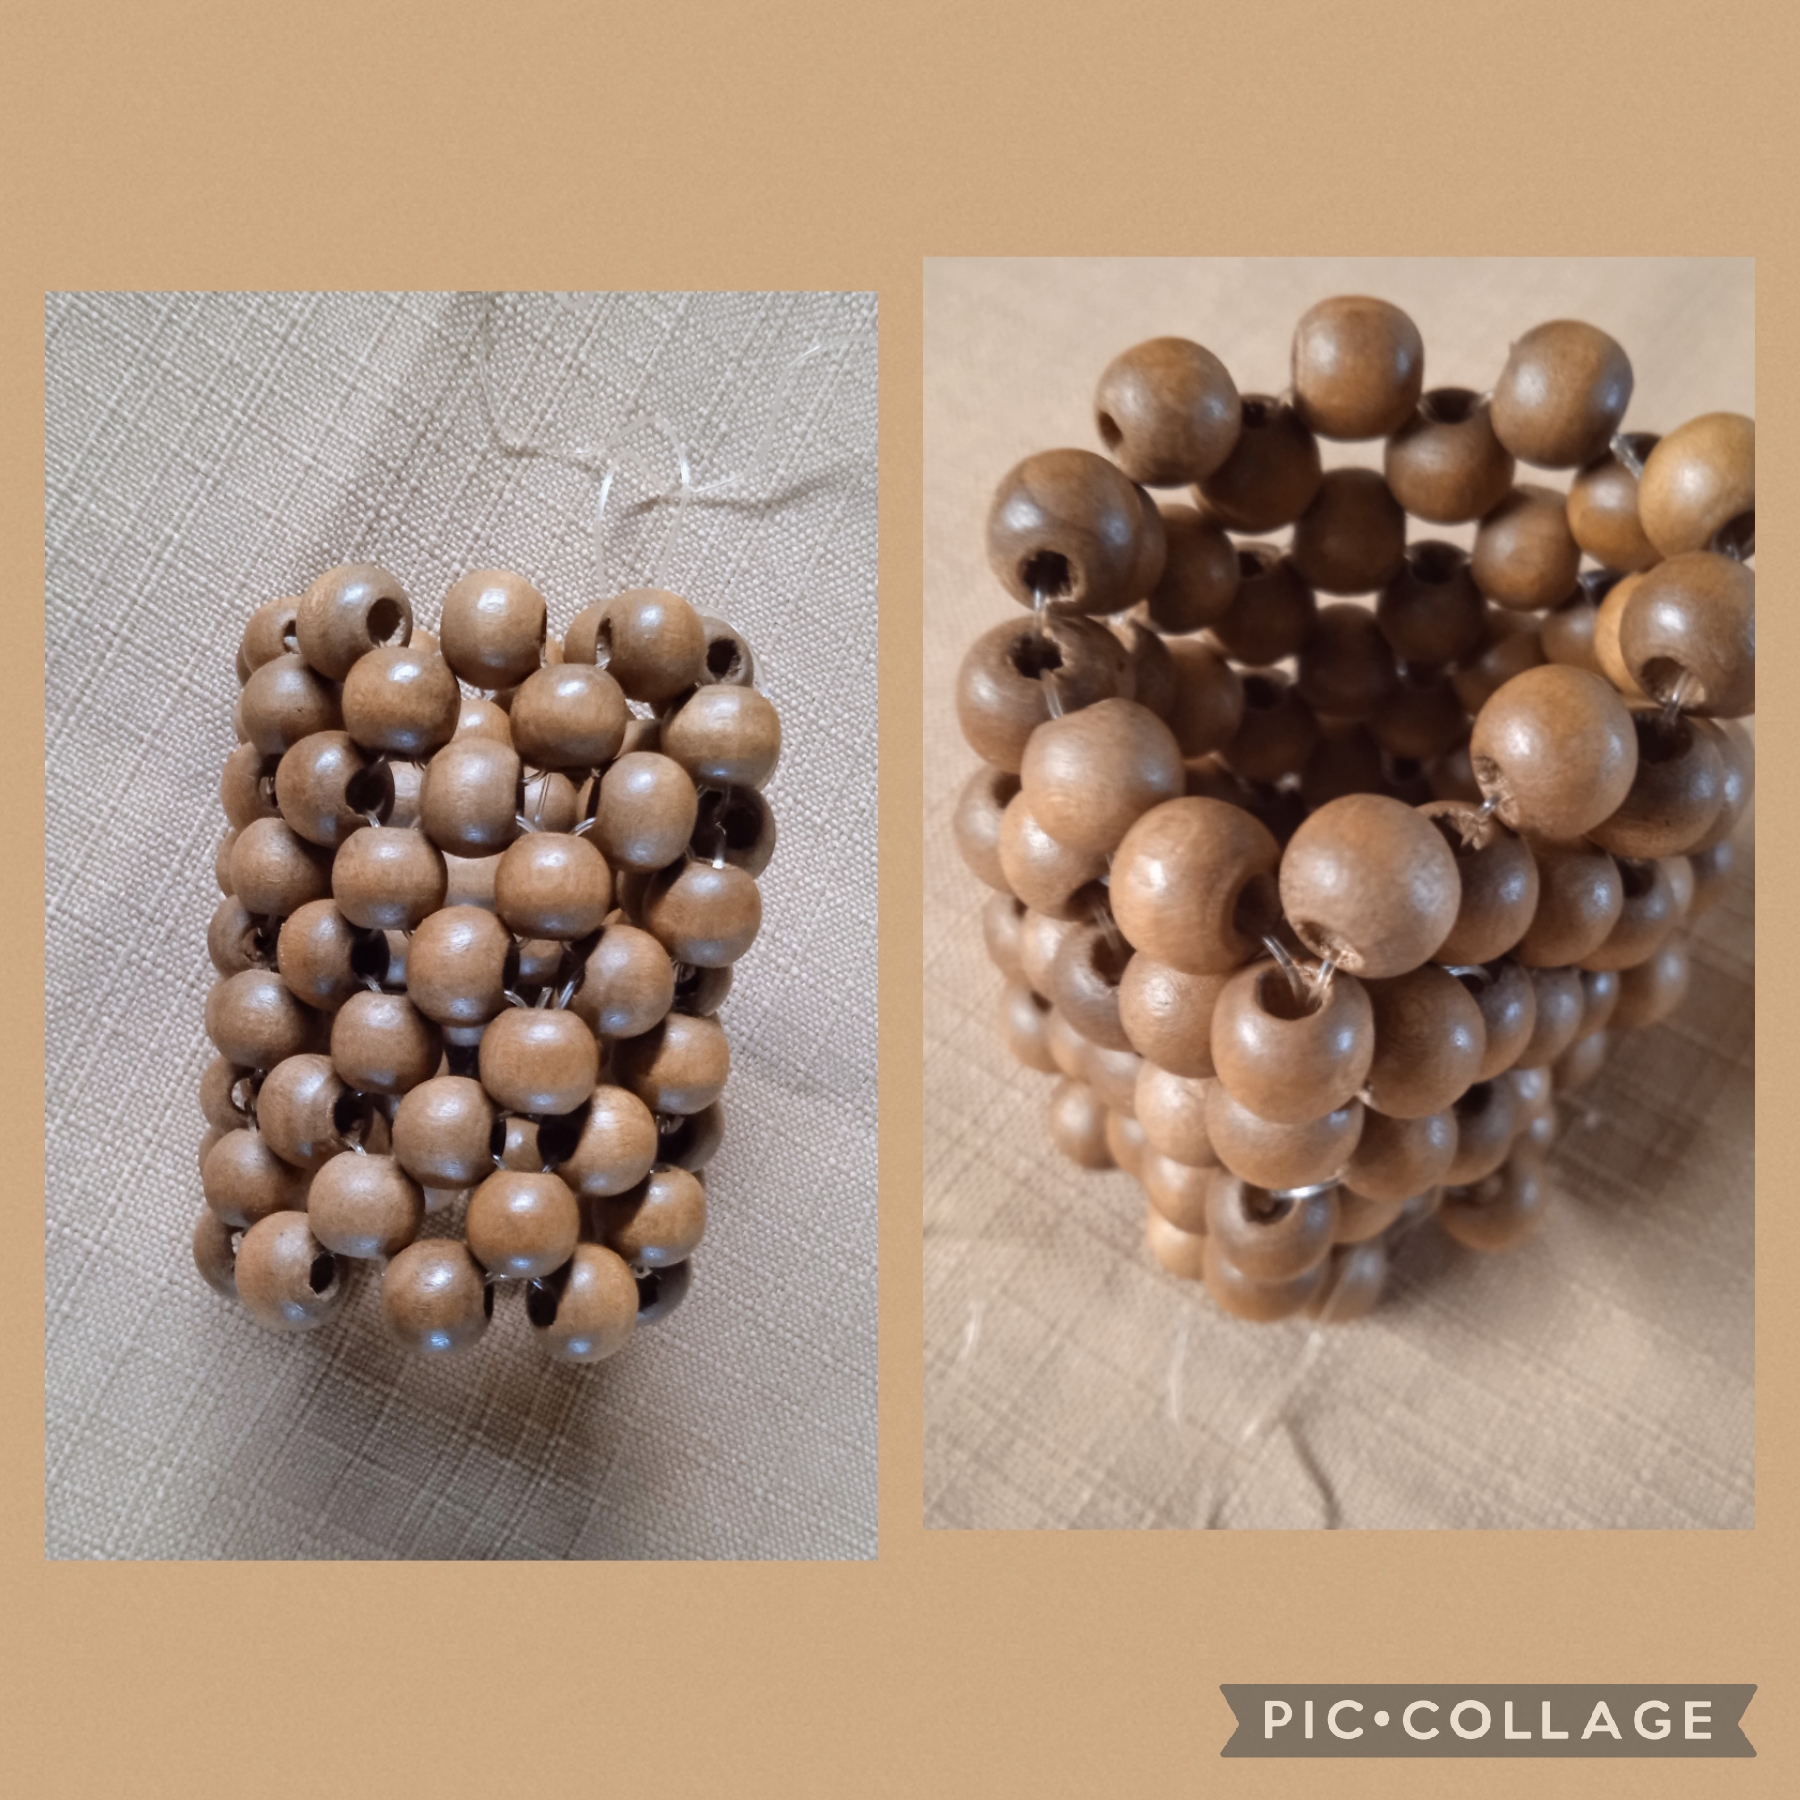
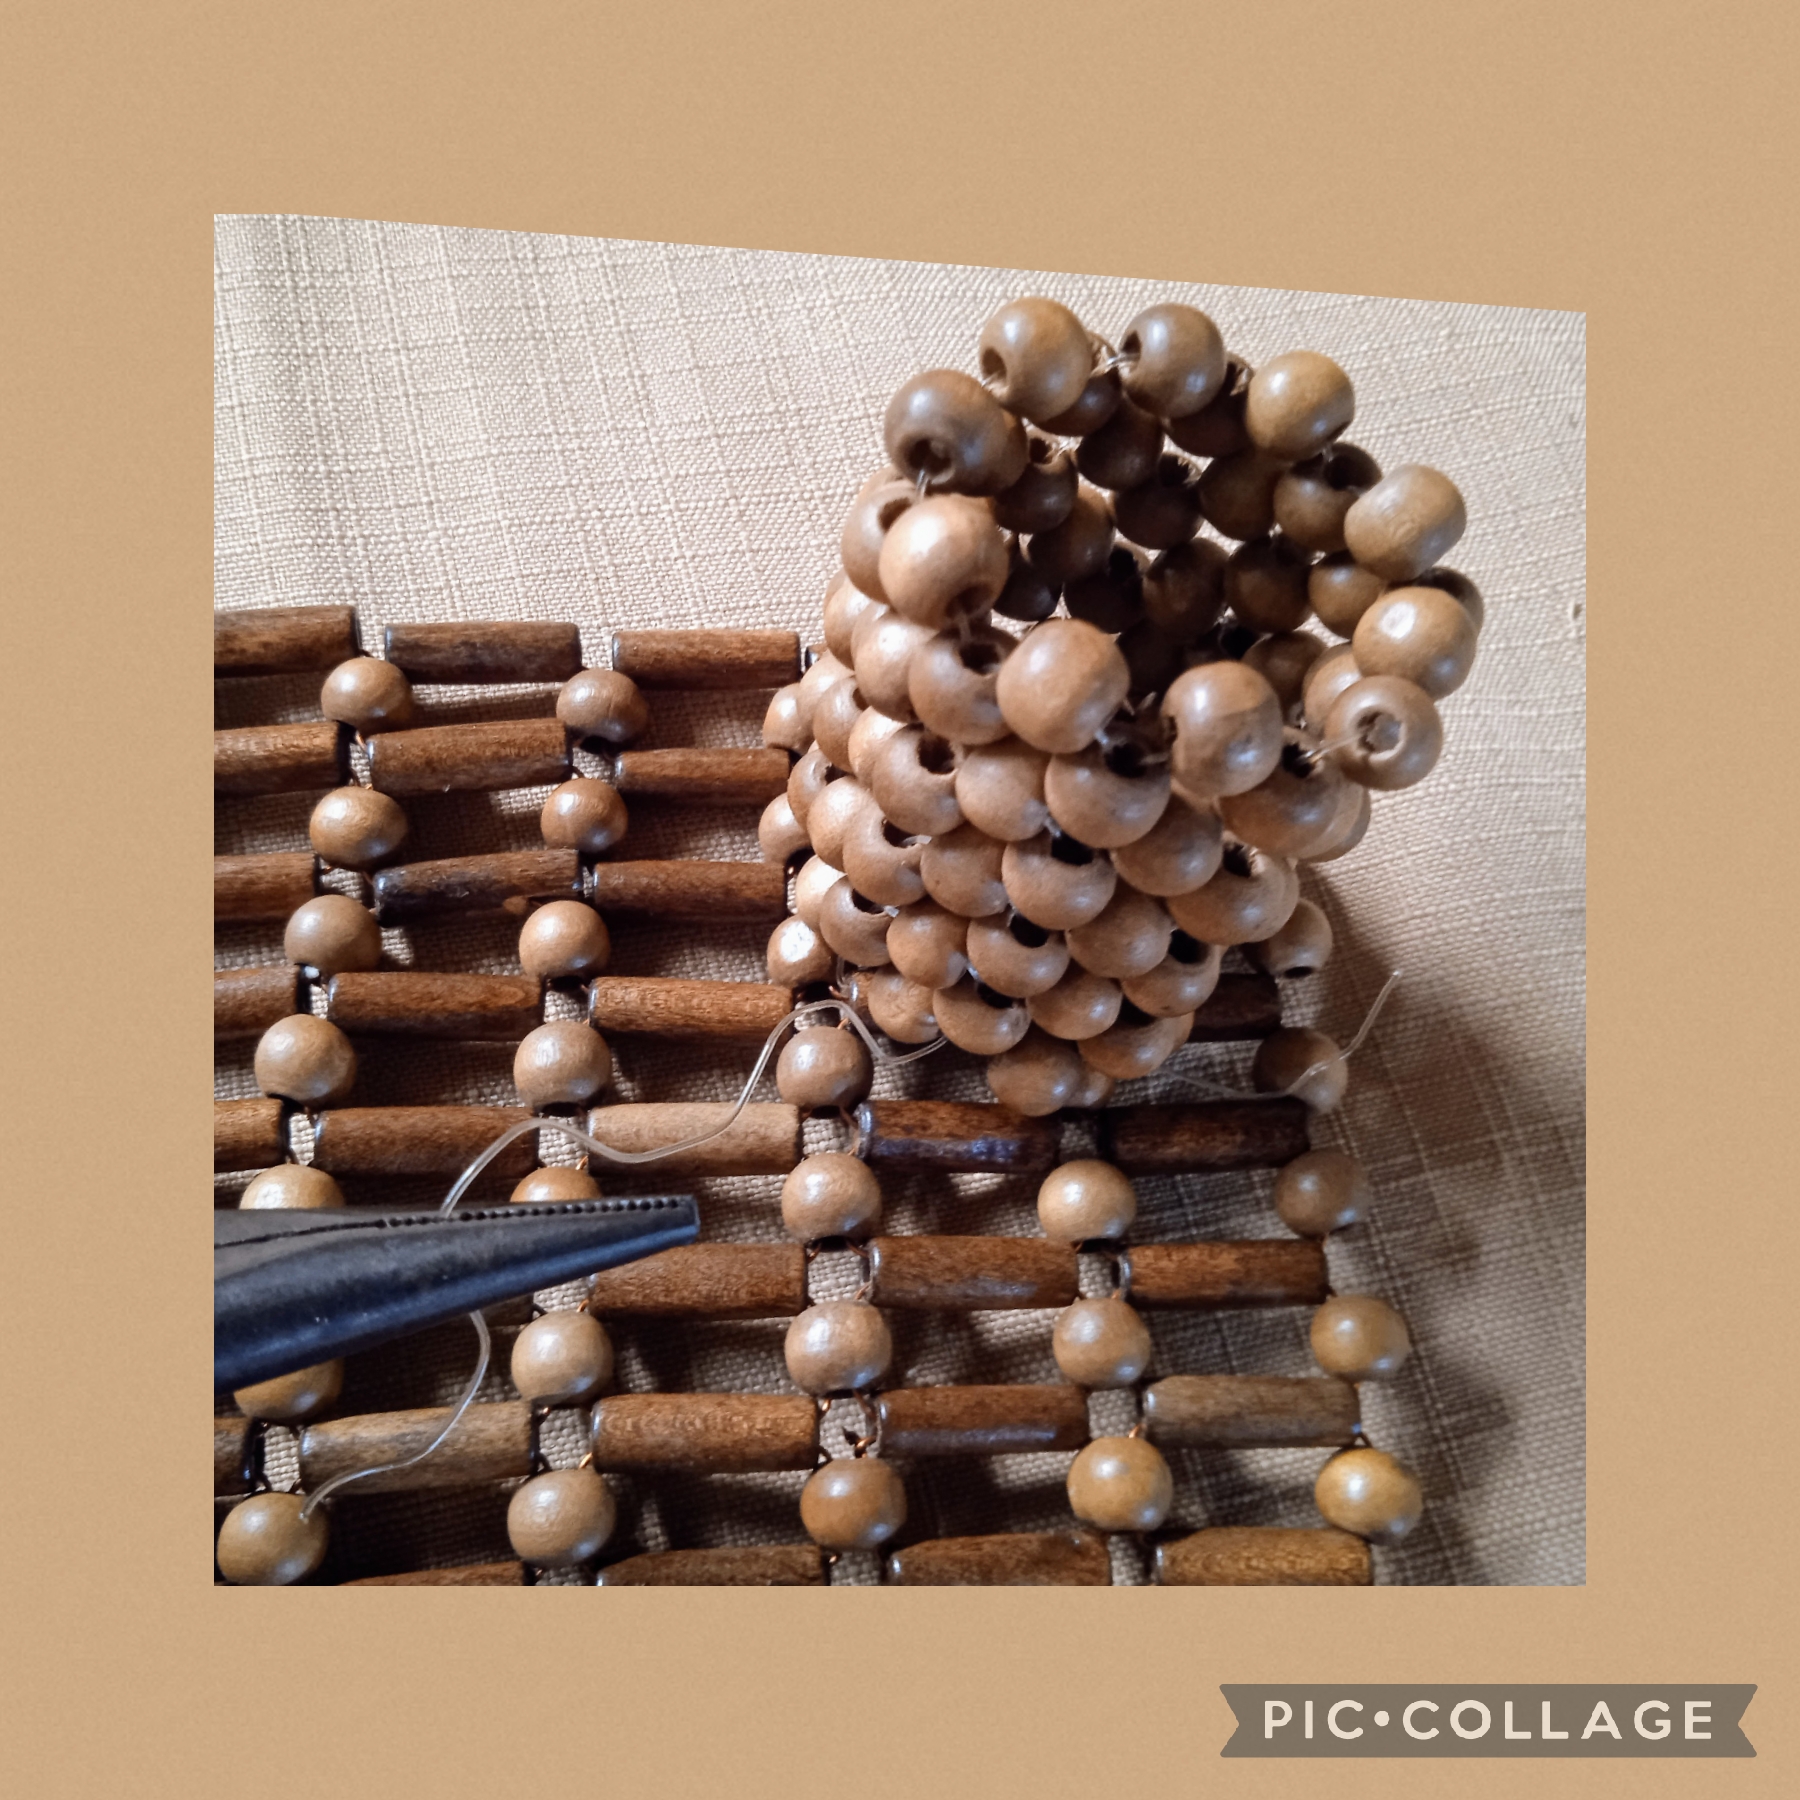
En un metro de hilo de naylon coloco cuatro cuentas redondas y cruzo por la última cuenta, formo módulo de cuatro en forma de una pequeña flor, así realizó doce módulos, y hago cuatro vueltas iguales, ahora uno los lados y cierro para formar un cilindro, como se ve en la imagen.
STEP THREE
I am going to create the storage room where I can place the pencils, pens, markers, etc.
Here I use nylon thread to join the beads and give it a cylindrical shape that is not so rigid.
In one meter of nylon thread I place four round beads and cross the last bead, I form a module of four in the shape of a small flower, thus I made twelve modules, and I make four equal turns, now I join the sides and close to form a cylinder , As seen in the image.
PASO CUATRO:
Ahora realizaré un módulo donde se puede colocar papel para notas, 📎 clips etc. De nuevo uso alambre de cobre 26" y hago tres vueltas de ocho flores de cuatro pétalos, cada una, dejo dos para la base y tres para cada lado como en la imágen.
STEP FOUR:
Now I will make a module where you can place paper for notes, 📎 clips, etc. Again I use 26" copper wire and make three turns of eight flowers with four petals, each, leaving two for the base and three for each side as in the image.
PASO CINCO:
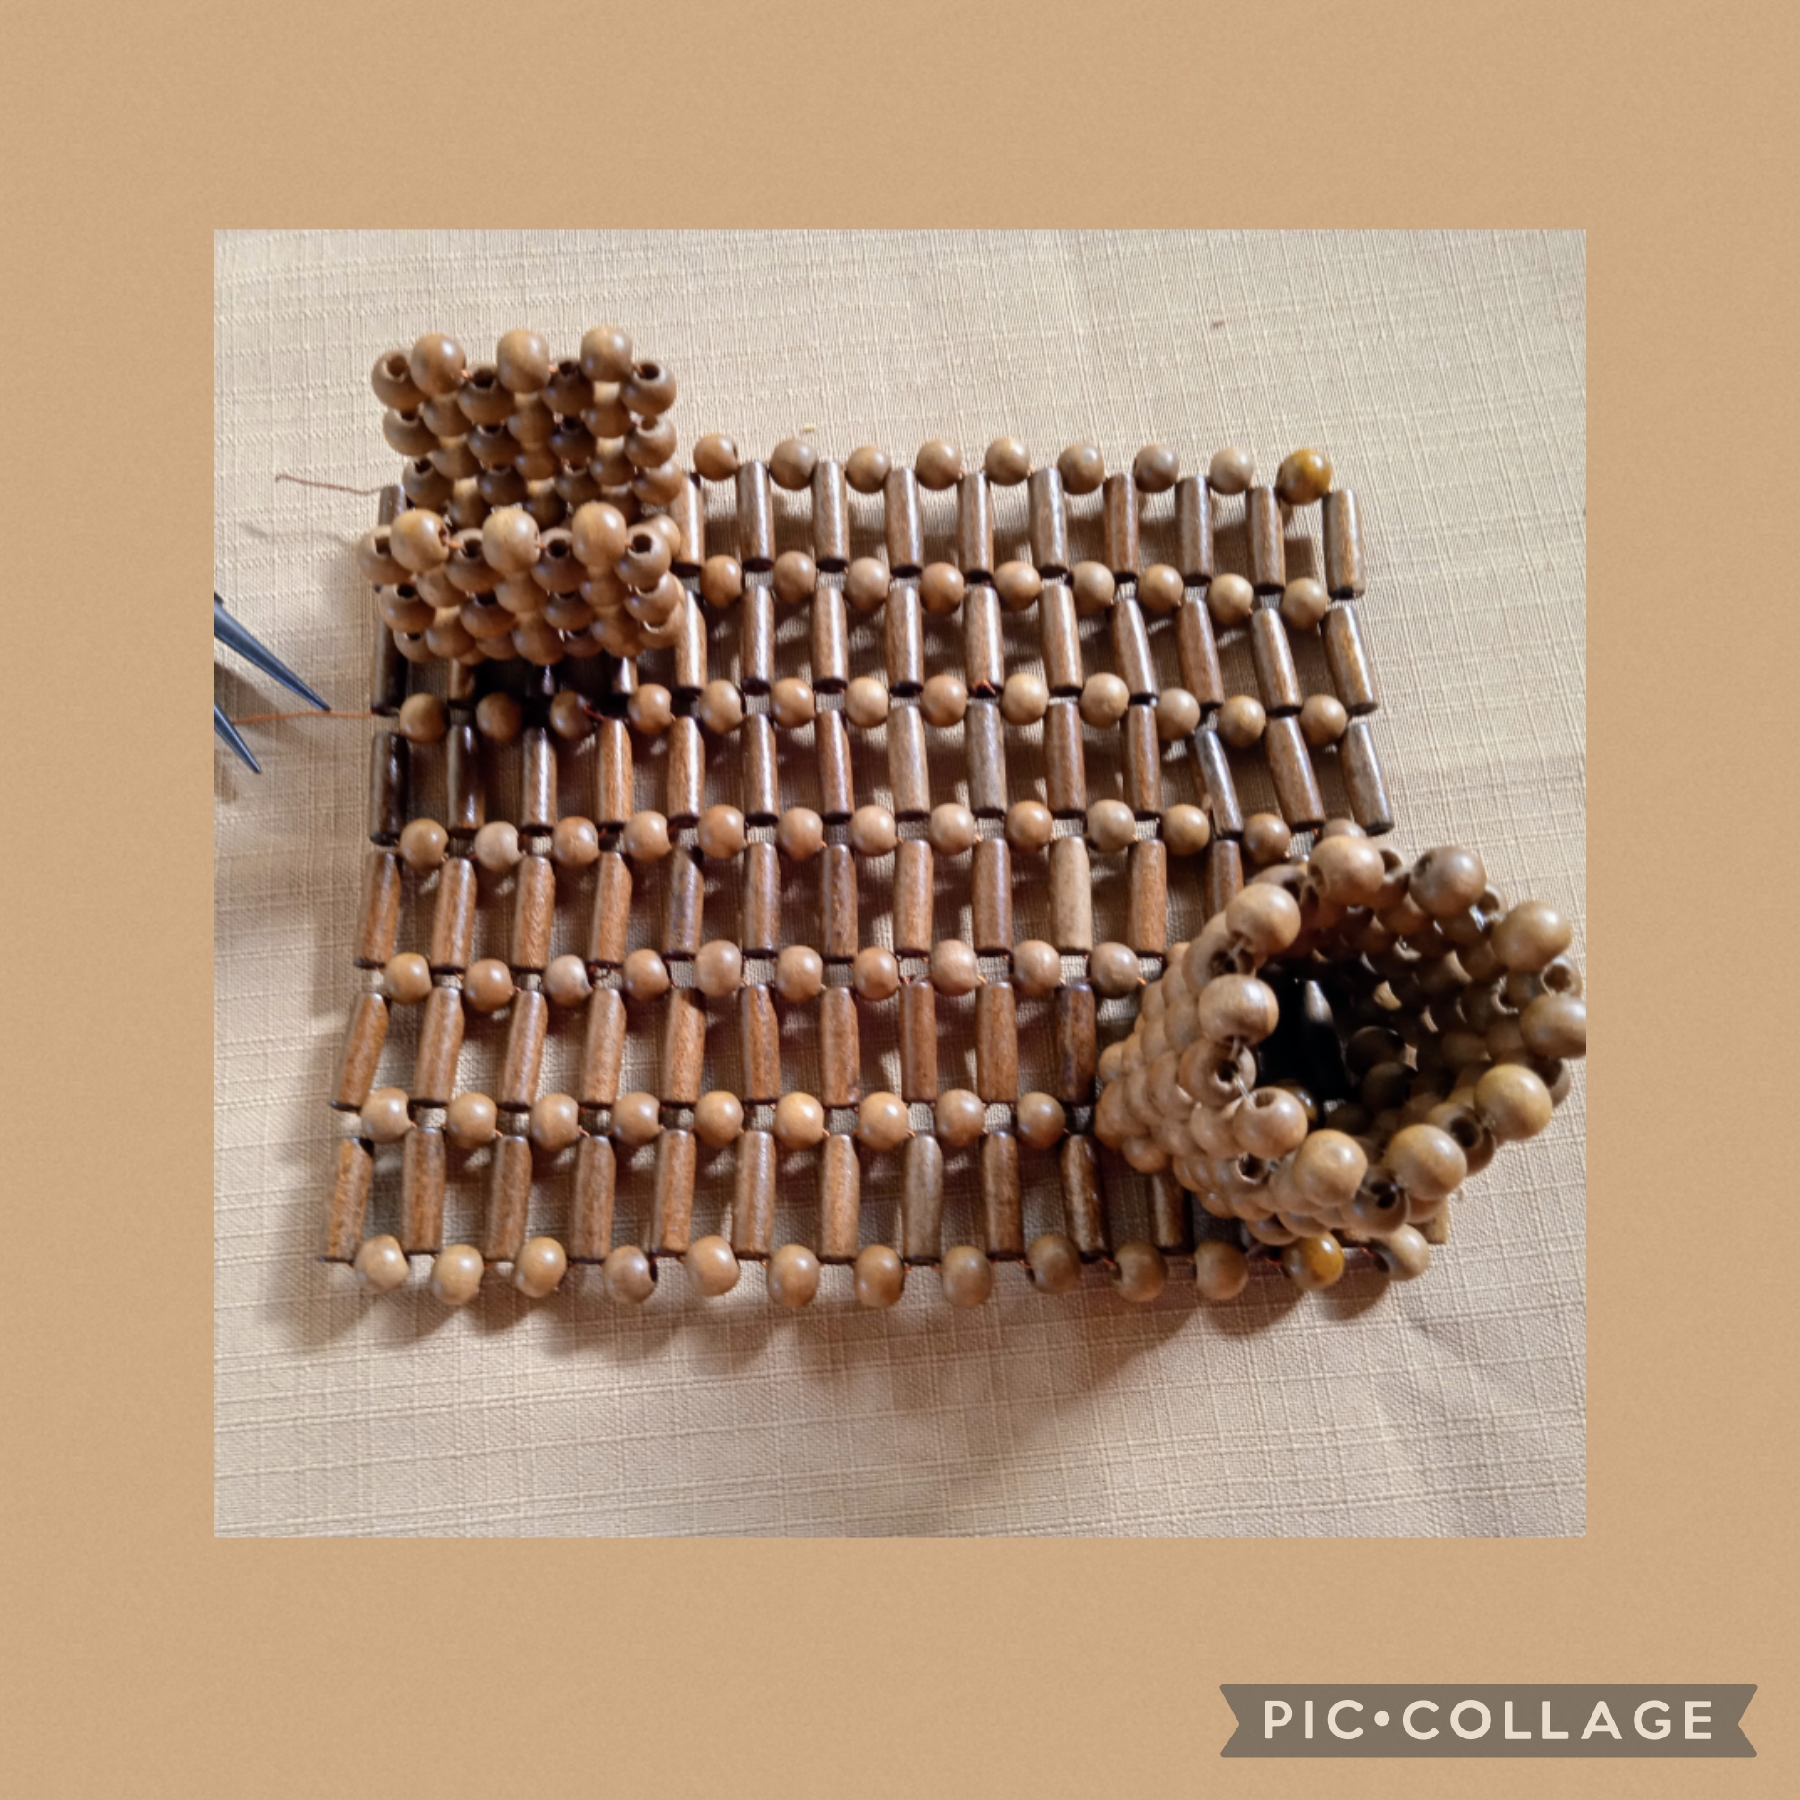
Ya para finalizar uno las tres fases de mi proyecto en la esquina superior coloco el cilindro y lo fijo con el naylon pasándolo por las cuentas de la base ajusto bien y con la pinza corto los excedentes, lo mismo hago con el depósito para papel o clips este lo coloco en la esquina inferior y así queda muestro la imagen.
STEP FIVE:
To finish the three phases of my project, in the upper corner I place the cylinder and fix it with the nylon, passing it through the beads on the base, I adjust well and with the clamp I cut off the excess, I do the same with the container for paper or clips I place this in the lower corner and this is how I show the image.
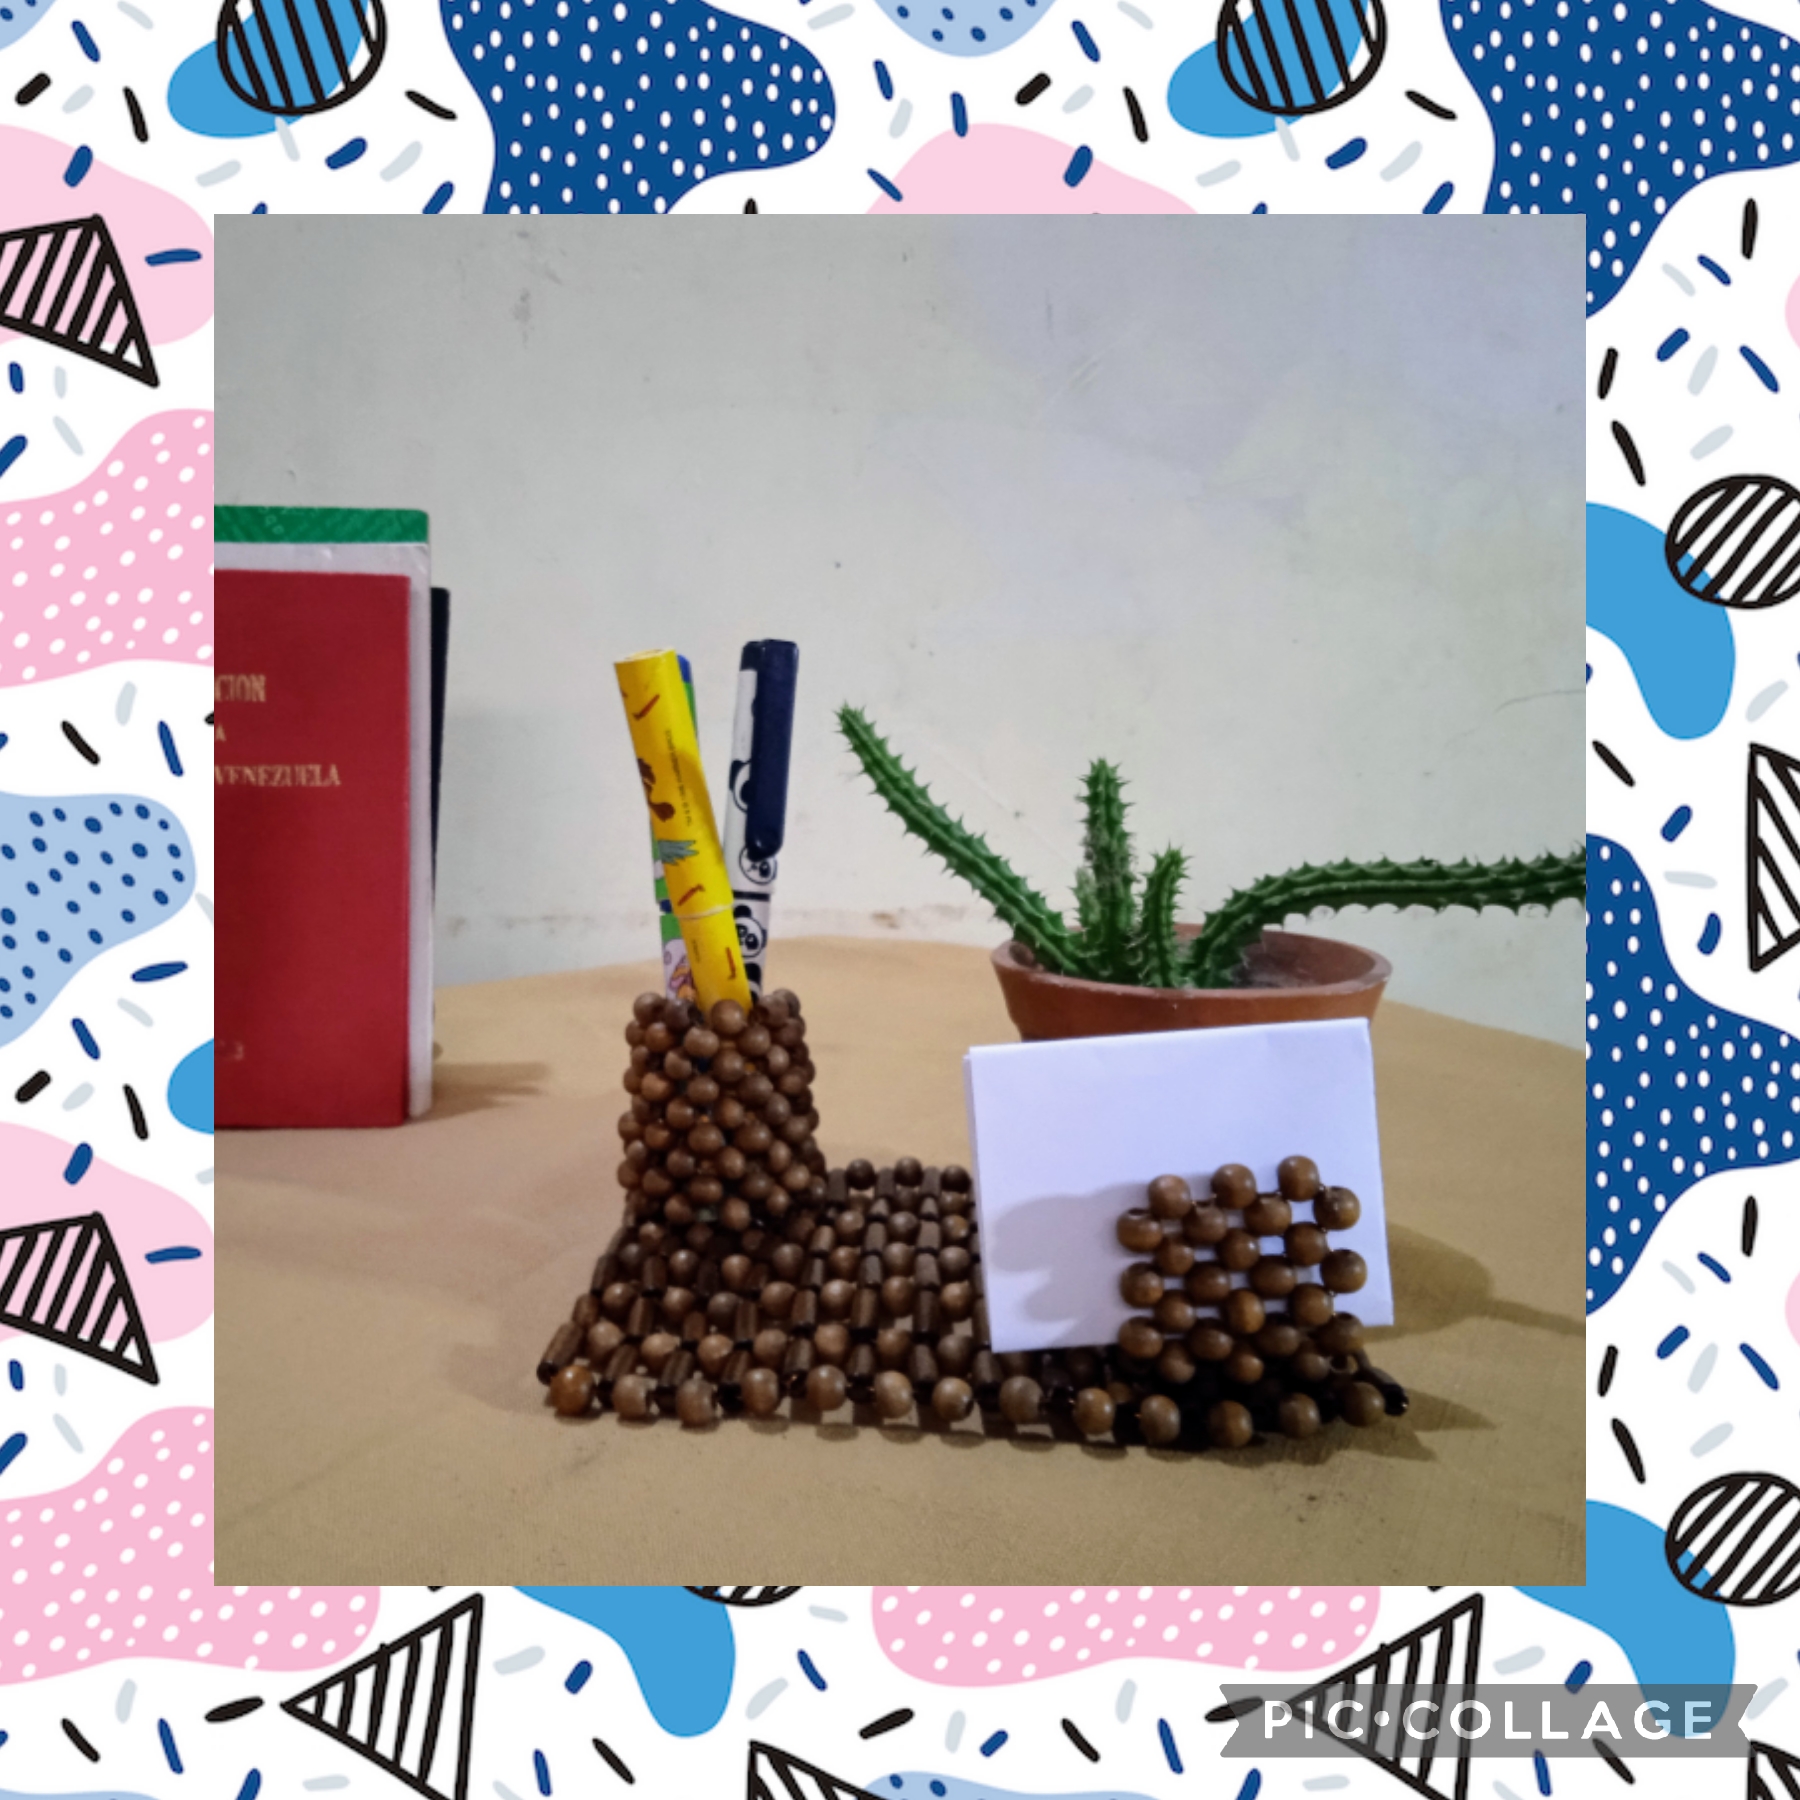
Artesanos Creadores, este es el resultado final de mi manualidad, espero que les guste y me dejen sus valiosos comentarios, gracias por leerme y apoyar mis publicaciones, nos vemos en la próxima manualidad, bye bye.
Artisans Creators, this is the final result of my craft, I hope you like it and leave me your valuable comments, thank you for reading me and supporting my publications, see you in the next craft, bye bye.
Las imágenes y redacción de este tutorial son de mi propiedad, las fotos fueron tomadas con mi teléfono celular redmi 9 y las edité con una aplicación gratis del mismo.
Para traducir texto use Google traductor.
The images and writing in this tutorial are my property, the photos were taken with my Redmi 9 cell phone and I edited them with a free application.
To translate text use Google translator.

aha interesting, that looks cool thanks for sharing.
Wow ! it looks so nice.
!DIY
You can query your personal balance by
!DIYSTATSMuchísimas gracias ese apoyo tan valioso me honra y conmueve.
De nada querido amigo
Hola amiga @nhaydu 👋 gusto en saludarte. Este organizador está hermoso. De lujo. Las cuentas de maderas son muy bonitas. Me encantó.
El gusto es mío @creacioneslelys, me da mucha alegría saber que te gustó, para mí también las cuentas de madera son un lujo me parecen fascinantes, agradecida con tu visita y comentario halagador. 🌹
Good job! The beads look very pretty in its finishing!
Agradecida por la visita a mi blog y dejar tan valioso comentario, saluditos @judas9.
Interesante y muy creativo! eso me da un par de ideas!
El toque personal que le damos a esas ideas son las que llevan a crear hermosos contenidos: así que Aprovecharlas!!! 🤗