Tutorial: Elegant Brooch Made With Elephant Design 🐘,//[Esp-Eng]
Saluditos Artistas Creativos de las Manualidades y la Joyería mis mejores deseos para todos esperando que la gracia de Dios los bendiga y proteja para que la felicidad y bienestar reine en los hogares, solo faltan 50 días para terminar el año, y se ve bastante alegría, y entusiasmo navideño.
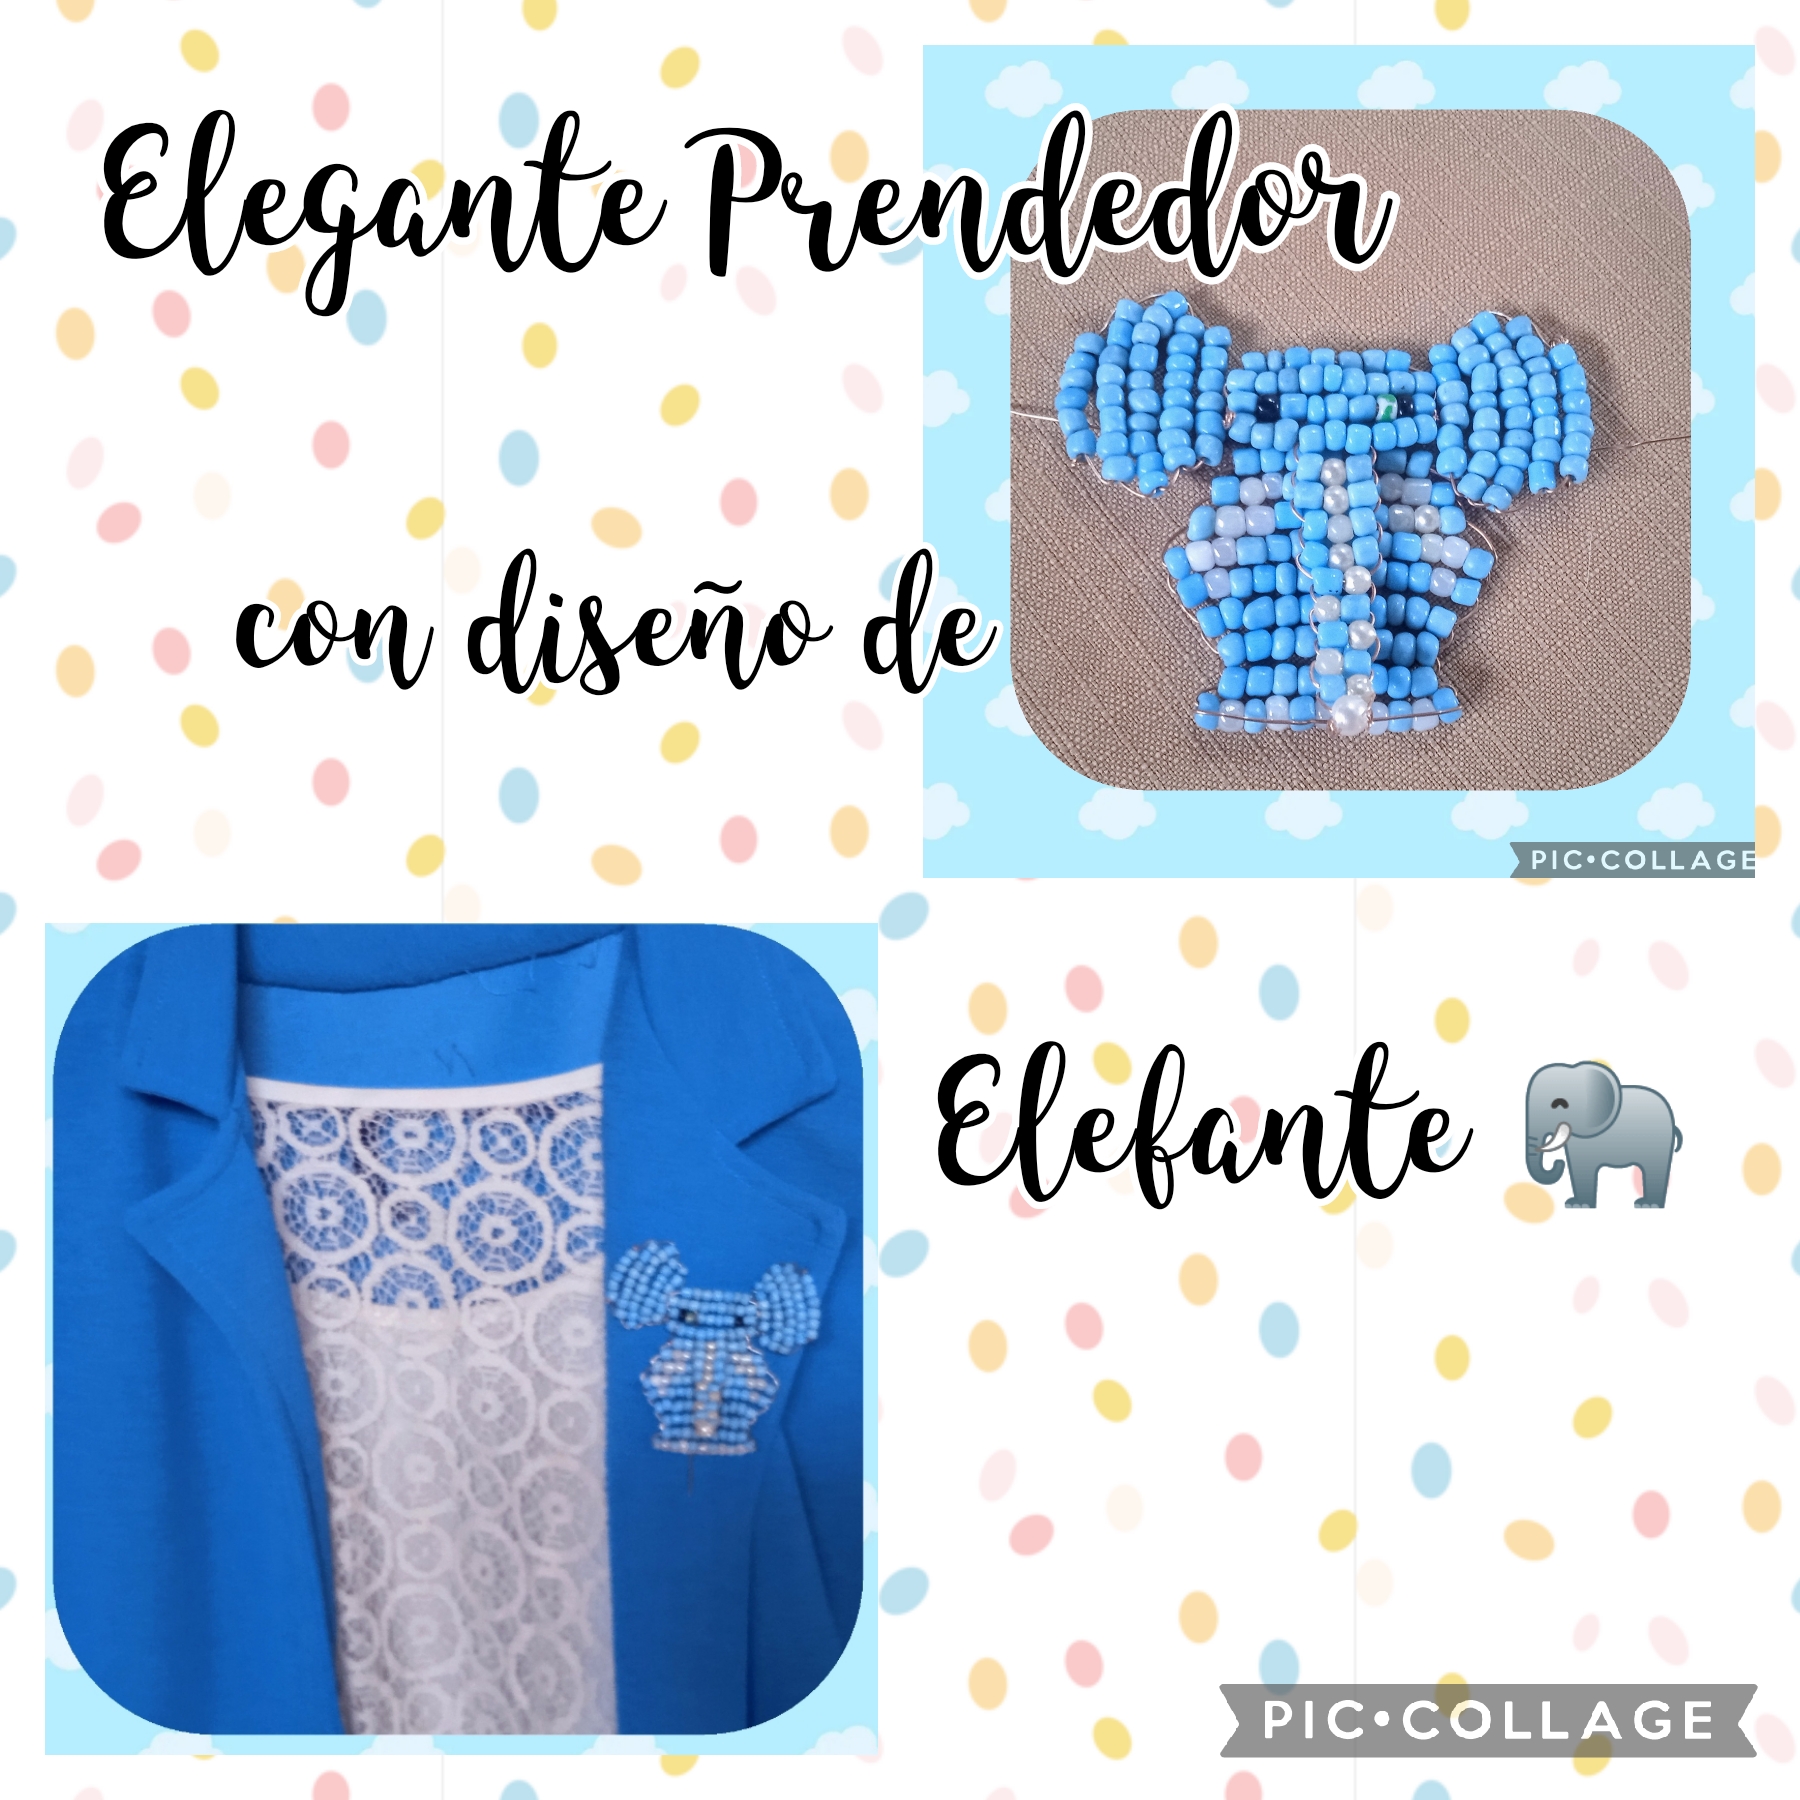
Hoy les compartiré como realicé un bonito Elefante 🐘 para convertirlo en un elegante Prendedor, y es que las creencias místicas de cada uno a veces se convierte en un mito y hay que respetarlas, una amiga sorprenderá a su madrina haciéndole ese regalo, porqué la señora es creyente del poder espiritual que irradian esos animales por su fuerza, majestuosidad, union, sabiduría, protectores del bien , impulsores del amor y bienestar familiar y muchos otros poderes que se le atribuyen como que atraen buena suerte y abundancia.
Para realizar el Elefante use mostacillones y la técnica del alambrismo.
Sigan leyendo para que vean como lo hice.
Greetings Creative Artists of Crafts and Jewelry, my best wishes to all, hoping that the grace of God blesses and protects you so that happiness and well-being reign in your homes. There are only 50 days left to finish the year, and there is a lot of joy and Christmas enthusiasm.
Today I will share with you how I made a beautiful Elephant 🐘 to turn it into an elegant Brooch, and the mystical beliefs of each one sometimes become a myth and they must be respected. A friend will surprise her godmother by giving her that gift, because the lady is a believer in the spiritual power that these animals radiate due to their strength, majesty, union, wisdom, protectors of good, promoters of love and family well-being and many other powers that are attributed to them, such as attracting good luck and abundance.
To make the Elephant, I used beads and the wire technique.
Keep reading to see how I did it.
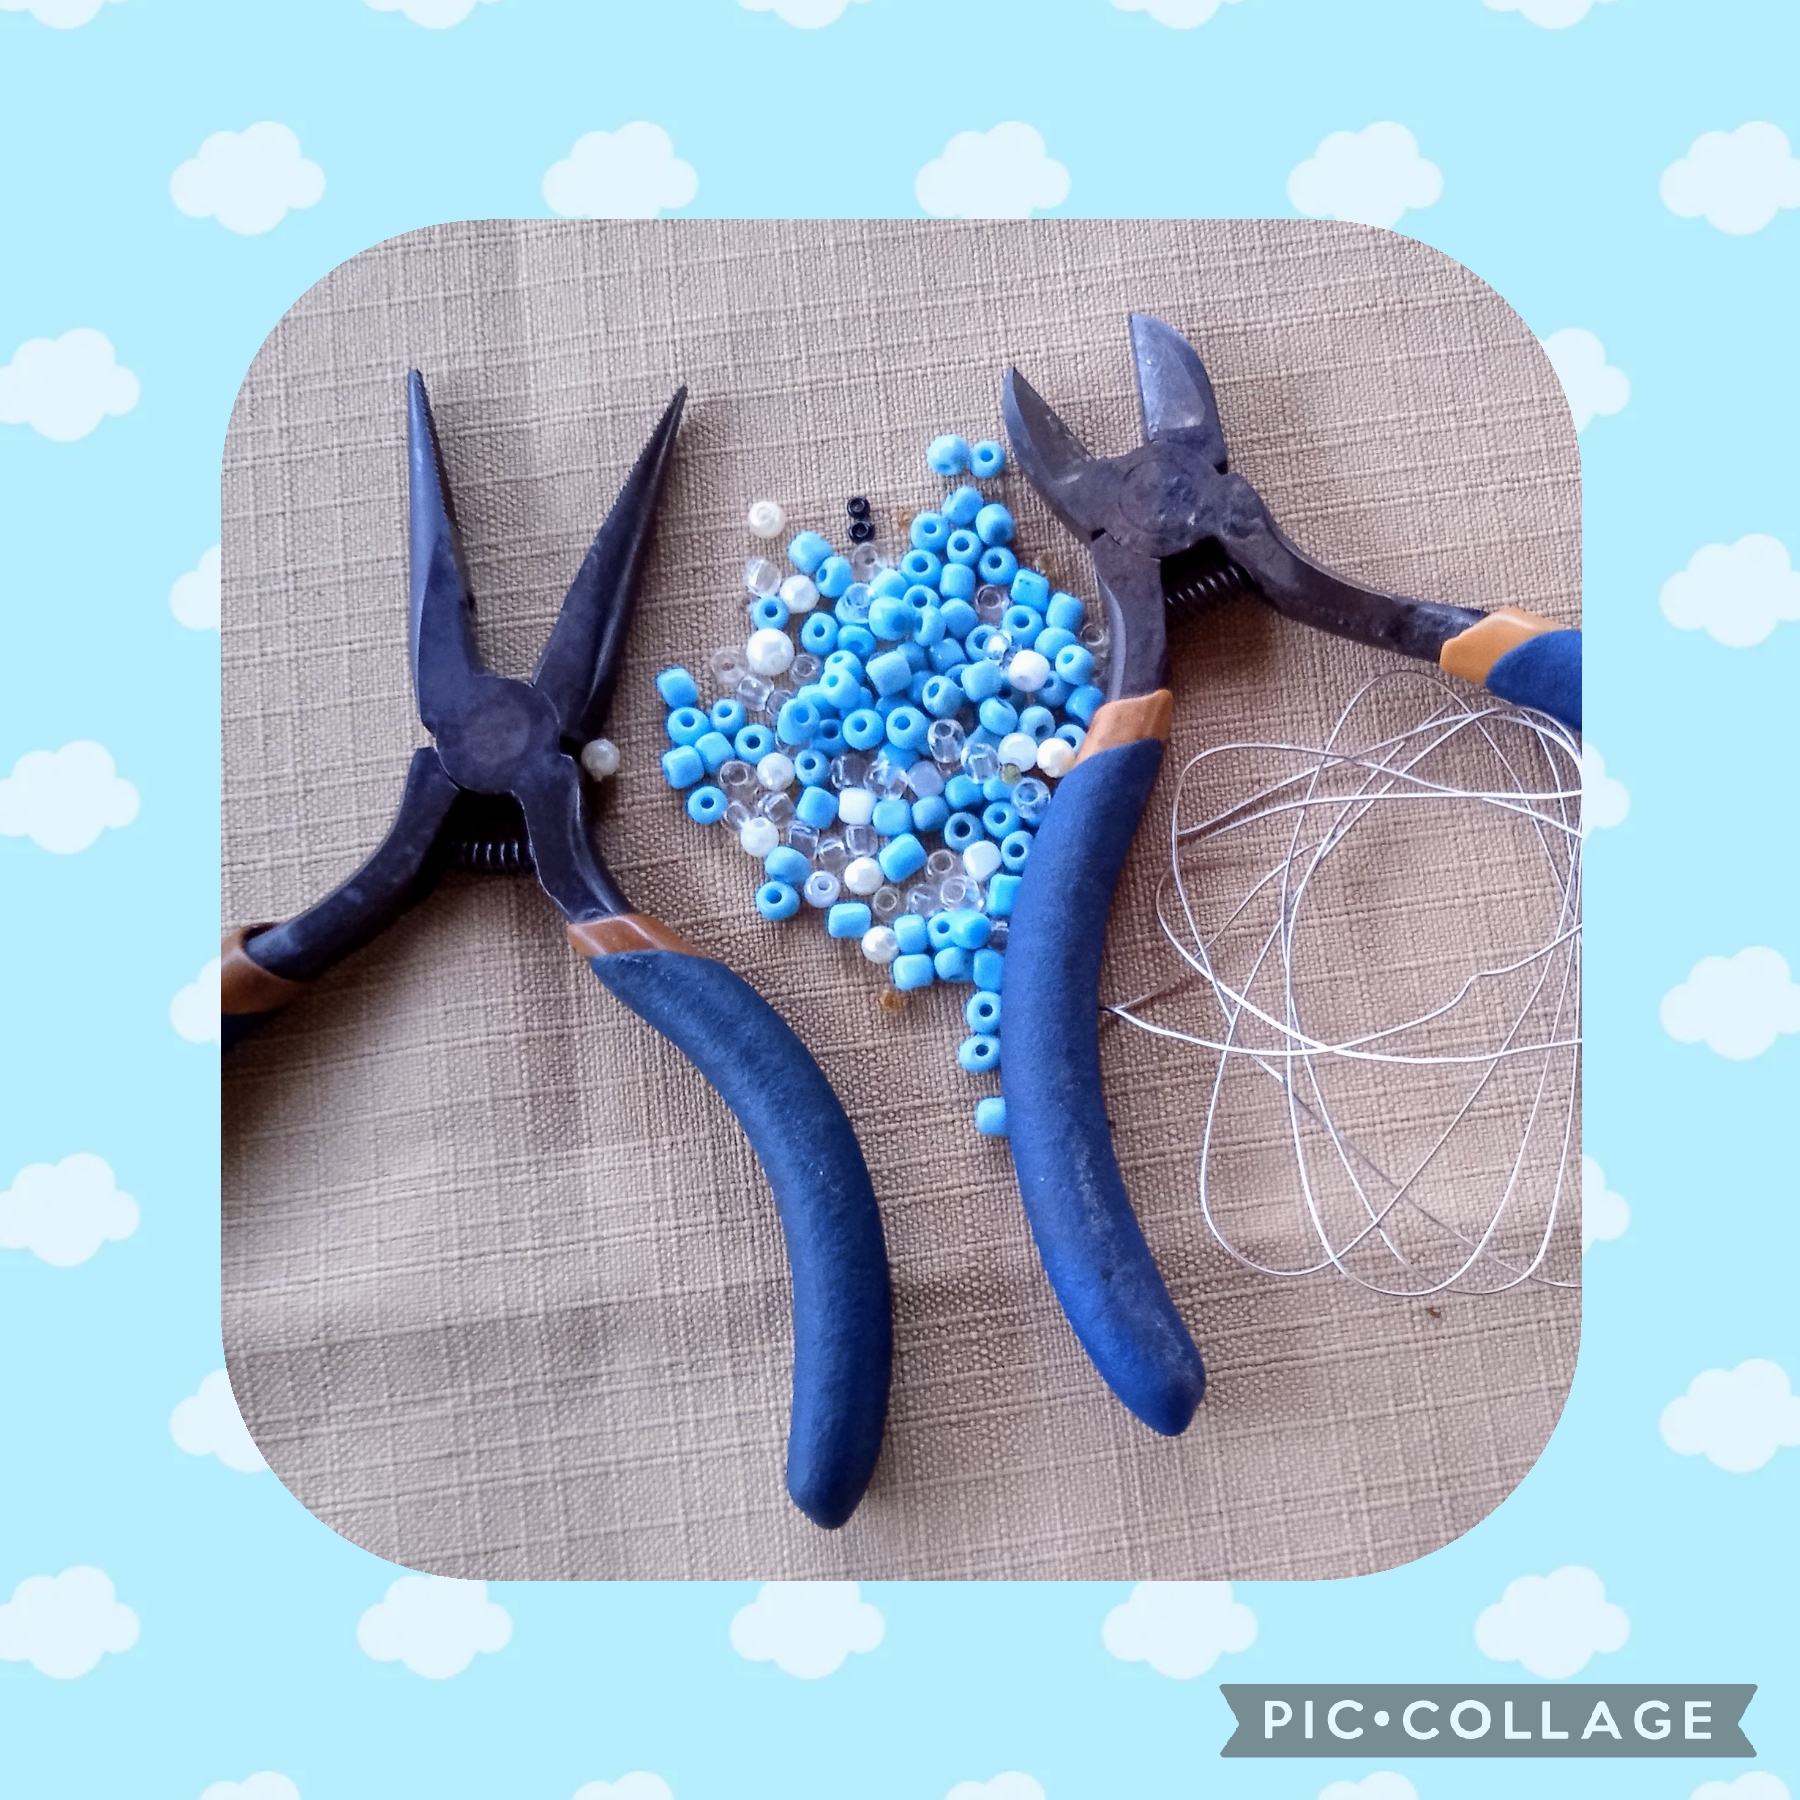
MATERIALES USADOS PARA LA ELABORACIÓN DEL PRENDEDOR:
✓ Mostacillones azul.
✓ Mostacillones blancos.
✓ Dos mostacillones negros.
✓ Alambre de cobre calibre 26 pulgadas.
✓ Pinza plana.
✓ Pinza punta redonda.
✓ Pinza de corte.
✓MATERIALS USED TO MAKE THE BROOCH:
✓ Blue seed beads.
✓ White seed beads.
✓ Two black seed beads.
✓ 26-inch gauge copper wire.
✓ Flat pliers.
✓ Round-tipped pliers.
✓ Cutting pliers.
PASOS PARA ELABORAR ESTE ELEGANTE PRENDEDOR.
PRIMER PASO:
Comienzo con la elaboración del Elefante 🐘 que será el diseño del Prendedor:
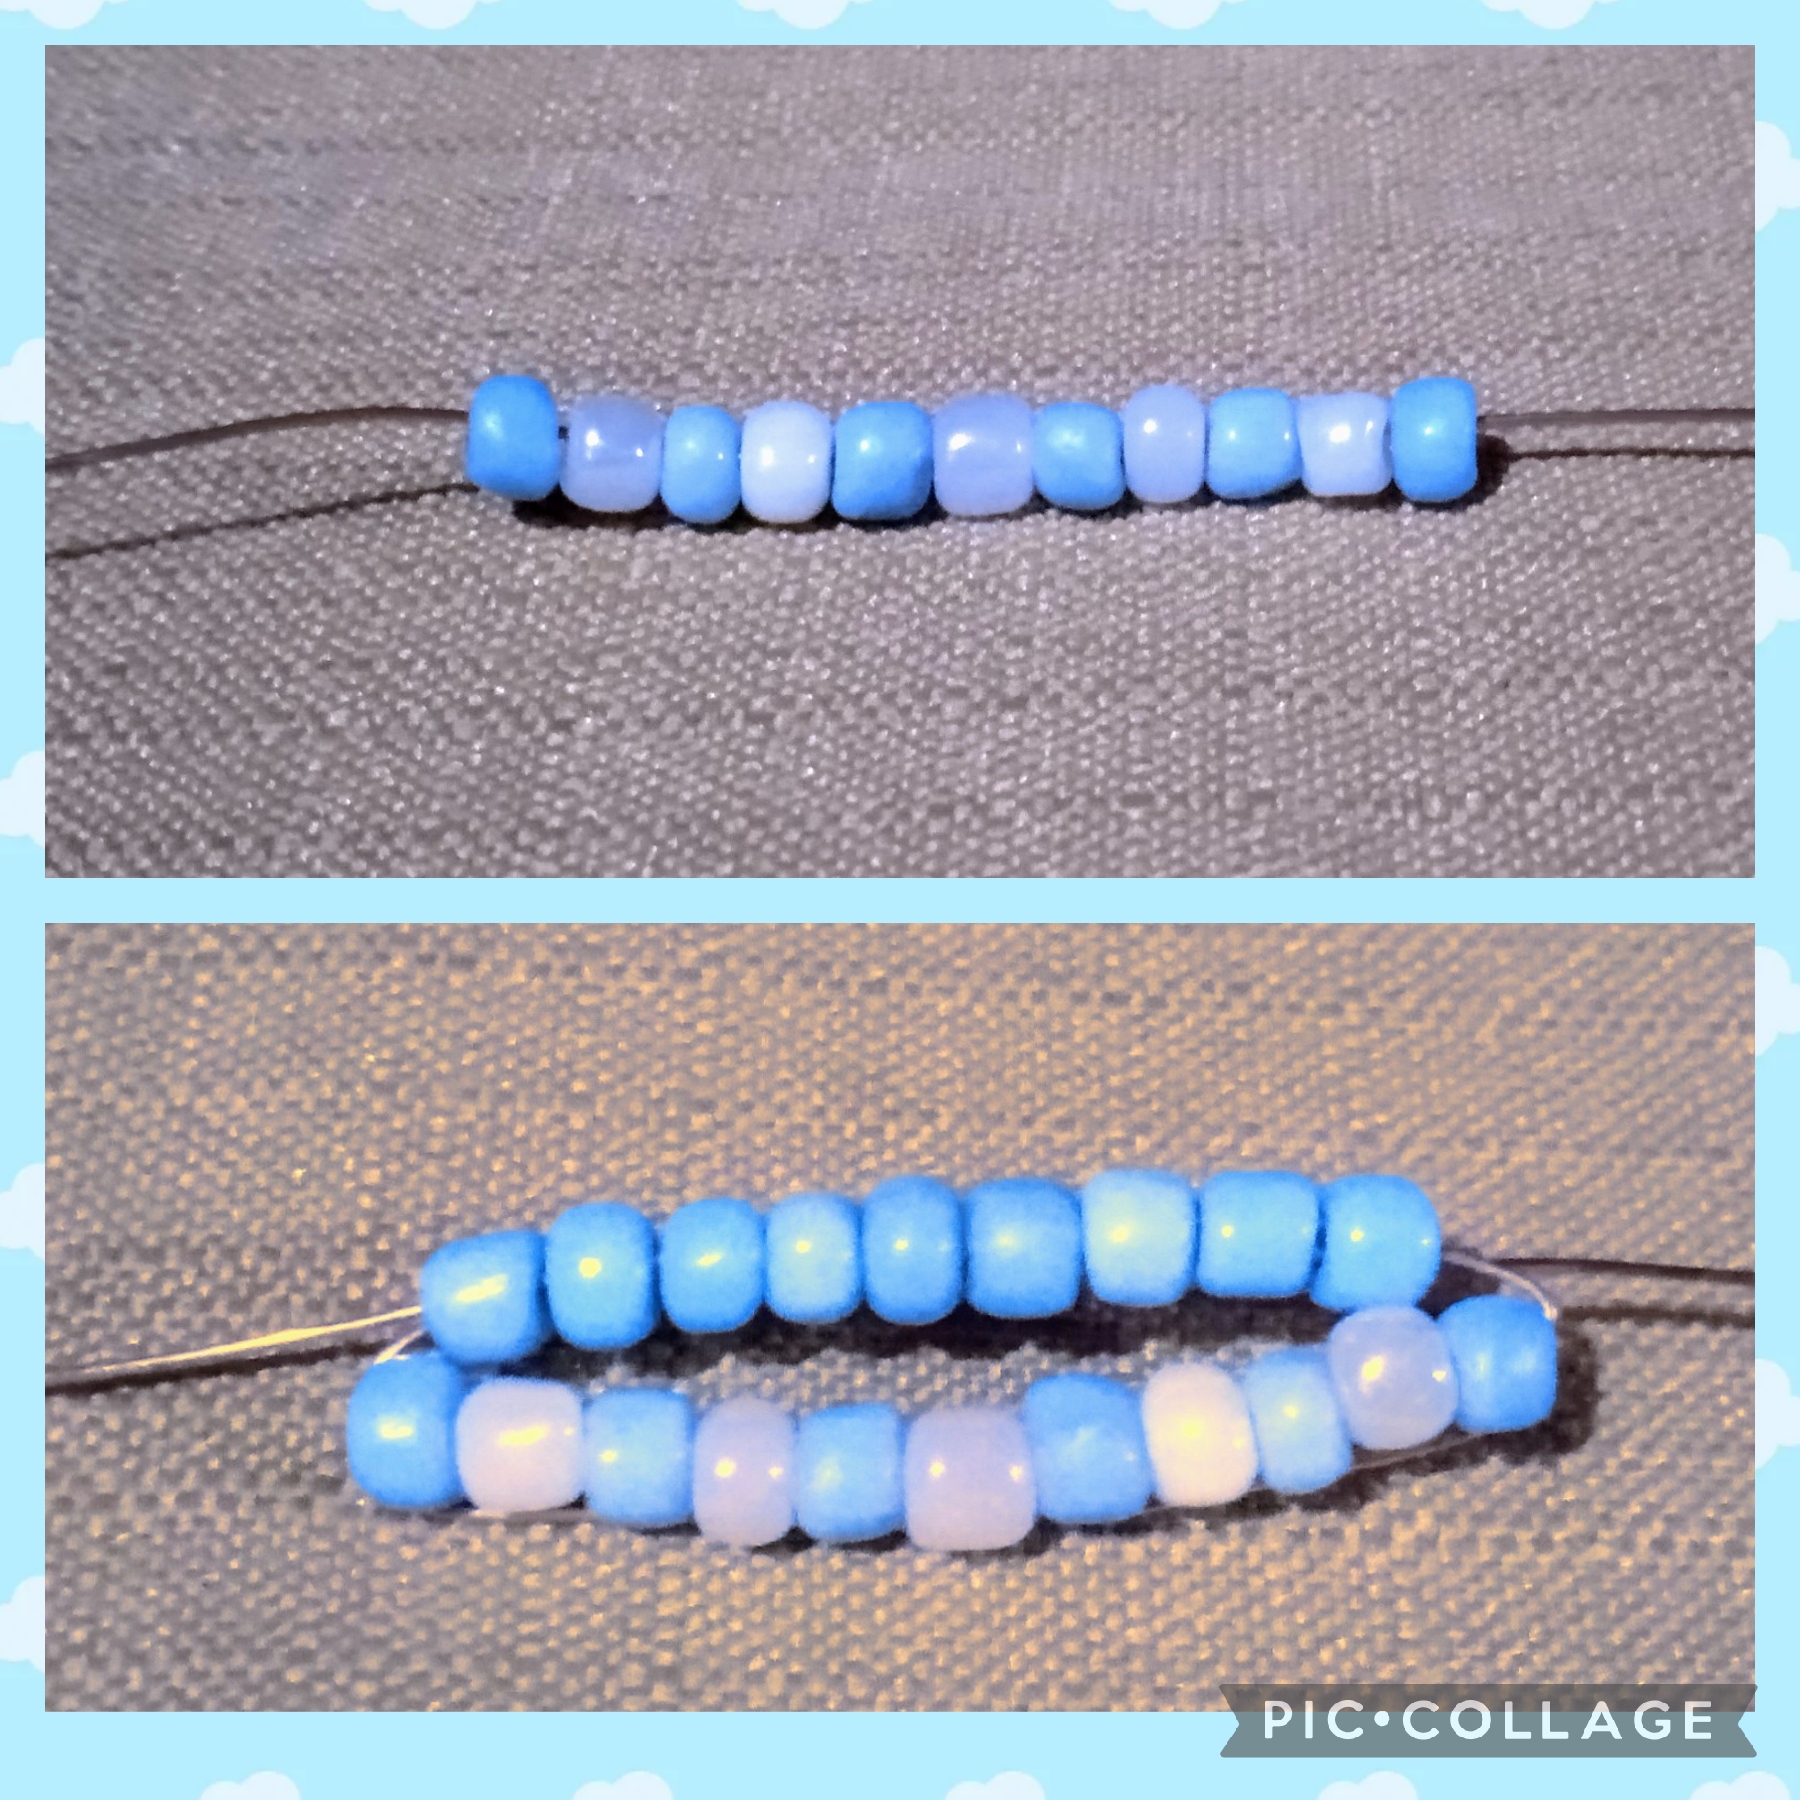
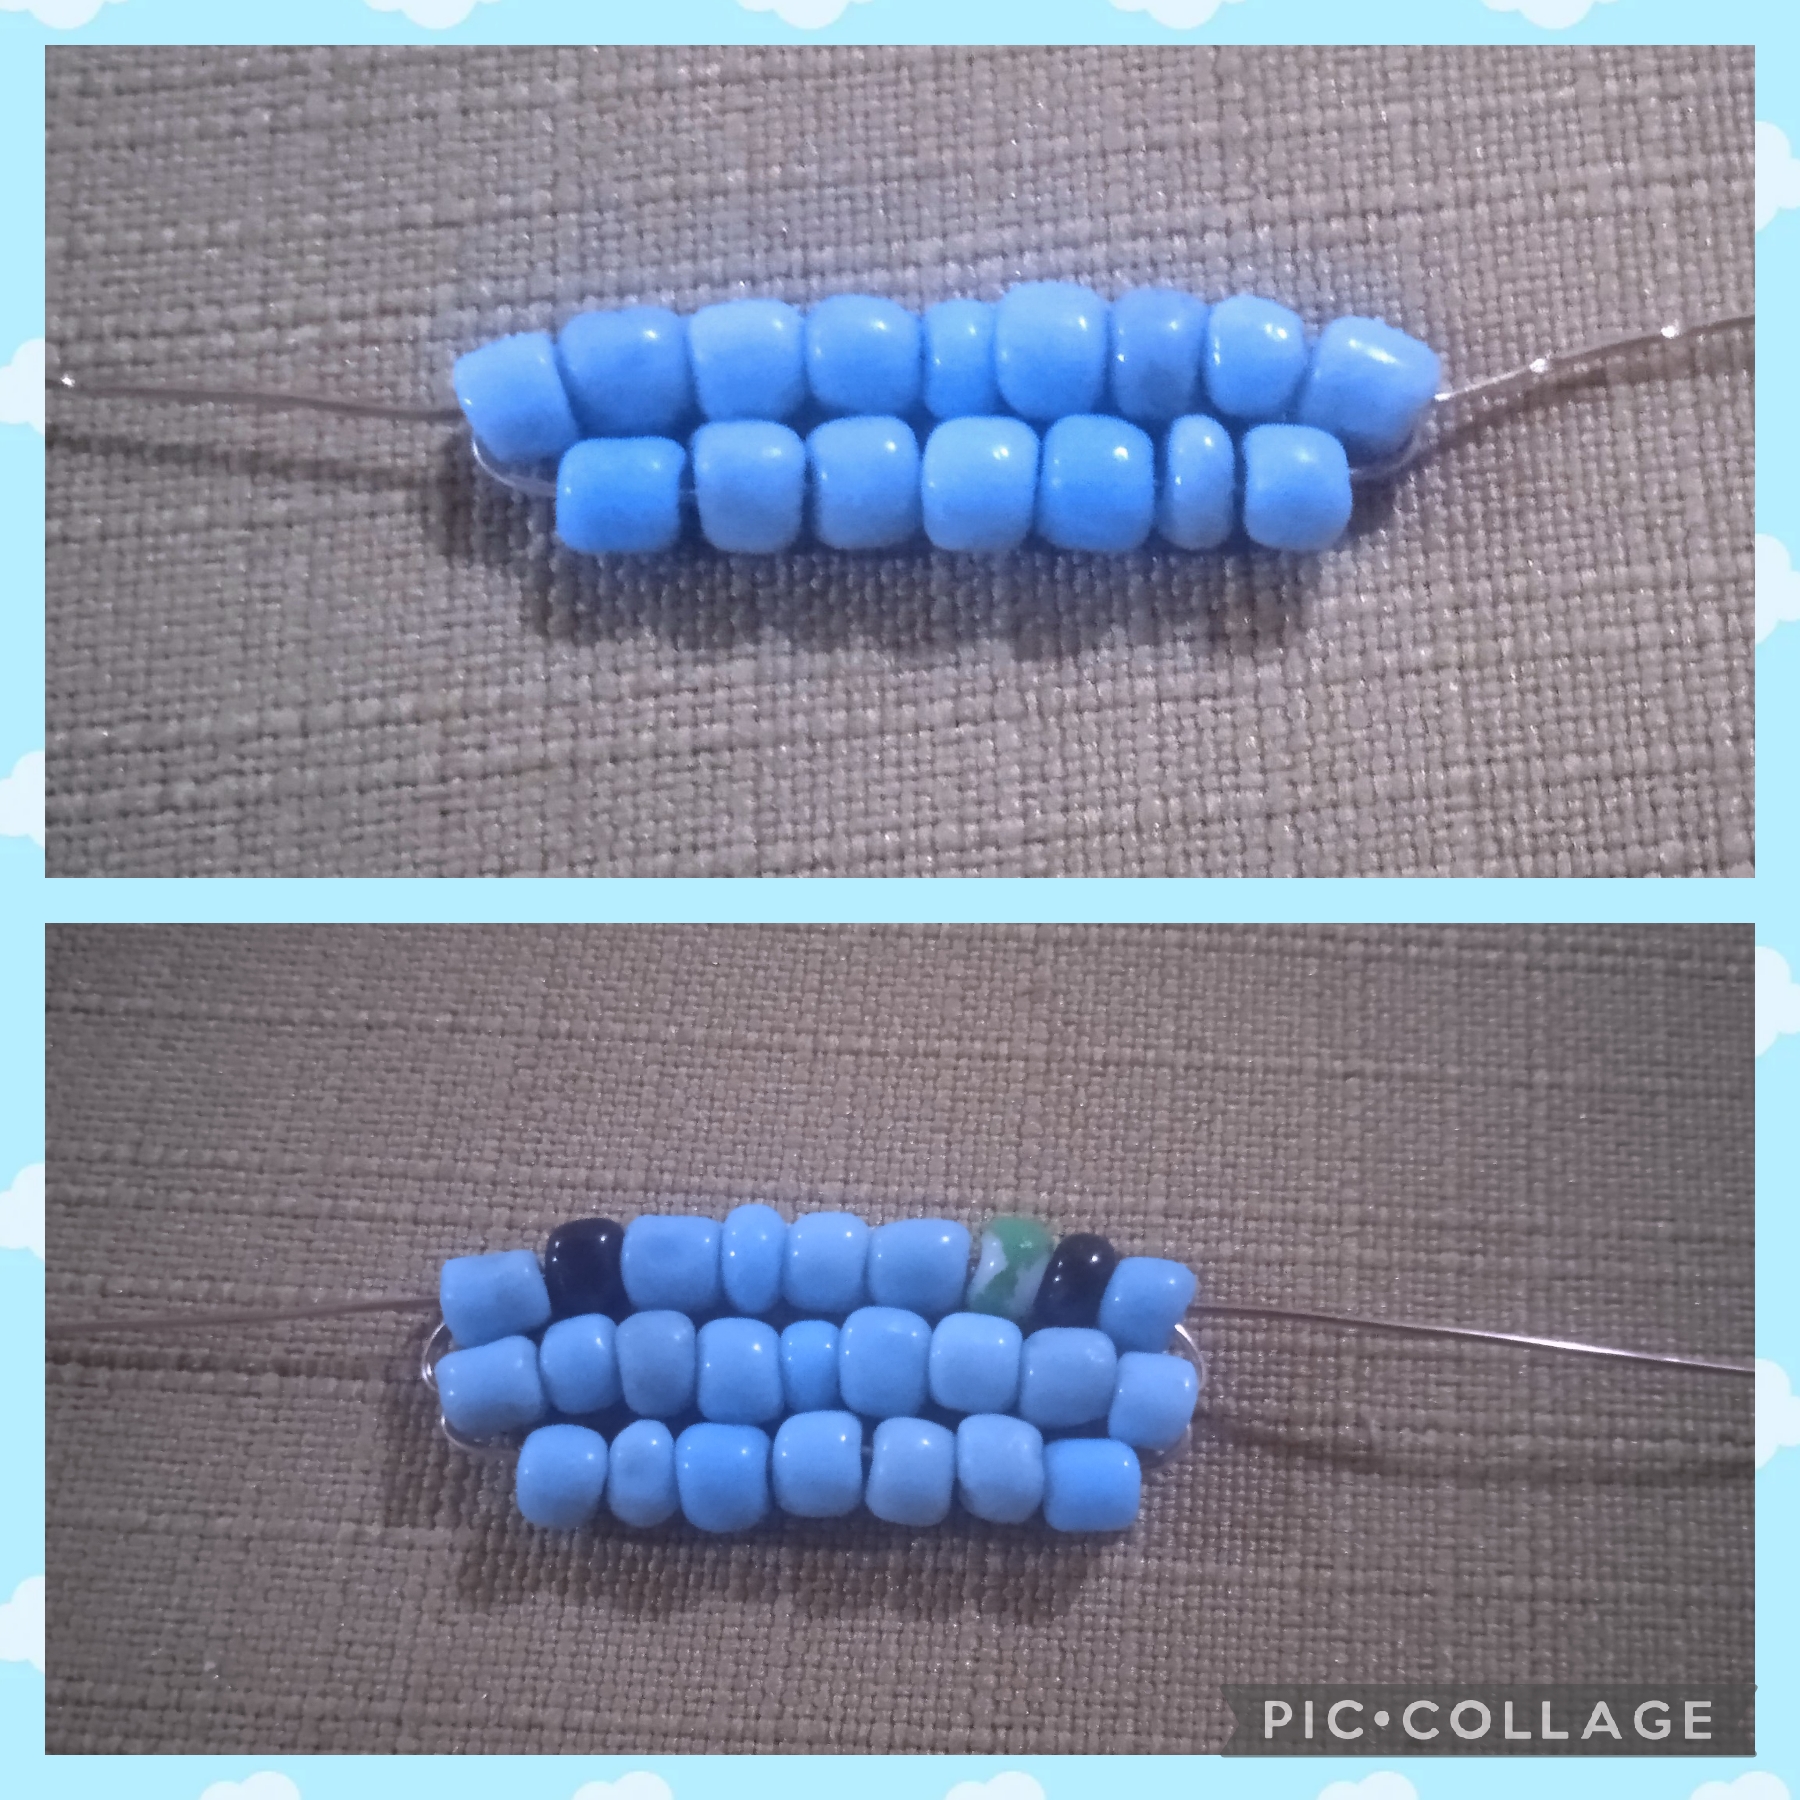
En un alambre de cobre calibre 26 pulgadas que tiene una medida de cuarenta centímetros voy a introducir por una punta, un mostacillón de color azul, luego un mostacillón blanco, otro mostacillón azul siguiendo está secuencia hasta introducir seis mostacillones azules y cinco blancos para un total de once. Ahora inserto nueve mostacillones azules que los cruzo con la otra punta, halo las dos puntas y ajusto moldeo bien con las manos de forma que queden bien alineados y así tengo la primera y se gunda vuelta como se ve en la imágen.
WAYS TO MAKE THIS ELEGANT BROOCH.
FIRST STEP:
I start with the making of the Elephant 🐘 which will be the design of the Brooch:
In a 26-inch gauge copper wire that measures forty centimeters, I will insert a blue bead at one end, then a white bead, another blue bead following this sequence until I insert six blue beads and five white ones for a total of eleven. Now I insert nine blue beads that I cross with the other end, I pull the two ends and adjust and shape well with my hands so that they are well aligned and thus I have the first and second round as seen in the image.
SEGUNDO PASO:
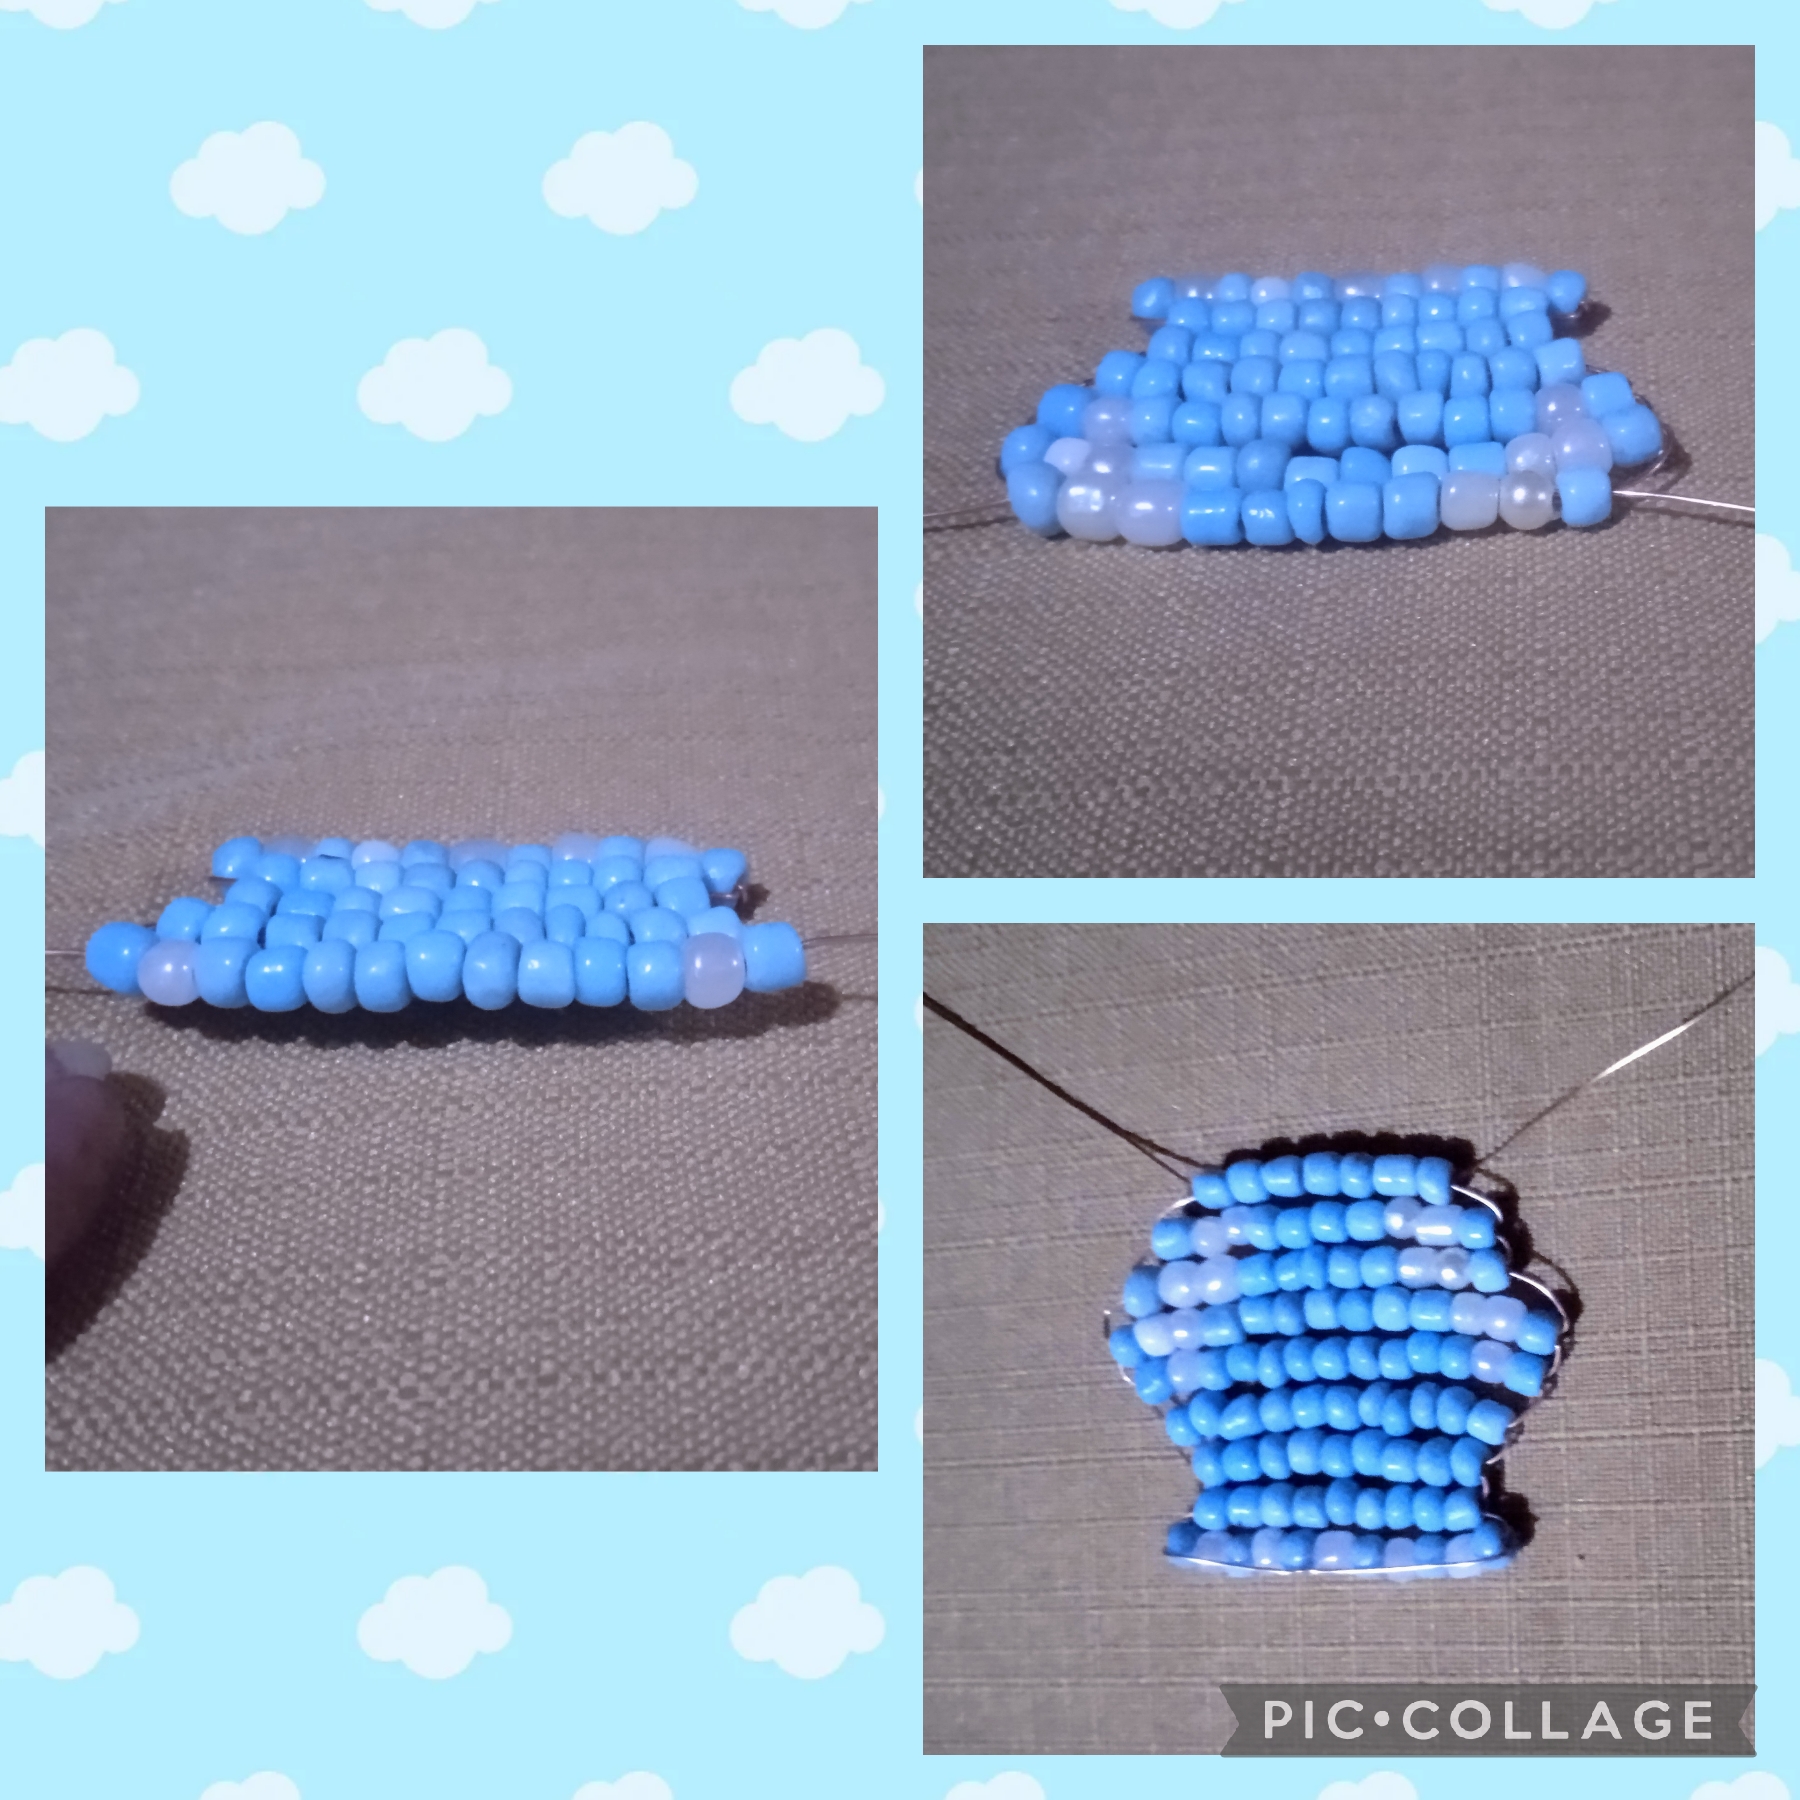
Hago una tercera vuelta de nueve mostacillones azules y una cuarta vuelta de once mostacillones azules, en la quinta vuelta inserto un mostacillón azul, un mostacillón blanco, nueve mostacillones azules, un mostacillón blanco y uno azul para finalizar la quinta vuelta. En la sexta vuelta inserto un mostacillón azul dos
mostacillones blancos, siete azules, dos blancos uno azul. En la séptima vuelta inserto un mostacillón azul, dos mostacillones blancos, cuatro mostacillones azules, dos blancos uno azul
Octava vuelta inserto siete mostacillones azules y con esta vuelta finalizo lo que sería el cuerpo del elefante 🐘
SECOND STEP:
I make a third round of nine blue beads and a fourth round of eleven blue beads, in the fifth round I insert one blue bead, one white bead, nine blue beads, one white bead and one blue bead to finish the fifth round. In the sixth round I insert one blue bead, two white beads, seven blue beads, two white beads and one blue bead. In the seventh round I insert one blue bead, two white beads, four blue beads, two white beads and one blue bead
Eighth round I insert seven blue beads and with this round I finish what would be the body of the elephant 🐘
TERCER PASO:
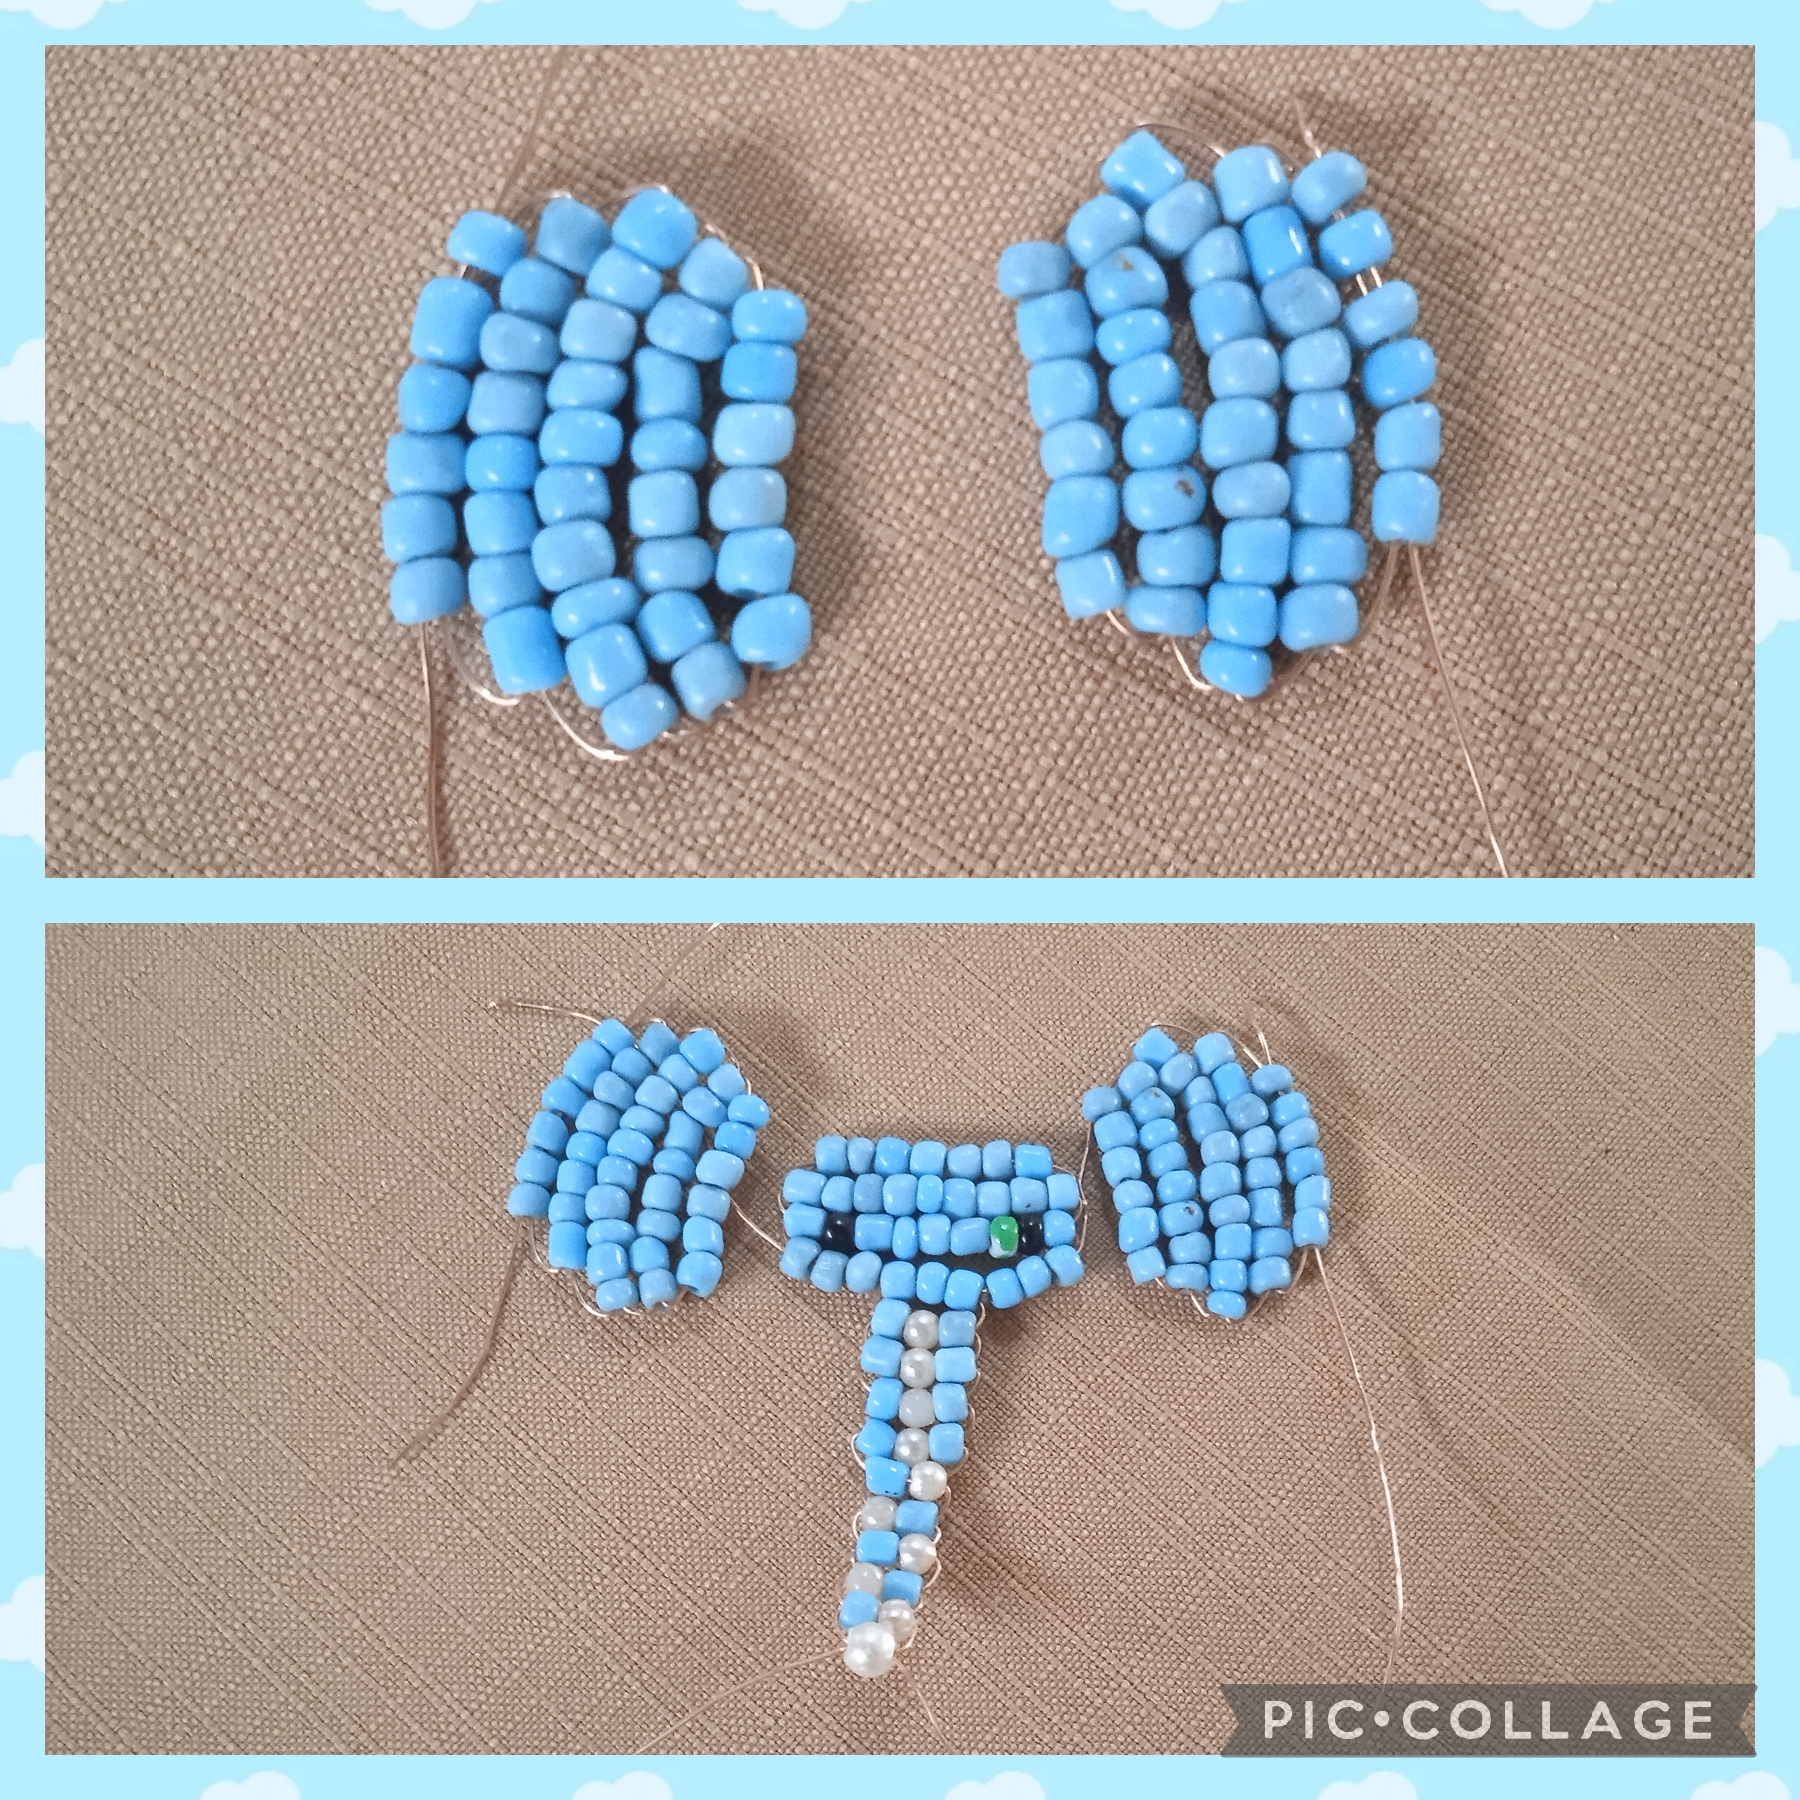
Ahora en este paso voy a explicar cómo realicé de forma individual la cara, las orejas y la trompa para hacer la cabeza Empiezo insertando en un alambre de cobre calibre 26 pulgadas de veinte centímetros por una punta siete mostacillones azules, los llevo hasta el centro los cruzo con la otra punta y las igualo para tener la misma medida de ambos lados, en una segunda vuelta inserto nueve mostacillones azules, en la tercera vuelta inserto un mostacillón azul uno negro, cinco azules uno negro y uno azul de esta forma quedan los ojos; en la cuarta vuelta de la cara la finalizo con nueve mostacillones azules.
Ahora paso a formar la trompa la cuarta vuelta consta de nueve mostacillones azules, tomo un trozo del alambre de cobre de díez centímetros y lo paso por los tres mostacillones del centro como se ve en la imagen, inserto tres mostacillones uno azul uno blanco uno azul y los cruzo está vuelta la realizo cuatro veces, en la quinta vuelta pongo un mostacillón blanco uno azul y este proceso lo realizo cinco veces alternando los colores, como en la imagen para terminar la trompa coloco una perlita de dos milímetros para definir la punta de la trompa y así queda. Ahora paso a elaborar las orejas: tomo un trozo de alambre de quince centímetros para insertar seis mostacillones azules en una primera vuelta, para una segunda vuelta ocho mostacillones azules hago una tercera de díez y una cuarta de seis mostacillones azules para finalizar la oreja, paso el alambre de nuevo por la vuelta de abajo halo las dos puntas para fijar bien y uso la pinza para cortar los excedentes y con la pinza plana, aplano para dejar prolija mi labor. De esta manera tengo las piezas para la cabeza.
THIRD STEP:
Now in this step I will explain how I made the face, ears and trunk individually to make the head. I start by inserting seven blue beads into a 26-inch gauge copper wire measuring twenty centimeters at one end, I take them to the center, cross them with the other end and match them to have the same measurement on both sides, in a second turn I insert nine blue beads, in the third turn I insert one blue bead, one black, five blue ones, one black and one blue, this way the eyes remain; in the fourth turn of the face I finish it with nine blue beads.
Now I move on to form the trunk, the fourth round consists of nine blue beads, I take a ten-centimeter piece of copper wire and pass it through the three beads in the center as seen in the image, I insert three beads, one blue, one white, one blue, and I cross them, I do this round four times, in the fifth round I put a white bead, one blue, and this process I do five times alternating the colors, as in the image to finish the trunk I place a two-millimeter pearl to define the tip of the trunk and this is how it looks. Now I move on to make the ears: I take a fifteen-centimeter piece of wire to insert six blue beads in a first round, for a second round eight blue beads, I make a third of ten and a fourth of six blue beads to finish the ear, I pass the wire again through the bottom round, I pull the two ends to secure it well and I use the pliers to cut the excess and with the flat pliers, I flatten it to leave my work neat. This way I have the pieces for the head.
CUARTO PASO :
Ahora voy a unir las piezas para formar el diseño del Elefante 🐘.
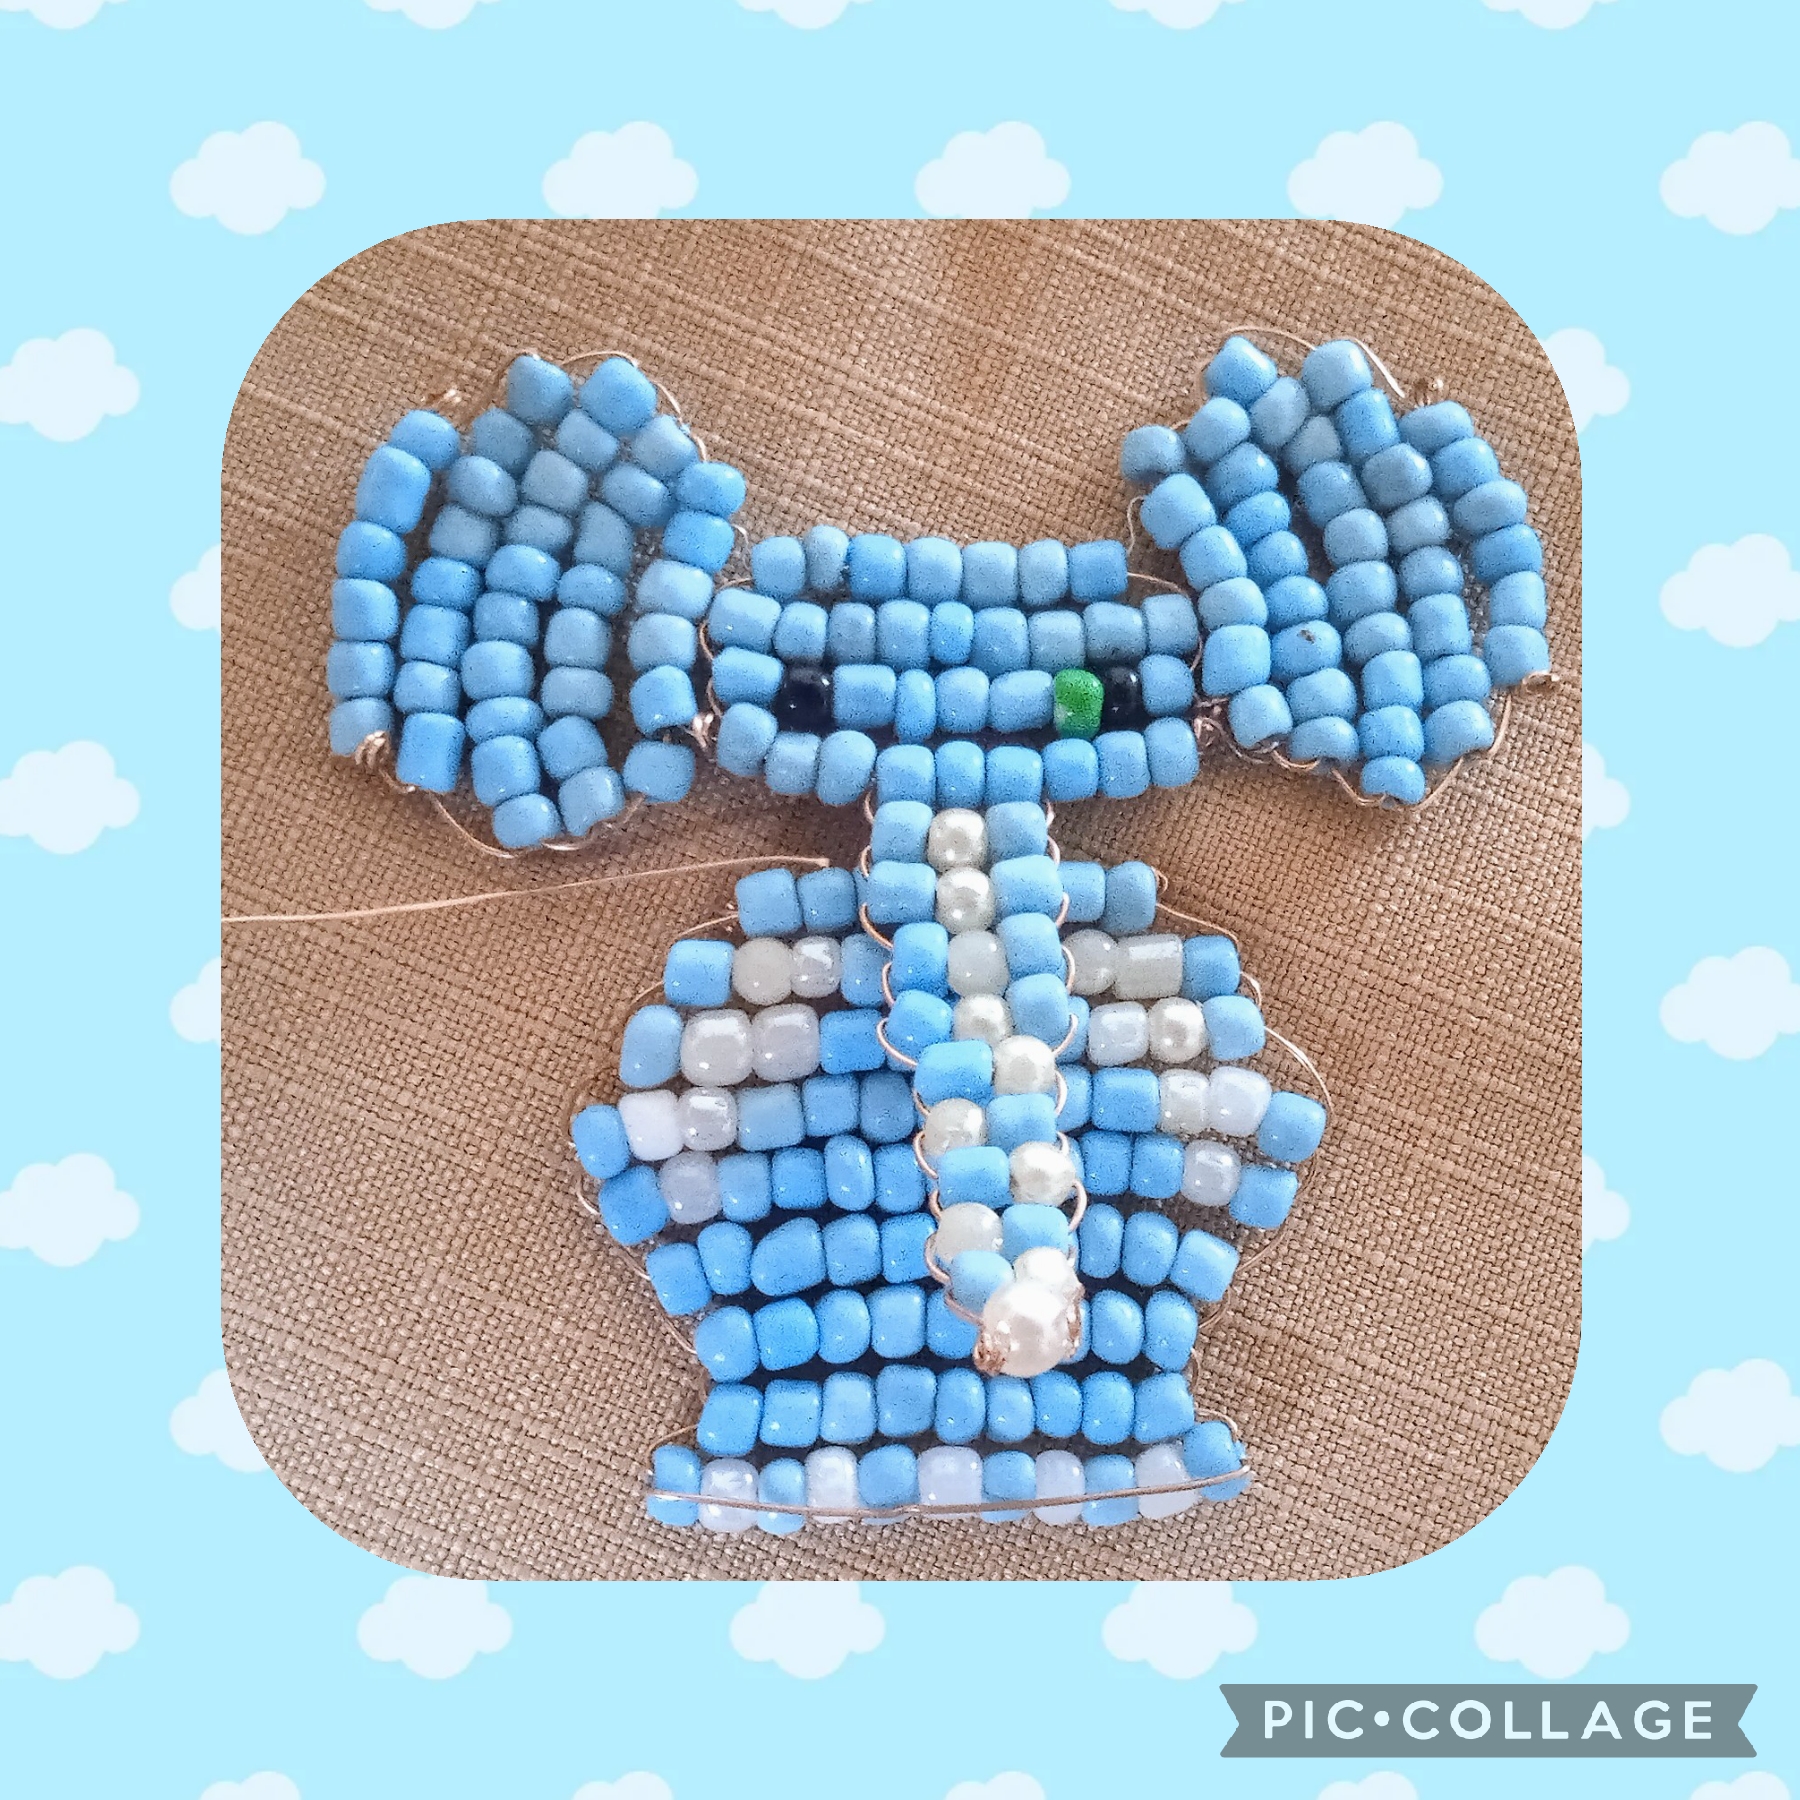
Ya la cara está lista con los ojos y la trompa, solo falta agregarle las orejas, con un alambre de díez centímetros lo paso de lado a lado por los siete mostacillones de la parte superior inserto una punta por cuatro de los últimos mostacillones azules de la oreja dejando uno sin trabajar de cada lado hago lo mismo del otro lado, halo las puntas y ajusto bien para que queden bien alineados con el resto de la cara, paso el alambre por los nueve mostacillones azules de parte inferior donde esta la trompa halo las puntas ,ajusto y saco los alambres por el tercer mostacillón de cada lado o sea donde esta la trompa allí lo paso por los tres mostacillones de la trompa, uno la cabeza y el cuerpo, halo fuerte los alambres los paso de nuevo por la vuelta de arriba,corto los excedentes y aplanó para finalizar.
STEP FOUR:
Now I'm going to join the pieces to form the Elephant design 🐘.
The face is now ready with the eyes and the trunk, all that's left is to add the ears. With a ten-centimeter wire, I pass it from side to side through the seven beads on the top, insert one tip through four of the last blue beads on the ear, leaving one unworked on each side. I do the same on the other side, pull the tips and adjust well so that they are well aligned with the rest of the face, pass the wire through the nine blue beads on the bottom where the trunk is, pull the tips, adjust and remove the wires through the third bead on each side, that is, where the trunk is, there I pass it through the three beads on the trunk, one for the head and the body, pull the wires tightly, pass them again through the top loop, cut the excess and flatten to finish.
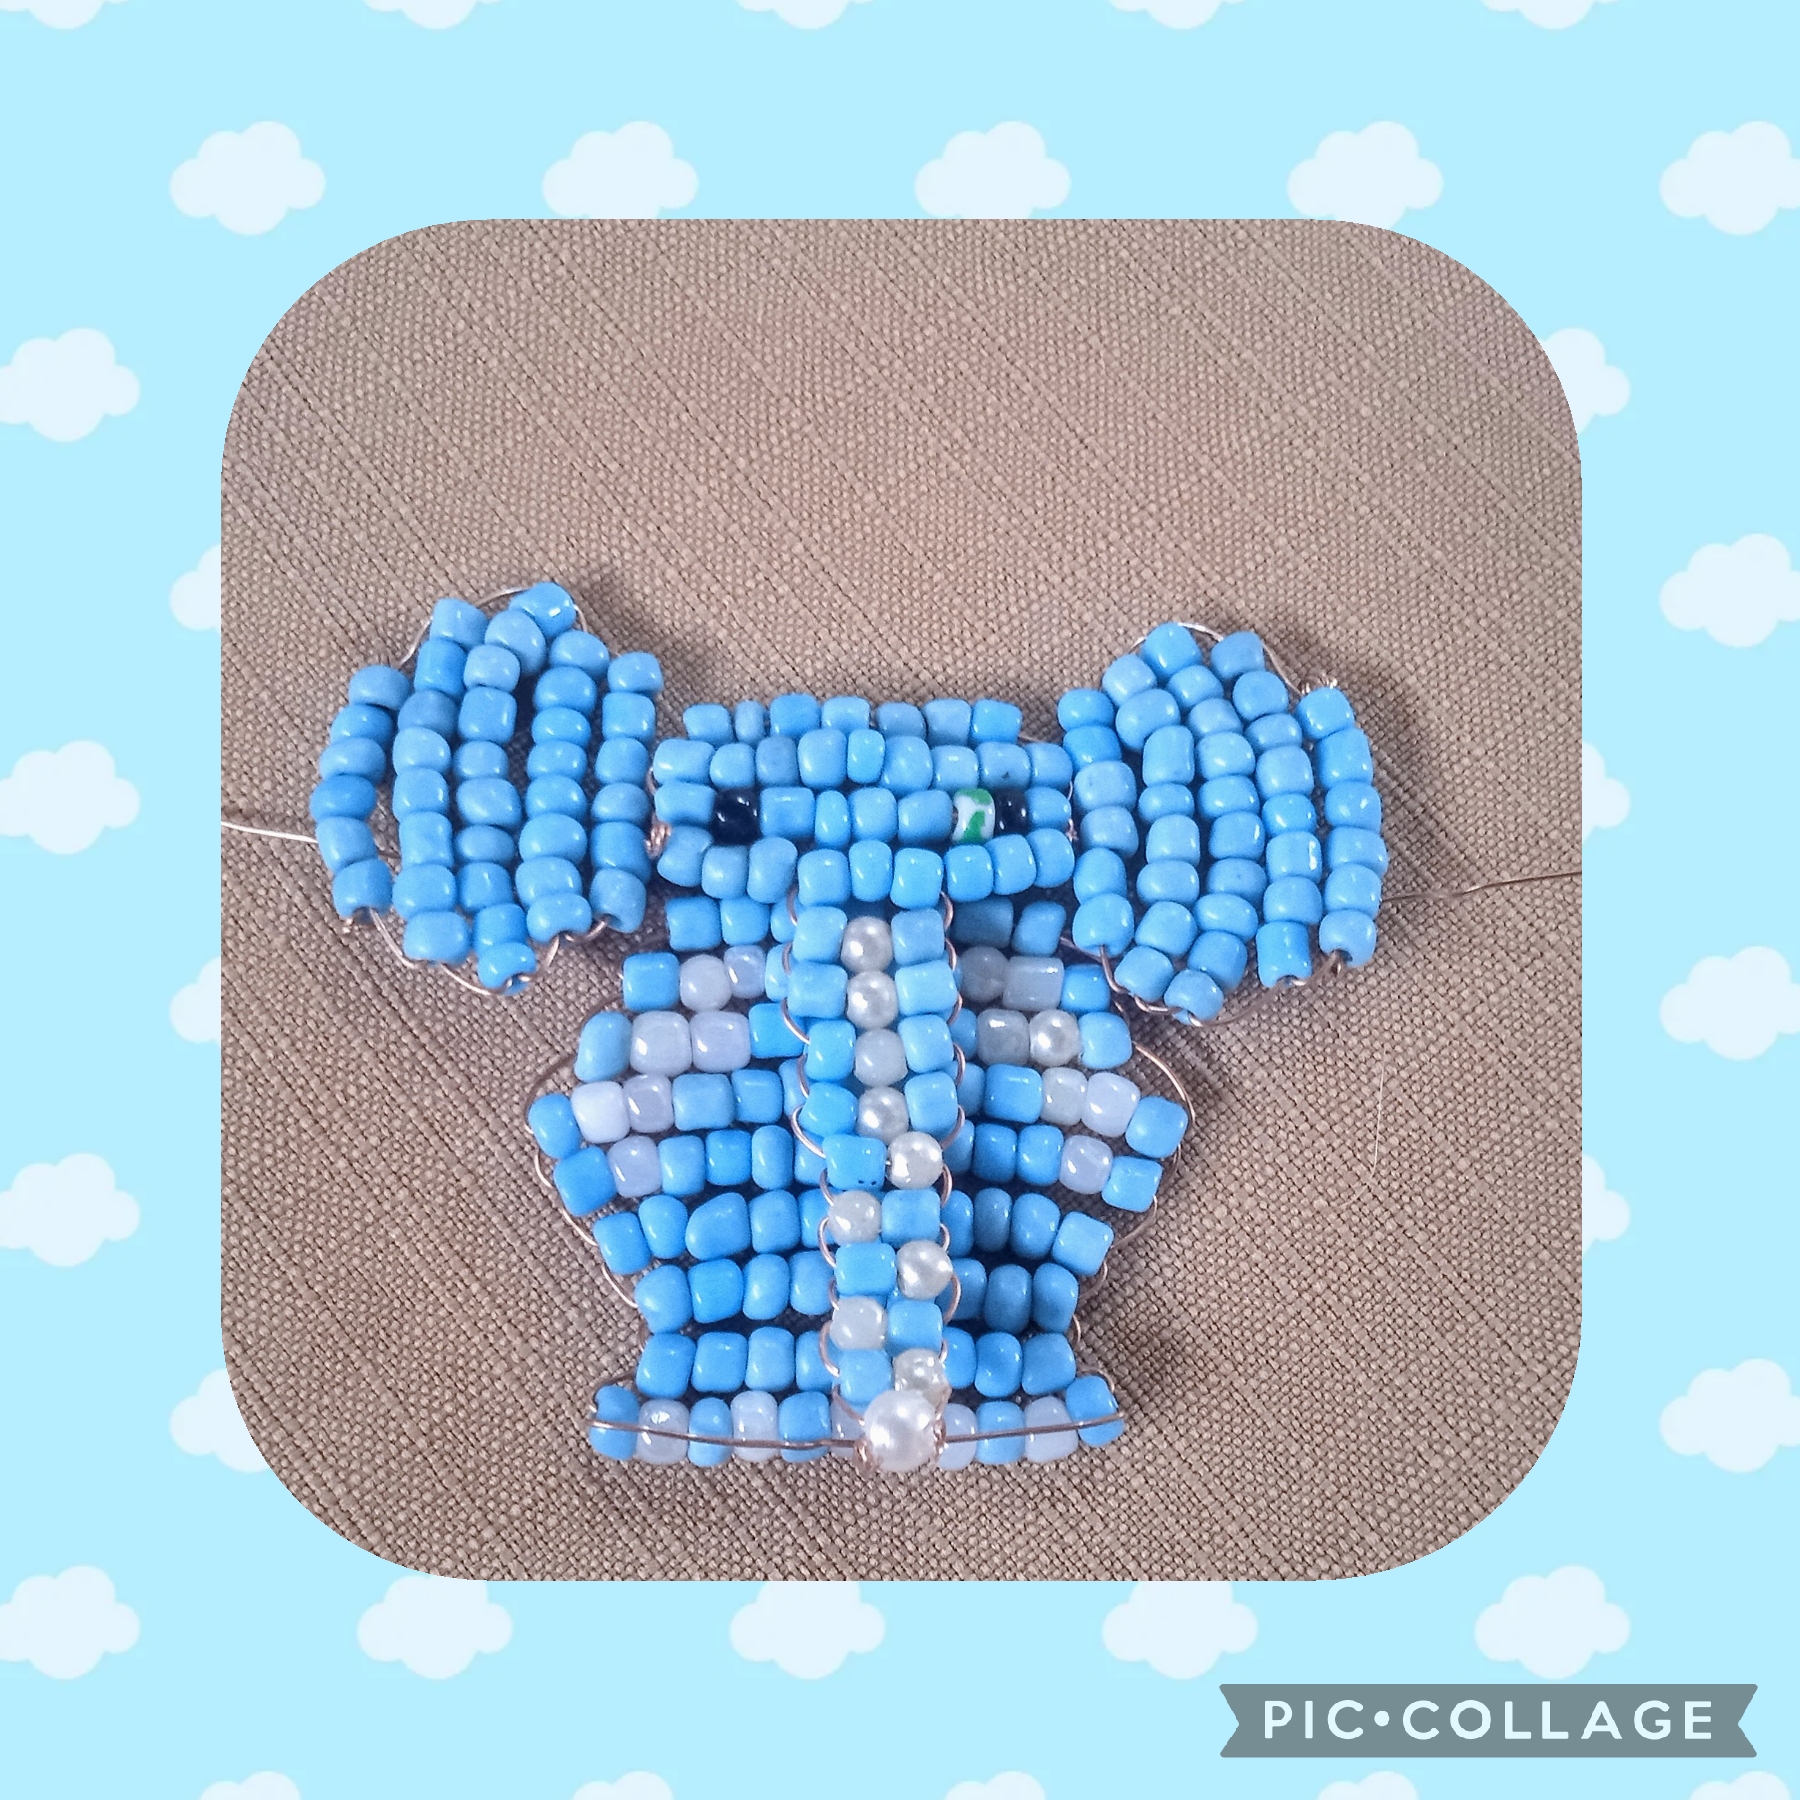
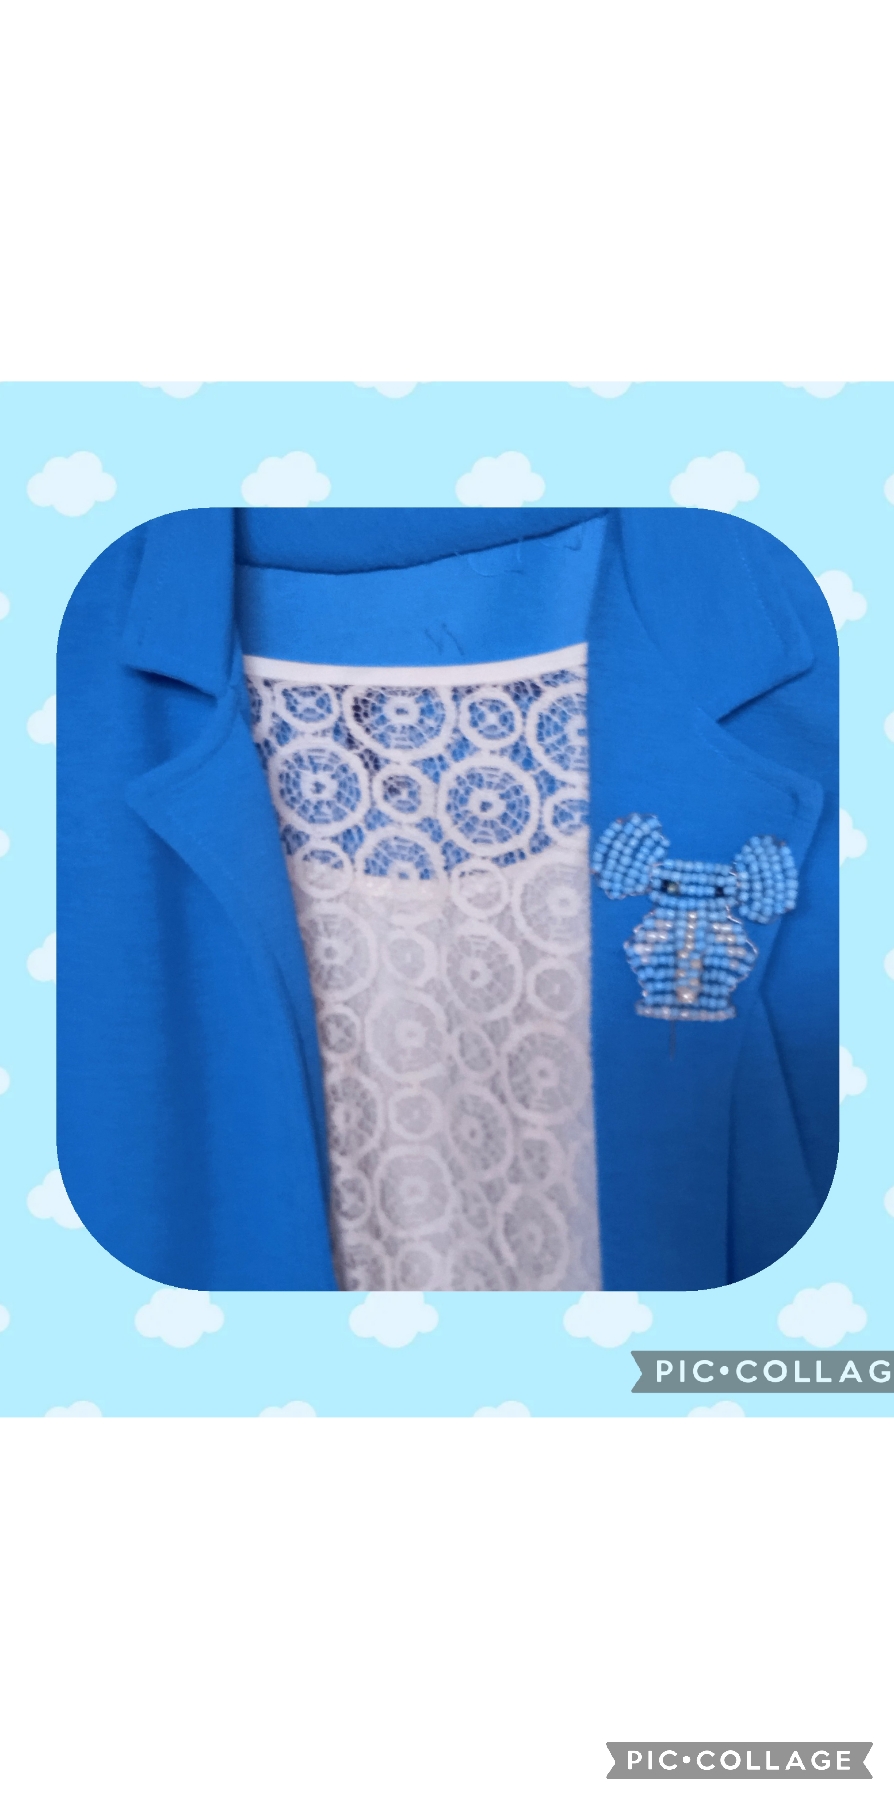
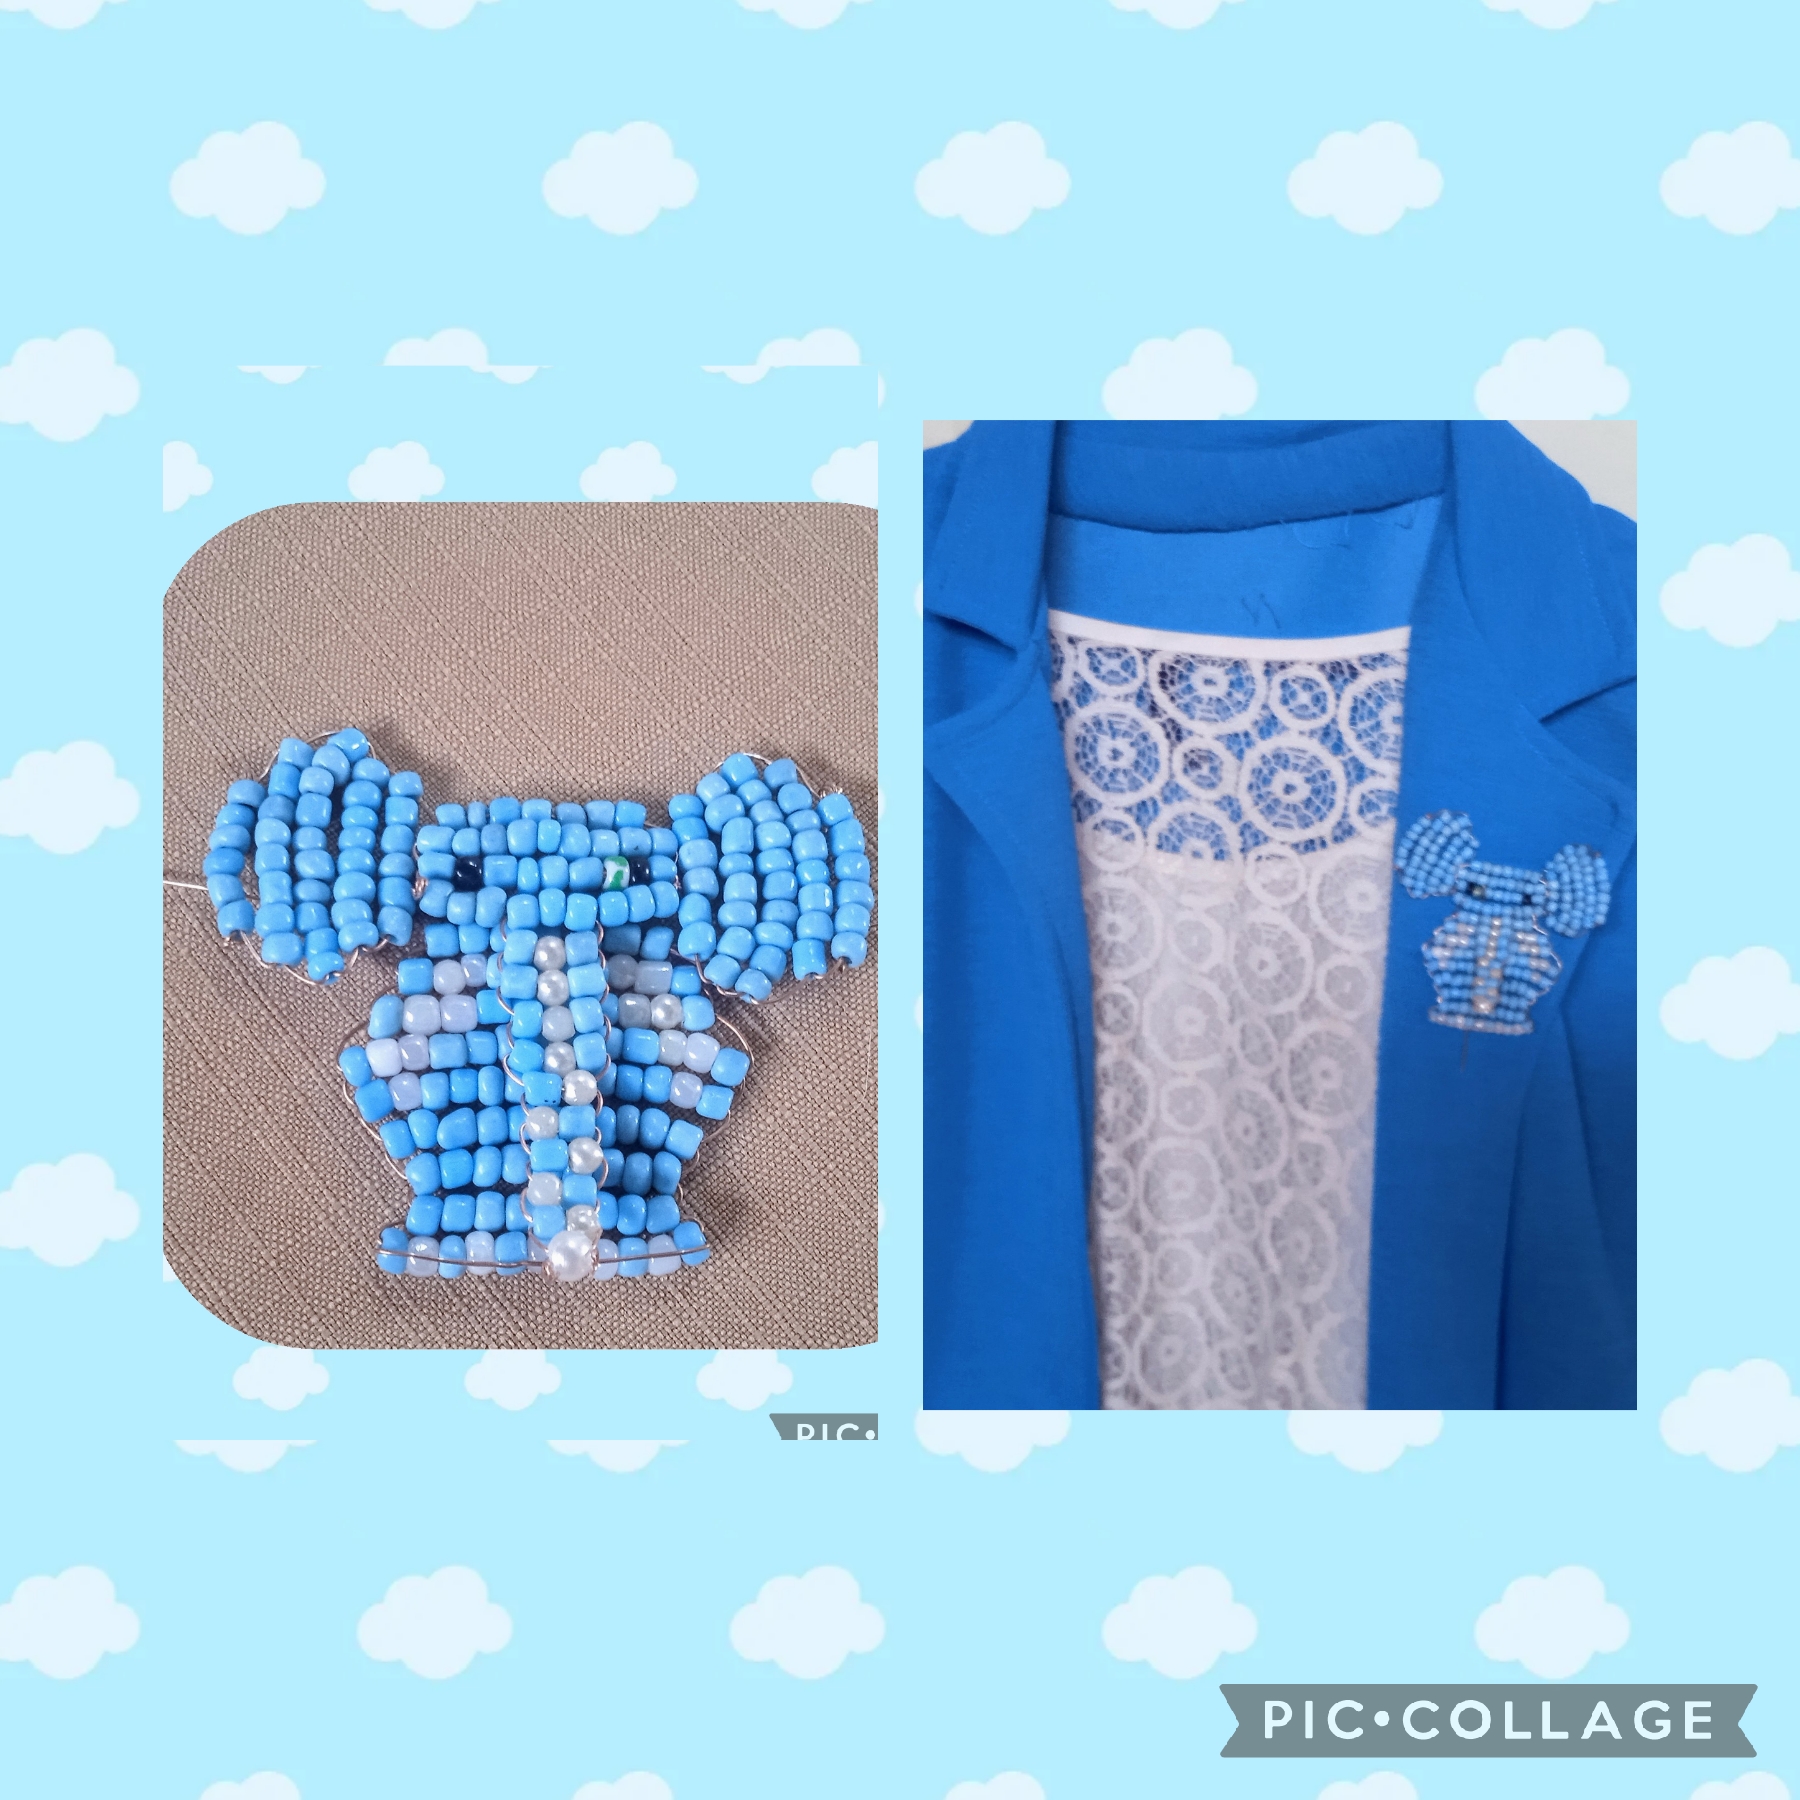
Artistas Creativos de las Manualidades y la Joyería este es el resultado final de esta pieza, un Elefante 🐘 que aunque no me gusta parecer pedante me encantó este diseño, como mi amiga me pidió un Prendedor coloqué en la parte posterior un alfiler para sostenerlo puede ser en una bufanda, en una chaqueta, un chal, o cualquier etcétera de tu vestimenta. Espero que les guste, me gustaría que tomarán esta idea y con su sello personal hicieran el suyo, gracias por ver y leer mis publicaciones y nos vemos en la próxima manualidad, bye, bye.
Creative Artists of Crafts and Jewelry this is the final result of this piece, an Elephant 🐘 Although I do not like to seem pedantic, I loved this design, since my friend asked me for a Brooch, I placed a pin on the back to hold it, it can be on a scarf, a jacket, a shawl, or any etcetera of your clothing. I hope you like it, I would like you to take this idea and with your personal stamp make yours, thanks for seeing and reading my posts and see you in the next craft, bye, bye.
Las imágenes y redacción de éste tutorial son de mi exclusiva propiedad, las fotos fueron tomadas con mi teléfono celular redmi 9 y las edite con una aplicación gratis del mismo.
Para traducir texto use Google traductor
The images and writing of this tutorial are my exclusive property, the photos were taken with my redmi 9 cell phone and I edited them with a free application of the same.
To translate text use Google translator

This is magnificent friend, the colour and design are perfect. You did such an amazing job friend, well done and thanks for sharing.
I am very pleased to receive such valuable and flattering comments, thank you very much.
Bellisimo trabajo.Te quedo tierno. delicado y muy prolijo. Gracias por compartir en nuestra comunidad.
Para recibir halagos como ese, bien vale la pena compartir con tan maravillosa comunidad, gracias @dayadam tu comentario es muy valioso 🤗
I !LUV this elephant 🐘 is beautiful with a unique color. And it fits perfectly with the clothes.
@nhaydu, @funshee(2/4) sent you LUV. | tools | discord | community | HiveWiki | <>< daily
Gracias, gracias por visitarme y dejarme tan valioso comentario, 🤗