DIY on how to sew an old Hilux car seat to a new one.
How are you all doing today? I hope you all are doing pretty good. Here we go again, today I am sharing with you guys another clean work I did. It is all about the upholstery of an old Hilux seat to a new one.
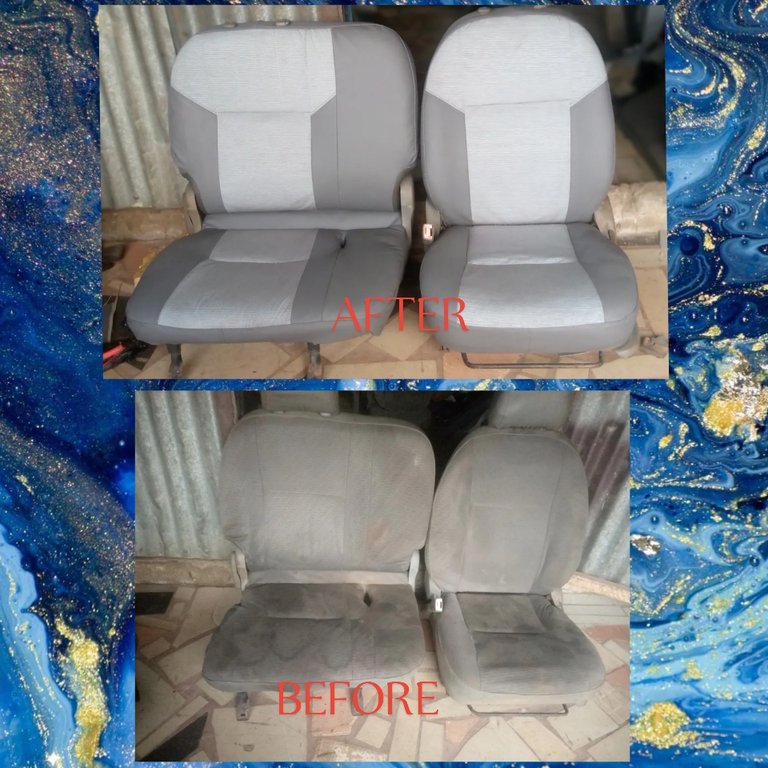
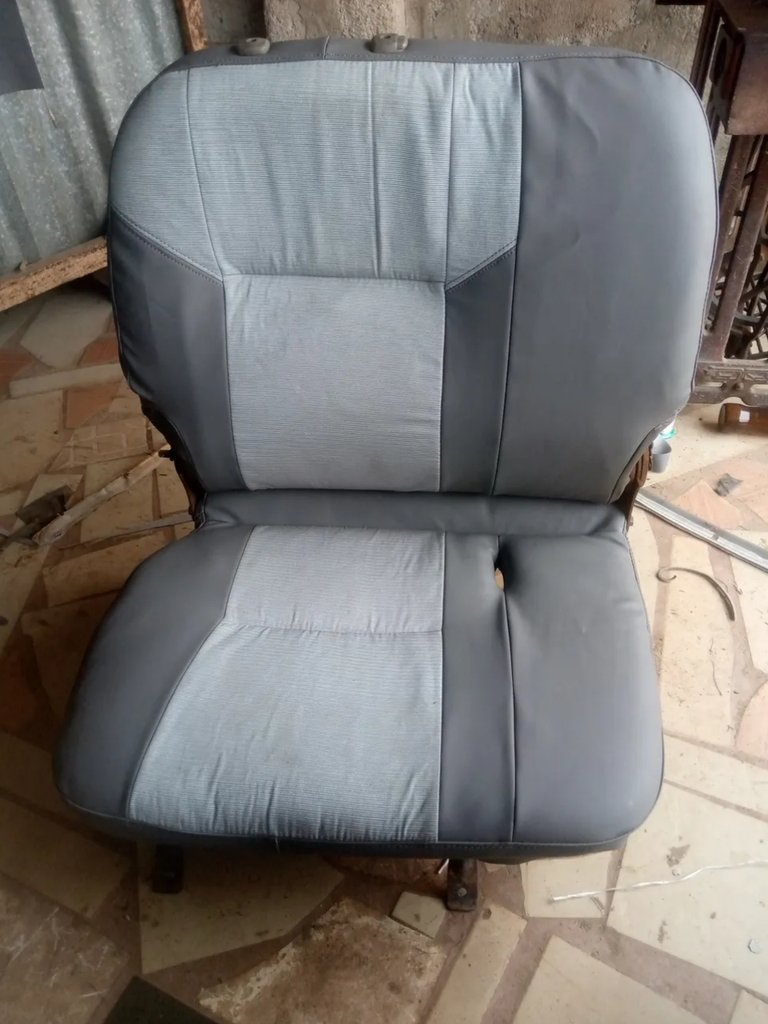
The finished work looks so amazing, well I must say I am trying my best. Check this out.
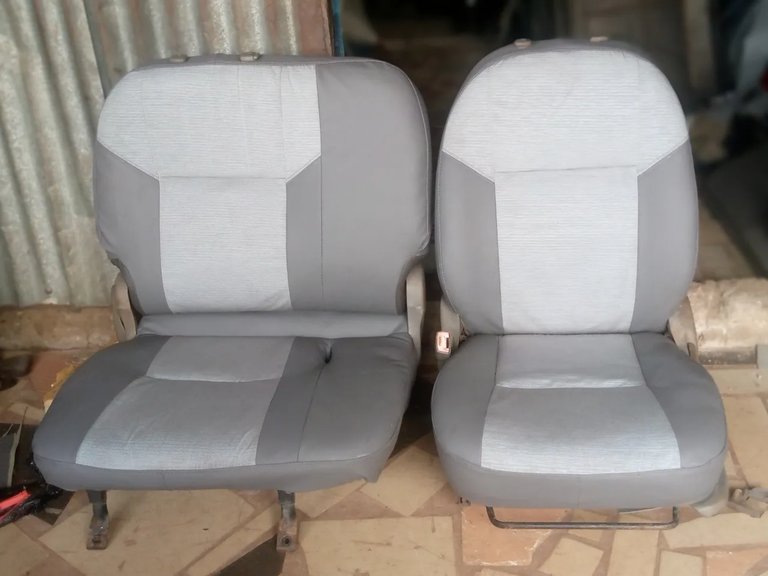
Finish work
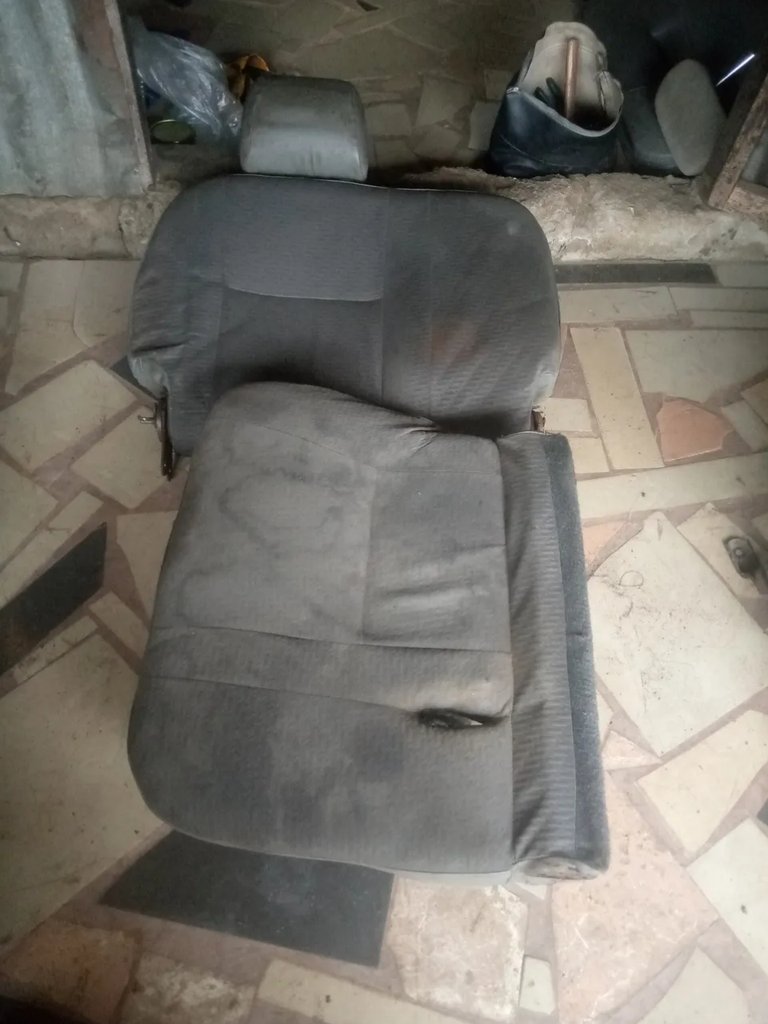
Before

Comparing the seats, you will see the difference and finish work to speak out the results.
This seat is a Hilux seat given to me by my customer. He said the seat belonged to his friend, after seeing my work it was moved to work his own and I have tried my best, so what can you say about it?
I would love to share with guys some steps I follow to make it come real and if you have followed up on my last post you will discover I use the same step to do my upholstery work and the only difference is the material and the design of the seat.
Let's get started
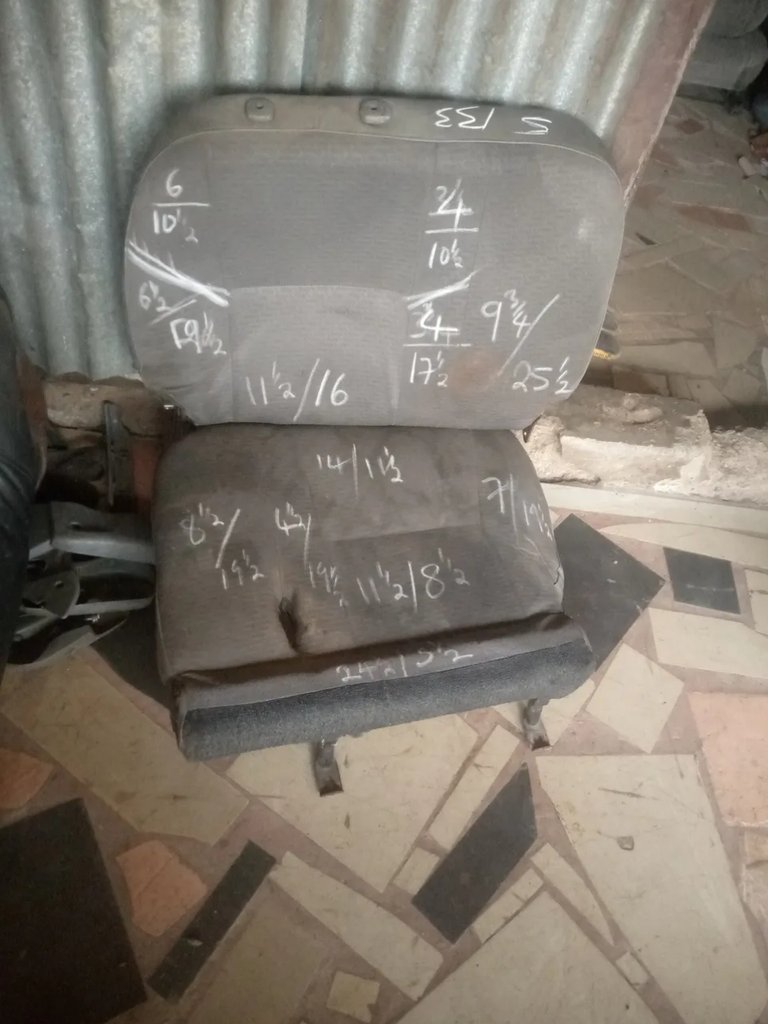
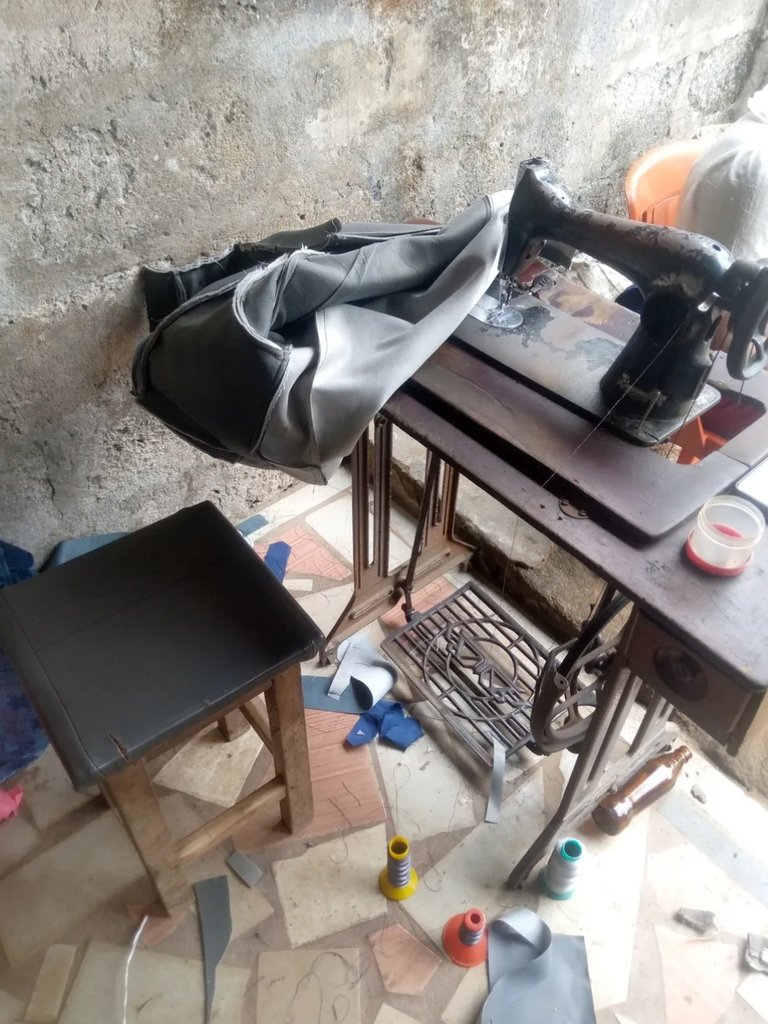
To begin the process, I first loose the seat separate from the back for easy upholstery to the hidden part of the seat. The seats are two but I will use one to illustrate my steps.
After losing it, I then use tape to measure the length of each pattern of the seat and then write it down.
I then went to the market to get a new leather I am using for the work. Here I am using both fabric and leather. See the photo below.
I then transfer the measurements to the new leather marking the measurements and drawing a line to connect each point.
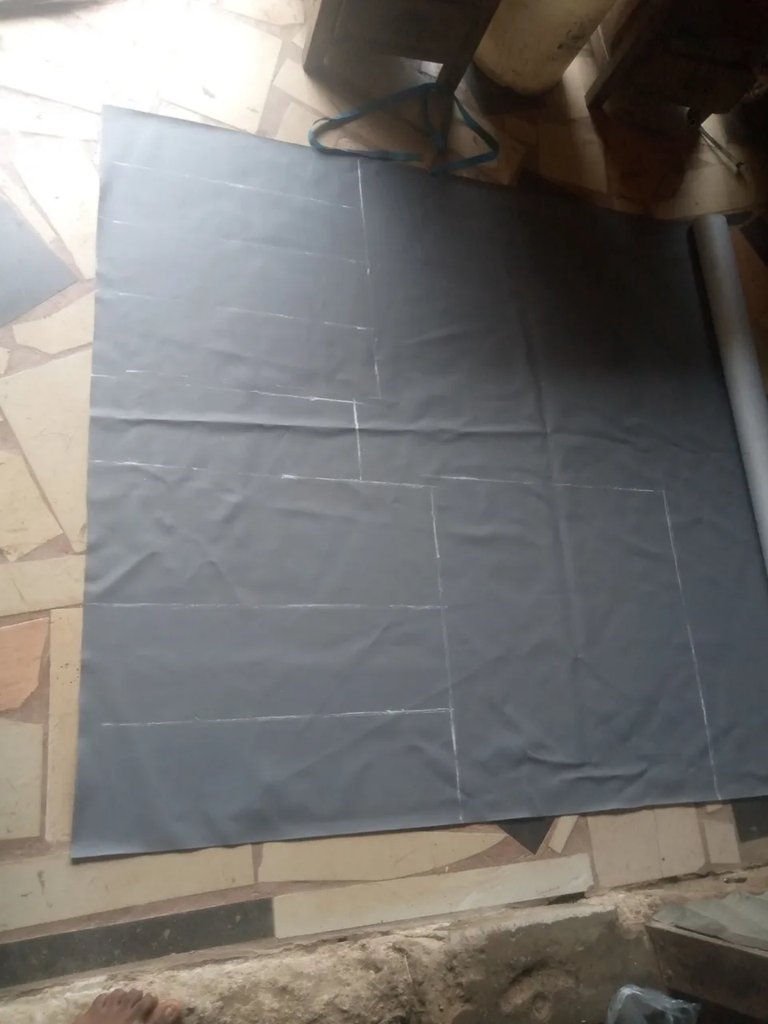
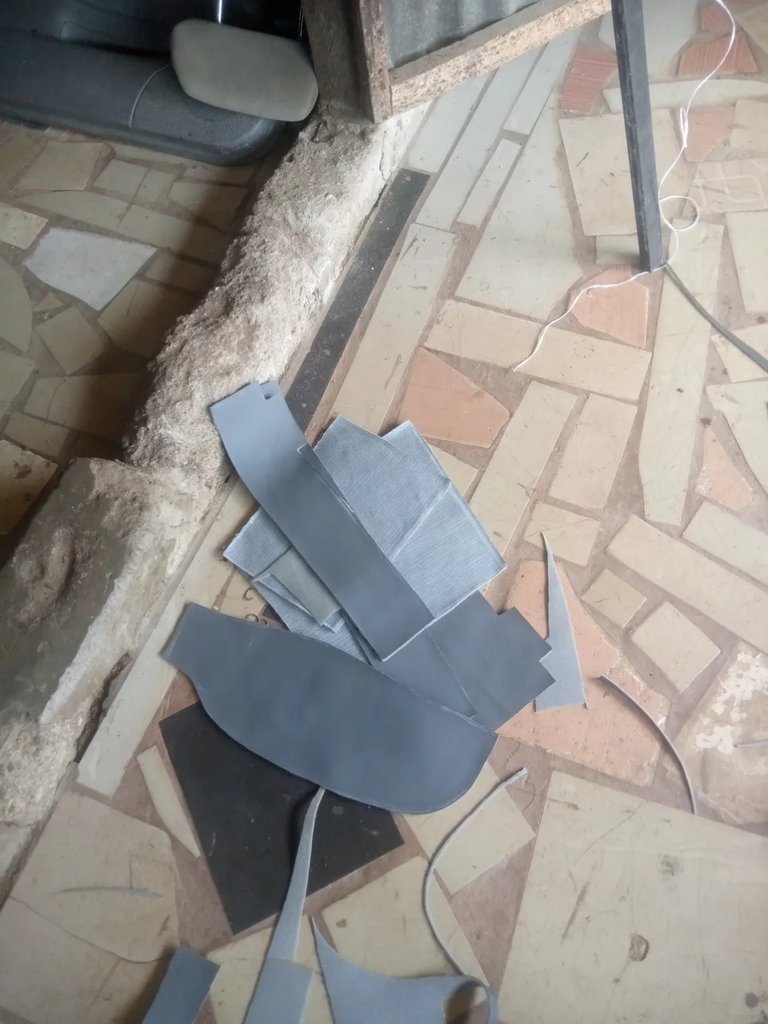
I then cut them out.
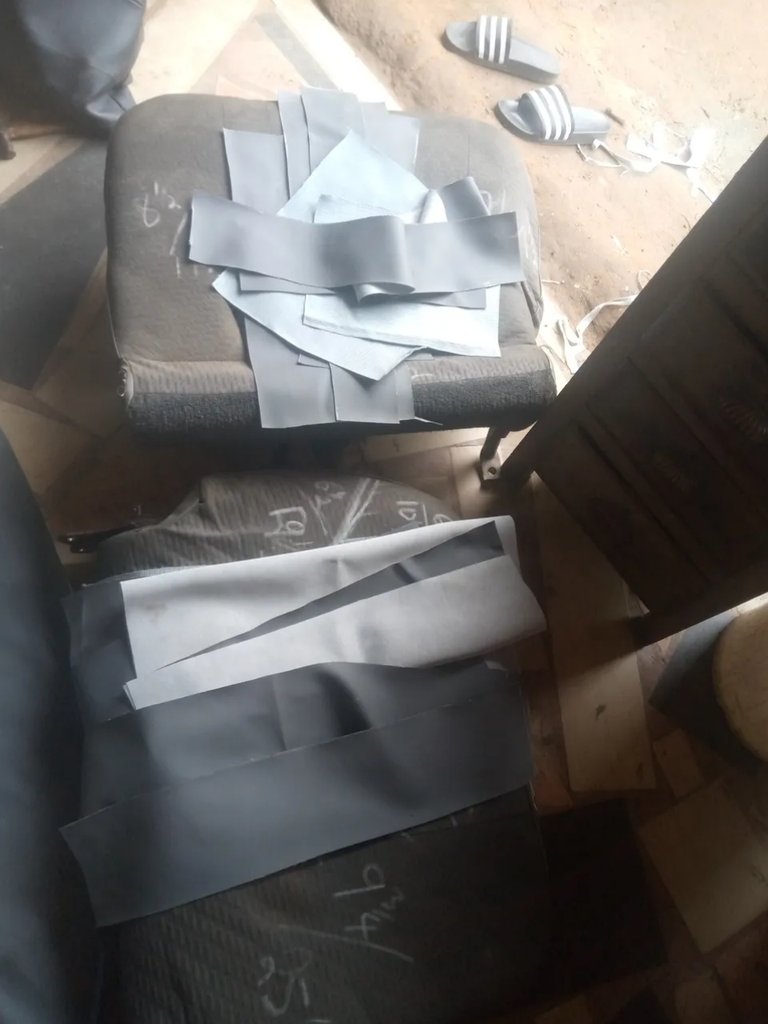
After cutting it out, I then place it on a roof material, gum it together, and finally cut it how for the sewing process.
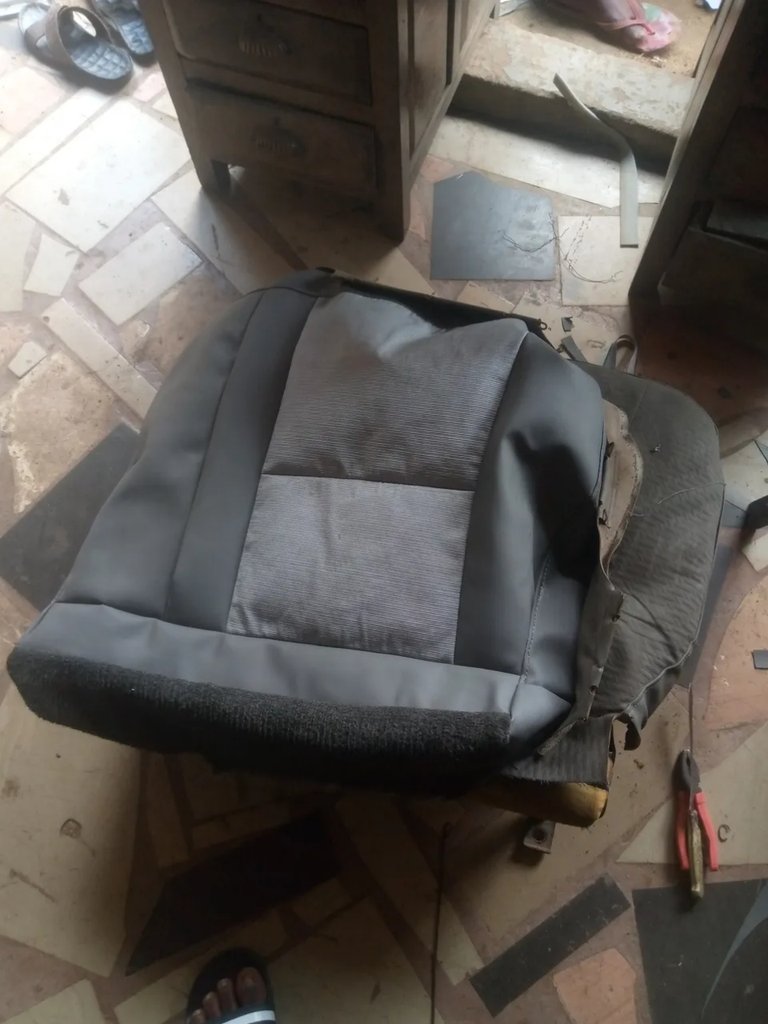
I then use a sewing machine to join each pattern together, making sure all the points entered have marks. I use the old seat to check what the pattern looks like since we are not changing the design.
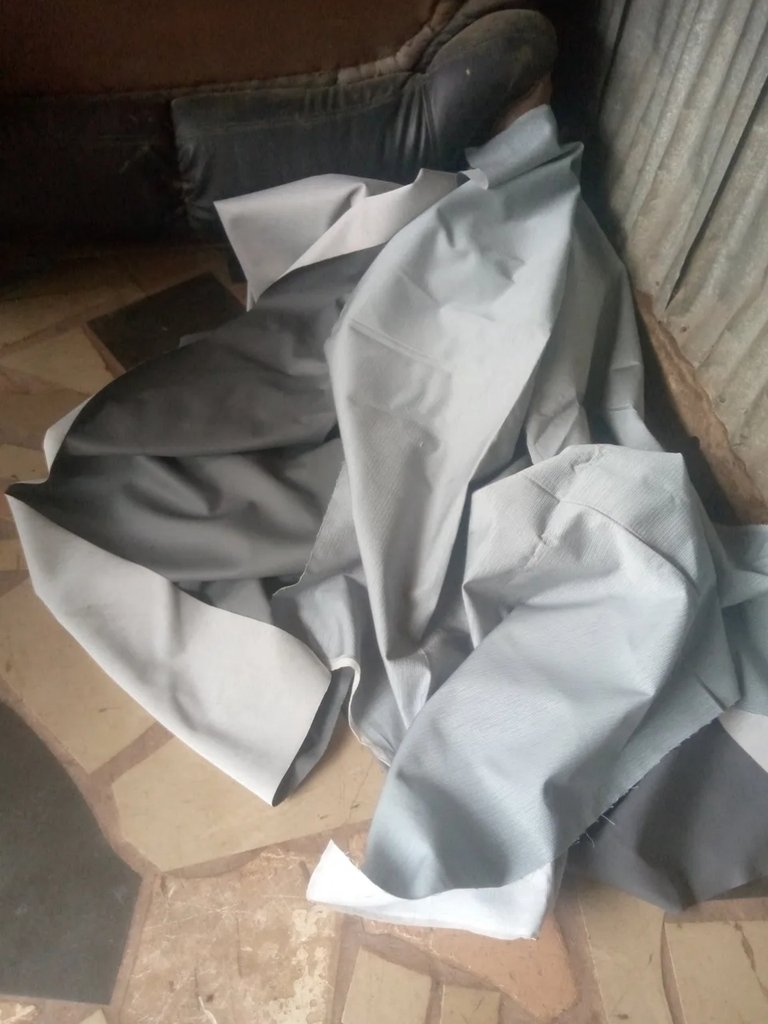
Here, I have finished sewing the seat, and is ready to be covered on the old seat.
With the help of a pliar, I clip the new sew seat cover to the old seat.
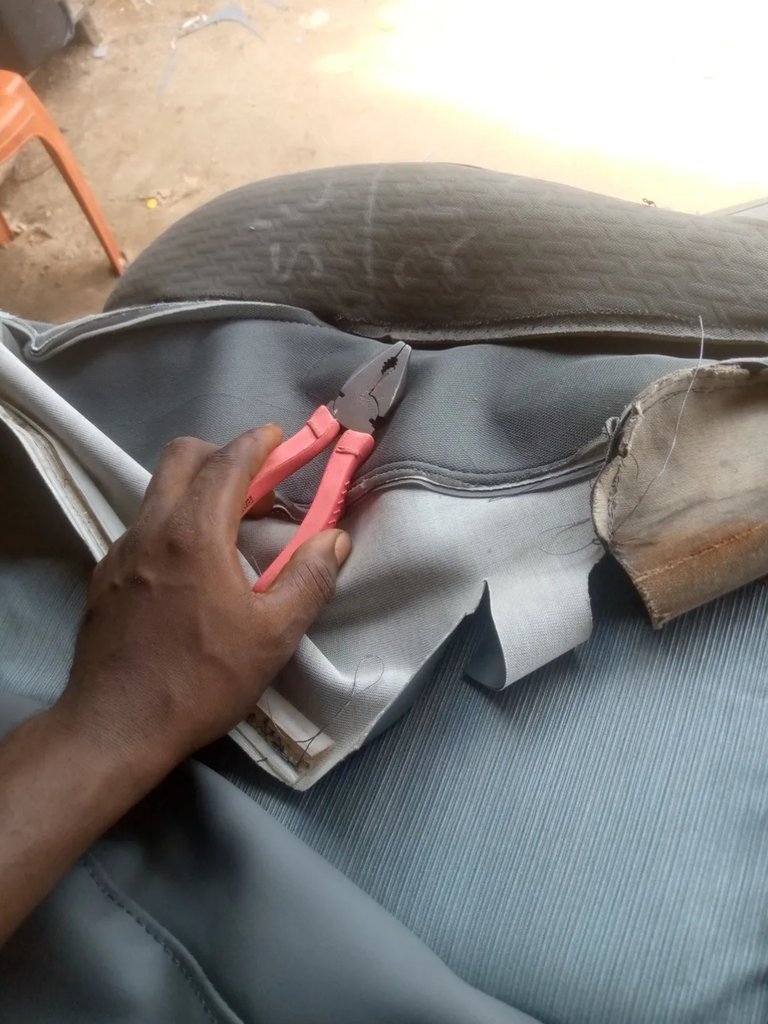
After clipping it, I then make sure I cover the other part of the seat, huck it where it's supposed to be, and here is the outcome of it.
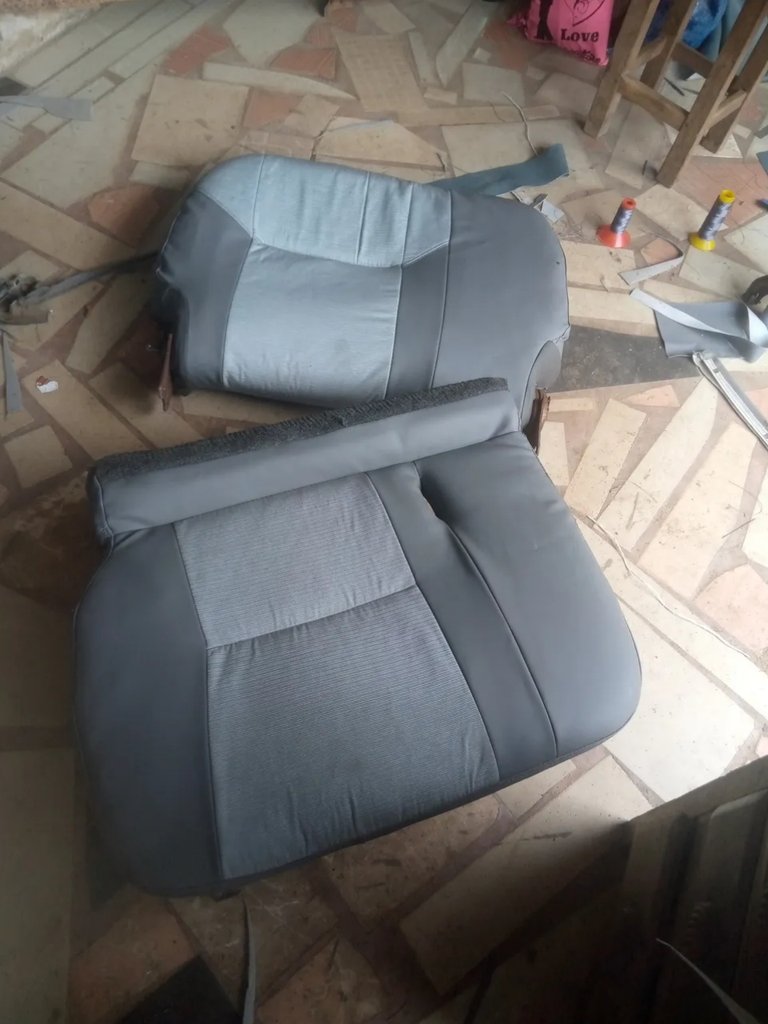
Finally, I tightened the seat as I loose it carefully, and here is the final work.
What can you say about it? Hope it looks beautiful and I also think you love the color combination.
Thanks everyone for your time.
Please do well to support my efforts, I love you all.
It’s beautiful you did a wonderful job
Thanks, I appreciate
This looks so beautiful. Keep it up
Sending Love and Ecency Vote!

Thanks so much for your support I appreciate
Very nice work. Thank you for the step by step photos. I think my own car needs a service like this.
If I am in your area I will love to work for you. Thanks for stopping by
The seat looks good as new now. Well done
Thanks so much I really appreciate you support on my post. God bless you ten times
Well done, it looks beautiful.
Thanks dear
Wow! Great job. This looks so neat and beautiful. Almost as if it came with the car. Well done.👍🏽