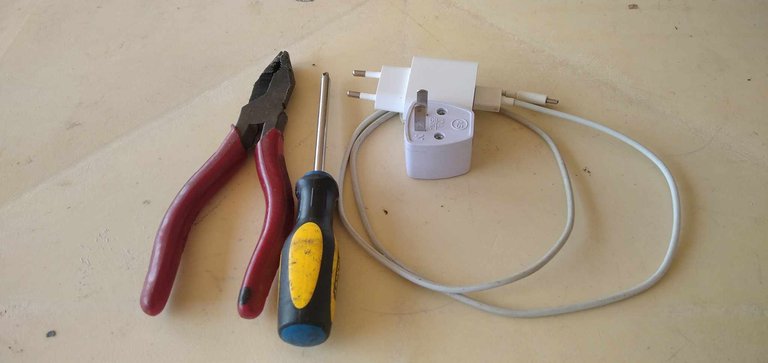
Reparación de adaptador para cargador tipo Europeo/Repair of adapter for European-type charger. (Epn-Eng)
Versión En Español.

Los elementos con los que contaba para realizar la reparación fueron los siguientes:
-Adaptador.
-Un cargador con enchufe de teléfono tipo europeo.
-Un destornillador de estrías.
-Un alicate.

Paso 1: desarmé el adaptador, con el destornillador de estrías retiré los tornillos que presentaba en la parte frontal, con los tornillos sin sujetar la carcasa procedí a abrirlo.

Paso2: Pude notar como desde la base de los conectores presentaba unas marcas producto de una comunicación débil entre la base y las platinas internas, esto pudo ocurrir por el uso diario el cual hizo que al contante empuje las platinas internas cedieran dando paso a que no se comunicaran, impidiendo así la continuidad en la corriente.

Paso 3: retiré los conectores de la carcasa y muy suave doblé su base en diagonal con la ayuda del alicate, permitiendo así que volviera a tener comunicación a lo interno, las doblé unos 30 grados aproximadamente.

Paso 4: volví a armar tal cual como desarmé, deben observar muy bien sobre la posición de los conectores, deben quedar en una posición como de alas abiertas de lo contrario costará cerrar y no habrá continuidad.

Paso 5: conecté el adaptador al cargador y probé en un tomacorriente, resultado.

Nota importante: esta reparación es provisional, en los próximos días estaré reemplazando, pero si en tu caso te ocurre lo mismo o no dispones al momento para reemplazar el adaptador este post te puede servir.
Si llegaste a esta parte del blog quiero agradecer el tiempo que te tomaste en leerme, estoy siempre presto a leer comentarios y sugerencias con el fin de mejorar y traer ante ustedes contenido de calidad, espero coincidir con ustedes muy pronto.
English Version.

Greetings Diyhub community, I hope you are well, this time I come to share with you step by step a job I did over the weekend that got me out of trouble with my cell phone charger because due to the day and time in which I was presented with this situation I decided temporarily see if I could fix it successfully, it turns out that when connected to the outlet had no continuity, which is why I first checked the adapter, part where I could detect the fault, so I got down to work.
The elements I had to make the repair were the following:
- Adapter.
- A charger with European type telephone plug.
- A fluted screwdriver.
- A pliers.
- A cell phone.
Step 1: I disassembled the adapter, with the slotted screwdriver I removed the screws on the front part, with the screws without holding the casing I proceeded to open it.
Step 2: I could notice how from the base of the connectors presented some marks product of a weak communication between the base and the internal platens, this could occur by the daily use which made the constant push the internal platens gave way to not communicate, thus preventing the continuity in the current.
>
Inside the area marked in red, you can see the marks due to bad contact between the parts.
Step 3: I removed the connectors from the casing and very gently bent its base diagonally with the help of the pliers allowing it to return to have internal communication, I bent them about 30 degrees approximately.
Step 4: I reassembled as I disassembled, you must observe very well the position of the connectors, they must be in a position like open wings otherwise it will be difficult to close and there will be no continuity.
Step 5: I connected the adapter to the charger and tested in an outlet, result.
Important note: this repair is provisional, in the coming days I will be replacing, but if in your case the same thing happens to you or you do not have the time to replace the adapter this post can help you.
If you came to this part of the blog I want to thank you for the time you took to read me, I am always ready to read comments and suggestions in order to improve and bring to you quality content, I hope to meet you very soon.
De verdad que muy útil tu post, este tipo de adaptadores son los más comunes y también he visto como presentan dicho problema. Saludos ☺️
Si, es frecuente que se dañen.
Great job with the fixing. Well done
Para salir de apuros, buena idea. 👍
Es un mientras siempre.
Ah thank you for this I have a charger with adapter like this too for my phone, so I will keep it bookmarked in case I ever need it!
I am glad the information was useful.
Congratulations @miguelc88! You have completed the following achievement on the Hive blockchain And have been rewarded with New badge(s)
Your next target is to reach 2500 upvotes.
You can view your badges on your board and compare yourself to others in the Ranking
If you no longer want to receive notifications, reply to this comment with the word
STOPTo support your work, I also upvoted your post!
Felicidades @miguelc88, esa es una solucion sencilla y nos ayudará a descartar si hay averias en el tomacorriente o en el teléfono.
Muchas gracias, efectivamente es una solución que sirve en momentos de contingencia.