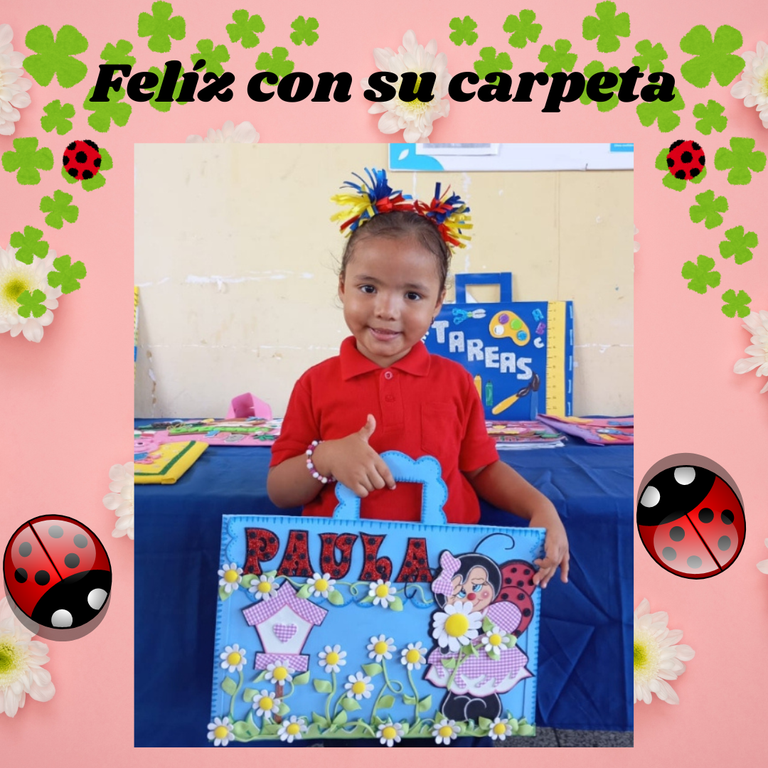
Linda Carpeta de Mariquita en foami
Hola amigos de la grandiosa comunidad de @diyhub; soy @marijoha, tenia bastante tiempo sin postear nada pues tuve problemas con mi teléfono. Pero ya con el favor de Dios, espero ponerme al día y activarme con nuevas publicaciones. Hoy quiero mostrarles mi paso a paso de una linda carpeta de mariquita hecha en foami, esta carpeta la realicé para el fin de curso escolar de mi sobrinita
Hello friends of the great community of @diyhub; I'm @marijoha, I had a long time without posting anything because I had problems with my phone. But now with God's favor, I hope to catch up and get active with new publications. Today I want to show you my step by step of a cute ladybug folder made in foami, I made this folder for the end of my little niece's school year.
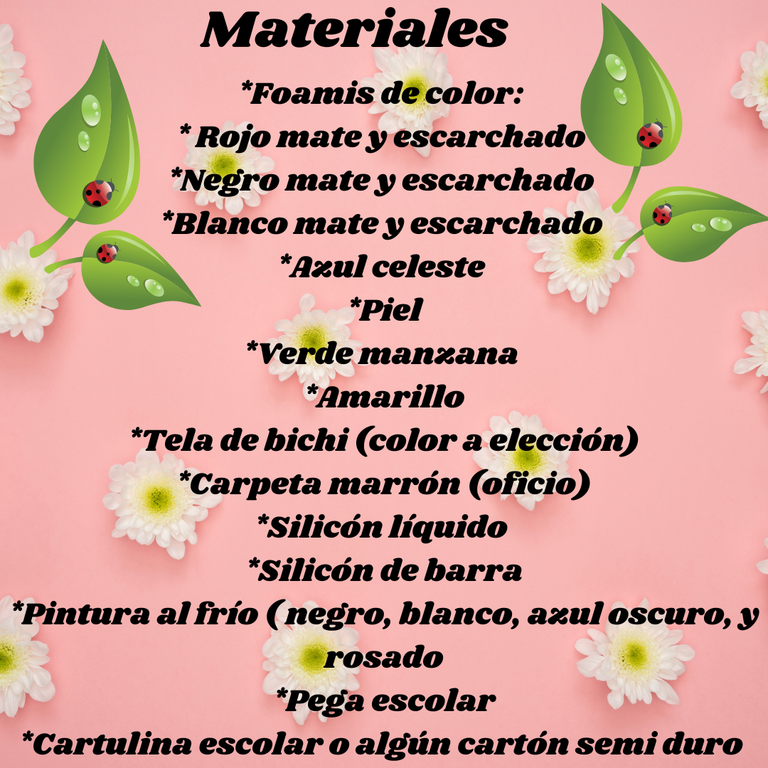
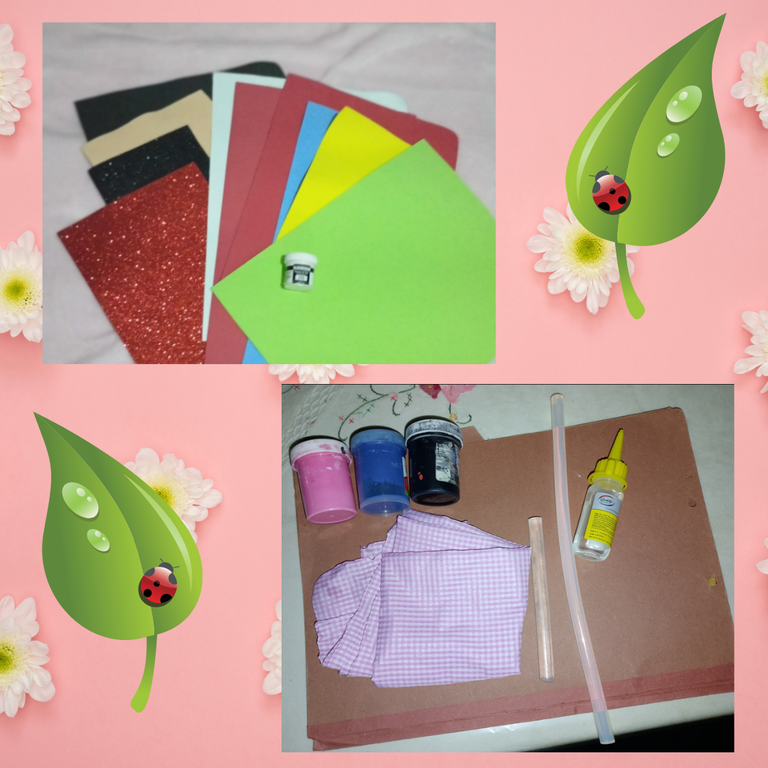
*Foami de los colores del dibujo elegido( rojo mate y escarchado,
negro mate y escarchado, blanco mate y escarchado, azul celeste, amarillo, piel y verde manzana).
*Tela de vichi(color a elección).
*Carpeta marrón(oficio).
*Silicón liquido.
*Silicón de barras.
*Pinturas al frío( negro, blanco, azul oscuro y rosado).
*Pega escolar.
*Cartulina escolar o algún cartón semi duro.
*Otros accesorios que tenemos en casa(pistolita de silicón, pinceles, cautin y tijera),
To make this beautiful folder I used the following materials:

*Foami in the colors of the chosen drawing( matte and frosted red,
matte and frosted black, matte and frosted white, sky blue, yellow, skin and apple green).
*Vichi fabric (color of your choice).
*Brown folder (office).
*Liquid silicone.
*Silicone sticks.
*Cold paints (black, white, dark blue and pink).
*School glue.
*School cardboard or semi-hard cardboard.
*Other accessories that we have at home (silicone gun, brushes, soldering iron and scissors),
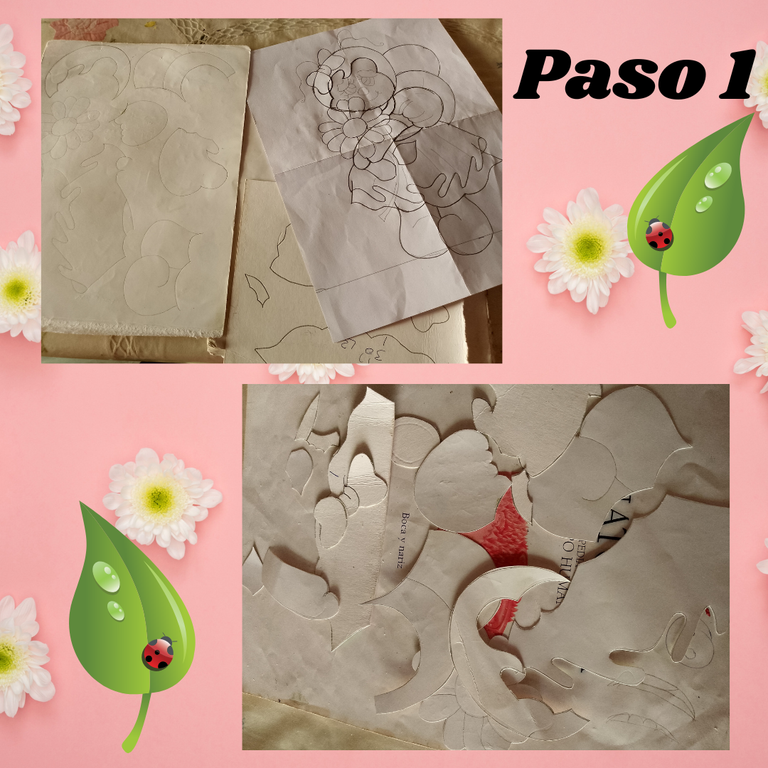
Step 1:
I proceed to draw on the cardboard the patterns of the drawing that I am going to capture in the folder; it should be noted that I got the drawing from the network. Once the patterns are cut out, I cut them out
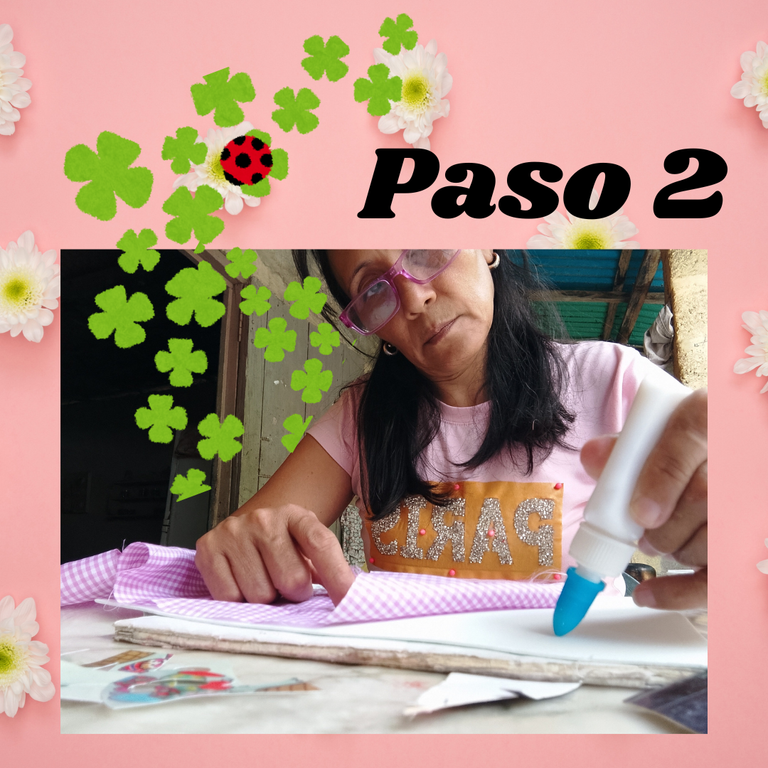
Step 2:
After cutting out the patterns, I will proceed with the technique of gluing the fabric to the foami. To do this procedure I put glue to the white foami, glue the fabric and leave it well stretched with a ruler so there are no bubbles, then let it dry and ready to cut. I used this technique to make the bow and dress of the ladybug; and the roof, bottom and heart of the little house.
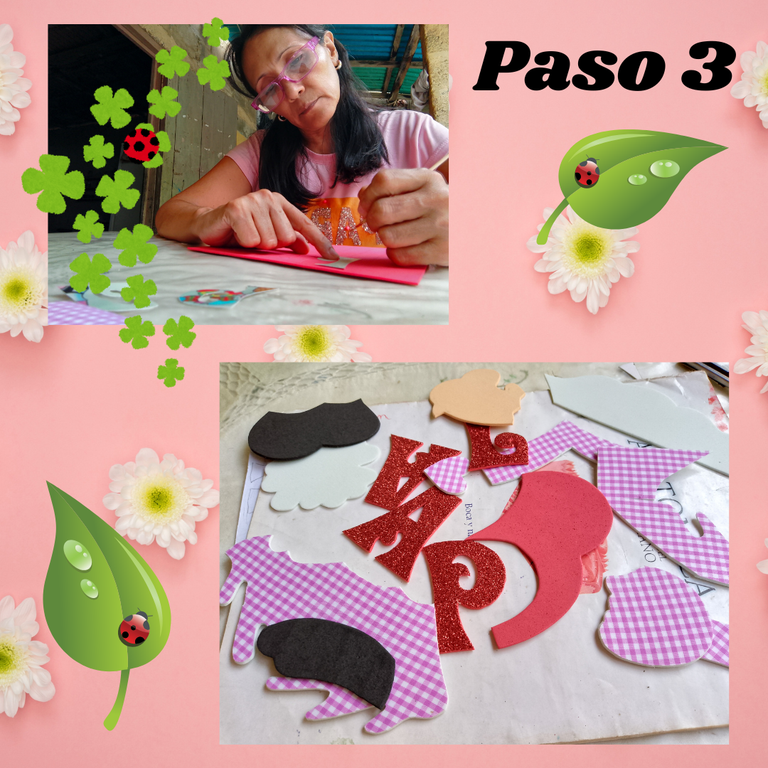
Paso 3:
Ya seca la tela en el foami, paso a recortar el vestido, el lazo y las partes de la casita, para este procedimiento se coloca el patrón por el lado contrario, marco y recorto (este proceso para recortar es solo con el de foami y tela) las demás piezas se recortan con el patrón del lado normal.
Step 3:
Already dry the fabric on the foami, step to cut out the dress, the bow and the parts of the little house, for this procedure the pattern is placed on the opposite side, frame and cut out (this process to cut out is only with the foami and fabric) the other pieces are cut out with the pattern on the normal side.
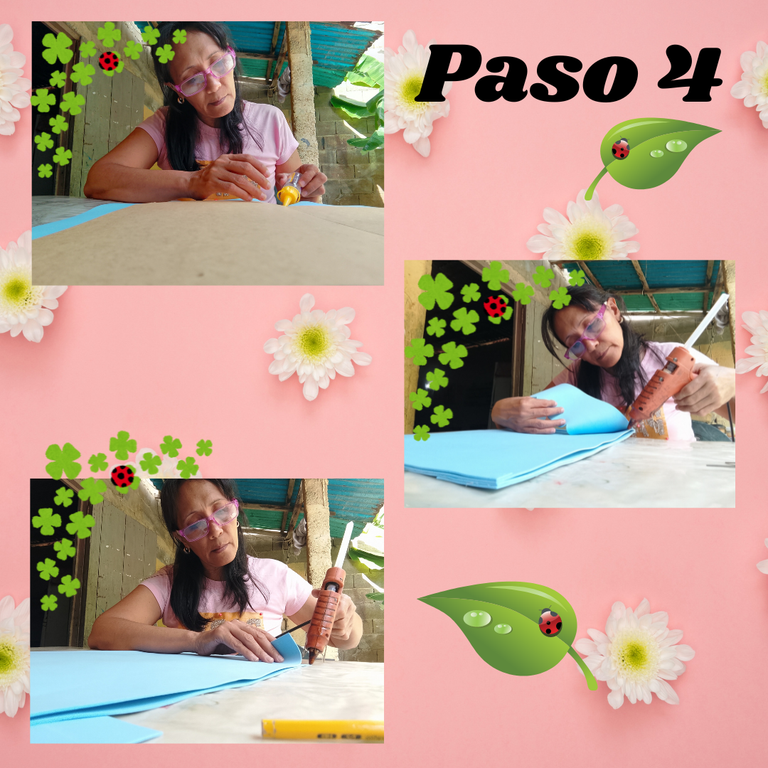
Paso 4:
Ya recortada todas las piezas, las dejo a un lado y comienzo a armar la carpeta, para esto pego la carpeta con silicón frío al pliego de foami azul celeste, dejo secar y luego recorto dejando unos centímetros mas grandes el foami que el tamaño de la carpeta, quedando ésta en forma de sobre grande, ya cortado el foami, paso a cerrar los lados con la pistola de silicón.
Step 4:
Already cut out all the pieces, I leave them aside and begin to assemble the folder, for this I glue the folder with cold silicone to the sheet of light blue foami, let dry and then cut leaving a few centimeters larger foami than the size of the folder, leaving it in the form of large envelope, and cut the foami, step to close the sides with the silicone gun.
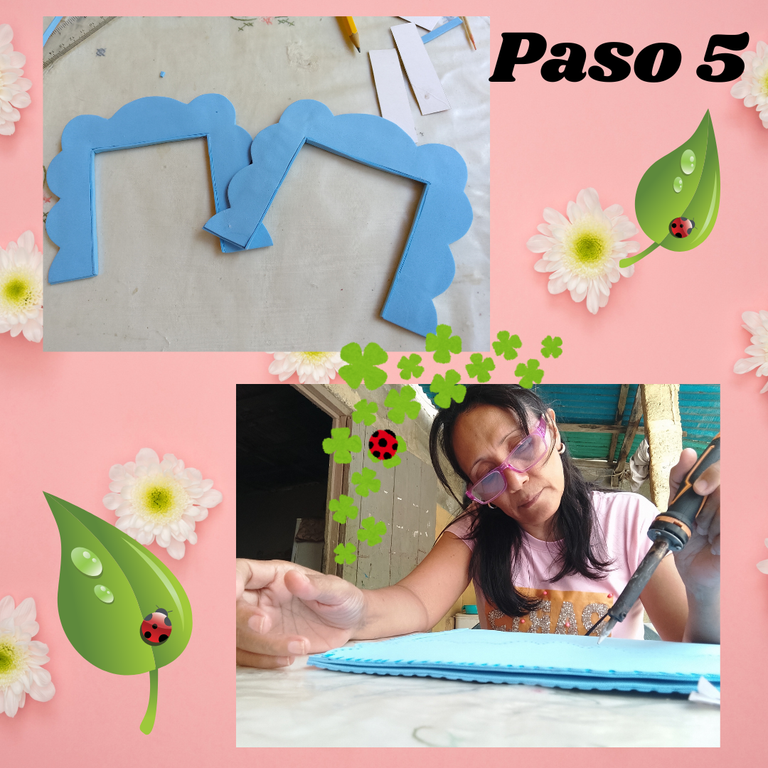
Step 5:
Once the whole folder is glued, I cut out and assemble the handles of the folder, ready, with a soldering iron I make shapes around it, I repeat this procedure with the folder and its flap.
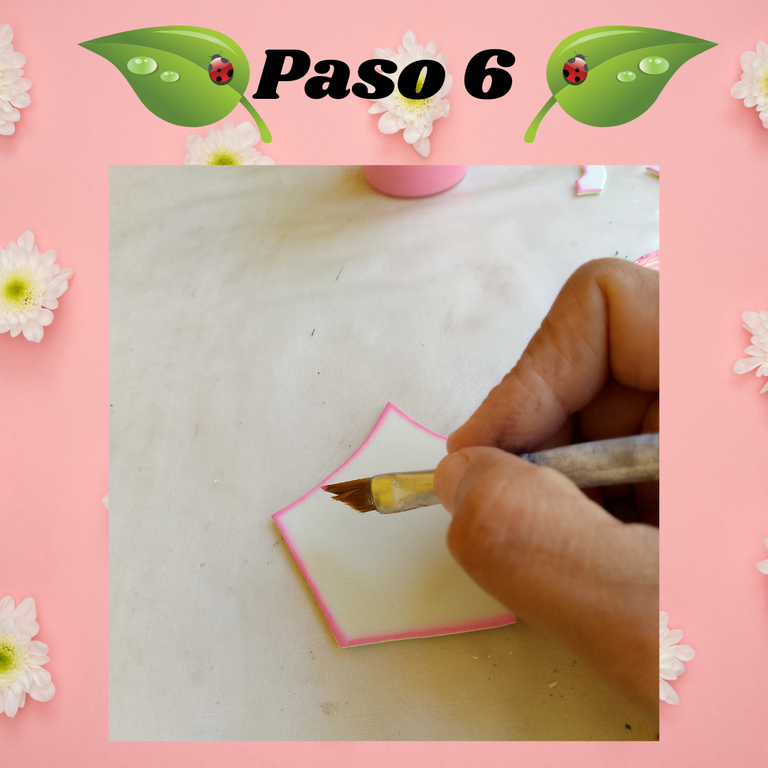
Step 6:
In this step I start shading each of the cut out pieces, including the folder and handles, and also move on to painting the ladybug's eyes and mouth.
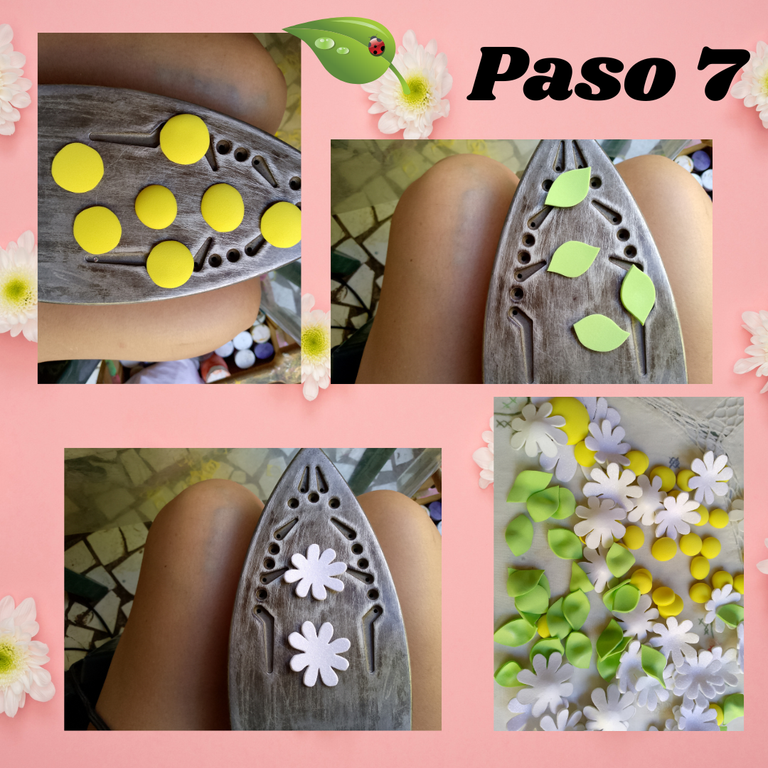
Paso 7:
Aquí paso a hacer la última parte de la carpeta, y es la de termoformar las flores y hojas. Para este procedimiento coloco las flores y hojas ya recortadas sobre la plancha caliente y espero que el foami esté un poco blando y voy dándole la forma a cada una de las flores y hojas.
Step 7:
Here I move on to the last part of the folder, and that is to thermoform the flowers and leaves. For this procedure I place the flowers and leaves already cut out on the hot plate and wait until the foami is a little soft and I give the shape to each of the flowers and leaves.
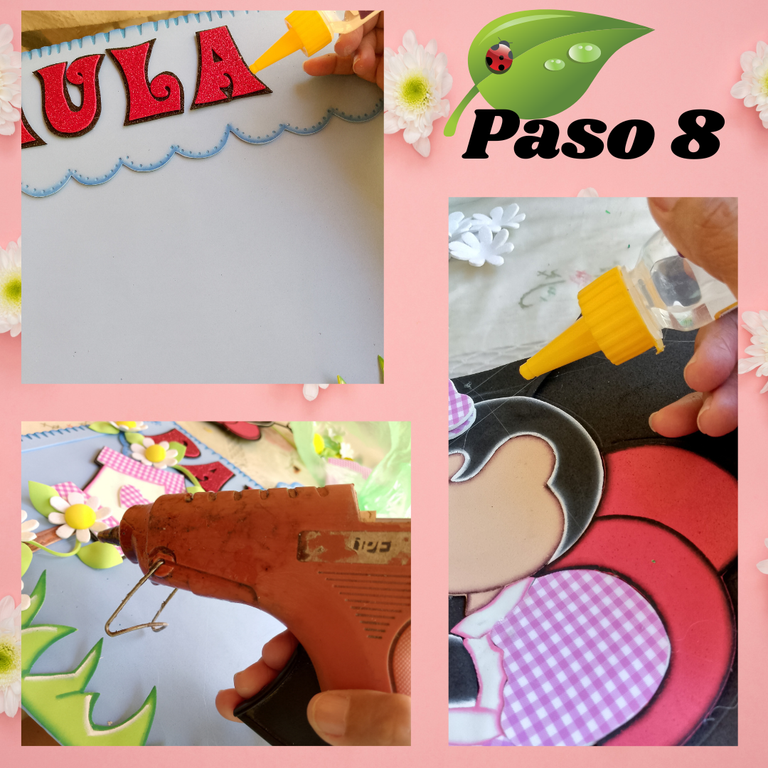
Paso 8:
Ya termoformada todas las flores y hojas, y sombreadas todas las piezas comienzo a armar toda la carpeta.
Step 8:
Already thermoformed all the flowers and leaves, and shaded all the pieces I start to assemble the whole folder.
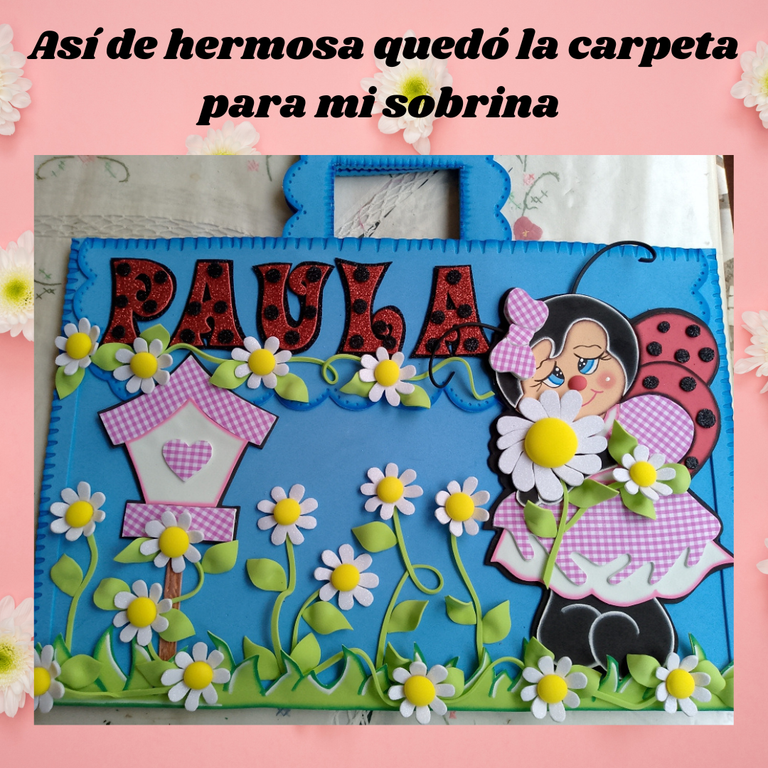
Y así quedó esta hermosa carpeta hecha en foami. Gracias por leerme.
And this is how this beautiful folder made in foami turned out. Thanks for reading.
Fotos tomadas con mi equipo celular Tecno Go Spark 2024
Editor de imagenes Canva
Traductor utilizado DeepL.com
Tutorial or step by step, completely by myself.

Photos taken with my Tecno Go Spark 2024 cell phone equipment.

Canva image editor

Translator used DeepL.com
Saludos @marijoha, que hermosa quedó la mariquita, me encantó la tela que usaste para el vestido, le da un estilo diferente y delicado, necesito una carpeta así para guardar mis patrones de costura, se ve espectacular, gracias por compartir el paso paso bien detallado.
Feliz viernes!
!DIY
Hola amiga @belkyscabrera, infinitas gracias por tus comentarios para con mi trabajo, que bueno que te haya gustado, espero te animes a hacer la carpeta para que tengas tus patrones guardados y seguros, un abrazo, saludos...🤗
You can query your personal balance by
!DIYSTATSThis is so nice.
Thank you friend @bimpcy I'm glad you liked it, greetings...🤗
Wow. Every thing about this folder making is perfection. Amazing detailing
Congratulations @marijoha! You have completed the following achievement on the Hive blockchain And have been rewarded with New badge(s)
Your next target is to reach 2500 upvotes.
You can view your badges on your board and compare yourself to others in the Ranking
If you no longer want to receive notifications, reply to this comment with the word
STOPEs muy hermoso y el tutorial está bien explicado. Buen trabajo.
Infinitas gracias amiga @ladyfoth me llena de satisfacción esos comentarios positivos, porque sé, que gusta mi trabajo, y me motiva a seguir intentándolo cada día, un abrazo, saludos...☺️🤗
De nada querida 🤗
La verdad es que Dios bendiga tus manos amiga te ha quedado muy linda la carpeta.
Amén y gracias por tus bendiciones amiga @tesoro4...🤗🙌