TUTORIAL: Korean Accessories, Earrings // Accesorios coreanos, Zarcillos.
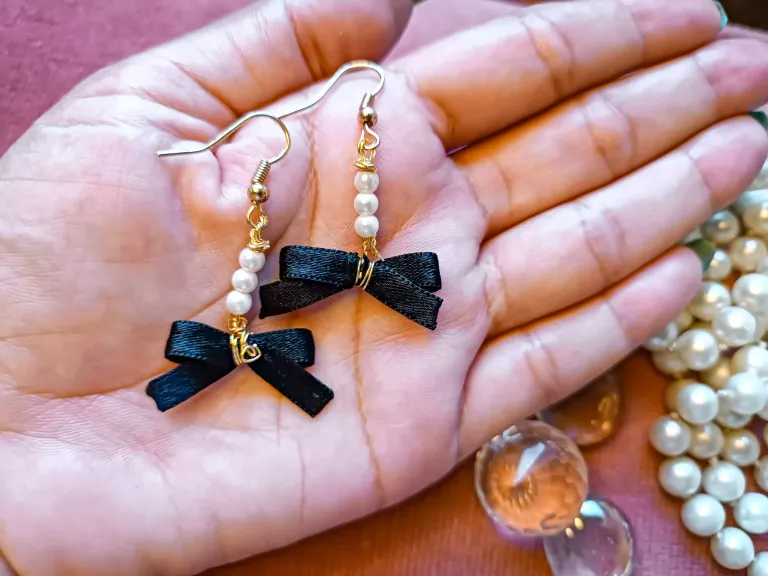
No sé si sea tendencia en los jóvenes de ahora o sólo es un gusto de mi hija que todo lo desea al estilo Coreano... Entonces me di a la tarea de buscar algunos accesorios con este estilo y le realicé unos zarcillos bastante cuchis y delicados.
He notado que muchos de los accesorios de esta moda coreana, llevan perlitas y lacitos... Son bastante delicados, elegantes y minimalistas.
Comprendí entonces que mi niña ya no está tan niña 🥹... No le gustan las cosas tan coloridas como antes, sus gustos están creciendo también y eso me llena de nostalgia.❤️🩹
Pese a que no tenía todos los materiales necesarios, me las ingenié con los que tenía a la mano y el resultado no me decepcionó.
Les cuento mi proceso y los materiales que usé para ello.
I don't know if it is a trend among young people nowadays or if it is just a taste of my daughter who wants everything Korean style.... So I decided to look for some accessories with this style and I made her some pretty cute and delicate earrings.
I have noticed that many of the accessories of this Korean fashion, have pearls and bows.... They are quite delicate, elegant and minimalist.
I understood then that my little girl is not so little anymore 🥹.... She doesn't like things as colorful as before, her tastes are growing up too and that fills me with nostalgia.❤️🩹
Despite the fact that I didn't have all the materials I needed, I managed with the ones I had on hand and the result did not disappoint.
I will tell you about my process and the materials I used for it.
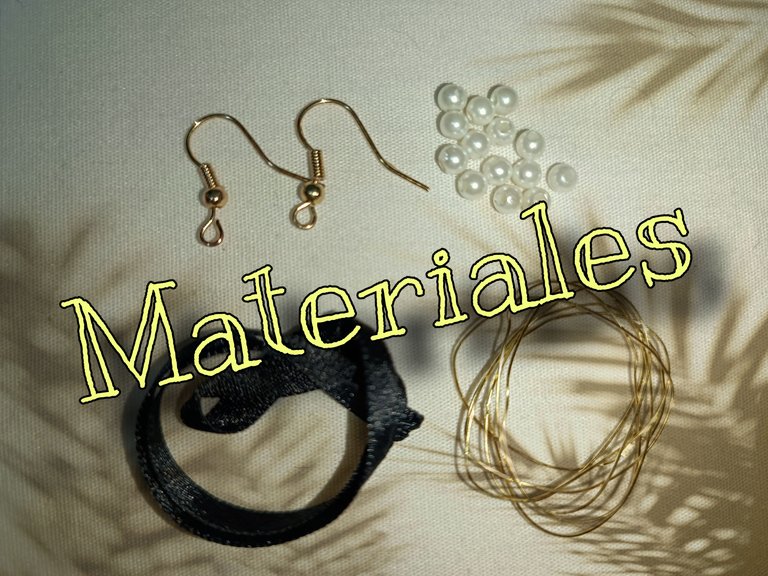
✨ Anzuelos dorados.
⚪ Perlitas pequeñas.
⚫ Cinta negra delgada.
⚪ Alambre de Goldfield para bisutería.
✨ Pinzas o piquetas pequeñas.
✨ Gold hooks.
⚪ Small beads.
⚫ Thin black ribbon.
⚪ Goldfield's wire for costume jewelry.
✨ Small tweezers or picks.
PROCESO
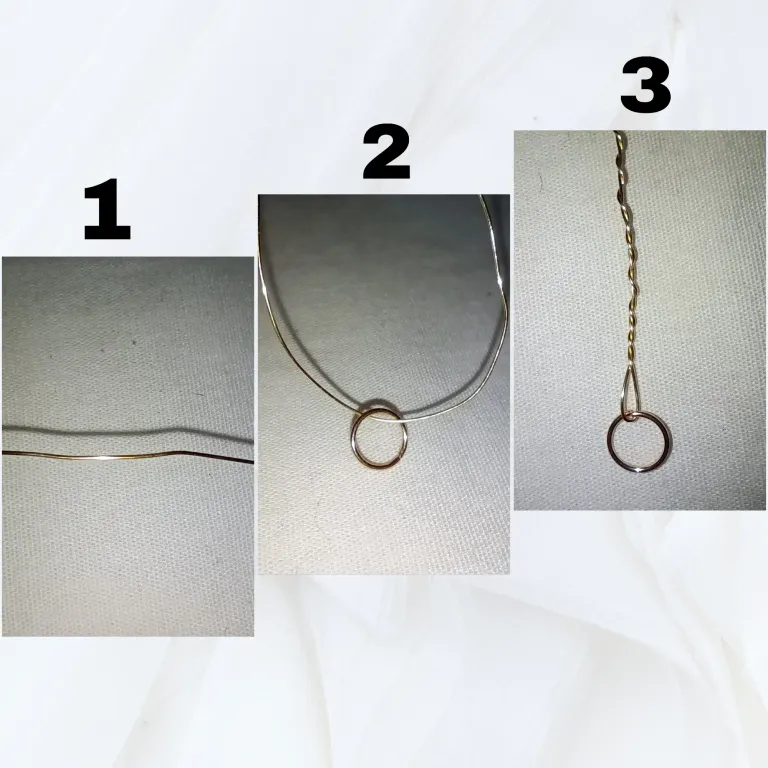
Como no tenía palillos de alambre para armar zarcillos, opté por trabajar con el alambre de Goldfield. No tenía muy claro como trabajaría con él pero sabía que me sería útil 😁.
Así que corté un pedazo generoso, de unos 7 centímetros más o menos, lo pasé a través de un arito que al final no terminé usando 😁 y como tercer paso entorché el alambre, dejando en la parte final una argollita creada con el mismo alambre.
PROCESS
Since I didn't have wire sticks to assemble tendrils, I opted to work with Goldfield's wire. I wasn't quite sure how I would work with it but I knew it would come in handy 😁.
So I cut a generous piece, about 7 centimeters or so, passed it through a hoop that in the end I didn't end up using 😁 and as a third step I twisted the wire, leaving at the end a little ring created with the same wire.
Luego empecé a pasar las perlitas por el entorchado... Cómo los zarcillos son para mí hija, no quería que fueran demasiados largos, pues aunque tiene tamaño no quiero algo tan exagerado para ella, así que sólo le agregué 3 perlitas pequeñas.
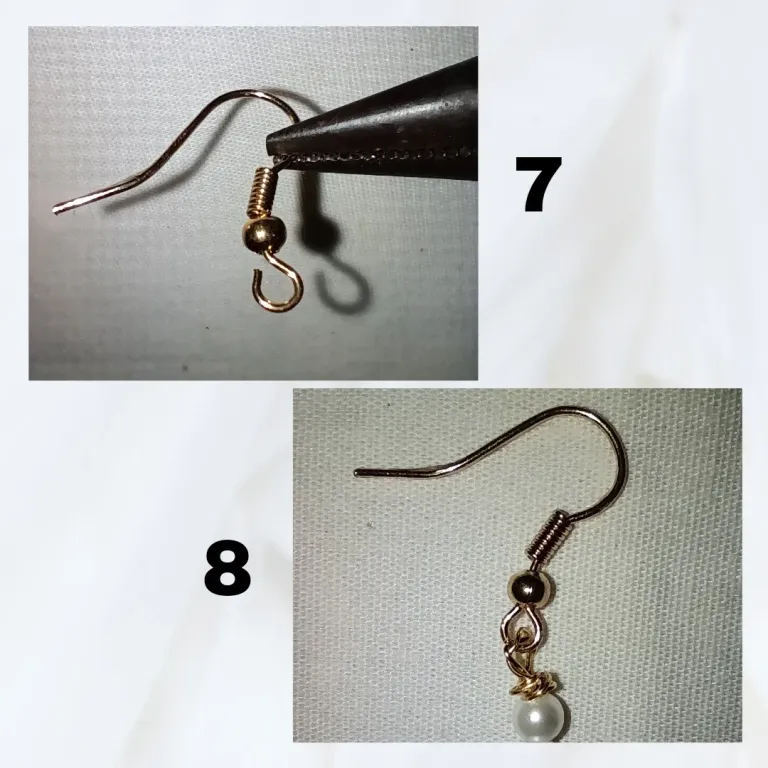
Como sexto paso, con las pinzas hice un entorchado y creé otra argollita.
Los siguientes pasos fueron abrir un poco la curvatura del anzuelo para pasar por allí la argollita que había hecho anteriormente y cerré.
Then I started to pass the beads through the braiding.... As the tendrils are for my daughter, I didn't want them to be too long, because although she has size I don't want something so exaggerated for her, so I only added 3 small beads.
As a sixth step, with the tweezers I made a twist and created another little ring.
The next steps were to open the bend of the hook a little to pass through it the small ring I had made earlier and I closed the hook.

A este punto solo necesitamos el adorno central de los zarcillos, que serían los lacitos.
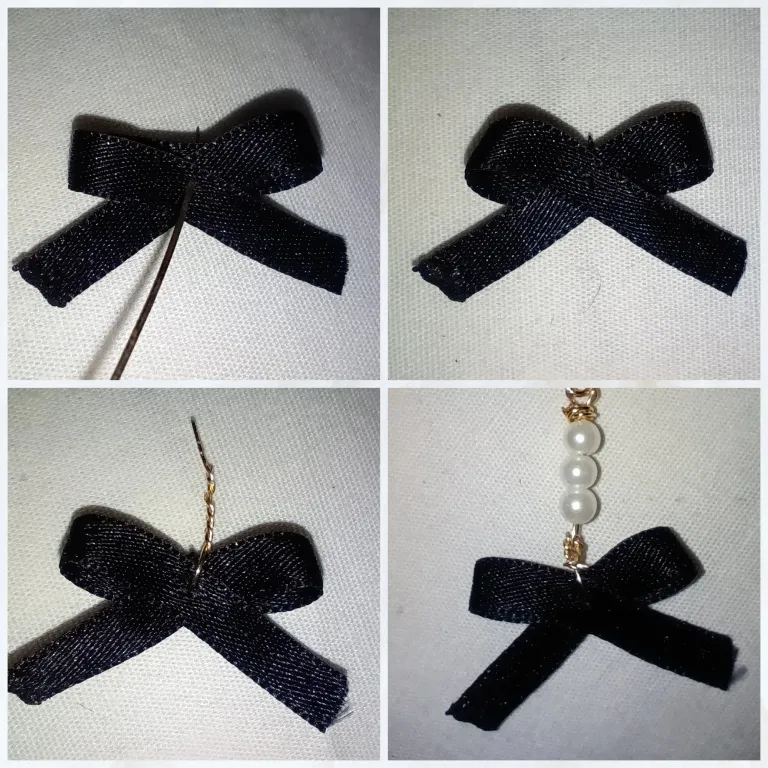
Tomamos una cinta negra delgadita y hacemos un lacito bastante pequeño, eso hará que se vea delicado y nada grotesco.
Lo cosemos, luego atravesamos el centro del lazo con un trocito de alambre, entorchamos y lo fijamos al zarcillo, es importante quemar los bordes de la cinta para evitar que se vayan por allí los hilitos.
Al principio había pensado fijarlo a la argolla grande, sin embargo esto haría ver el zarcillo más grande y no quería. Por eso lo fijé solamente en la argollita hecha con alambre.
Y por último hice "el intento" 😁, de hacer un diseño en el lazo con el alambre, pero aún no me sale. Creo que necesito una pinza con la punta más fina.
Un TIPS importante: Como el anzuelo es de fantasía, tiende a oxidarse muy pronto y más si la persona es de sudor fuerte. Así que para retardar un poco ese proceso, le aplico varias capas de brillo de uña, y así formo una capa que los proteje en el tiempo).
Luego de esto, los puse a secar y walaaa... Ha sacar las fotos del resultado! 😍
At this point we only need the central ornament of the tendrils, which would be the bows.
We take a thin black ribbon and make a fairly small bow, that will make it look delicate and not grotesque.
We sew it, then we go through the center of the ribbon with a small piece of wire, we twist and fix it to the tendril, it is important to burn the edges of the ribbon to prevent the threads from going through there.
At first I had thought of attaching it to the big ring, however this would make the tendril look bigger and I didn't want to. So I only attached it to the little ring made with wire.
And finally I made "the attempt" 😁, to make a design on the loop with the wire, but it still doesn't come out. I think I need a tweezers with a finer tip.
An important TIPS: As the hook is fancy, it tends to rust very soon and more if the person is of strong sweat. So to slow down this process a little, I apply several coats of nail polish, and thus form a layer that protects them over time).
After that, I put them to dry and walaaa.... To take the pictures of the result! 😍
RESULTS // RESULTADO
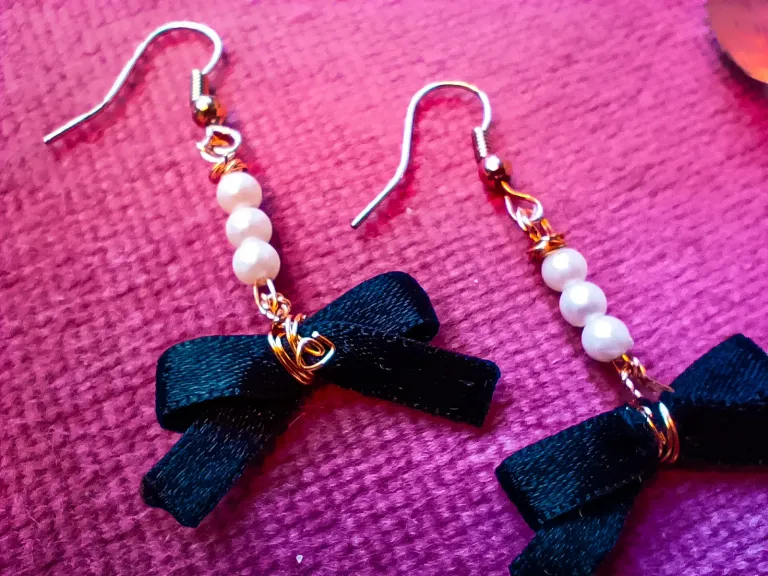
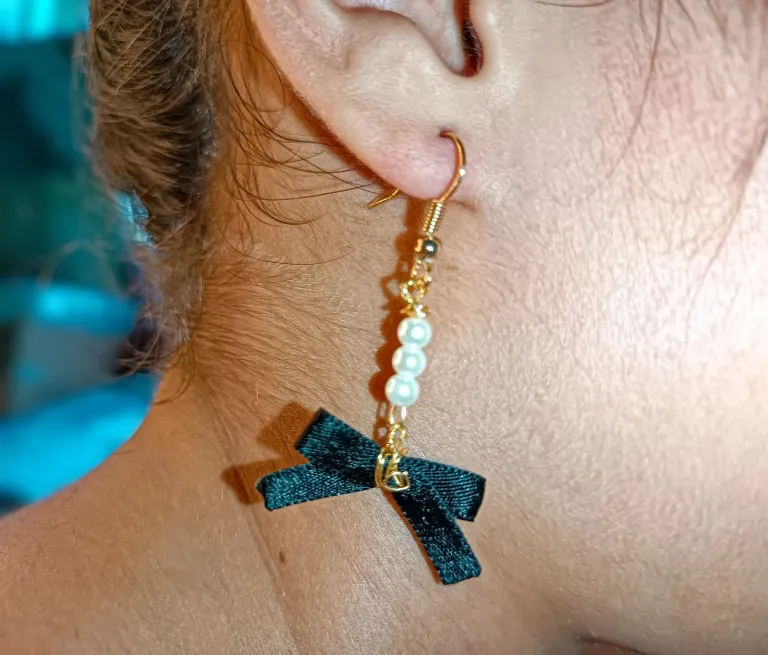
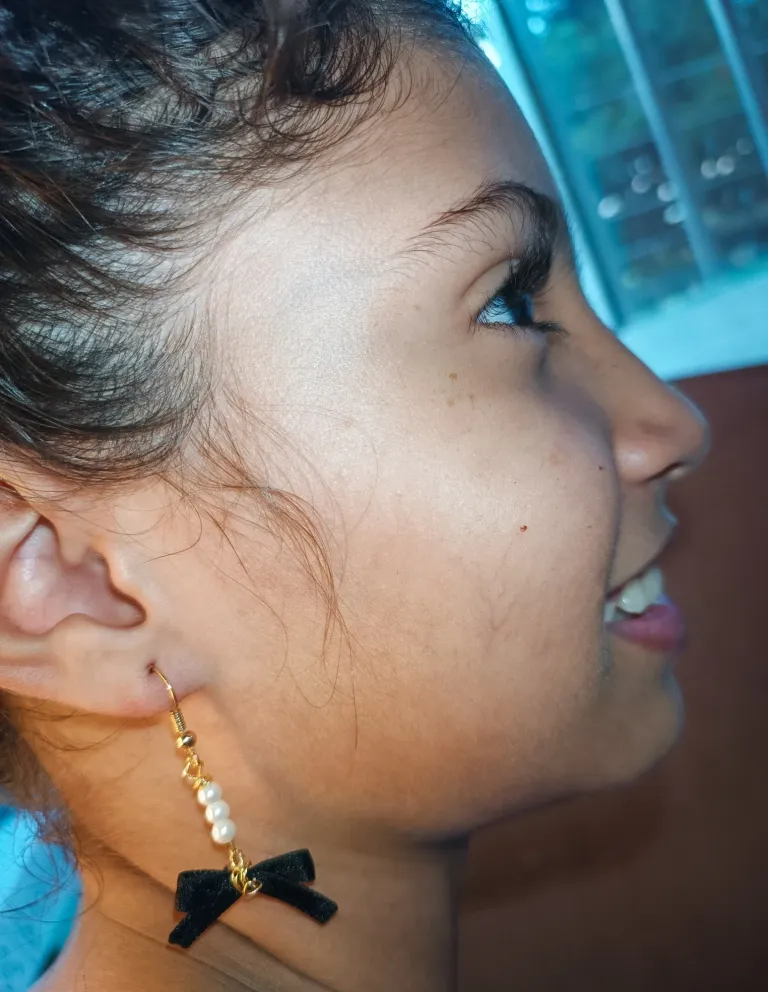
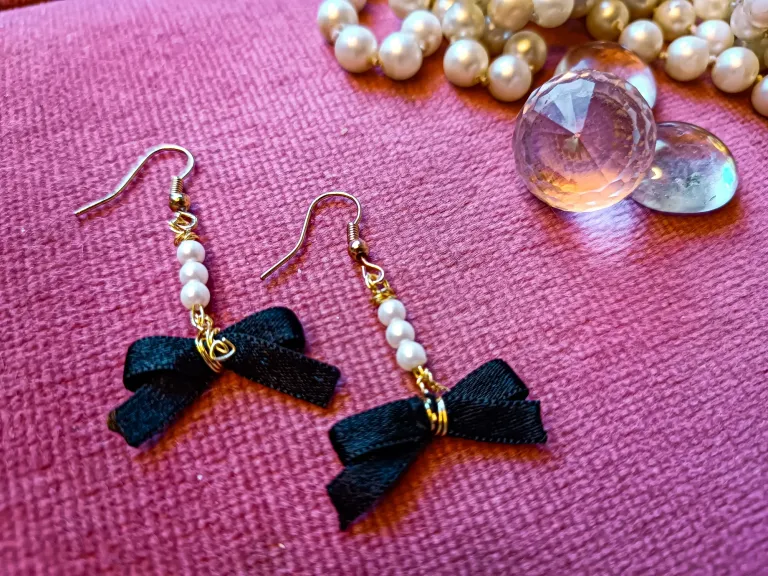
Estos zarcillitos quedaron muy coquetos, a mí hija le encantaron y yo ya estoy pensando en hacerme un diseño parecido con perlas y lacitos... 😍✨
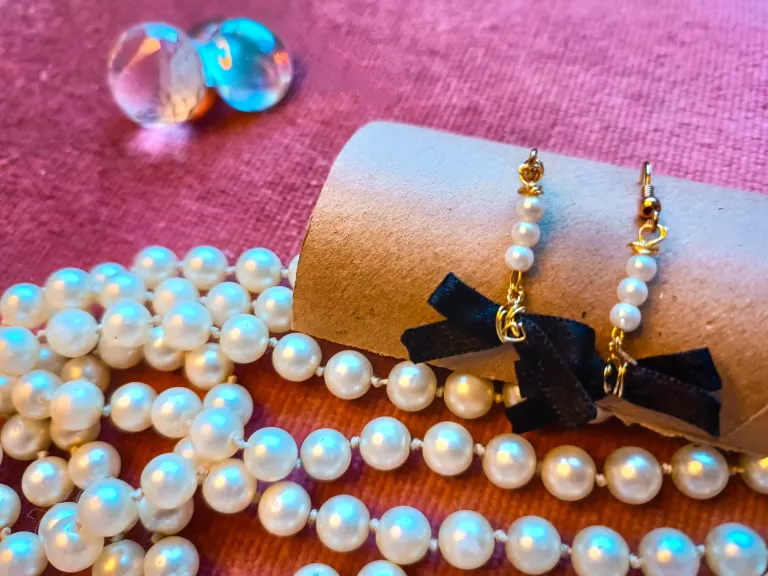
Existen muchos accesorios con estilo coreano muy fáciles de recrear, así que probablemente empiece a elaborar unos cuantos más para mí niña adolescente.
Espero les haya resultado útil y práctico este tutorial. Me despido con cariño, hasta un próximo post!♥️
These little tendrils were very cute, my daughter loved them and I'm already thinking of making a similar design with pearls and bows.... 😍✨
There are many Korean style accessories that are very easy to recreate, so I will probably start making some more for my teenage girl.
I hope you found this tutorial useful and practical. I bid you a fond farewell, until a future post!♥️
For the best experience view this post on Liketu
Te quedaron muy muy lindos y delicados.
Muchas gracias amiga! 😊♥️
So beautiful
Very thanks My dear @patience2 💚
Lovely dear.
Please I need a set of this earing becasue what's all these beauty. It's so lovely dear
Very thanks My dear Friend! A Big hug!♥️