[ESP-ENG] Hermosa Muñequita con Imán, para la Nevera 👩🏻🦰/Beautiful Doll with Magnet, for the Fridge 👩🏻🦰
Feliz dia amigos de la comunidad de Hive diy, espero estén teniendo un excelente dia, cómo siempre un gran gusto saludarles, en esta ocasión les mostraré mi nuevo proyecto, una hermosa muñequita con imán para la nevera, realizado con reciclaje, es un adorno para darle vida y vistosidad a este artefacto de la cocina.
Happy day friends of the Hive diy community, I hope you are having an excellent day, as always a great pleasure to greet you, this time I will show you my new project, a beautiful little doll with a magnet for the fridge, made with recycling, it is an ornament for give life and showiness to this kitchen artifact.
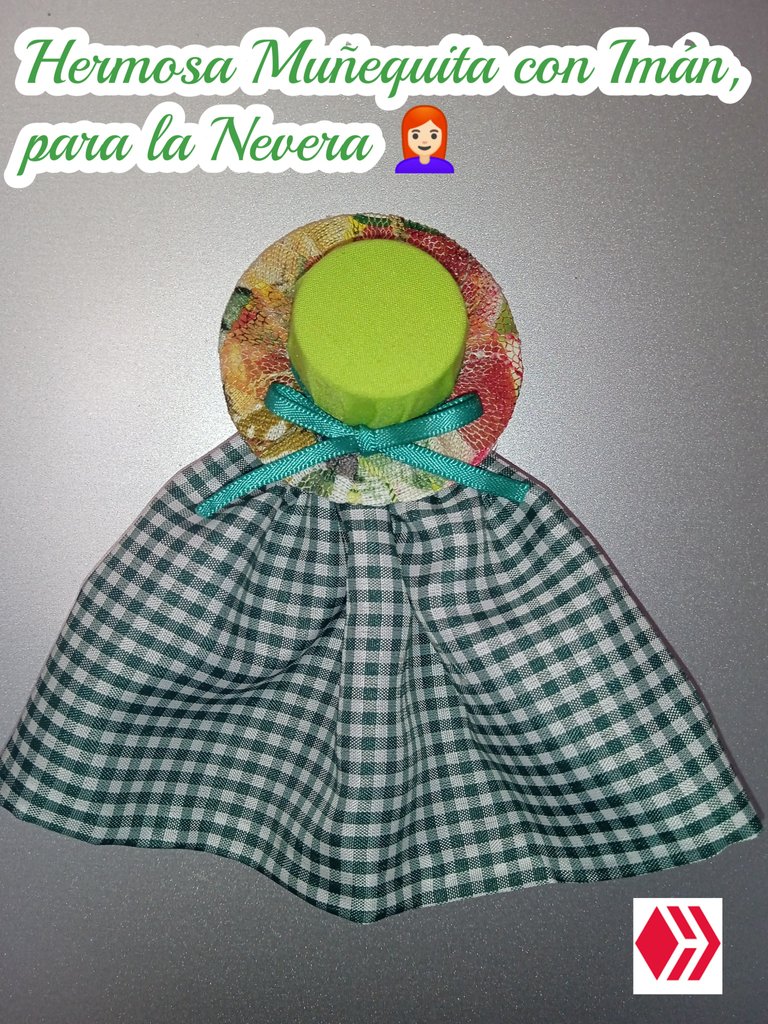
Hermosa Muñequita con Imán, para la Nevera 👩🏻🦰
Materiales
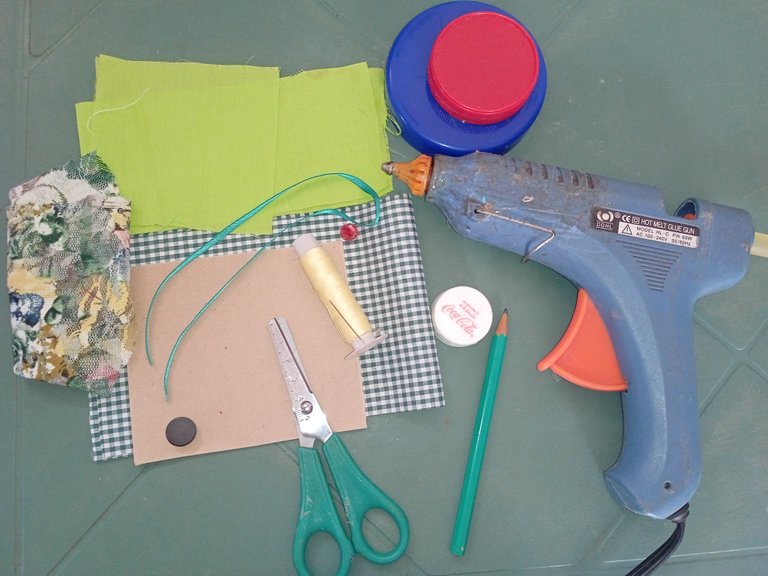
Retazos de tela combinados
Cartulina
Hilo y aguja
1 tapa de plástico
Lápiz
Tijera
Cinta de tela
Silicón caliente
Imán
Molde de círculo de 5 y 10 cm
Beautiful Doll with Magnet, for the Fridge 👩🏻🦰
Materials
Mixed fabric scraps
Cardboard
needle and thread
1 plastic lid
Pencil
Scissors
cloth tape
hot silicone
Magnet 5 and 10 cm circle mold
Procedimiento/Process
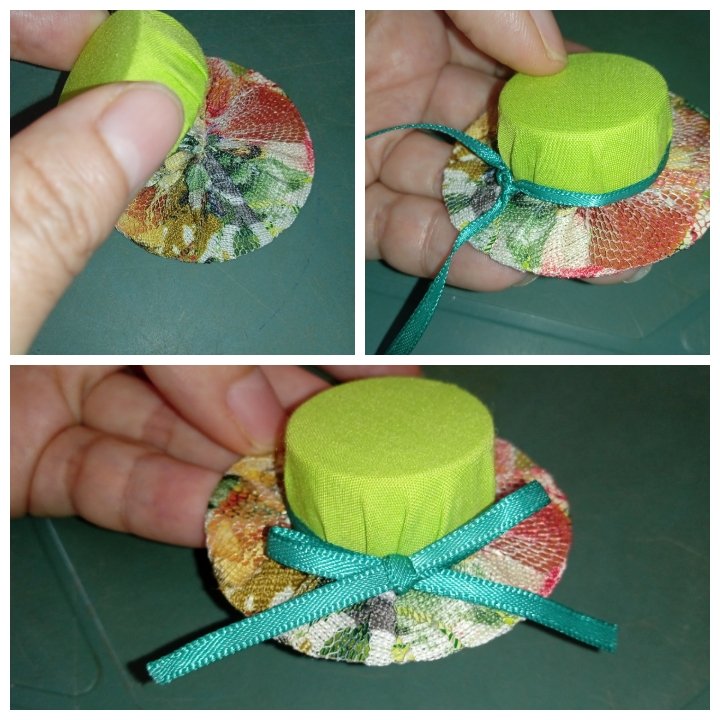
1.Para comenzar este proyecto vamos a realizar el sombrero de la muñeca y para ello, marcamos en la tela verde claro un círculo de 5 cm de diámetro y recortamos, luego hacemos el popular yo-yo con aguja e hilo (pasamos una costura alrededor del círculo de tela que hicimos introducimos la tapa y luego arruchamos y reforzamos muy bien).
1.To start this project we are going to make the doll's hat and to do this, we mark a circle of 5 cm in diameter on the light green fabric and cut it out, then we make the popular yo-yo with a needle and thread (we pass a seam around from the circle of cloth that we made we introduce the lid and then we wrinkle and reinforce very well).
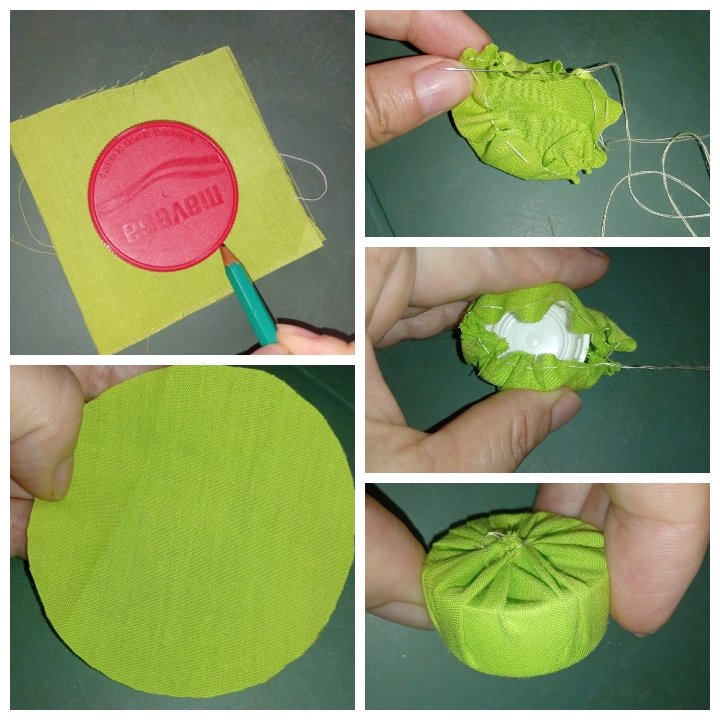
2.Continuamos haciendo el sombrero ahora la base, marcamos en la cartulina un círculo de 5 cm y recortamos, de igual manera, marcamos en la tela un círculo de 10 cm de diámetro y recortamos, luego hacemos la técnica de yo-yo y colocamos el cartón que recortamos, reforzamos muy bien al final.
2.We continue making the hat now the base, we mark a 5 cm circle on the cardboard and cut, in the same way, we mark a 10 cm diameter circle on the fabric and cut, then we do the yo-yo technique and place the cardboard that we cut out, we reinforced very well at the end.
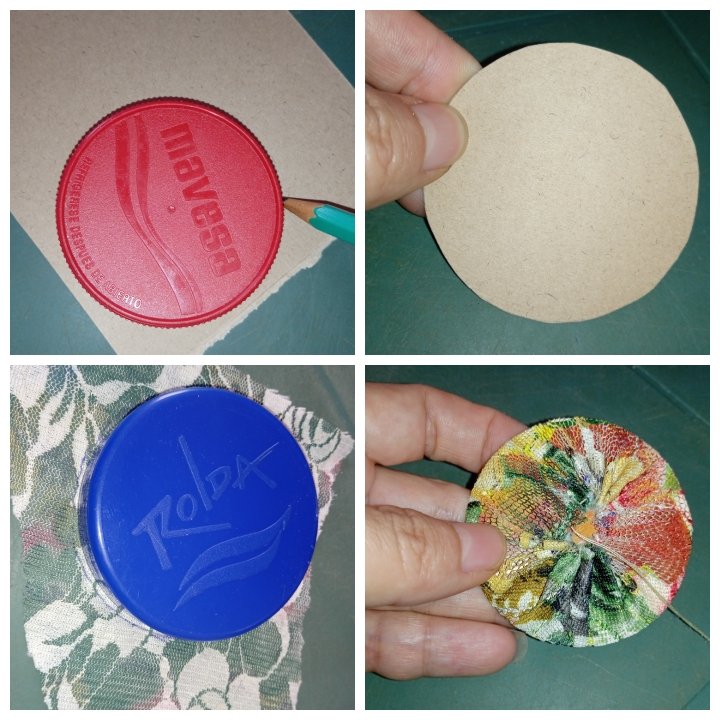
3.Una vez que tenemos las dos piezas, pegamos con silicón caliente la tapa forrada en lo que hicimos en el paso anterior, también con la cinta hacemos un lazo y listo el sombrero de la muñeca.
3.Once we have the two pieces, we glue the lined lid with hot silicone in what we did in the previous step, we also make a bow with the tape and the doll's hat is ready.
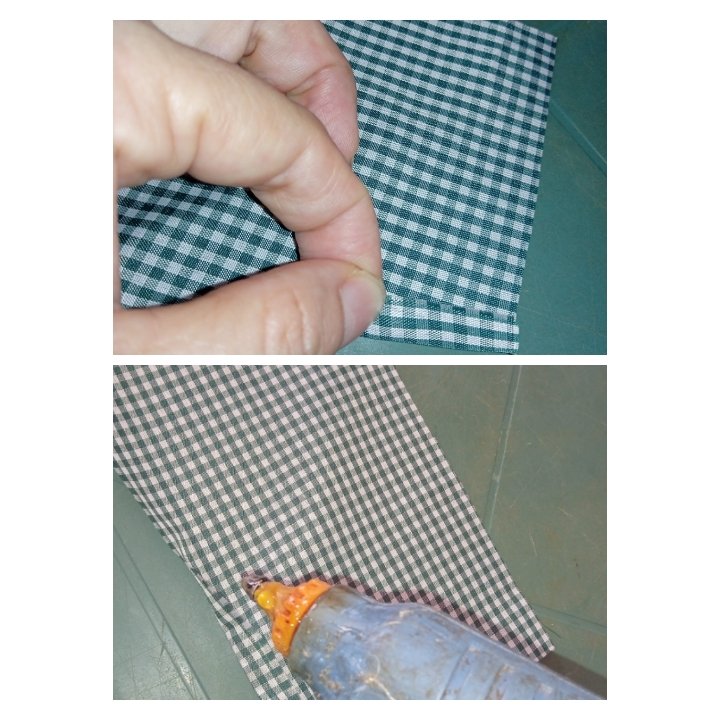
4.Luego vamos a realizar el vestido, para ello recortamos en la tela un rectángulo de 30x10 cm, en un extremo doblamos a 1/2 cm aproximadamente y pegamos o cosemos, en este caso lo pegué con el silicón.
4.Then we are going to make the dress, for this we cut out a 30x10 cm rectangle in the fabric, at one end we fold approximately 1/2 cm and glue or sew, in this case I glued it with silicone.
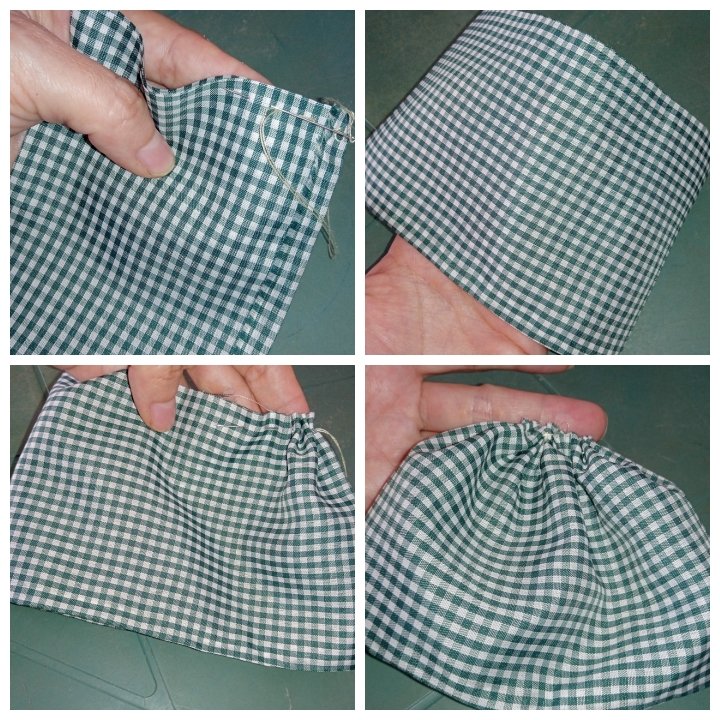
5.Luego doblamos por lo ancho y cosemos, recordamos siempre reforzar la costura al principio y al final, luego volteamos hacia el derecho y cosemos en el extremo superior y arruchamos, así queda el vestido.
5.Then we fold in width and sew, always remembering to reinforce the seam at the beginning and at the end, then we turn to the right and sew at the upper end and wrinkle, so the dress remains.
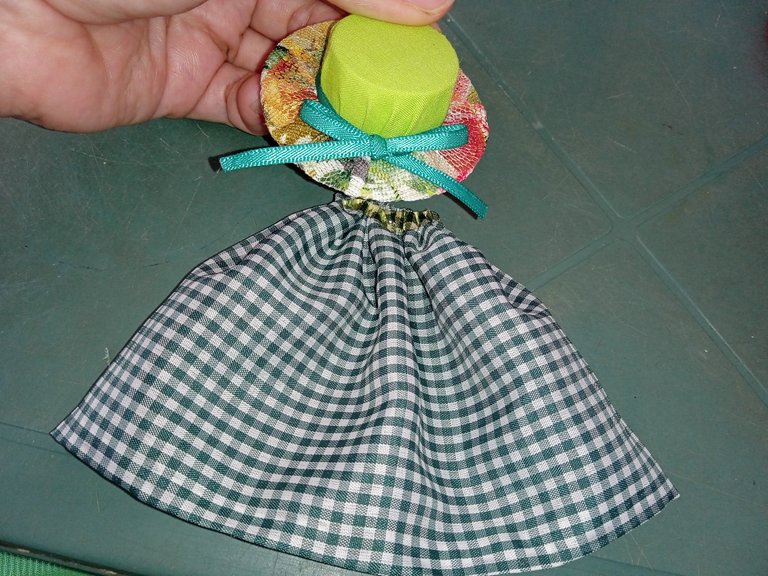
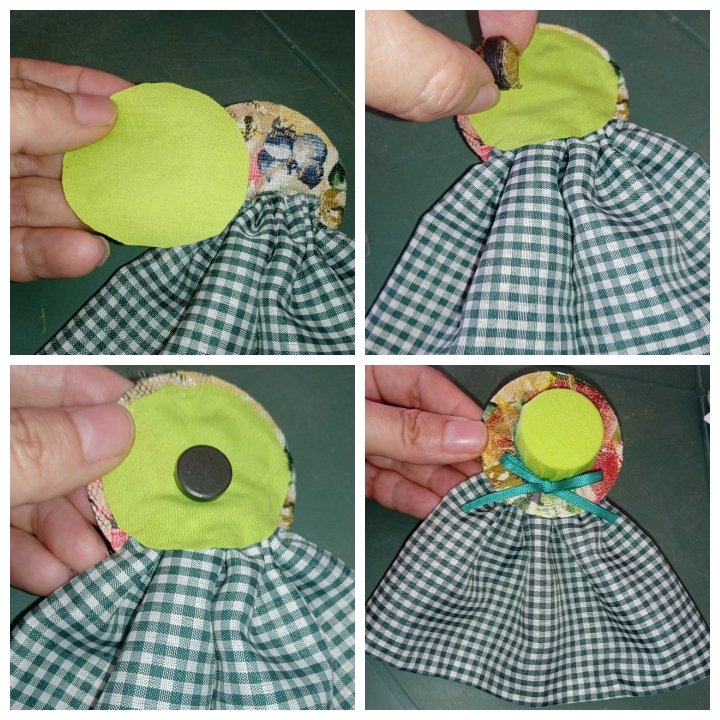
6.Despues pegamos el sombrero al vestido.
6.Then we glue the hat to the dress.
7.Recortamos otro círculo con la tela y pegamos en la parte de atrás, para que el proyecto quede más prolijo, pegamos el imán y lista la muñeca con imán para la nevera.
7.Cut out another circle with the fabric and glue on the back, so that the project is neater, glue the magnet and the doll with magnet for the fridge is ready.
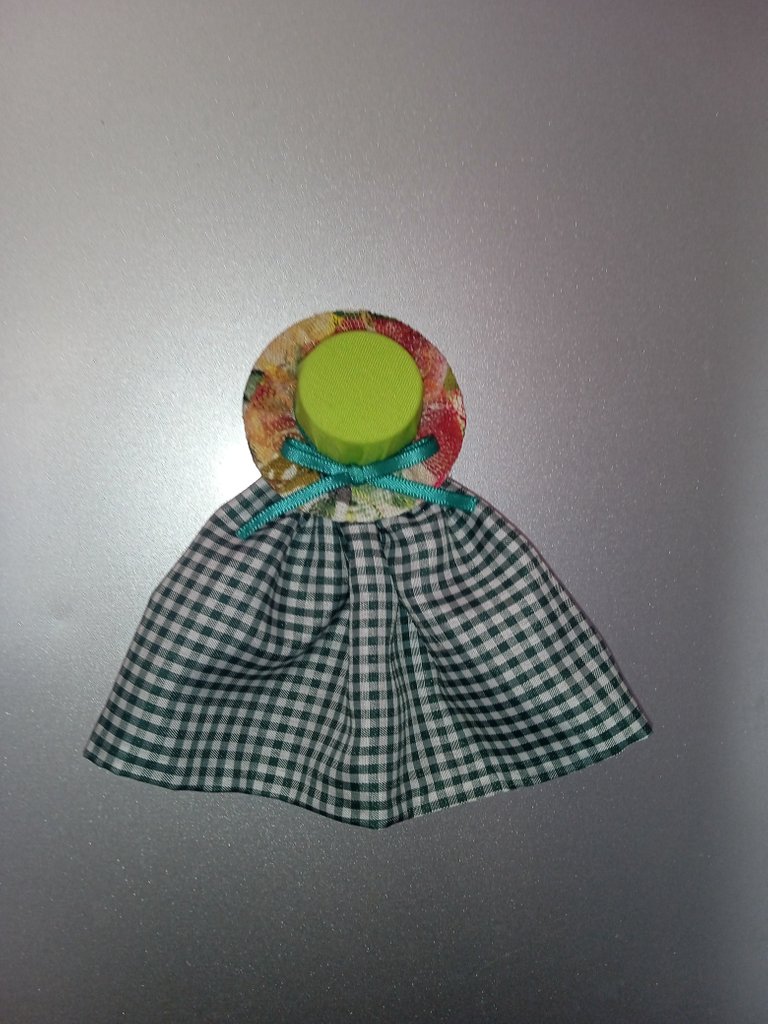
Hermosa Muñequita!
Beautiful Doll!
Hasta aquí mi Proyecto de este día, espero les haya gustado, muchas gracias por el apoyo brindado. Saludos 👩🏻🦰
So Project for this day, I hope you liked it, thank you very much for the support. Greetings 👩🏻🦰
Todas las imágenes son de mi autoria por @mariarodriguez, tomadas especialmente para esta publicación.
All images are my own by @mariarodriguez, taken especially for this publication.

Hermoso proyecto me recuerda aquellos adornos de nevera que mi mamá tenía.
!discovery 35
This post was shared and voted inside the discord by the curators team of discovery-it
Join our Community and follow our Curation Trail
Discovery-it is also a Witness, vote for us here
Delegate to us for passive income. Check our 80% fee-back Program
Linda creatividad, felicidades buen trabajo.
Es un lindo adorno, me gustaron los colores de la tela. Me parece que el proceso es sencillo, así que lo puedo intentar 😃. Gracias por compartir, bendiciones para ti, amiga.