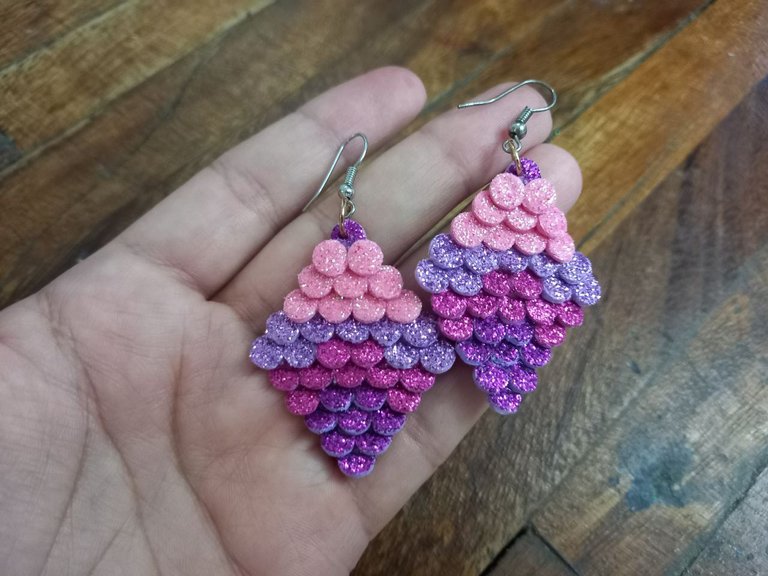
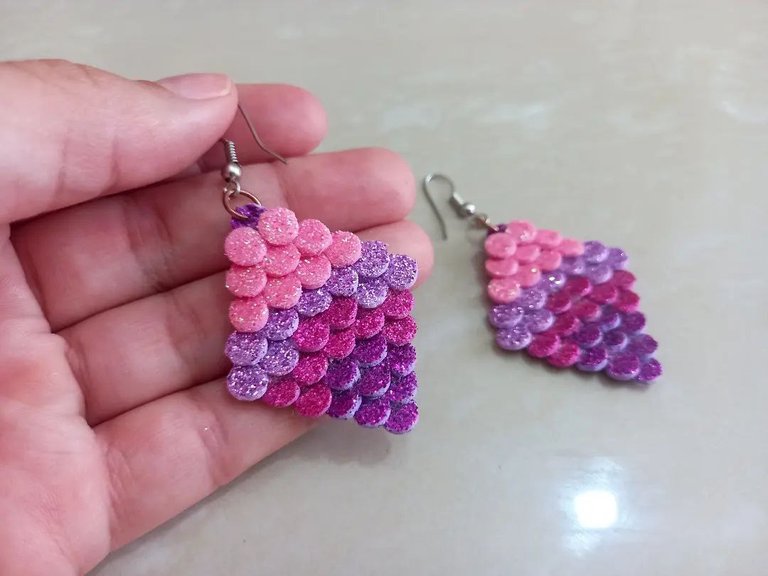
Zarcillos de foami en forma de rombo al estilo sirena | Tutorial [ESP-ENG]


En definitiva este ha sido el año en el que menos manualidades he elaborado y es que entre tantas cosas ha sido prácticamente imposible para mi tomarme el tiempo de sentarme a crear alguna manualidad, pero créanme que las pocas que he hecho me han gustado mucho y aunque tarde más de lo esperado en compartir los tutoriales en mi blog tarde o temprano termino haciéndolo y es por eso que estoy acá el día de hoy, en esta ocasión les quiero mostrar algo diferente a lo que normalmente suelo compartirles, pues, no es una manualidad para decorar sino un lindo accesorio que he elaborado en foami, unos hermosos zarcillos en forma de rombo al estilo sirena con 4 tonos diferentes de foami que para mí quedaron simplemente hermosos y además lucen elegantes, tenía tiempo con la idea en mente de hacer accesorios pero en foami porque es el material con el que más trabajo y finalmente pude llevar a cabo esta idea y elaborar unos lindos zarcillos y luego de ver el resultado quiero hacer muchos accesorios más de este estilo, por supuesto no podía dejar de compartir el proceso con ustedes y en este post les mostraré su elaboración, espero que les guste, sin más, ¡vamos a crear!
In short, this has been the year in which I have made the least crafts and among so many things it has been practically impossible for me to take the time to sit down and create some crafts, but believe me, I really liked the few that I have made and although It takes longer than expected to share the tutorials on my blog, sooner or later I end up doing it and that is why I am here today, on this occasion I want to show you something different from what I normally share with you, well, it is not a craft to decorate but a nice accessory that I have made in foami, some beautiful rhombus-shaped tendrils in the mermaid style with 4 different shades of foami that for me were simply beautiful and also look elegant, I had the idea in mind of making accessories for some time but in foami because it is the material with which I work the most and finally I was able to carry out this idea and make some beautiful tendrils and after seeing the result I want to make many more accessories of this style, of course I couldn't stop sharing the process with you and in this post I will show you how it is made, I hope you like it, without further ado, let's create!

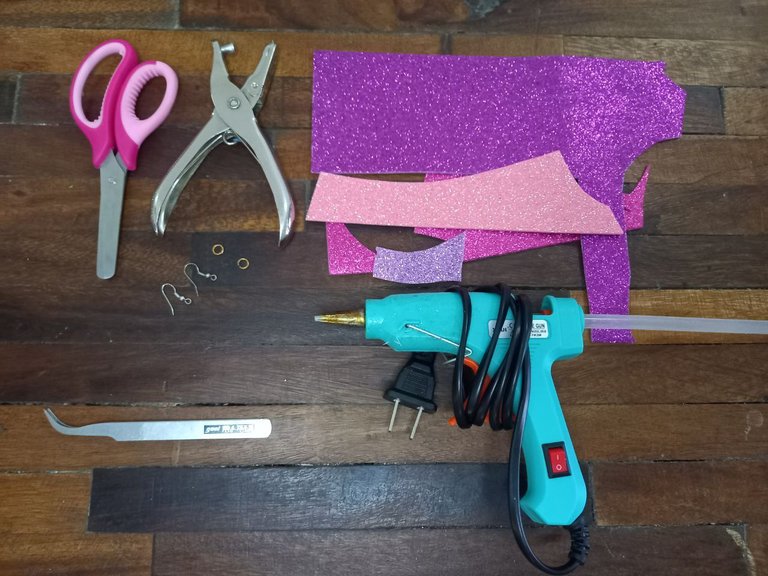
• Foami escarchado morado de 2 tonos diferentes.
• 2 Aros de bisutería.
• 2 Ganchos tipo anzuelo.
• Pinza punta fina.
• Abrehuecos.
• Silicón caliente.
• Tijera.
• Alicate.
• Purple frosty foam in 2 different shades.
• 2 jewelry rings.
• 2 hook type hooks.
• Fine tip tweezers.
• Gap opener.
• Hot silicone.
• Scissors.
• Pliers.

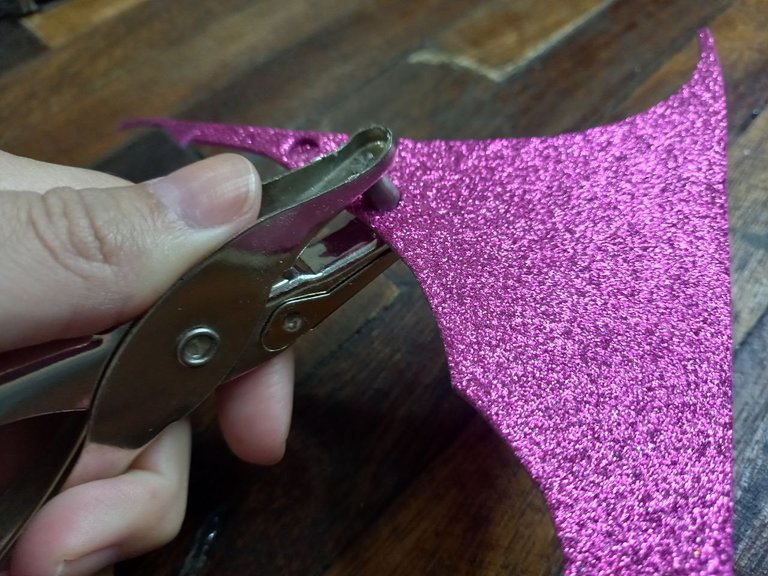
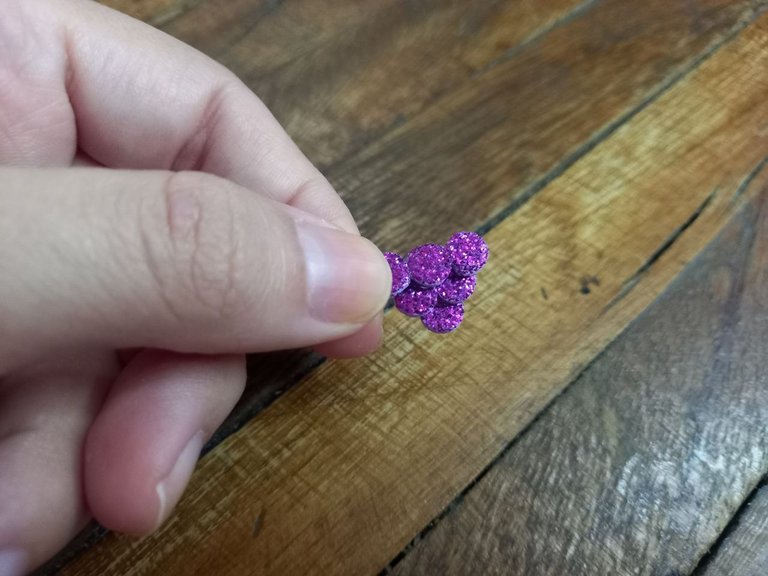
★ PASO 1. Lo primero que hice fue recortar varios círculos de foami de todos los colores con el abrehuecos, en total fueron 9 de cada color.
★ STEP 1. The first thing I did was cut out several foam circles of all colors with the hole opener, in total there were 9 of each color.


★ PASO 2. Ya teniendo todas las piezas de foami procedí a ordenarlas por color dándole la forma de rombo que quería que tuvieran los zarcillos.
★ STEP 2. Having all the foam pieces, I proceeded to organize them by color, giving them the rhombus shape that I wanted the tendrils to have.
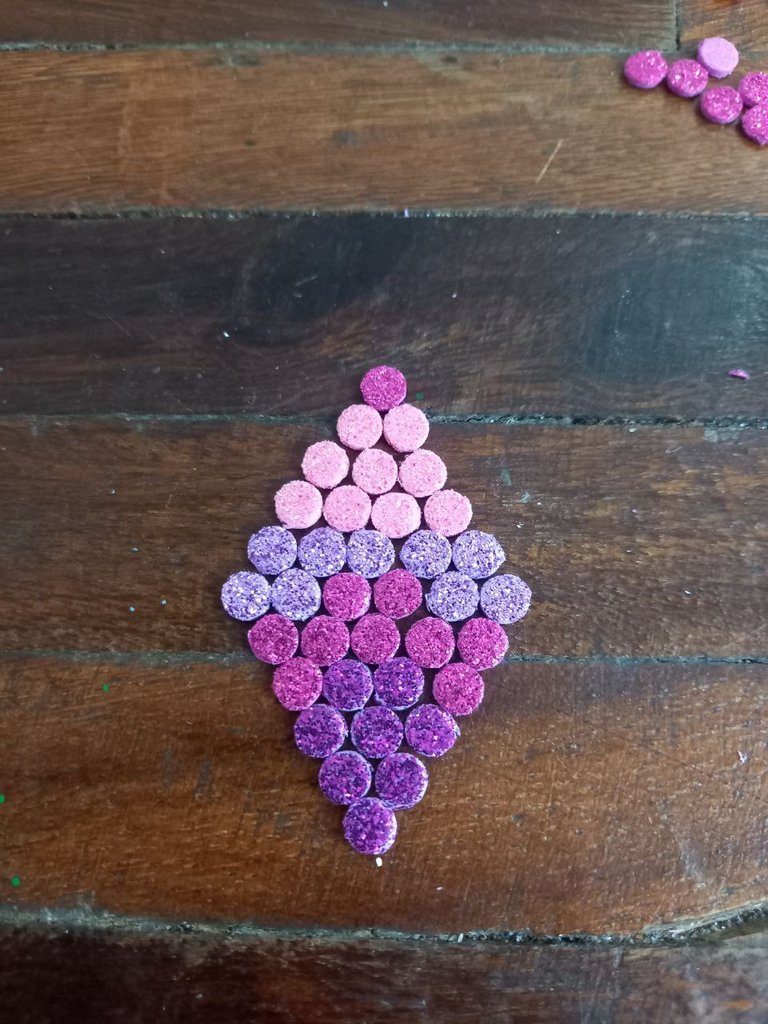
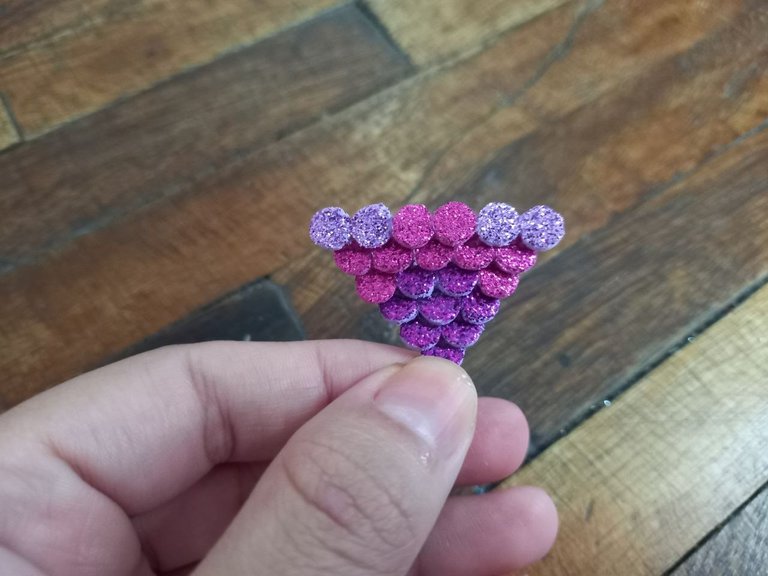
★ PASO 3. Una vez que sabía cómo formar el zarcillo comencé a unir las piezas de foami comenzando desde abajo hacia arriba, primero unía las piezas de una hilera completa pegando los círculos uno al lado del otro para formar las hileras y para ello me ayudé con una pinza de punta muy fina.
★ STEP 3. Once I knew how to form the tendril, I began to join the foam pieces starting from the bottom up, first I joined the pieces of a complete row by gluing the circles next to each other to form the rows and To do this, I helped myself with a very fine-tipped tweezer.
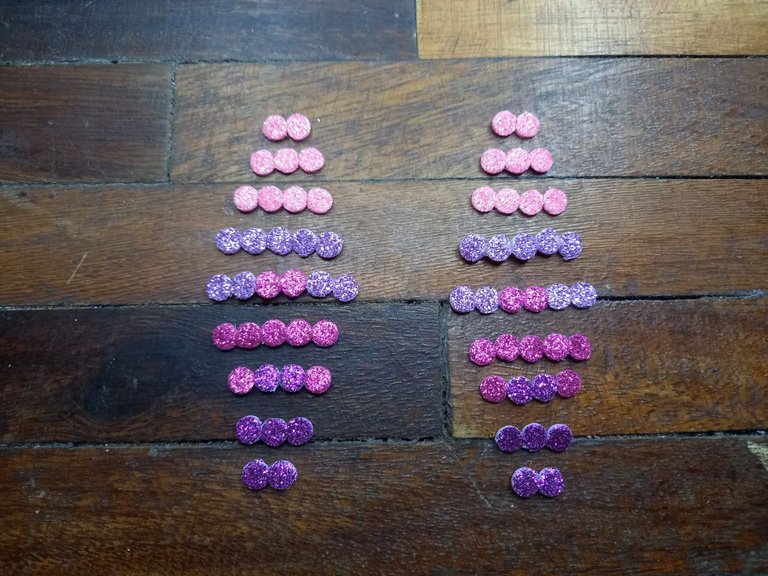
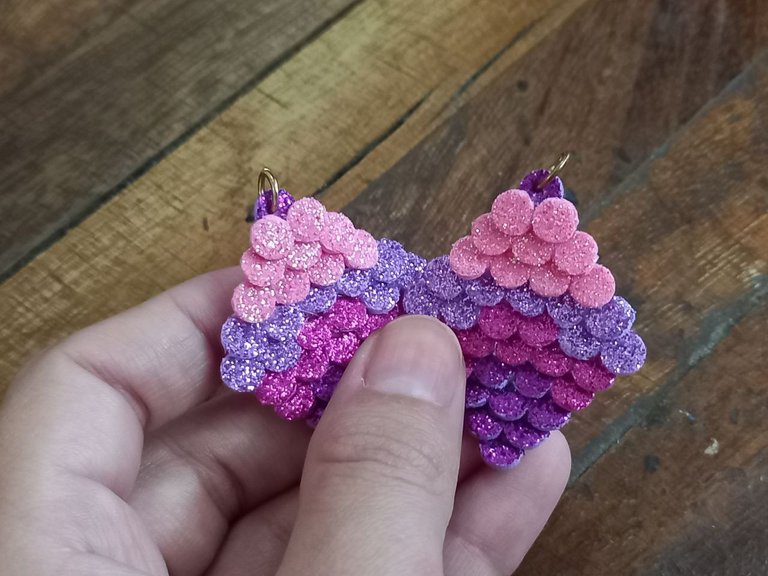
★ PASO 4. Al tener las piezas completas listas procedí a pegarlas sobre la pieza de abajo y así sucesivamente hasta llegar a la parte de arriba y darle la forma de rombo que quería.
★ STEP 4. When I had the complete pieces ready, I proceeded to glue them on the bottom piece and so on until I reached the top part and gave it the rhombus shape I wanted.

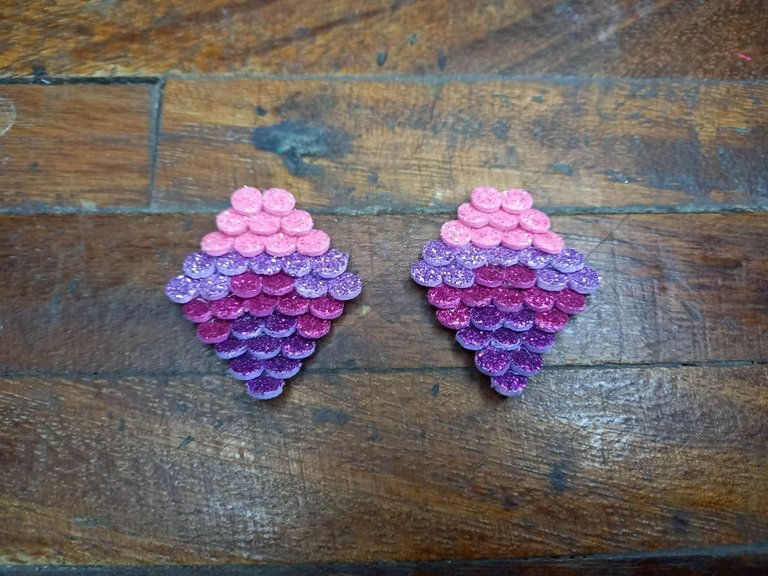
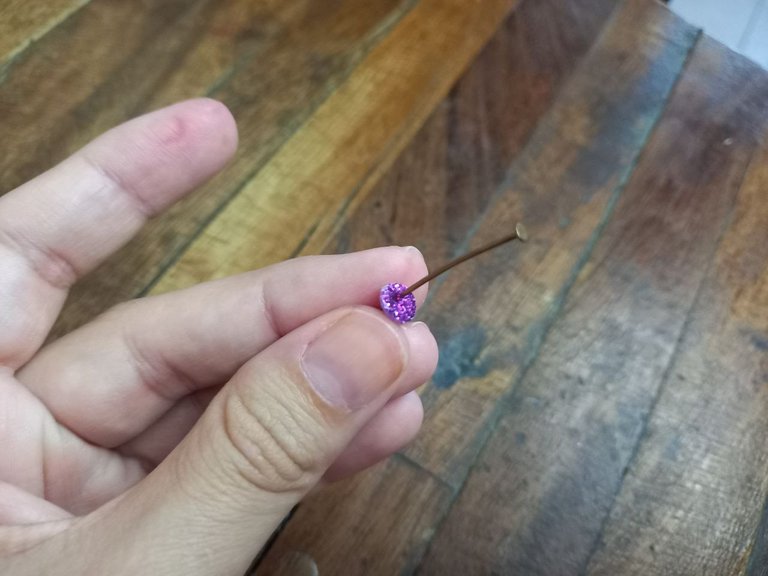
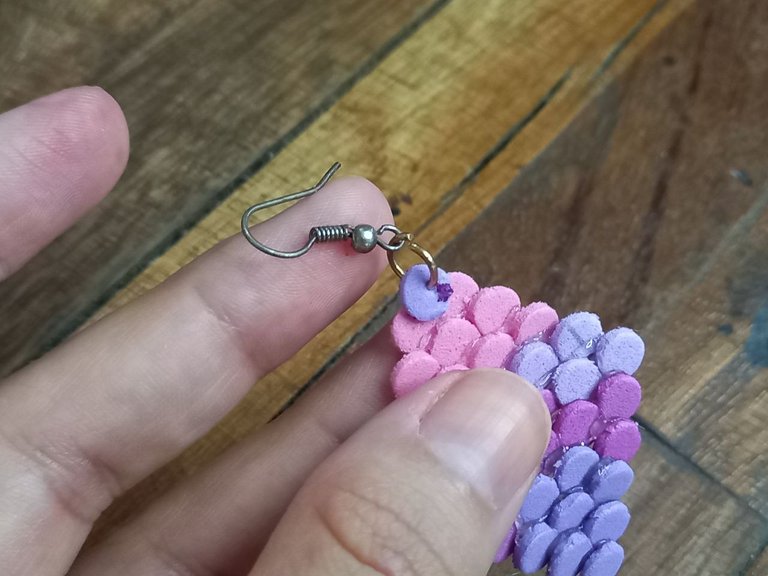
★ PASO 5. A la última pieza (la de la parte superior) le abrí un agujero en el centro con una aguja e introduje en cada uno un arito de bisutería, luego pegué esa pieza en la parte superior del zarcillo.
★ STEP 5. In the last piece (the one at the top) I opened a hole in the center with a needle and inserted a jewelry ring into each one, then I glued that piece to the top of the earring.
★ PASO 6. Por ultimo coloqué el gancho tipo anzuelo en el arito de la pieza superior del zarcillo, con ayuda de un alicate cerré bien el arito para que quedara bien asegurado y listo.
★ STEP 6. Finally, I placed the hook type hook in the ring of the upper piece of the earring, with the help of pliers I closed the ring well so that it was well secured and that was it.
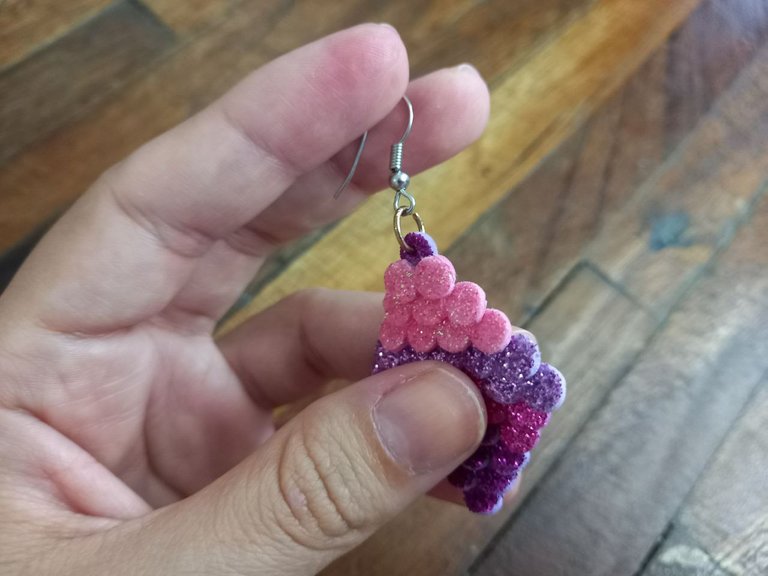
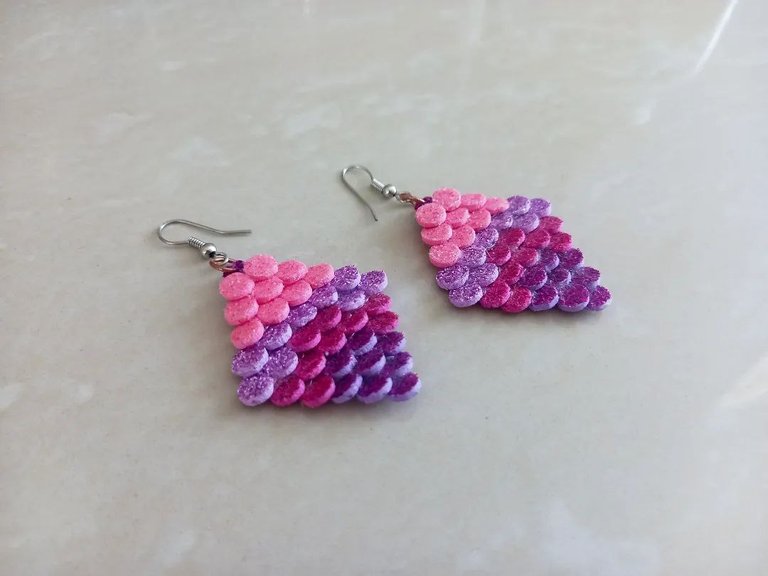
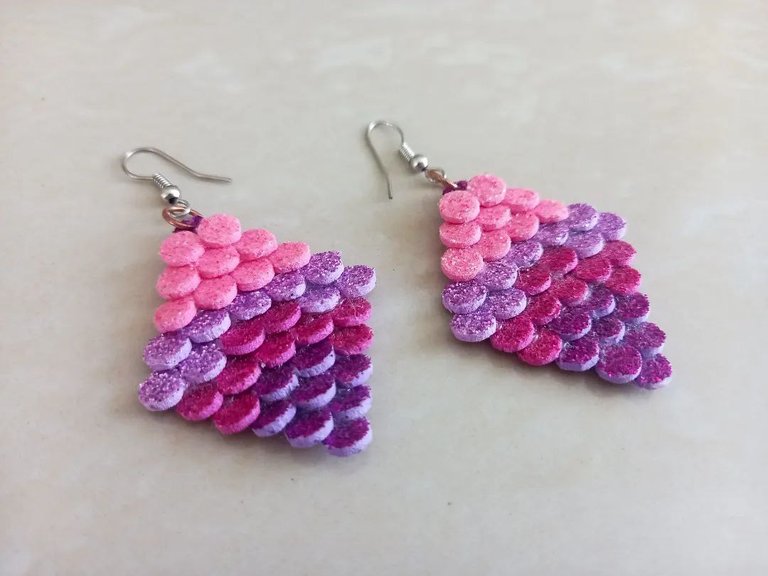
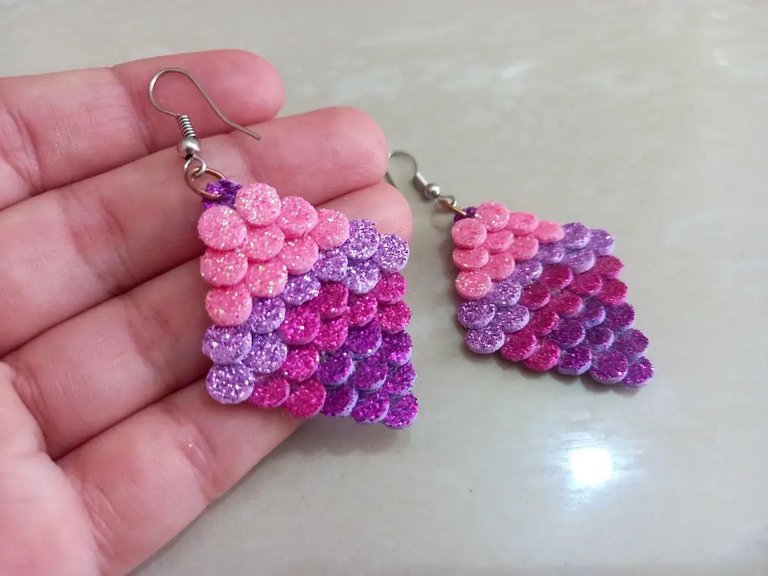
¡Y listo! De esta manera tan sencilla fue como elaboré estos lindos y elegantes zarcillos de foami con forma de rombo al estilo sirena, la combinación de colores es simplemente hermosa, por mi parte siento que es un accesorio que luce muchísimo tanto por su forma como por sus colores y sin duda puede notarse ese estilo de piel de sirena que tanto buscaba hacer notar, para ser un simple accesorio en foami siento que quedó bastante bien y ahora quiero hacer muchos más de diferentes colores y estilos, ¿Qué les pareció a ustedes? Espero que les haya gustado, nos vemos pronto con una nueva idea creativa.
And that's it! In this simple way I made these cute and elegant rhombus-shaped foam tendrils in the mermaid style. The color combination is simply beautiful. For my part, I feel that it is an accessory that looks great both for its shape and its colors. And without a doubt you can notice that mermaid skin style that I was trying so hard to get noticed, for being a simple foam accessory I feel that it turned out quite well and now I want to make many more of different colors and styles, what did you think? I hope you liked it, see you soon with a new creative idea.


Todas las fotografías son de mi propiedad.
Fotografías capturadas con mi Samsung Galaxy A12
Separador de texto elaborado en Canva.
Nos vemos en mi próxima publicación.
¡Tengan un feliz día!
All photographs are my property.
Photos captured with my Samsung Galaxy A12
Text separator made in Canva.
See you in my next post.
¡Have a happy day!
This is so nice and beautiful, it looks good on you.
Thanks, they look good despite being made of foam 😊
Ami, qué lindos te quedaron, los colores están preciosos!
Gracias ami linda, de verdad que si, los colores quedaron bien en combinación.
From Venezuela, our witness drives decentralization and the adoption of Web3 technology, creating opportunities for the local community and contributing to the global ecosystem. // Desde Venezuela, nuestro testigo impulsa la descentralización y la adopción de la tecnología Web3, generando oportunidades para la comunidad local y contribuyendo al ecosistema global.
Sigue, contacta y se parte del testigo en: // Follow, contact and be part of the witness in:
Muchas gracias por el apoyo! 🤗
This is one creative piece, your earrings came out so well and it looks beautiful on you. Good job!
Thank you, I'm glad to know that you liked it. Thanks for the support! 😊🤗
Preciosos amiga, de verdad que fueron muy creativos y la combinación de colores bellísimos, me encantaron.🤗🤗🤗🩷💕
Hola amiga muchas gracias. Me alegra inmenso que te gustara este invento, los colores sin duda combinan muy bien y el resultado es simplemente hermoso 😍
Hermosos amiga, muy creativos y coloridos, los usaría sin dudar.
Gracias amiga, asi es, son coloridos y hermosos, lucen bastante bien 😊
Una belleza total Ami! Se te da espectacular elaborar zarcillos . 💕
Gracias mi Valen 🥰 Yo creo que si jaja, Tengo que ponerme a inventar mas
Tienen un aspecto creativo y un contraste de colores que los hace llamativos.😀
Muchas gracias amiga. Que bueno saber que se nota lo que queria mostrar con ellos 😍
Amiga pude notarlo enseguida, quedo hermoso.❤️🤗
Quedaron muy lindos, espero ver más accesorios como este 😉🤗
Hola muchas gracias, me alegra que te gustara ❤️
guao! Son realmente hermosos, me encantan! So he visto que hast estado algo ausente de las manualidades, yo también asi como los dibujos, no es solo canalizar el tiempo es también el dinero.
Te quedaron estupendos.
Hola amiga, muchas gracias. Si, es que la verdad no he tenido tiempo de dedicarme a hacer cositas pero lo extraño, ahora vienen muchos cambios y será más difícil poder hacer manualidades pero seguro en algún momento lo retomaré. Me alegra que te gustara este invento ❤️
Que cuchis están estos zarcillos 💜 parecen una colita de sirena. Me encantaron 🫶🏼🥹
Gracias amiga, justo eso queria que parecieran. Me alegra que te gustaran 🥰
Qué bellooos. Amé la combinación de colores 😍 se ve muy cuchi
Gracias mi Albi ❤️ La combinación de colores es lo mejor, para mi quedaron perfectos 😍
¡Estupendos colores! No sabía que este material se podía usar para hacer zarcillos!, lucen muy bien.
Escrito por lionsaturbix / Written by lionsaturbix
¡¡¡Buen trabajo!!! Gracias por publicar tu excelente contenido en Hive Diy.
Muchas gracias, aprecio mucho que les gustara. Un abrazo! 🤗