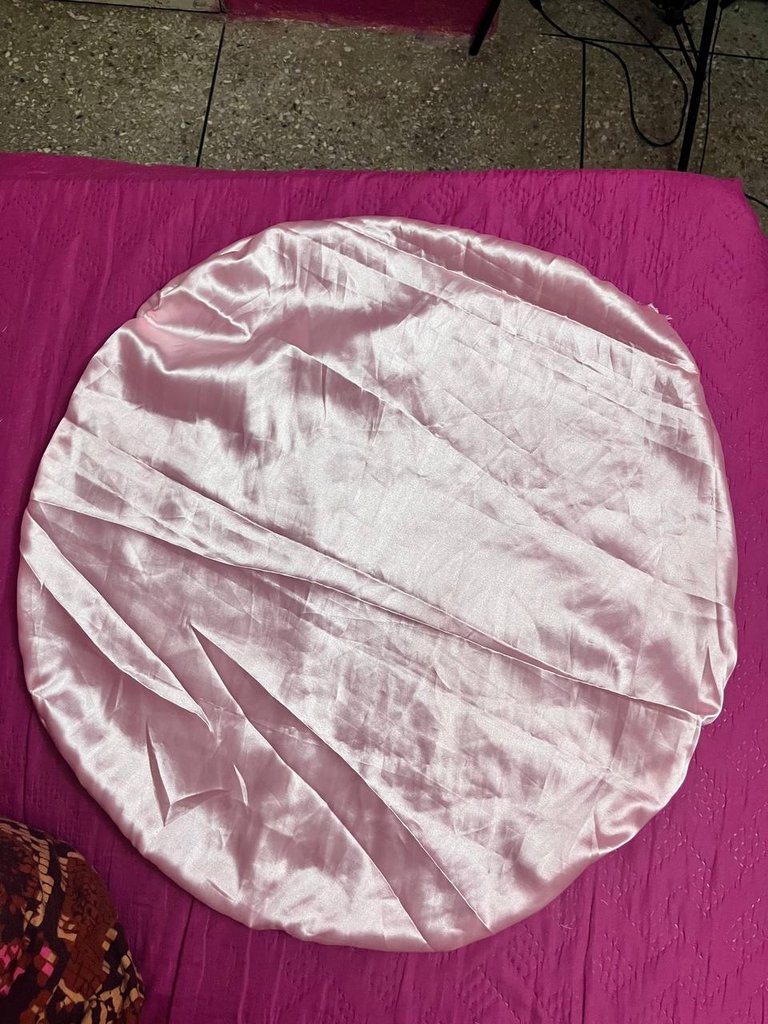
Handmade Silk Cap for my Hair
💕 Hello Hive Community! 💕
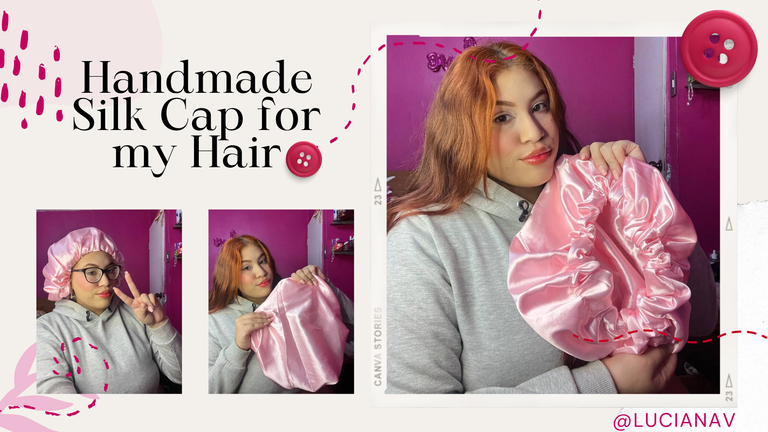
Hace mucho tiempo que no hacía nada a mano, pero es que cuando algo se me mete a la cabeza tengo que crearlo porque de lo contrario no me puedo quedar tranquila. Para contarles la historia, yo adoro mi cabello y me gusta mucho hacerme ondas, además que cuando lo tengo natural sin hacerme nada mi cabello es muy wavy. Y se me ocurrió hacerme un gorro de seda para dormir con él todas las noches y así disminuir el frizz y también que el tubo de las ondas sin calor se quede en su lugar. Así que les presento este tutorial con muy pocos materiales y que se puede hacer completamente a mano.
It's been a long time since I've done anything by hand, but it's just that when something gets in my head I have to create it because otherwise I can't stay calm. To tell you the story, I love my hair and I like to make waves, plus when I have it natural without doing anything my hair is very wavy. So I decided to make a silk cap to sleep with it every night to reduce the frizz and also that the tube of the waves without heat stays in place. So I present to you this tutorial with very few materials and that can be done completely by hand.
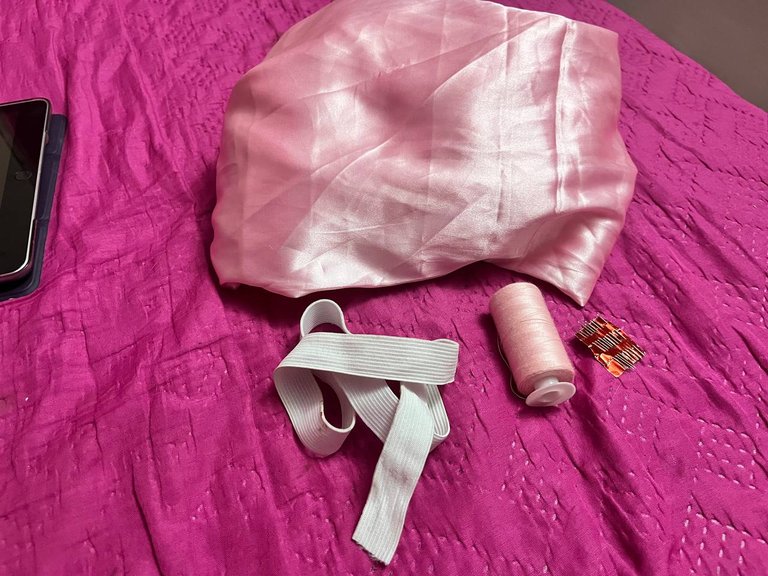
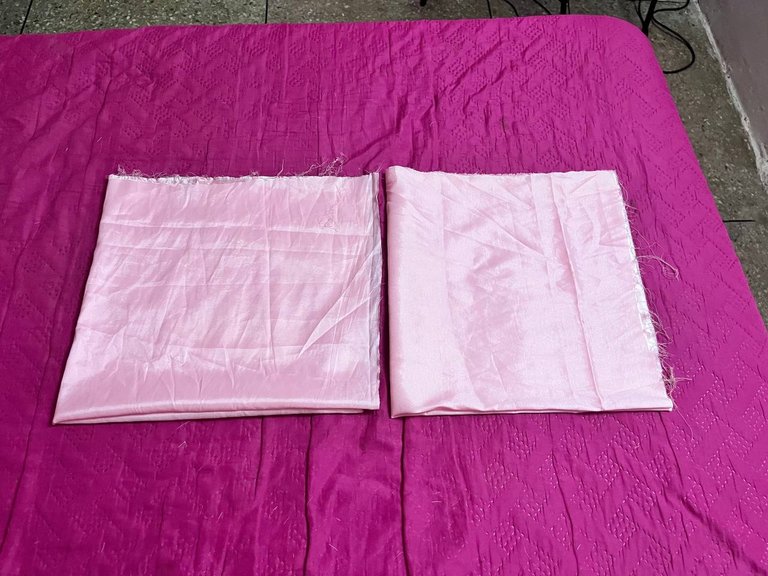
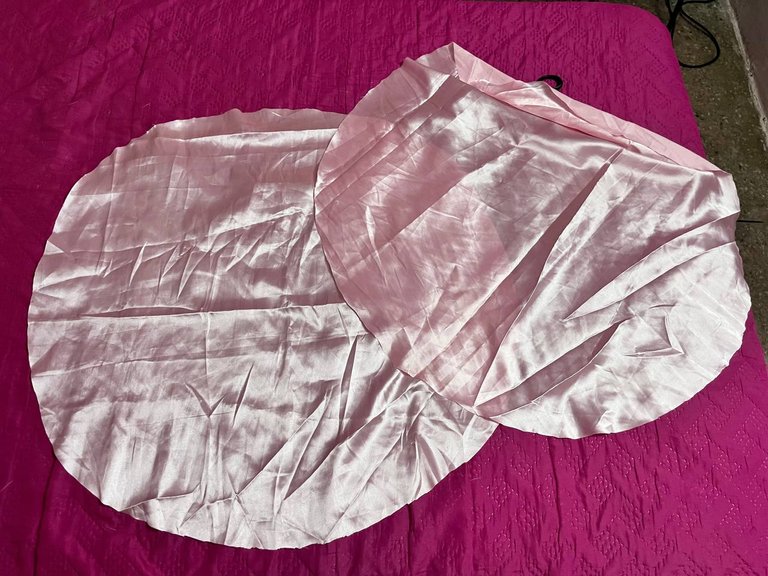
Para hacer este gorro es necesario utilizar una tela de satín o de seda, también una elástica que no sea muy fuerte para que no maltrate aguja e hilo. Yo estuve utilizando dos trozos de tela satinada que medían 68 cm y un trozo de elástica que me dio mi mamá y realmente no me di, pero que me daba justamente el diámetro de mi cabeza.
To make this hat you need to use a satin or silk fabric, also an elastic that is not too strong so that it does not damage needle and thread. I was using two pieces of satin fabric that measured 68 cm and a piece of elastic that my mom gave me and I really did not give me, but that gave me just the diameter of my head.
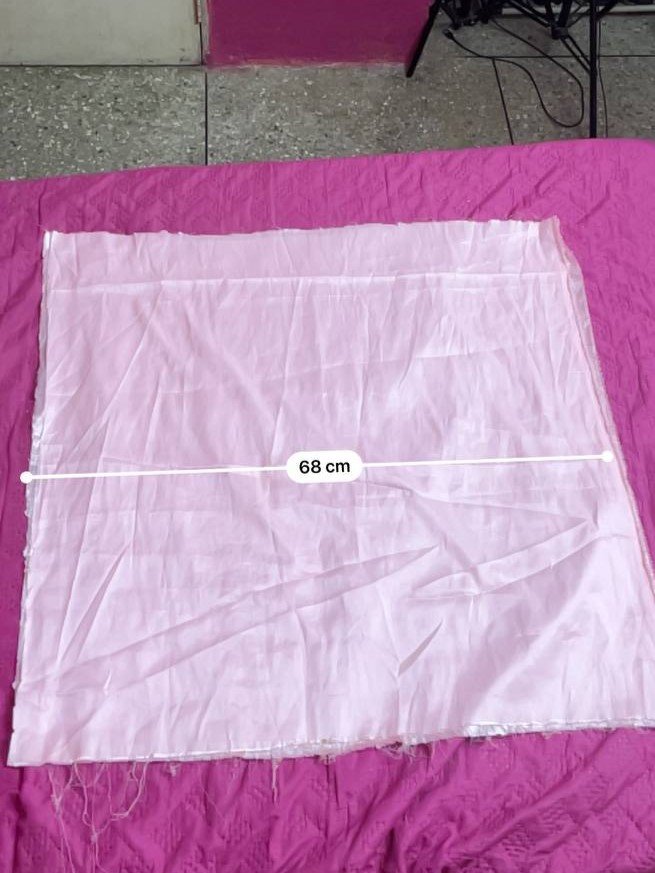
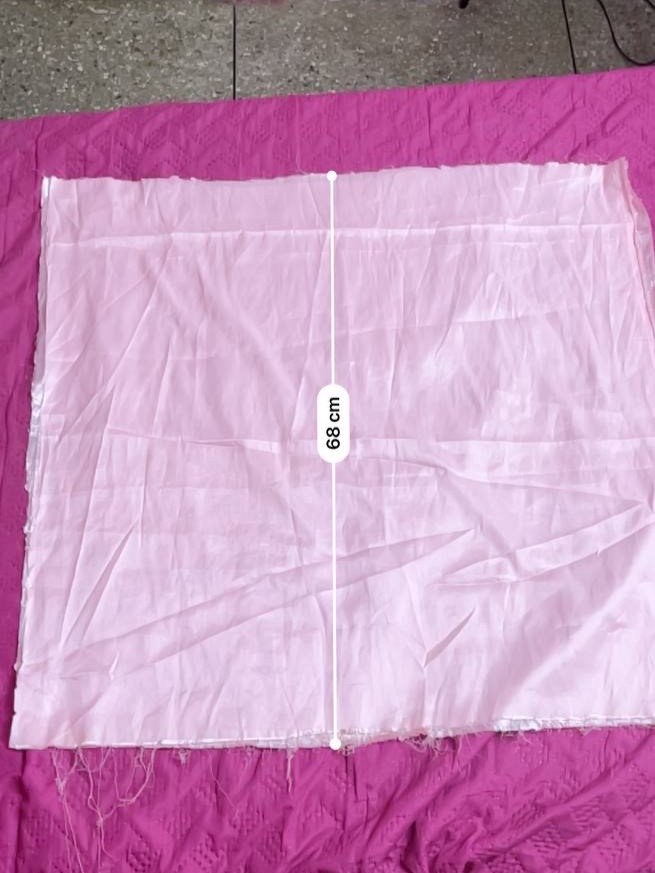
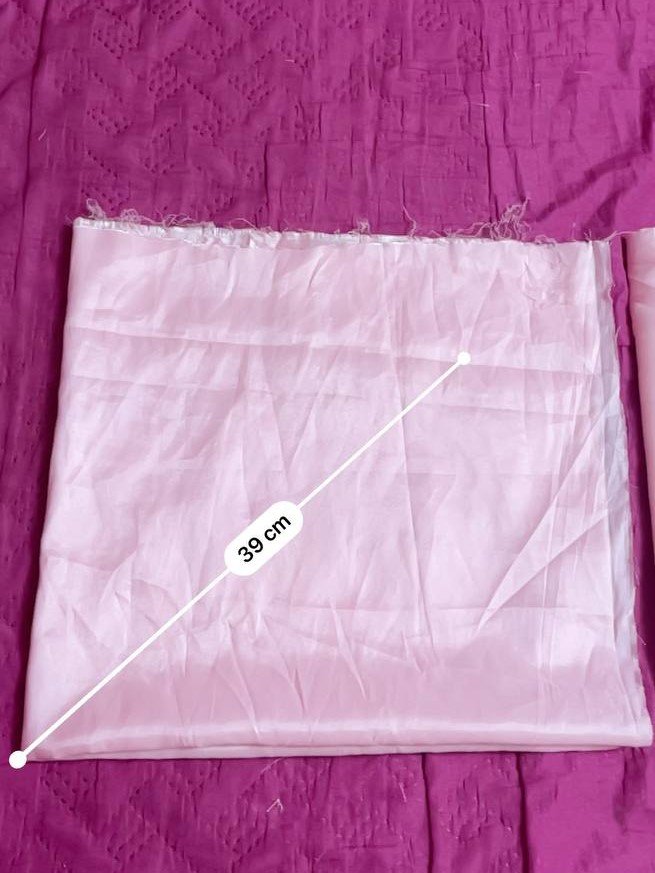
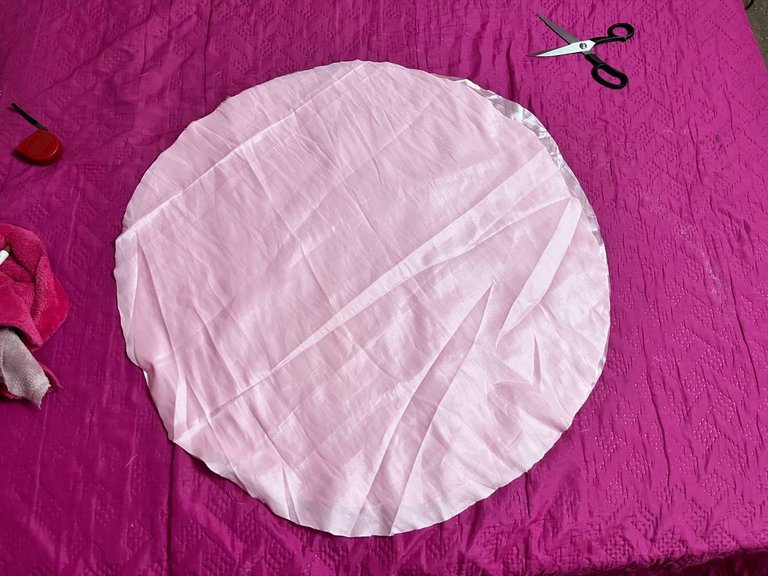
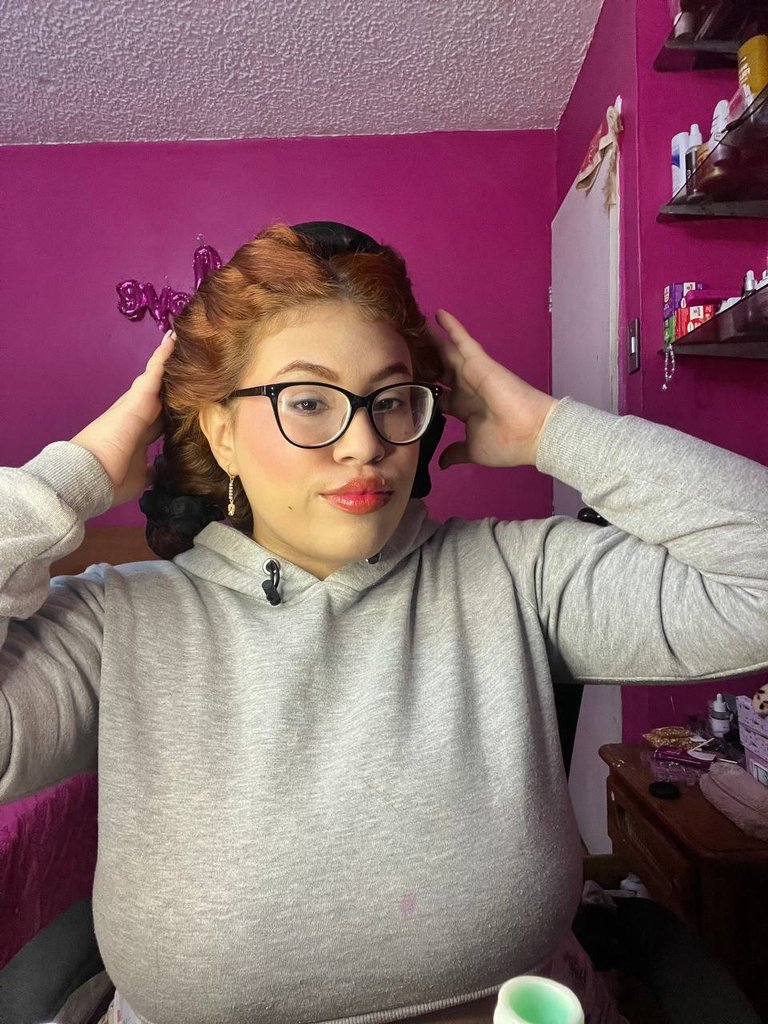
Lo primero que vamos a hacer es doblar los dos cuadrados por separado en cuatro, en mi caso yo quería que el gorro fuese bastante grande porque utilizo a veces el tubo de la Honda sin calor y es por eso que estuve marcando 32 cm desde la esquina hacia el centro, en la imagen se veía que es 39 cm, pero la verdad es que lo modifiqué después, estuve utilizando la aplicación de Medición del iPhone y también una cinta métrica para poder marcar bien. Una vez tenía todo bien marcado realicé el corte de círculo y lo utilicé de molde para cortar el otro.
The first thing we are going to do is to fold the two squares separately in four, in my case I wanted the hat to be quite large because I sometimes use the Honda tube without heat and that's why I was marking 32 cm from the corner to the center, in the image you could see that it is 39 cm, but the truth is that I modified it later, I was using the iPhone Measure app and also a tape measure to be able to mark well. Once I had everything well marked I made the circle cut and used it as a mold to cut the other one.
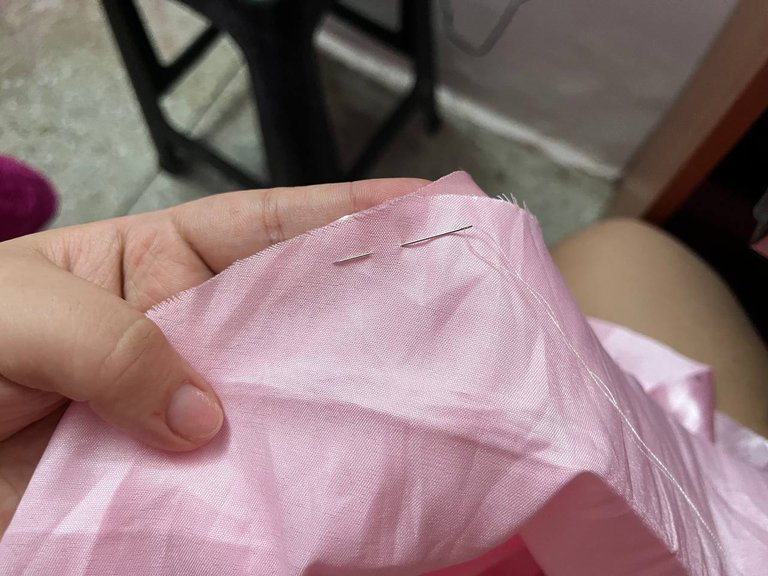
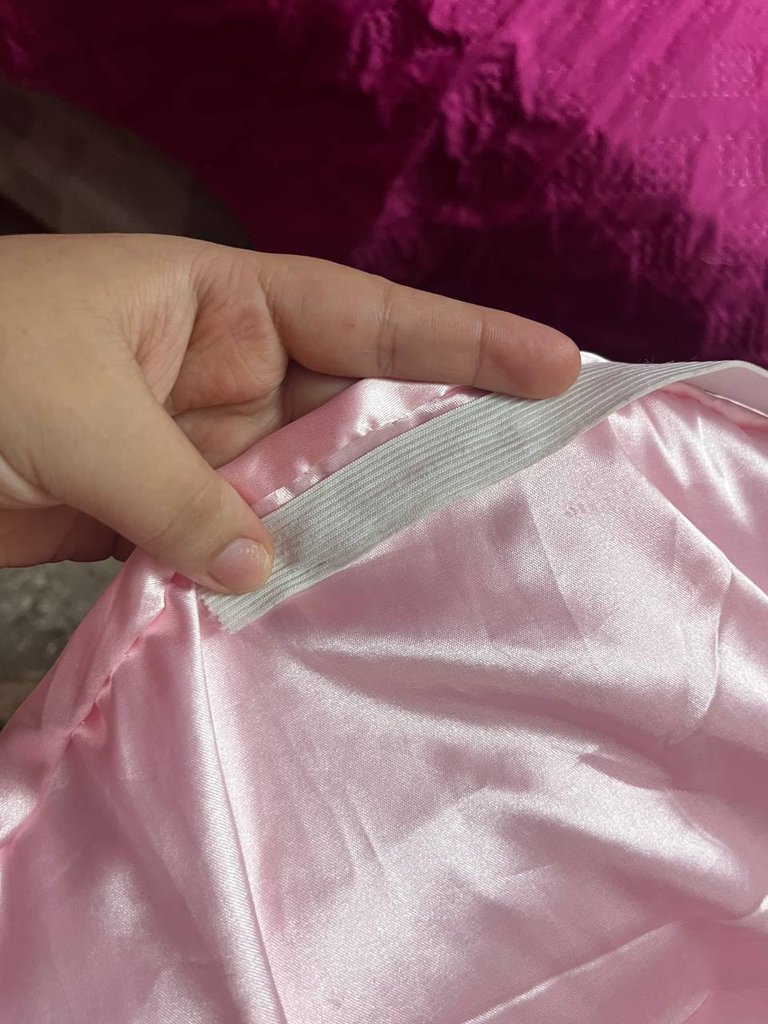
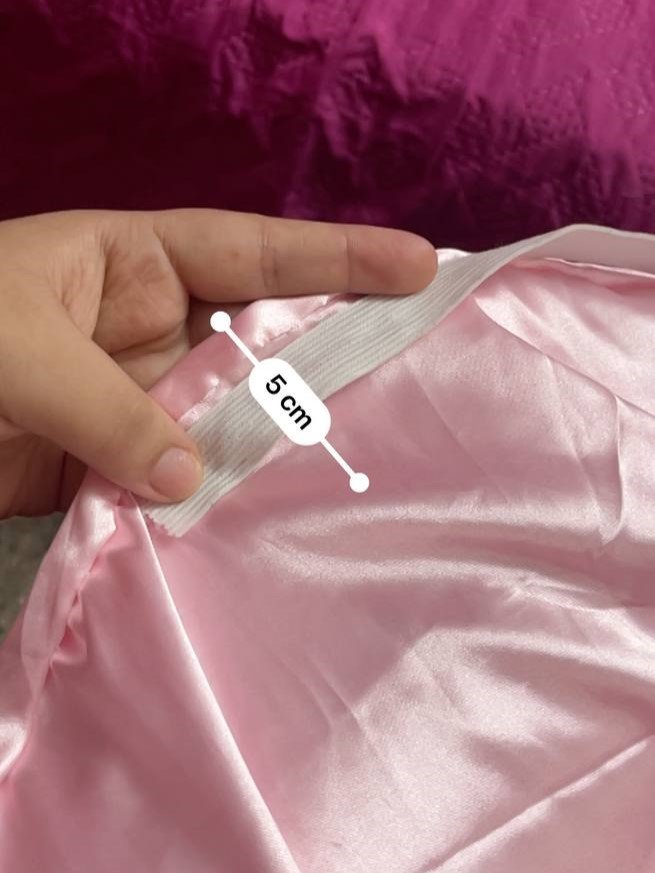
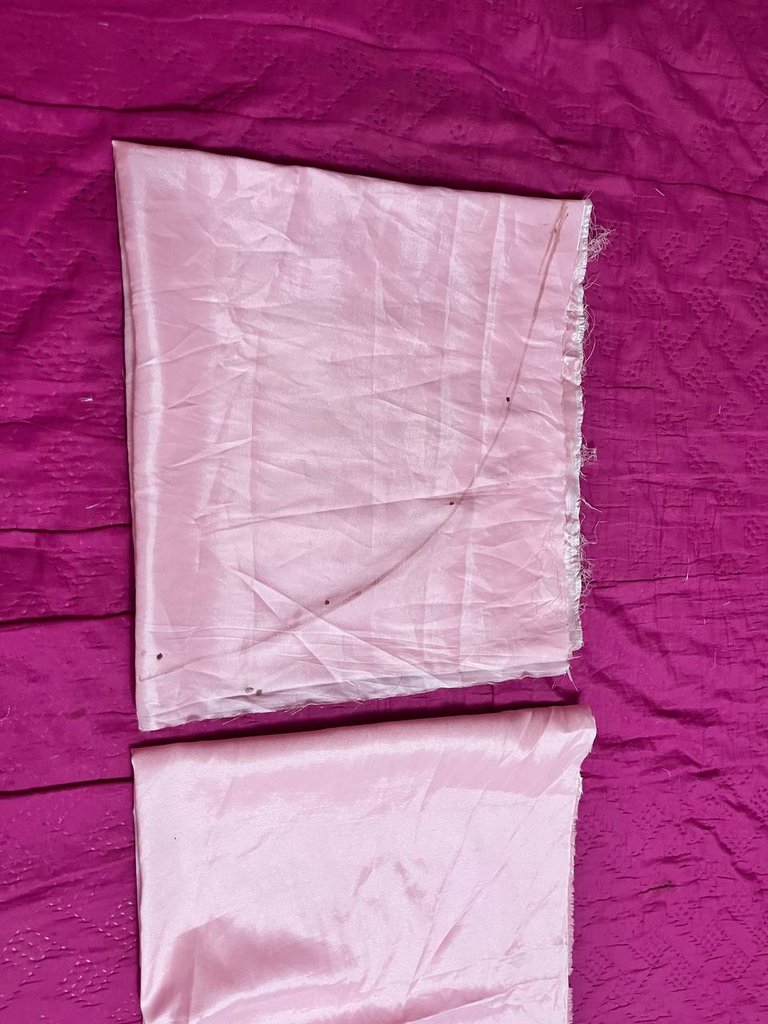
Luego estuve abriendo los círculos y coloque ambas telas del lado brillante juntas para poder cocer todo el borde. La costura las estoy haciendo a mano con un hilo del mismo color rosado bebé, y una aguja pequeña. Estuve cociendo todo el borde dejando un hueco para poder voltear el círculo. Luego coloqué la elástica para poder ver cuál iba a ser la otra costura y me dio aproximadamente 5 cm, así que lo estuve calculando cada vez que avanzaba en la costura y realicé el círculo del medio.
Then I was opening the circles and placed both fabrics on the shiny side together so I could stitch the entire edge. The stitching I am doing by hand with a thread of the same baby pink color, and a small needle. I was stitching the entire edge leaving a gap so I could flip the circle over. Then I placed the elastic so I could see what the other seam was going to be and it gave me approximately 5 cm, so I was calculating it each time I was advancing in the seam and I made the middle circle.
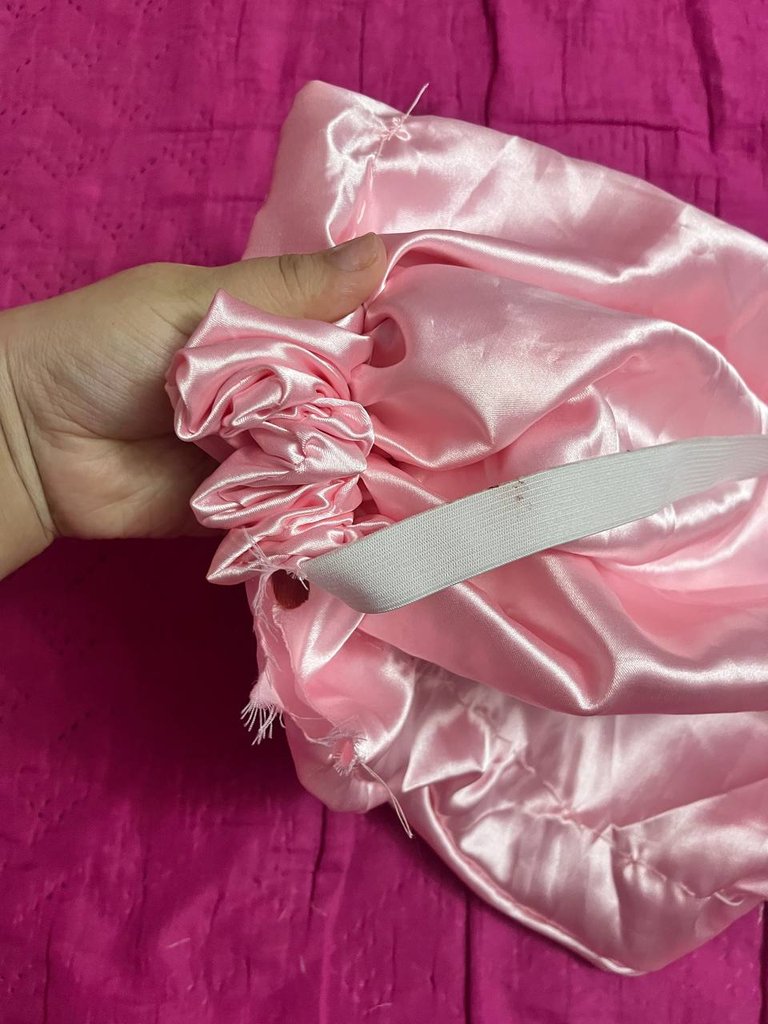
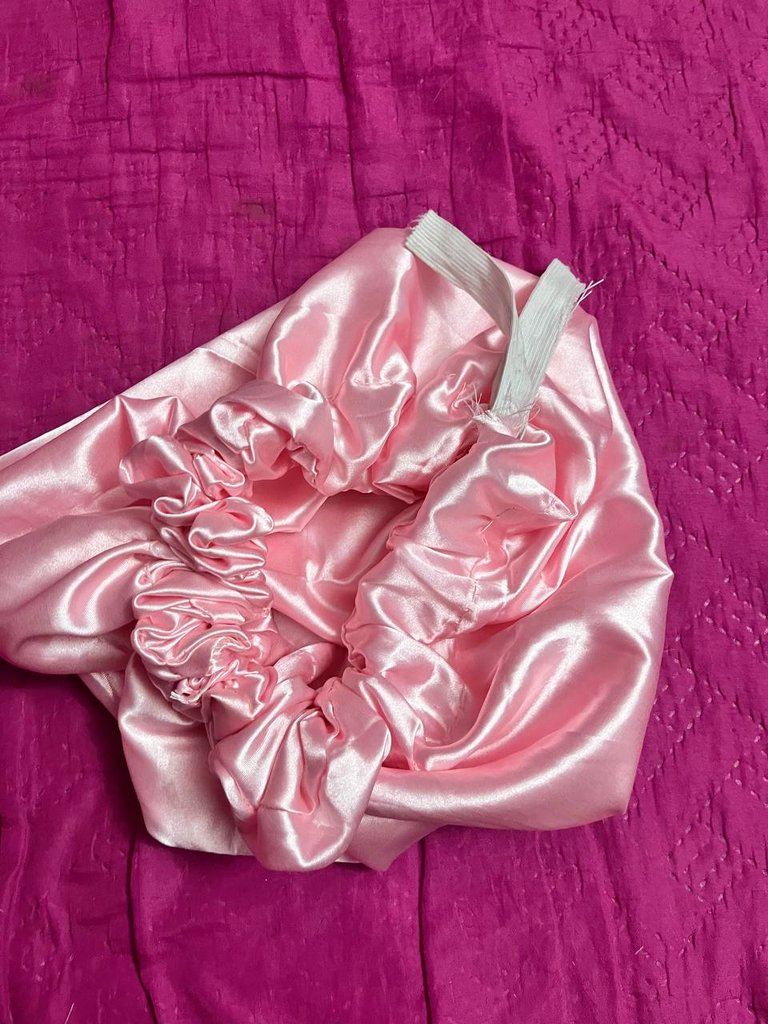
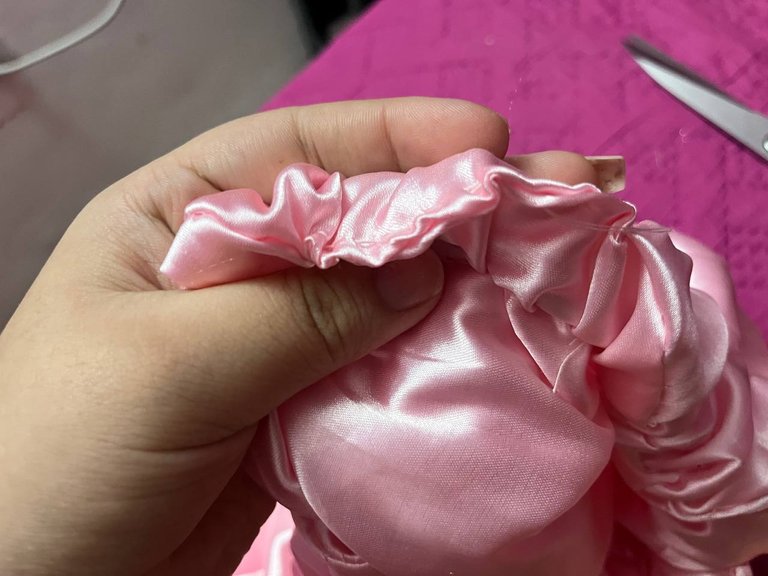
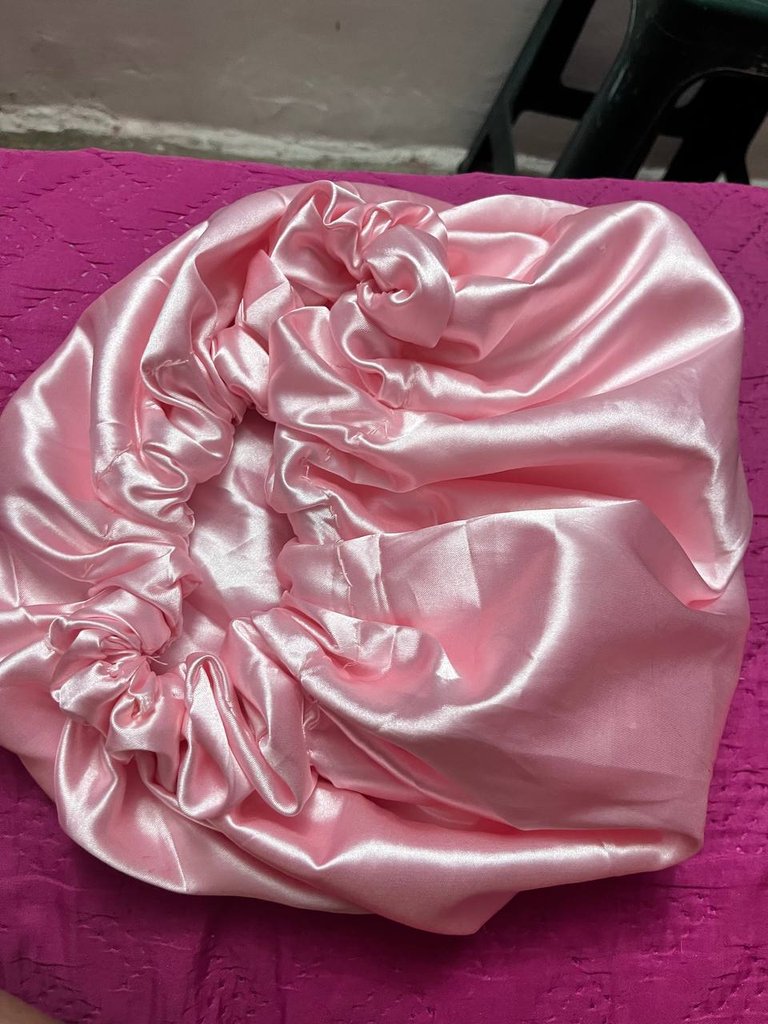
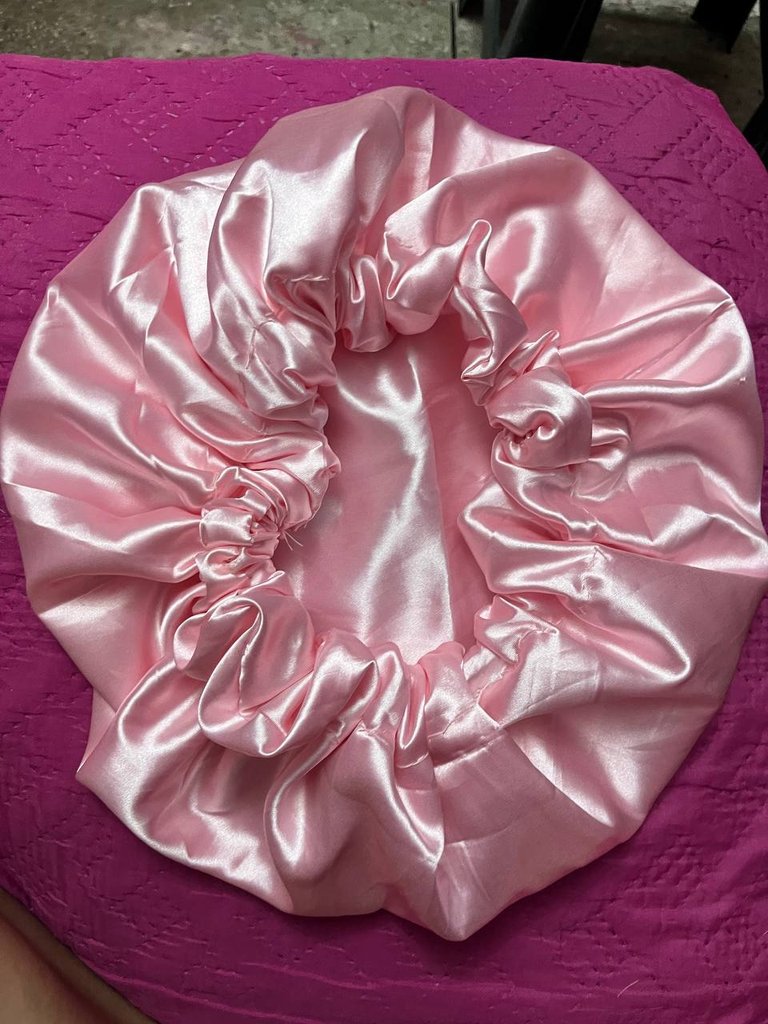
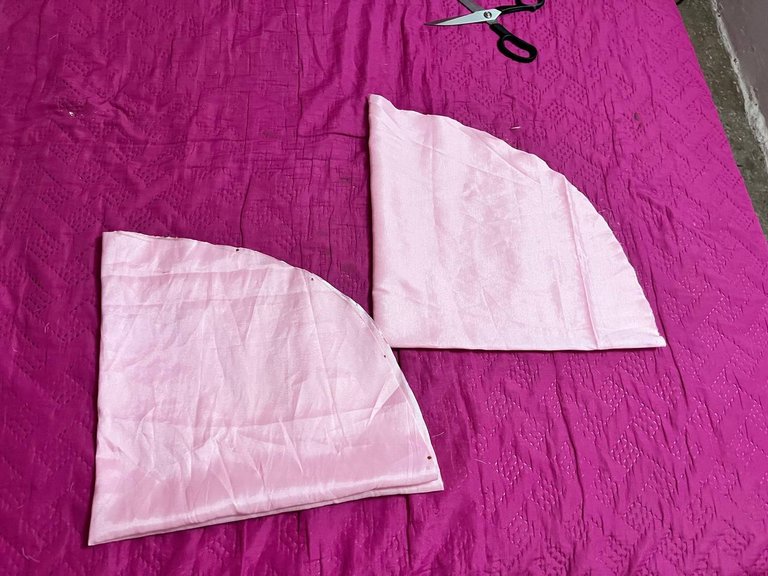
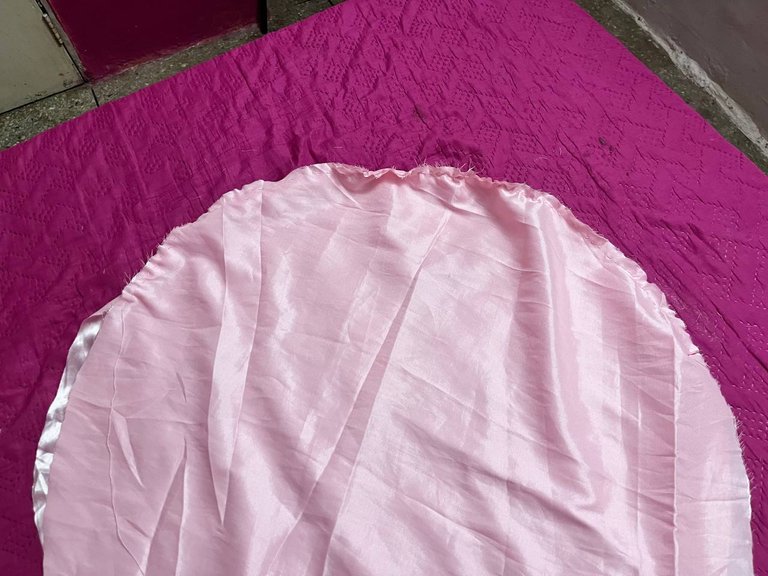
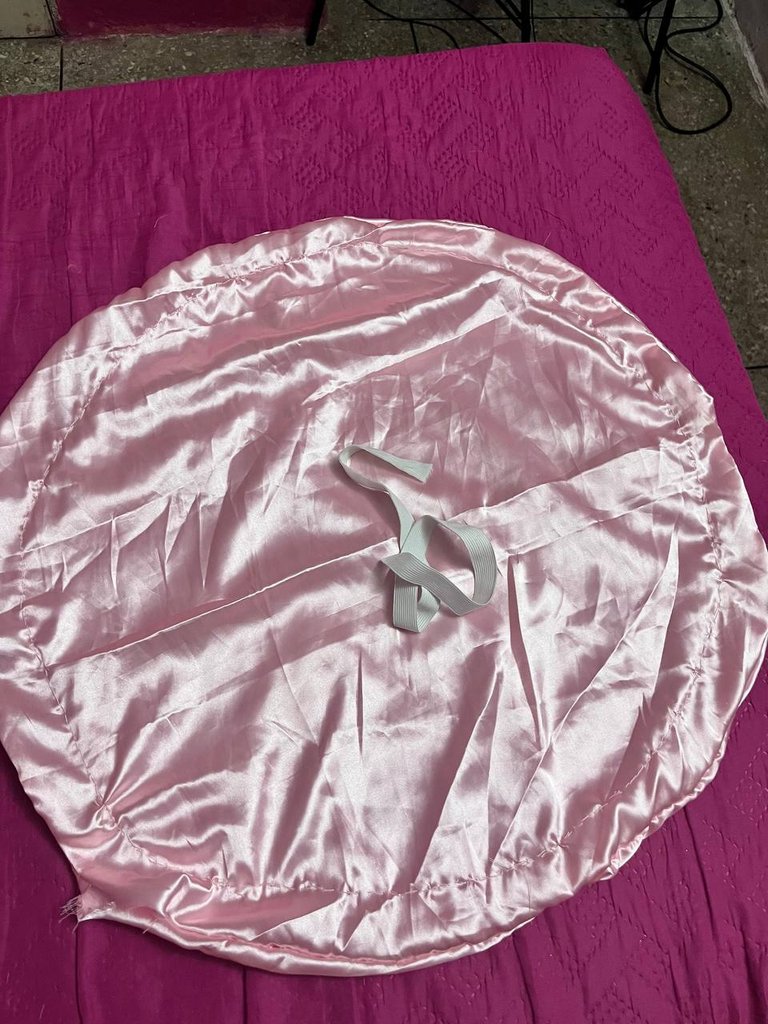
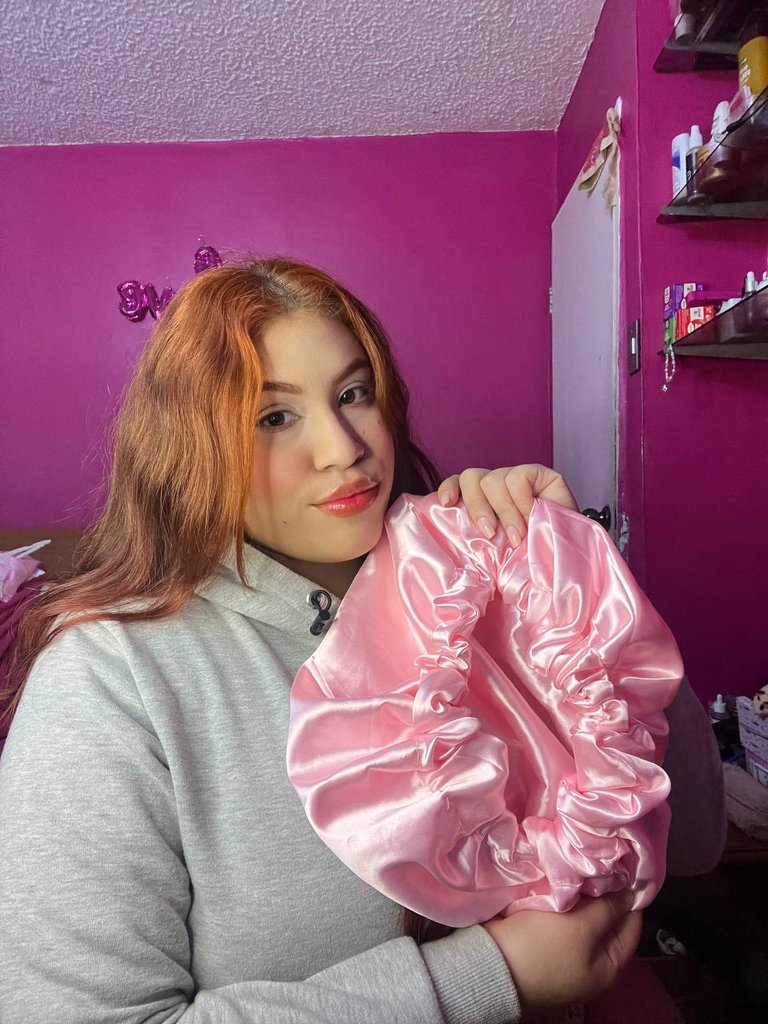
Una vez que termine todo, de hecho le hice doble costura al circulo del medio. Coloque la elástica por el hueco que había quedado la primera vez que realice la costura. Ya cuando pude colocar toda la elástica realicé un doble nudo bastante fuerte para que no se deshiciera y el hueco que quedó lo estuve cociendo por fuera muy bien para que no se abriera con el uso. Solo me quedo acomodar bastante bien elástica, distribuirla muy bien y así quedó el gorro.
Once I finished everything, I actually double stitched the middle circle. Place the elastic through the hole that was left the first time I sewed it. When I was able to place all the elastic I made a double knot quite strong so that it would not come undone and the hole that was left I was cooking it on the outside very well so that it would not open with use. All that was left for me to do was to place the elastic very well, distribute it very well and that's how the hat turned out.
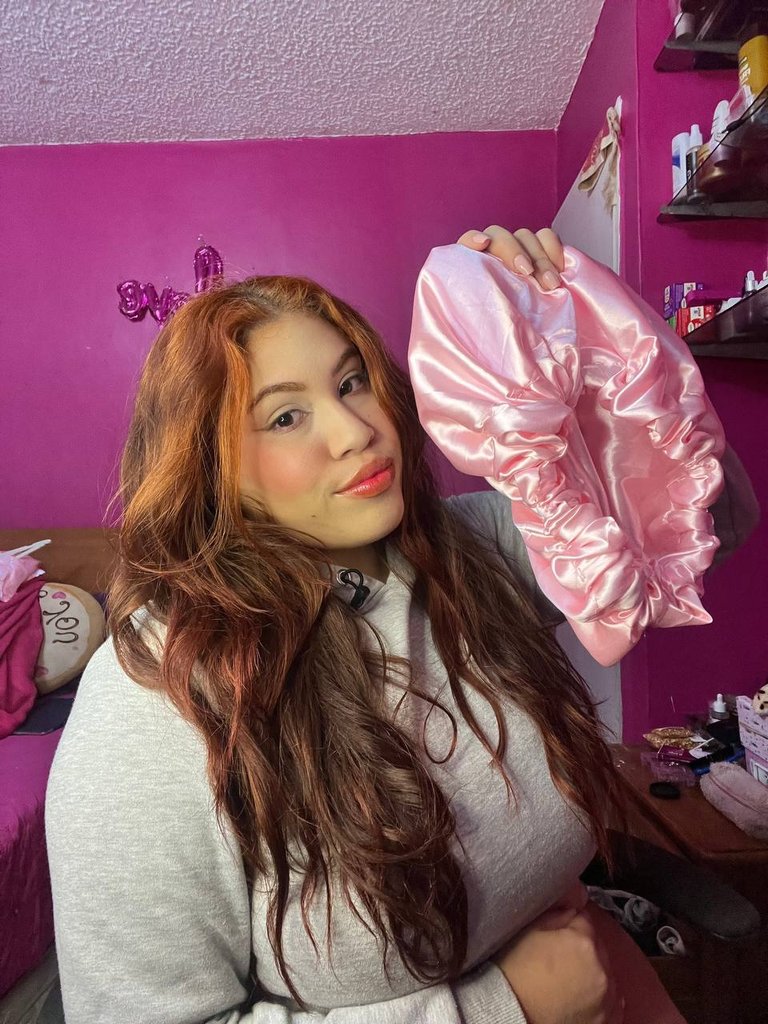
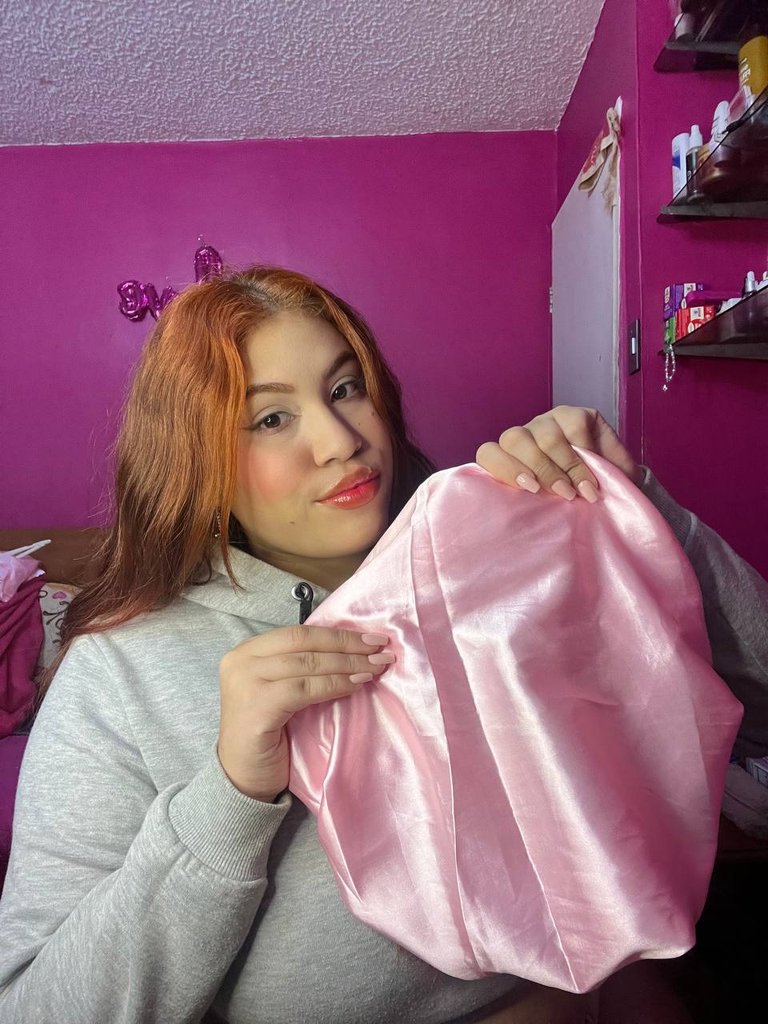
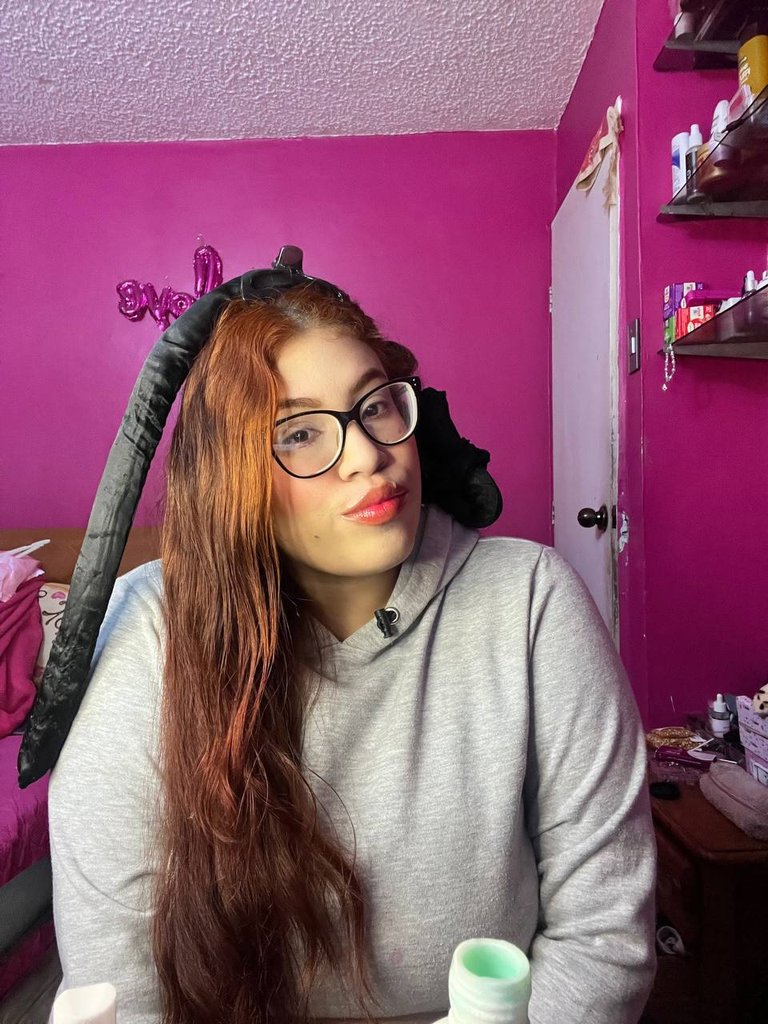
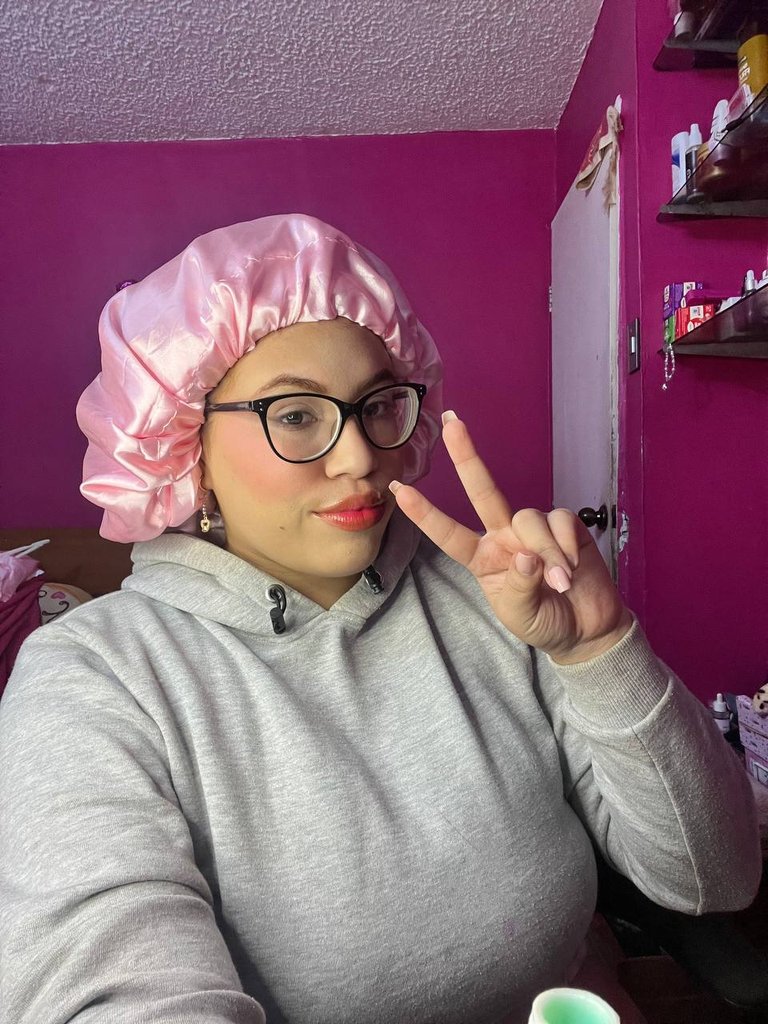

La verdad es que me tomó menos de dos horas hacerla, literalmente acabo de terminarlo y acabo de colocármelo para poder acostarme a dormir. Primero me lo estuve colocando sin con el pelo suelto sin hacerme ningún moño ni nada y me gustó mucho como quedó, luego si me coloqué el tubo de las ondas sin calor como lo suelo hacer con bastante frecuencia en la semana y el gorro el cual me gustó muchísimo porque siento que voy a poder dormir bastante cómoda así tampoco se me va a soltar las ondas y van a quedar bastante firmes al otro día en la mañana cuando me retiré todo. Ya me queda probar este gorro con el pelo alisado para ver si me ayuda bastante con el Frizz, pero le tengo mucha fe a esta creación tan fácil de hacer. ¡Espero que les haya gustado muchísimo este tutorial y espero que pueda compartir luego otra creación, nos leemos pronto!
The truth is that it took me less than two hours to make it, I literally just finished it and I just put it on so I could go to sleep. First I was putting it on with my hair down without any bun or anything and I really liked how it looked, then I put on the tube of the waves without heat as I usually do quite often during the week and the cap which I really liked because I feel that I will be able to sleep quite comfortable so the waves won't come loose and they will be quite firm the next day in the morning when I take it all out. I still have to try this cap with straightened hair to see if it helps me a lot with the frizz, but I have a lot of faith in this easy to make creation, I hope you liked this tutorial and I hope I can share another creation, see you soon!
Pictures of my property.
Exclusive Content for HIVE.
Camera: Apple iPhone 13.
If you like makeup, the world of beauty or making art on your skin I invite you to the Makeup Power Community and the Makeup Power Telegram
Sí eres un Hiver activo Sucrense, te invito a nuestra comunidad Hive Sucre y a nuestro grupo de Telegram
Scan the QR and follow me!
| Telegram | TikTok | 3speak | ||
|---|---|---|---|---|

|

|

|
|

|

I absolutely love the chosen pink silk fabric used in making your pretty bonnet, thanks for sharing the process with is, I have a 4c hair and can understand frizzles as well, also I use mine to keep my hair from getting rough after making it.
Wow que fácil se ve, me encantó tu tutorial , estos gorros son muy buenos para el frizz del cabello. Me lo han recomendado. Excelente 🤗
This hat is great, I also like that you made it very quickly, it didn't take you much time. It is supposedly excellent for preventing frizz in your hair. Unfortunately I don't think I can use it because I go back and forth a lot when I grieve, I don't think I can keep it. although I have been thinking about doing it for my daughters. excellent post.
Awsome and incredible, thanks to share 🤠
I will try a day to do it and finally have my personal handmade cap 😍
Big Hugs