[ESP-ENG] ESTUCHE PARA LENTES, GAFAS O ANTEOJOS HECHO A MANO CON FIELTRO
BIENVENIDOS A MI BLOG
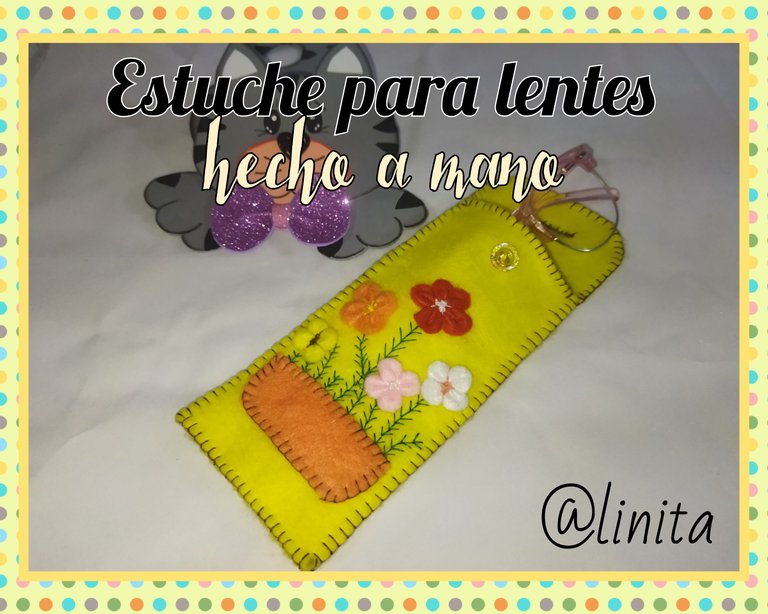
¡Holaaaa, holaaaaa! Saludos creativos y creativas de Hive Diy. El tutorial de hoy se trata de un estuche para guardas nuestros lentes, gafas o anteojos, para evitar que se te rallen o maltraten cuando lo llevas en tu cartera. He tenido mala experiencia con este tema porque la mayoría de mis gafas no me duran más de tres meses debido a las ralladuras que sufren los cristales por el poco cuido que les doy pero eso ya se acabará con este estuche que les realicé, además de ser muy útil y práctico, es muy lindo y sólo necesitaremos fieltro, hilos, aguja para conseguirlo.
WELCOME TO MY BLOG
Hellooooo, hellooooo! Creative and creative greetings from Hive Diy. Today's tutorial is about a case to keep our lenses, glasses or glasses, to prevent them from being scratched or mistreated when you carry it in your wallet. I have had a bad experience with this issue because most of my glasses do not last more than three months due to the scratches that the lenses suffer due to the little care I give them, but that will be over with this case that I made for them, as well as being very useful and practical, it is very cute and we will only need felt, threads, a needle to achieve it.
MATERIALES
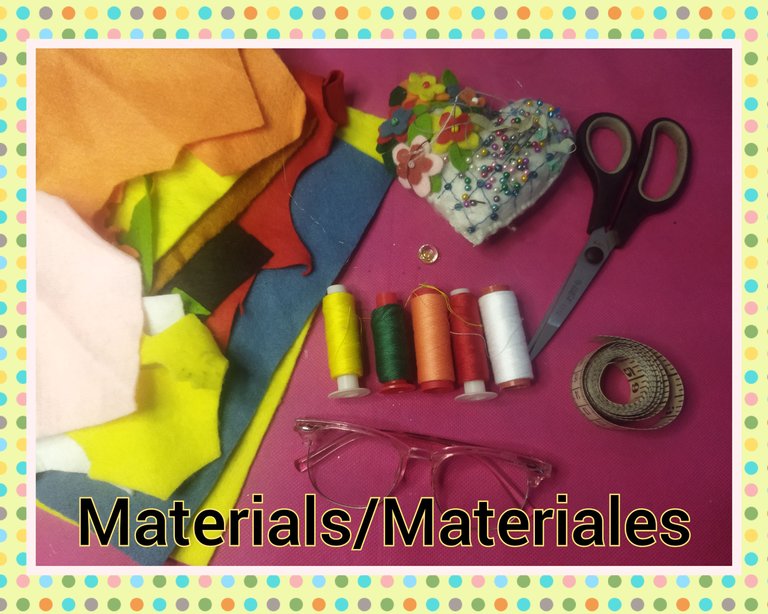
- Fieltro (colores variados)
- Hilos de coser (colores variados)
- Aguja
- Alfileres de costura
- Botón
- Tijera
- Cinta métrica
- Regla y lápiz de grafito
MATERIALS
- Felt (assorted colors)
- Sewing threads (assorted colors)
- Needle
- Sewing pins
- Button
- Scissors
- Measuring tape
- Ruler and graphite pencil
PASO A PASO // STEP BY STEP
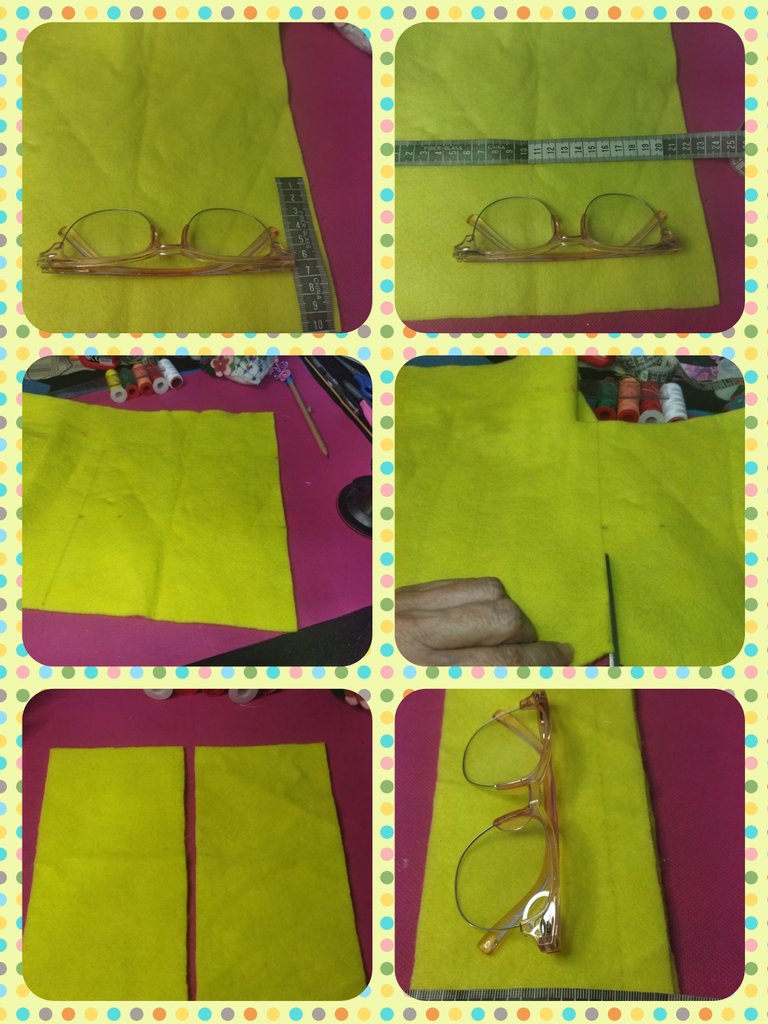
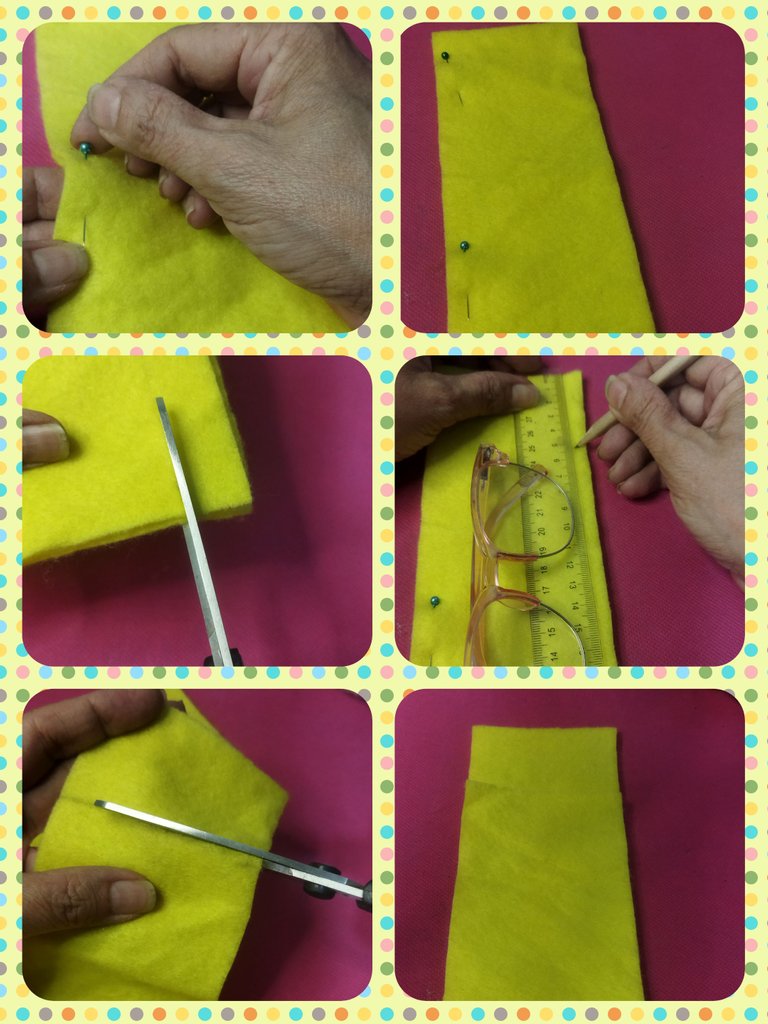
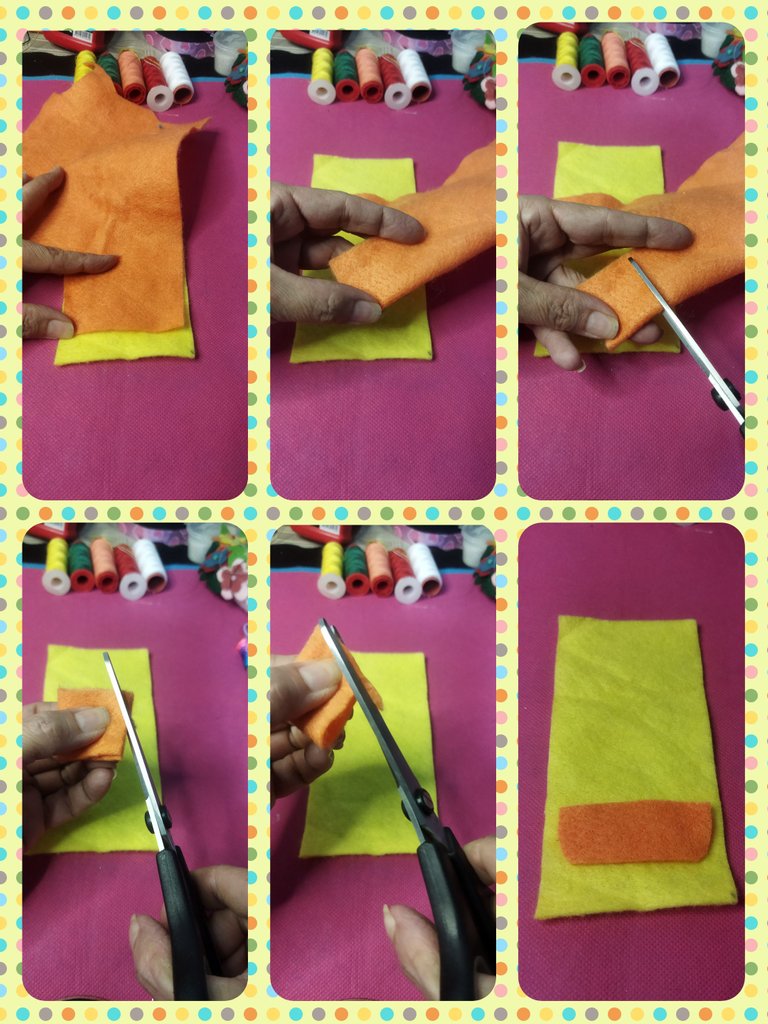
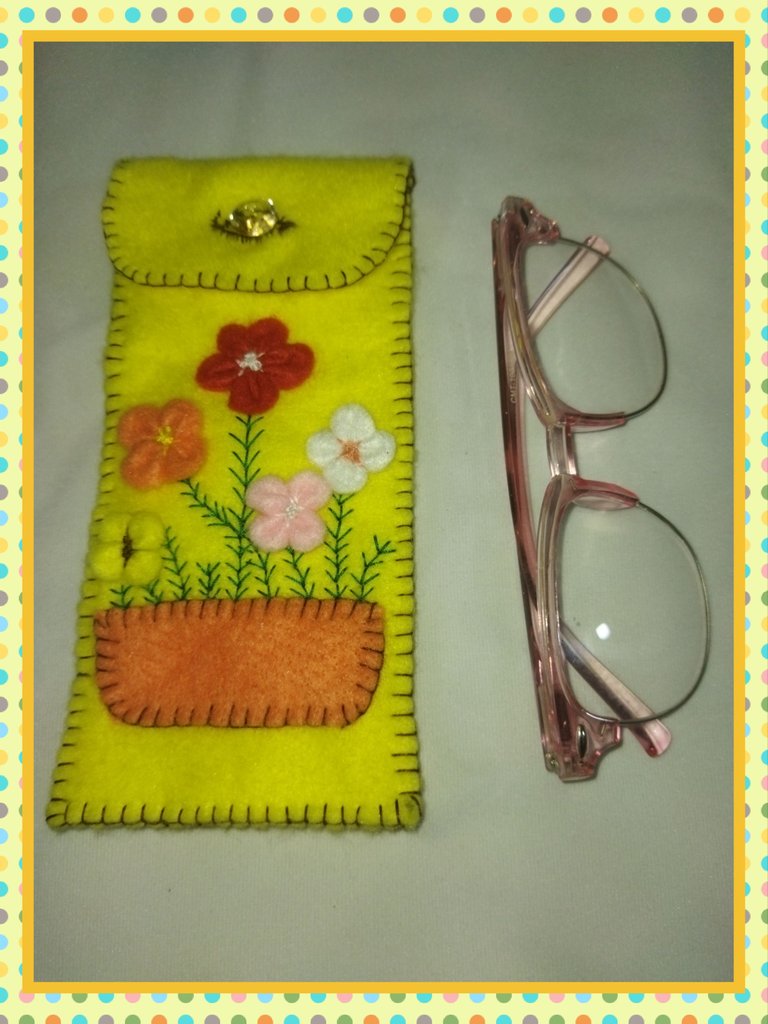
Tomamos las gafas y marcamos en el fieltro seleccionado para el estuche y medimos el ancho y largo que lo queremos. En este caso será de 8 cm de ancho por 22 de largo.
Cortamos por la línea de marca y volvemos a ajustar.
Tomamos dos alfileres y unimos ambas piezas. Marcamos nuevamente hasta que quede del tamaño deseado y cortamos el exceso.
Luego en la parte que quedará arriba cortamos 5 cm y nos quedará de 8 cm de ancho por 17 cm de largo.
We take the glasses and mark on the felt selected for the case and measure the width and length that we want. In this case it will be 8 cm wide by 22 long.
We cut along the brand line and adjust again.
We take two pins and join both pieces. Mark again until it is the desired size and cut off the excess.
Then in the part that will be on top we cut 5 cm and we will have 8 cm wide by 17 cm long.
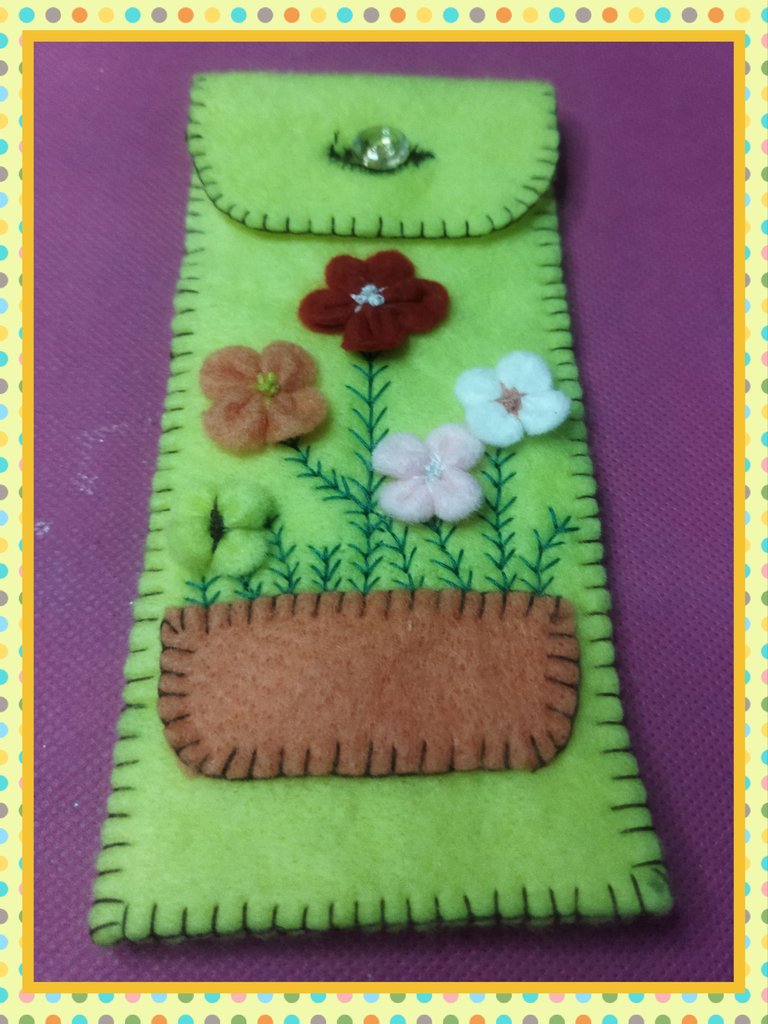
El diseño para adornar mi estuche es un macetero con pequeñas flores. Para realizar el macetero corté un rectángulo de fieltro naranja calculando el ancho y largo con la del estuche, para evitar que quedará ni muy grande, ni muy pequeño.
The design to decorate my case is a flower pot with small flowers. To make the flowerpot I cut a rectangle of orange felt calculating the width and length with that of the case, to avoid that it will be neither too big nor too small.
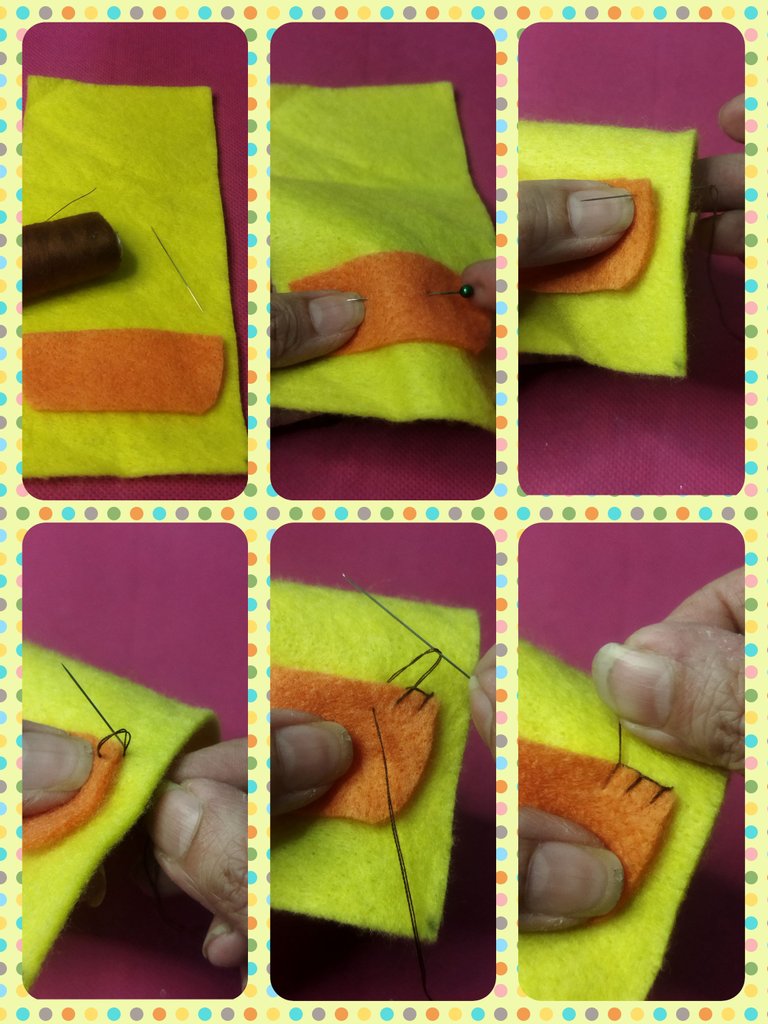
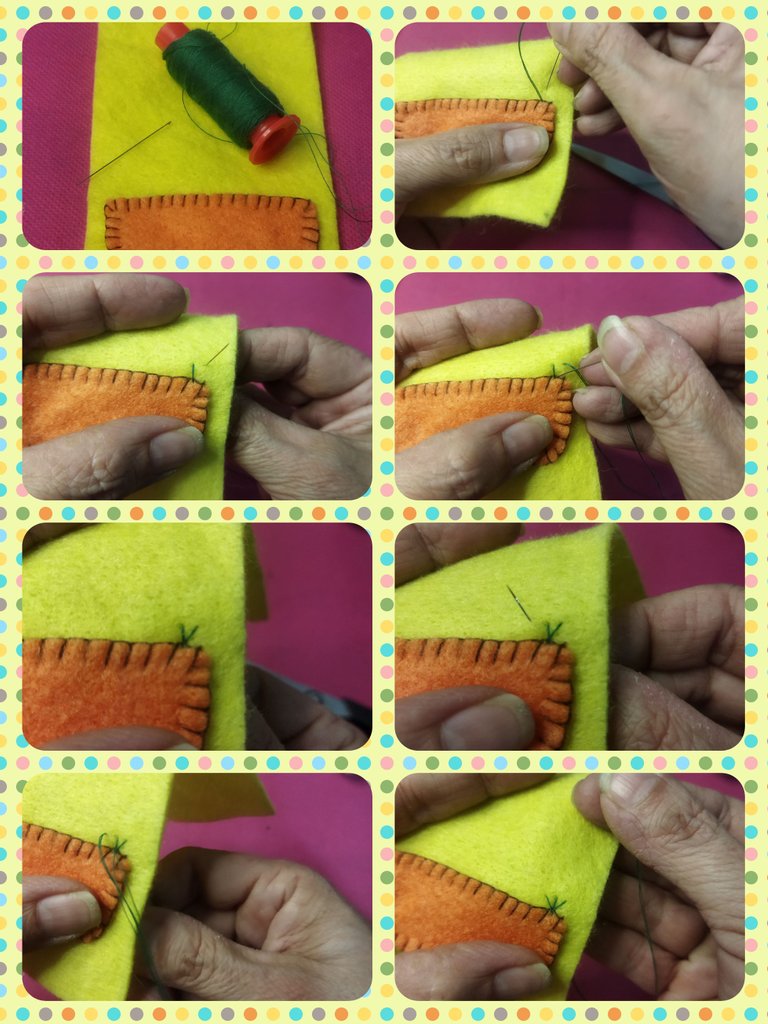
Luego lo uní a la pieza de fieltro amarillo de 17x8 cm, es decir, la más pequeña que será el frente el estuche y realicé puntada festón o de ojal, por todo el contorno.
Then I joined it to the 17x8 cm yellow felt piece, that is, the smallest one that will be the front of the case, and I made a scallop or buttonhole stitch, all around the contour.
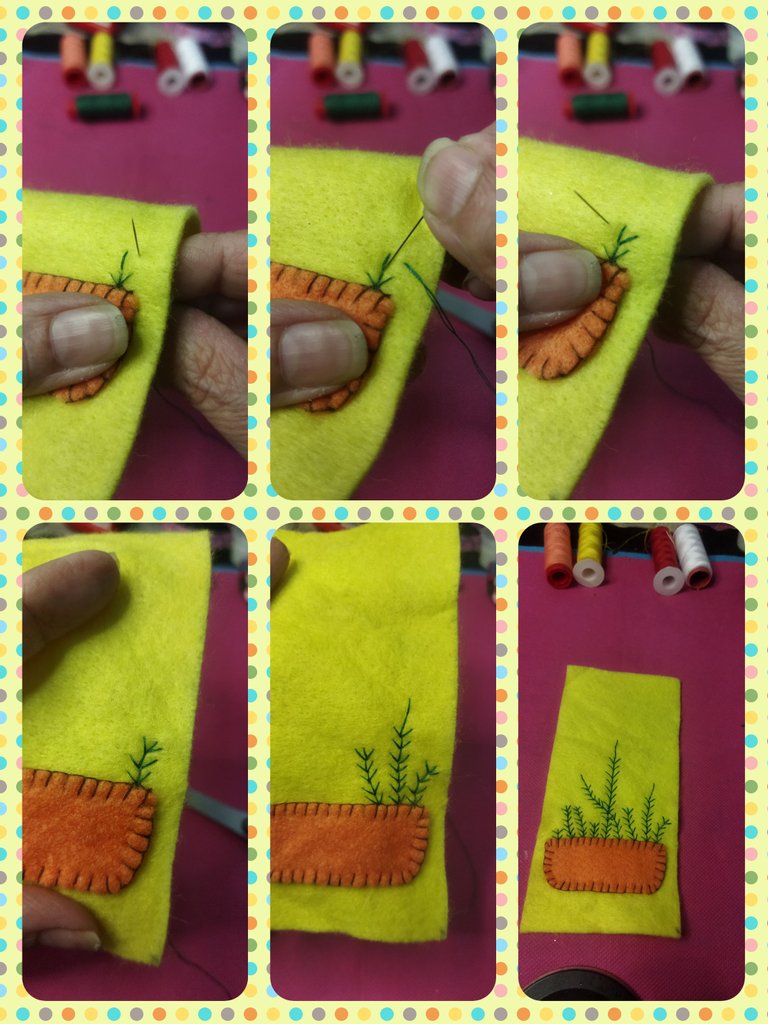
Para las flores, comencé formando las ramas sobre el contorno del macetero realizando la puntada de helecho, que no es mas que formar tres puntadas rectas a partir de la primera puntada para luego realizar las otras dos a los costados. Y así sucesivamente hasta formar las ramas a la altura que desees.
For the flowers, I started forming the branches on the outline of the flower pot, making the fern stitch, which is nothing more than forming three straight stitches from the first stitch and then making the other two on the sides. And so on until you form the branches at the height you want.
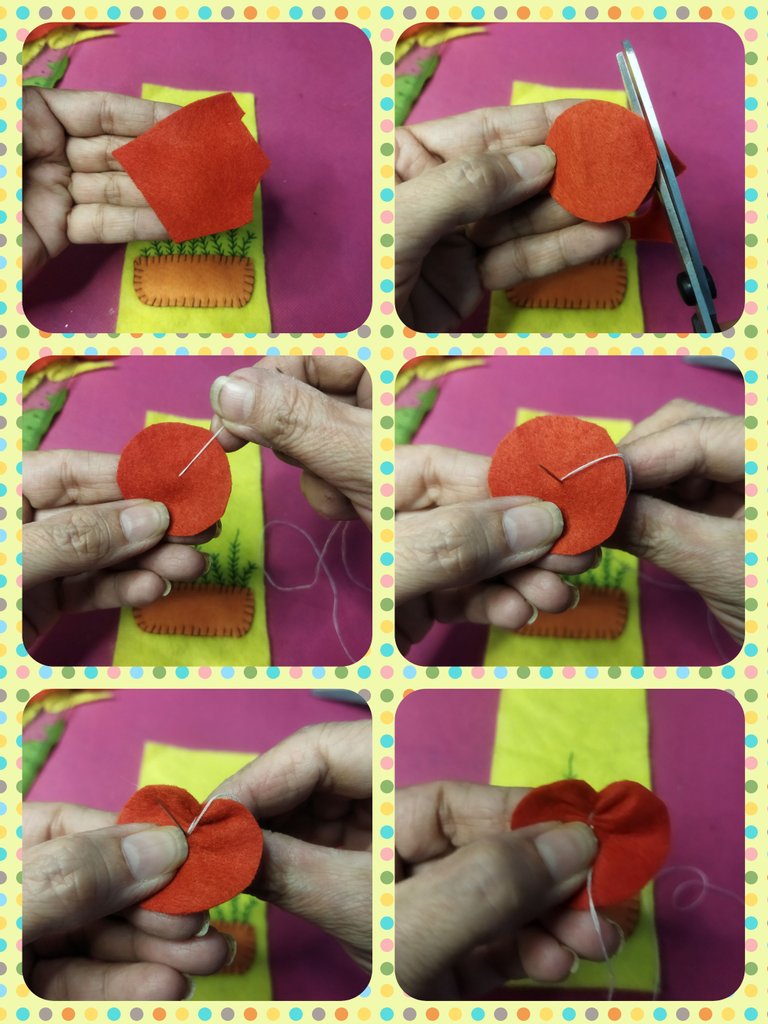
Para formar las flores realicé círculos de diversos tamaños y con fieltro de diversos colores.
Tomamos el trozo de fieltro y formamos un círculo dependiendo del tamaño que lo quieras. Luego insertamos la aguja con un hilo de color que haga contraste con el color del fieltro para que resalte la forma del pétalo que realizaremos. Una vez insertada la aguja en el centro, sacamos el hilo e introducimos nuevamente la aguja dos veces, por el mismo punto, por detrás y arruchamos hasta pegar el contorno al centro.
To form the flowers I made circles of different sizes and with felt of different colors.
We take the piece of felt and form a circle depending on the size you want it to be. Then we insert the needle with a colored thread that contrasts with the color of the felt so that it highlights the shape of the petal that we will make. Once the needle is inserted in the center, we remove the thread and reintroduce the needle twice, through the same point, from behind and wrinkle until the outline is glued to the center.
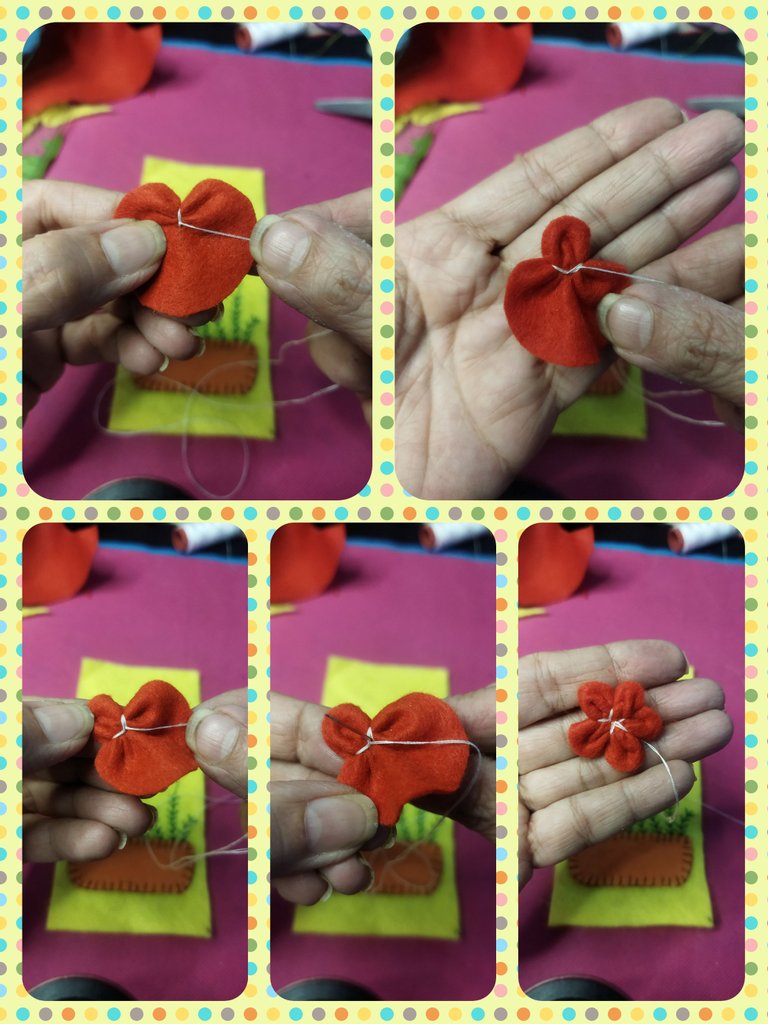
Ahora calculamos la distancia y la cantidad de pétalos que haremos para la flor y realizamos la misma operación anterior. Una vez ubicada, la distancia, introducimos la aguja y damos dos vueltas con el hilo y halamos hasta arruchar y formar el pétalo. Y así hasta formar la flor.
Now we calculate the distance and the number of petals that we will make for the flower and we carry out the same operation as before. Once the distance is located, we introduce the needle and we turn the thread twice and pull until we curl up and form the petal. And so until the flower is formed.
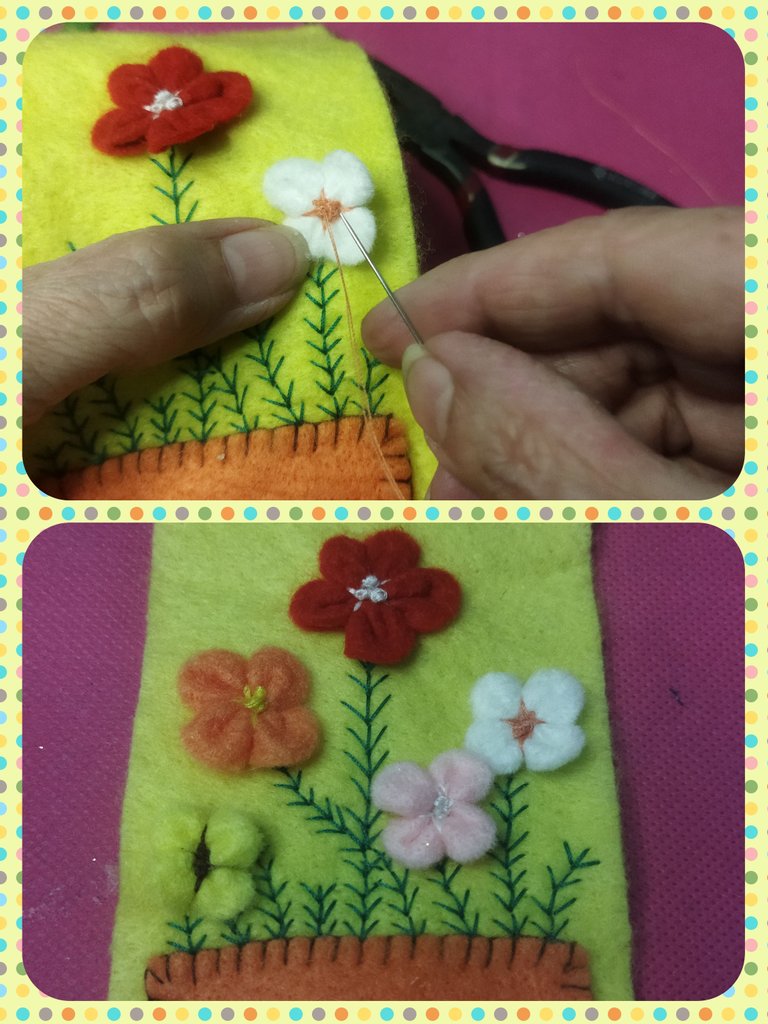
Hacemos 4 o 5 flores de diversos colores y las vamos colocando en las ramas que ya hemos bordado realizando puntada pespunte y luego realizaremos el punto francés.
We make 4 or 5 flowers of different colors and we place them on the branches that we have already embroidered using backstitch and then we will do the French stitch.
Una vez que ya hemos definido nuestro adorno con el bordado de las flores, procedemos a formar el estuche uniendo las dos piezas. Colocamos la parte bordada encima de la otra pieza amarilla y sujetamos con los alfileres para que no se muevan y comenzamos a unir ambas piezas con la puntada de festón o punto ojal.
Once we have already defined our ornament with the embroidery of the flowers, we proceed to form the case by joining the two pieces. We place the embroidered part on top of the other yellow piece and fasten with the pins so that they do not move and we begin to join both pieces with the satin stitch or buttonhole stitch.
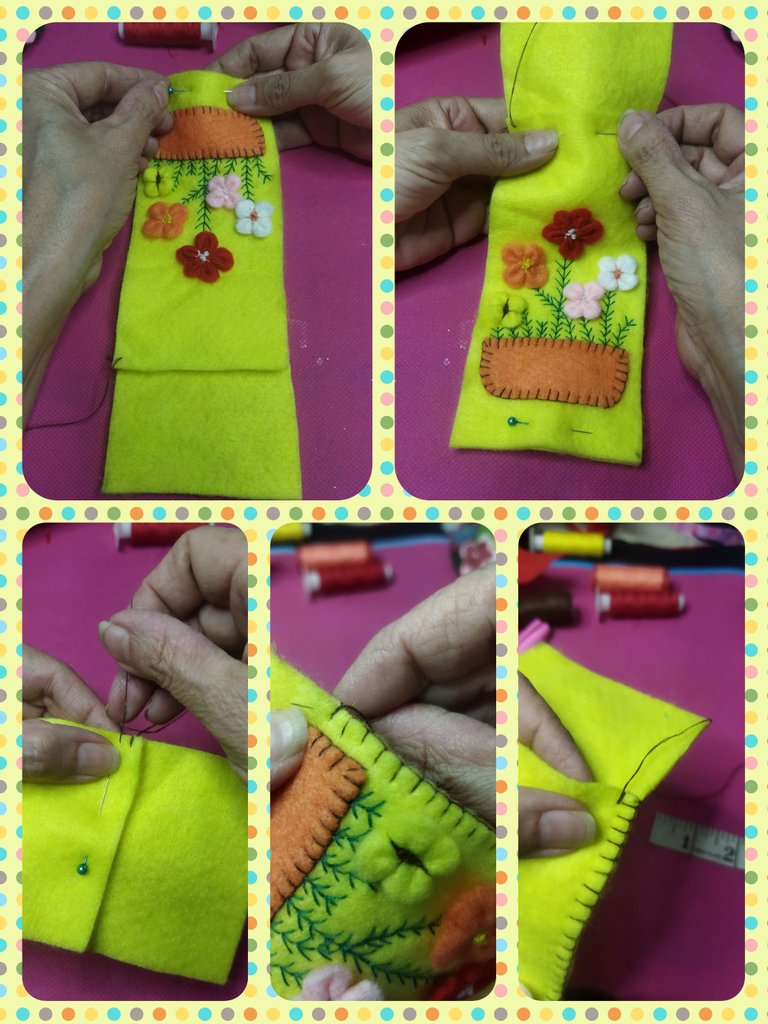
Este punto lo realizaremos comenzando por una de las esquinas donde se enlazan las dos piezas, luego continuamos realizando el punto festón sólo por la pieza superior donde realizamos el bordado.
We will make this stitch starting from one of the corners where the two pieces meet, then we continue making the scallop stitch only through the upper piece where we do the embroidery.
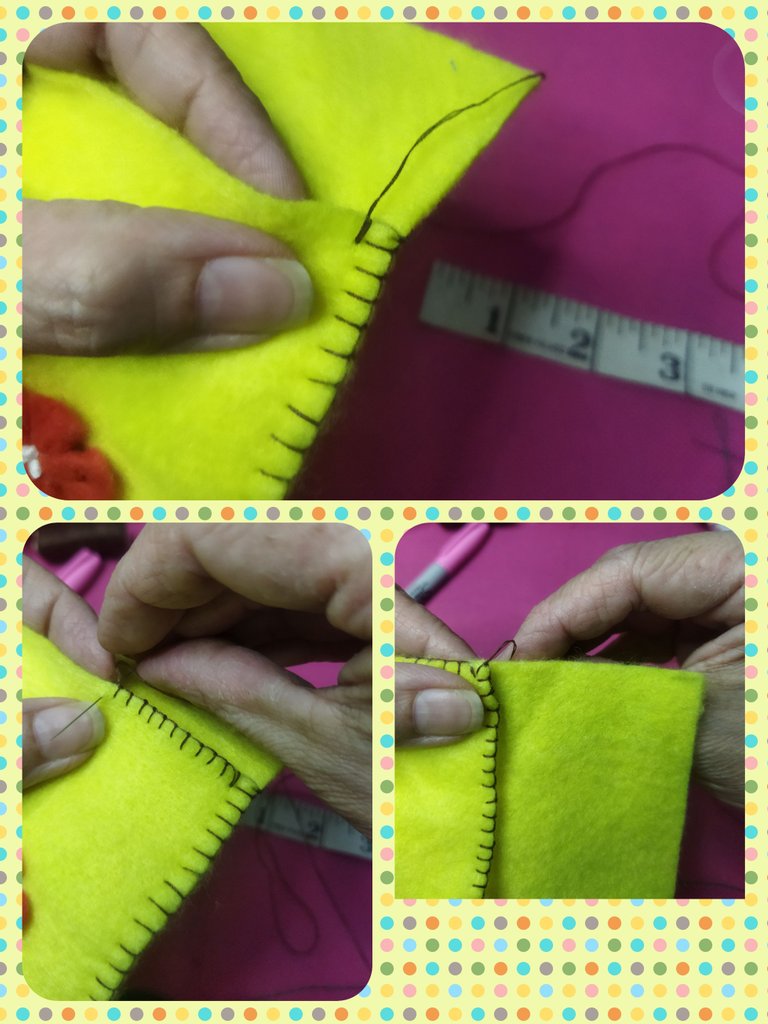
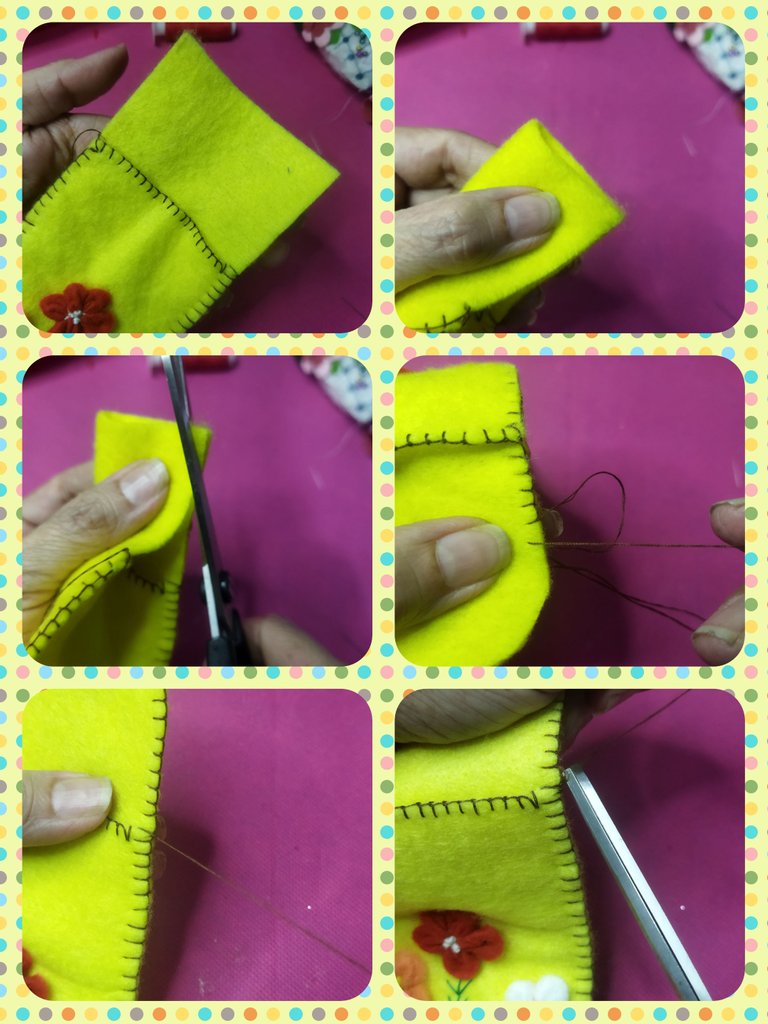
Para la solapa del estuche, haremos un recorte curvo en los costados y luego continuamos bordando con el punto festón hasta finalizar la solapa.
For the case flap, we will make a curved cutout on the sides and then continue embroidering with the satin stitch until the flap is finished.
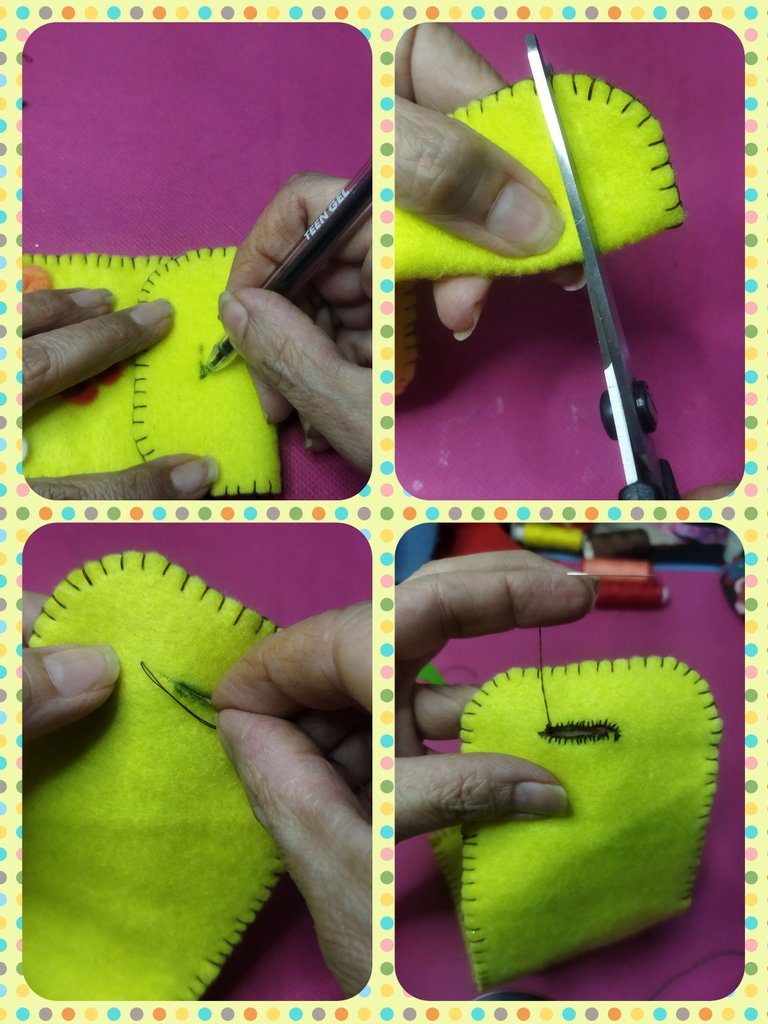
Y para culminar sólo queda realizar el ojal y pegar el botón para cerrar el estuche. Realizamos un corte en la parte central de la solapa y cosemos con el punto de ojal. Cosemos el botón a la altura del ojal en el corte donde hemos realizado el adorno bordado.
And to finish, all that remains is to make the buttonhole and glue the button to close the case. We make a cut in the central part of the flap and sew with the buttonhole stitch. We sew the button at the height of the buttonhole in the cut where we have made the embroidered trim.
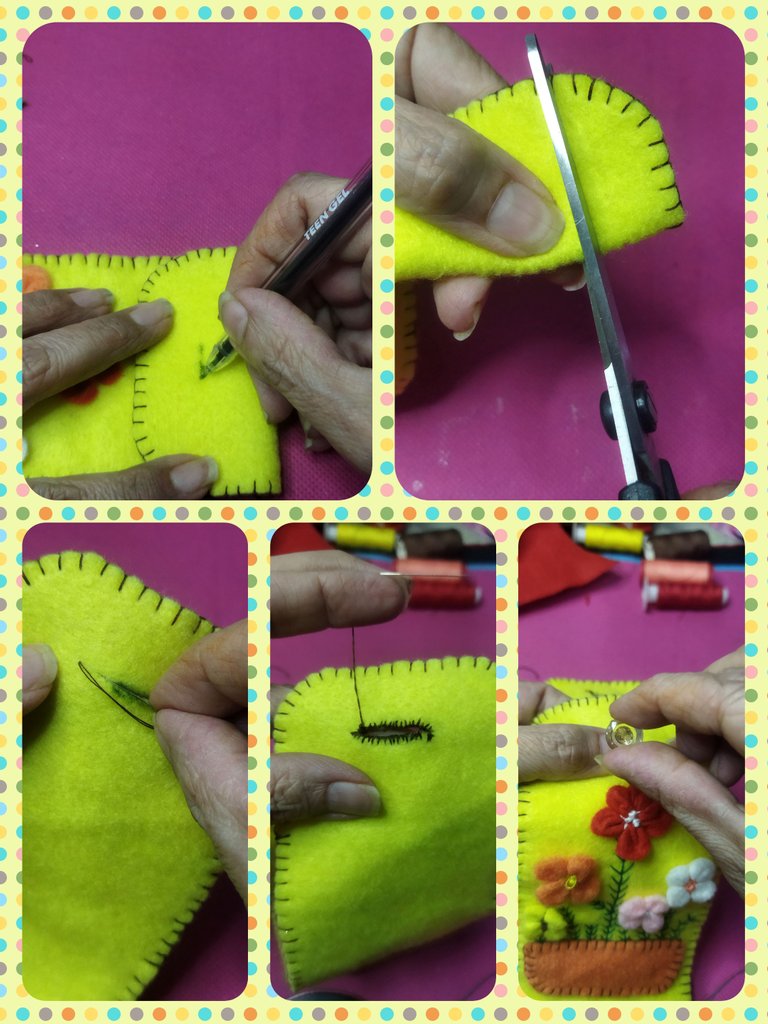
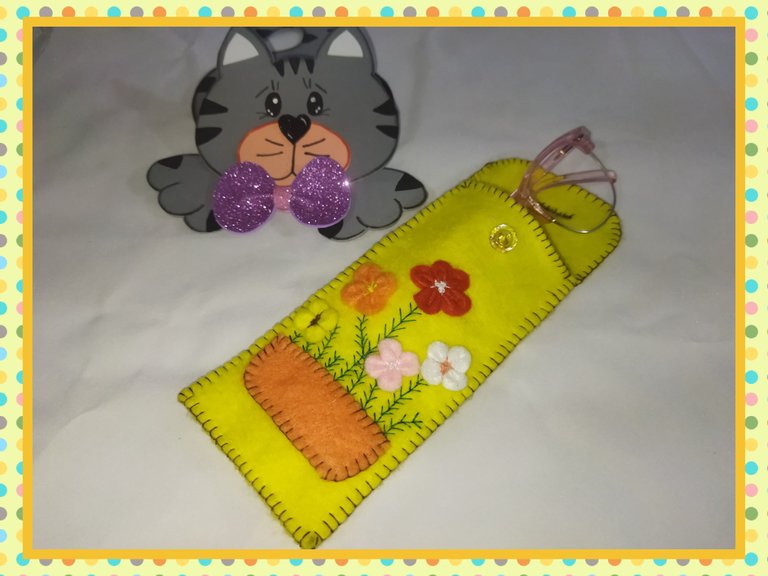
Y de esta forma obtenemos un práctico y muy lindo estuche para proteger nuestros lentes de golpes y ralladuras. Espero que te guste y dejes tus comentarios. Nos vemos en la próxima.
And in this way we obtain a practical and very nice case to protect our lenses from bumps and scratches. I hope you like it and leave your comments. See you next time.
¡Hola @linita!Felicitaciones por ese hermoso y delicado trabajo.
Hola buena tarde @linita, que lindura has hecho, los colores lo hacen lucir llamativos...tus pasos fáciles de seguir. Enamorada de el resultado. Necesitaré hacerme unos...gracias por compartir cariño...felicidades
El bordado quedo genial, muy bonito y original, muy bien mostrado el paso a paso, te felicito, muy creativo, saludos.
Me encantó tu trabajo!! 😍 No solamente porque es muy útil, sino también por ese bonito bordado que le hiciste y lo bien que explicaste el paso a paso. Te felicito!!🌺
Me alegro que te guste, pues sí que me será útil porque he perdido muchos lentes por descuidada, pero ya no me pasará más.
Good work...👍
Congratulations @linita! You have completed the following achievement on the Hive blockchain And have been rewarded with New badge(s)
Your next target is to reach 40000 upvotes.
You can view your badges on your board and compare yourself to others in the Ranking
If you no longer want to receive notifications, reply to this comment with the word
STOPCheck out our last posts:
Support the HiveBuzz project. Vote for our proposal!