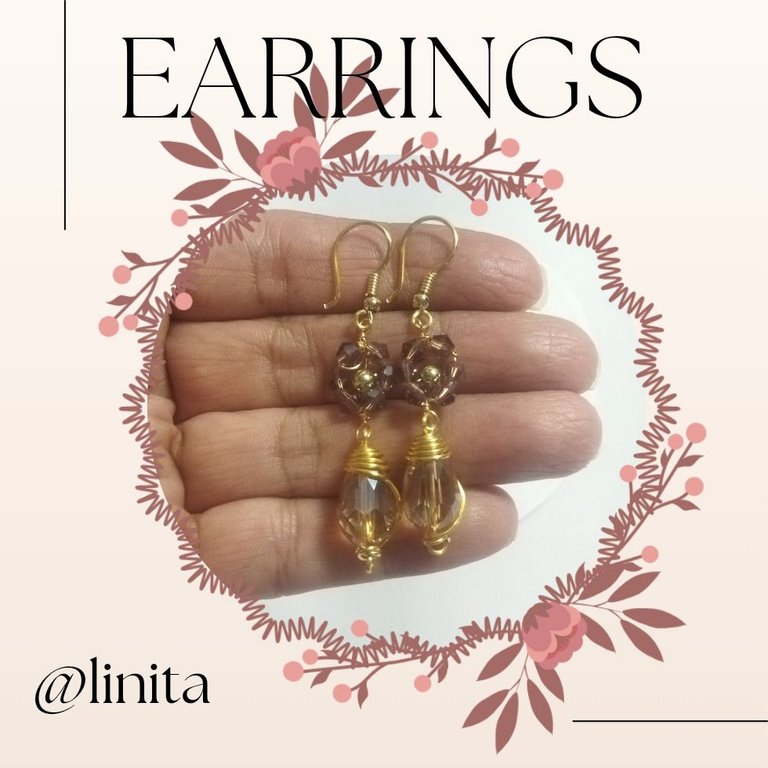
[ENG-ESP] EARRINGS MADE WITH CRYSTALS AND WIRE
WELCOME TO MY BLOG
Hellooooo, hellooooo! Greetings #Jewelry creators. In this tutorial we are going to learn how to make earrings with wire and crystals, as well as how to make hooks decorated with colling and beads and, in turn, the snail setting so that our earrings look much more elegant and eye-catching. I hope you like it.
BIENVENIDOS A MI BLOG
¡Holaaaa, holaaaaa! Saludos creadores de #Jewelry. En este tutorial vamos a aprender a realizar unos zarcillos con alambre y cristales, así como también a realizar los anzuelos decorados con colling y balines y a su vez, el engarce caracol para que nuestros zarcillos queden mucho más elegantes y llamativos. Espero les guste.
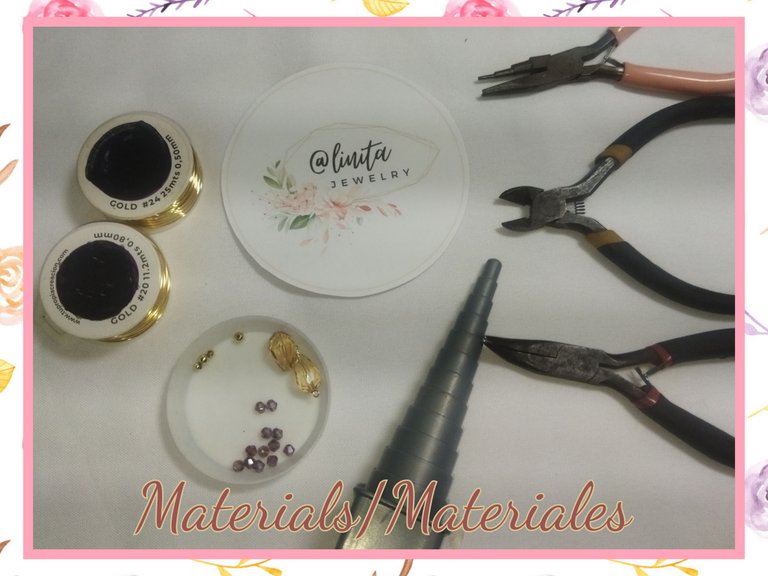
MATERIALS
- Wire #20, #24 and #26
- 2 elongated crystals of 1.7 mm
- 12 brown crystals of 4 mm
- 2 4 mm balls
- 2 2 mm balls
- Jewelry pliers
- Round mandrel
MATERIALES
- Alambre #20, #24 y #26
- 2 cristales alargados de 1,7 mm
- 12 cristales marrones de 4 mm
- 2 balines de 4 mm
- 2 balines de 2 mm
- Pinzas de bisutería
- Mandril redondo
STEP BY STEP // PASO A PASO
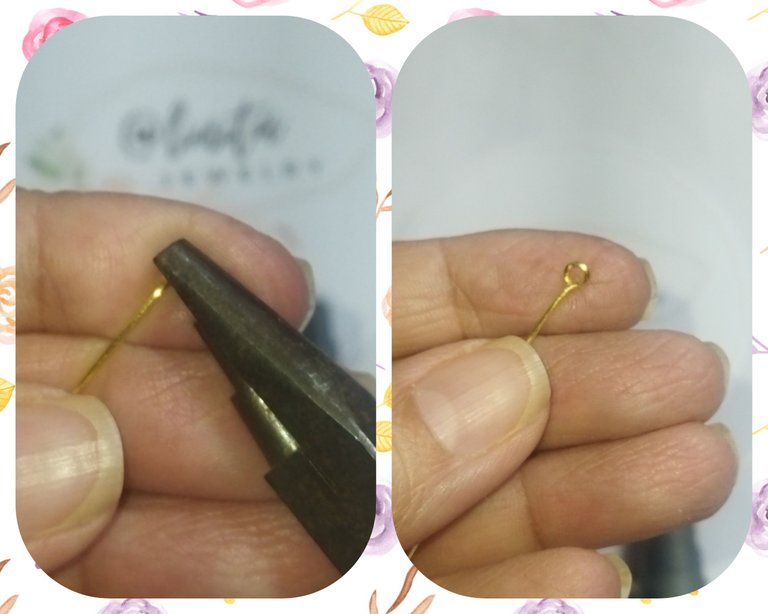
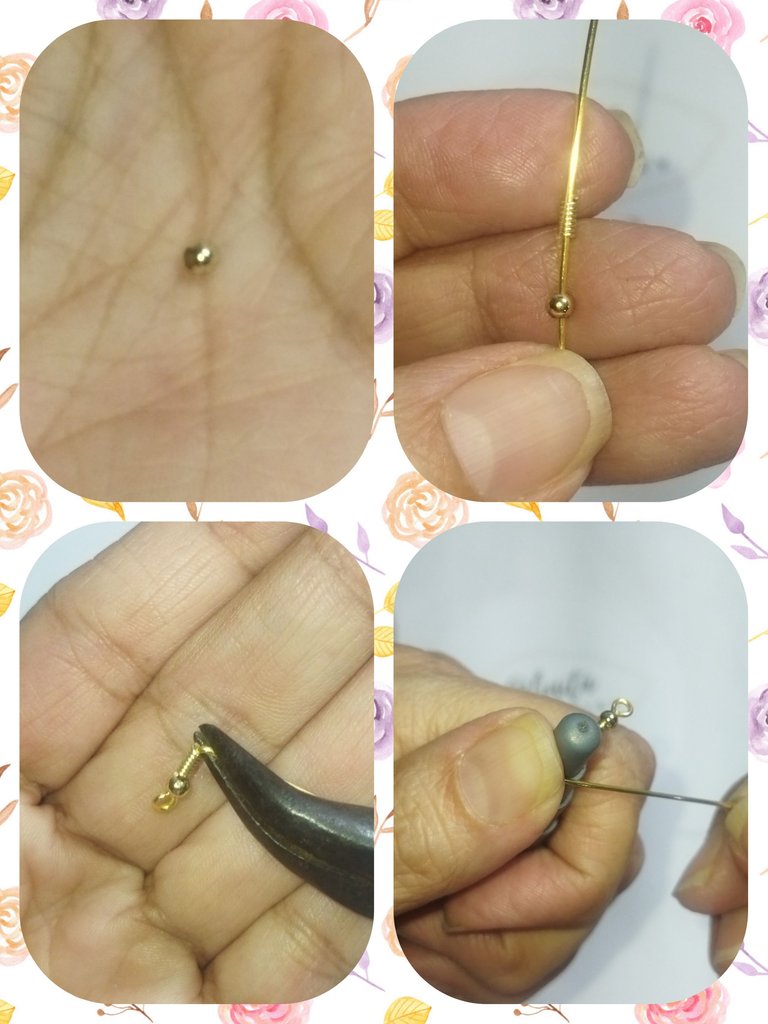
HOOKS
To make the hooks we will use 6 cm of #20 wire for each one. With the conical pliers we will make a small ring.
ANZUELOS
Para realizar los anzuelos utilizaremos 6 cm de alambre #20 para cada uno. Con la pinza cónica vamos a realizar u aro pequeño.
Next, we will take a strand of #20 wire and with the #26 wire we will make a twist to obtain the colling. Once we have twisted the amount we will use, we remove the twist from the wire and chop it.
Luego vamos a tomar un trazo de alambre #20 y con el alambre #26 vamos a realizar un entorchado para obtener el colling. Una vez que hemos entorchado la cantidad que usaremos, retiramos el entorchado del alambre y picamos.
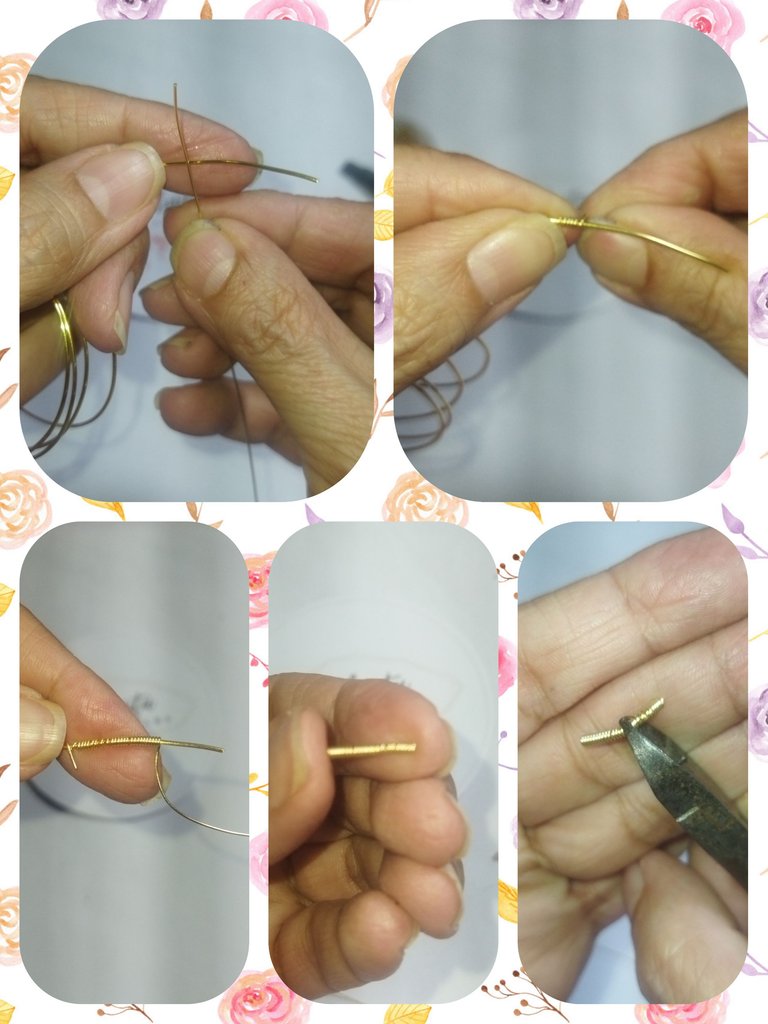
We take the 2 mm ball and insert it through the 6 cm wire where we made the ring, we place 5 mm of colling and with the flat pliers we make a 45º bend.
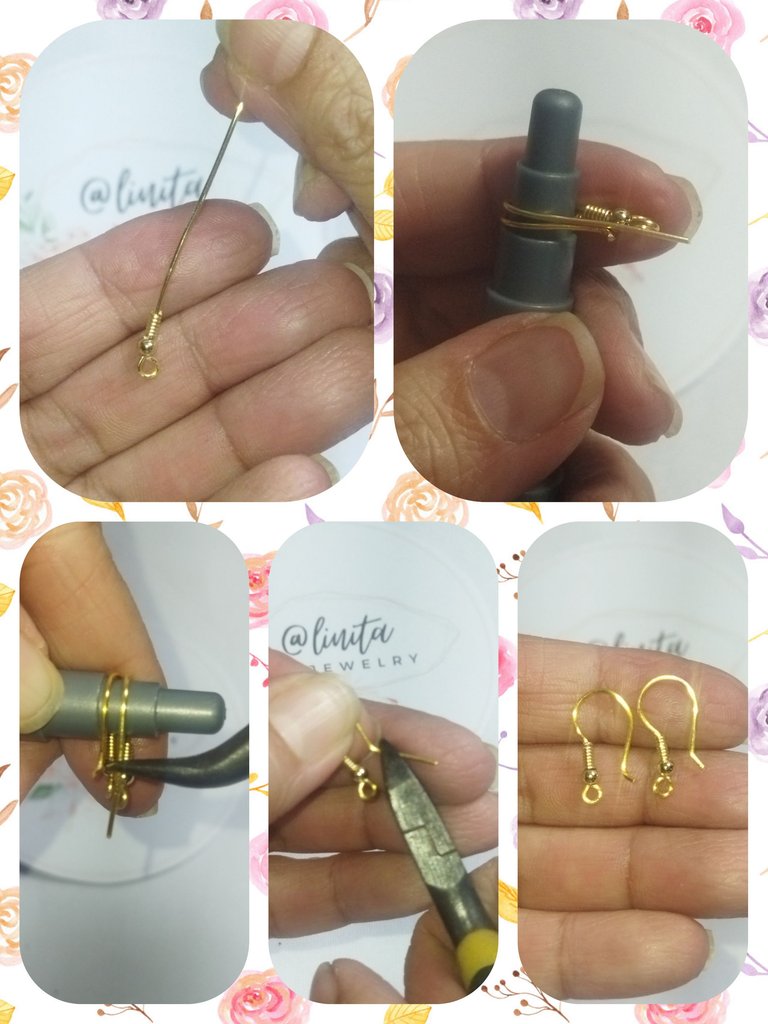
Now we are going to take the round mandrel and place the wire and surround it around the second level of the mandrel until we form the hook.
Tomamos el balín de 2 mm e introducimos por el alambre de 6 cm donde realizamos el aro, colocamos 5 mm de colling y con la pinza plana realizamos un doblez de 45º.
Ahora vamos a tomar el mandril redondo y colocamos el alambre y rodeamos por el segundo nivel del mandril hasta formar el anzuelo.
- Using the flat pliers, make a small fold at the height of the ball and cut, leaving 1 mm from the fold.
- Con la pinza plana realizamos un pequeño doblez a la altura del balín y cortamos dejando 1 mm a partir del doblez.
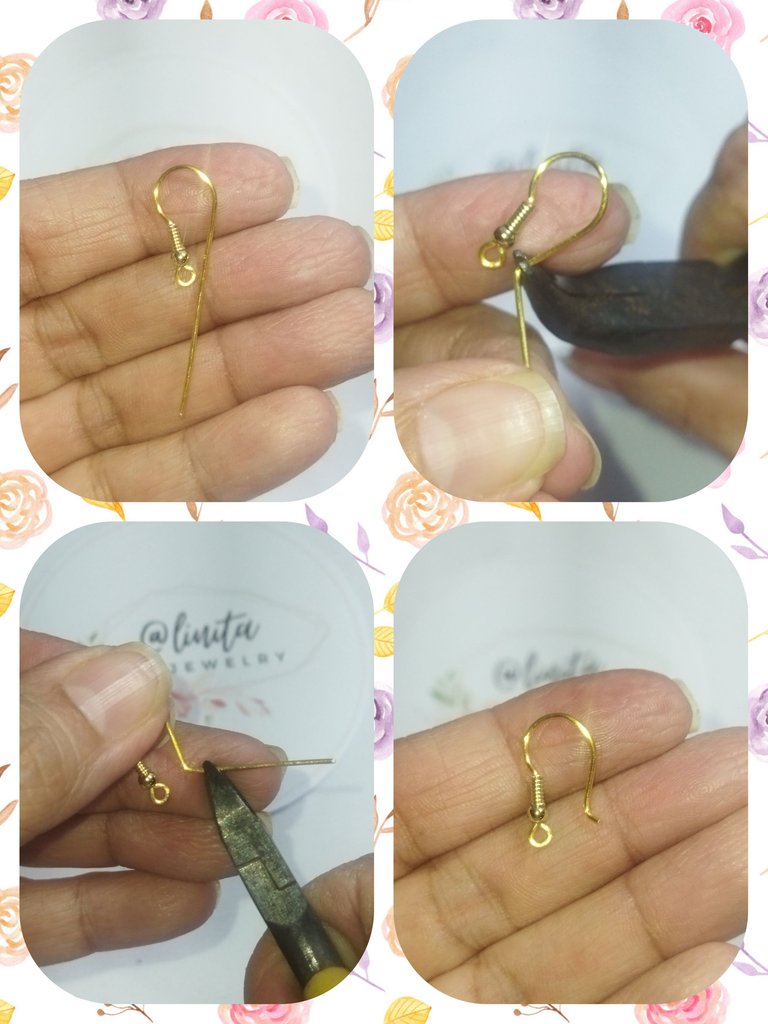
We make the second hook taking the first as a measure so that both are the same.
Realizamos el segundo anzuelo tomando el primero como medida para que ambos queden iguales.
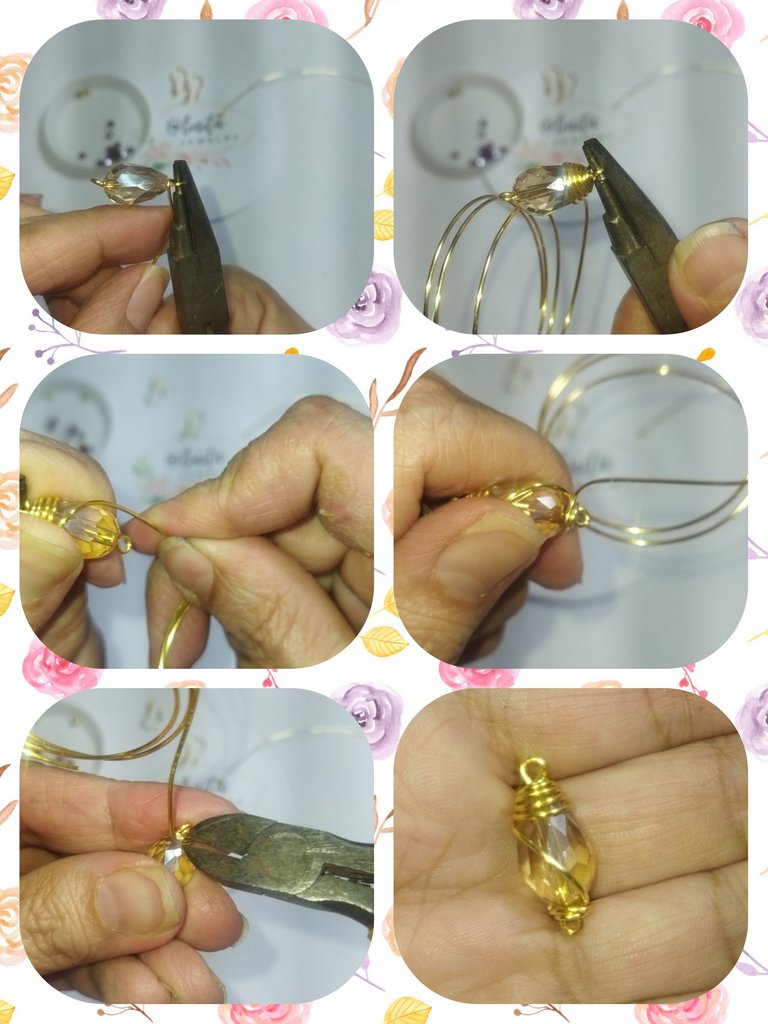
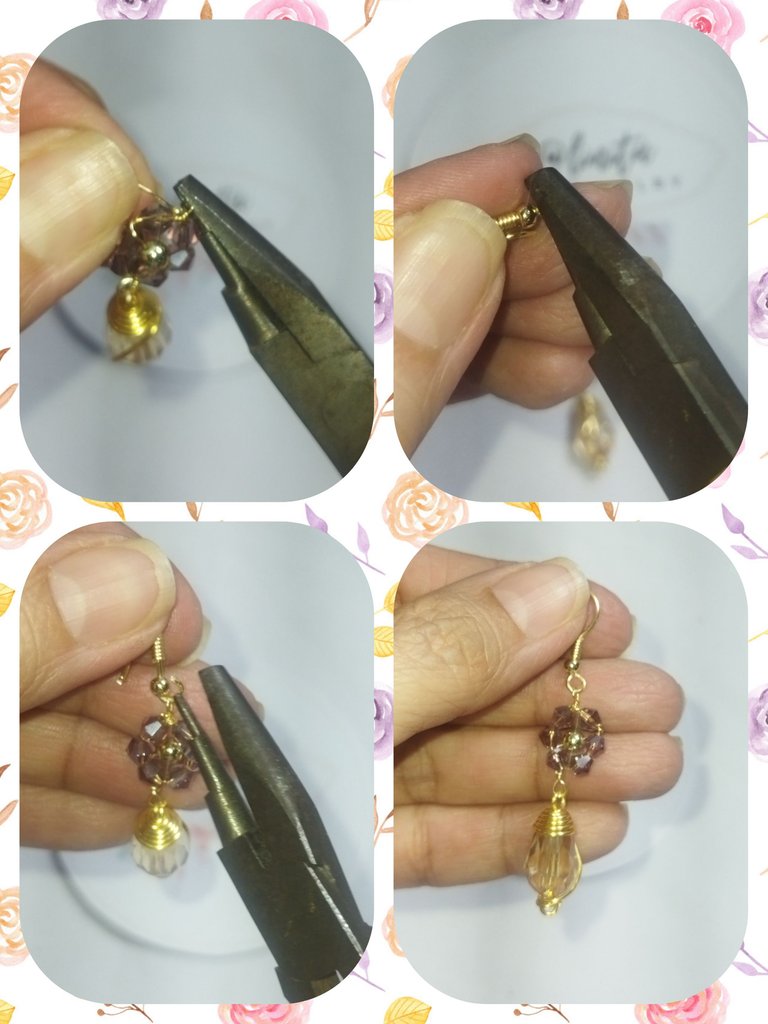
SNAIL LINK
To make the snail setting, take the stone that we will use and thread it through the wire. We make a ring at that end to prevent the crystal from coming out and then at the other end we form another ring that we will close with a twist, then we will make a twist of 5 turns around the crystal.
Once the twists are made, we will stop the wire towards the other end and close a rosary knot of 2 turns. We cut the wire and flatten it with the flat pliers.
ENGARCE CARACOL
Para realizar el engarce caracol, tomamos la piedra que utilizaremos y pasamos por el alambre. Hacemos un aro en ese extremo para evitar que se salga el cristal y luego en el otro extremo formamos otro aro que vamos a cerrar con un giro, luego vamos a realizar un entorchado de 5 giros alrededor del cristal.
Una vez realizados los giros vamos a parar el alambre hacia el otro extremo y cerramos un un nudo de rosario de 2 giros. Cortamos el alambre y aplanamos con la pinza plana.
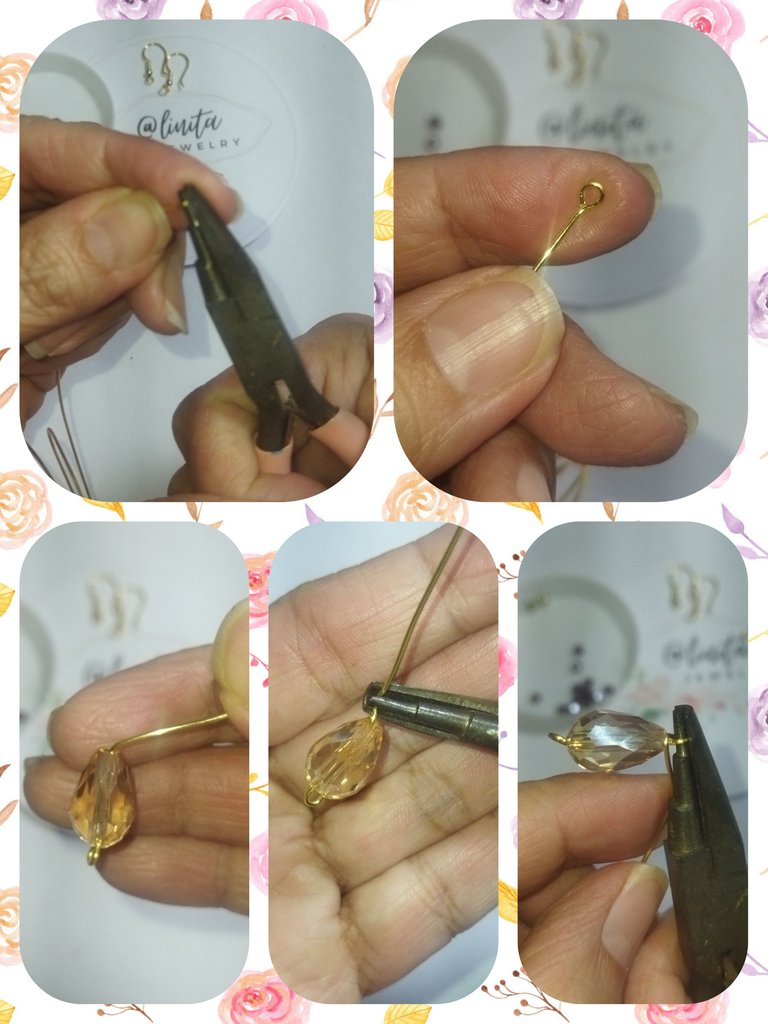
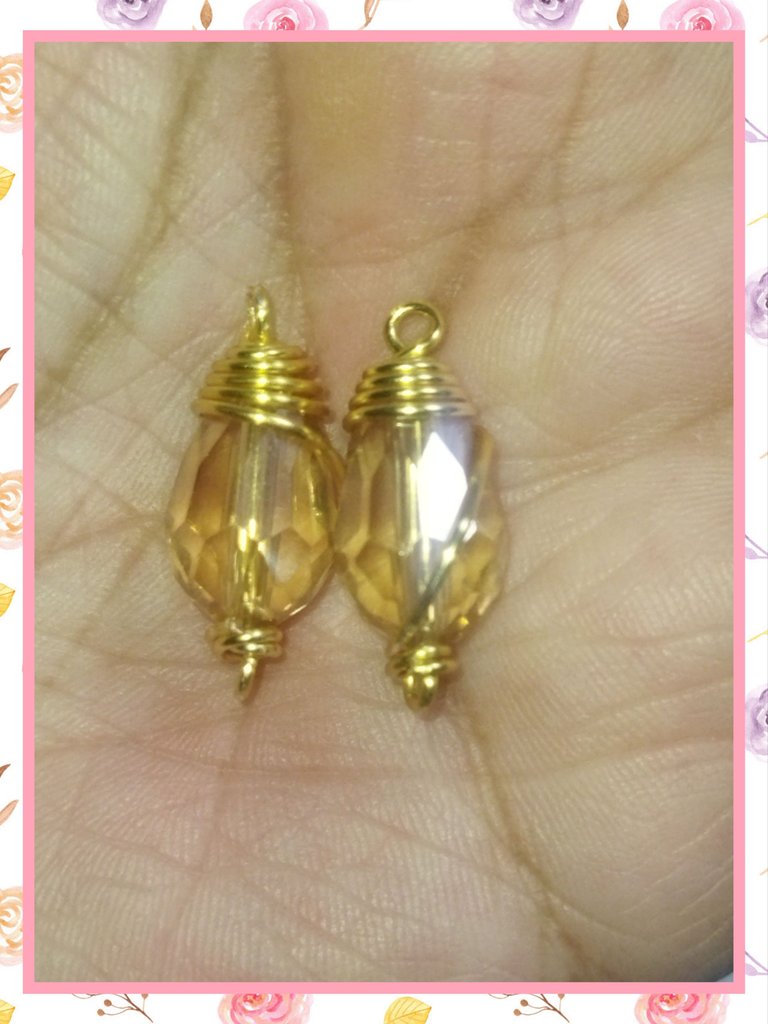
We make two identical pieces to make the earrings.
Hacemos dos piezas iguales para realizar los zarcillos.
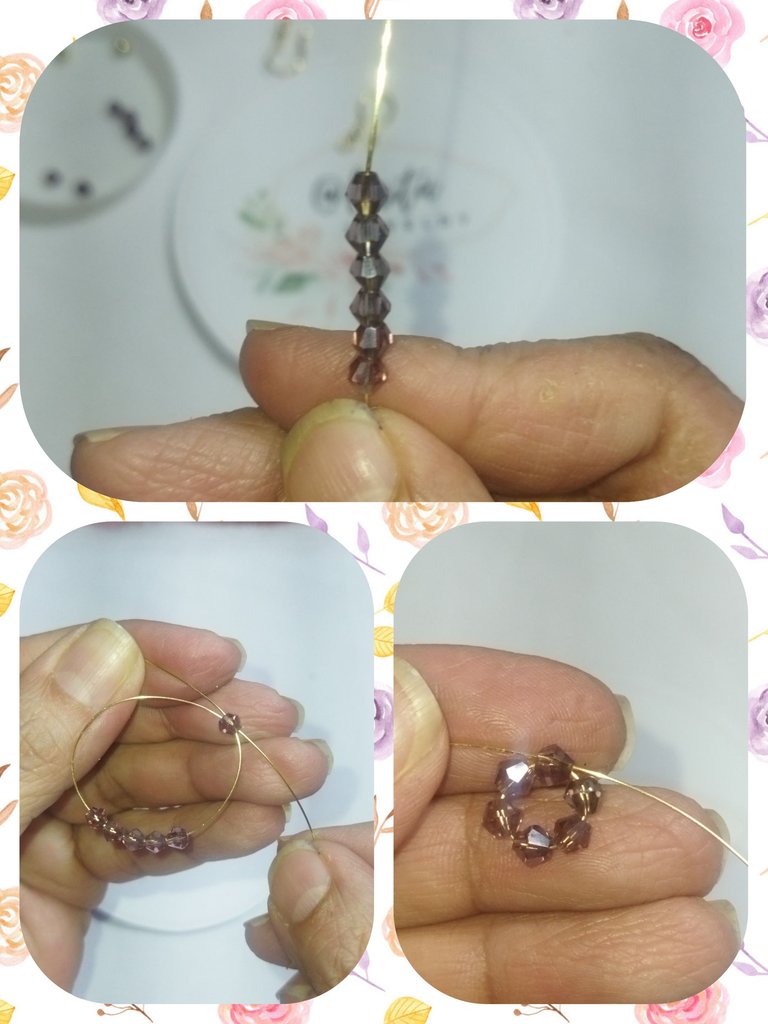
FLOWER
To make the flower we will use a piece of #26 wire approximately 20 cm long.
We introduce 6 crystals and we are going to take the wire and we pass it through the first crystal and we form a circle, trying to keep it in the center of the wire.
FLOR
Para realizar la flor vamos a utilizar un trozo de alambre # 26 de 20 cm aproximadamente.
Introducimos 6 cristales y vamos a tomar el alambre y lo pasamos por el primer cristal y formamos un círculo, tratando que nos quede en el centro del alambre.
Now we pass a 4 mm ball through either end of the wire and place it in the center of the circle, we make a twist to secure the ball and form the flower.
Ahora pasamos un balín de 4 mm por cualquiera de los extremos del alambre y lo ubicamos en el centro del círculo, hacemos un entorche para asegurar el balín y formar la flor.
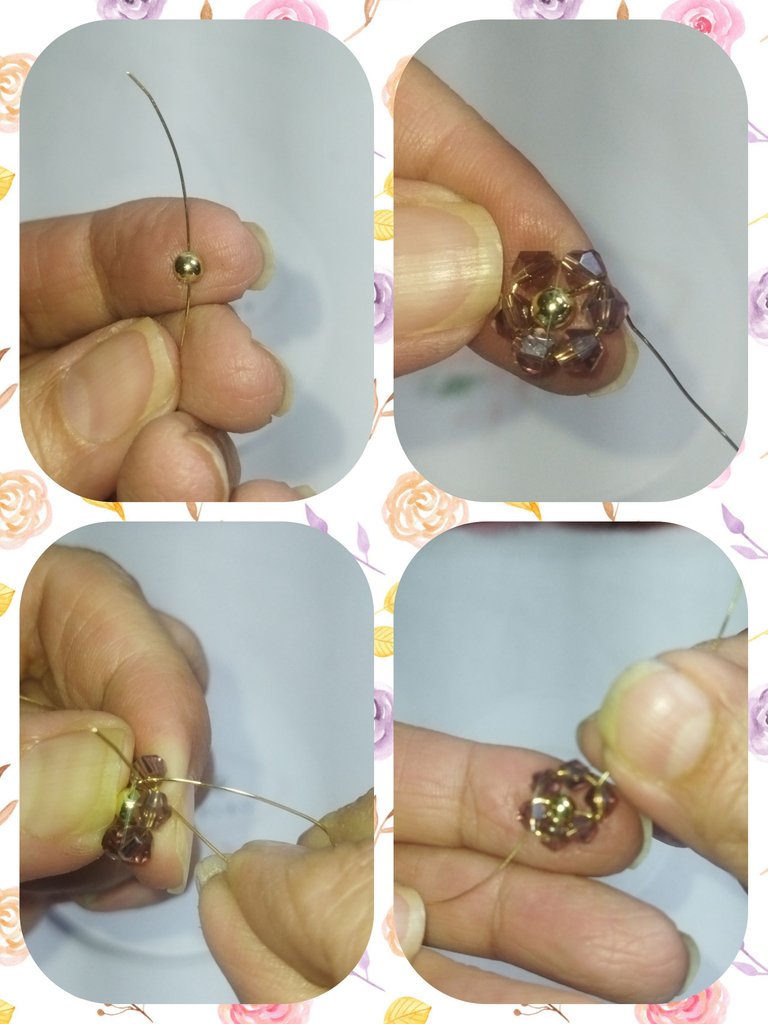
Next, we place the crimped crystal on one end of the flower wire. We make a ring and tie a rosary knot to form a loop to hold the crimped crystal. We cut off the excess wire.
A continuación, colocamos el cristal engarzado por uno de los extremos del alambre de la flor. Realizamos un aro y realizamos un nudo de rosario para formar un argolla, que sujete el cristal engarzado. Cortamos el exceso de alambre.

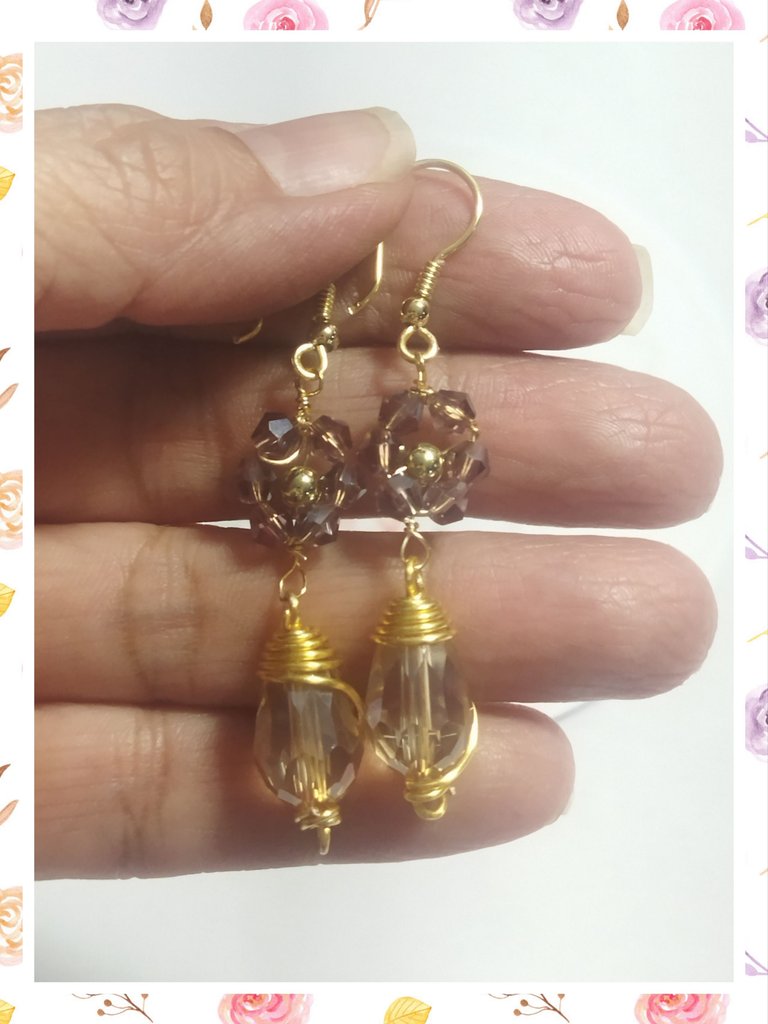
At the other end of the flower we make a ring that we will also close with a rosary knot. And we place one of the hooks that we made at the beginning. And we have now formed our first tendril.
En el otro extremo de la flor realizamos un anillo que también cerraremos con un nudo de rosario. Y colocamos uno de los anzuelos que realizamos al inicio. Y ya tenemos formado nuestro primer zarcillo.
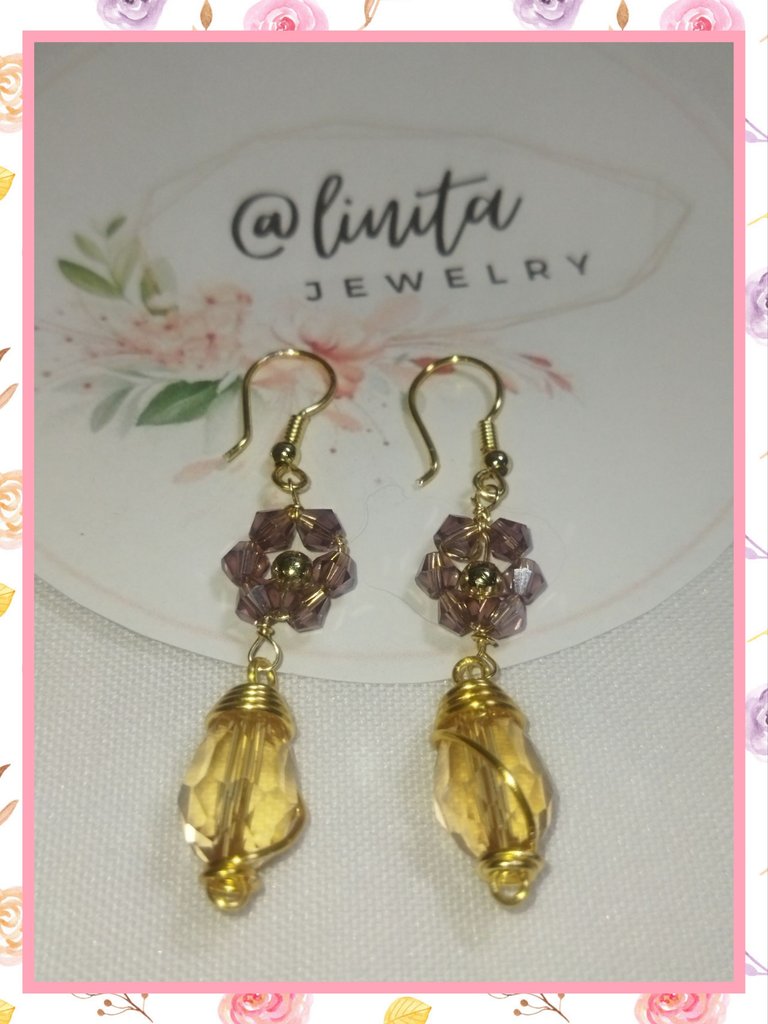
We form the other tendril and now we have some beautiful and elegant tendrils. Three simple processes in one tutorial to make all the models you want. See you next time.
Formamos el otro zarcillo ya ya tenemos unos bellos y elegantes zarcillos. Tres procesos sencillos en un solo tutorial para realizar todos los modelos que quieras. Nos vemos en la próxima.
It is so beautiful, elegant, and stylish. Its design is pretty cool. Love it. Nice work! Keep it up!
So simple but unique 🥰
You did a nice job here
I am very happy to read you, thank you for commenting.
Lovely earrings
Thanks You. I'm glad you liked it.
Hola. Están muy elegantes estos zarcillos, como para usarlo una emperatriz o reina faraón 👑
Gracias querida hermana, especiales para ti entonces 😘😘
This is so beautiful, I love the style, you nice work, weldone
I'm glad you liked it. Thanks for commenting, greetings.
I love it when I see people make beautiful things with wire
I love working with wire, I'm glad you liked it.
Sure