(ENG-ESP)How to make a cardboard suitcase with compartments. // Cómo hacer una maleta de cartón con compartimientos.
Hola y bienvenidos. //Hello and welcome.
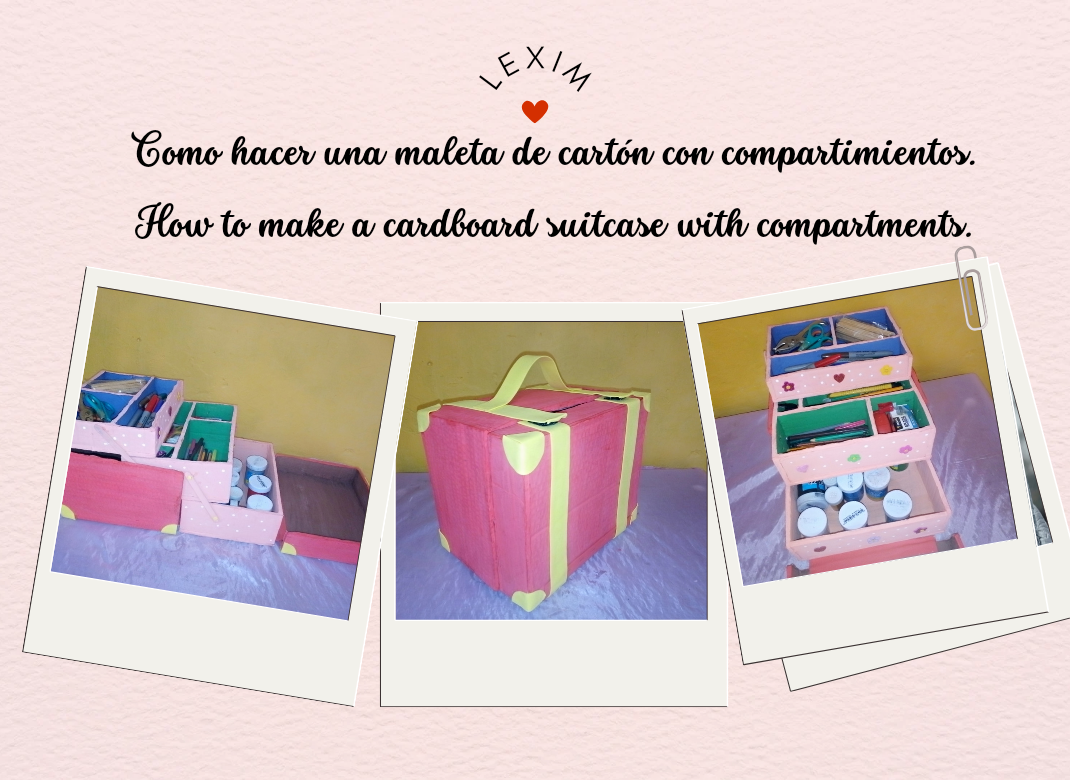
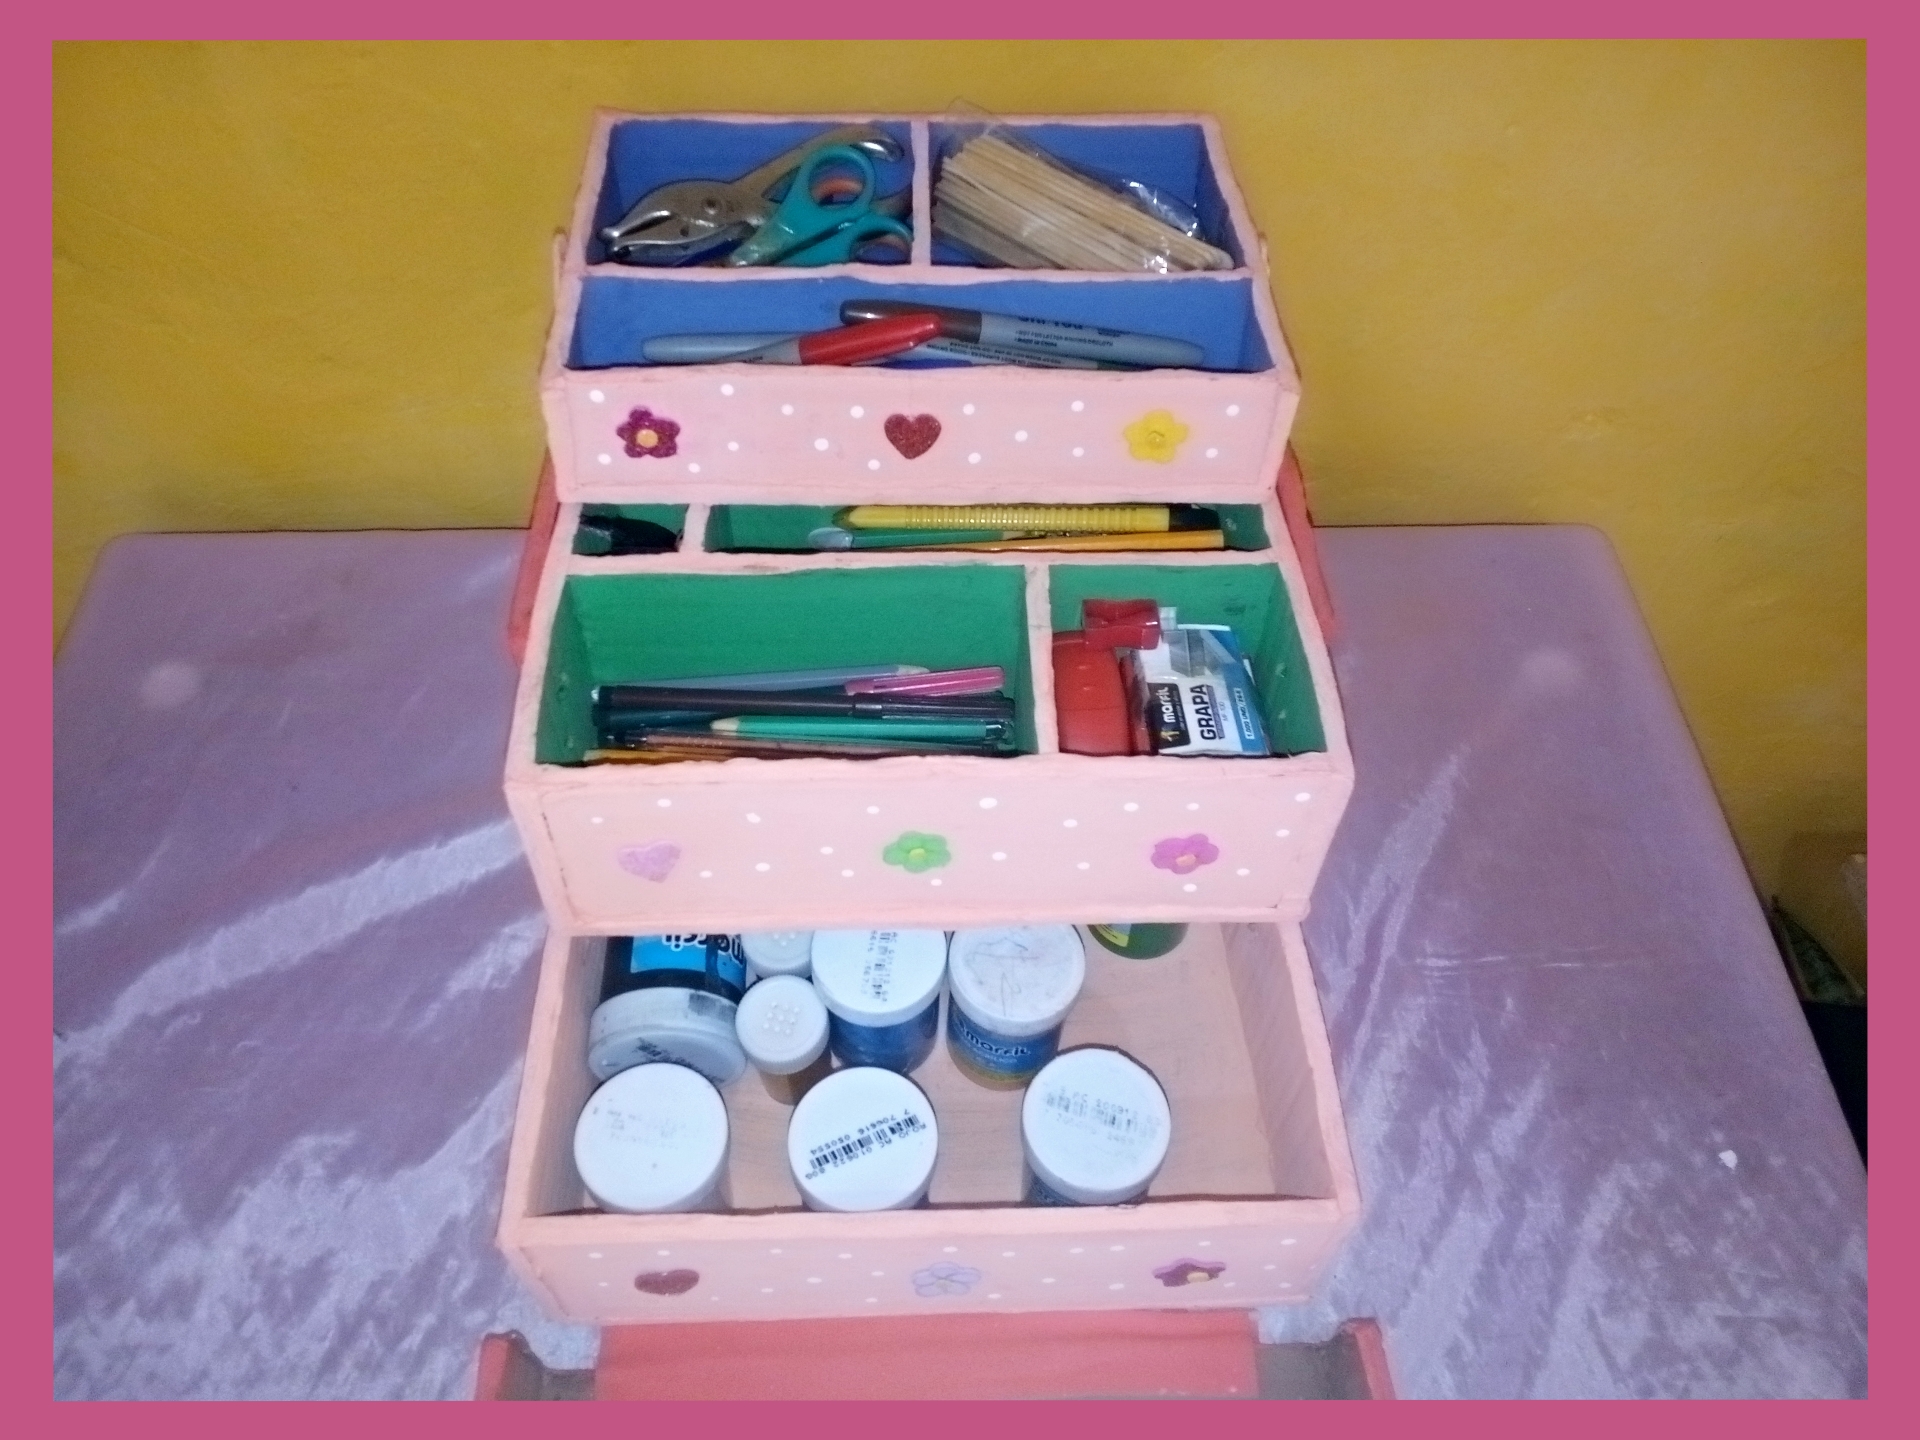
Hello to all dear colleagues who are part of this social network. Today I bring you one of my creative activities that I like to do with much affection for you a step by step on how to make a cardboard suitcase with compartments I made it for my personal use since the previous one was damaged this suitcase I like it very much because it takes up little space on my desk and I can also organize inside it my materials that I use the most here I show you the steps.
Hola a todos queridos compañeros que hacen parte de esta red social. El día de hoy les traigo una de mis actividades creativas que me gusta hacer con mucho cariño para ustedes un paso a paso de como hacer una maleta de cartón con comparticiones la hice para mí uso personal ya que la anterior se me daño está maleta me gusta mucho porque ocupa poco espacio en mi escritorio y además puedo organizar dentro de ella mis materiales que más uso acá les dejos los pasos.

Materials.
Materiales.

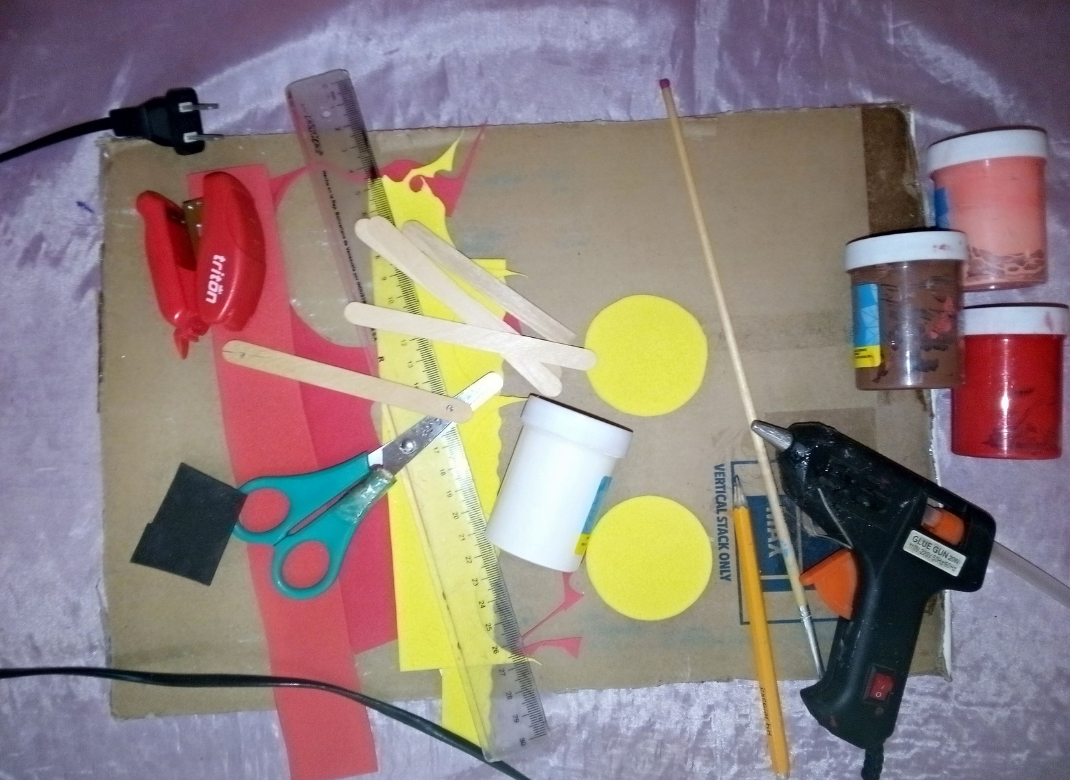
- Cardboard
- Scissors
- Acrylic paint
- Ruler
- Pencil
- Popsicle stick
- Magic clasp
- Yellow and red eva rubber
- Silicone
- Paintbrush
- Stapler
- Shelf paper
- Chopsticks.
- Cartón
- Tijera
- Pintura acrílica
- Regla
- Lapiz
- Palito de helado
- Cierre mágico
- Goma Eva amarilla y roja
- Silicón
- Pincel
- Grapadora
- Papel kraft
- Palillos

Step by step.
Paso a paso.

Paso 1. // Step 1.
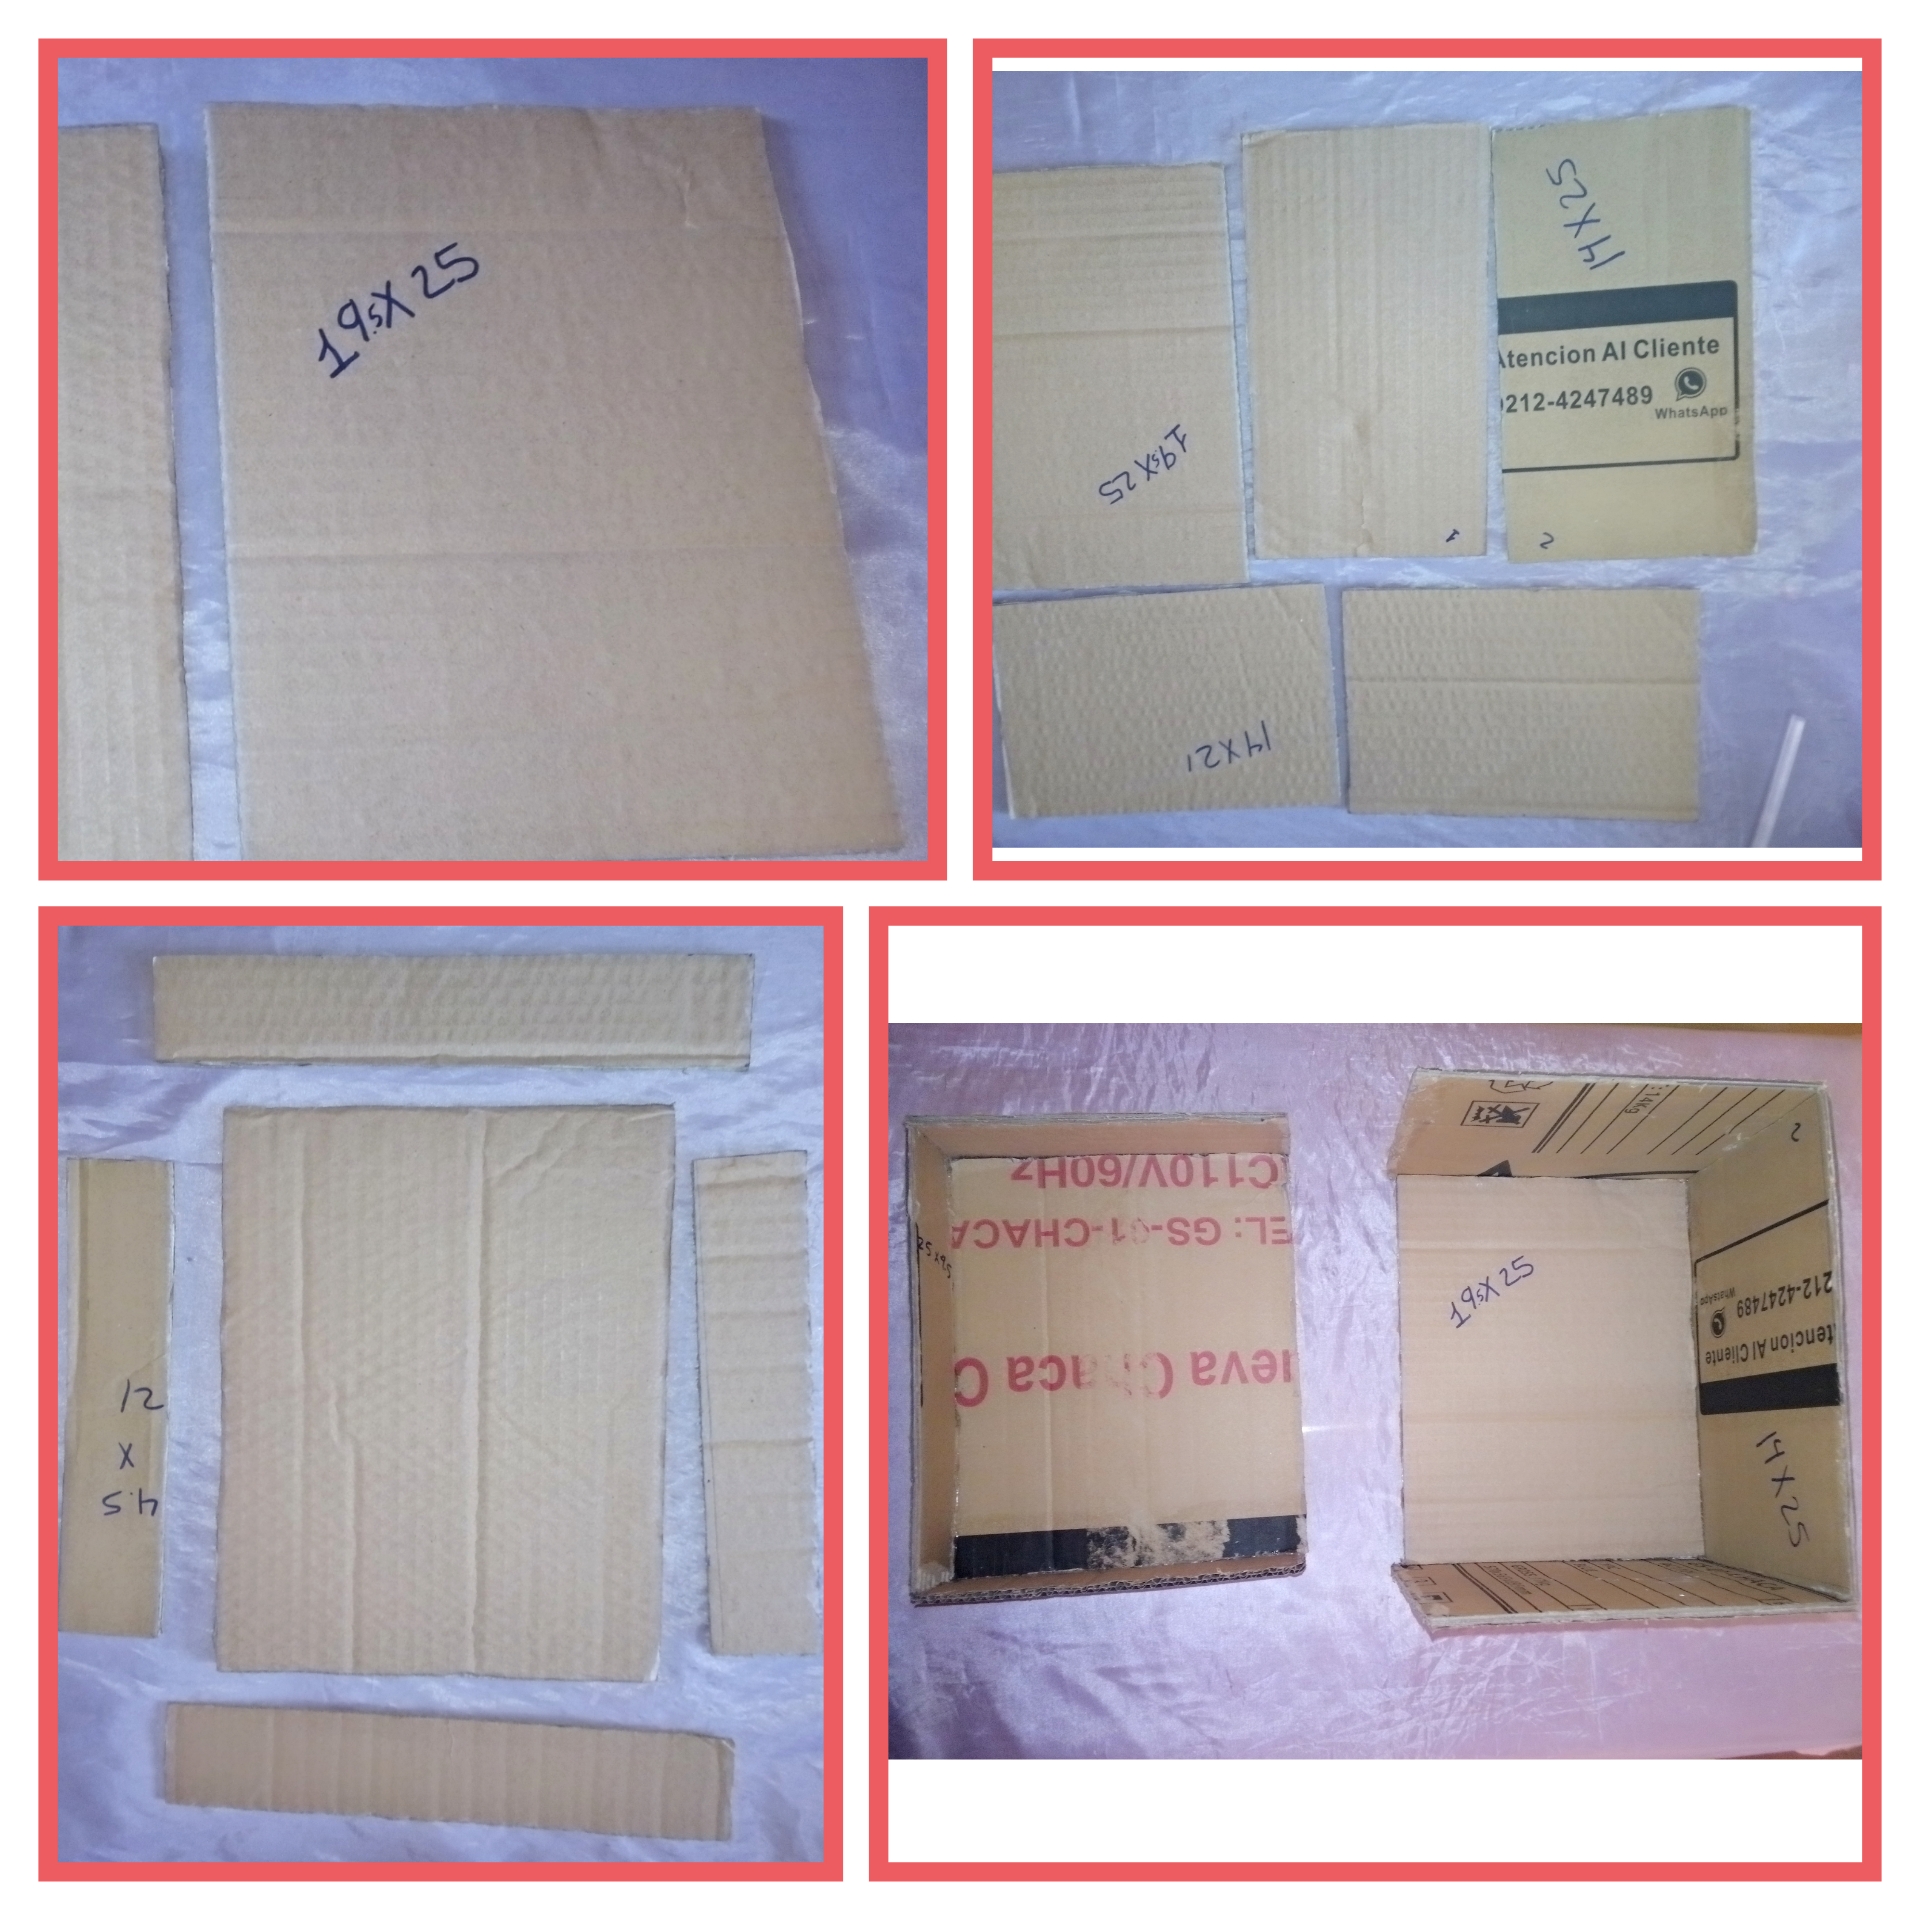
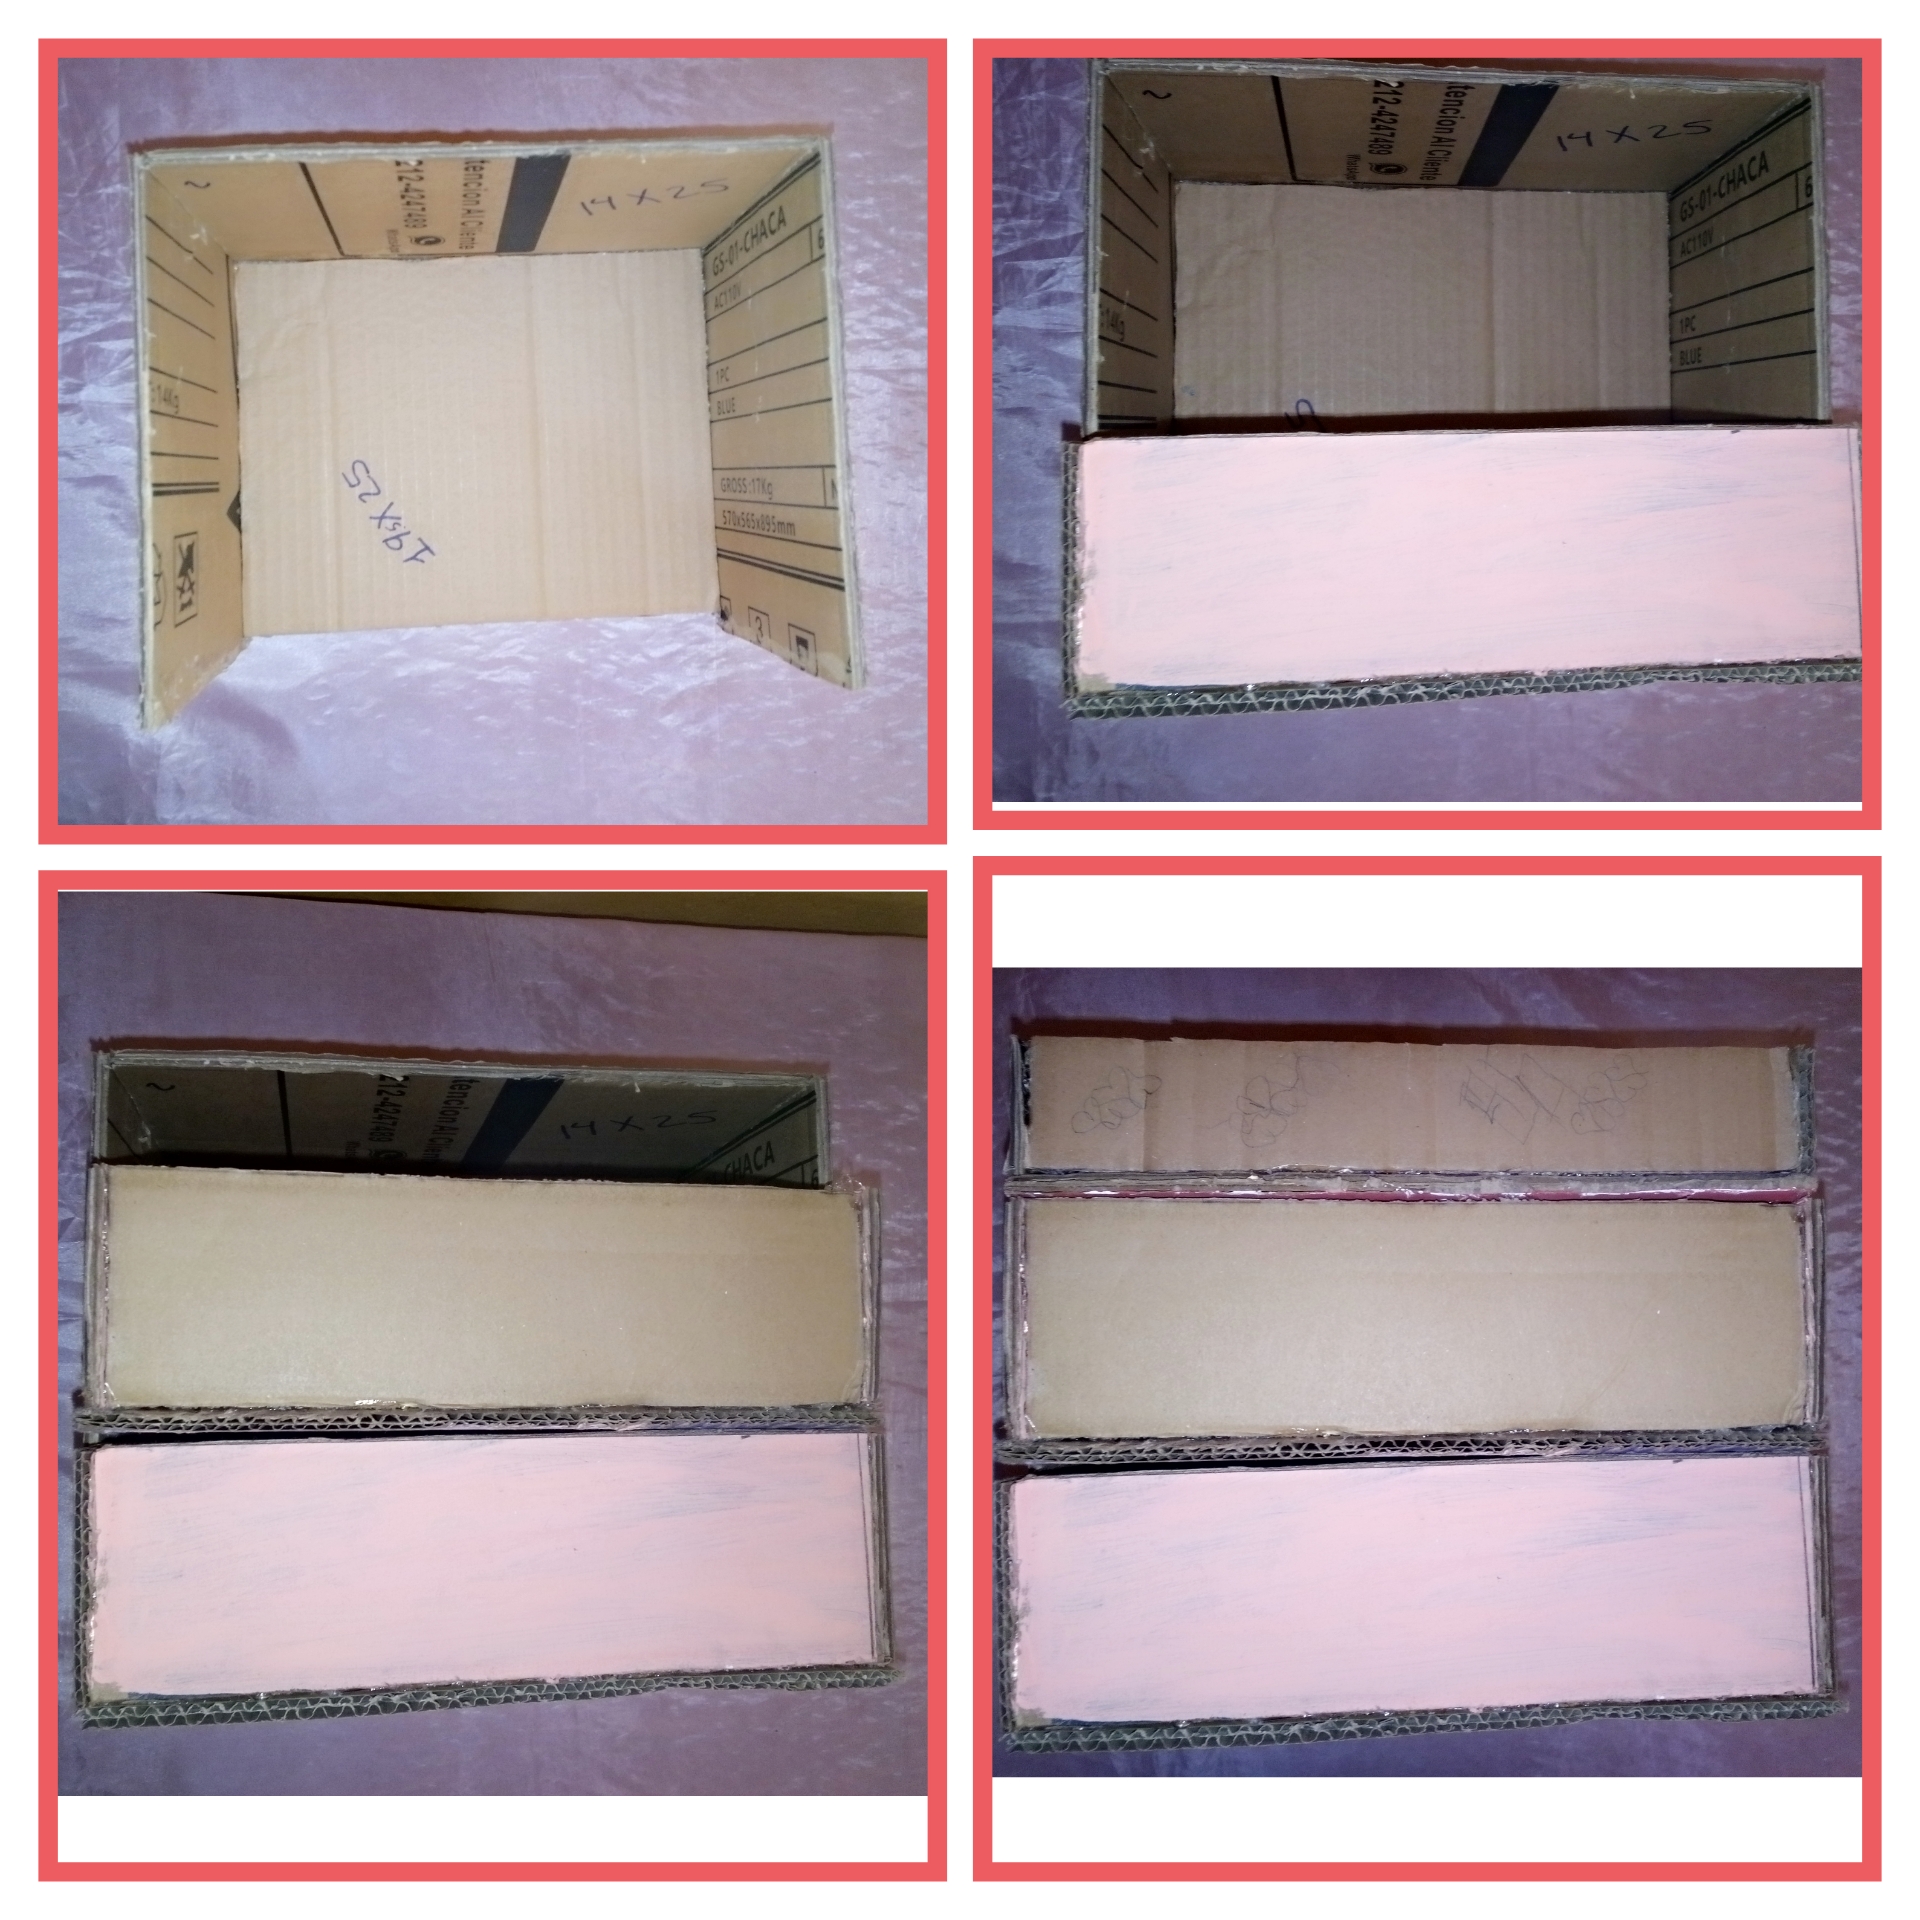
Well the first thing to do is to cut out two 26.5 x 21 centimeters cartons, take one of the cartons and make one of 26.5 x 14 centimeters and two of 14x21 centimeters and having these measures cut out we glue that part then take the other carton and make other measures of two cartons of 5 x 21 centimeters and one of 5x26.5 centimeters and glue these pieces in the fourth photo are already glued so you can see two boxes, one large and one less wide.
Bueno lo primero que hay que hacer es recortar dos cartones de 26,5 x 21 centímetros, cogemos uno de los cartones y hacemos uno de 26,5 x 14 centímetros y dos de 14x21 centímetros y teniendo estas medidas recortadas pegamos esa parte luego cogemos el otro cartón y hacemos otras medidas de dos cartones de 5 x 21 centímetros y uno de 5x26,5 centímetros y pegamos estas piezas en la cuarta foto ya están pegadas por lo que se pueden ver dos cajas, una grande y otra menos ancha.
Paso 2. // Step 2
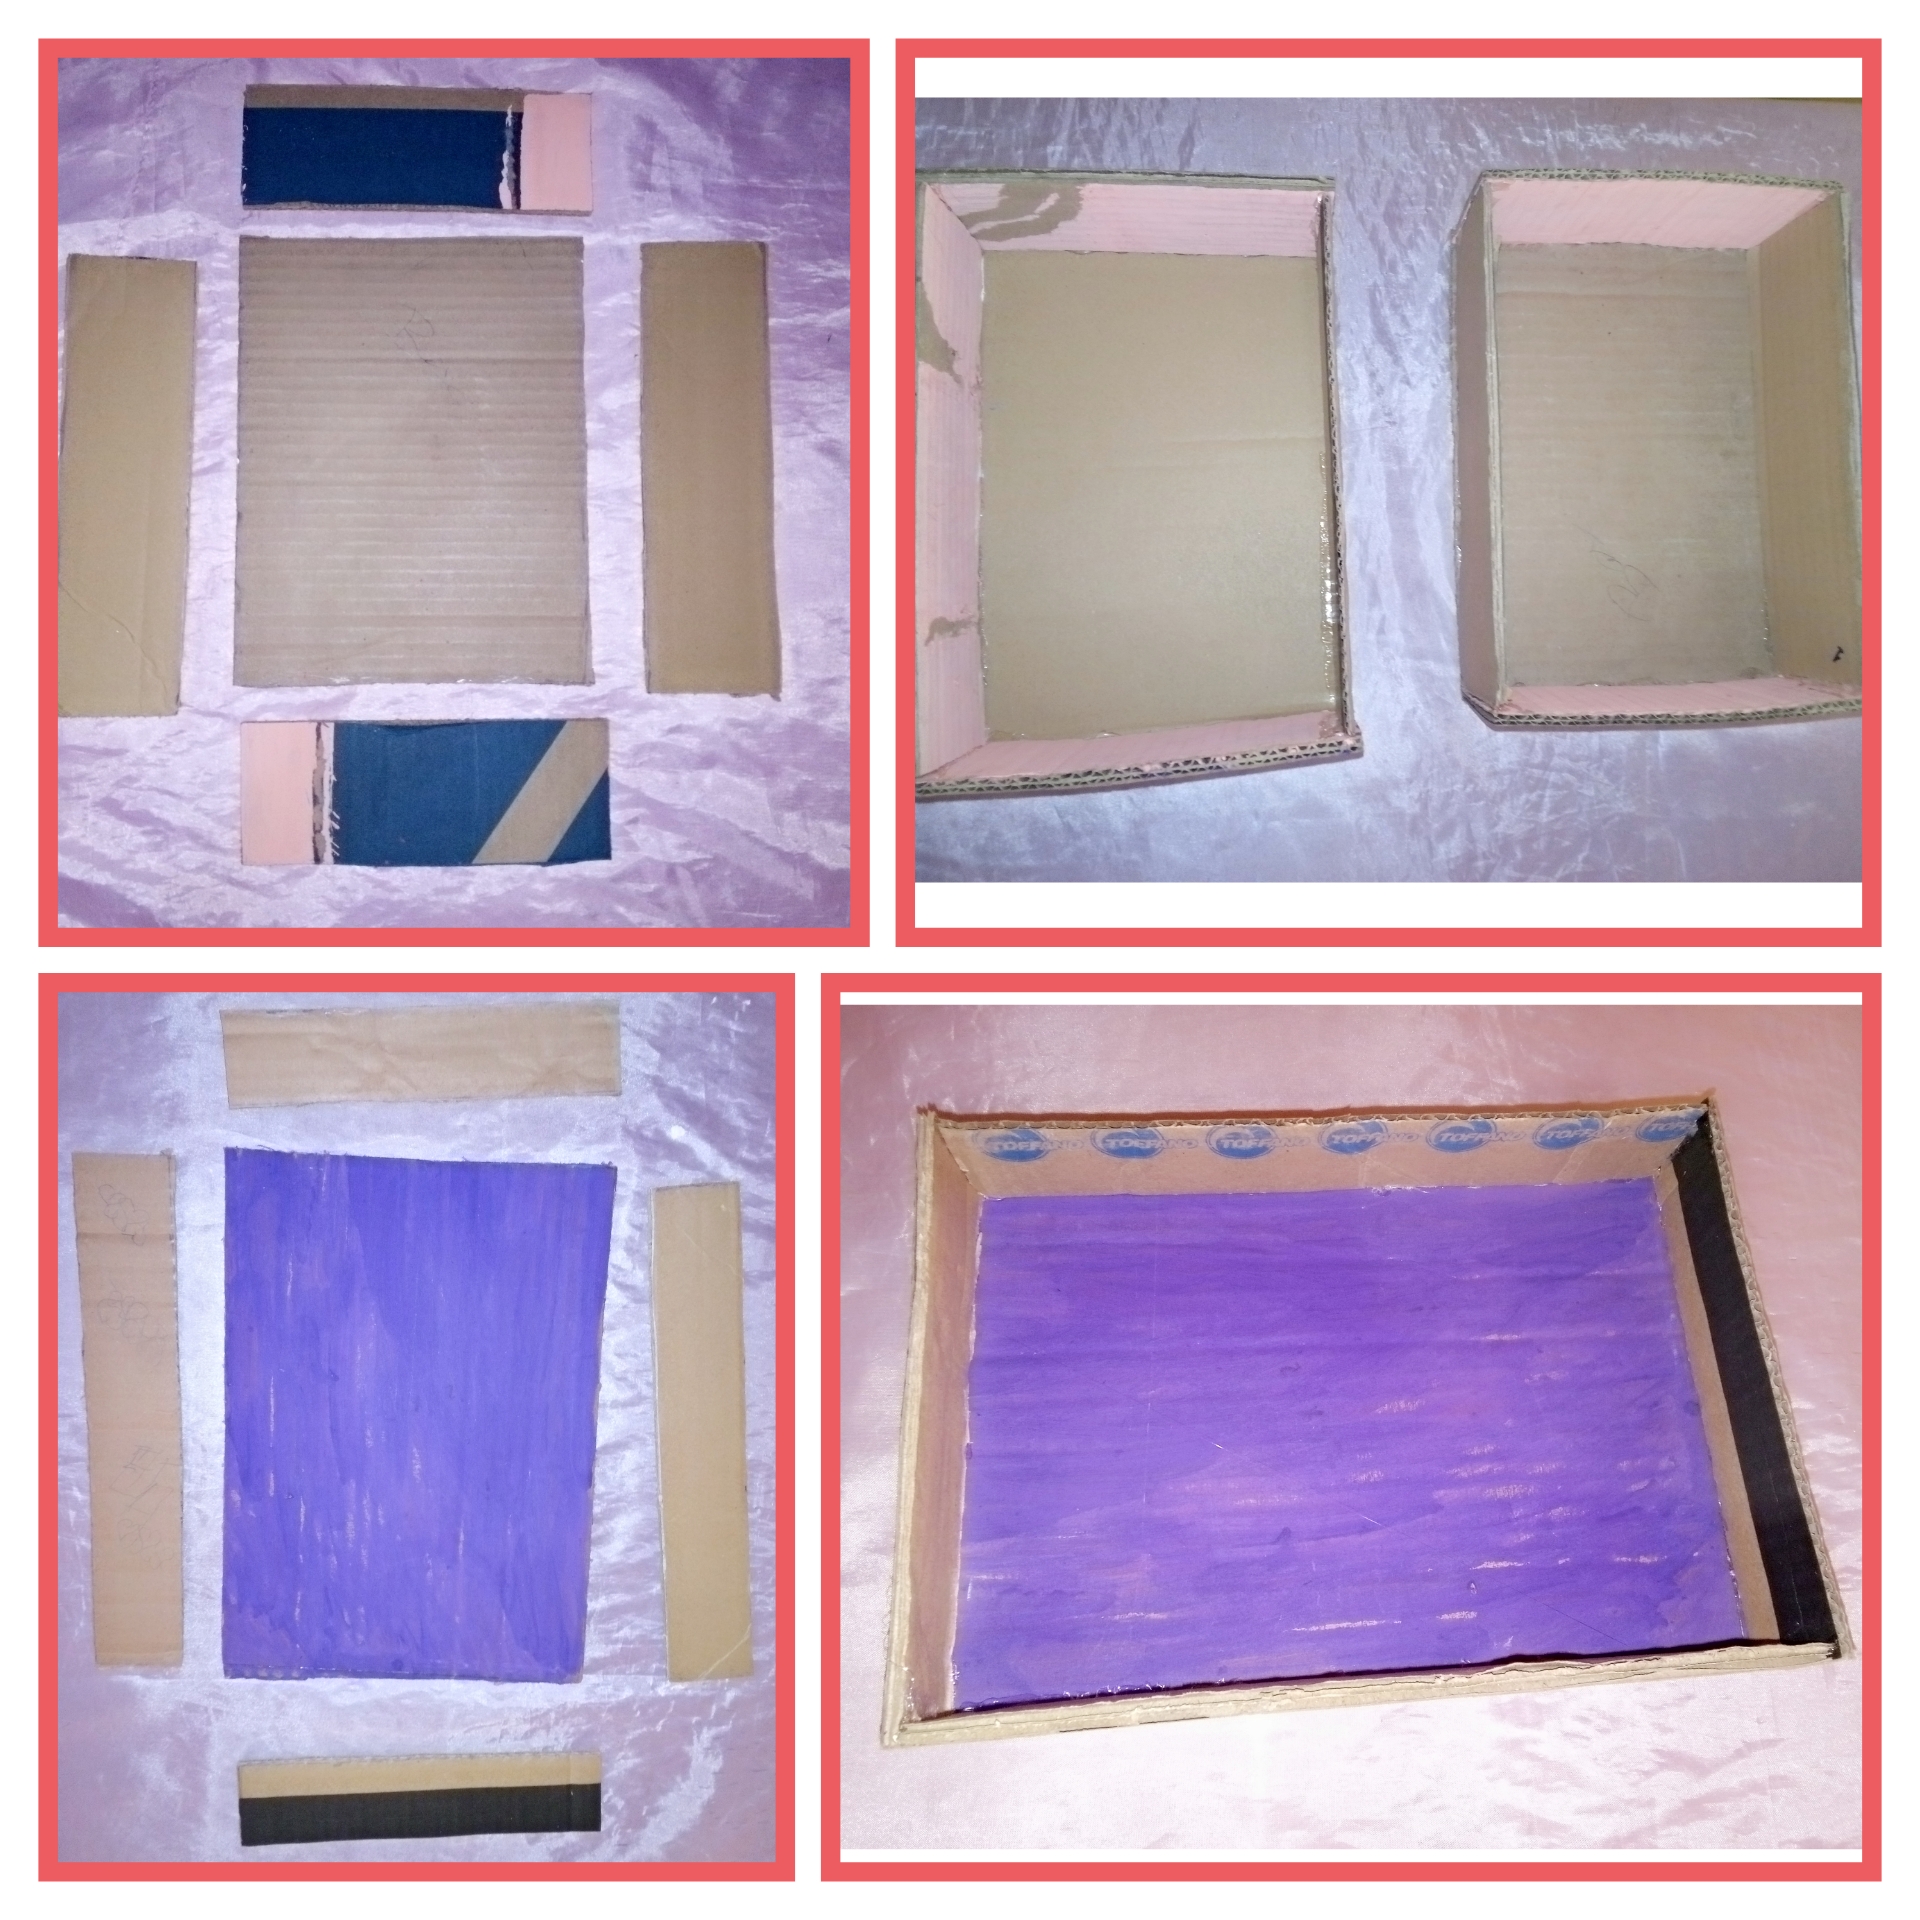
For the share inside the suitcase make four of 18.5 x 25 cm and four 7x 24.5 cm and three of 18.5 x 24.5 cm and two of 5x 24.5 cm and two 5x 18.5 cm and glue the pieces to form three box two of the same measures and one less high.
Para la parte de dentro de la maleta haz cuatro de 18,5 x 25 cm y cuatro de 7x 24,5 cm y tres de 18,5 x 24,5 cm y dos de 5x 24,5 cm y dos de 5x 18,5 cm y pega las piezas para formar tres caja dos de las mismas medidas y una menos alta.
Paso 3. // Step 3.
Then we put the boxes in to see if it fits and it will look like this.
Luego metemos las cajas para ver si encaja y quedará así.
Paso 4. // Step 4.
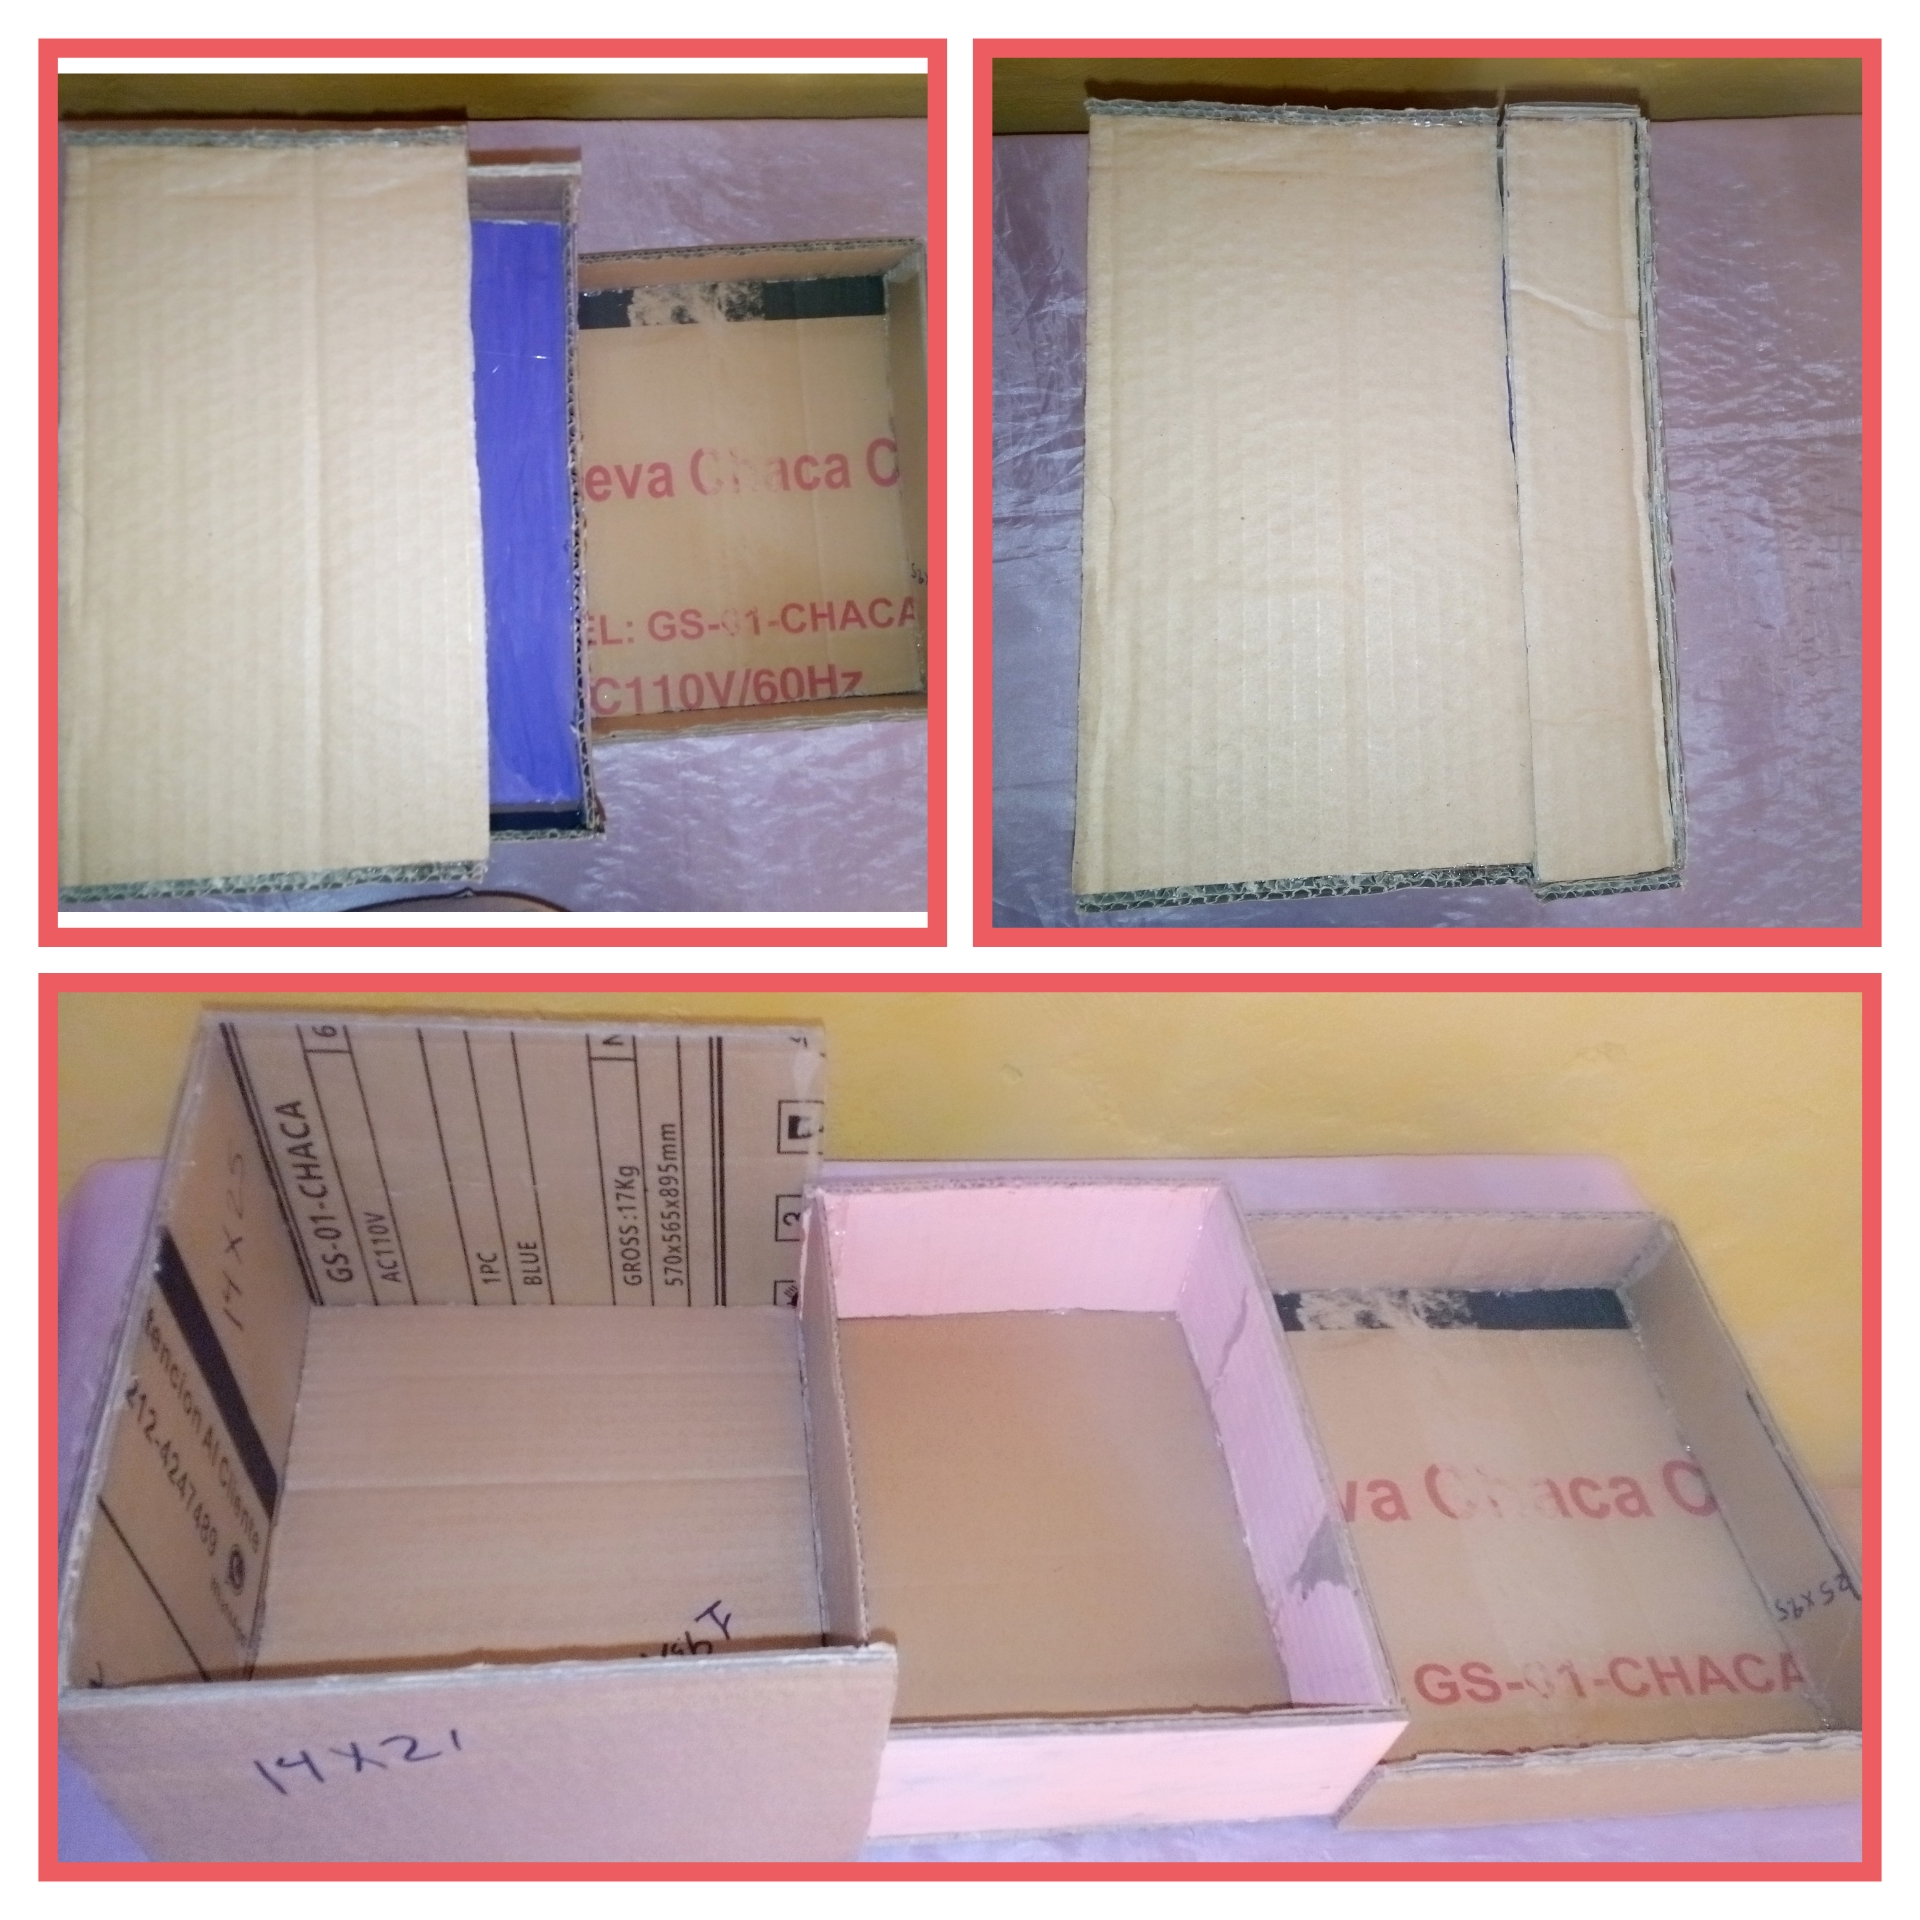
Take the boxes that will be the suitcases and put it together so we can see if it looks good.
Coge las cajas que serán las maletas y júntalas para que veamos si queda bien.
Paso 5. // Step 5.
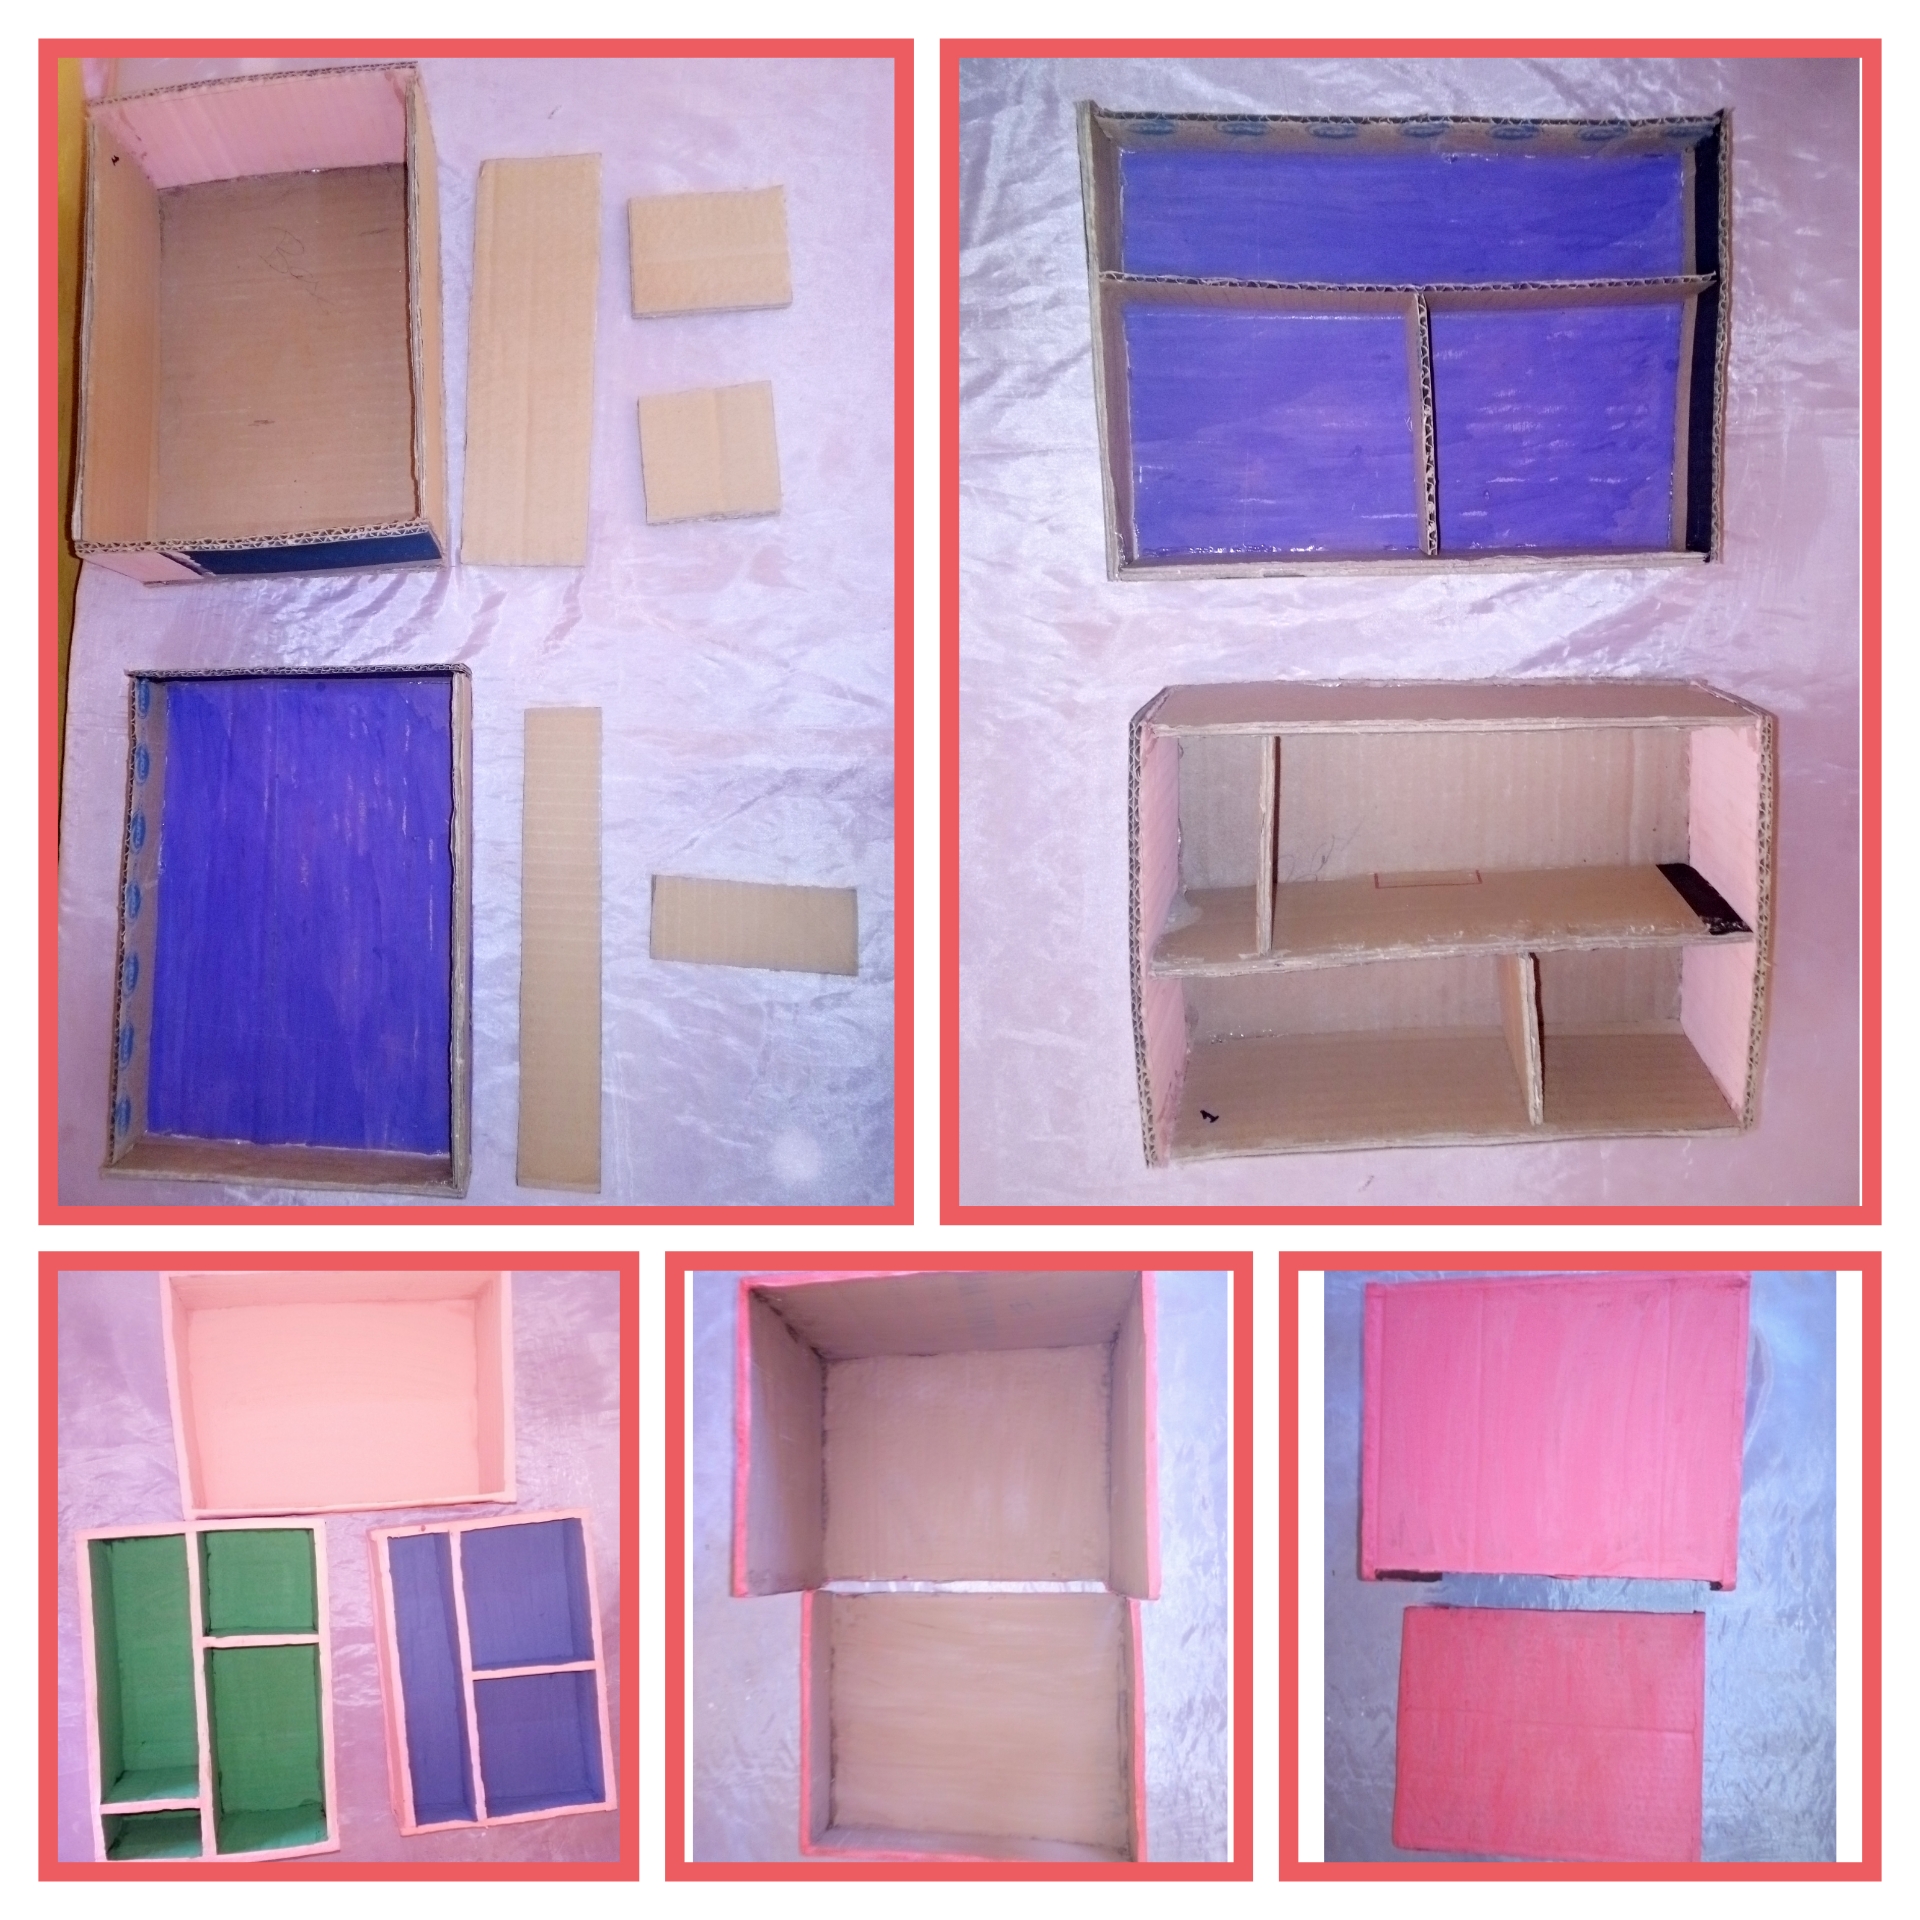
Take the boxes that will be the suitcases and put it together so we can see if it looks good.then the boxes of the compartments we make with cardboard divisions of the form as we want it. With the crack paper make strips to cover the holes in the cardboard and paint as we want to see our suitcase I chose a red outside and inside various colors that I had on hand.
Acontinuacion las cajas del compartimientos hacemos con cartón diviciones de la forma como la queramos. Con el papel crack haz tira para tapar los agujeros del cal cartón y pintamos como queremos ver nuestra maleta yo eleji un rojo por fuera y por dentro varios colores que tuve a la mano.
Paso 6. // Step 6.
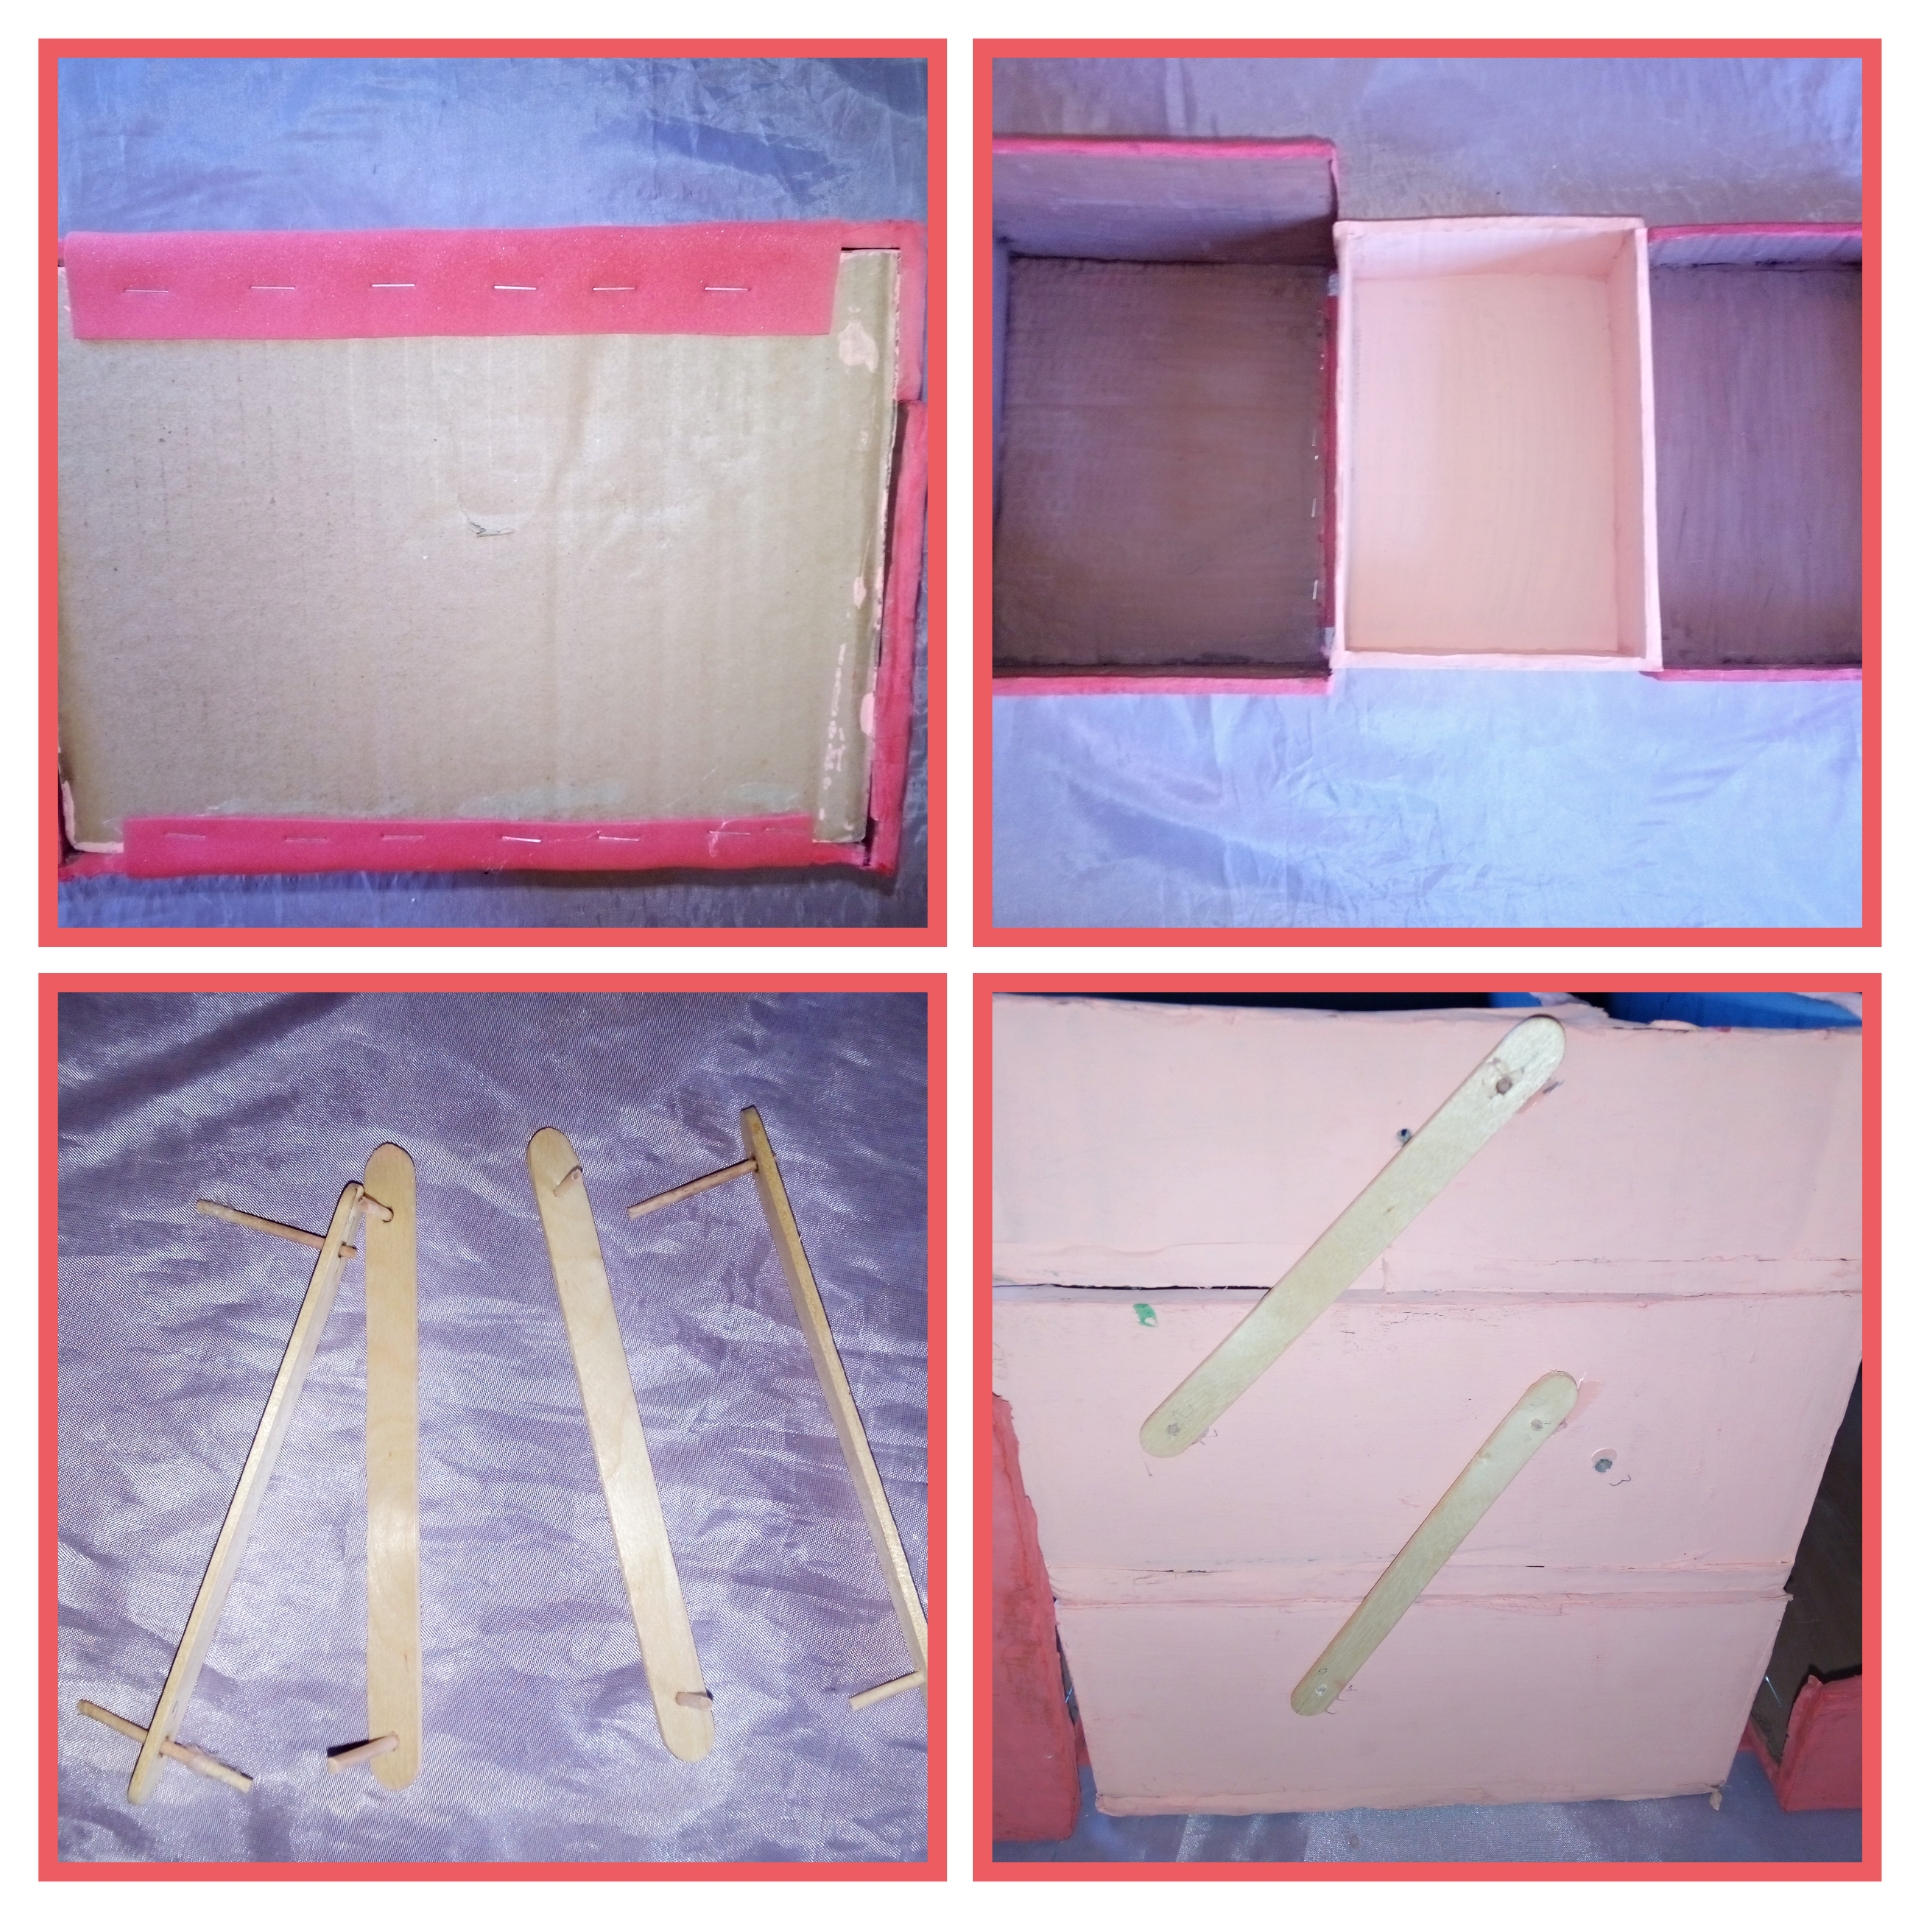
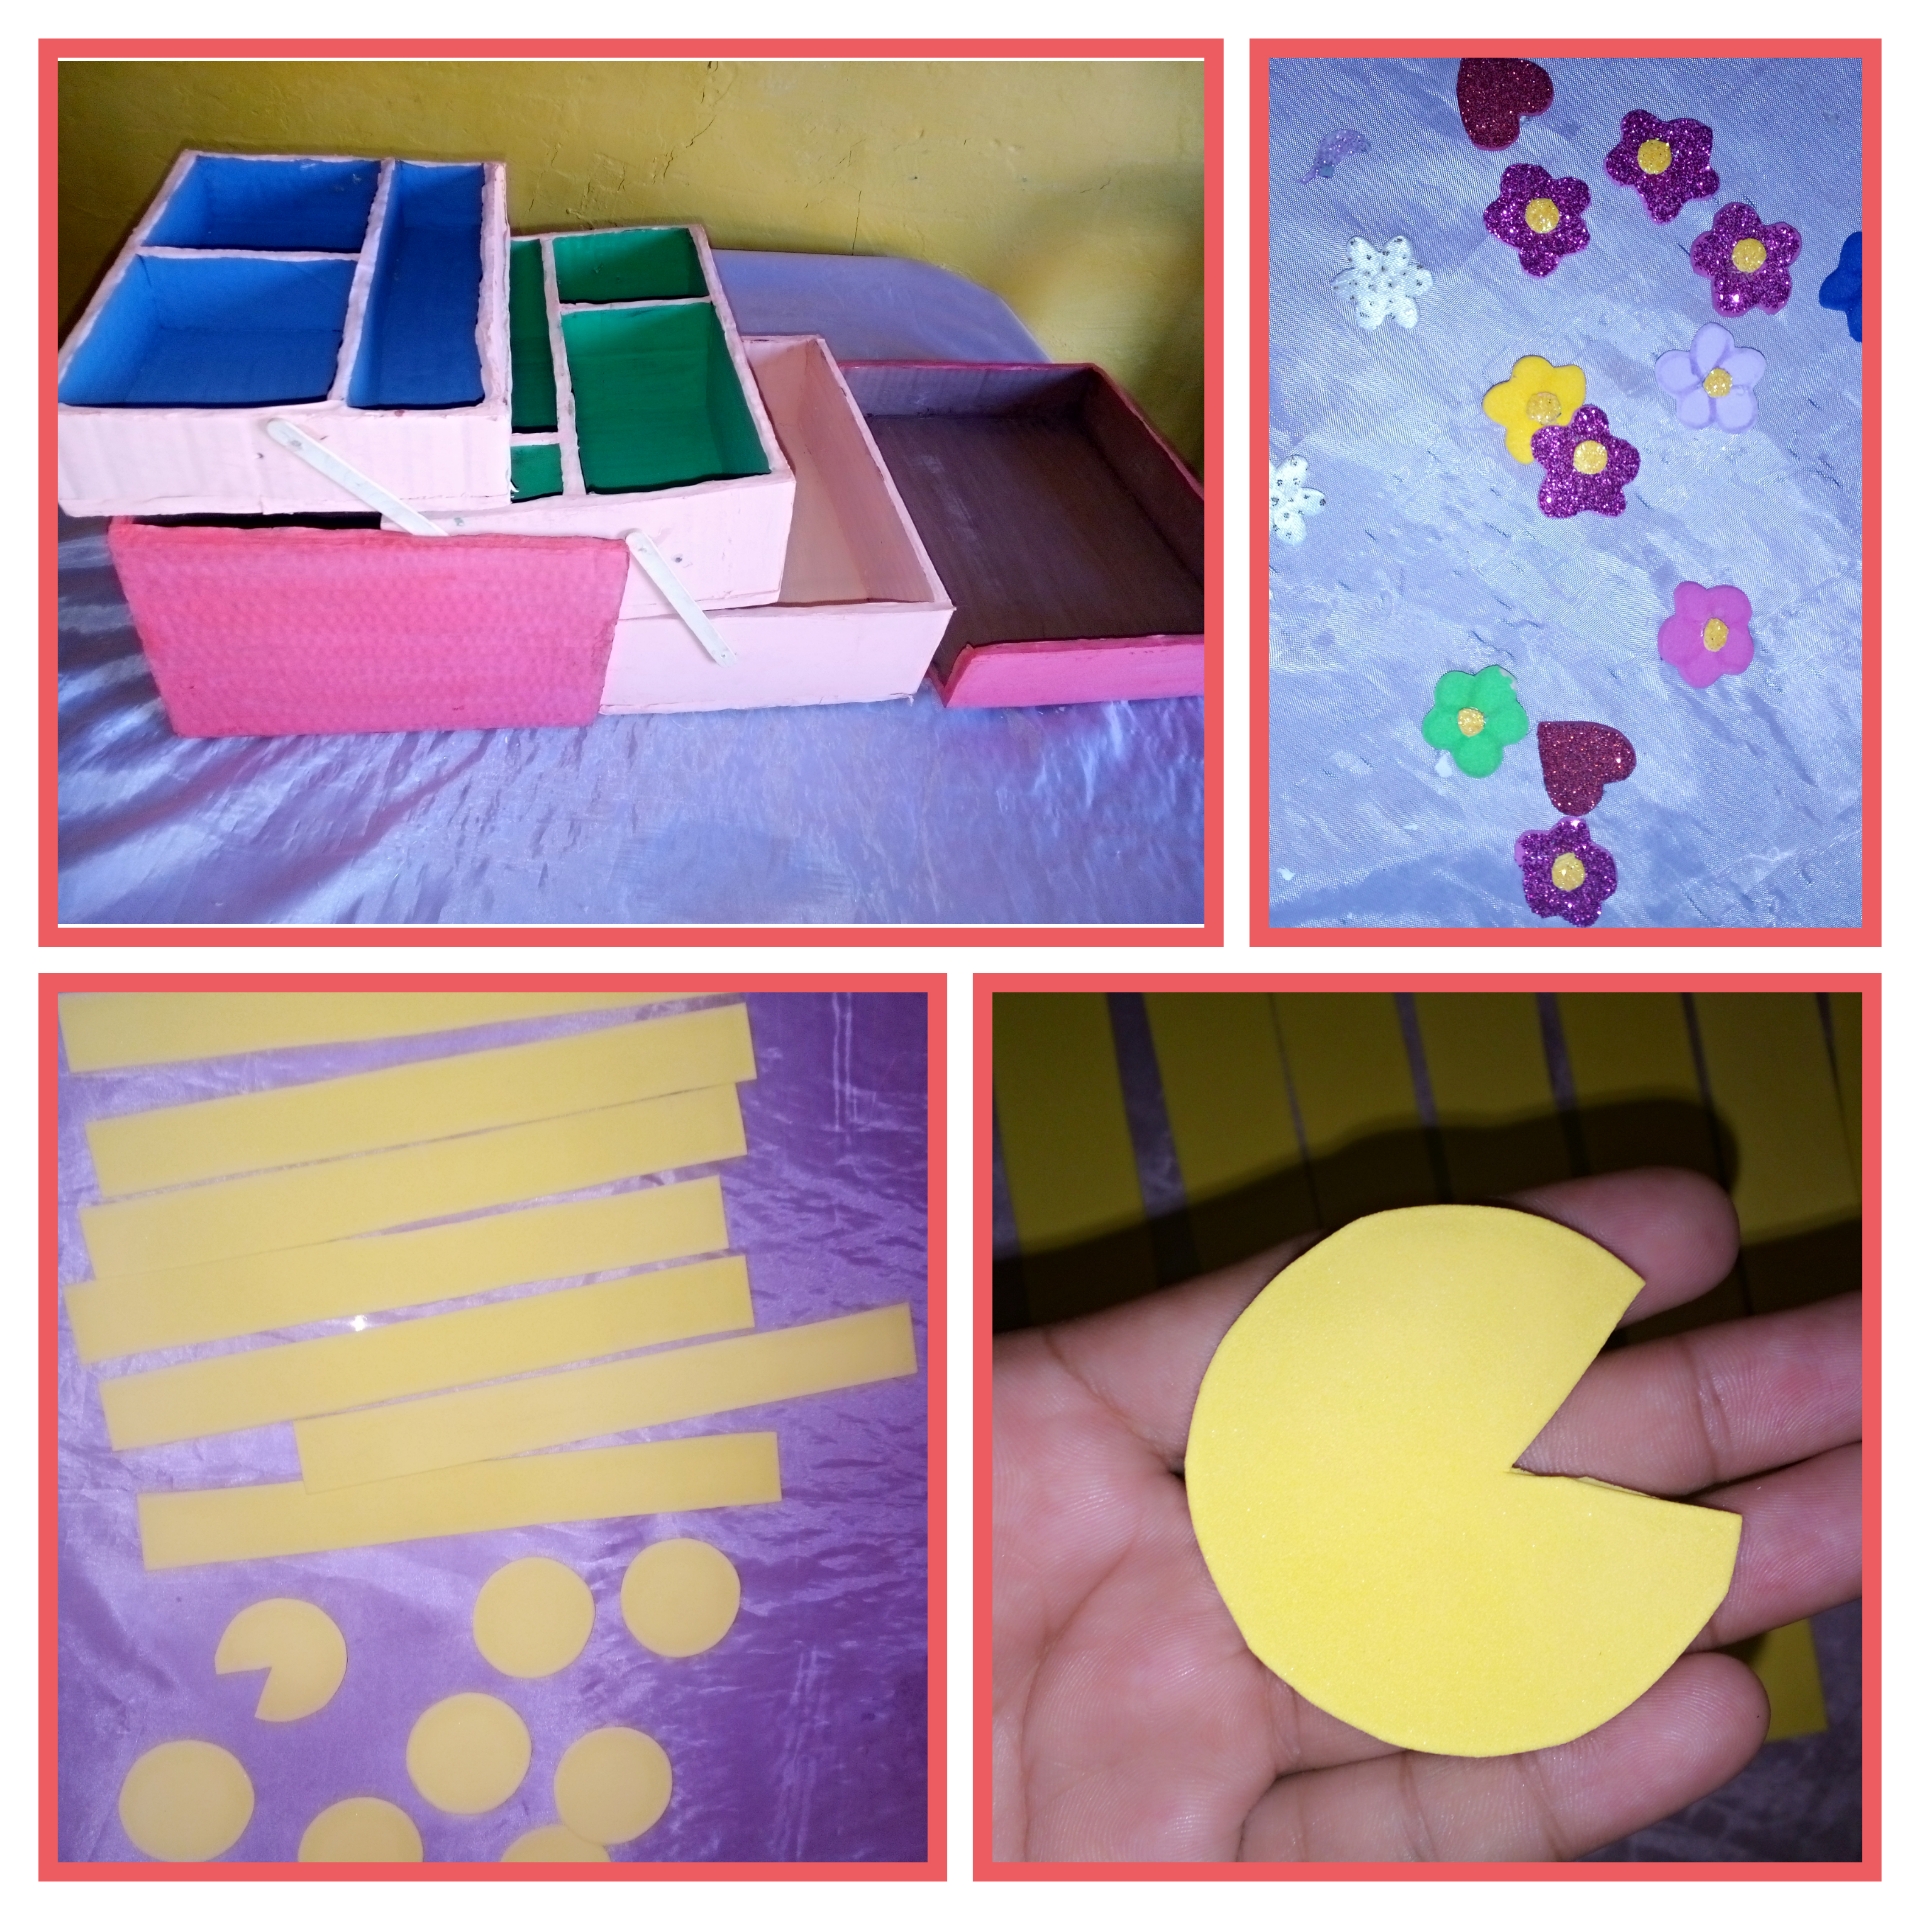
Take the boxes that will be the suitcases and put it together so we can see if it looks good.Then the boxes of the compartments we make with cardboard divisions of the form as we want it. With the crack paper make strips to cover the holes in the cardboard and paint as we want to see our suitcase I chose a red outside and inside various colors that I had on hand.in order to open the suitcase glue the red boxes that are on the outside with one of the compartments with red eva rubber strips we glue with silicone and staple so we can see the bottom in the photo section number 1 of this picture. Then take four popsicle sticks and make two holes each on both sides then glue them in the box with a slanted shape and make holes in the boxes as well and insert sticks to fix and to move the compartments and reinforce with hot silicone.
Para poder abrir la maleta pega las cajas rojas que son por fuera con una del compartimientos con tiras de goma Eva del color rojo pegamos con silicón y grapamos así se vez en la parte de abajo en la sección de foto número 1 de esta imagen. Después toma cuatro palito de helado haremos dos agujeros cada uno en ambos lado luego pegamos en la caja con forma inclinada y haz agujeros en las cajas también y introduces palillos para fijar y que se mueva las comparticiones y refuerza con silicón caliente.
Paso 7. // Step 7.
This is how the suitcase will look like. To decorate the suitcase we had some little flowers and with yellow eva glued the details of the suitcase with strips 3 centimeters wide and the length of the suitcase. And for the corners with circles we glued and cut a triangle to the circle so that it fits well in the corners.
Así se verá abrieta la maleta. Para decorar la maleta tenías unas florecitas guardada y con goma Eva amarilla pegamos los detalles de la maleta con tiras de 3 centímetros de ancho y de largo la de la maleta. Y para las esquinas con círculos pegamos y cortamos un triángulo al círculo para que encaje bien en las esquinas.
Paso 8. // Step 8.
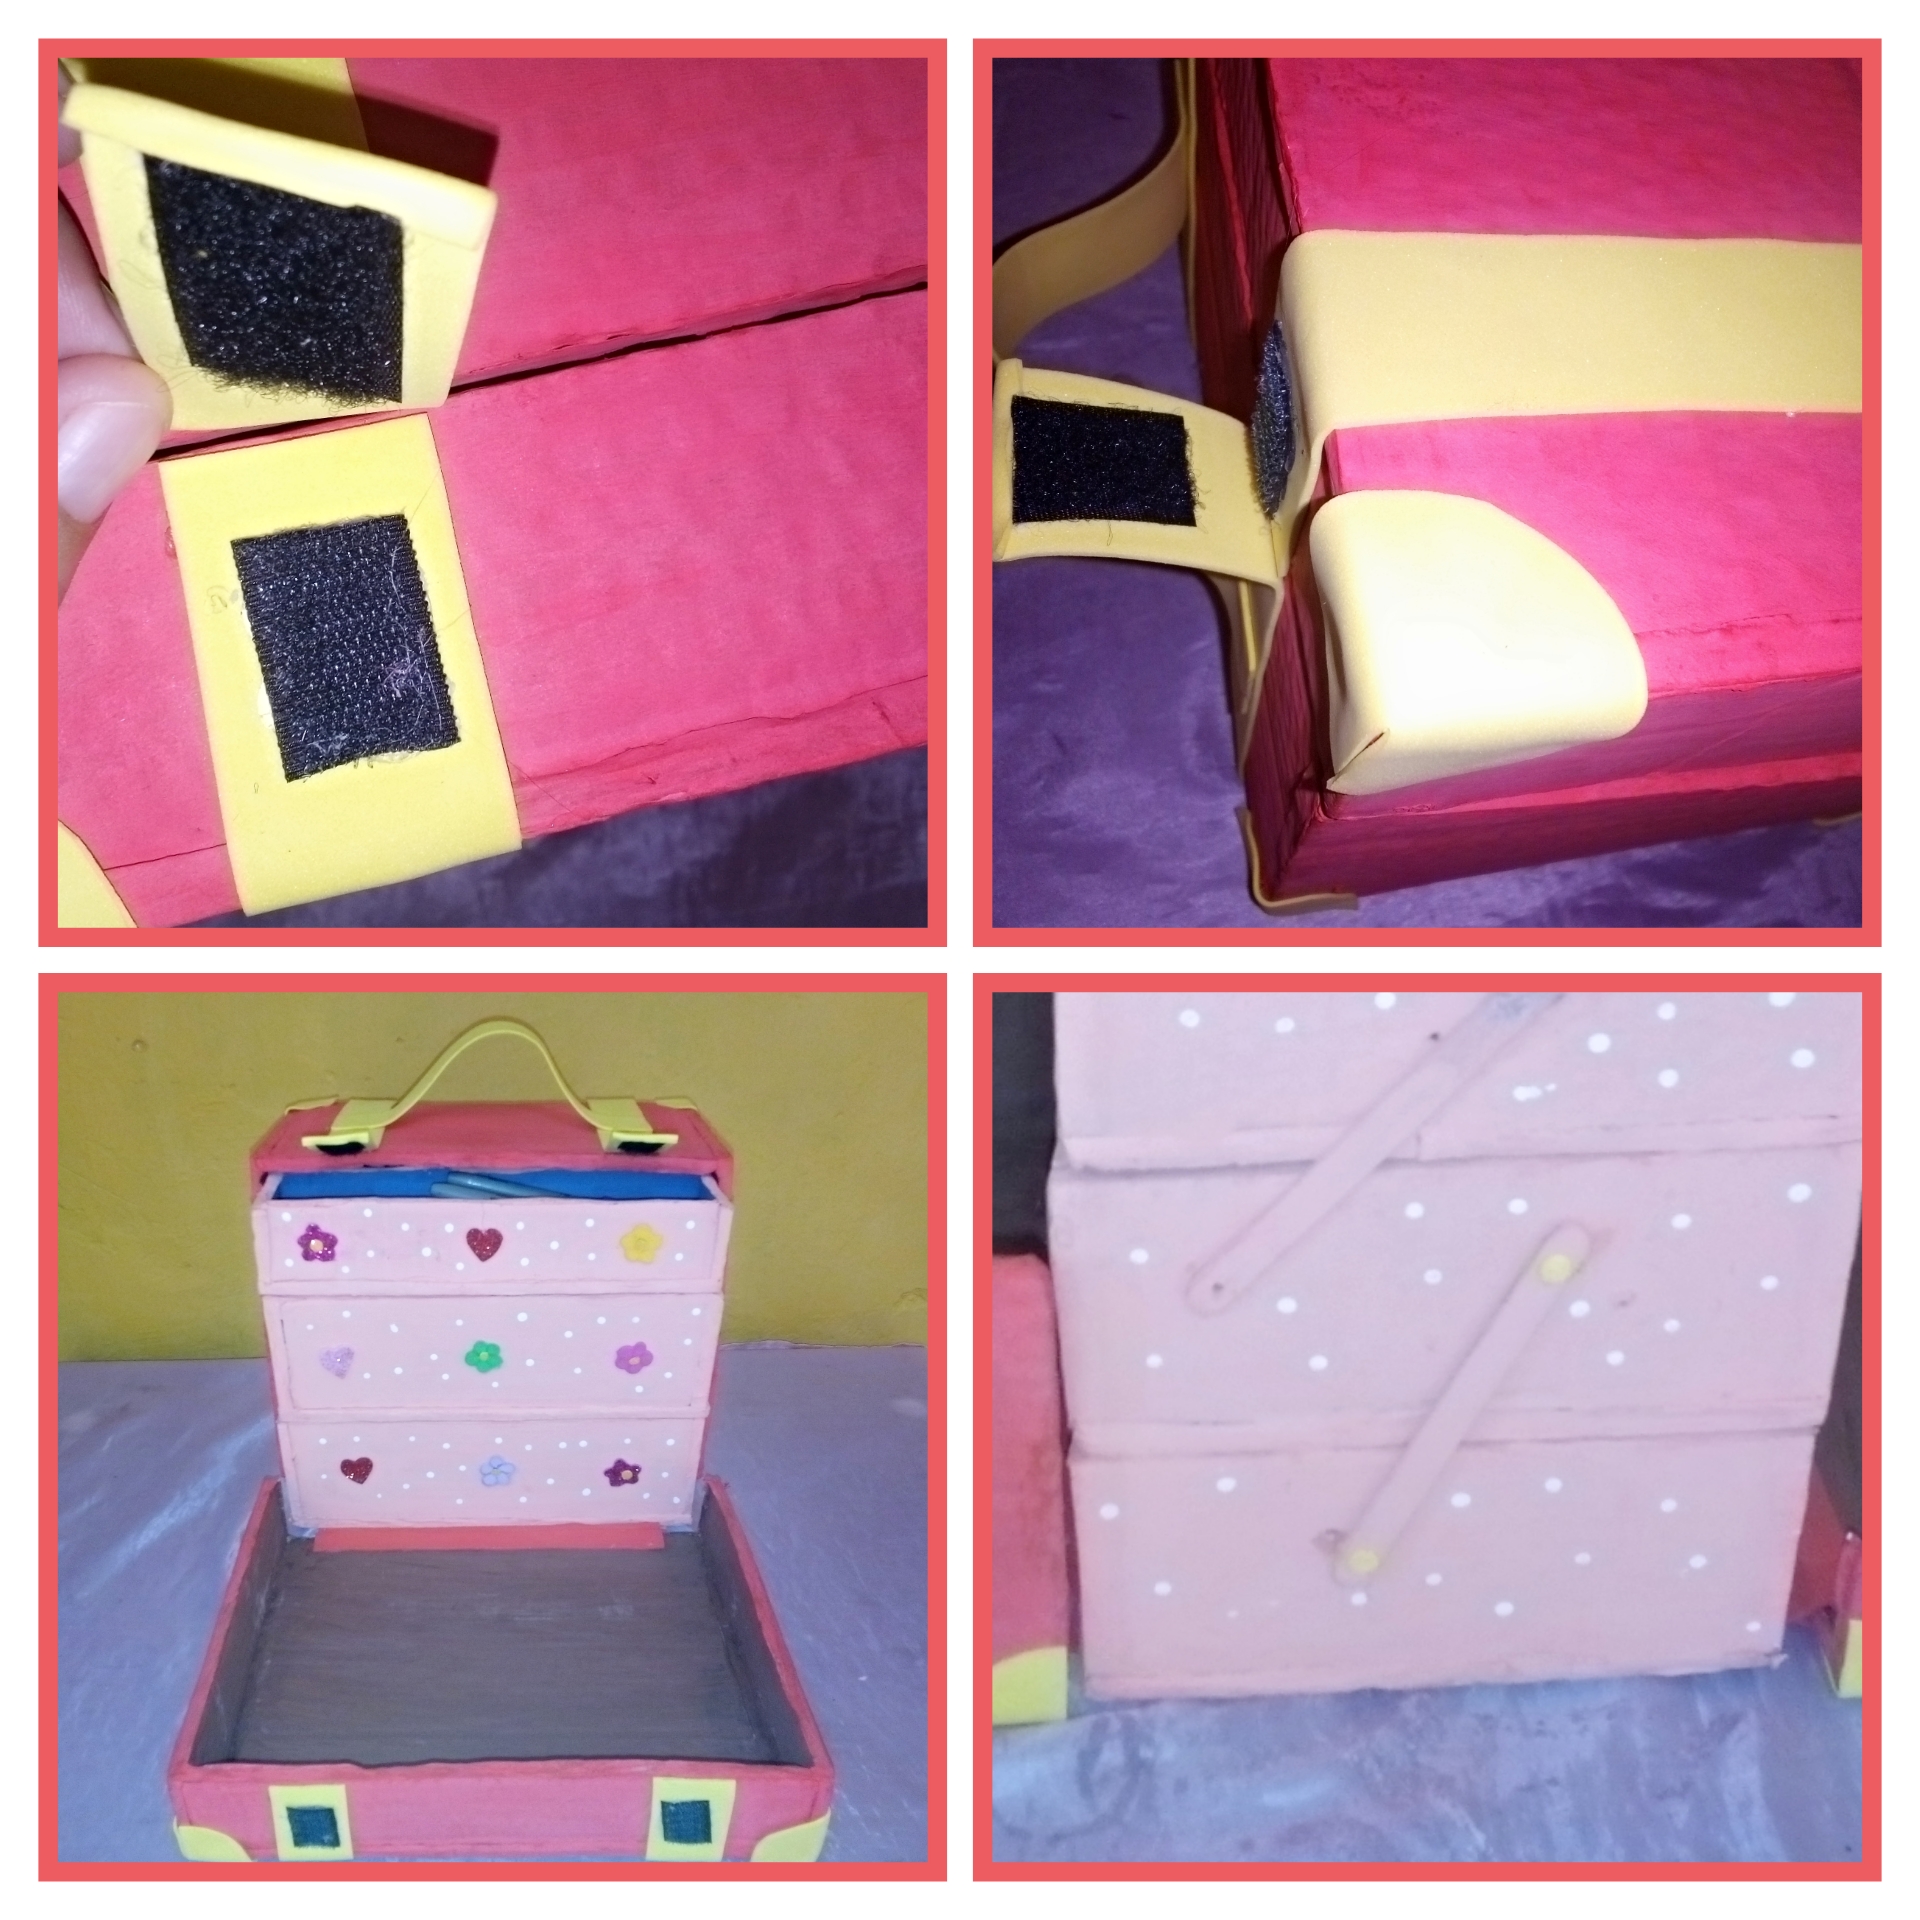
The last step is to glue a magic clasp and a handle for the suitcase. And we finish with a decoration with white dots.
Ya por último paso pegamos un cierre magico y una agarradera para la maleta. Y culminamos con una decoración con puntos blancos.

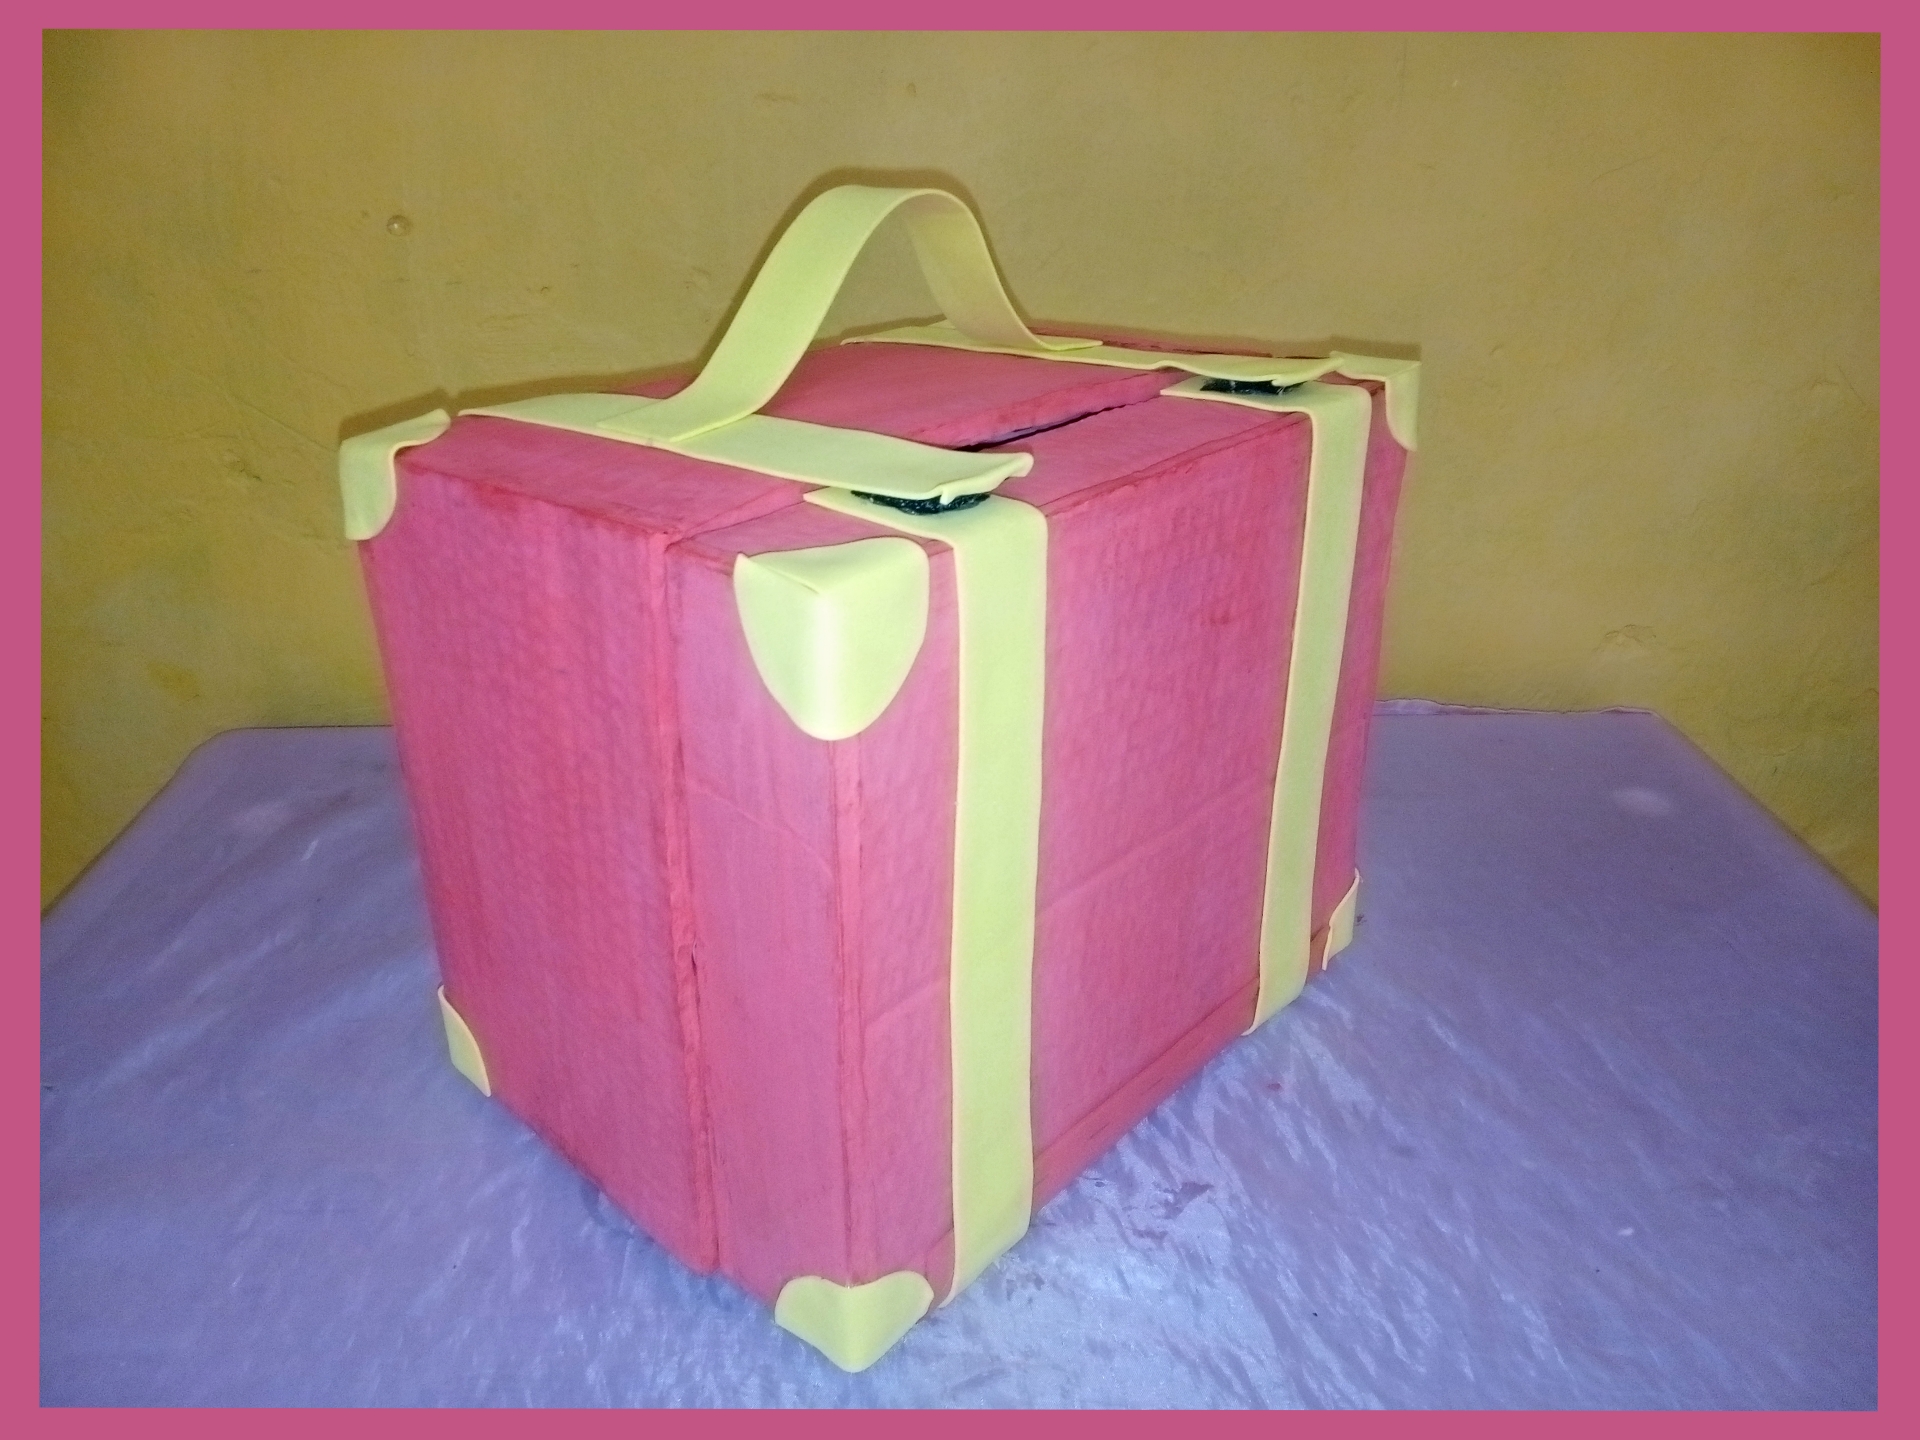
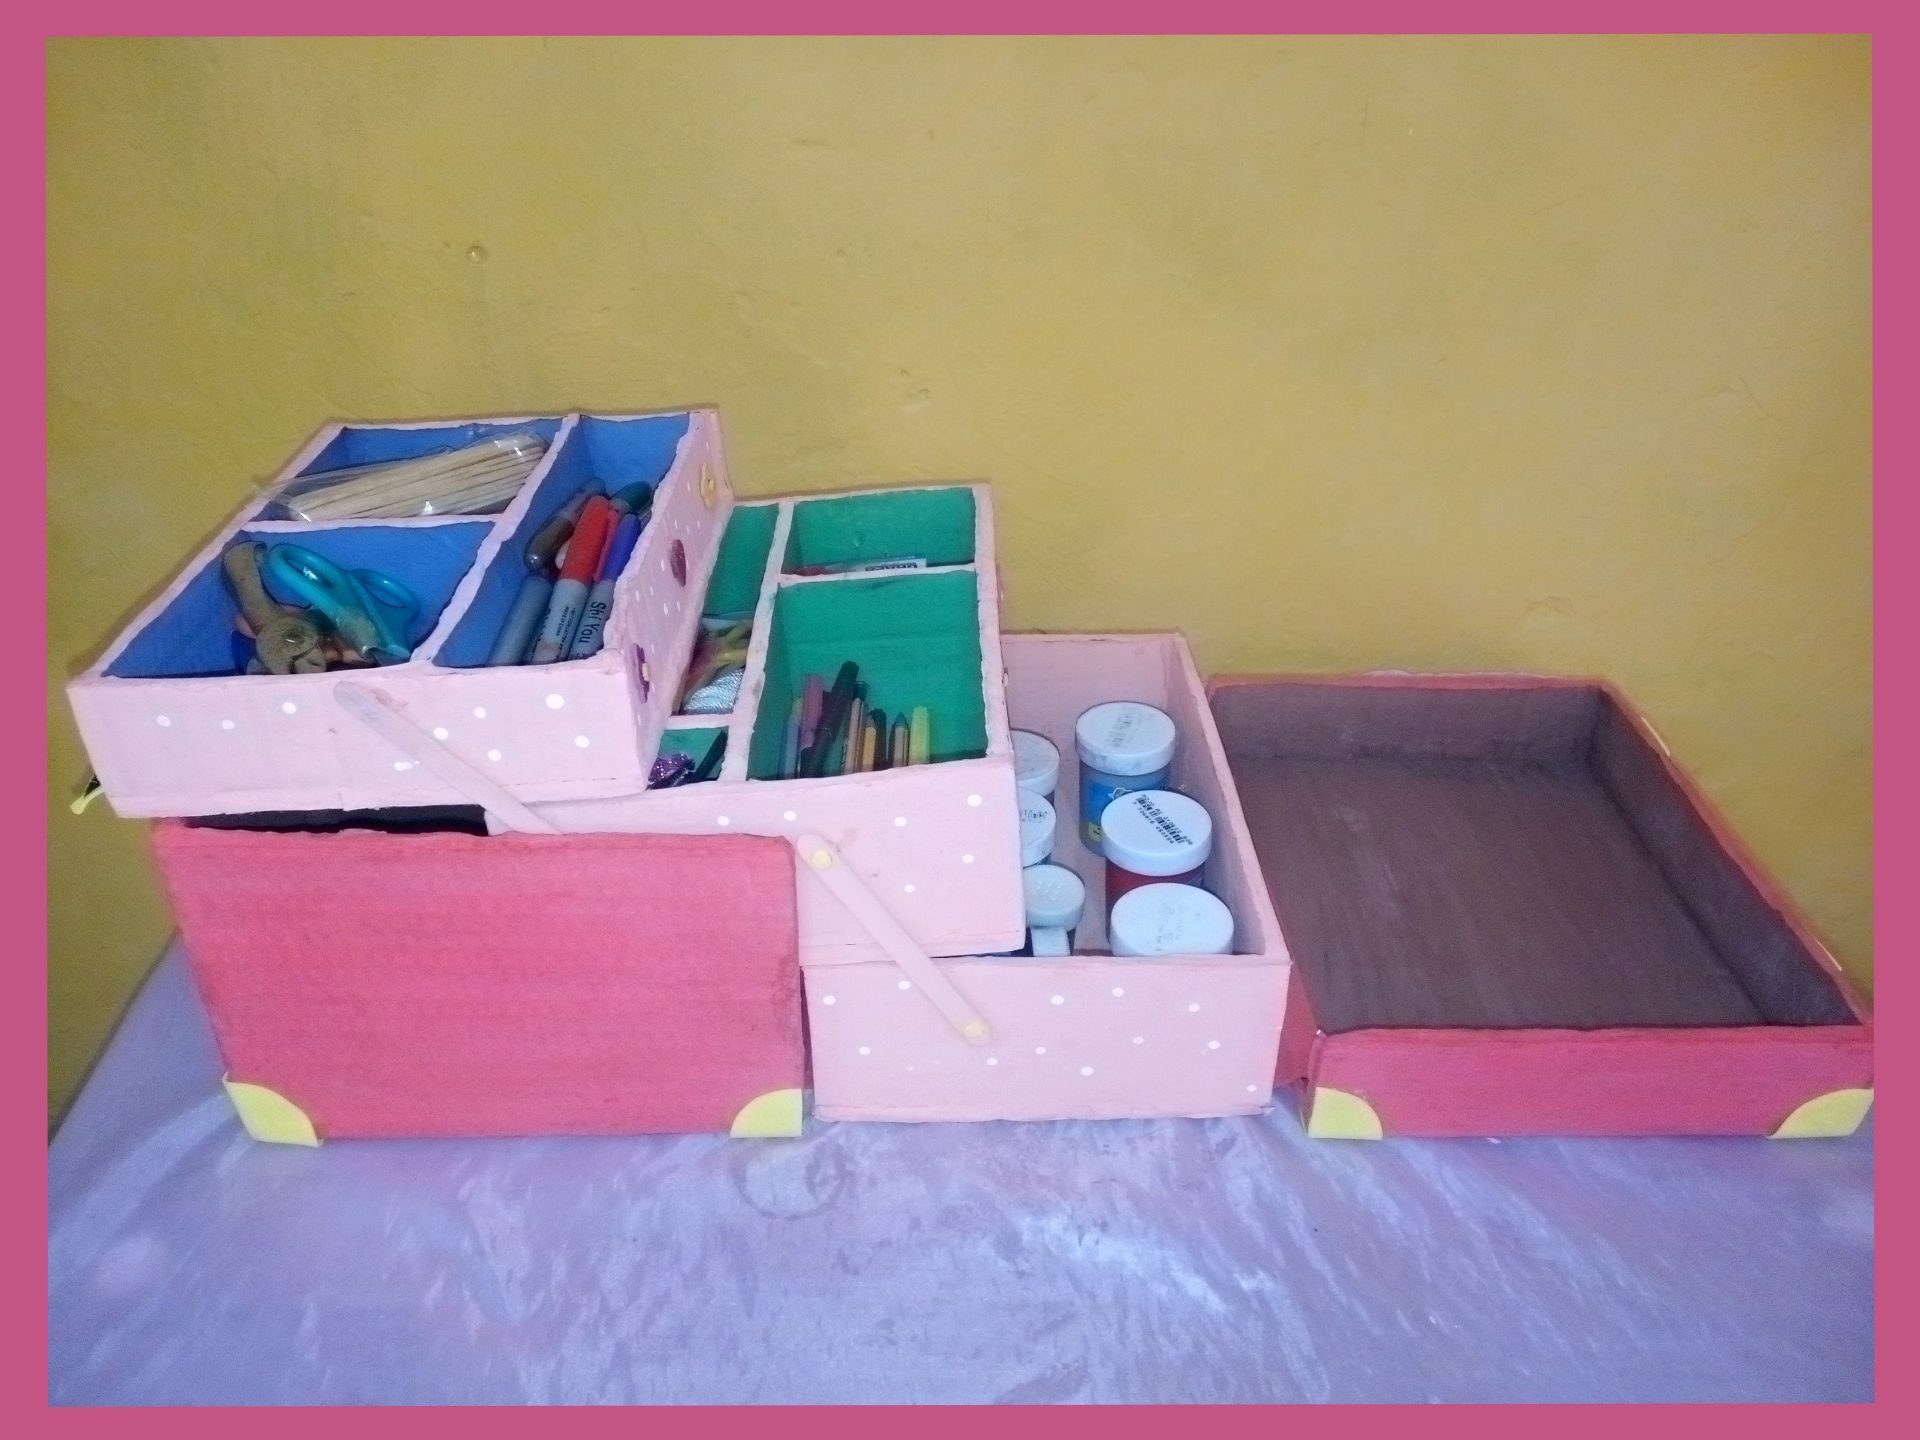
Final result. // Resultado final.

Gracias por visitar.
Todas las fotos y el contenido son originales que hago diariamente para mi blog. Para La traducción uso deepl los marcos y separadores es usado de canva .📷🖼️🤗
Thank you for visiting.
All photos and content are originals that I make daily for my blog. For translation I use deepl the frames and separators are used from canva .📷🖼️🤗


0
0
0.000
This is so smart. Makes everything look very well organised and arranged for east retrieval.
Bravo
!discovery 30
!diy
Thank you if you really make everything look organized it is very helpful thank you for your comment.
This post was shared and voted inside the discord by the curators team of discovery-it
Join our Community and follow our Curation Trail
Discovery-it is also a Witness, vote for us here
Delegate to us for passive income. Check our 80% fee-back Program
the case is so well done and thought out. The compartments looks like they were preconceived as they fit the objects they hold very nicely.
Well done
Thanks @diyhub yes I really liked it since I organize the materials I use. Thanks for the support 🤗
You can query your personal balance by
!DIYSTATSQue bien. Una idea muy ingeniosa, una forma económica de tener nuestras cosas ordenadas. Gracias por compartir estimada @lexim. Un fuerte abrazo desde Maracay.
https://twitter.com/irvinc1/status/1672791917698994179?t=Fu2cFRQFurnj2BRFsTSypQ&s=19
Hola feliz domingo, si muy económico y muy bueno para tener todo ordenado gracias por tu tiempo en compartir.
Wow! Wow 🤩. This so so amazing. I couldn’t believe my eyes when I saw the result. This is pretty cool. Recycling and making something amazing the steps of the case blew my mind.
You did amazing. Good job 👏
Hi thanks I'm glad you liked it if in the step by step steps are many measures to cut out greetings and blessings!!!!
oye, que bonito, una buena idea para mantener el orden, me gusta mucho, gracias por compartirla...😊
What a great job you have done. I congratulate you for taking the time to explain the step by step in detail. It is a very useful tool to have.
Quedó genial el organizador, con materiales que todos podemos tener en casa y resulta práctico el trabajo.