Drawing a Beautiful peacock with school colors / (ENG/ESP)
Saludos a todos mis queridos amiguitos amantes del hermoso mundo del arte.
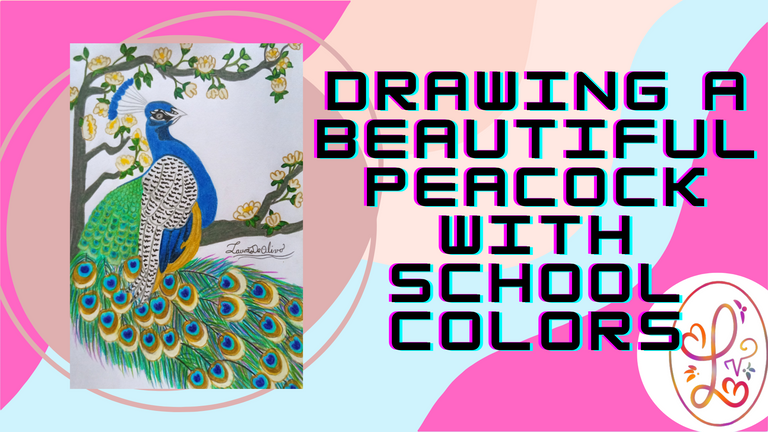
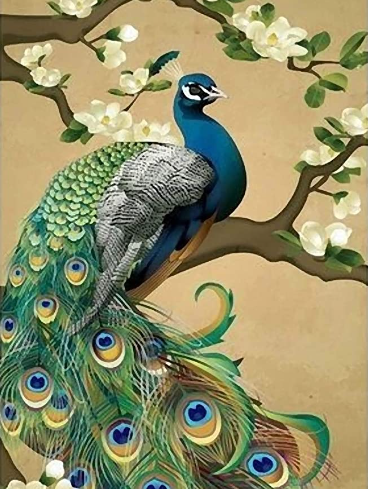
Hoy vuelvo a compartir con ustedes, otros de mis hermosos dibujos a color de un hermoso animal llamado Pavo Real, es un animal muy hermoso y misterioso, sus colores de azul, verde y amarillo convierten a este hermoso animal en uno de los más llamativos del mundo, su cola alargada es tan atractiva que hace llamar mucho la atención entre los seres humanos, y que sin lugar a dudas también atraen a las hembras de esta misma especie.
Al final de la publicación les estaré mencionando los materiales que utilice para poder crear este hermoso dibujo.
Las fotografías que verán a continuación, fueron tomadas con mi teléfono modelo Alcatel_5044R.
A continuación, les presentaré el proceso de elaboración que implemente para realizar este dibujo.
Greetings to all my dear friends who love the beautiful world of art.
Today I return to share with you, another of my beautiful color drawings of a beautiful animal called Peacock, is a very beautiful and mysterious animal, its colors of blue, green and yellow make this beautiful animal one of the most striking in the world, its elongated tail is so attractive that draws much attention among humans, and that undoubtedly also attract females of the same species.
At the end of the publication I will be mentioning the materials I used to create this beautiful drawing.
The pictures you will see below were taken with my Alcatel_5044R phone.
Next, I will show you the elaboration process that I implemented to make this drawing.


Paso 1
INICIO DEL DIBUJO
Como punto de partida, cree una silueta que usaré como boceto para poder trabajar con este hermoso animal, antes que nada, el animal se encuentra en una posición de perfil, por lo que cree la silueta de una de sus alas, también agregue la rama sobre que la está posando.
Más adelante comencé a darle forma en la cabeza, este hermoso animal tiene un extraño plumaje sobre su cabeza, ya que tiene algunas plumas alargadas y también tiene formas de lunares en su rostro para hacerlas mucho más atractivas, también le di forma al ala, creando largas plumas que tapen gran parte de su cuerpo.

Step 1.
START OF THE DRAWING
As a starting point, I created a silhouette that I will use as a sketch to be able to work with this beautiful animal, first of all, the animal is in a profile position, so I created the silhouette of one of its wings, I also added the branch on which it is posing it.
Later I started to shape the head, this beautiful animal has a strange plumage on its head, as it has some elongated feathers and also has polka dot shapes on its face to make them much more attractive, I also shaped the wing, creating long feathers that cover much of its body.


PASO 2
ELIMINADO DE LAS LÍNEAS GUIAS
Seguidamente, comencé a trabajar con el resto del cuerpo, trabajar en su cola no fue un trabajo fácil, por lo que fue un reto para mí, cada una de sus plumas tiene como una especie de ojo de varios colores, haciendo que este animal al abrir su cola sea muy atractivo, por lo que trabajar en la cola me tomo mucho tiempo.
Después trabaje con las ramas del árbol en la que está posando, cabe destacar que use una imagen de referencia para poder inspirarme en realizar este dibujo, así que le agregue cosas nuevas que en la imagen de referencia no se pueden apreciar.
Al terminar con toda la silueta del dibujo, comencé a trabar con el coloreado del mismo, así que comencé a remarcar cada parte de la silueta del dibujo, por lo que comencé con la cabeza de este hermoso animal, recuerden que antes de remarcar, debemos usar el borrador para borrar antes las líneas que anteriormente habíamos trazado para no manchar nuestro dibujo.

STEP 2
REMOVAL OF THE GUIDE LINES.
Next, I started to work with the rest of the body, working on its tail was not an easy job, so it was a challenge for me, each one of its feathers has like a kind of eye of several colors, making this animal very attractive when opening its tail, so working on the tail took me a lot of time.
Then I worked with the branches of the tree in which it is posing, it is worth mentioning that I used a reference image to be inspired to make this drawing, so I added new things that in the reference image can not be seen.
When I finished with all the silhouette of the drawing, I began to work with the coloring of it, so I began to highlight each part of the silhouette of the drawing, so I started with the head of this beautiful animal, remember that before highlighting, we must use the eraser to erase before the lines that we had previously drawn not to stain our drawing.


PASO 3
PRIMERAS CAPAS DE COLOR
Luego de trazar las líneas de color, quise usar dos tonos de colores para colorear el cuerpo del pavo real, así que comencé primero con la cara usando dos tonos de azul, uno más oscuro que otro, seguidamente comencé a colorear el resto del cuerpo y parte del ala.
Cono no poseía un tono de azul un poco más oscuro, decidí usar el color marrón como primera capa en la parte más oscuras, sobre este use el color azul, después nuevamente el marrón y por último el mismo azul para poder llegar al tono deseado.

STEP 3.
FIRST LAYERS OF COLOR
After drawing the color lines, I wanted to use two shades of colors to color the body of the peacock, so I started first with the face using two shades of blue, one darker than the other, then I started to color the rest of the body and part of the wing.
Since I didn't have a darker shade of blue, I decided to use brown as the first layer in the darkest part, on top of that I used blue, then brown again and finally the same blue to reach the desired tone.


PASO 4
PRIMERAS CAPAS DE COLOR EN LA COLA
Para poder colorar la otra parte del ala, decidí dejar espacios en blanco y con la ayuda del color negro cree degradados en el resto de las partes del ala, esto crea un efecto muy hermoso, por lo que estoy muy sorprendida del efecto que le agrego a mi dibujo esta parte.
Al finalizar con el ala, podemos notar que el último espacio que me faltaba de colorear, así que use el color ocre para rellenar el espacio del ala que había dejado.
Al terminar con el ala precedí a usar el color jade para remarcar la silueta de la cola, como este color es muy brillante lo use para crear la primera capa, la cola del pavo real es muy llamativo, por lo que he tenido que mezclar varios colores para poder hacer que se observe lo más llamativo posible, pero antes borre las líneas de gráfico que había colocado con el lápiz de dibujo.

STEP 4
FIRST LAYERS OF COLOR ON THE TAIL.
In order to color the other part of the wing, I decided to leave white spaces and with the help of the black color I created gradients in the rest of the parts of the wing, this creates a very beautiful effect, so I am very surprised of the effect that this part adds to my drawing.
When finishing with the wing, we can notice that the last space I had left to color, so I used the color ochre to fill the space of the wing that I had left.
When finishing with the wing I preceded to use the color jade to highlight the silhouette of the tail, as this color is very bright I used it to create the first layer, the tail of the peacock is very striking, so I had to mix several colors to make it look as striking as possible, but first I erased the graphic lines that I had placed with the drawing pencil.


PASO 5
SEGUNDA CAPA DE COLOREADO EN LA COLA
Al terminar con el ala de este hermoso anima, procedí a agregar una capa de color verde, por algunas partes del mismo use el color azul oscuro y sobre este el verde, de esta manera pude lograr este efecto y mezcla de color, en el proceso de coloreado no me había dado cuenta que las líneas del plumaje se me habían desaparecido, así que use el color ocre para remarcar cada una de las plumas de la cola, también para las formas de ojo de la cola, use el color azul como primera capa.
Cuando termine con la primera parte de la cola, use el color jade para colorear la parte de alrededor de los plumajes con forma de ojos de la cola, después de este use el color ocre y por último use un poco del color blanco para que brillara un poco más.

STEP 5.
SECOND LAYER OF COLORING ON THE TAIL.
When I finished with the wing of this beautiful anima, I proceeded to add a layer of green color, for some parts of it I used the dark blue color and over it the green, in this way I could achieve this effect and color mixture, in the process of coloring I had not realized that the lines of the plumage had disappeared, so I used the ocher color to highlight each of the feathers of the tail, also for the eye shapes of the tail, I used the blue color as the first layer.
When I finished with the first part of the tail, I used the color jade to color the part around the eye-shaped feathers of the tail, after this I used the color ochre and finally I used some white color to make it shine a little more.


PASO 6
ÚLTIMOS DETALLES
Para poder terminar de colorear la cola de este hermoso animal, cree las venas de las plumas con el color azul oscuro con una pequeña mezcla del color marrón para hacer que se vea lo más oscuro posible, seguidamente con el color jade, verde y azul, cree trazos para simular las plumas alargadas que tiene la parte final de la cola.
Seguidamente, comencé a colorear la corteza del árbol, el mismo tiene un color verdoso casi llegando a gris, así que como primera capa use el color gris, seguidamente use el color verde para darle el efecto que deseaba a la corteza del árbol.
Por último, comencé a colorear los pétalos de las flores que hay alrededor de este hermoso animal, para los pétalos use el color blanco y en las puntas de esta use el color ocre para remarcar la diferencia de color entre lo blanco de la hoja de dibujo y la de la flor.
Y de esta forma pude realizar este hermoso pavo real, espero que te haya gustado, a continuación les presentaré los materiales y colores que use para poder crear este hermoso dibujo.
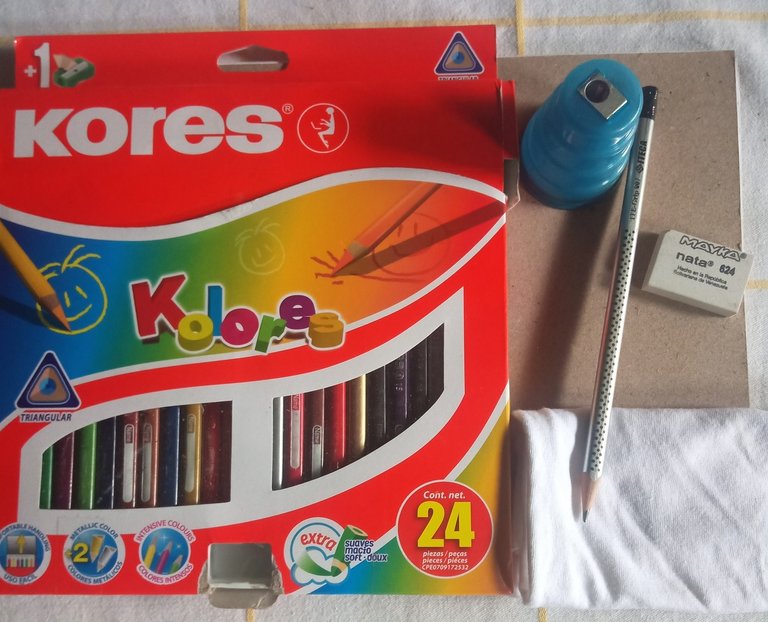
MATERIALES
BLOC DE DIBUJO.
BORRADOR.
SACAPUNTAS.
Lápiz de dibujo 2B.
PAÑO.
Colores como:
Verde.
Negro.
Jade.
Gris.
Blanco.
Azul claro.
Azul oscuro.
Marrón.
Jade.
Verde oscuro.
La imagen que utilice en referencia posee su fuente, puesto que es una imagen sacada de Pinterest, de donde estoy sacando todas las imágenes que uso para realizar mis dibujos.
Así culmino mi publicación amigos, espero que te haya gustado y hayas aprendido algo nuevo el día de hoy.
Nos veremos en otra publicación basada en el hermoso mundo del arte del dibujo.

STEP 6
LAST DETAILS
To finish coloring the tail of this beautiful animal, I created the veins of the feathers with the dark blue color with a little mixture of brown color to make it look as dark as possible, then with the color jade, green and blue, I created strokes to simulate the elongated feathers that has the end of the tail.
Next, I began to color the bark of the tree, it has a greenish color almost reaching gray, so as a first layer I used the gray color, then I used the green color to give the effect I wanted to the bark of the tree.
Finally, I began to color the petals of the flowers that are around this beautiful animal, for the petals I used the white color and at the tips of the petals I used the ocher color to highlight the difference in color between the white of the drawing sheet and the flower.
And in this way I could make this beautiful peacock, I hope you liked it, then I will present the materials and colors I used to create this beautiful drawing.
MATERIALS.
DRAWING PAD.
DRAWING PAD.
SACAPTER.
2B drawing pencil.
RAG.
Colors such as:
Green.
Black.
Jade.
Gray.
White.
Light blue.
Dark blue.
Brown.
Jade.
Dark green.
The image I used in reference has its source, since it is an image taken from Pinterest, where I am getting all the images I use to make my drawings.
That's the end of my post friends, I hope you liked it and learned something new today.
See you in another publication based on the beautiful world of the art of drawing.




social networks / redes sociales
Traductor Deepl
Translated Deepl
Ediciones Canva
Editions Canva



¡Enhorabuena!
✅ Has hecho un buen trabajo, por lo cual tu publicación ha sido valorada y ha recibido el apoyo de parte de CHESS BROTHERS ♔ 💪
♟ Te invitamos a usar nuestra etiqueta #chessbrothers y a que aprendas más sobre nosotros.
♟♟ También puedes contactarnos en nuestro servidor de Discord y promocionar allí tus publicaciones.
♟♟♟ Considera unirte a nuestro trail de curación para que trabajemos en equipo y recibas recompensas automáticamente.
♞♟ Echa un vistazo a nuestra cuenta @chessbrotherspro para que te informes sobre el proceso de curación llevado a diario por nuestro equipo.
Cordialmente
El equipo de CHESS BROTHERS
¡Que lindo! que buen trabajo @lauracraft ¡saludos!
Gracias amiga, me alegro que te haya gustado, Saludos para ti tambien