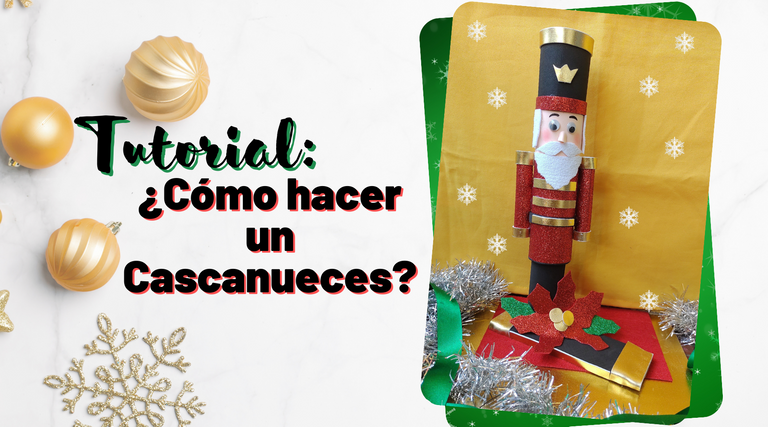
Tutorial: ¿Cómo hacer un Cascanueces? Regalo especial para el Señorito C. ❄️ / Eng: Tutorial: How to make a Nutcracker? Special gift for Mr. C.❄️
Recientemente el Señorito C estuvo viendo algunas caricaturas relacionadas a la Navidad, entre ellas la Historia del Cascanueces. Quedó fascinado, nunca habría imaginado la historia detrás de ese lindo muñeco, y allí como todo niño dijo: ¡Mamá quiero uno!. Yo anteriormente había visto algunos en la ciudad vecina, eran algo costosos. Pero, decidí más bien hacerle su propio Cascanueces en base a materiales como cartulina, foami de colores, silicón y un trozo de porcelana que se había caído de la cocina (la usé para la base). De todos modos, sé que el Señorito C solo lo quiere para tipo colección, no es un niño de jugar con movimientos explícitos ni similares. Disfruta observar sus juguetes en la distancia.
Por otro lado, les cuento que pensé mucho para ponerme a elaborarlo, puesto que sinceramente no soy una persona que se caracteriza por hacer figuras ni similares, siento que son muy complejas. Por ello, me fui al corredor de mi casa por la tarde y me senté tranquilamente y en paciencia a dibujar, cortar y armar
las piezas. Pero, puedo decir que me siento orgullosa con el resultado, dijera: ¡Quedó monisimo!. Y lo mejor de todo, al Señorito C le ha encantado.
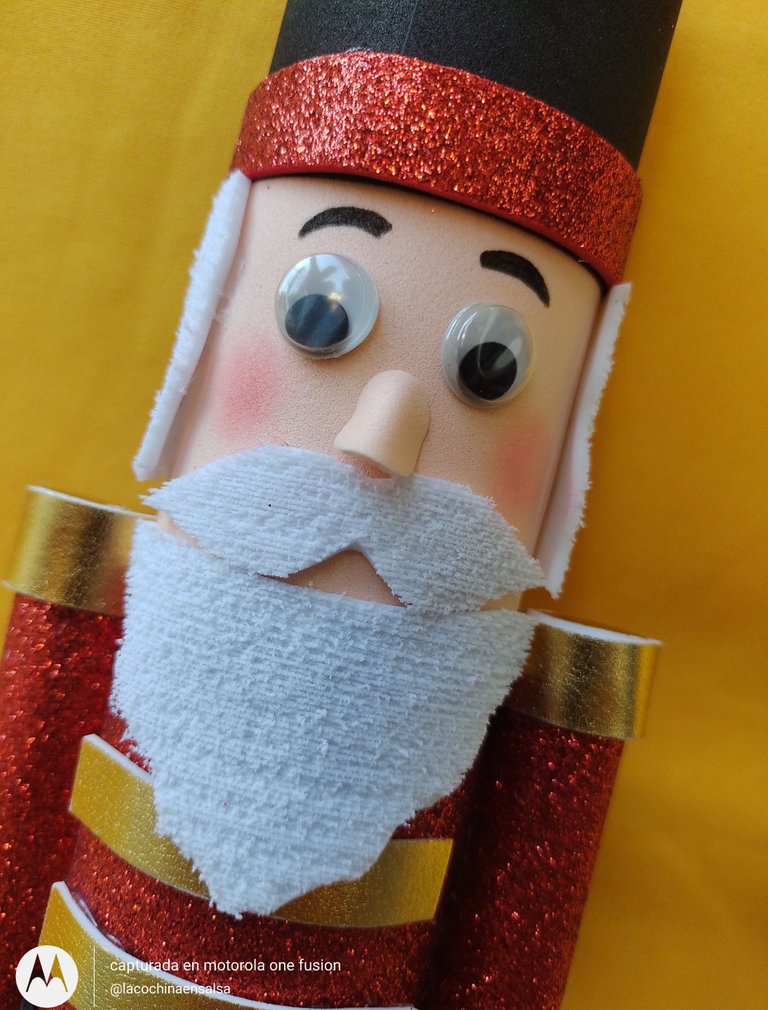
Los materiales que he usado para la elaboración del Cascanueces son cartulina texturizada, aunque puedes sustituirle por materiales como cartón o cartulina común. En mi caso, me ha resultado más cómodo de usar la cartulina texturizada debido a que no es tan fina, ni tan gruesa. También he usado foamis de diversos colores, como rojo escarchado, negro, piel, dorado y blanco con textura de peluche. En cuanto los detalles del rostro he optado por usar un par de ojos con movimiento y una nariz hecha con un pequeño trozo de foami. La barba y el cabello me han gustado mucho, porque son de esos foamis de textura peluche que le da más dimensión y detalle. Para el detalle de las cejas, las he dibujado con lapicero y las mejillas realzadas con rubor.
Historia Breve del Cascanueces:
Originalmente el personaje nace del cuento “El Cascanueces y el rey de los ratones” de 1816 del escritor Ernst Theodor Amadeus Hoffmann. Pero, seguido nace una versión infantil que es más conocida alrededor del mundo. La versión infantil relata que había un Príncipe que contraería matrimonio con una Princesa, pero la malvada ratona le hizo una especie de hechizo y lo convirtió en el "Cascanueces". Un muñeco de madera, con ornamentos y aires reales, que tenía la poderosa habilidad de romper nueces con su mandíbula. Allí, inicia una aventura del Príncipe en contra del legado de los ratones para recuperar su apariencia y vida.

Materiales:
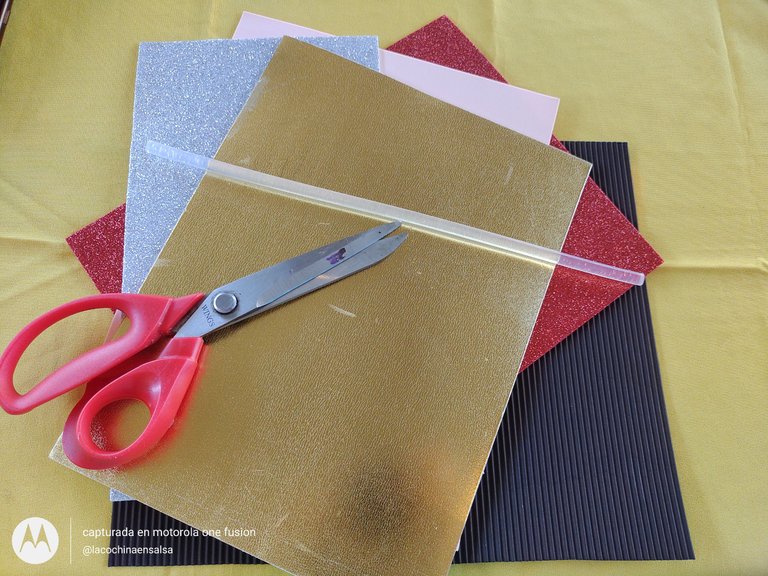
- Foamis de diversos colores, como: dorado, negro, rojo, verde, blanco y piel.
- Par de ojos movibles, también podrías dibujarlos.
- Silicon.
- Cartulina con textura, también puedes usar cartón o cartulina común.
- Trozo de madera o porcelana para la base.
- Tijeras.
¿Cómo hacerlo?
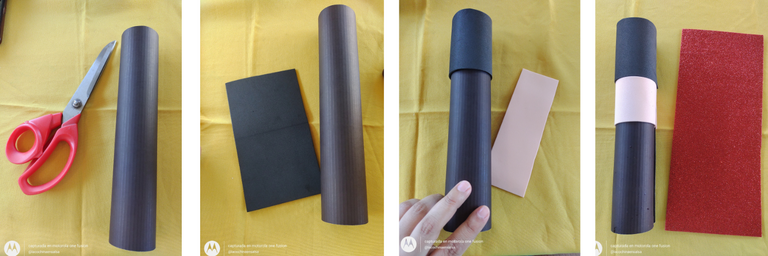
- Cortamos y formamos un cilindro alargado de 15 centímetros de alto. Fijamos con silicon. Luego cortamos rectángulos que serían para seccionar y diferenciar las partes del Cascanueces, como: gorro, rostro y tronco. Para la parte superior que es el gorro o sombrero, usamos el color negro. Los rectángulos deben cubrir completo y cuadrar en la parte trasera. Lo mismo haremos con el rostro, variando el tamaño, siendo este más pequeño. Así también haremos con el tronco, que sera de color rojo por el traje.
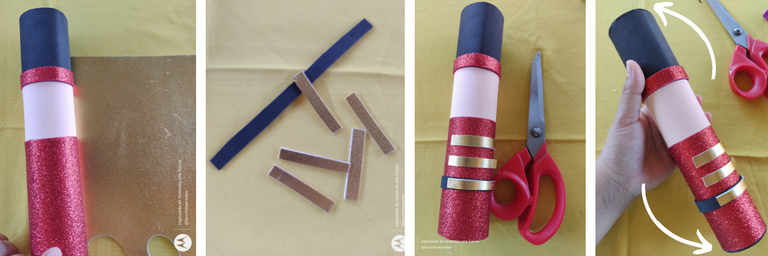
- Después de haber cubierto con los colores debidos. En foami dorado cortamos unos listones pequeños que serán para decorar el tronco, simularan ser los ornamentos del traje. También cortamos un listón negro que simulará ser la correa. Fijamos los detalles con silicón. Además, colocamos una base o tapa de foami en la parte superior y la inferior, para sellar los extremos. Fijamos también con silicon.
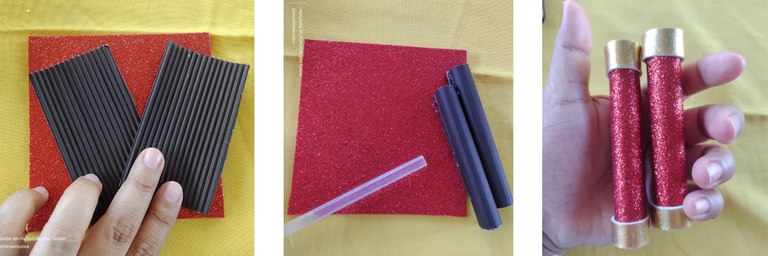
- Ahora formaremos los brazos, donde iniciamos haciendo un par de cilindros más finos y pequeños con cartulina. Forramos con foami rojo, colocamos detalles en dorado.
- Fijamos los brazos con silicon en los costados respectivos. Elaboramos otro cilindro para las piernas, este bien puedes hacerlo en dos partes, o solo un cilindro como lo he hecho yo. Con silicon fijamos los ojos movibles. Cortamos un pequeño circulo y doblamos a mitad, así a medio abrir le fijamos en el centro bajo de los ojos.
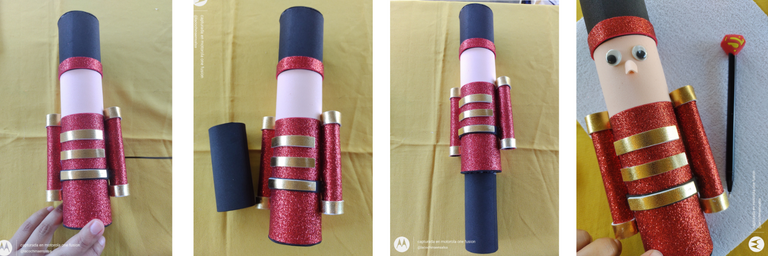
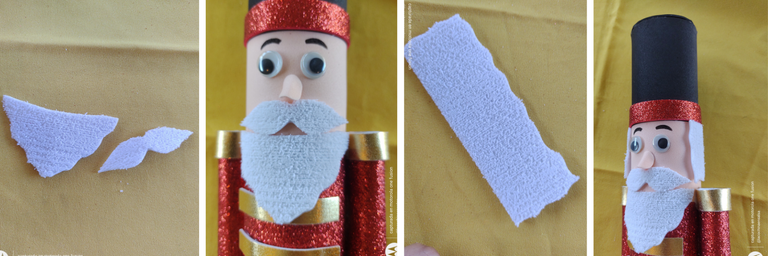
- Dibujamos las cejas con lapicero fino. Aparte, dibujamos y cortamos en el foami blanco lo que son los bigotes y la barba. También dibujamos y cortamos el cabello. Fijamos con silicon cada pieza.
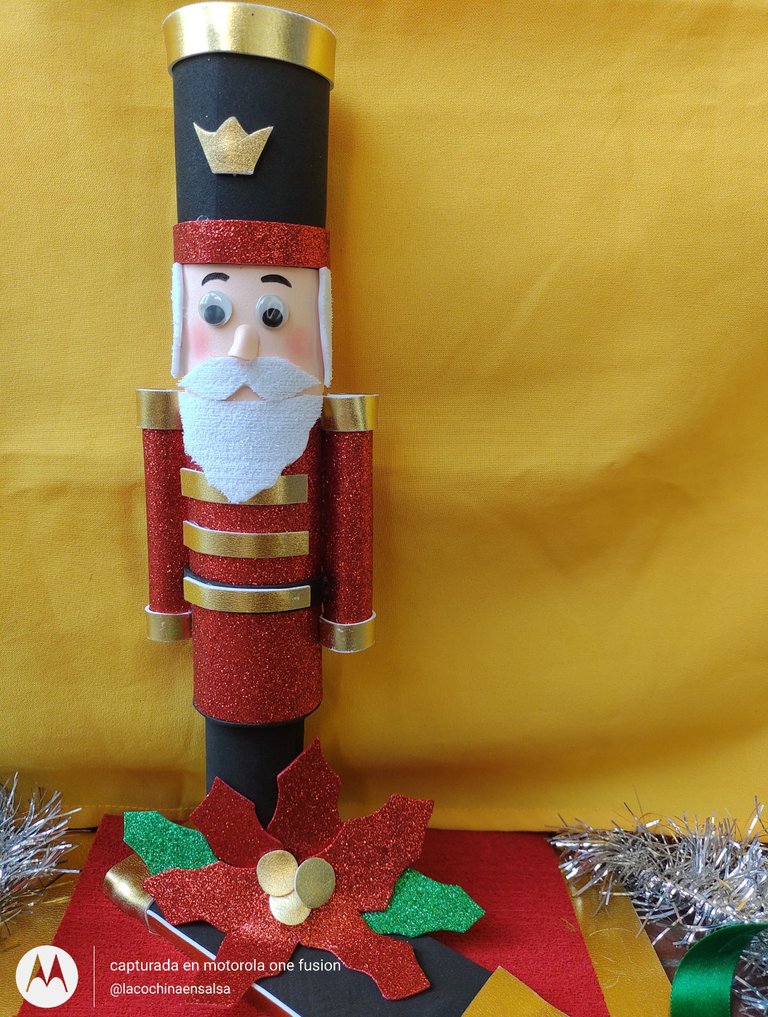
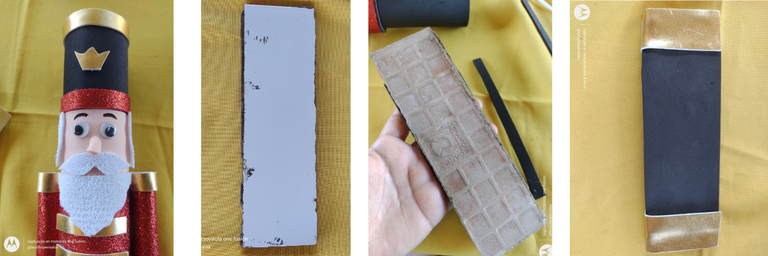
- Dibujamos en dorado algunos detalles para el sombrero y con rubor le he dado color a las mejillas. Y ya le tendremos listo. Solo faltaría decorar la base, como había comentado, es un trozo de cerámica que se desprendió de la cocina. Le he forrado con foami negro y detalles en dorado.
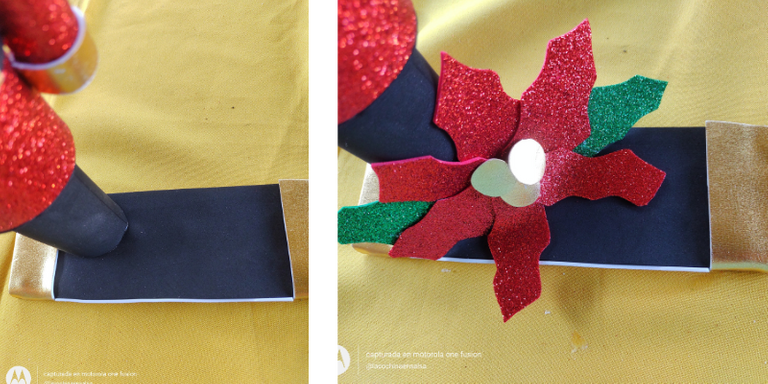
- Fijamos el muñeco sobre la base. He hecho aparte una flor navideña en rojo y detalles en dorado.
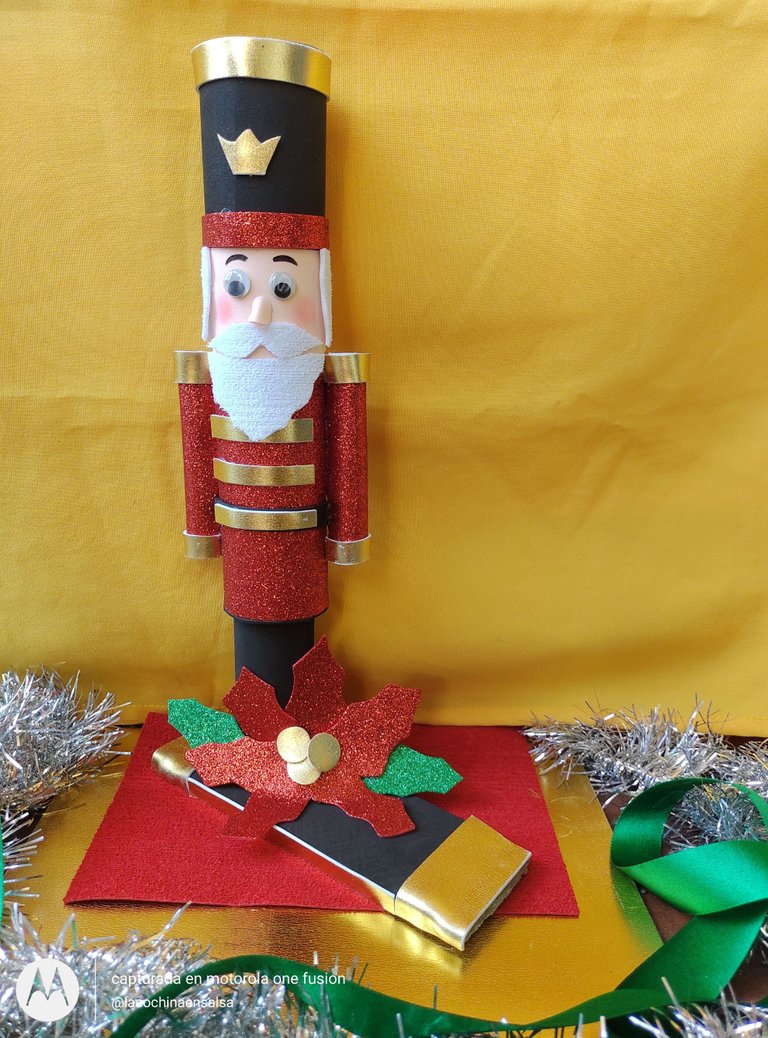
El Cascanueces para el Señorito C, está listo:
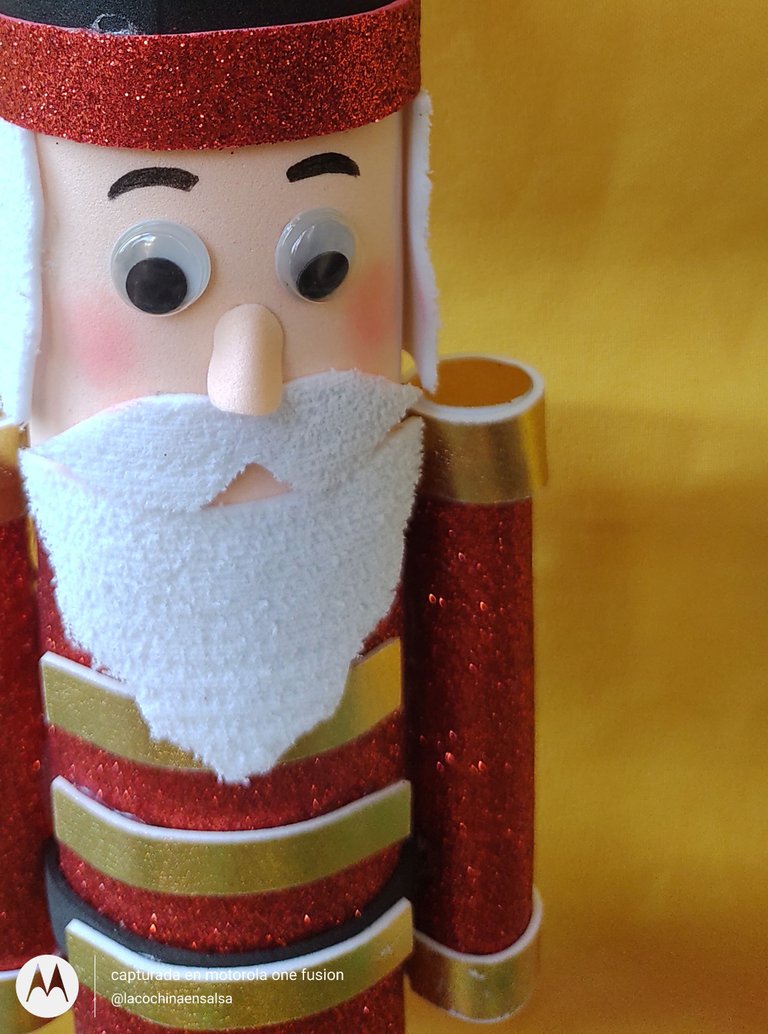
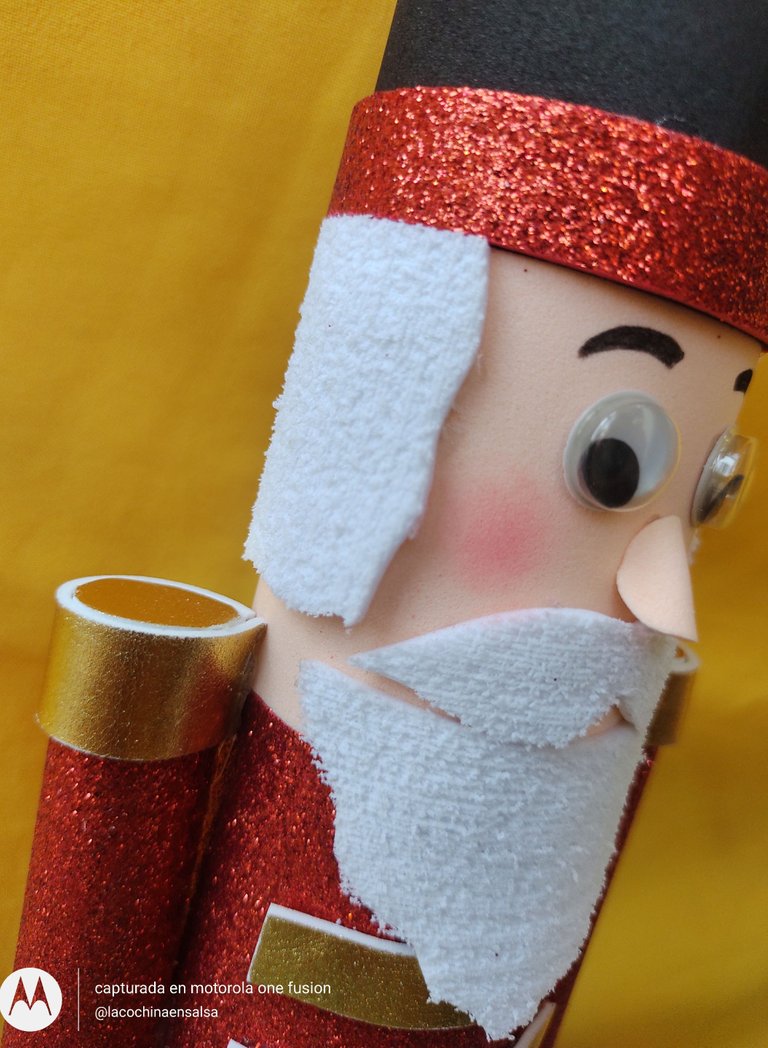
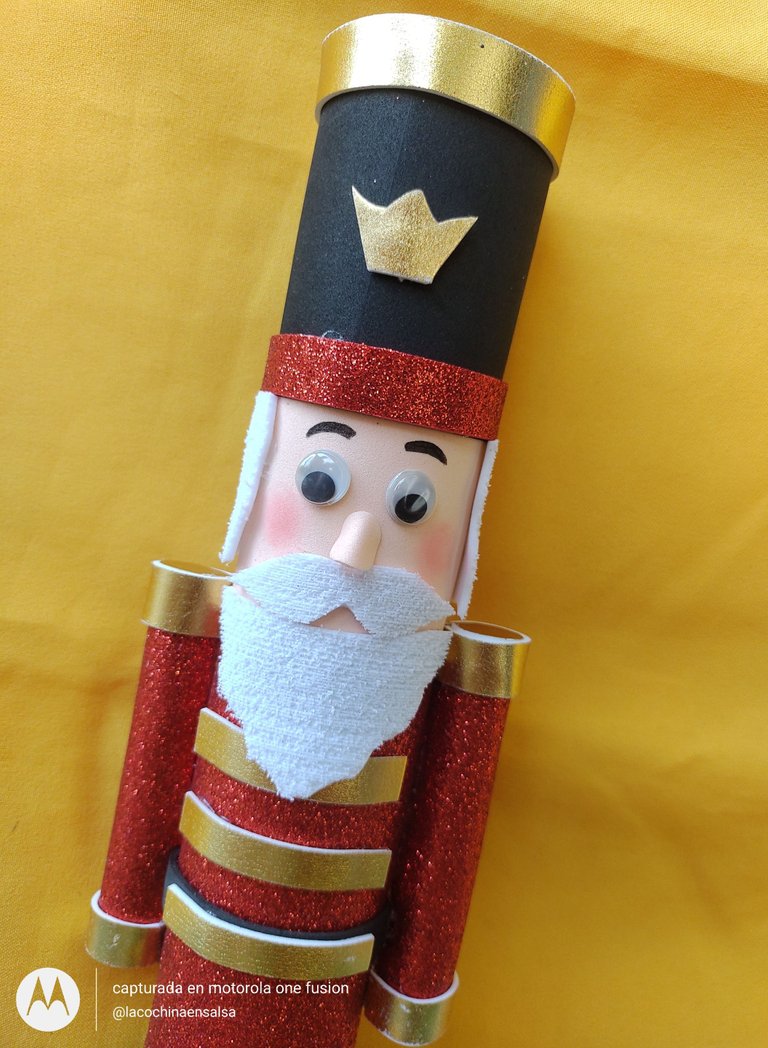
El Señorito C ha quedado muy contento, gracias a Dios. Complacer en lo posible a nuestros pequeños hijos es uno de esos placeres sentidos que no tienen precio en la vida. Optó por colocar el lindo Cascanueces sobre la pequeña mesa del comedor.
Se sienta a un costado a observarle. mientras recuerda la historia del Príncipe...

Imágenes de las instrucciones editadas en Canva Pro.
Traducción: Google Traductor.


Recently, Mr. C was watching some cartoons related to Christmas, including the History of the Nutcracker. He was fascinated, he would never have imagined the story behind that cute doll, and there, like every child, he said: Mom, I want one !. I had previously seen some in the neighboring city, they were somewhat expensive. But, I decided rather to make her own Nutcracker based on materials such as cardboard, colored foam, silicone and a piece of porcelain that had fallen from the kitchen (I used it for the base). Anyway, I know that Mr. C only wants it for collection type, he is not a kid to play with explicit moves or the like. He enjoys watching his toys in the distance.

On the other hand, I tell you that I thought a lot to start making it, since honestly I am not a person who is characterized by making figures or similar, I feel that they are very complex. For this reason, I went to the corridor of my house in the afternoon and sat calmly and patiently to draw, cut and assemble
The pieces. But, I can say that I feel proud with the result, I said: It was so cute!. And best of all, Mr. C has loved it.
The materials that I have used to make the Nutcracker are textured cardboard, although you can substitute materials such as cardboard or common cardboard. In my case, it has been more comfortable to use the textured cardboard because it is not so thin, nor so thick. I have also used foamis in various colors, such as frosty red, black, skin, gold and white with a plush texture. Regarding the details of the face, I have chosen to use a pair of moving eyes and a nose made with a small piece of foam. I liked the beard and hair a lot, because they are one of those foams with a plush texture that gives it more dimension and detail. For the detail of the eyebrows, I have drawn them with a pencil and the cheeks enhanced with blush.

A Brief History of the Nutcracker:
Originally the character was born from the story "The Nutcracker and the Mouse King" of 1816 by the writer Ernst Theodor Amadeus Hoffmann. But, often a children's version is born that is better known around the world. The children's version tells that there was a Prince who would marry a Princess, but the evil mouse put a kind of spell on him and turned him into the "Nutcracker". A wooden doll, with royal ornaments and airs, who had the powerful ability to crack nuts with his jaw. There, the Prince begins an adventure against the legacy of mice to recover his appearance and life.


Materials:
- Foamis of various colors, such as: gold, black, red, green, white and skin.
- Pair of movable eyes, you could also draw them.
-Silicon. - Textured cardboard, you can also use cardboard or common cardboard.
- Piece of wood or porcelain for the base.
- Scissors.

How to do it?
- Cut and form an elongated cylinder 15 centimeters high. We fixed with silicone. Then we cut rectangles that would be to section and differentiate the parts of the Nutcracker, such as: hat, face and trunk. For the upper part, which is the cap or hat, we use the color black. Rectangles must be full coverage and square at the back. We will do the same with the face, varying the size, being this smaller. We will also do the same with the trunk, which will be red because of the suit.

- After having covered with the appropriate colors. In golden foami we cut some small ribbons that will be to decorate the trunk, they will pretend to be the ornaments of the suit. We also cut a black ribbon that will pretend to be the strap. We fix the details with silicone. In addition, we place a foami base or lid on the top and bottom, to seal the ends. We also fix with silicone.

- Now we will form the arms, where we start by making a couple of finer and smaller cylinders with cardboard. We lined with red foami, we placed details in gold.

- We fix the arms with silicone on the respective sides. We make another cylinder for the legs, this one you can do in two parts, or just one cylinder like I did. With silicone we fix the movable eyes. We cut a small circle and fold it in half, so half open we fix it in the lower center of the eyes.

- We draw the eyebrows with a fine pencil. Besides, we draw and cut in the white foami what are the mustaches and the beard. We also draw and cut hair. We fix each piece with silicone.

- We drew in gold some details for the hat and with blush I have given color to the cheeks. And we will have you ready. The only thing left to do is decorate the base, as I had commented, it is a piece of ceramic that came off the kitchen. I have lined it with black foami and gold details.

- We fix the doll on the base. I have made a Christmas flower in red and details in gold.

The Nutcracker for Mr. C is ready:


Mr. C has been very happy, thank God. Pleasing our little children as much as possible is one of those heartfelt pleasures that are priceless in life. He opted to place the cute Nutcracker on the small dining room table.
*Sits to the side to watch him. while he recalls the story of the Prince... *

Instruction Images edited in Canva Pro.
Translation: Google Translator.

https://twitter.com/1583574951981994002/status/1601314489152176129
https://twitter.com/1422413915275812864/status/1601346664778043393
The rewards earned on this comment will go directly to the people( @lacochinaensalsa, @mariajcastro28 ) sharing the post on Twitter as long as they are registered with @poshtoken. Sign up at https://hiveposh.com.
Te quedó bello, me gusta el detalle del foami que usaste para la barba y bigote con esa textura, se ve muy bien, me encantó como te quedó, gran trabajo ♥️
Muchas gracias querida. Y si, a mi también me ha encantado... Primera vez que veía un foami de esas texturas y me pareció ideal para este muñeco. También vi en rojo y otros colores, ha de ser genial para otras manualidades. Gracias por pasar y por el apoyo 💛
Sii, de hecho yo hice 2 cascanueces y pensé en ese foami pero no lo conseguí y tuve que usar escarchado pero igual queda bien, el tuyo quedó hermoso
Entiendo. Y si, así también debe quedar bien. El foami blanco escarchado es muy lindo 💛. Muchas gracias nena
Me encantan los cascanueces y también de la manera que lo realizo muy buen trabajo realizado
Que bueno. En mi caso me parecen lindos, pero el Señorito C estaba con la idea de querer uno y me salía mejor hacerlo. Quedó más contento y considero que así tiene un sentido más especial. Saludos, gracias por pasar 😊
Gracias por tan preciado apoyo 😌
Muy hermoso.
saludos!
Muchas gracias, saludos 😌
Thank you for sharing this post on HIVE!
Your content got selected by our fellow curator desro & you just received a little thank you upvote from us for your great work! Your post will be featured in one of our recurring compilations which are aiming to offer you a stage to widen your audience within the DIY scene of Hive. Stay creative & HIVE ON!
Please vote for our hive witness <3
Gracias por el aprecio a mi contenido 😊
¡Felicidades! Esta publicación obtuvo upvote y fue compartido por @la-colmena, un proyecto de Curación Manual para la comunidad hispana de Hive que cuenta con el respaldo de @curie.
Si te gusta el trabajo que hacemos, te invitamos a darle tu voto a este comentario y a votar como testigo por La Colmena.
Si quieres saber más sobre nuestro proyecto, te invitamos a acompañarnos en nuestro servidor de Discord.
Gracias por el aprecio a mi contenido. 😊
Congratulations @lacochinaensalsa! You have completed the following achievement on the Hive blockchain And have been rewarded with New badge(s)
Your next target is to reach 7000 upvotes.
You can view your badges on your board and compare yourself to others in the Ranking
If you no longer want to receive notifications, reply to this comment with the word
STOPCheck out the last post from @hivebuzz:
Support the HiveBuzz project. Vote for our proposal!
mujer, ese cascanuez quedo demasiado hermoso, me encanto tu trabajo, oye, para no ser un experta en manuelidades como dices, te quedo demasiado lindo, tienes mucho talento, felicidades, saludos.
Muchas gracias. La verdad, me gusta hacer las cosas con esmero. Por ello, espero las emociones adecuadas, tiempo de tranquilidad y con la paciencia por delante 😊. Las únicas manualidades que he hecho anteriormente, son para el Señorito C y las actividades escolares. Gracias por el lindo comentario ;)