(ENG/ESP) TUTORIAL: BEAUTIFUL DECORATIVE BOARD, INSPIRED BY CHRISTMAS.
( ENG)
Very good day, what a pleasure to be with all of you once again. Inspired and very motivated, waiting for the last month of the year, one of the most colorful months, full of many customs and traditions, among them, that enthusiasm for decorating. Motivated to do so, I have made a very nice decorative board for this DIY-loving community, @diyhub. Where you use materials to recycle and profit. Getting a great result. The invitation is for you to follow me. I hope you enjoy it.

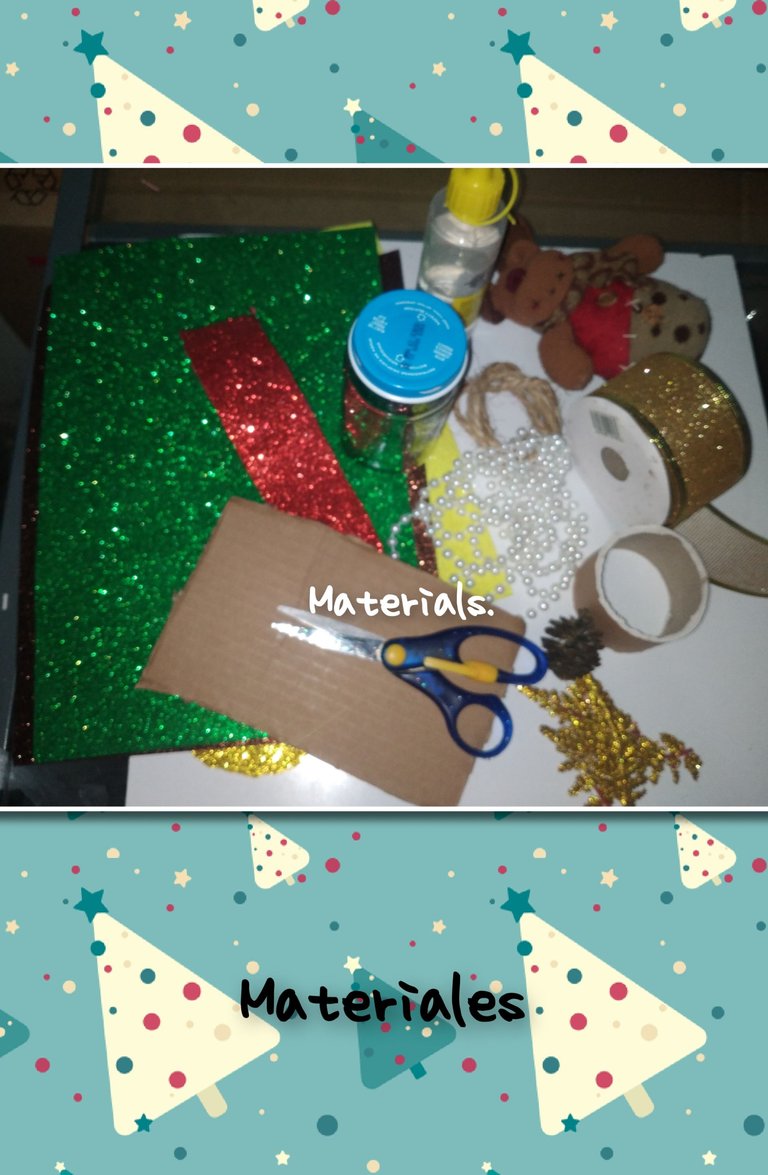
Materials.
. Cardboard
. Compote glass container with lid . Mecatillo.
. Small, commercial rower.
. Colored foam (green, yellow, gold, white red).
. Commercial golden spikes.
. Decorative gold ribbon. Hot silicone.
. Scissors.
. Cardboard tube where it comes for decorative tape, which I will use in the materials . white pearls
. Ruler.
In this way I have concluded, hoping you liked it. . All the content of this post is my authorship. . Grateful for following me to the end, it is always a pleasure to show you my projects. It will be until the next opportunity.
STEPS.
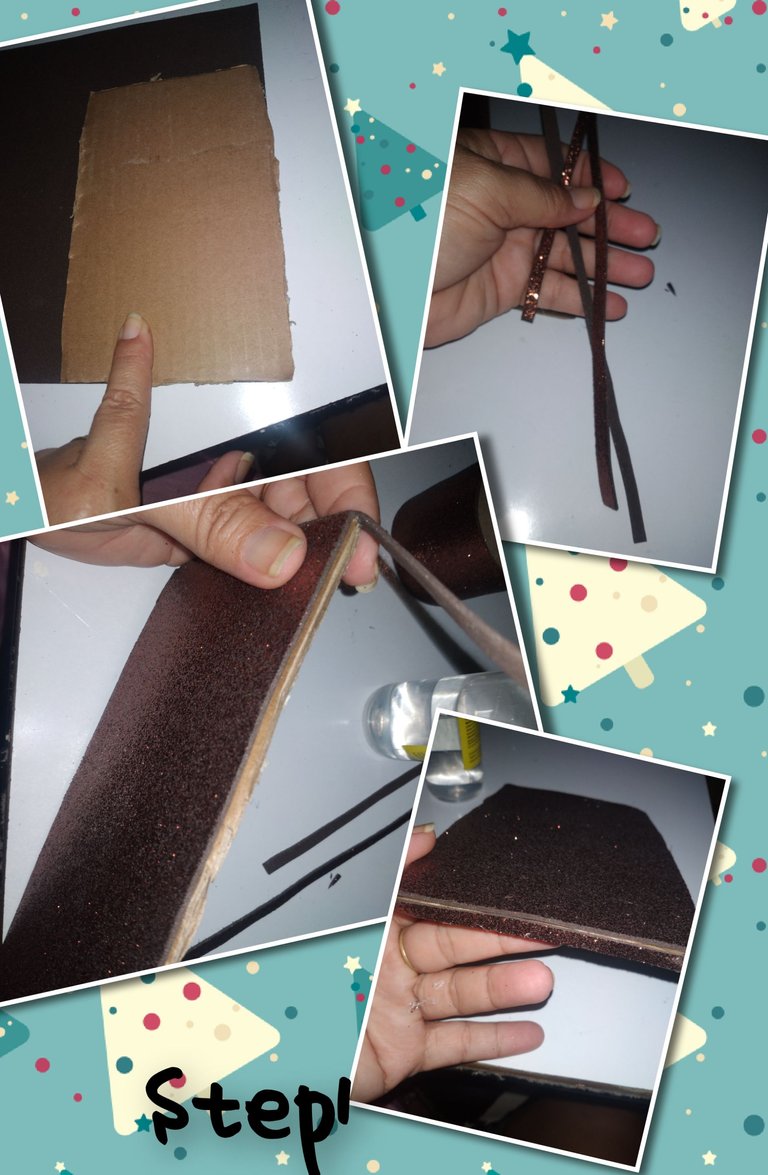
1.) I cut a piece of cardboard, the thickest, 4cm x 6 cm and cover both sides with brown foam. Likewise, I cut thin strips of foam of the same color and applying silicone, I cover the edges of it. cardboard. Thus leaving the Board ready.
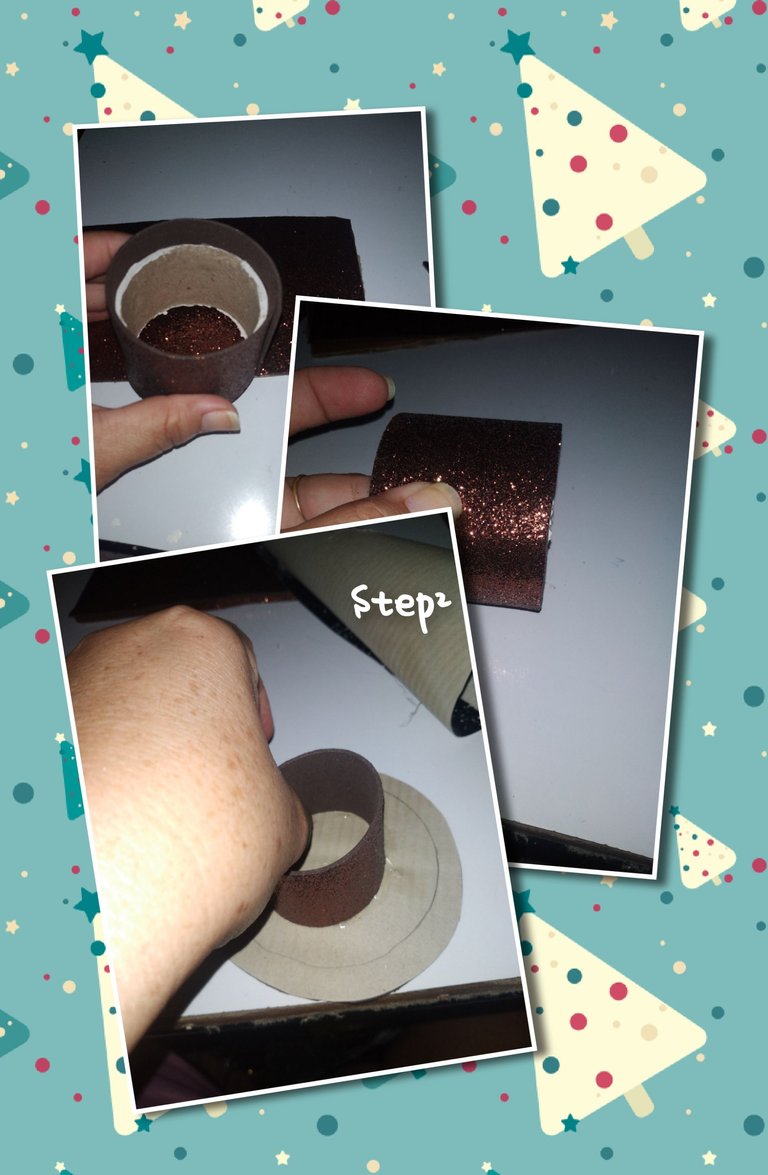
2.) I take the cardboard tube, and cover it with brown foam, leaving about 3cm more height than the cardboard tube, with the lid of the glass container, I mark a circle on the brown foam and on the glue the tube already lined
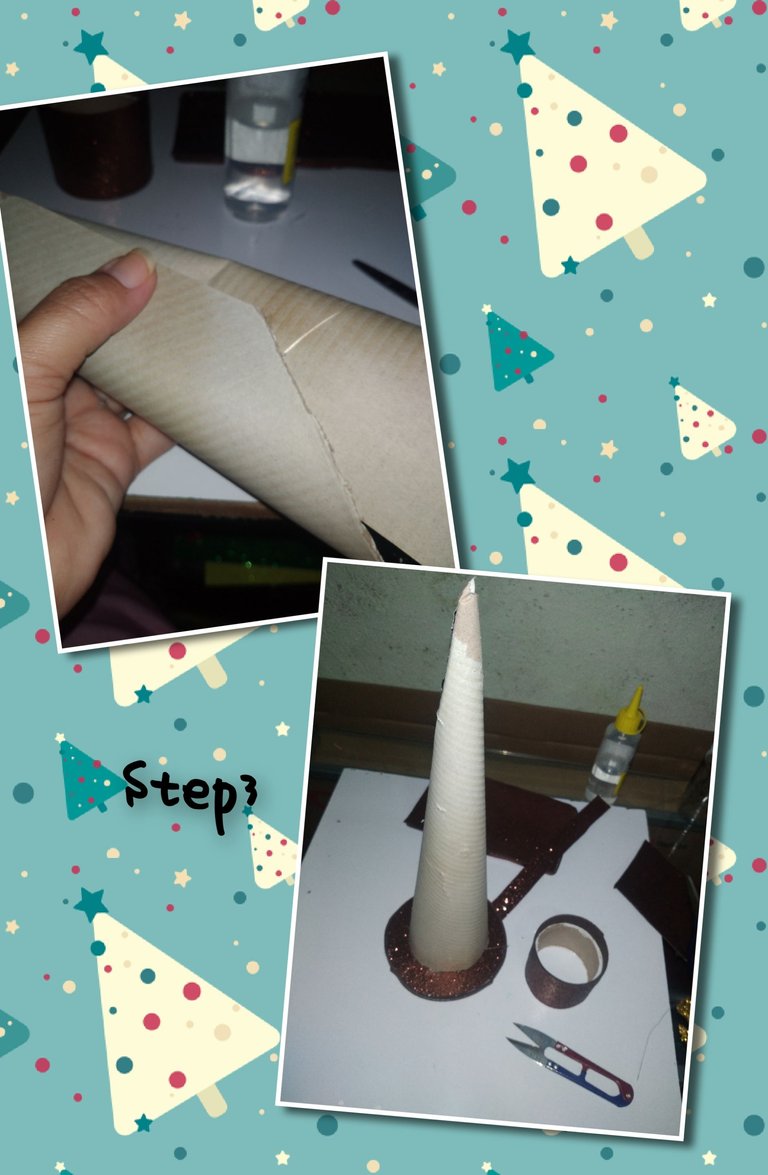
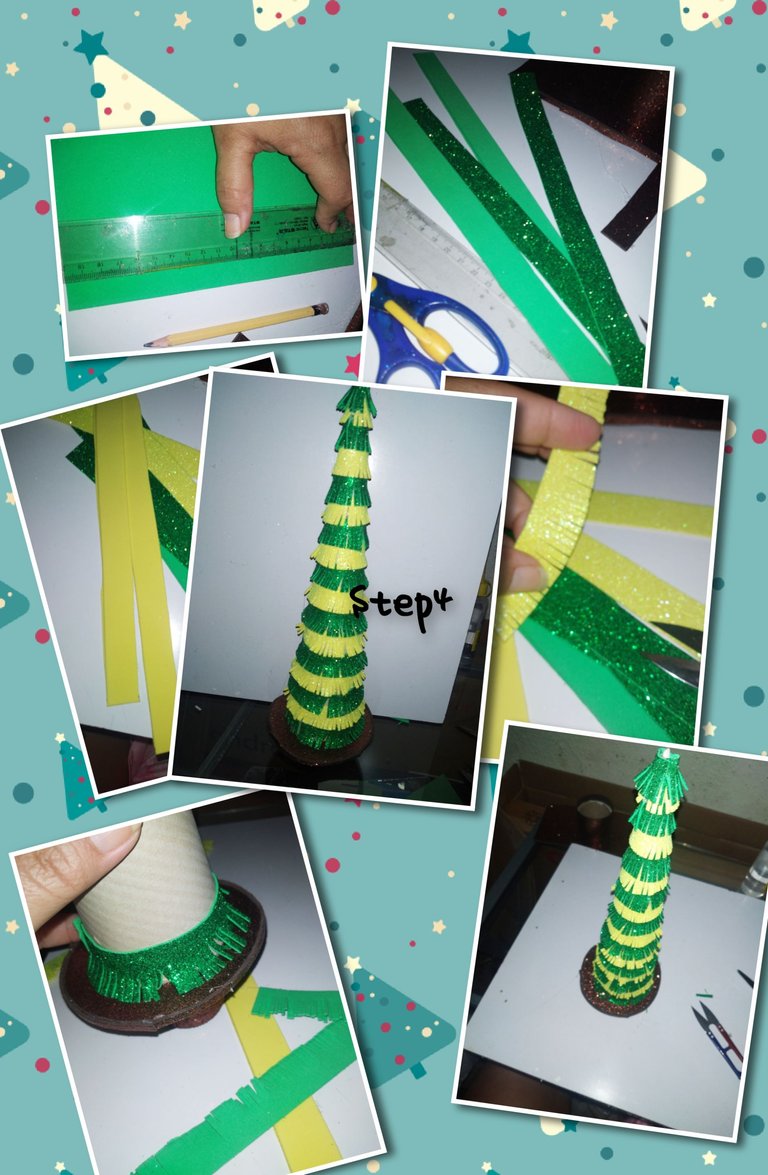
3.) With the thinner cardboard, I formed a 16cm cone. After gluing and fixing well, I rounded the bottom part and glued it onto the round cardboard base, lined at the end, from the previous step and glued it.
4.) I cut strips of yellow and frosty green foam, then I make small cuts at each end of the foam. Applying silicone, I begin to cover the cone, starting from the bottom to the top.
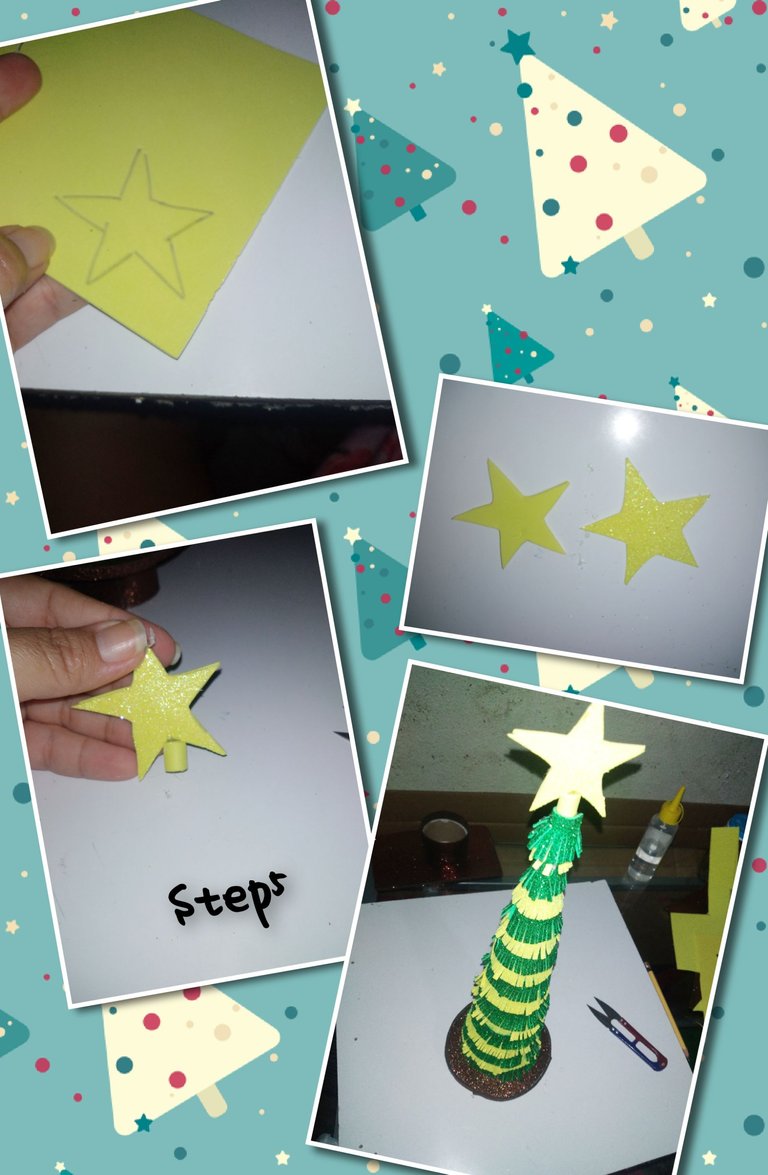
5.) I draw a star on the frosty yellow foam, I use the scissors to trace two of the same size, which I glue on the back side face to face. With a small strip of yellow foam, and roll it to make a small tube. I apply silicone and glue to the bottom of the star, and then glue to the top of the tree.
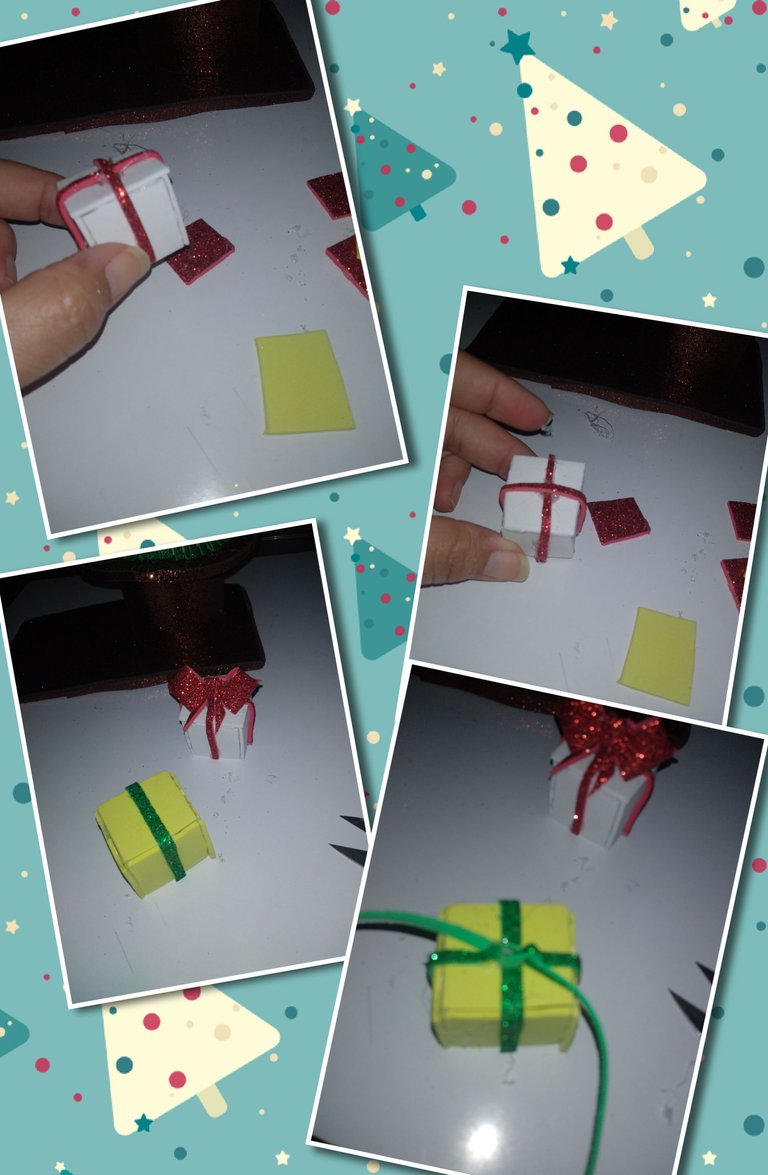
6.) I cut 4cm*4cm squares of yellow and white foam, then put it together to form a small square, to the white one I make a red bow, to the yellow one, I make a thin bow with a strip of colored foami green. Thus being ready, the gifts that will go on the bottom of the tree. This is also how I make a small Christmas flower, with gold foam.
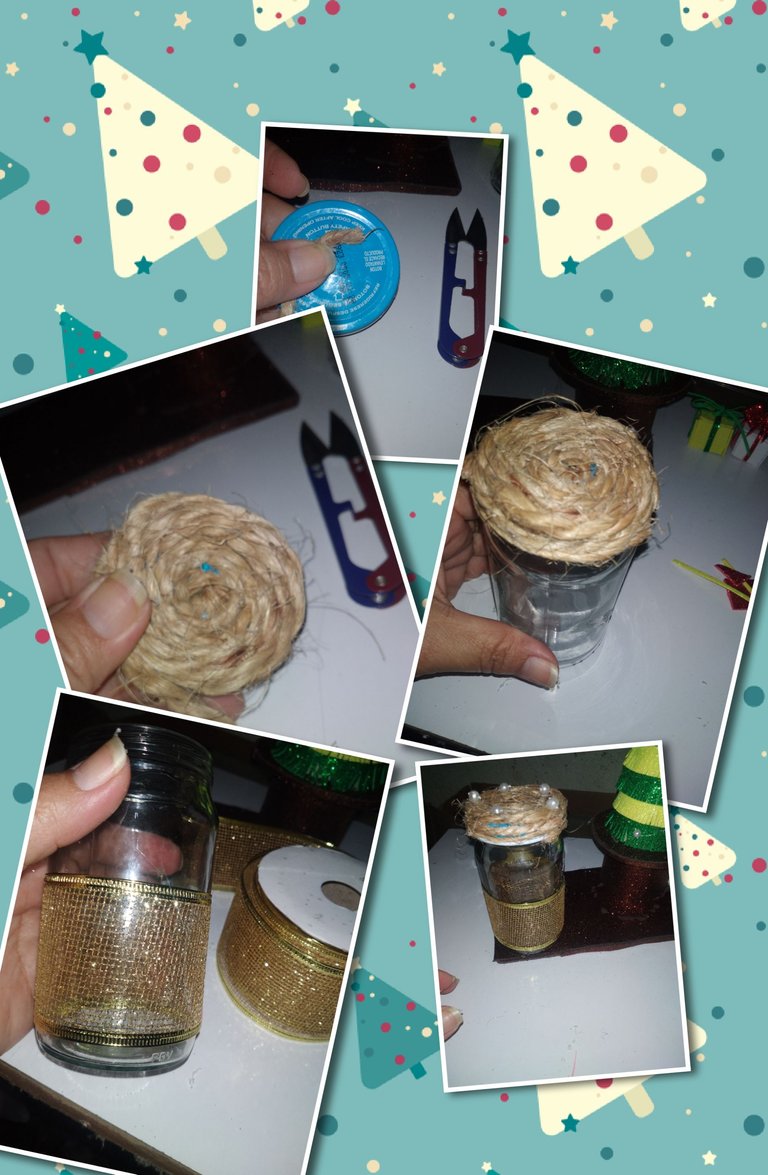
7.) I begin to apply silicone and cover the lid, continue gluingsome sautéed pearls on the lid already lined with mecatillo, I put a silicone stitch and glue the dried pine flower, which allows the lid to be placed and removed from the candy bowl, and I glue the gold ribbon to the bottom of the glass.
8.) The next thing, to finish, will be to decorate the board, first I glue the Christmas tree on the right, on the left the already decorated glass container, I apply silicone and glue in the middle of the tree and the container, but on the On the back is the small oar, and on the front is the flower, I place and glue the spikes under the flower, and under the tree right at the foot the little gifts.
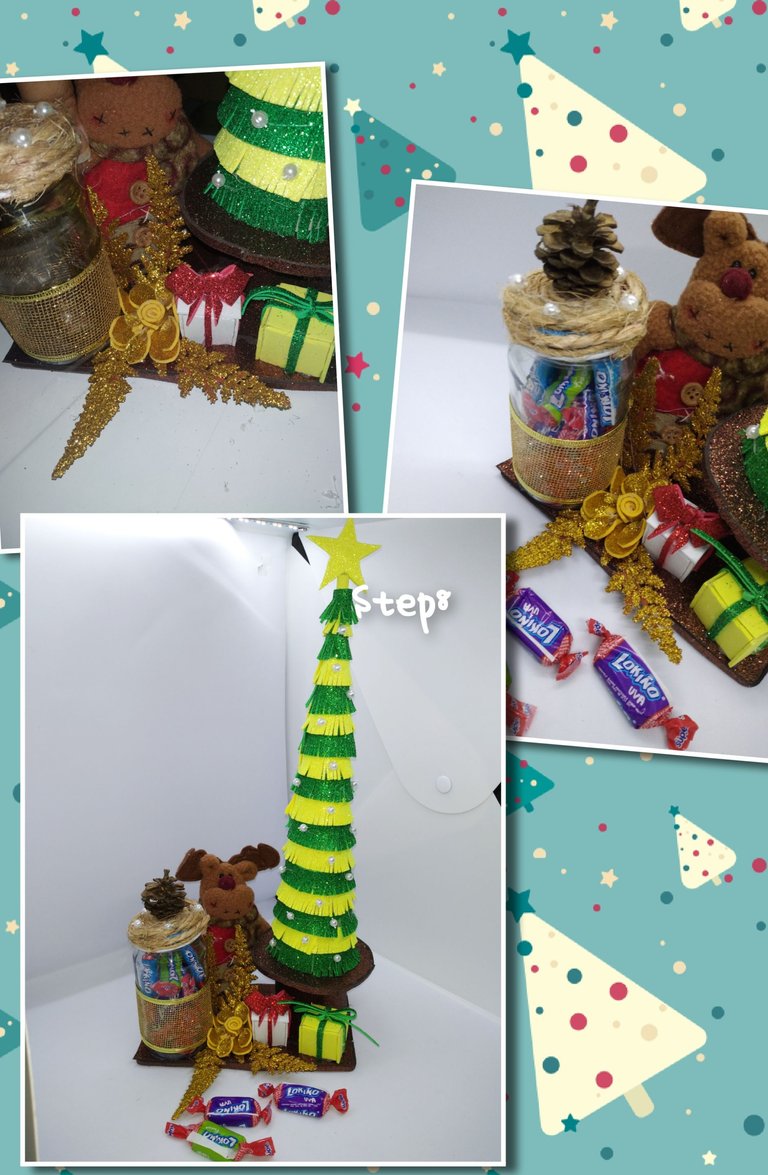
(ESP)
Muy buen día, que gusto estar una vez más con todos ustedes. Inspirada y muy motivada, en la espera de el último mes de el año, uno de los meses más coloridos, lleno de muchas, costumbre y tradiciones, dentro de ellas, ese entusiasmo de decorar. Motivado a ello, he realizado un muy bonito, tablero decorativo, para esta comunidad, amante de el bricolaje, @diyhub. Dónde use materiales para reciclar y de provecho. Obteniendo un gran resultado. La invitación es para que me siga. Espero lo disfruten.

Materiales.
. Cartón
. Envase de vidrio con tapa de compota
. Mecatillo.
. Remo pequeño, comercial.
. Foami de colores ( verde, amarillo, dorado,blnaco rojo).
. Espigas doradas comerciales.
. Cinta dorada decorativa.
Silicón caliente.
. Tijeras.
. Tubo de cartón dónde viene pa cinta decorativa, que utilizaré en los materiales
. Perlas blan
. Regla.

PASOS.
1.) Corto un trozo de cartón, de el más grueso, de 4cm x 6 cm y cubro por ambos lados con foami de color marrón, así mismo, corto delgadas tiritas de foami de mismo color y aplicando silicón, cubro los bordes de el cartón. Quedando así listo el Tablero.

2.) Tomo el tubo de cartón, y cubro con foami de color marrón, dejando unos 3cm más de altura a diferencia de el tubo de cartón, con la tapa de el envase de vidrio, marco un círculo en el foami de color marrón y sobre el pego el tubo ya forrado

3.) Con el cartón, más delgado, formó un cono de 16cm, luego de pegar y fijar bien, redondeo la parte inferior y pego sobre la base redonda de cartón, forrada en final, de paso anterior y pego.

4.) Corto tiras de foami de color amarillo y verde escarchado, luego hago pequeños cortes en cada aunó de los extremos de el foami. Aplicando silicon, comienzo a cubrir el cono, comenzando de abajo a arriba.

5.) Dibujo sobre el foami de color amarillo escarchado una estrella, recorro con las tijeras, dos de igual tamaño, las cuales pego por la parte de revez cara a cara. Con una pequeña tira de foami de color amarillo, y enrrollo para hacer un pequeño tubo. Aplico silicón y pego por la parte de abajo de la estrella, para seguidamente, pegaren la parte superior de el árbol.

6.) Corto cuadritos de 4cm*4cm de foami color amarillo y blanco, luego armó para formar un pequeño cuadritos, a el de color blanco hago un lazo de color rojo, a el amarillo, hago un delgado lazo con tira de foami de color verde. Quedando así listo, los regalos que irán en el pue de el árbol. Así también hago una pequeña flor de navidad, con foami dorado.

7.) Comienzo a aplicar silicón y cubrir la tapa, continuo pegando algunas perlas salteadas en la tapa ya forrada por mecatillo, pongo una puntada de silicón y pego la flor seca de pino, que permita colocar y quitar la tapa del dulcero y pego en la parte inferior de el vaso, la cinta dorada.

8.) Lo siguiente, para finalizar será, decorar el tablero, primero pego en la derecha el árbol Navideños, en el izquierdo el envase de vidrios ya decorado, aplico silicón y pego en medio de el árbol y el envase , pero en la parte de atrás el pequeño remo, y el la parte de el frente la flor, coloco y pego las espigas debajo la flor, y debajo de el árbol justo en el pie los regalitos.

De esta manera he concluido, esperando les haya gustado.
. Todo el contenido de este post es de mí autoría.
. Agradecida me hayas seguido hasta el final, siempre es un gusto mostrarles misbproyecti. Será hasta aúna próxima oportunidad.
que bello! todo muy hermoso!
how beautiful! everything is so beautiful!
Hola @yasmarit que bueno le haya gustado
Quedó bellísimo
Gracias mi niña hermosa...que bueno le haya gustado.
Muy bonito trabajo. Bendiciones
Gracias cariño. Lindo su comentario 😊