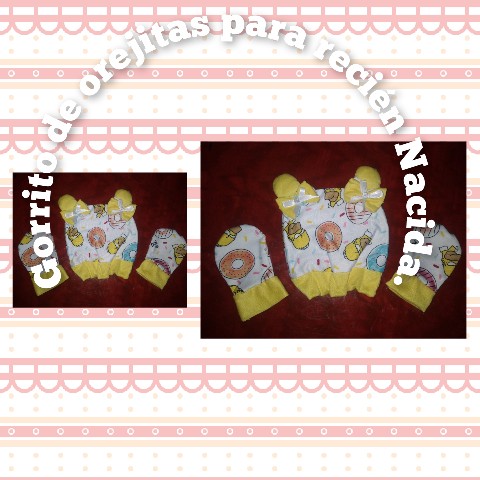
[ENG/ESP]. HOW TO MAKE A BEAUTIFUL EAR CAP FOR BABY./ COMO HACER UN LINDO GORRO DE OREJITA PARA BEBE./(TUTORIAL)
Have a very good day everyone at @hivediy, I wish it a great day for everyone at work, home and especially in the hive, today I'm here to show you how, in very simple steps, we can make a cute hat with ears and mittens for a baby, ideal to protect from the cold in their first days of birth, this is especially, I did it with a lot of love and dedication, since I recently found out, I will be a grandmother for that reason I match between colors, because the sex is still unknown, and I could remove some details in the future to adapt it, follow me and I'll show you how to do it.
Muy buen día tengan todas en @hivediy, deseo sea un gran día para todos en sus trabajos, hogar y sobre todo en la colmena, hoy paso para mostrar , como en muy sencillos paso, podemos hacer un lindo gorrito de orejitas y Manoplas para un bebé, ideal para protejer del frío en sus primeros días de nacidos, esté en especial, lo hice con muchísimo amor y dedicación, ya que recientemente me enteré, seré abuela por ello hago juego entre colores, porque aún se desconoce el sexo, y pudiera quitarle algun detalla a futuro para adaptarlo, sigueme y te muestro como hacerlo.
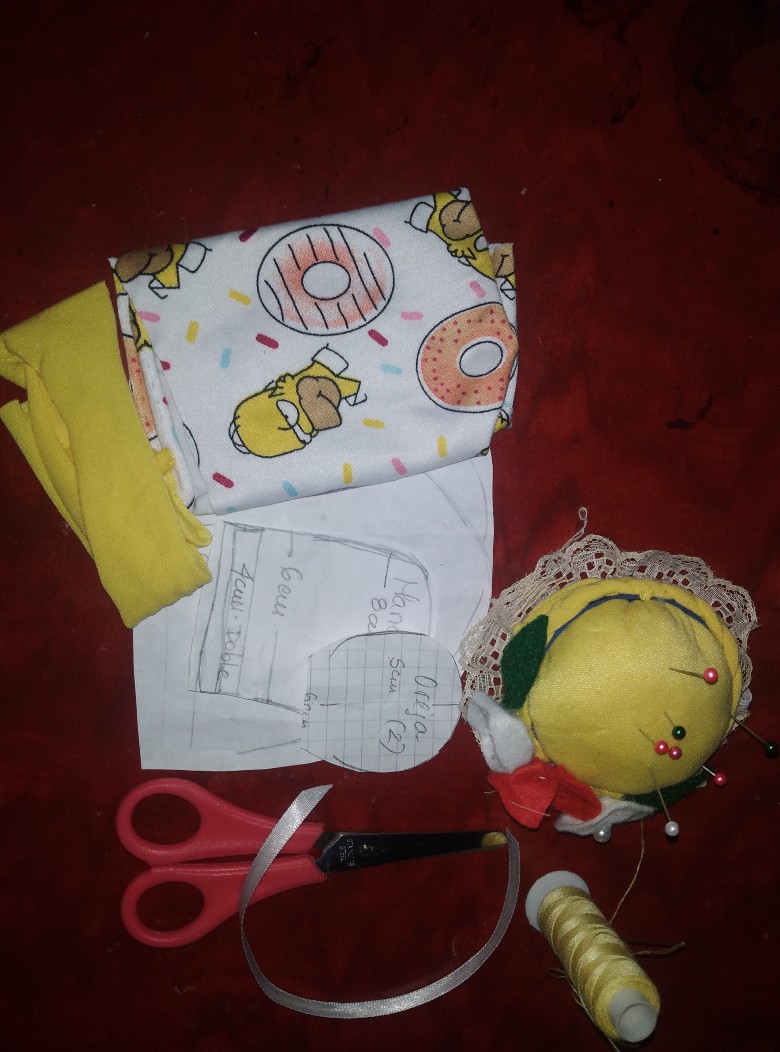
Materials/ Materiales.
Cotton fabric with Homer Simpson print.
. yellow cotton fabric
. knitting needle and thread
. Patterns previously drawn on paper to recycle (hat, little ears, mittens)
. Pair of scissors.
. Stuffed
. pins.
.thin white ribbon.
. Tela de algodón con estampado de Homero Simpson.
. Tela color amarilla de algodón
. Hilo y aguja de tejer
. Patrones previamente sacados en papel para reciclar (gorro, orejitas, manoplas)
. Tijeras.
. Relleno
. Alfileres.
.cinta color blanca delgada.
Steps/Pasos.
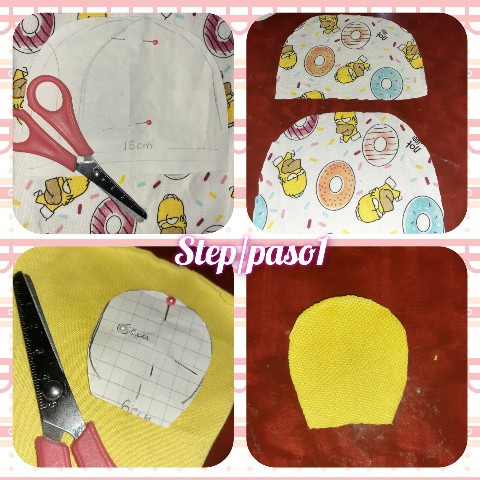
1.) Using the patterns for the hat and the little eyes, mark on the fabrics, for the hat it will be the patterned fabric and for the ears the yellow fabric. To avoid the patterns running I use pins, short for the hat two pieces and will give each little ear two, making a total of 4 little ears that will be joined in pairs.
1.) Usando los patrones para el gorro y las ojejitas, marco sobre las telas, para el gorro será de la tela estampada y para las orejas la tela de color amarilla.para evitar se corran los patrones uso alfileres, corto para el gorro dos piezas y dará cada orejita dos, haciendo un total de 4ojeritas que irán unidas en pares.
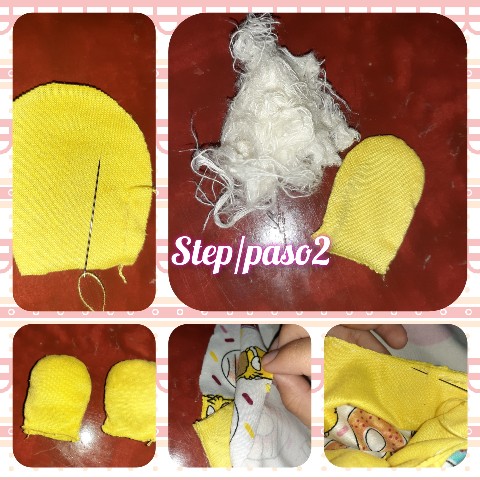
2.) Ready the patterns, first I will sew the pieces of the ears, I turn to the right side and fill, it should be the same for the other, after this I will glue the hat, I will put pins to make sure that the ears are in the same direction, I sew the whole hat around and I will cut a strip of double yellow fabric 4cm and 12cm long, sew its ends and glue to the bottom of the hat.
2.) Listo los patrones, primero cosere las piezas de las orejitas,volteo por la parte derecha y relleno, deberá ser igual para la otra, luego de esto pegare al gorro, pondré alfileres para asegurarme que las orejitas queden en la misma dirección, coso todo el gorro por el alrrededor y cortaré un liston de tela color amarilla doble de 4cm y 12cm de largo, cosos sus extremo y pego en la parte inferior de el gorro.
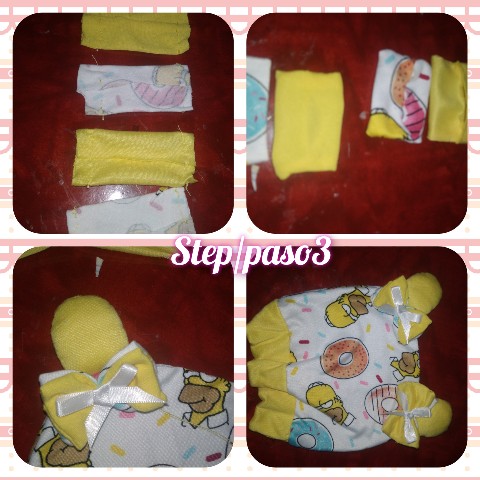
3.) Using both fabrics, I cut two pieces of each one, sew on the wrong side and turn to form a bow, this will have both shades of the fabric and in the center I will glue a small bow of white tape, which I will glue on the ears of the baby hat.
3.) Usando ambas telas corto dos trozos de cada una, cosos por el revez y volveo para formar un lazo, este tendrá ambas tonalidades de la tela y en el centro pegare un pequeño lazo de cinta color blanca, que así vez pegare sobre la orejitas de el gorro para bebé.
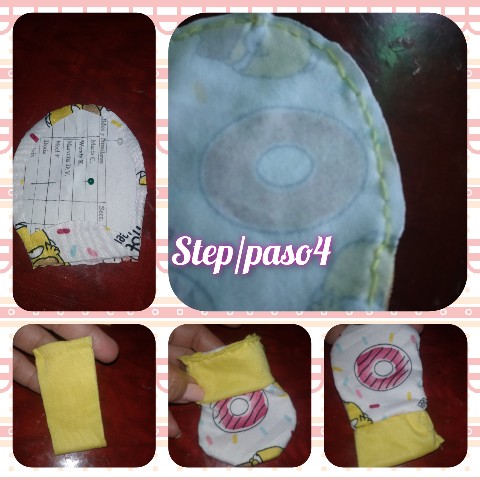
4.) Now mark the pattern of the mittens on the printed fabric, cut it out, sew all around and run a 4cm ribbon which I fold, sew the ends and glue and then sew on the bottom of the mittens.
4.) Ahora marco el patrón de las manoplas sobre la tela estampada, recortó, cosere por todo el alrededor y corro un liston de 4cm el cual doblo, coso los extremos y pego para luego coser en la parte baja de las manoplas.
Finally it was very simple and practical, I have already bought several shades of fabric, so that the future mother can be distracted during pregnancy.
Finalmente fue muy sencillo y práctico, ya he comprado varias tonalidades de tela, para que la futura madre se distraiga durante el embarazo.
All photos are my property, taken with my smartphone.
. Use Incollage for the step-by-step demonstration.
. Use Google translate.
Todas las fotos son de mí propiedad, tomadas con mí teléfono inteligente.
. Use Incollage para la demostración de el paso a paso.
. Use traductor Google.
I thank you for visiting my blog, it will be until tomorrow dear friends, do not forget any comment in a good way will be welcome.
Le agradezco hayas visitado mí blog, será hasta mañana queridos amigos, no olvides algún comentario de buena forma será bienvenido.
Hermosas manoplas ideal para que los bebés no se hagan daño con las uñas,gracias por compartir
Muy bello y delicado...me gustó mucho
💫🎉🌈💐⭐😘🌹🎊🌱🌙🍁🍀✨🌟🌵🍂🌳🌟🌲🌼🌻🏵️💮🌸🌷🌺🥀🍄☺️