(ESP/ENG) Diy/ Hermosas Trenzas para el Cabello con Ligas/ Diy/ Beautiful Hair Braids with Garters.
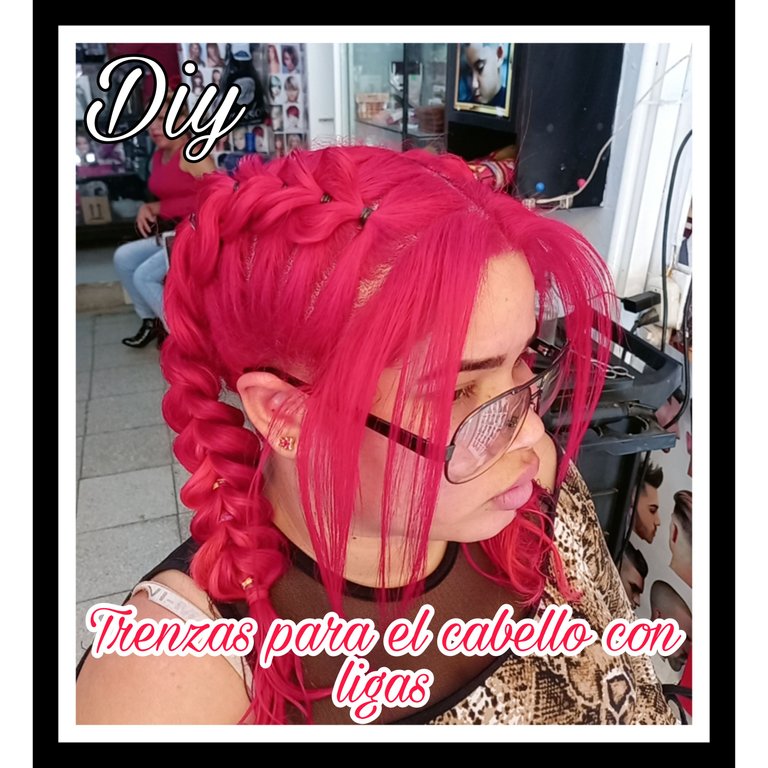
Hola, hola mi linda familia de artesanos de esta creativa Colmena, #Hive-Diy deseo que estén pasando un resto del día agradable y con buena salud; sí eres el tipo de persona que te cuesta realizar trenzas en el cabello, te muestro una manera muy fácil de realizarlas con ligas, con resultados muy hermosos.
Hello,hello my beautiful family of artisans of this creative Hive, #Hive-Diy wish you are having a nice rest of the day with good health; if you are the type of person who finds it hard to braid your hair, I show you a very easy way to braid your hair with garters, with beautiful results.

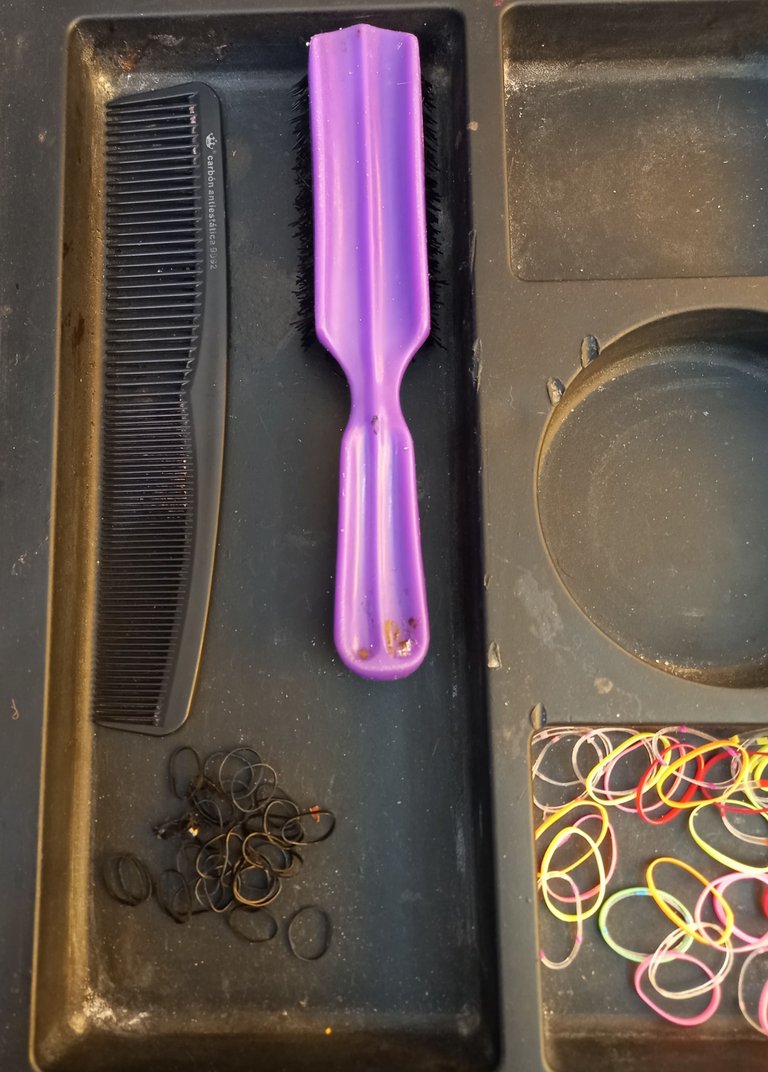
- Peine y cepillo
- Ligas.
- Gel fijador.
- Comb and brush
- Hair rubber bands.
- Fixing gel.

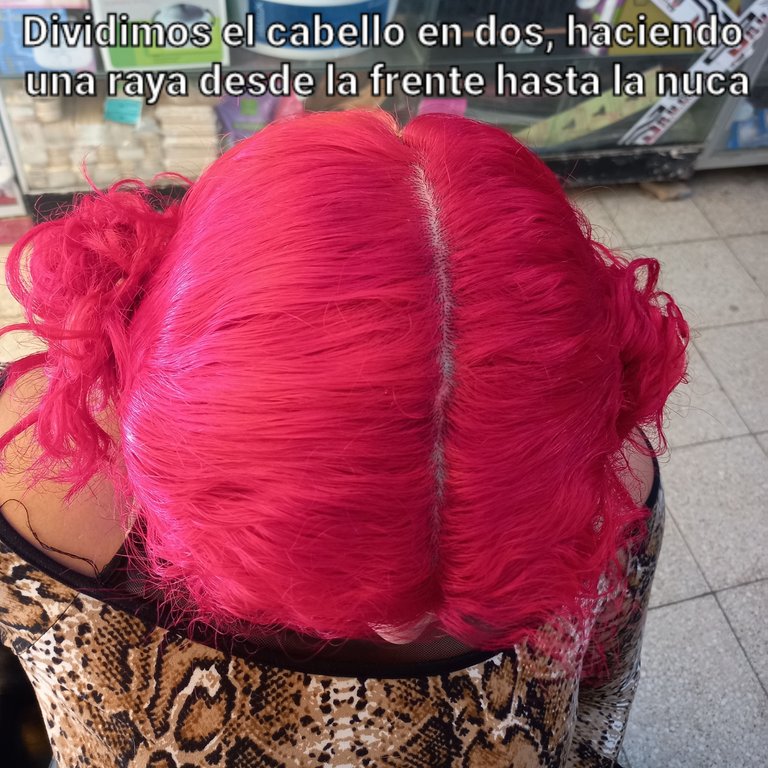
Lo primero que haremos es realizar dos particiones en el cabello, realizando una línea recta en el centro de la cabeza, desde la frente hasta la nuca.
The first thing to do is to make two partings in the hair, making a straight line in the center of the head, from the forehead to the nape of the neck.
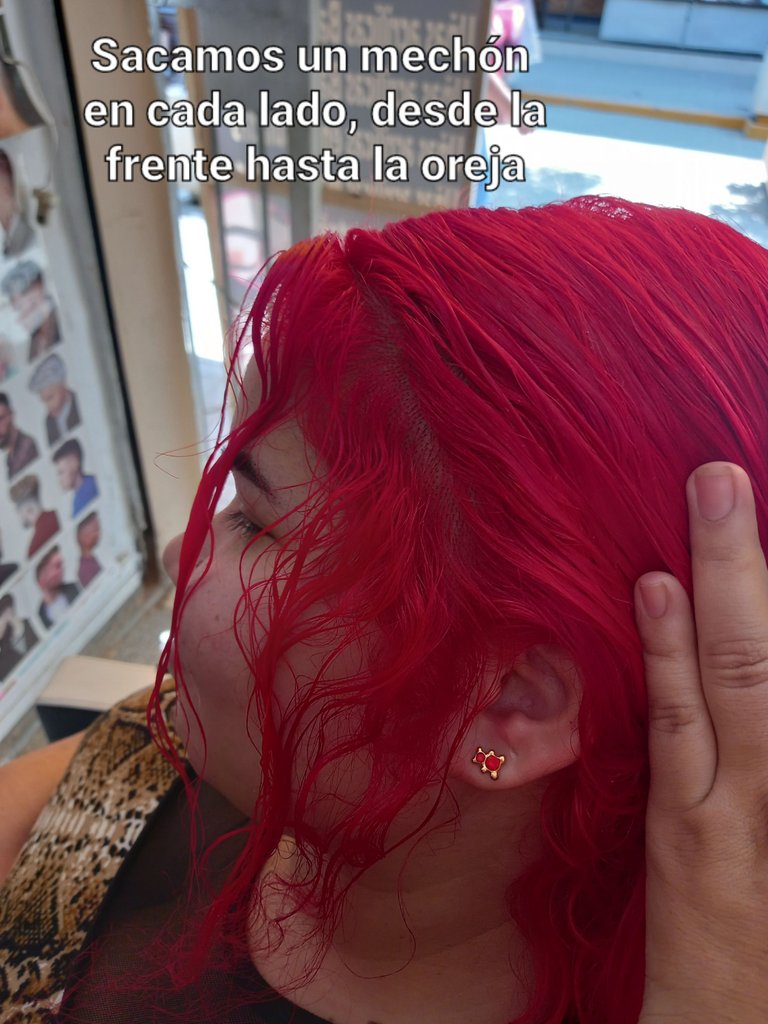
Sacamos un mechón en cada lado de la parte del frente de la cabeza.
We take out a strand on each side of the front of the head.
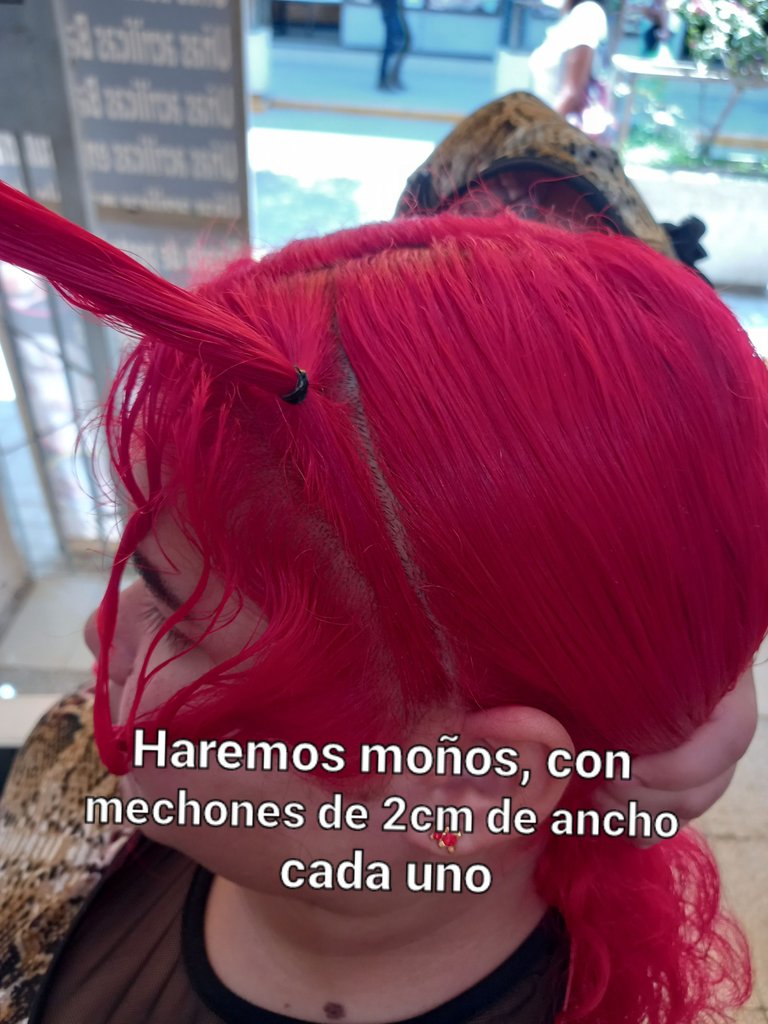
Después de haber realizado las dos divisiones en el cabello, procedemos a trabajar primeramente de un lado de la cabeza, haciendo secciones de cabellos de 2 cm de ancho, las cuales sujetaremos cada uno por separado con ligas. Éstos los haremos desde la frente hasta la nuca.
After having made the two divisions in the hair, we proceed to work first on one side of the head, making sections of hair 2 cm wide, which we will fasten each one separately with rubber bands.
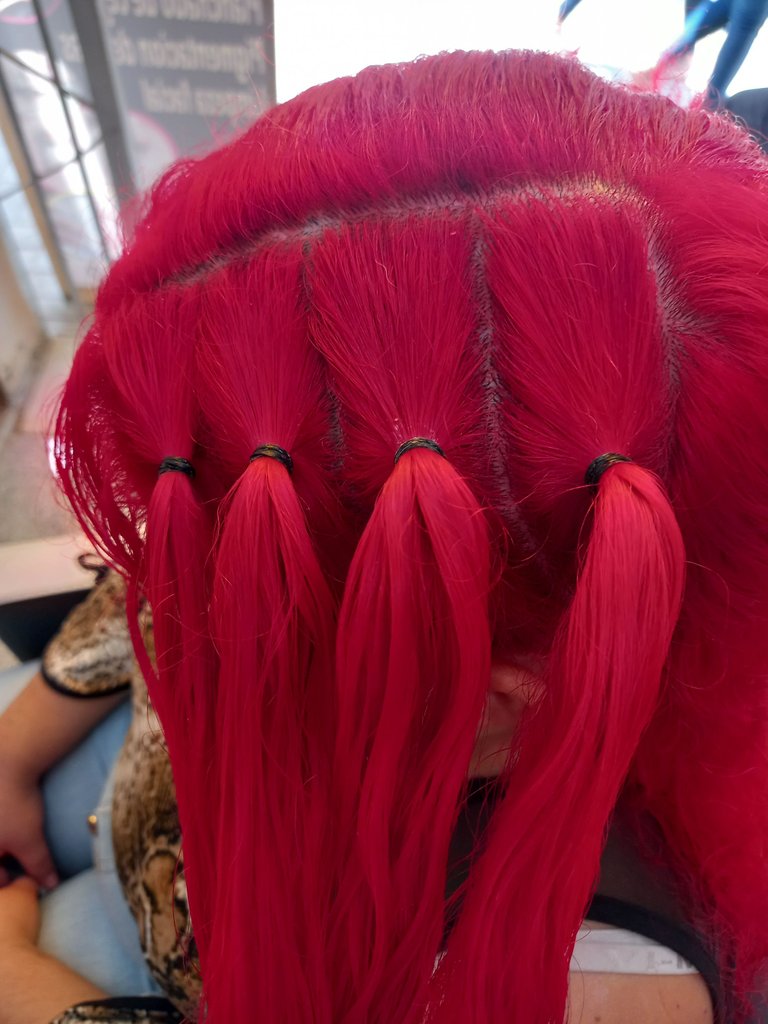
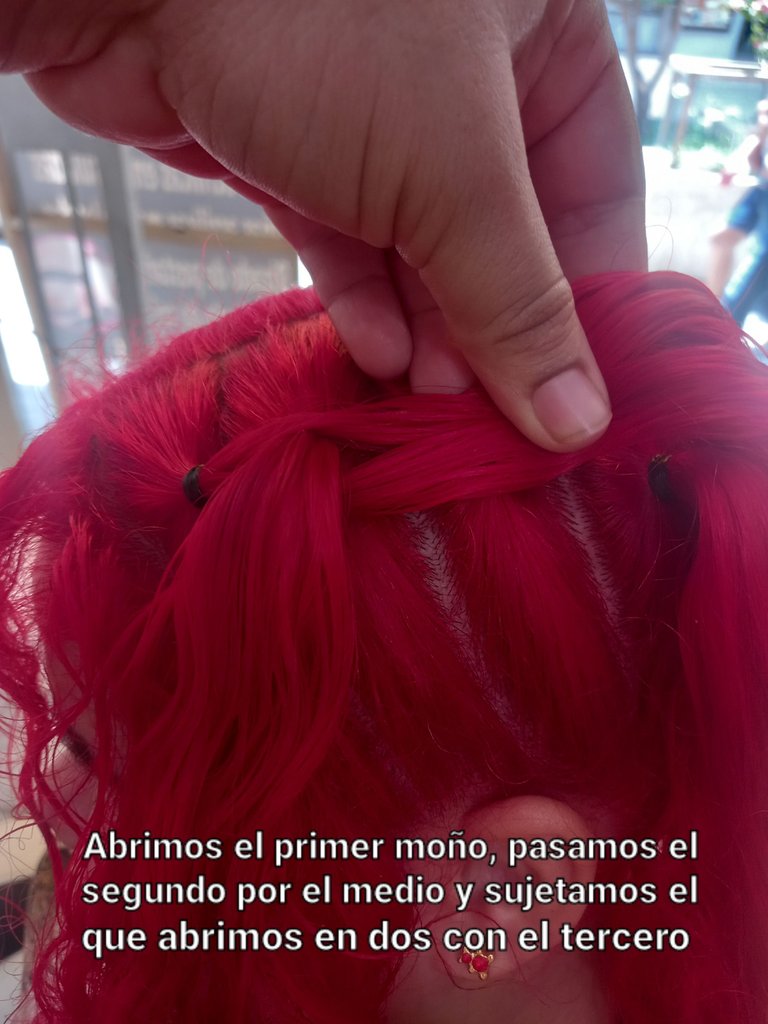
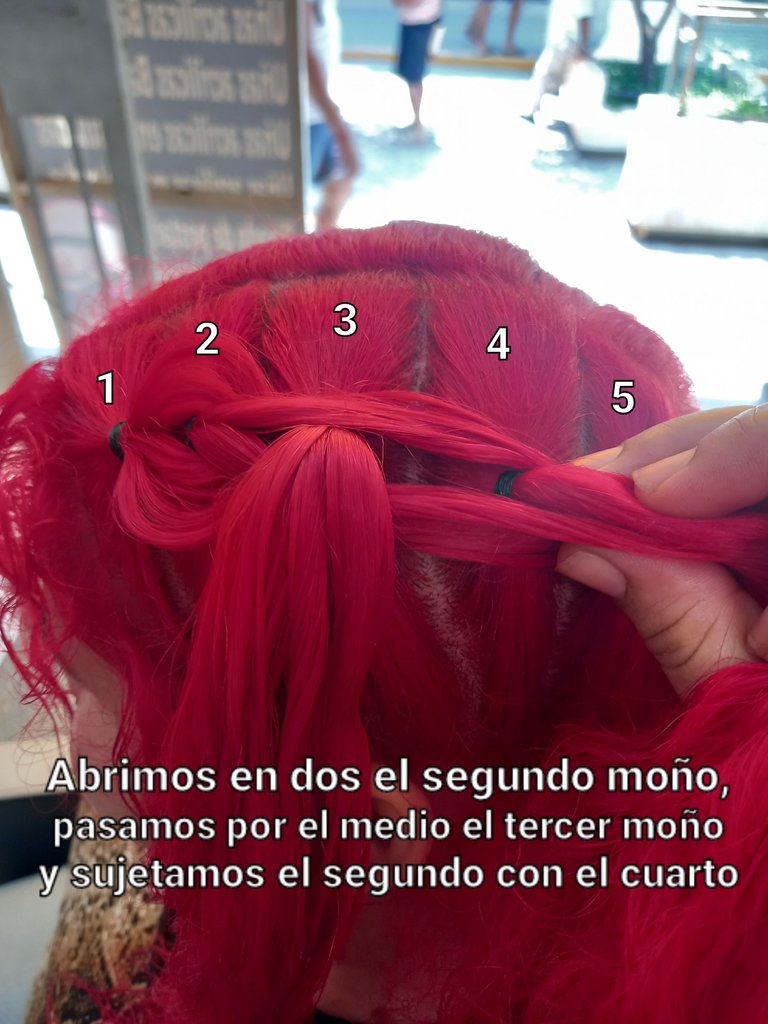
Luego, comenzaremos a realizar el tejido, para esto, tomaremos el primer moño y lo abrimos en dos, pasamos por el medio el moño siguiente y el que partimos en dos lo sujetamos con el tercer moño.
Then, we will begin to weave the fabric, for this, we will take the first bow and open it in two, we pass through the middle the next bow and the one we split in two we fasten it with the third bow.
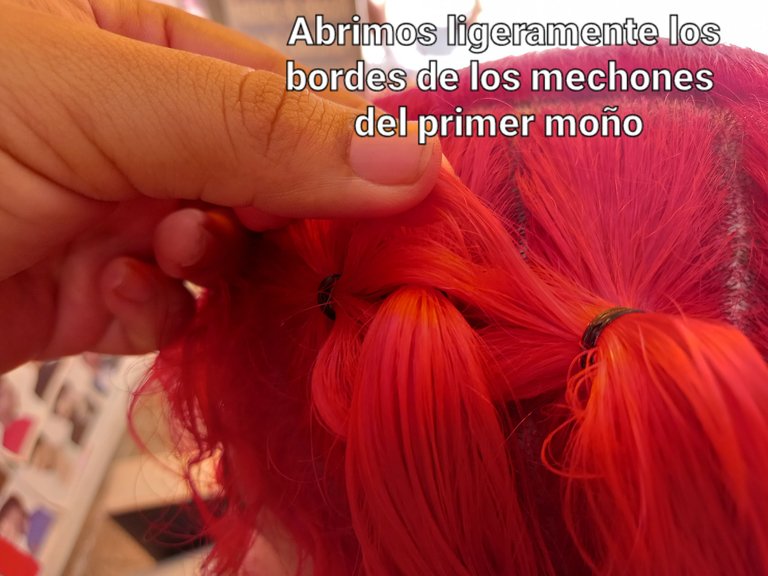
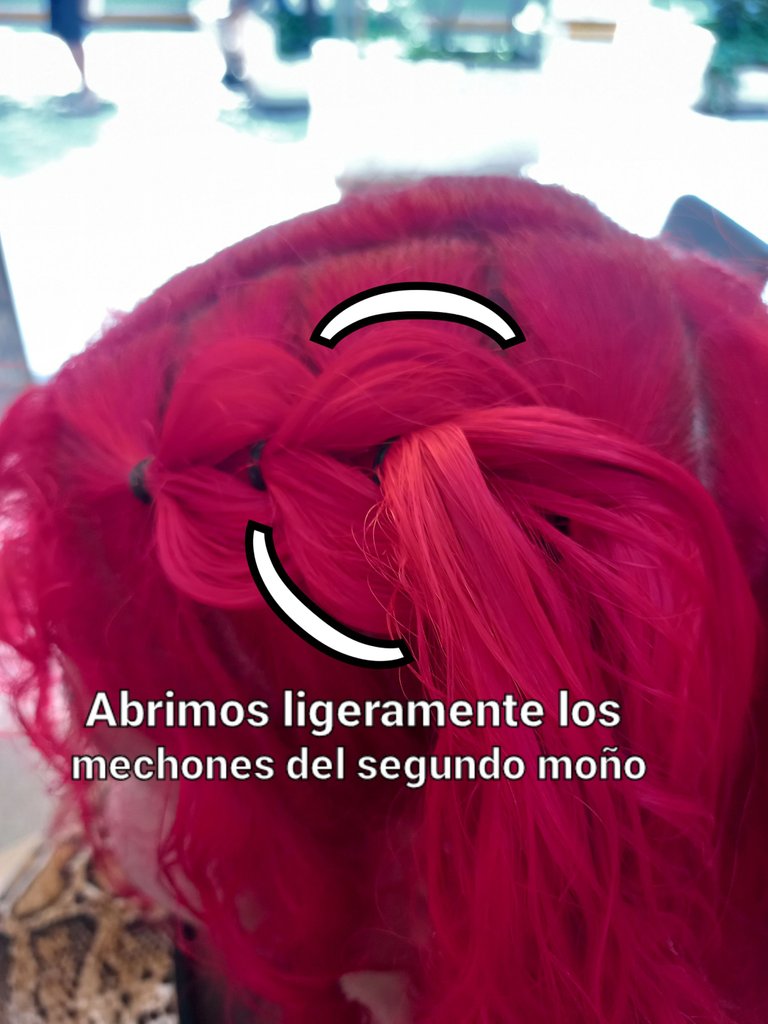
Después abrimos un poco los mechones, halandolos ligeramente por el borde.
Then we open the strands a little, pulling them slightly along the edge.
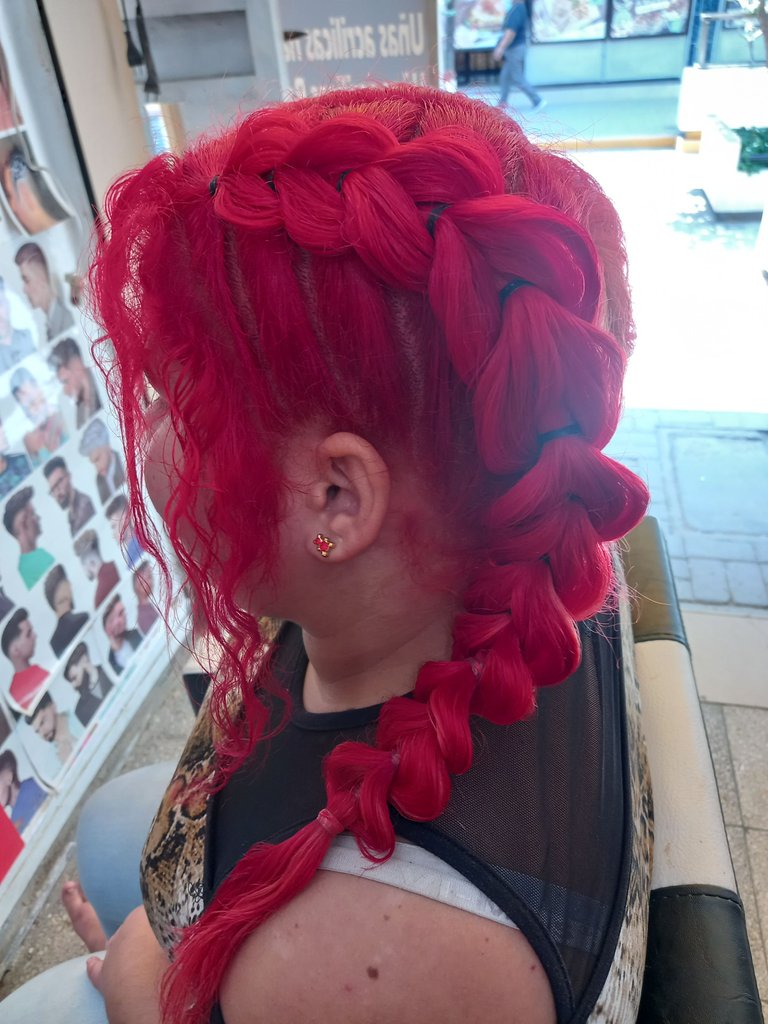
Posteriormente abriremos en dos el segundo moño, es decir el que quedó en el centro de las dos particiones que hicimos del primer moño y pasamos por el medio el tercer moño y lo sujeto con el cuarto moño y así iremos realizando con el resto.
Subsequently, we will open in two the second bun, that is to say the one that was in the center of the two partitions that we made of the first bun and we pass through the middle of the third bun and we will hold it with the fourth bun and we will do the same with the rest.
¡Veamos el resultado amigos!
¡Let's see the result folks!

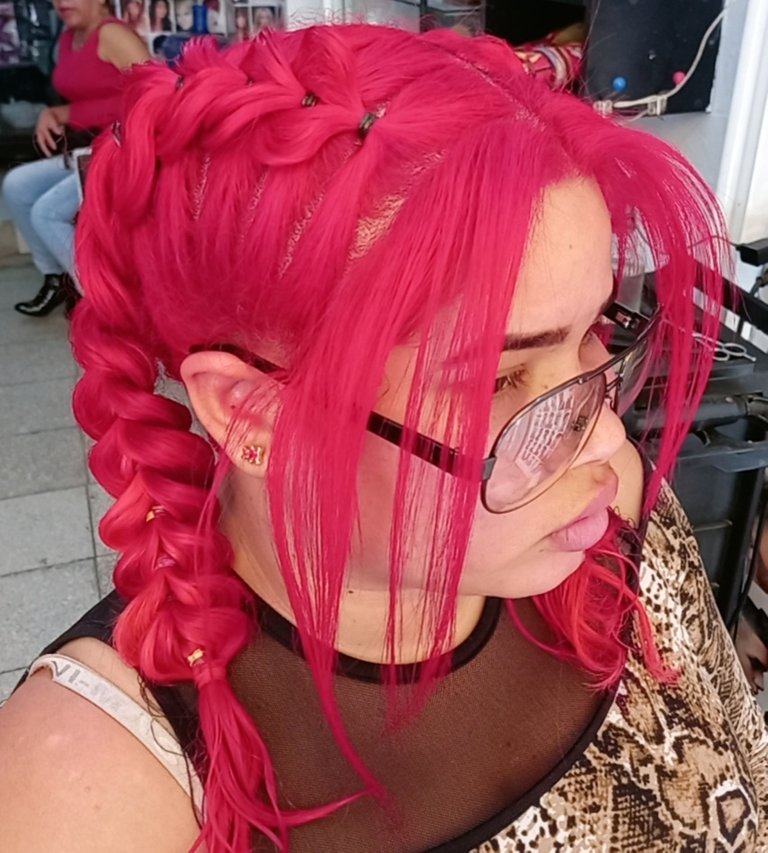
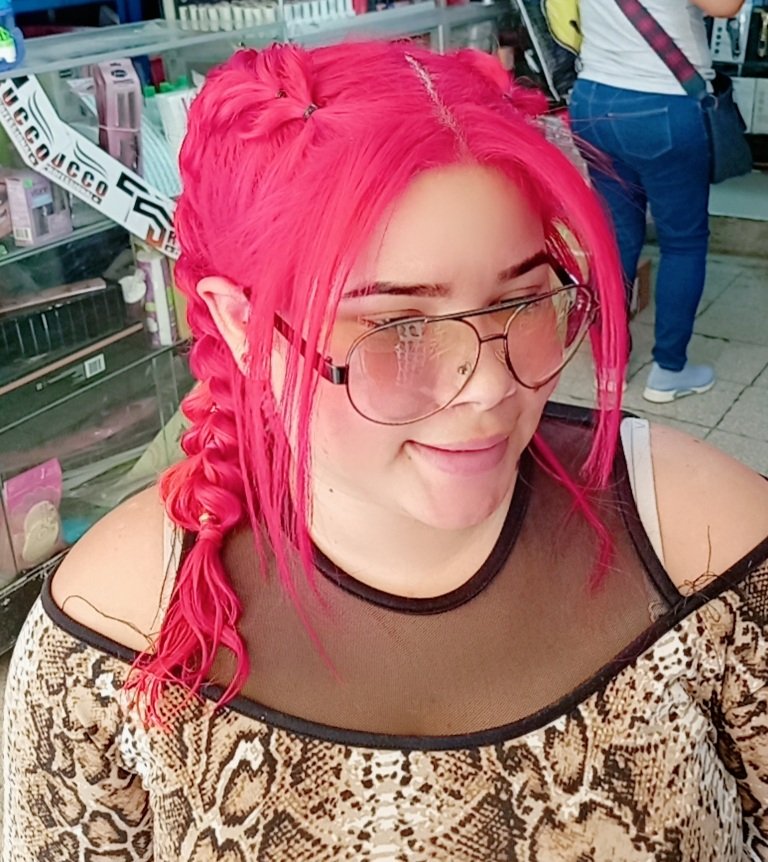
Y así, de esta manera queda este hermoso tejido con ligas; Espero que este tutorial haya sido de gran utilidad. Será hasta otra oportunidad. Saludos y muchas bendiciones amigos 🙏🏻🤗.
And so, this is how this beautiful garter stitch looks like; I hope this tutorial has been very useful. It will be until another opportunity. Greetings and many blessings friends 🙏🏻🤗.
Wow! It's really a unique kind of hairstyle. I like it 💞
Gracias por comentar @itsprachi, me alegra saber que éste peinado ha sido de tu agrado. Feliz día 😊
Un estilo unico. 🌟 Espero poder ver Esta tecnica en otros trabajos que nos quedan compartir. Gracias
Hola @divergente1 gracias mi linda por comentar, hay variedades de peinados que se pueden hacer aplicando ésta técnica y quedan muy hermosos. Saludos y bendiciones 🙏🏻 😊
Es una trenza hermosa y fácil de hacer. La técnica es excelente y se ve bastante uniforme, hermoso trabajo
Si amiga, es sumamente fácil y el resultado es hermoso. Gracias por comentar. Saludos 👍🏻😊
Es una trenza muy bonita y se ve muy fácil de hacer. Me encantó el color del cabello y los zarcillos de la chica 🤭. Gracias por compartir espero aprender a hacerla pronto 😊 Saludos.
Gracias amiga por comentar; anímate a hacerla y verás que es tan fácil de hacer como se observa en el tutorial. El colo de la chica es un rojo fantasía, sobre un fondo de aclaración #9. Saludos amiga 😊👍🏻
Your content has been voted as a part of Encouragement program. Keep up the good work!
Use Ecency daily to boost your growth on platform!
Support Ecency
Vote for new Proposal
Delegate HP and earn more
Estas son las trenzas perfectas el resultado es asombroso, me gustó tu tutorial, aunque te recomiendo usar la comunidad hair world dedicada a este arte.
Hola amiga @jennyzer, me alegro que te haya gustado éste tutorial y gracias amiga por la recomendación 😊👍🏻
Dear @kathelopez77,
May I ask you to review and support the Dev Marketing Proposal (https://peakd.com/me/proposals/232) we presented on Conference Day 1 at HiveFest?
The campaign aims to onboard new application developers to grow our ecosystem. If you missed the presentation, you can watch it on YouTube.
You cast your vote for the proposal on Peakd, Ecency, Hive.blog or using HiveSigner.
Thank you!