Drawing Flowers: Digital Botanical Illustration
Hello! My name is Hira Karmachela a.k.a BABE ODED, I'm a sharia-compliant artist based on Indonesia. In this post I will share my experience of drawing flowers using Clip Studio Paint. I used to work on illustrations that needed images of flowers and plants. Clip Studio Paint is the best software that I feel really helps my work.
About Botanical Illustration
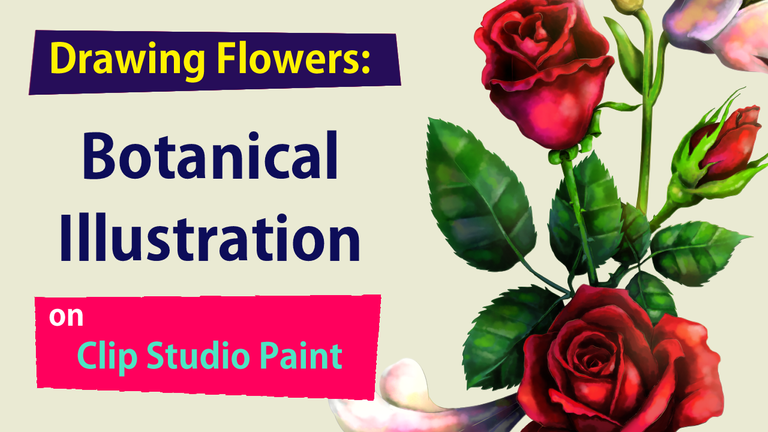
Specifically, in this tutorial, I will draw flowers as a botanical illustration. For your information, botanical illustration is art that depicts the shape, color, and detail of plant species (included flowers). The technique that is often used for botanical illustration is watercolor. They must be scientifically accurate. But, I will make it simpler and only intend to show the artistic side.
Sketch and Construction
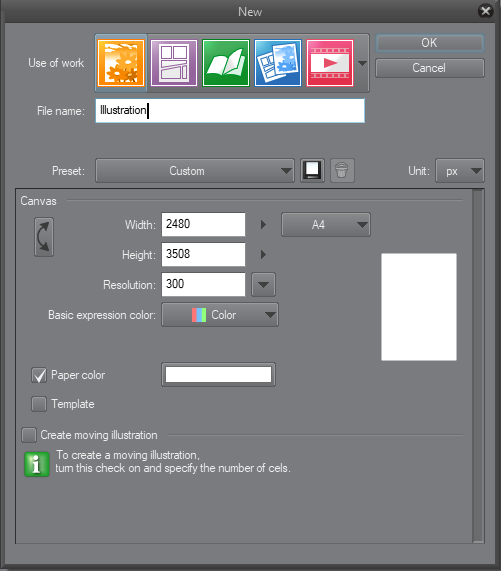
The first step is sketching and effective construction for drawing flowers. But, beforehand please open CSP and make a new file. I created a new file for illustration with A4 paper size and 300 dpi resolution.
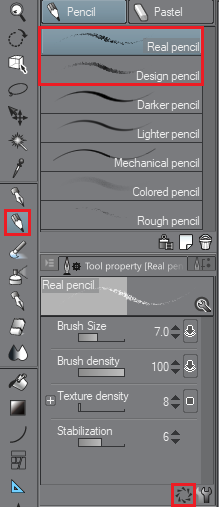
To sketch, I usually use the pencil tool. You can choose between "Real pencil" or "Design pencil"types. I usually use both because besides producing a texture that is very similar to the original pencil, it is also very easy to adjust its pressure on the canvas.
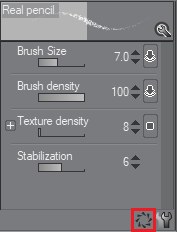
For the settings, I will revert to the default settings so that we use the same settings.

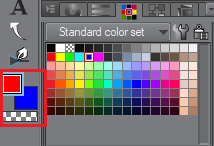
Tip: I usually use red and blue to sketch. This will be very helpful for the work in the next step.
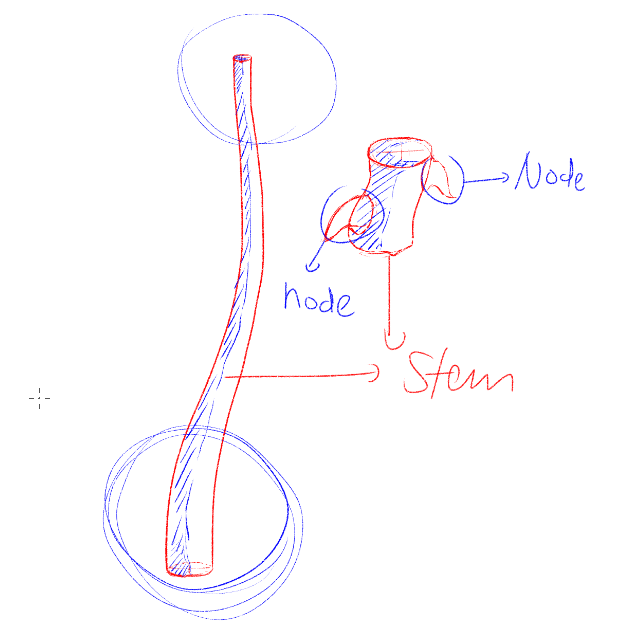
Now, we begin to scratch. I think the easiest thing we can draw from a flower is the stem. We just need to make natural lines, don't be too straight or overly curved, make it as natural as possible. Red for regular lines and blue for shading lines.
Generally a stem grows without or with branches. The base / bottom of the stem is usually wider in diameter than the tip / top. Stems can branch off and grow other stems to grow thorns, leaves, or flowers. The part that connects these branches to the stem is called a node.
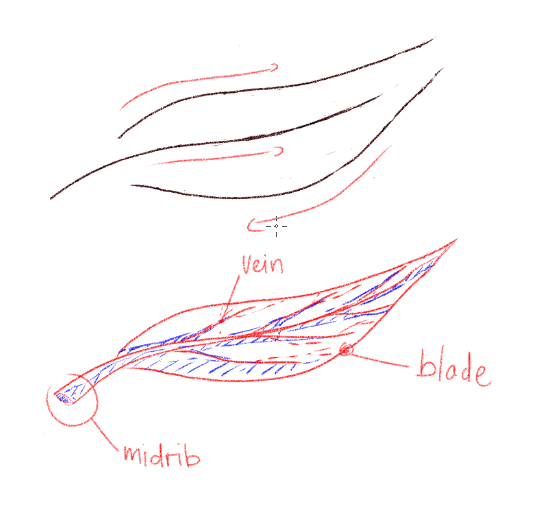
Now we sketch the leaf, there are various shapes of leaves. On this occasion I will only make the most common leaf shape. Simply put, we can make a leaf shape with two curved lines mirroring each other plus one curved line in the middle that divides it. For visual purposes, at least draw parts of leaves such as blade, midrib, and vein.
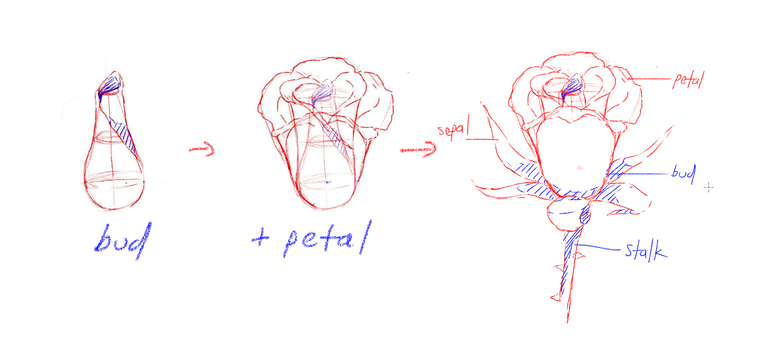
After the stem and leaf, it's time we draw sketches and flower construction. There are various types of flowers with different and unique shapes. In this tutorial I will only explain the basic principles of drawing flowers in general. Visually, at least the flower must consist of bud, petals, sepals, and stalk.
To draw a bud, I made a construction of a triangle or cone shape where the bottom has a larger diameter from the top / tip. Next, we cover the buds with petals. In this case, try to make natural lines and don't be afraid to make lines that are not measurable.
After the bud is coated with petals, then complete the flower with sepals which is a form of flower wrap before flower is blooming. Sepal looks like a leaf and will be directly connected to the stalk.
Vector Layer for Line Art
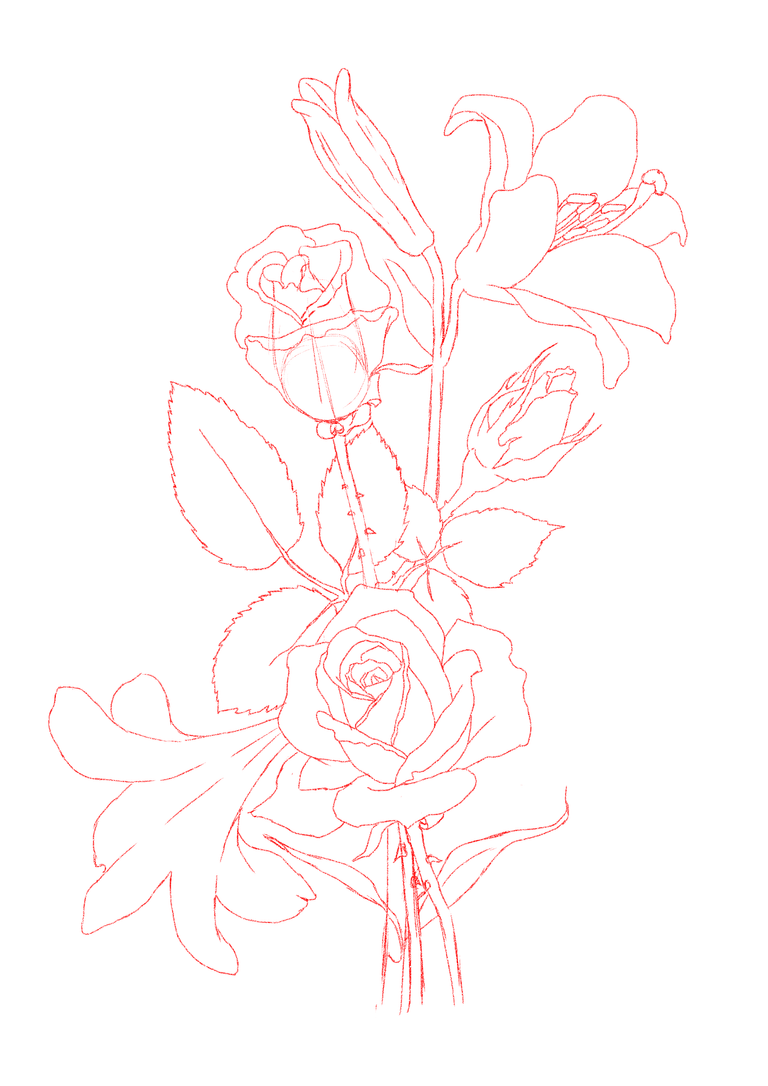
We have finished the sketch, and I have prepared a sketch for this botanical illustration. In essence, please sketch a flower that looks natural and I recommend looking at references from photographs or from real objects in nature.
The next step is to make a line art that is making a solid line using the pen tool by tracing selected lines in the sketch that has been made. Previously, I will first explain the selected features that I use in the line art step.
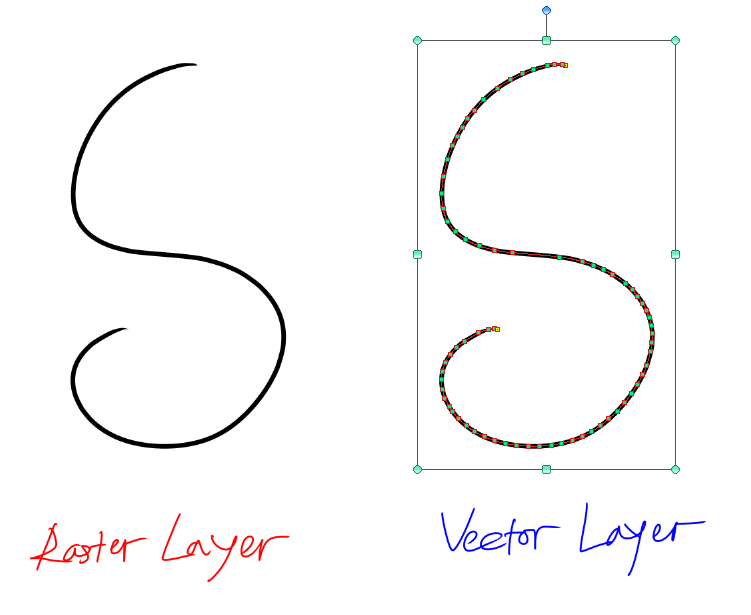
The feature I like the most in CSP is the Vector Layer, have you tried it? Vector Layer is working with mathematical algorithm instead of pixels. When we draw a line in the vector layer, it will draw as pixels, the same as the contents of the Raster Layer. So, our visuals will not see the difference.
But on the vector layer, the lines drawn will be formed by vector curves. Vector Layer will create points/nodes that make up the curve and then will draw pixels above its. Thus, we can adjust the points scale, move it and edit it without changing resolution of the image, because the curve will be recalculated and redrawn every time we make an edit.
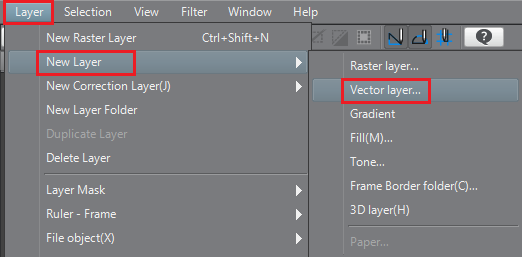
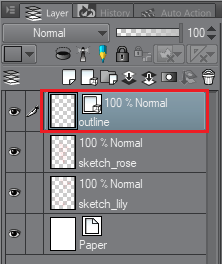
To create a Vector Layer please go to menu Layer > New Layer> Vector Layer. A dialog box will appear to fill the layer name. Usually I name it "outline" then click OK and then a new layer will appear in the Layers Panel with a special mark.

One more thing that we need to prepare to make line art is the pen tool. I use the type "G-pen" with regard to the line character and the resulting texture. Please click the revert button to restore the settings to default.
Tip: I activate the "Vector magnet" feature which conditions the nodes on the curve to snap when close together. This makes the line look smoother even if it isn't made with a single pull.
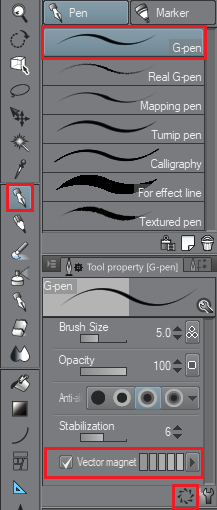
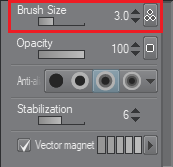
In the "Brush Size" section, I set the size to "3.0" so that the resulting lines are not too thick or too thin because in the next step we will apply watercolor technique.
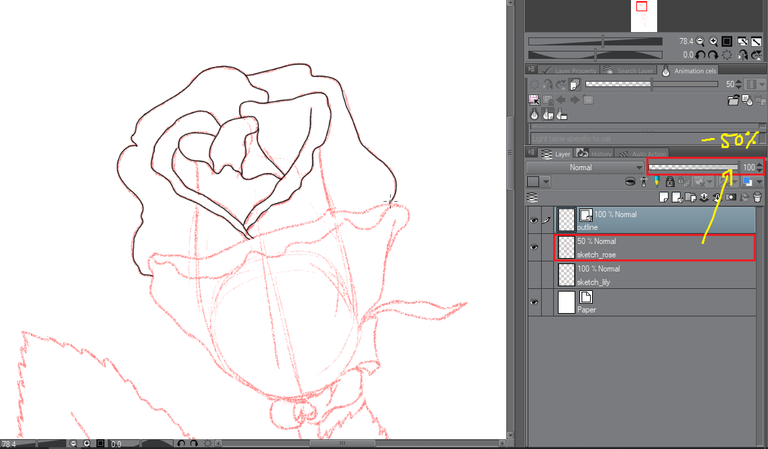
Now, please trace the selected lines in the sketch with the solid black lines on the "outline" layer. You can set the sketch layer's opacity to 50% to reduce its visibility so it is convenient to trace.
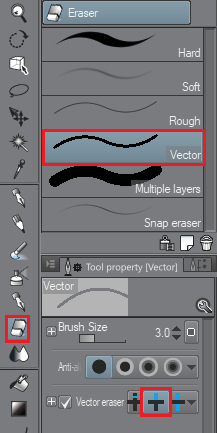
Don't hesitate when tracing, even when there are lines that intersect because we use Vector Layer it will be very easy to edit. If you have intersecting lines then it can be easily removed using the eraser tool with the type "Vector" and please activate the "Vector eraser" feature and select the "Erase up to intersection" setting.
Base Color
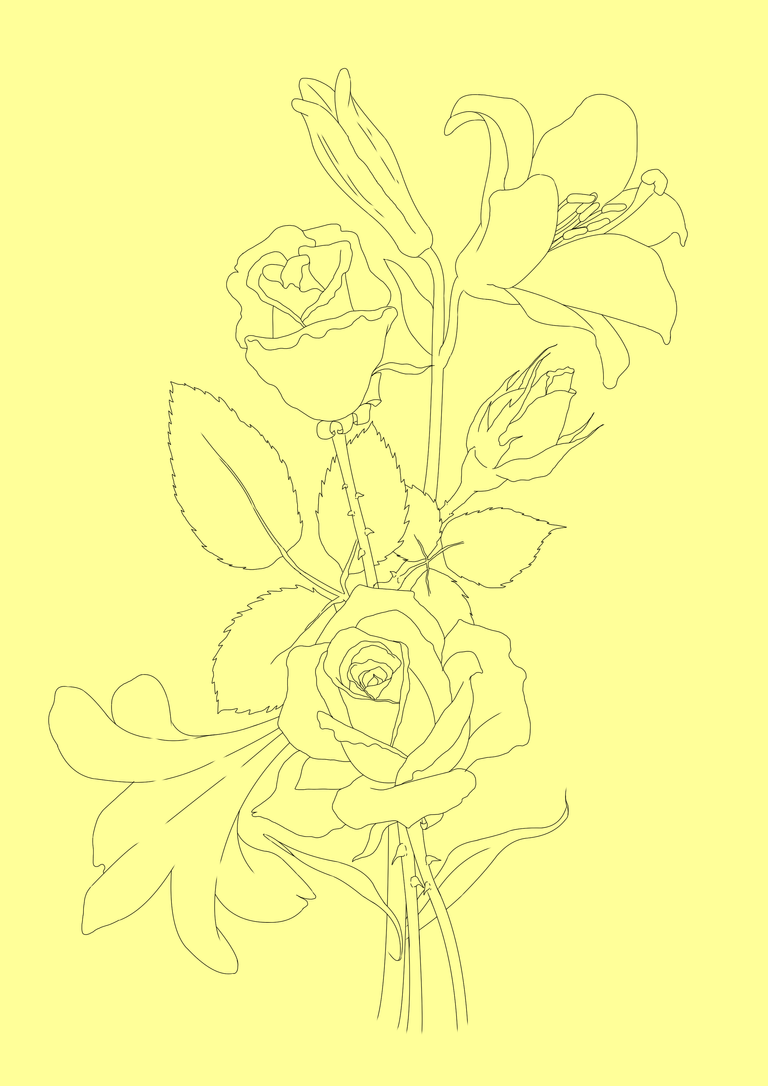
After all the sketches have been traced with solid black lines, the next step is to color the fields with base color. I deliberately changed the color of the paper to make it look contrasting with the coloring that we will apply to flowers.
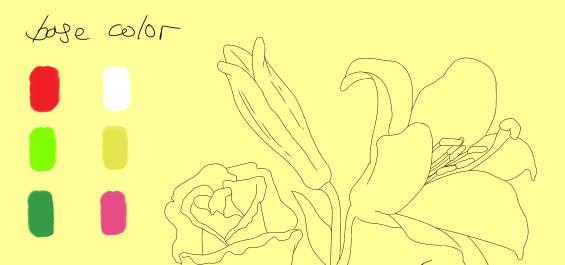
We must specify the colors that will be used as the basic colors for some parts of the image. To simplify the process, I created a layer to store the colors that I will use as the base color.
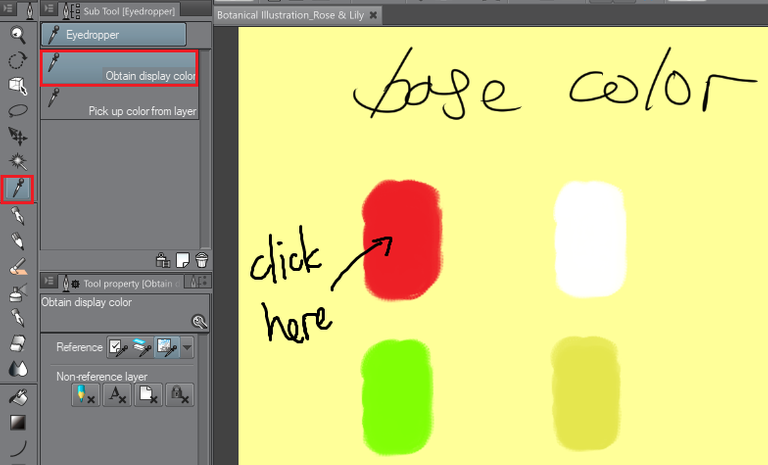
To choose the color of the palette layer that we created, we can use the eyedropper tool then select (click) on the color we need.
Next, we will color block in areas of the flower image using the fill tool with the type "Refer other layers". This setting conditions the lines of the other layers that make up the fields to be counted so that no color will spread out freely.
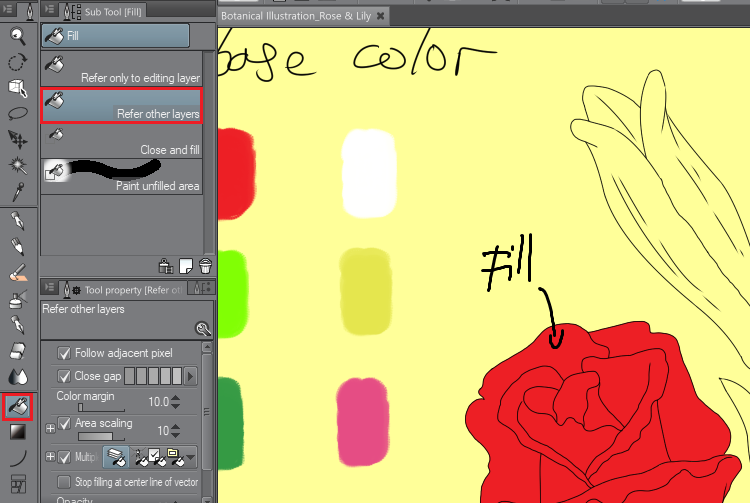
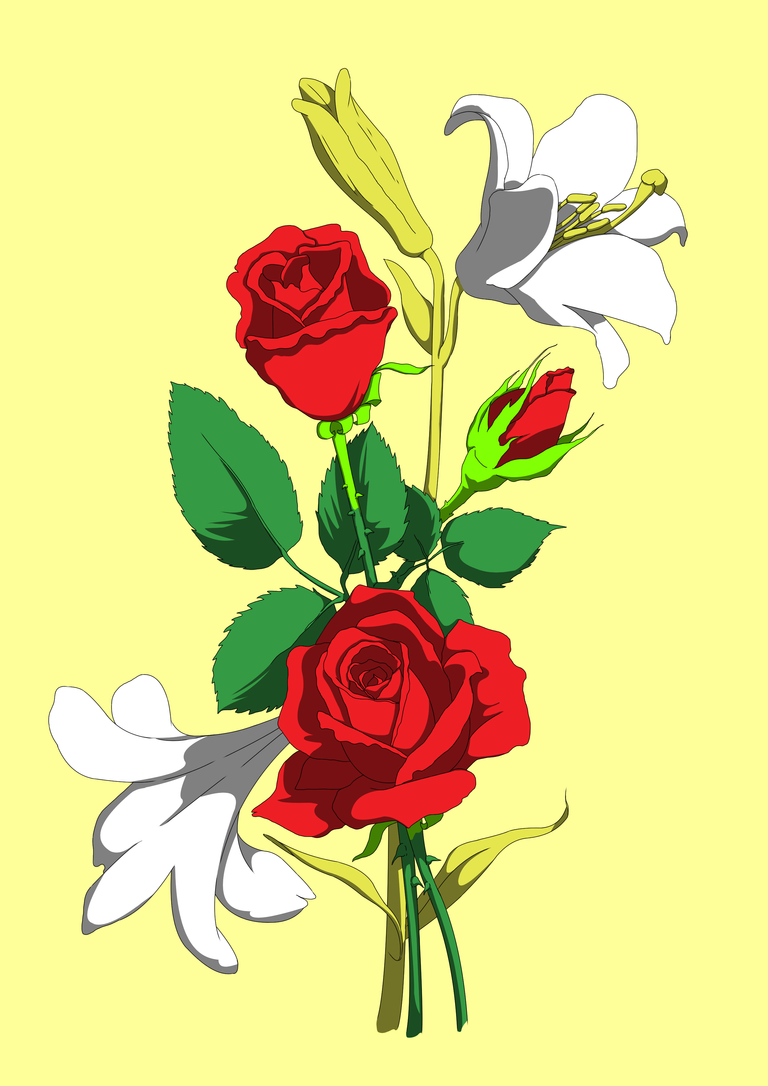
Fill in all the surface of the area that must be colored and make sure no small holes are missed because this will affect the coloring in the next step. Below is the result of color blocking using base color.
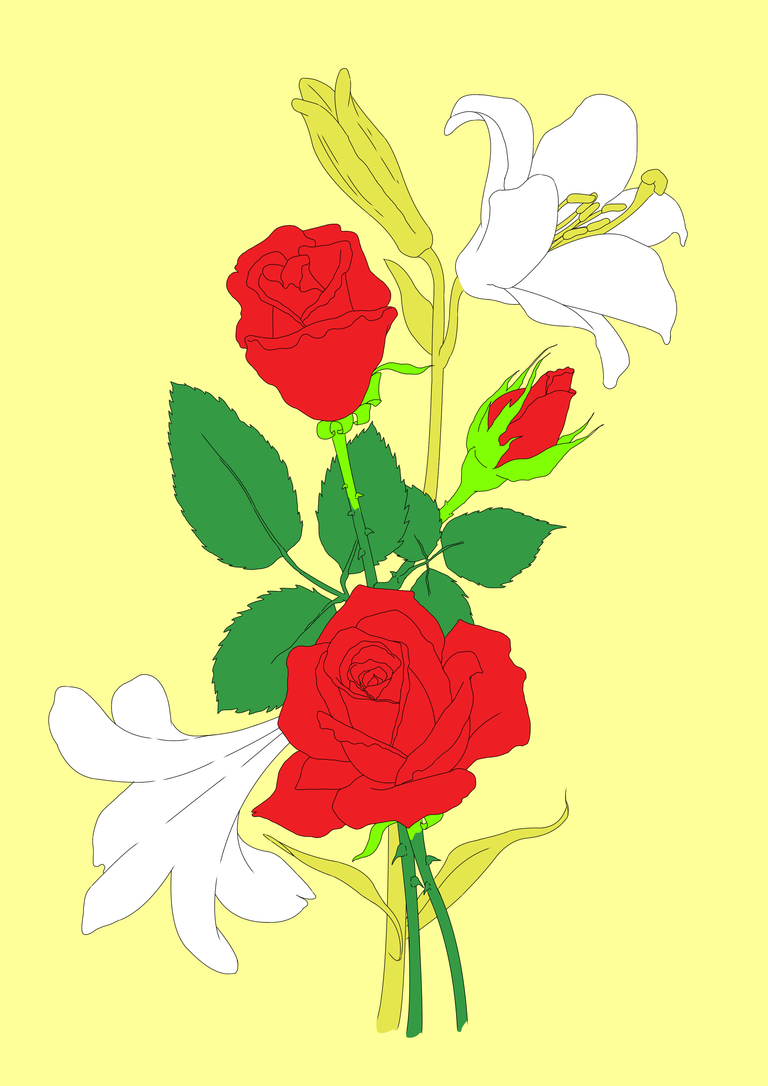
Shade Color
After all areas of the object image are completely blocked with base color, the next step is to apply shade color. Simply put, shade color is the color of the shadows that afflict the object. Shade color is obtained from the blending of base color and black.
To create a shade color, prepare a new layer named "shade" above the "base" layer. Then make the "shade" layer a clipping mask by going to the menu Layer > Layer Settings > Clip at Layer Below. Then change the opacity of the "shade" layer to 50%.
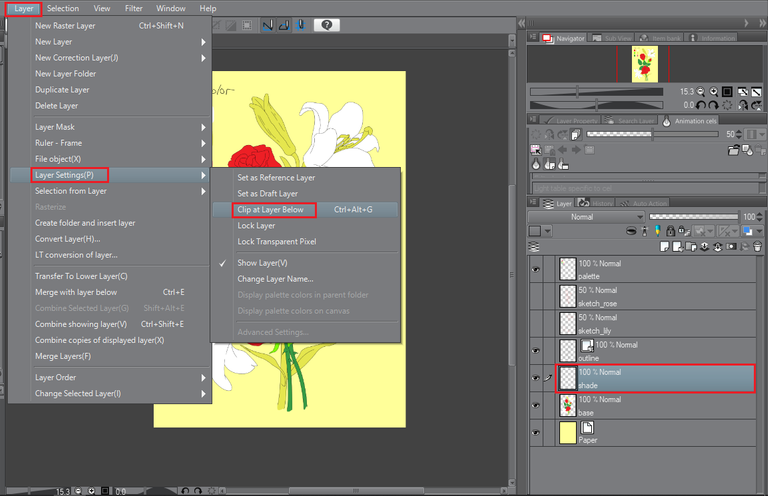
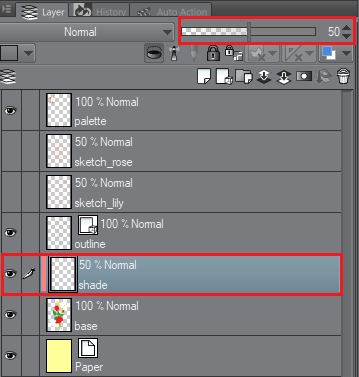
How do you determine the location of the shadows? We must determine where the light comes from and touches the object. I decided that the light came from the top right so that the shadows would be on the left side of the object. The shadows will expand further in the area that is covered by other parts of the object.
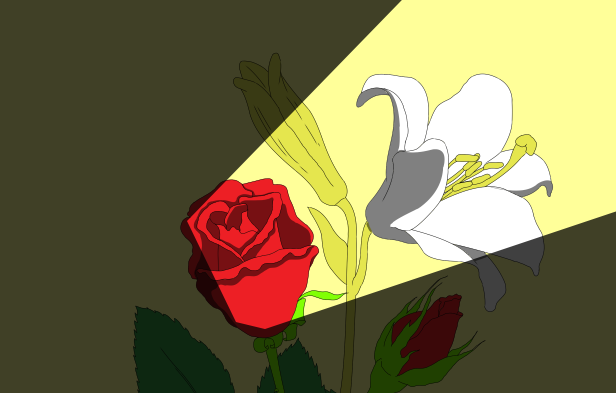
Below this is the result of applying the shadows to the object.
Blend Color
The next step is to blend the existing colors plus tone colors which are the base color, some are added black (shade) and some are added white (tint). To apply blend color, I use a brush tool with the type "Running color edge watercolor". This type of brush will sweep the edges of the field of color with water so that the colors will blend with one another.
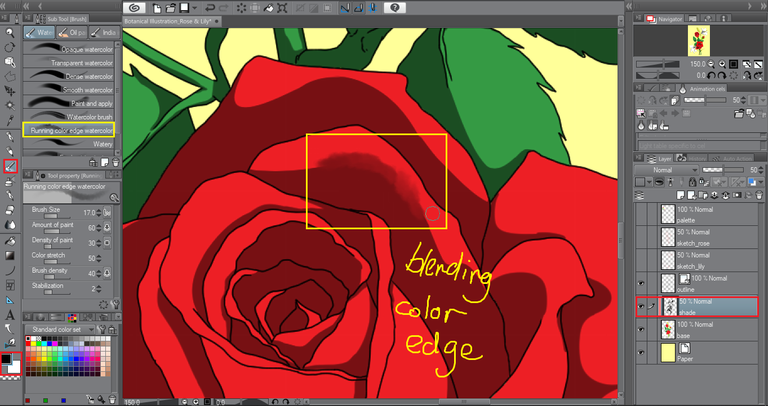
Apply the brushes on the "shade" layer to sweep the shade colors that have been made so that the colors blend in with the colors on the "base" layer. You can use other colors and other types of brushes for this blend color technique.
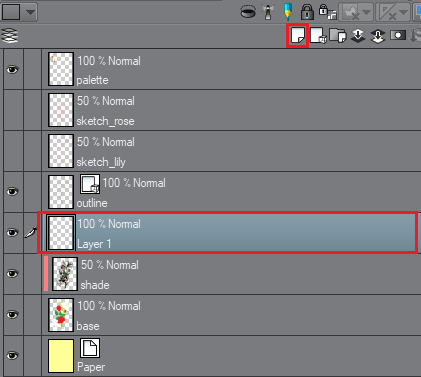
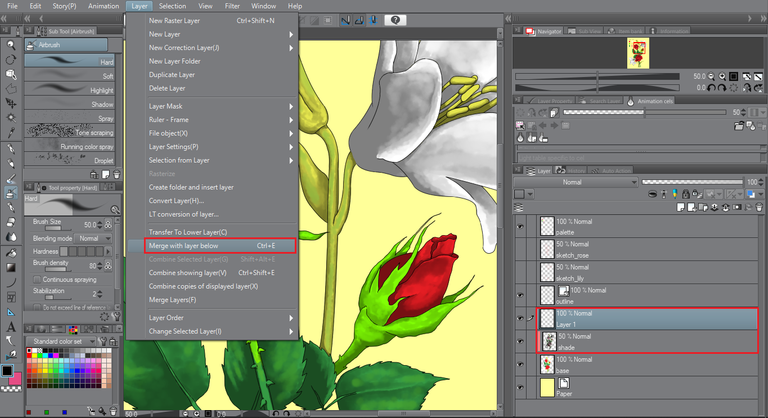
Remember, the "shade" layer has an opacity of 50% so that the thickest color will only be worth half. This means, you won't see black on the canvas if the opacity is only 50%. Therefore, to save the existing shade color without changing the opacity that has been set then I used to do this.
Tip: Make a new layer above the "shade" layer. Then select the new layer and go to menu Layer > Merge with layer below. Then the new layer will join the "shade" layer with 100% opacity.
Coloring Lines
So far, the images have not looked realistic. This is due to the presence of solid colored line art. Before continuing to apply blend color, we can change the color of the lines with the colors around them. So as if there is no line on the object.
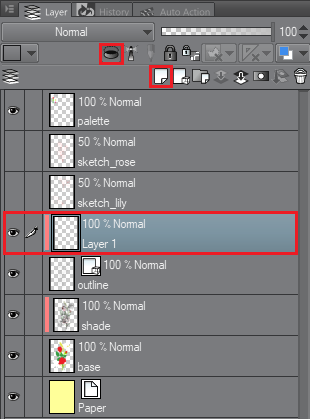
The steps, create a new layer above the "outline" layer then make it a clipping mask. Name the new layer as "hue"layer. Make sure the layer is selected then use the brush tool to color the lines on the object with the appropriate surrounding color.
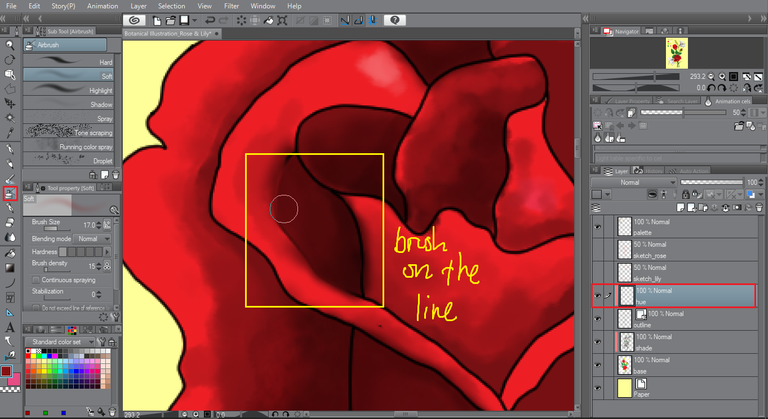
Continue applying blend colors to the object while blurring the presence of lines.
Finishing Touch
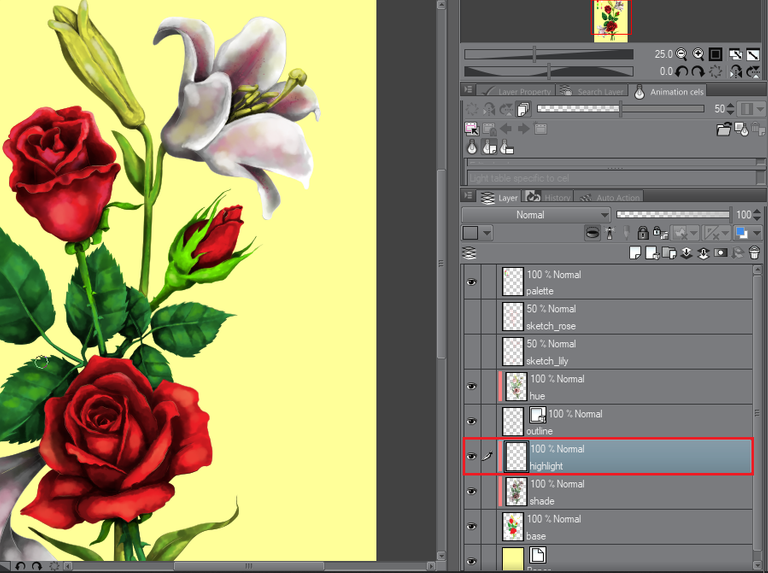
The closing step is to give a touch of light reflection on the object and apply some adjustments such as brightness and color contrast. You can create a new layer with the name "highlight". Then make the new layer a clipping mask to apply a bright white color to some parts of the object. After that, images can be saved and exported to the required image formats.
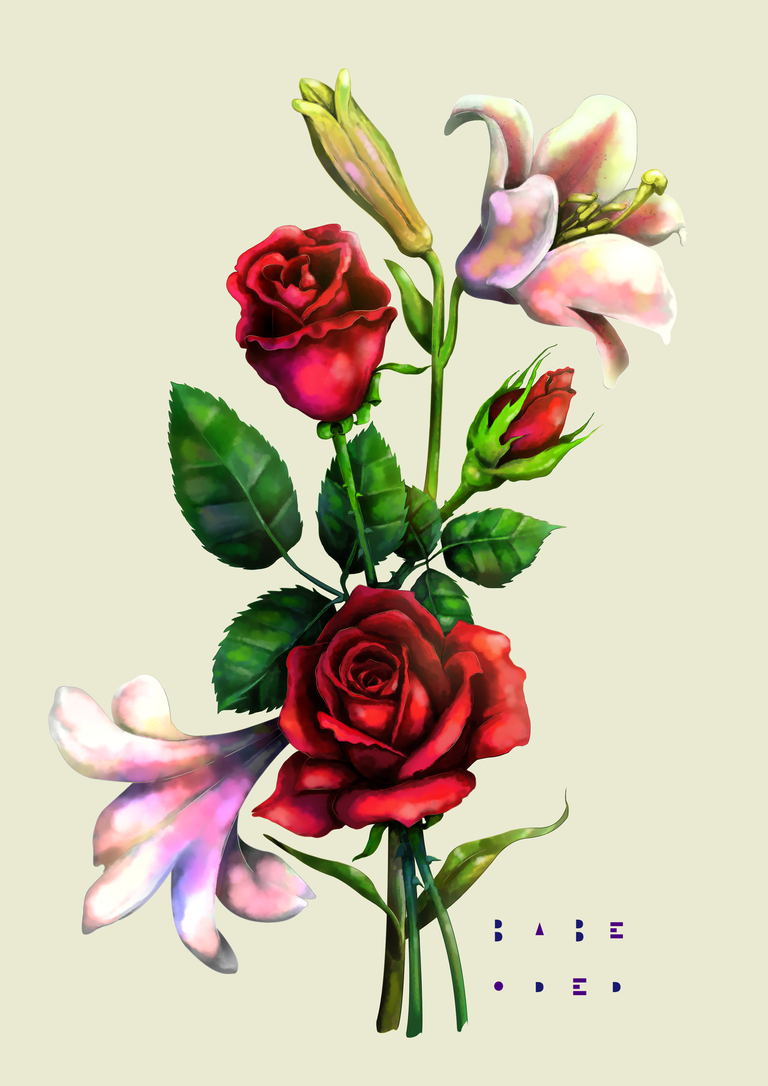
Thank you for visiting this post. Look forward to my next works.
Visit My Gallery:
Twitter | Instagram | H=N | Opensea | NFT Showroom | Holaplex

https://twitter.com/babeoded/status/1548287403692998656
The rewards earned on this comment will go directly to the people( @karmachela ) sharing the post on Twitter as long as they are registered with @poshtoken. Sign up at https://hiveposh.com.