Tutorial:Cintillo sombrero de payasita | Tutorial: Clown hat headband
Hola buenas noche tengan todos mis hermosos amigos lectores , espero que hayan pasado un agradable fin de semana , hoy les quiero compartir un precioso cintillo que realice de sombrero de payasita , ideal para fiestas de cumpleaños ,actividades recreativas o tardes casuales ,a continuación les mostraré cada paso que realice
Hello good evening to all my beautiful reader friends, I hope you have had a nice weekend, today I want to share a beautiful headband that I made a clown hat, ideal for birthday parties, recreational activities or casual evenings, then I will show you each step I made.
Materiales que utilice:
-Foamis
-Cintillo
-Tijera
-Piedras plástica
-Silicon
Materials I used:
-Foamis
-Headband
-Scissors
-Plastic stones
-Silicon

A continuación los pasos a seguir:
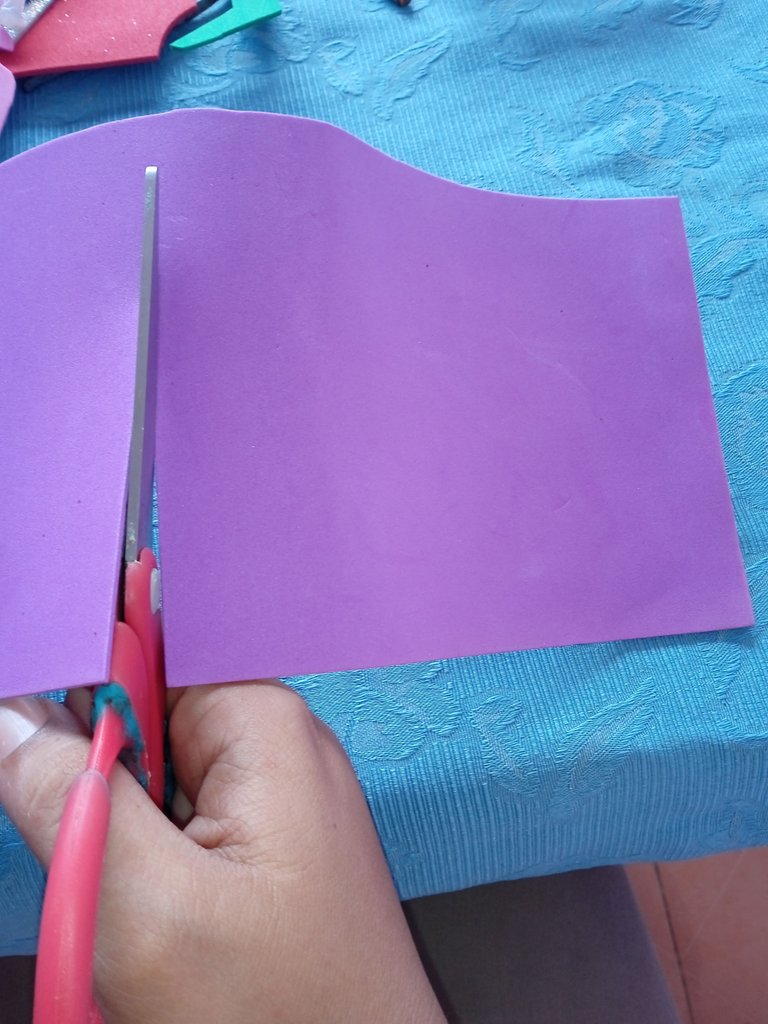
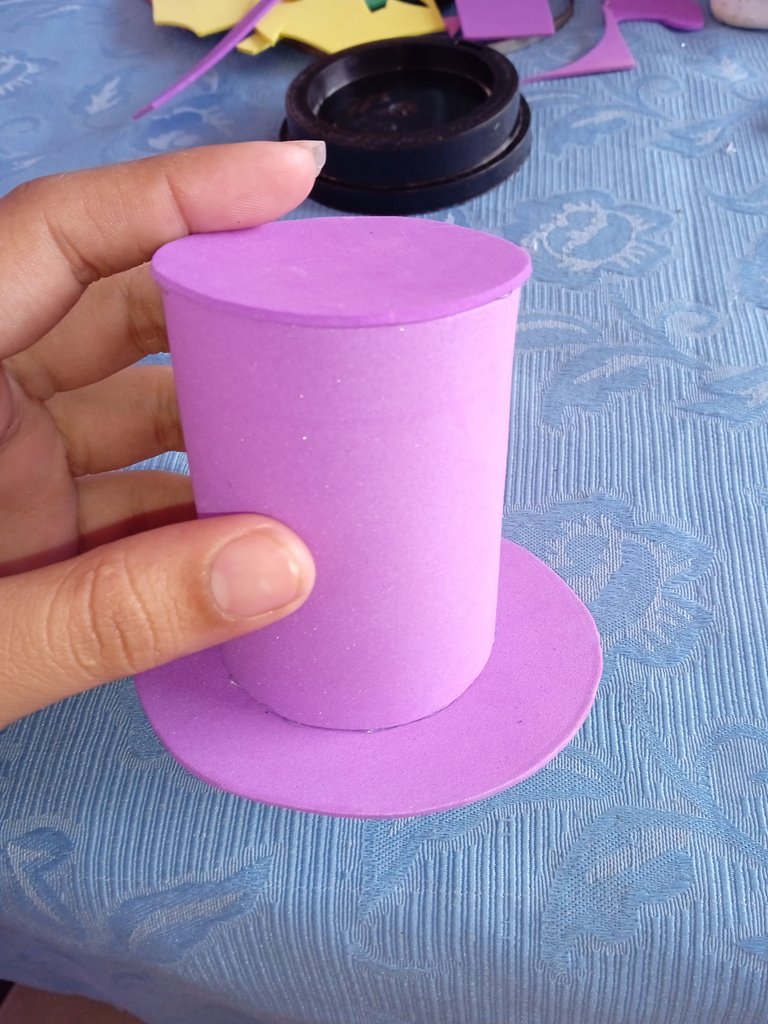
Para iniciar con nuestro bello chintillo ,vamos a comenzar con la decoración o temática ,Iniciaremos recortando un cuadro de 10 centímetros de altura y 18 centímetros de ancho del color de nuestra preferencia ,en esta ocasión utilice un morado lila
Here are the steps to follow:
To start with our beautiful chintillo, we will begin with the decoration or theme, we will start by cutting out a square of 10 centimeters high and 18 centimeters wide of the color of our preference, this time we will use a purple lilac.
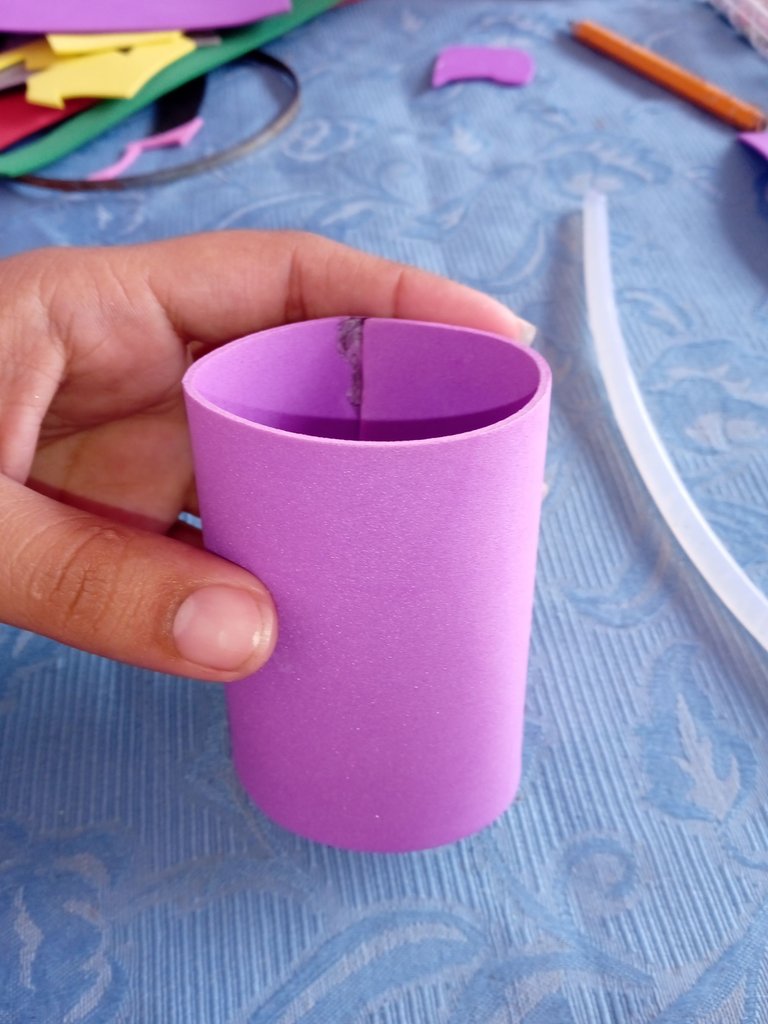
Luego Continuaremos tomando el cuadro de foamis que recortamos ,añadiremos silicón por todo el borde y pegaremos borde con borde hasta formar una figura parecida a la de un cilindro ,ya que vamos a realizar un mini sombrero de payasita la cual es la temática de hoy
Then we will continue taking the foamis square that we cut out, add silicone all around the edge and glue edge to edge to form a figure similar to that of a cylinder, as we are going to make a mini clown hat which is the theme of today.
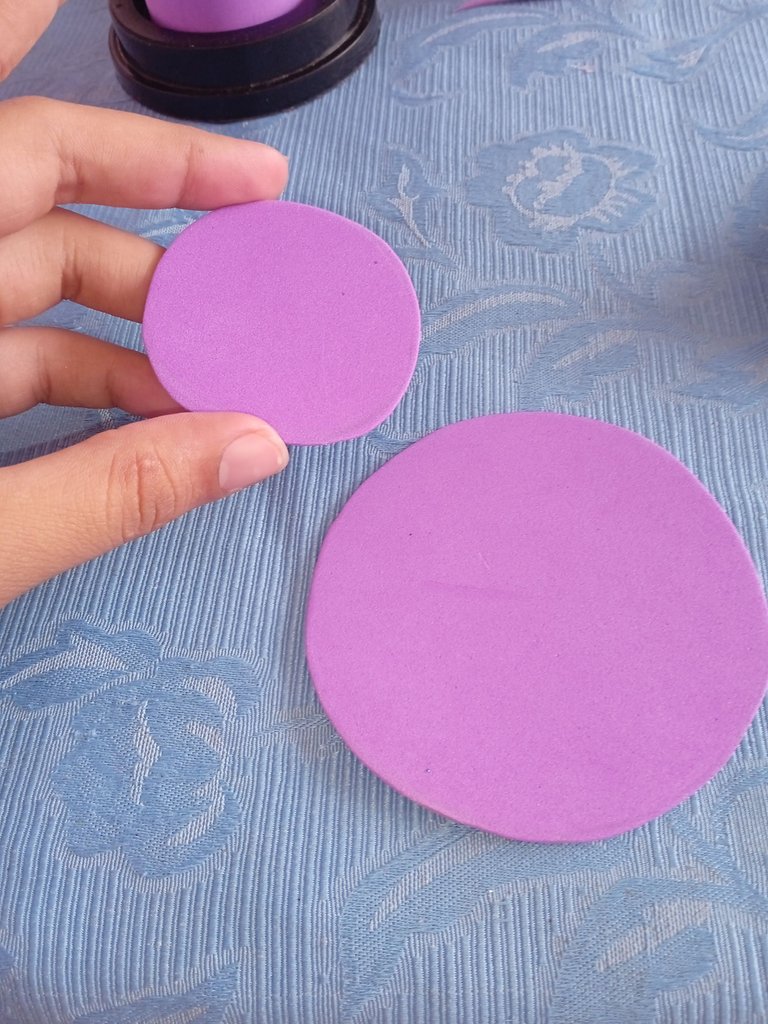
Una vez que tengamos listo el cilindro vamos a continuar realizando dos circulos ,uno grande para la base de el sombrero y otro pequeño que irá en la parte de arriba ,para realizar ambos círculos debemos tener un objeto de base redonda para apoyarnos y quede bien redondo
Once we have the cylinder ready we will continue making two circles, a large one for the base of the hat and a small one that will go on top, to make both circles we must have a round base target to support us and is well rounded.

Luego continúe tomando nuestra tijera y recortando ambos círculos que marcamos en el paso anterior
Then continue taking our scissors and cutting out both circles that we marked in the previous step.
Seguidamente tomé el circulo grande y lo pegue en la parte de abajo de el cilindro ,mientras que el circulo pequeño lo pegue en la parte de arriba ,terminando de esta manera nuestro mini sombrero
Next I took the big circle and glued it on the bottom of the cylinder, while the small circle I glued it on the top, finishing in this way our mini hat.
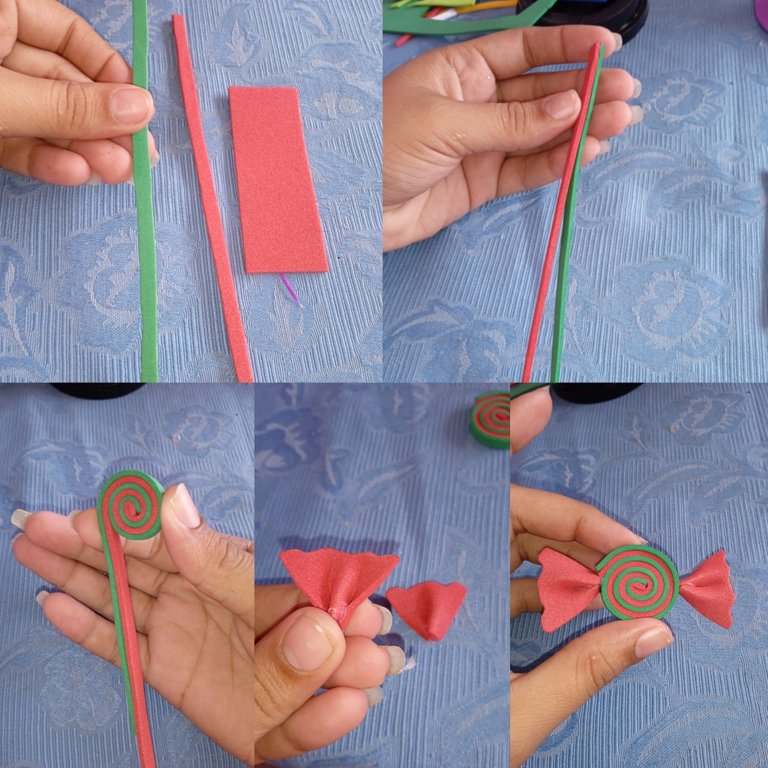
Luego comenzaremos con la decoración de el mini sombrero ,por ser de payasita utilice varios colores y sobre todo me inspire en dulces ya que son simpáticas y alegres ,inicie realizando una chupeta ,recorte dos tiras de 9 centimetros ,pegue ambas tiras punta con punta ,luego continúe enrollando hasta formar un círculo colorido ,una vez lista tomé un palito de chupeta lo corte por la mitad y lo pegue al círculo colorido formando así una chupeta
Then we will begin with the decoration of the mini hat, because it is a clown I used several colors and above all I was inspired by candy because they are nice and cheerful, I started making a lollipop, cut two strips of 9 centimeters, glue both strips tip to tip, then continue rolling to form a colorful circle, once ready I took a lollipop stick cut it in half and glued it to the colorful circle thus forming a lollipop.

Continúe realizando un caramelo de dos colores ,para ello recorte dos tiras de 10 centímetros y un cuadro de 8x4 y lo dividi en dos cuadros de 4x4 centímetros ,luego continuaremos pegando al igual que como iniciamos con la chupeta ,punta con punta ,seguidamente enrollamos hasta formar un círculo donde se aprecien ambos colores ,tomamos los cuadros y lo pegamos dando una forma parecida a un abanico y pegamos a los lados de el círculo de colores formando así un caramelo que aún está en bolsa
Continue making a candy of two colors, for this cut two strips of 10 centimeters and a square of 8x8 and divide it into two squares of 4x4 centimeters, then continue gluing the same as we started with the lollipop, tip with tip, then roll up to form a circle where both colors are appreciated, take the squares and glue it giving a shape similar to a fan and glue to the sides of the circle of colors thus forming a candy that is still in the bag.
Luego que tengamos listas las piezas para decorar vamos a continuar pegando la chupeta a una esquina de el sombrero ,en todo el centro pegue un pequeño lazo
After we have the pieces ready to decorate we will continue gluing the lollipop to one corner of the hat, in the center glue a small ribbon.
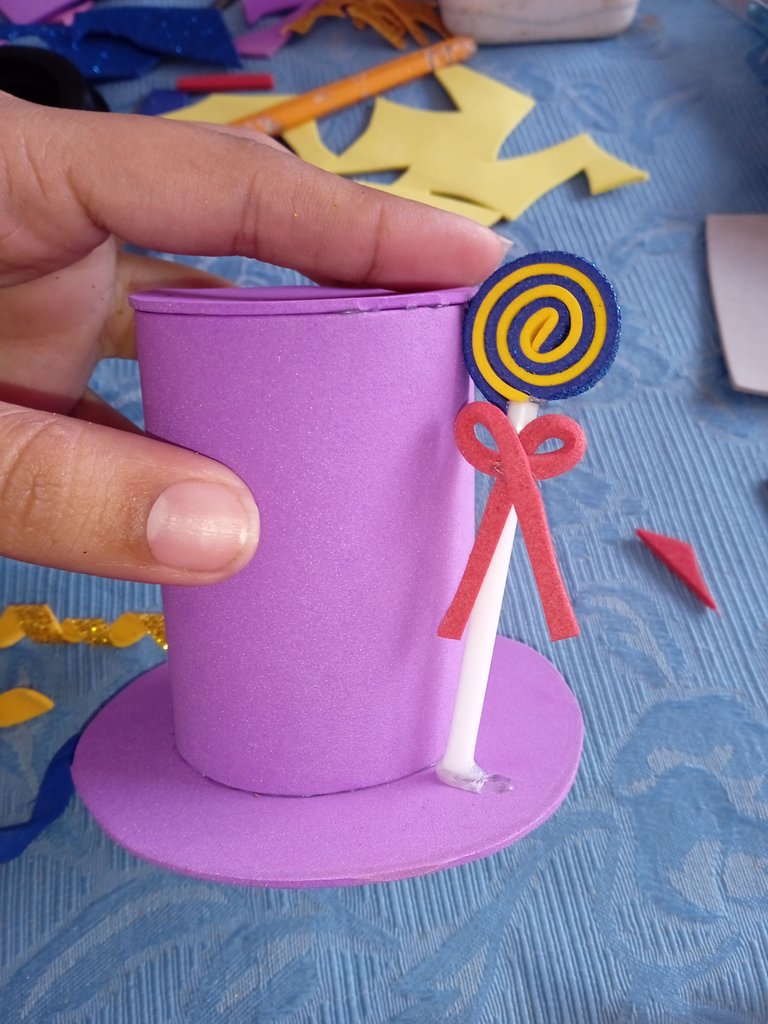
Seguidamente continúe tomando el caramelo y lo pegue en una esquina en la parte de arriba de el sombrero en el lado contrario de la chupeta ,luego al lado de la chupeta pegue tres piedras plásticas y q los lados de ellas unas tiras de foamis color azul ,estás tiras las enrolle con el apoyo de un lápiz
Then continue taking the candy and glue it in a corner at the top of the hat on the opposite side of the lollipop, then next to the lollipop glue three plastic stones and on the sides of them some strips of blue foamis, these strips are rolled with the support of a pencil.
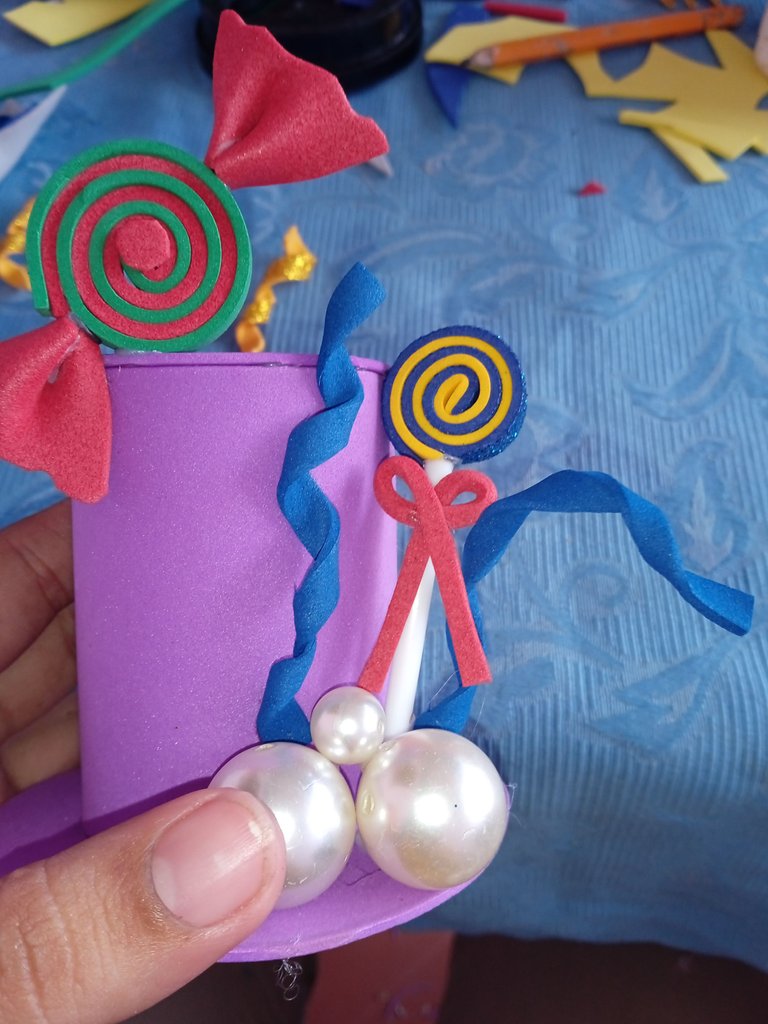
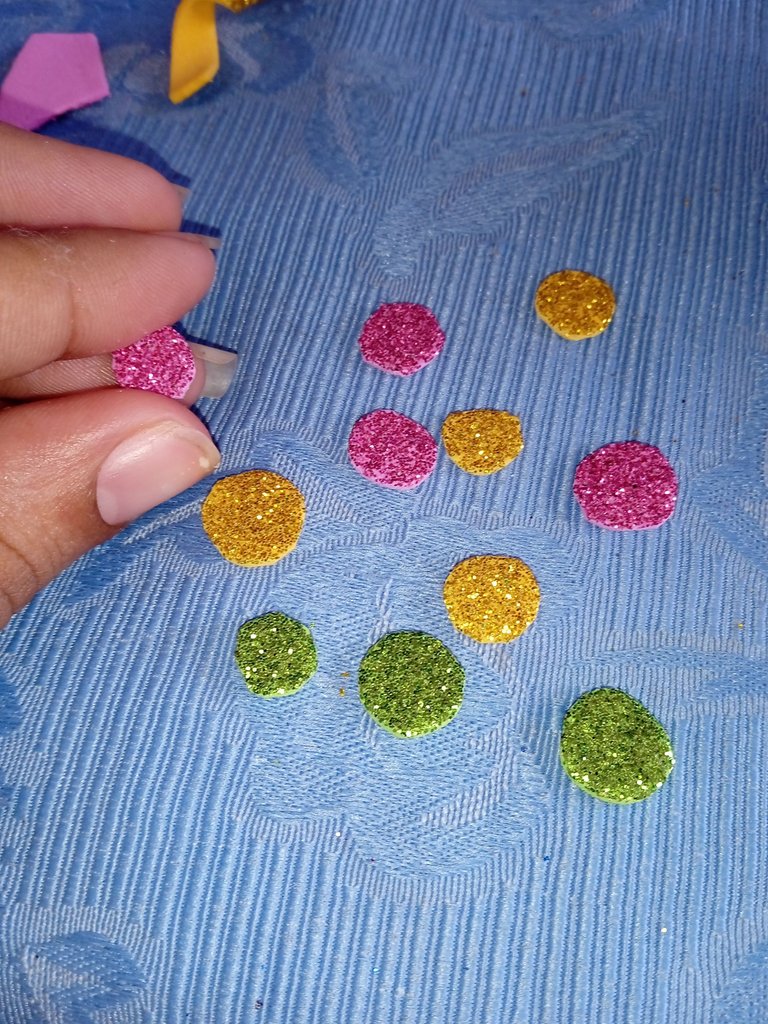
Seguidamente continúe recortando varios círculos de foamis escarchados y continúe pegando con colores diferentes al lado donde se encuentra ubicado el caramelo
Then continue cutting out several circles of frosted foamis and continue gluing them with different colors on the side where the candy is located.
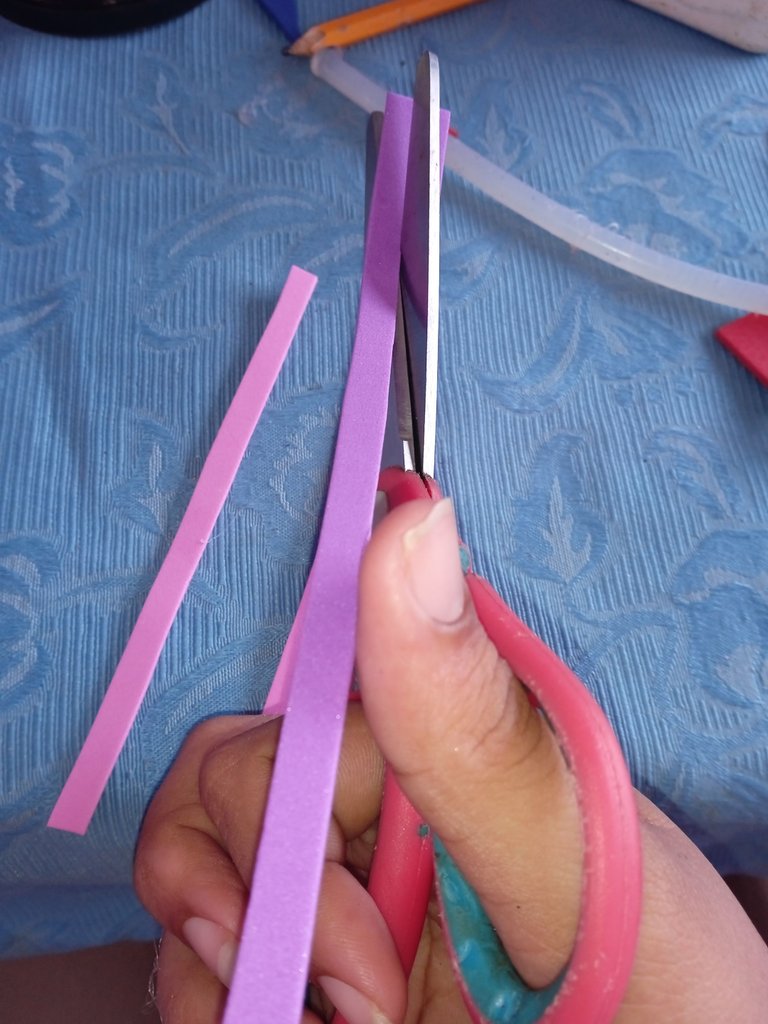
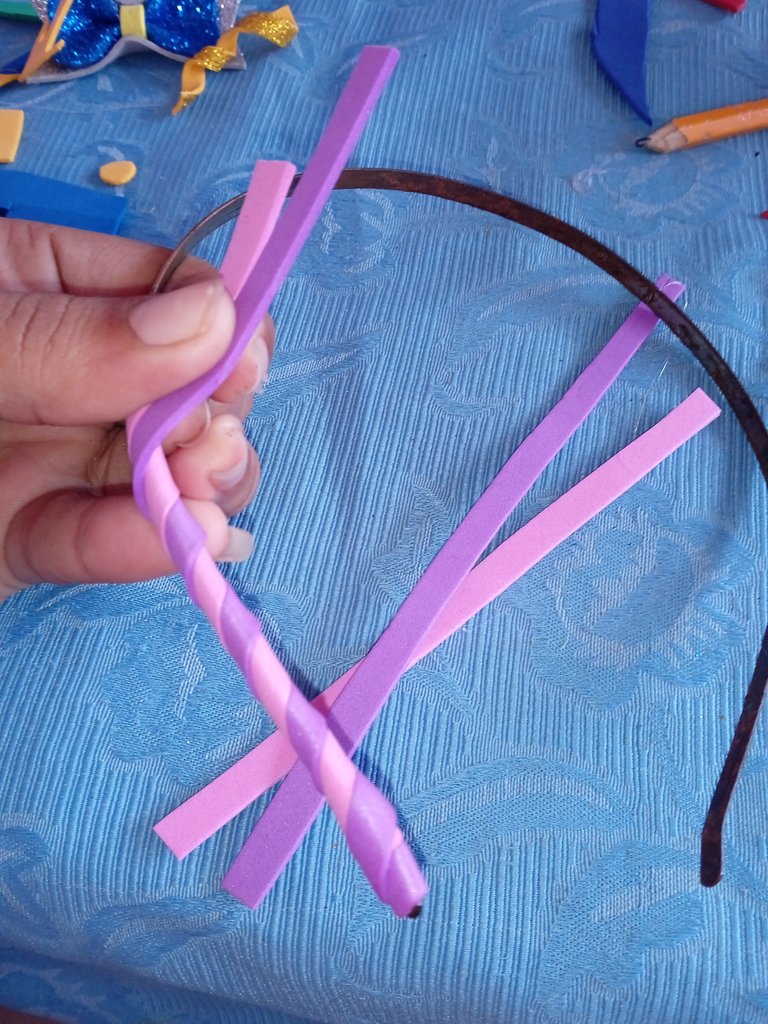
Una vez listo nuestro mini sombrero ,vamos a continuar con la decoración de el cintillo ,vamos a recortar unas tiras de foamis de el color de nuestra preferencia ,si el foamis es largo solo necesitaremos una de cada color ,si esta usado debemos recortar varias tiras como lo es en mi caso , añadimos silicón a la punta y comenzaremos a enrollar ambas tiras hasta cubrir todo el cintillo
Once our mini hat is ready, we will continue with the decoration of the headband, we will cut some strips of foamis of the color of our preference, if the foamis is long we will only need one of each color, if it is used we must cut several strips as in my case, we add silicone to the tip and begin to roll both strips to cover the entire headband.
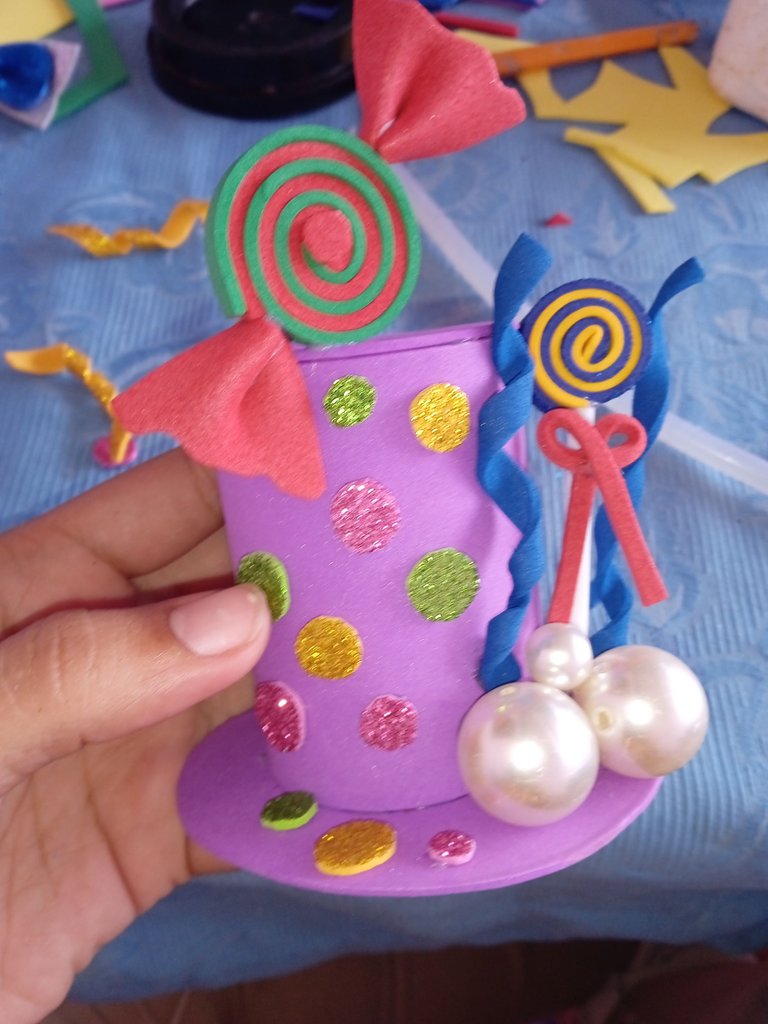
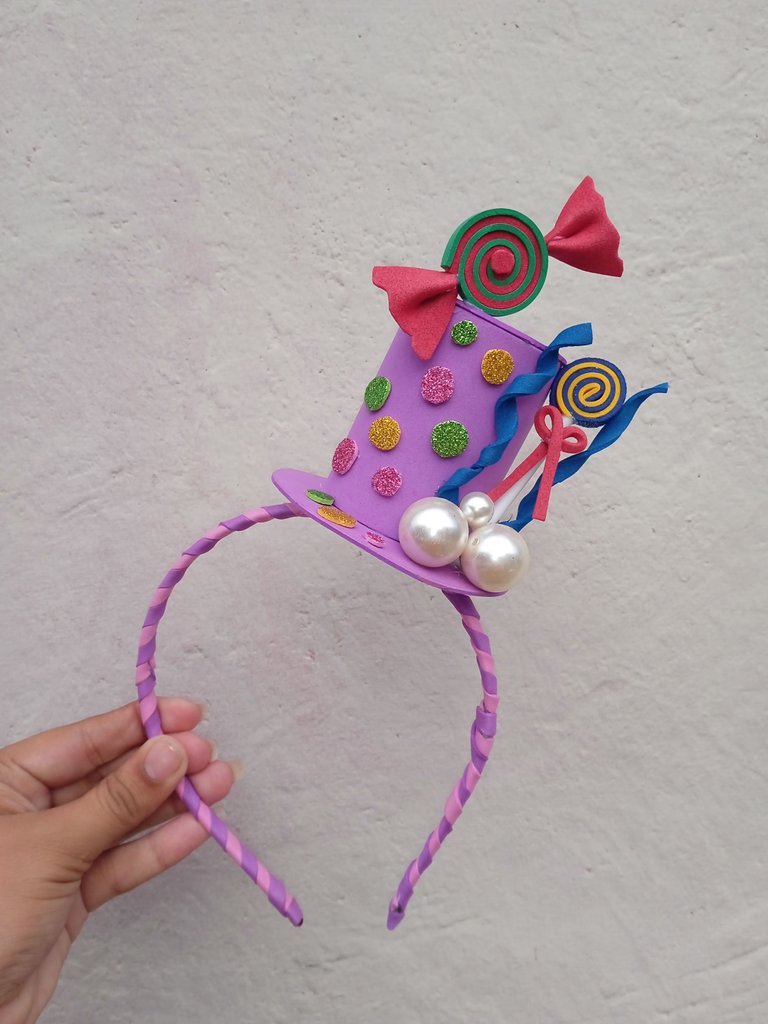
Por último vamos a tomar nuestro mini sombrero y lo vamos a pegar en el ángulo que nos guste más , cómo lo pueden apreciar en esta ocasión lo pegue en una esquina de modo que el sombrero quede de ladito
Finally we are going to take our mini hat and we are going to glue it in the angle that we like the most, as you can see in this occasion I glued it in a corner so that the hat is on the side.
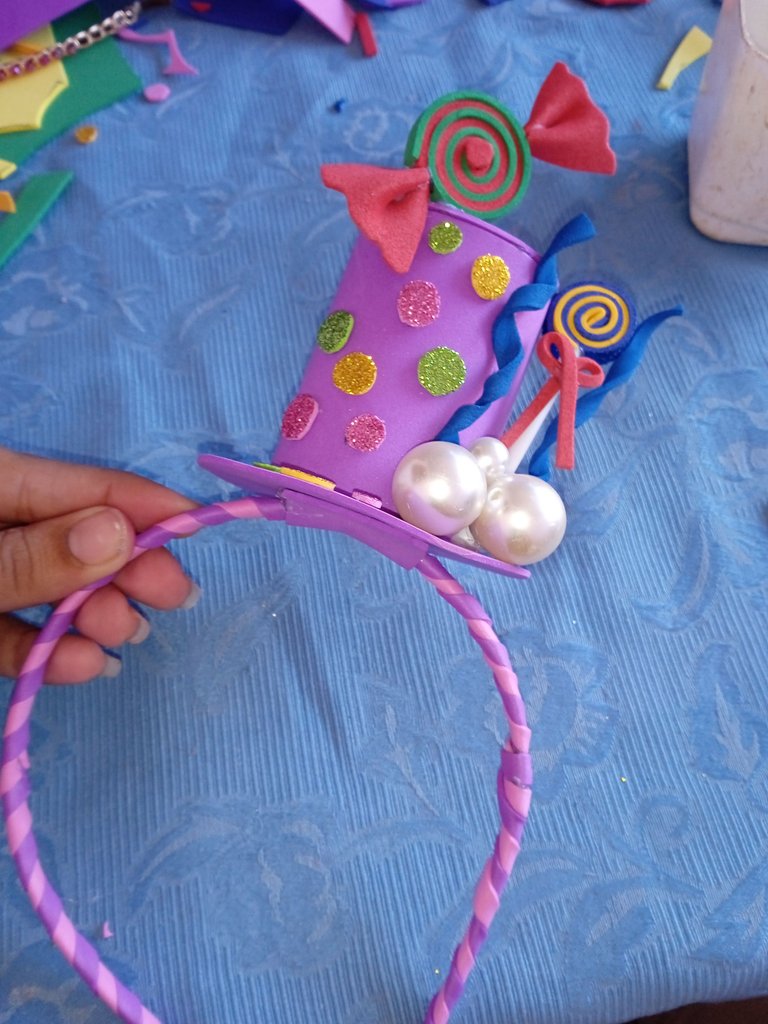
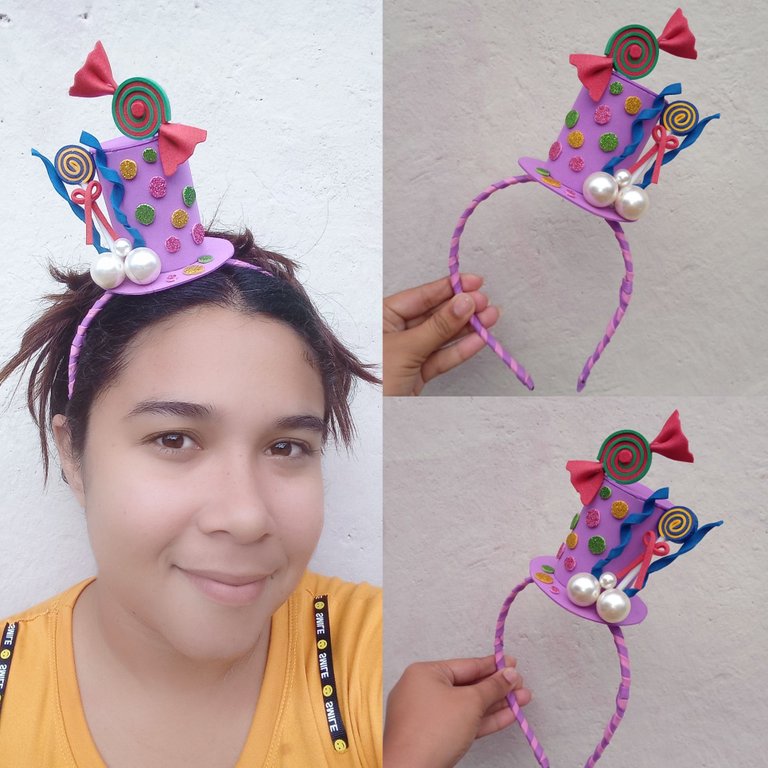
Este es el resultado final de mi hermoso cintillo de sombrero de payasita ,perfecto para las consentidas de el hogar ,ideal para lucir en cualquier fiesta de cumpleaños ,las fotos las tomé desde mi teléfono Redmi 9C y traduje mis textos con el traductor DeepL ,que pasen una maravillosa noche
This is the final result of my beautiful clown hat headband, perfect for the spoiled of the home, ideal to wear at any birthday party, the photos were taken from my Redmi 9C phone and translated my texts with the translator DeepL, have a wonderful evening.
Your content has been voted as a part of Encouragement program. Keep up the good work!
Use Ecency daily to boost your growth on platform!
Support Ecency
Vote for new Proposal
Delegate HP and earn more
Gracias por el apoyo