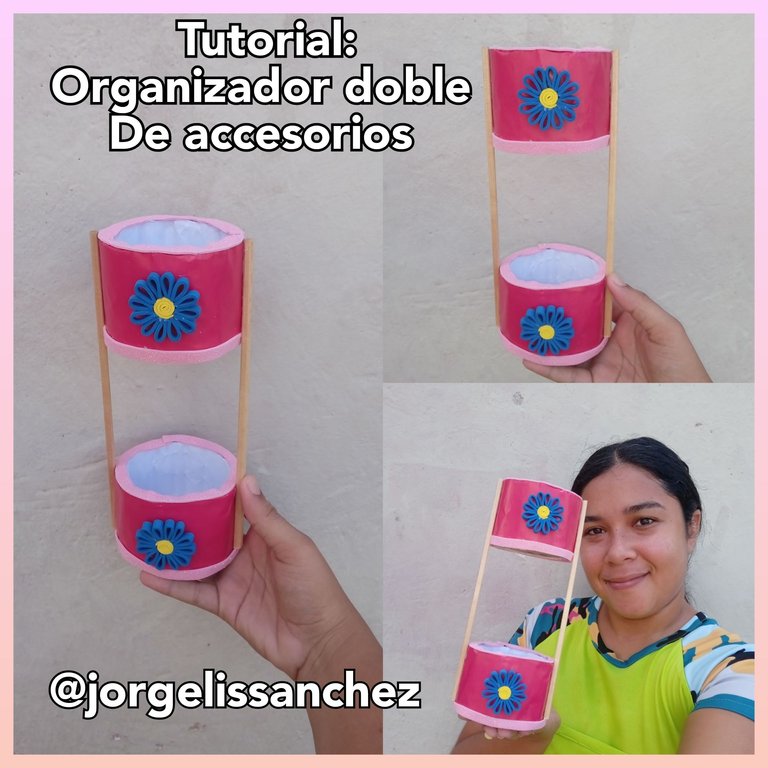
Tutorial : Organizador doble de accesorios | Tutorial : Double accessory organizer
Buenos días apreciados amigos , espero que se encuentren bien , hoy les quiero compartir un organizador de accesorios doble que realice , con el fin de tener en un lugar fijo nuestras prendas y que no se extravíen
Good morning dear friends, I hope you are well, today I want to share a double accessory organizer that I made, in order to have in a fixed place our clothes and do not go astray.
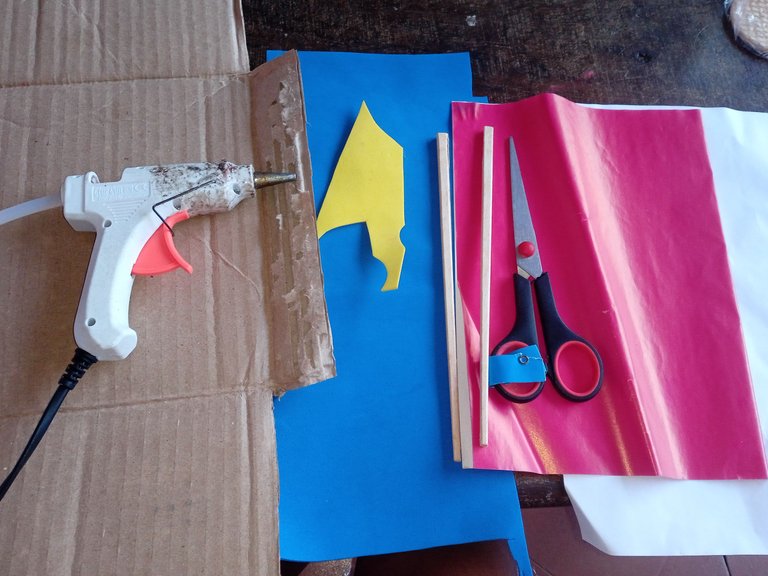
Materiales que utilice :
-Carton
-Papel rosa y blanco
-Palitos de madera
-Foamis
-Tijera
-Silicon
Materials I used :
-Cardboard
-Pink and white paper
-Wooden sticks
-Foamis
-Scissors
-Silicon
A continuación los pasos a seguir :
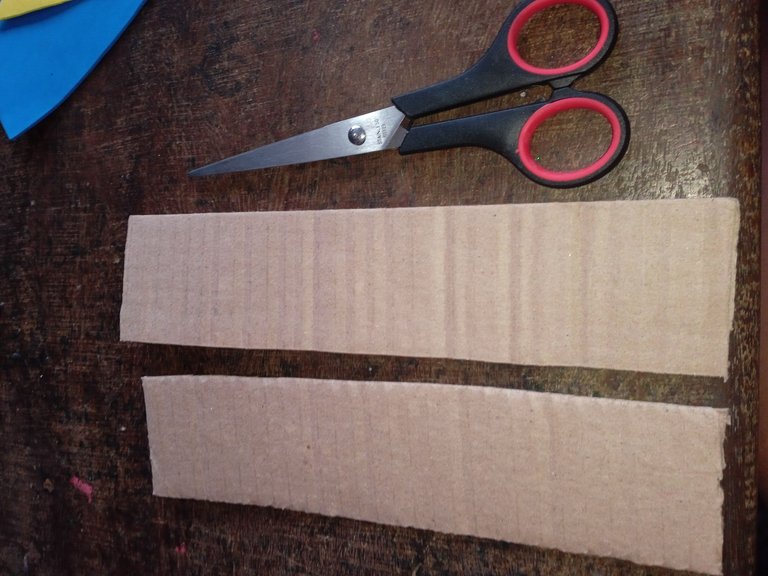
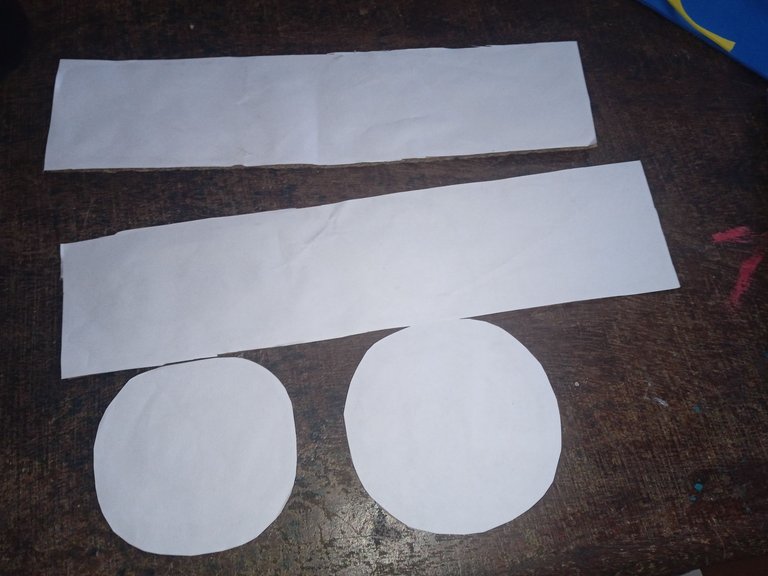
Iniciaremos tomando nuestro cartón y recortando dos tiras para realizar las bases donde irán nuestros accesorios , estas tiras tienen 5 centímetros de grosor y 12 centimetros de largo
Here are the steps to follow:
We will start by taking our cardboard and cutting out two strips to make the bases where our accessories will go, these strips are 5 centimeters thick and 12 centimeters long.
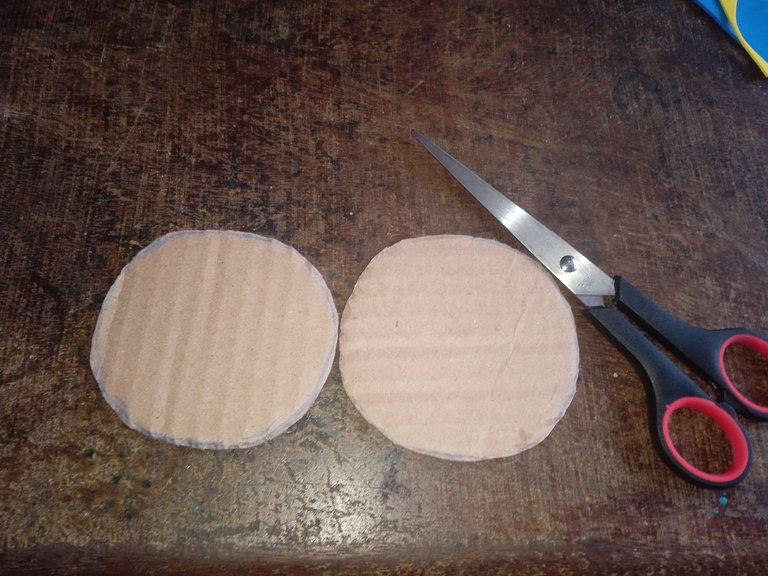
Luego vamos a continuar recortando dos círculos con el mismo material de cartón para realizar la base de nuestro organizador de accesorios
Then we will continue cutting out two circles with the same cardboard material to make the base of our accessory organizer.
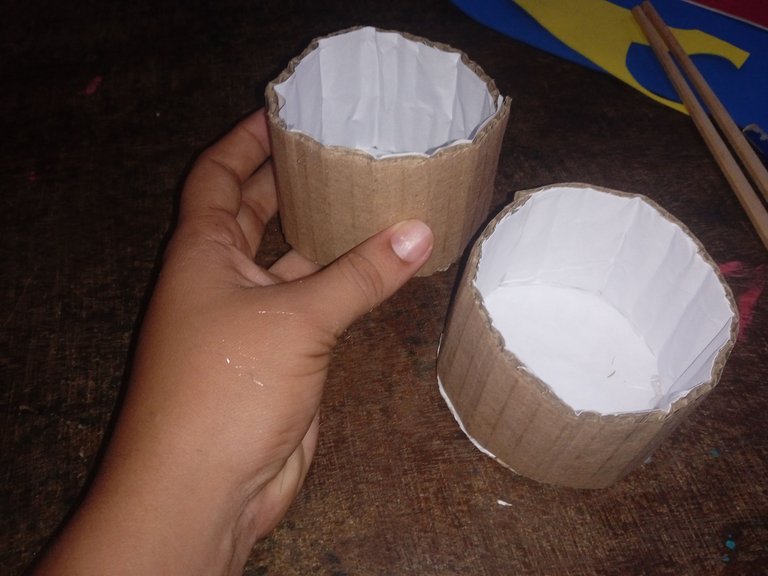
A continuación vamos a proceder pegando en nuestras piezas de cartón papel blanco para que este sea el fondo de nuestro organizador y no se observe el cartón
Next we are going to proceed by gluing white paper on our cardboard pieces so that this will be the bottom of our organizer and the cardboard will not be visible.
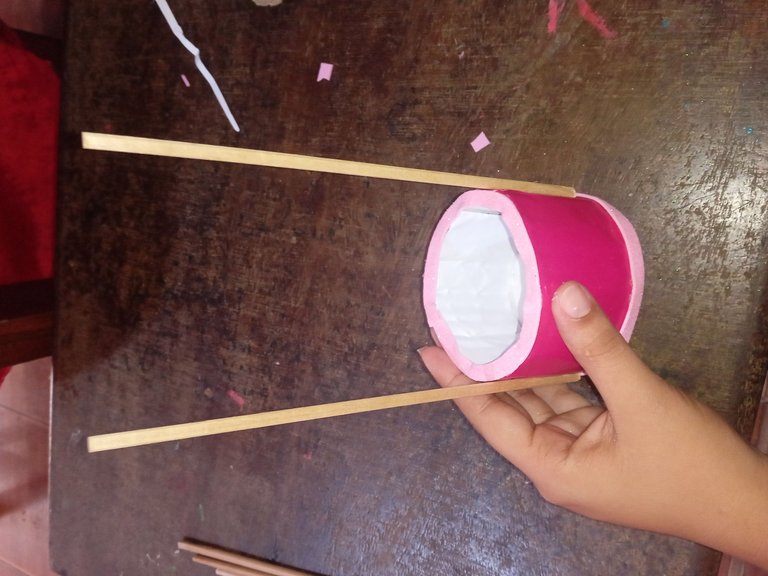
Luego vamos a proceder tomando nuestro círculo y nuestra tira y la pegaremos , añadiremos silicón por todo el borde del el círculo y pegaremos formando nuestras dos piezas de organizador
Then we will proceed by taking our circle and our strip and glue it, add silicone all around the edge of the circle and glue forming our two pieces of organizer.
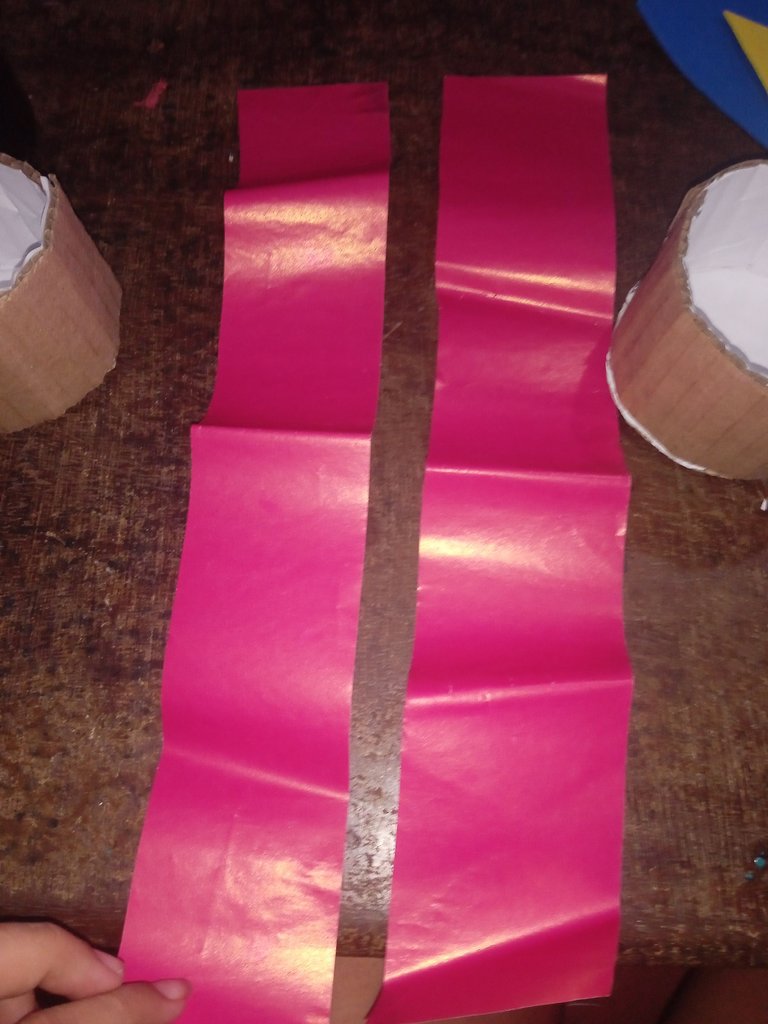
Seguidamente tomaremos nuestro papel de color con el vamos a decorar el frente de nuestro organizador , debemos medir y recortar el papel de la misma medida y altura
Next we will take our colored paper with which we will decorate the front of our organizer, we must measure and cut the paper to the same size and height.
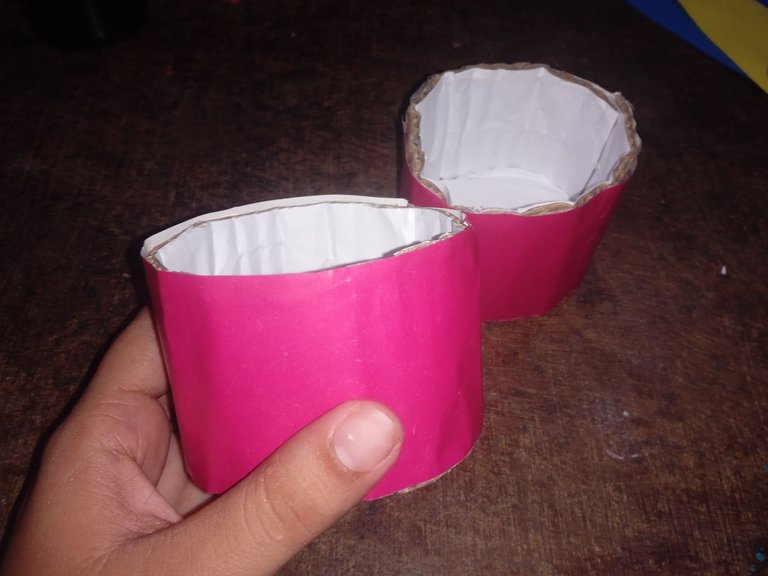
Luego que tengamos las dos piezas de color recortadas vamos a proceder pegando las por todo el alrededor de nuestros envase de cartón
After we have the two pieces of colored paper cut out we will proceed by gluing them all around our cardboard container.
Tomaremos dos tiras de foamis y la pegaremos por los bordes de abajo y por los bordes de arriba para que no se note el cartón
We will take two strips of foamis and glue them on the bottom edges and on the top edges so that the cardboard is not noticeable.

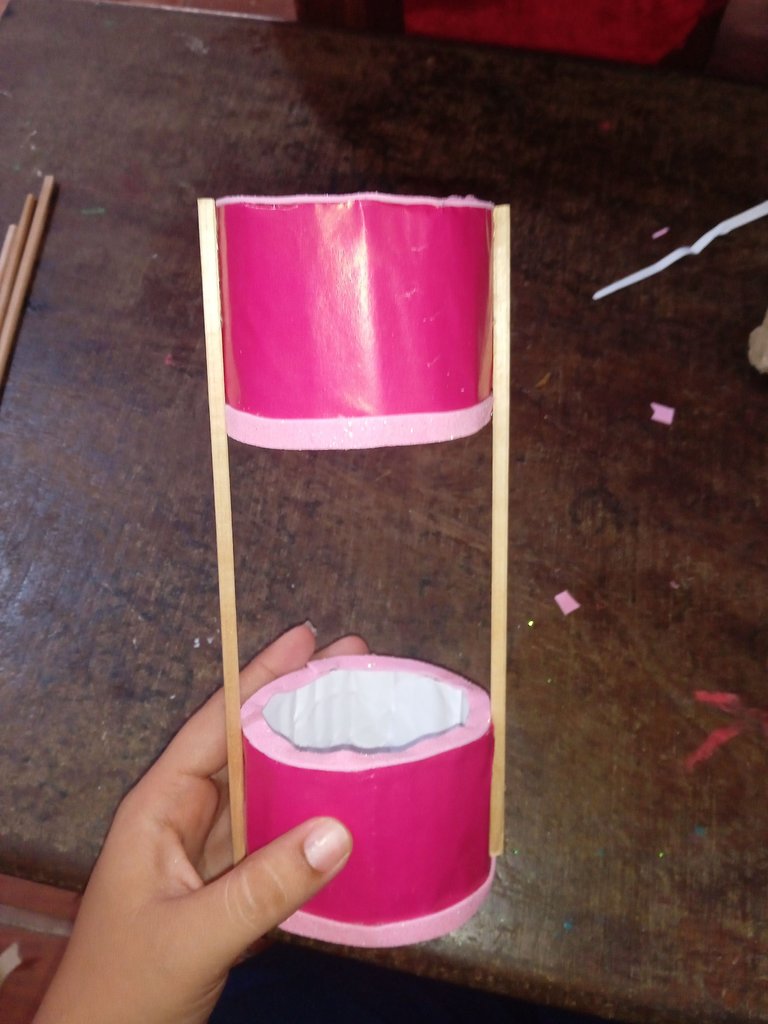
A continuación tomaremos nuestros dos palitos de madera y lo pegaremos en cada lado de el organizador para poder realizar lo doble ,primero pegamos el de abajo
Next we will take our two wooden sticks and glue them on each side of the organizer to make the double, first we glue the bottom one.
Luego continuaremos tomando el organizador sobrante y lo pegaremos en la parte de arriba tal cual iniciamos en el paso anterior
Then we will continue by taking the remaining organizer and glue it on the top as we started in the previous step.
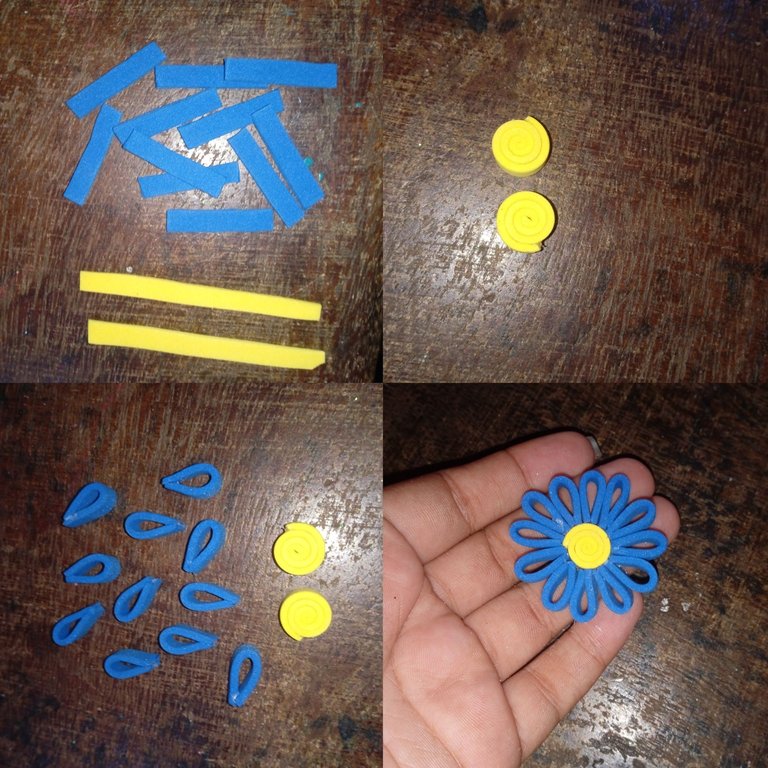
Para decorar el centro de nuestro organizador doble realizaremos dos flores , tomaremos unas tiras pequeñas azules y dos amarillas , enrollamos la amarilla en forma de círculo que será el centro y las tira las pegaremos punta con punta hasta formar los pétalos , luego tomaremos los círculos y pegaremos alrededor los pétalos hasta formar la flor
To decorate the center of our double organizer we will make two flowers, we will take some small blue strips and two yellow ones, we will roll the yellow one in the shape of a circle that will be the center and we will glue the strips end to end until we form the petals, then we will take the circles and we will glue around the petals until we form the flower.
Por último tomaremos nuestras flores y la pegaremos en todo el centro de cada organizador
Finally we will take our flowers and glue them around the center of each organizer.
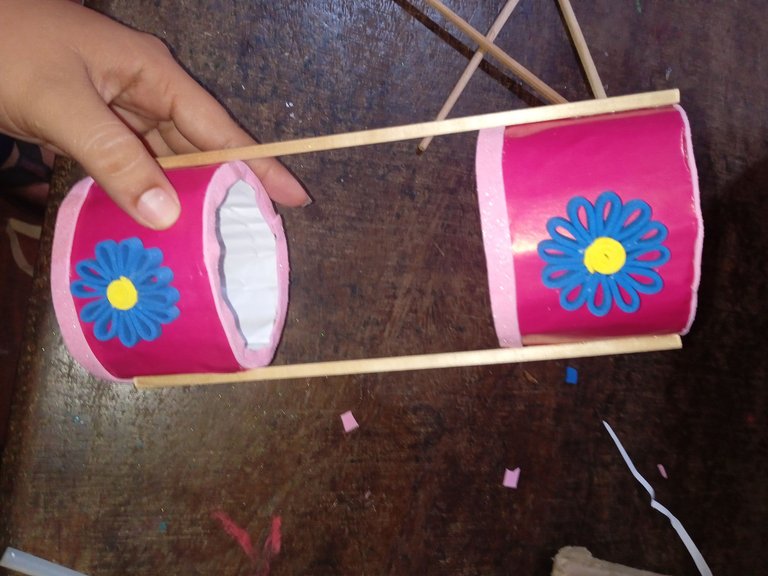
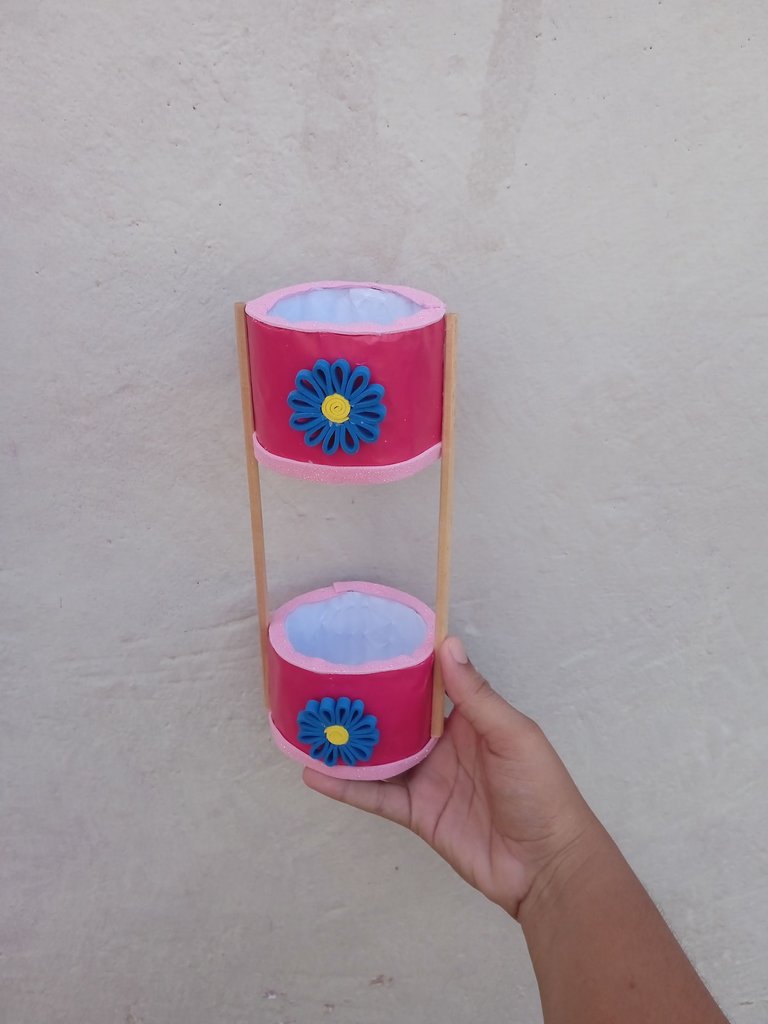
Este es el resultado de mi hermoso organizador doble ideal para guardar accesorios de la piel y cabello , para que se mantengan en un lugar seguro , las fotos las tomé con mi Redmi 9C y los textos los traduje con el traductor DeepL , feliz día
This is the result of my beautiful double organizer ideal for storing skin and hair accessories , to keep them in a safe place , the photos I took with my Redmi 9C and the texts I translated with the translator DeepL , happy day
Hola, que buena idea la de organizar varias cosas en un mismo lugar de manera práctica y sencilla.
Gracias por compartir tu trabajo.
Gracias amiga
Muy lindo y fácil de hacer, los colores son tiernos, justo para tener ordenadas nuestras prendas. Gracias por compartir tu creación 🙋
Gracias amiga
Nice, simple and useful work, excellent to use and recycle what we have at home. Thank you for sharing in our community
thanks to you for the support, happy day
Very beautiful work done
thanks my friend
I really liked the way you did the combination with the flower.❤️