Cintillo restaurado con tela y diseño de lazo | Restored headband with fabric and ribbon design
Hola mis apreciados amigos lectores y creadores de contenidos, espero que se encuentren bien, hoy les quiero compartir un tutorial , como restaurar un viejo cintillo con tela y diseño de lazo del mismo material, un modelo súper sencillo,elegante y hermoso para nuestras pequeñas
Hello my dear friends readers and content creators, I hope you are well, today I want to share a tutorial, how to restore an old headband with fabric and ribbon design of the same material, a super simple, elegant and beautiful model for our little ones
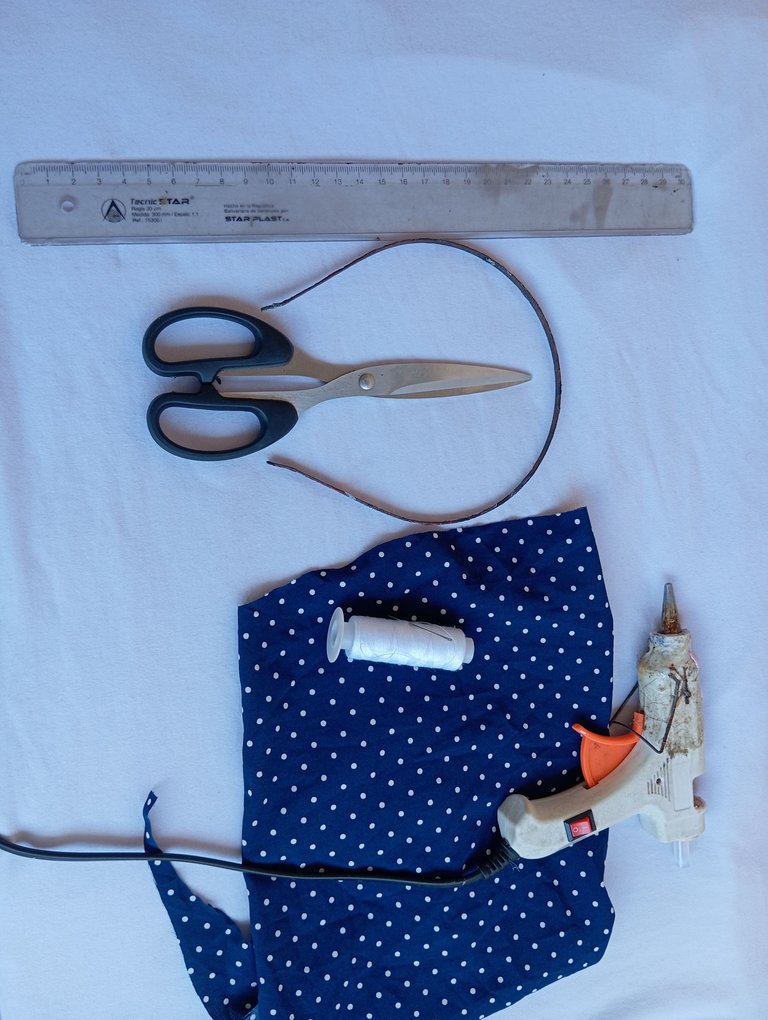
Materiales qué utilice:
-Cintillo
-Tela estampada de lunares blancos
-Tijera
-Hilo
-Aguja
-Silicon
-Regla geométrica
Materials I used:
-Headband
-Printed fabric with white polka dots
-Scissors
-Thread
-Needle
-Silicon
-Geometric ruler
A continuación los pasos a seguir:
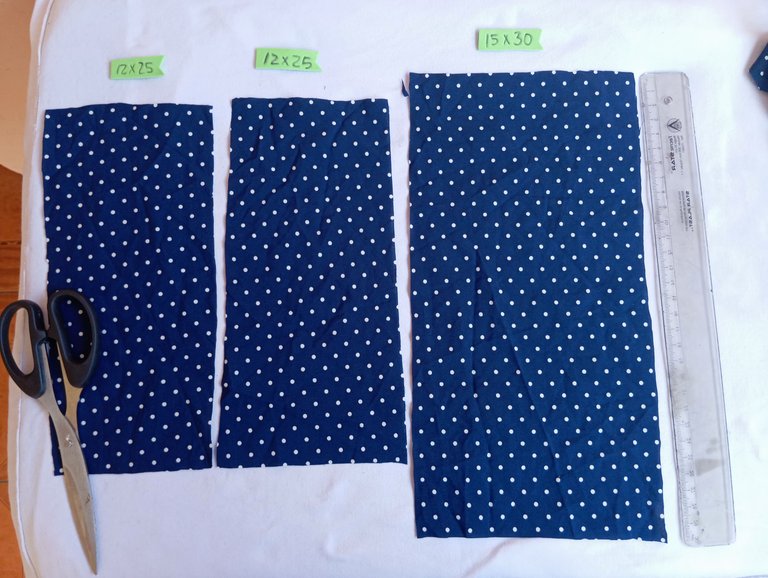
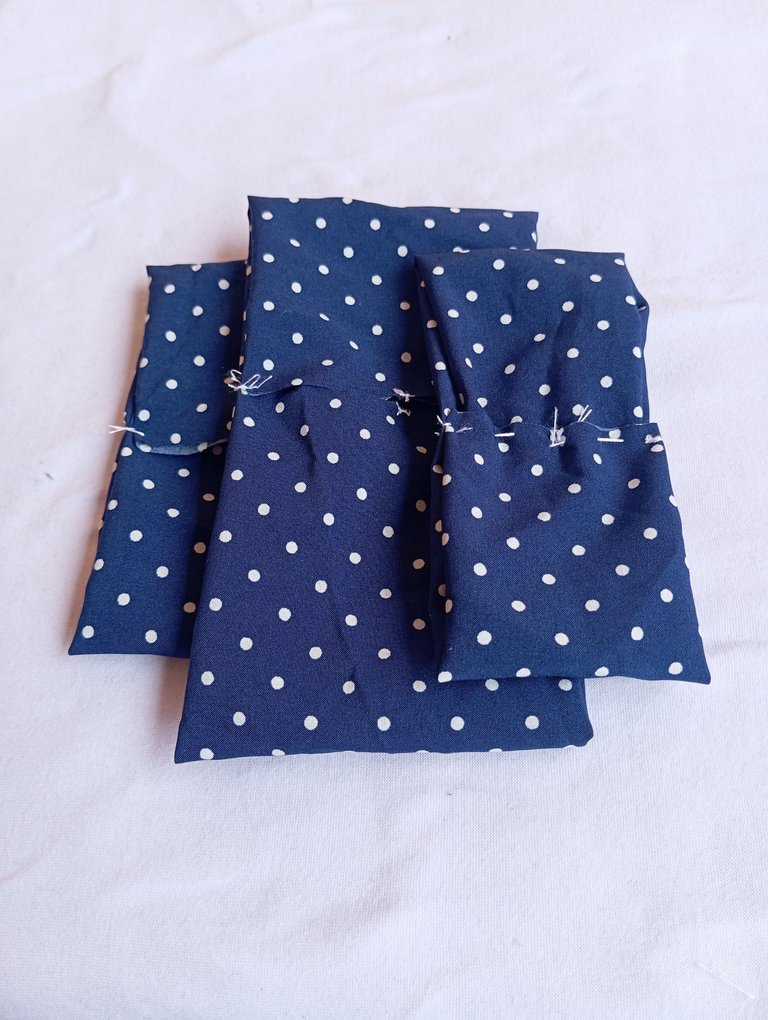
Primer paso : iniciaremos realizando el lazo de nuestro cintillo , comenzamos tomando nuestra tela y recortaremos unas tiras de las siguientes medidas: iniciamos recortando dos tiras medianas de 12x25 centímetros y una grande de 15x30 centímetros ,como lo puede. Apreciar en la fotografía
Here are the steps to follow:
First step: we will begin by making the ribbon of our headband, we start by taking our fabric and we will cut some strips of the following measures: we start by cutting two medium strips of 12x25 centimeters and a big one of 15x30 centimeters, as you can see in the picture. See in the picture
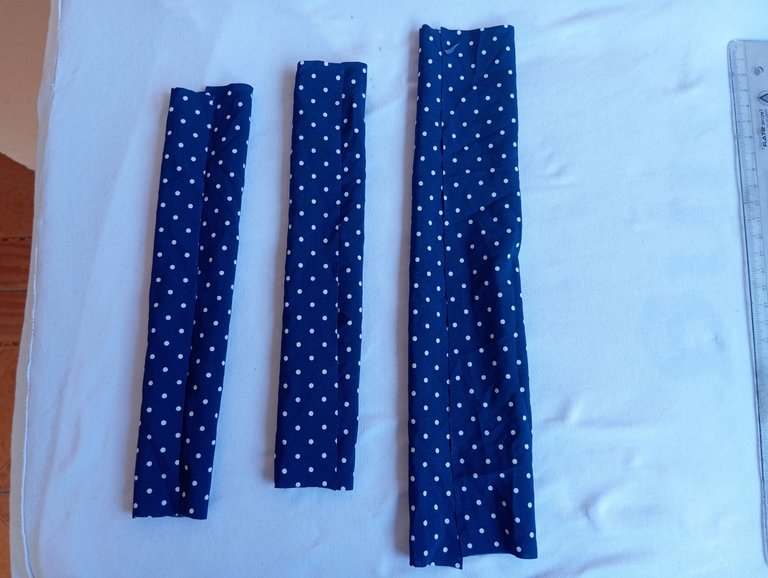
Segundo paso: luego vamos a continuar doblando nuestras tiras para que no se noten los bordes y lo más importante no se hilache la tela , tomaremos borde con borde y lo doblaremos hacia el centro de forma vertical
Second step: then we will continue folding our strips so that the edges are not noticeable and the most important thing is that the fabric is not spun, we will take edge to edge and we will fold it vertically towards the center.
Tercer paso : seguidamente vamos a continuar tomando las puntas y las doblaremos hacia el centro de forma horizontal , con la aguja y el hilo vamos a realizar un pequeño basteado por todo el centro para que quede firme la forma que le estamos dando a nuestras piezas
Third step: next we will continue taking the ends and we will fold them towards the center horizontally, with the needle and thread we will make a small baste all over the center so that the shape we are giving to our pieces is firm.

Cuarto paso : seguidamente vamos a continuar colocando encima de la pieza pequeña la pieza más grande , luego del otro lado la pieza más pequeña que quede de la siguiente manera que aprecian en la fotografía
Fourth step: then we will continue placing on top of the small piece the bigger piece, then on the other side the smaller piece as you can see in the picture.
Quinto paso : para finalizar realizamos varios dobles llevando las piezas hacia el centro y sostenemos con nuestros dedos para realizar el diseño del lazo
Fifth step: to finish we make several doubles taking the pieces towards the center and we hold them with our fingers to make the loop design.
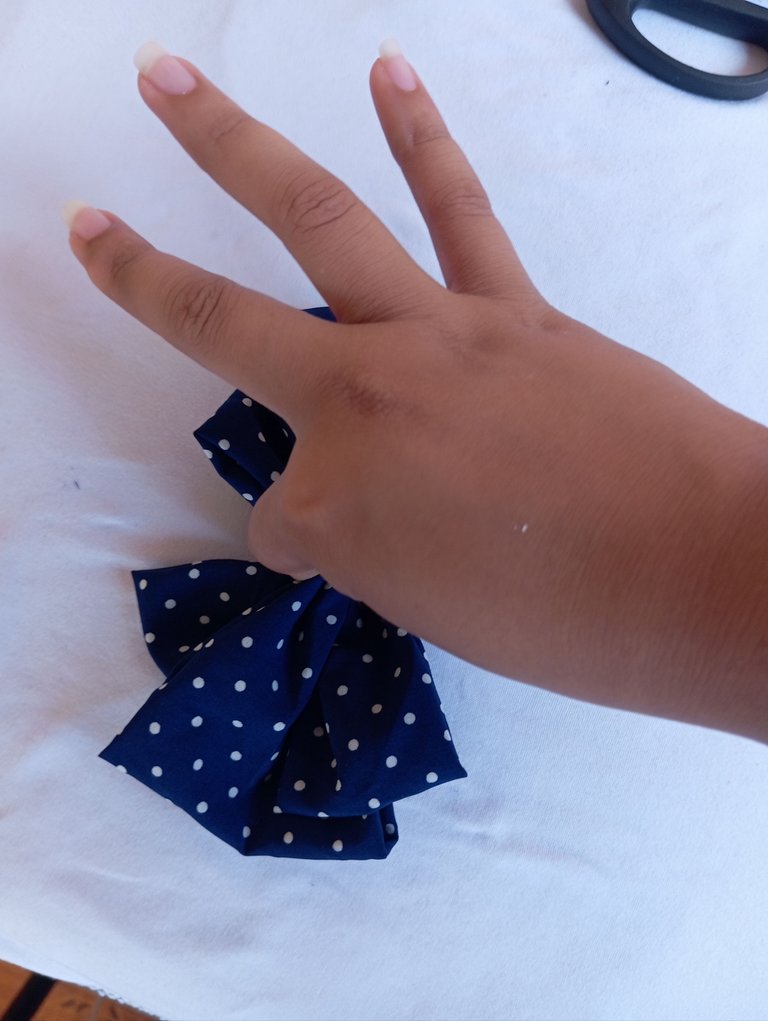
Sexto paso : continuamos tomando el hilo y realizando varias vueltas en todo el centro del lazo de este modo quedarán las piezas firmes y no se quitará el diseño
Sixth step: we continue taking the thread and making several turns around the center of the loop in this way the pieces will remain firm and the design will not be removed.

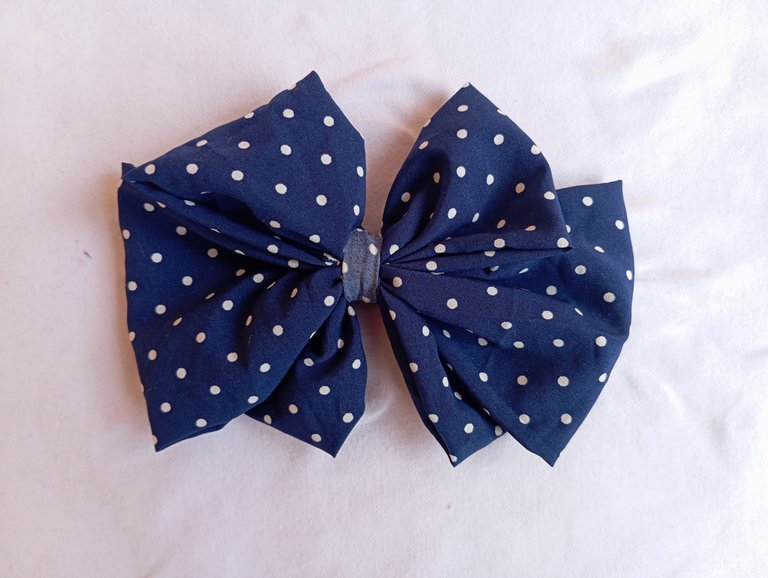
Séptimo paso : Por último vamos a continuar colocando una tira delgada en todo el centro del lazo para que no se note el hilo y finalizar nuestro accesorio
Seventh step: Finally we will continue placing a thin strip in the center of the loop so that the thread is not noticed and finish our accessory.
Octavo paso : una vez listo el lazo vamos a continuar cubriendo el Cintillo, recortaremos dos tiras del mismo material(tela), iniciamos enrollando desde abajo hacia arriba, hasta cubrirlo todo
Eighth step: once the ribbon is ready we will continue covering the headband, we will cut two strips of the same material (fabric), we start rolling from the bottom to the top, until we cover it all.
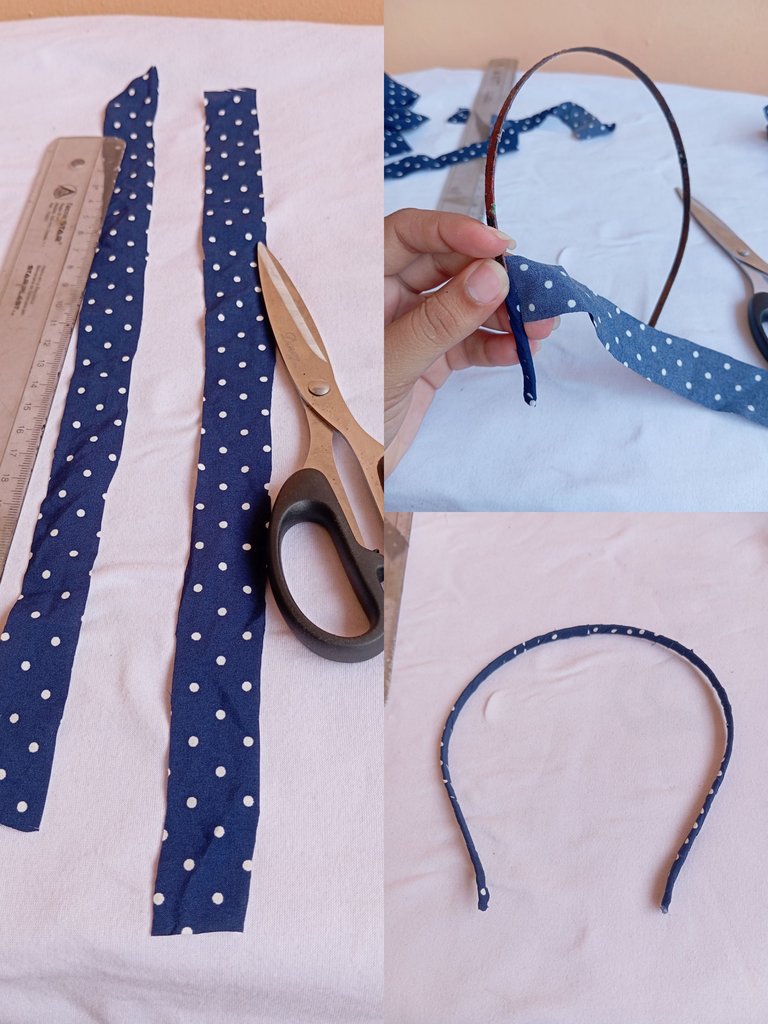
Noveno paso : para finalizar vamos a continuar tomando nuestro lazo y lo pegaremos en una esquina de nuestro Cintillo, en la parte de atrás pegaremos un recorte de tela para que no se note el silicón , finalmente terminando nuestro accesorio de tela con diseño de lazo
Ninth step: to finish we will continue taking our ribbon and we will glue it in a corner of our headband, in the back we will glue a fabric cutout so that the silicone is not noticed, finally finishing our fabric accessory with ribbon design.
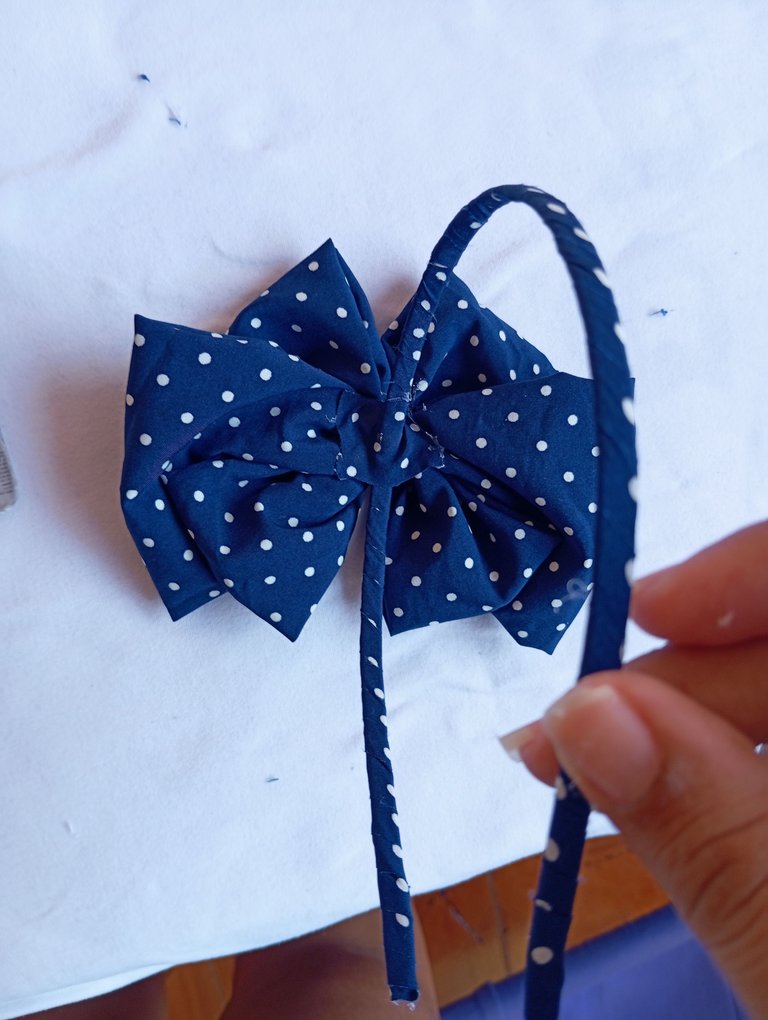
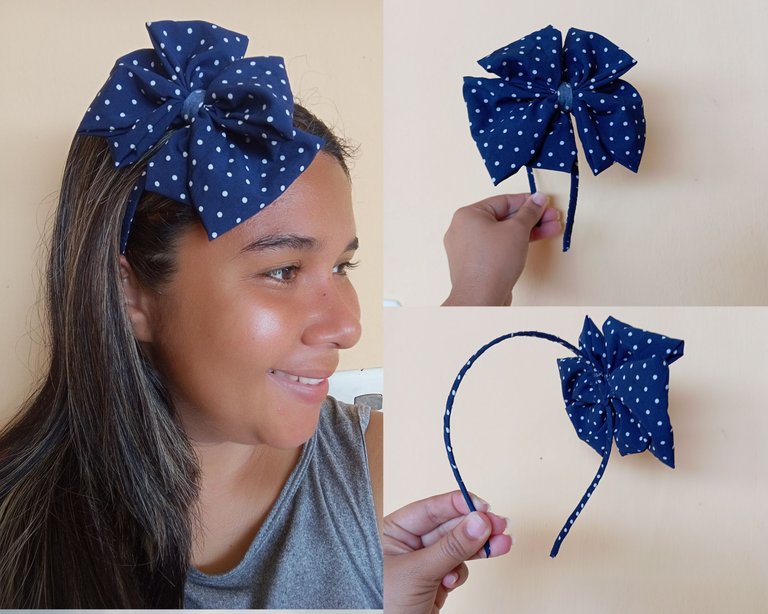
Este es el resultado final de la restauración de mi viejo cintillo con tela y diseño de lazo , ideal para las princesas de la casa .
Créditos: las fotos las tomé con mi redmi 12 y traduje los textos con el traductor deepl ,feliz tarde
This is the final result of the restoration of my old headband with fabric and bow design , ideal for the princesses of the house .
Credits: the photos were taken with my redmi 12 and I translated the texts with the deepl translator ,happy afternoon

WOW! It is so beautiful and eye-catching. Love its design. It shows your talent and creativity. Great job!
Wow your work is so attractive, great,nice what will I say so eye-catching.
This so nice and lovely
Que lindoooo, me encanta el diseño de la tela 😽
Gracias linda
Muy hermoso cintillo 👍