Cintillo de lazo con temática Stitch rosa | Pink Stitch themed ribbon bow headband
Hola mis queridos amigos creadores de contenidos, buenas tardes tengan todos , hoy les quiero compartir un lindo Cintillo inspirado en Stitch rosa , ideal para nuestras princesas, espero lleguen al final del post y aprendan junto conmigo
Hello my dear friends content creators, good afternoon have all, today I want to share a nice headband inspired by pink Stitch, ideal for our princesses, I hope you get to the end of the post and learn along with me.
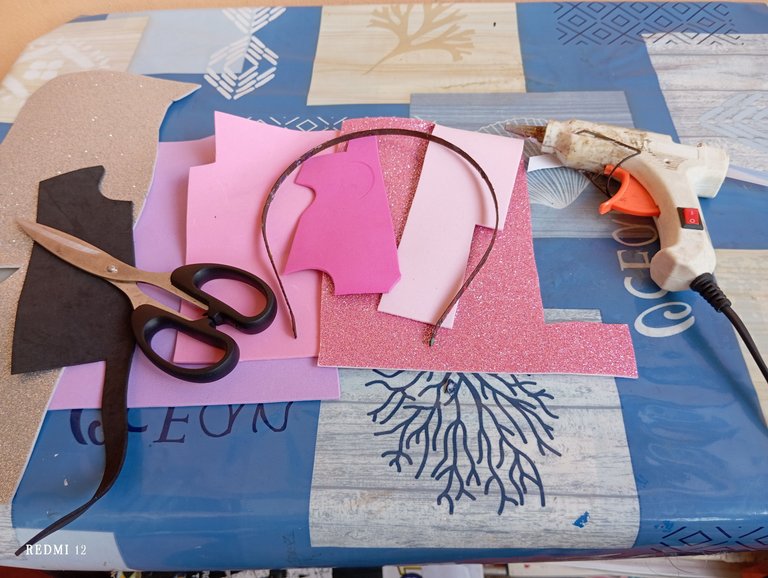
Materiales qué utilice para mí Cintillo:
-Cintillo
-Foamis
-Tijera
-Silicon
-Cinta
Materials I used for my headband:
-Cintillo
-Foamis
-Scissors
-Silicon
-Tape
A continuación los pasos a seguir:
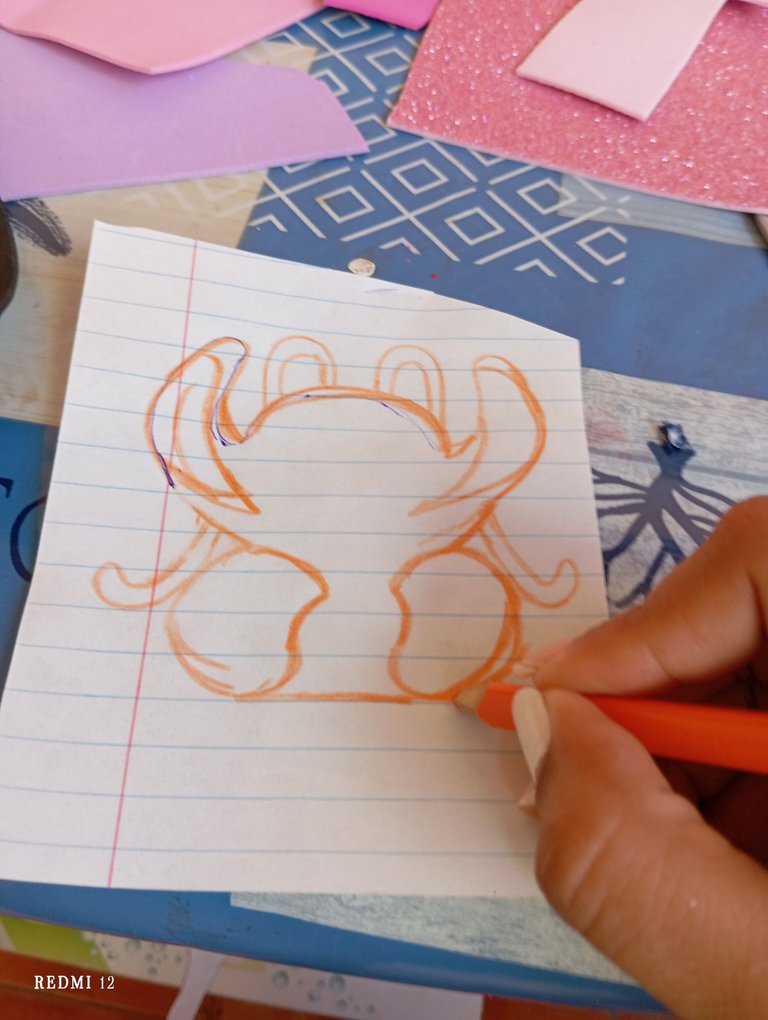
Iniciaremos dibujando un patrón con la temática con la que vamos a trabajar, en este caso nuestra temática es Stitch rosa , sólo realizaremos la parte de arriba
Here are the steps to follow:
We will start by drawing a pattern with the theme we are going to work with, in this case our theme is pink Stitch , we will only make the top part.
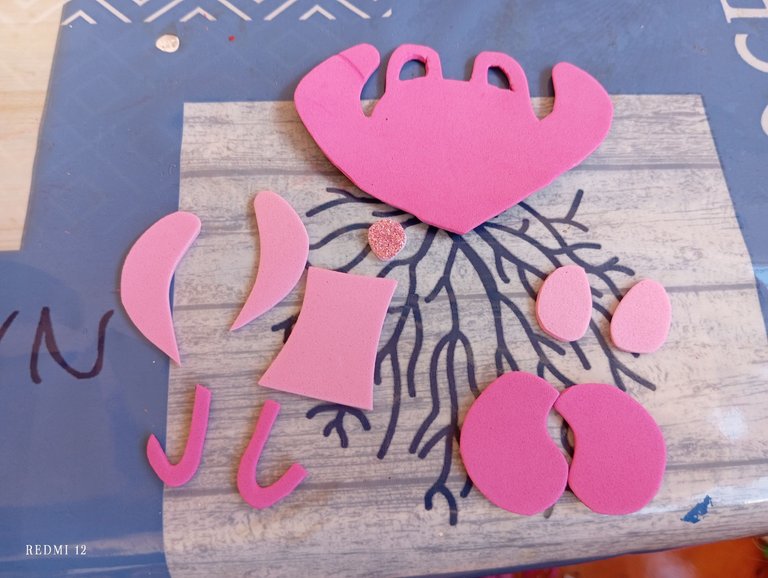
Una vez que tengamos nuestro patrón , con la ayuda de el vamos a proceder recortando las piezas en los colores indicados , orejas , fondo de las orejas, ojos,nariz mitad del cuerpo y las dos patas delanteras
Once we have our pattern, with the help of it we will proceed cutting out the pieces in the colors indicated, ears, bottom of the ears, eyes, nose, half of the body and the two front legs.
Seguidamente continuaremos pegando y formando nuestra Stitch rosa , iniciamos pegando el fondo de sus orejas que es un tono claro , sus ojos y nariz en todo el centro , luego vamos a proceder pegando el cuerpo en la parte de abajo de la cabeza en todo el centro , para finalizar pegaremos a los lados del cuerpo sus patas delanteras
Next we will continue gluing and forming our pink Stitch, we start by gluing the bottom of his ears which is a light tone, his eyes and nose in the center, then we will proceed by gluing the body at the bottom of the head in the center, and finally we will glue the front legs on the sides of the body.
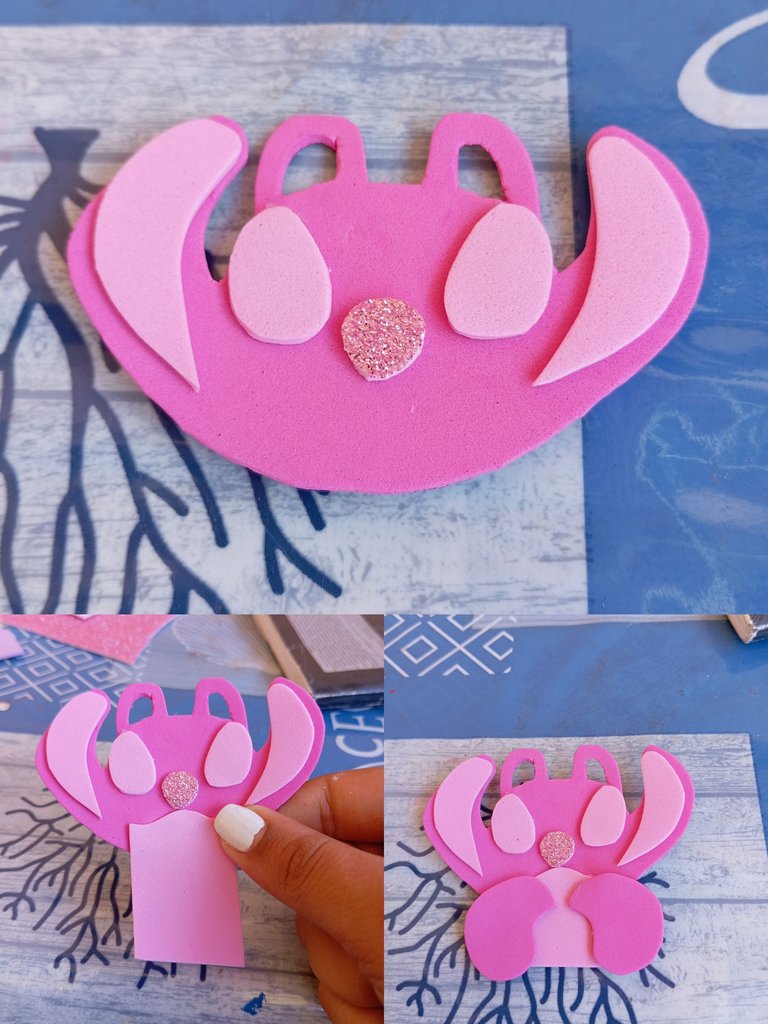
En este siguiente paso vamos a proceder pegando a Stitch rosa en el foamis color lila , de modo que recortaremos siguiendo el mismo modelo y dejando unos bordes para que se note la base y haga combinación
In this next step we will proceed by gluing the pink Stitch on the lilac foamis , so we will cut following the same model and leaving some edges to show the base and make a combination.

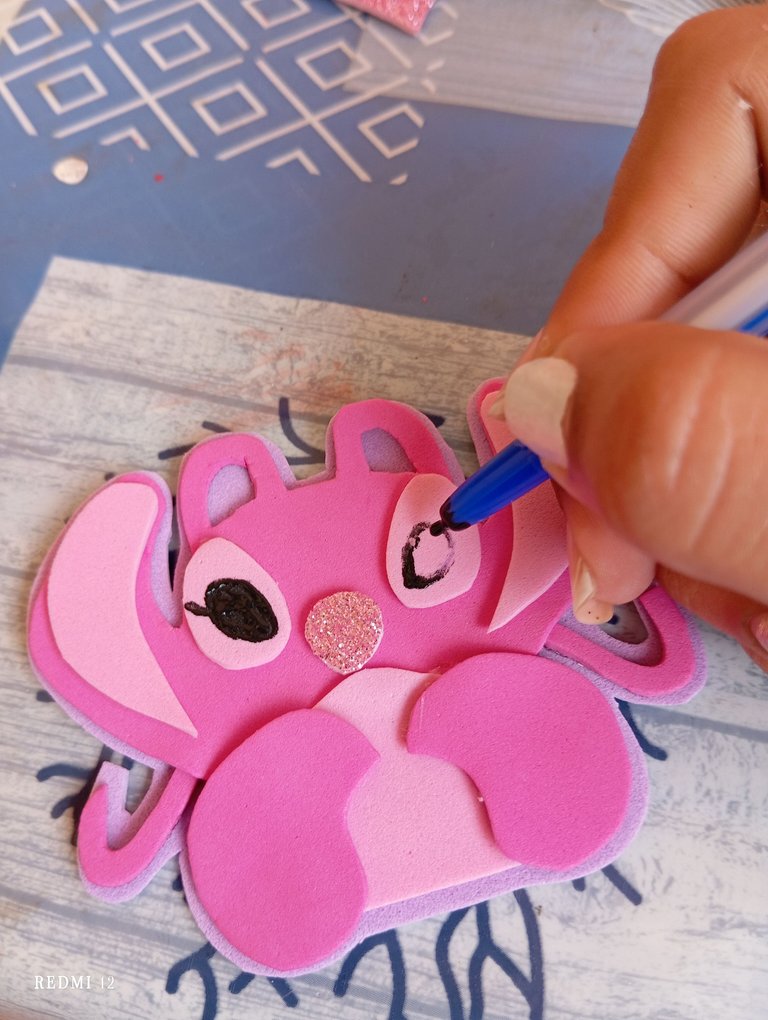
Por último vamos a continuar pintando el rostro de Stitch, sus ojos negros con iluminaciones blancas , su sonrisa y una iluminación del pelaje tipo pequeño collar blanco en su pecho
Finally we are going to continue painting Stitch's face, his black eyes with white lights, his smile and a small white collar type fur lighting on his chest.
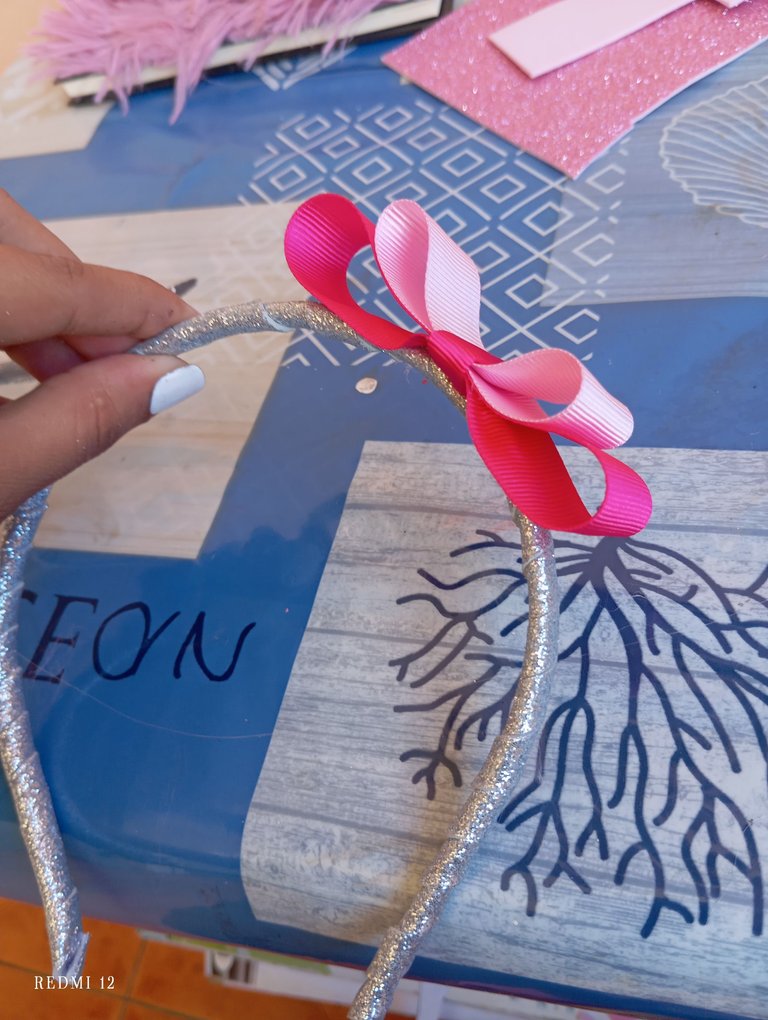
A continuación procedí recortando tres tiras , la fucsia de 15 centímetros y, la rosa clara de 8 centímetros y por último una tira pequeña fucsia, vamos a pegar borde con borde formando unas piezas tipo círculo
Then I proceeded to cut three strips, the fuchsia of 15 centimeters, the light pink of 8 centimeters and finally a small fuchsia strip, we will glue edge to edge forming a circle type pieces.
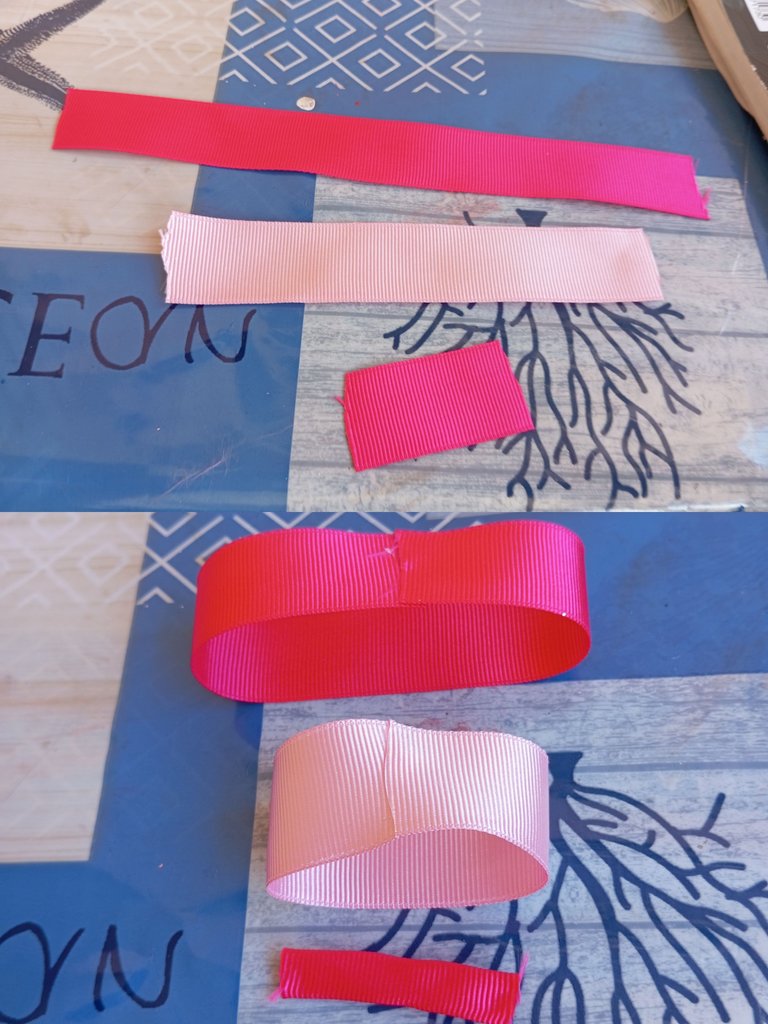
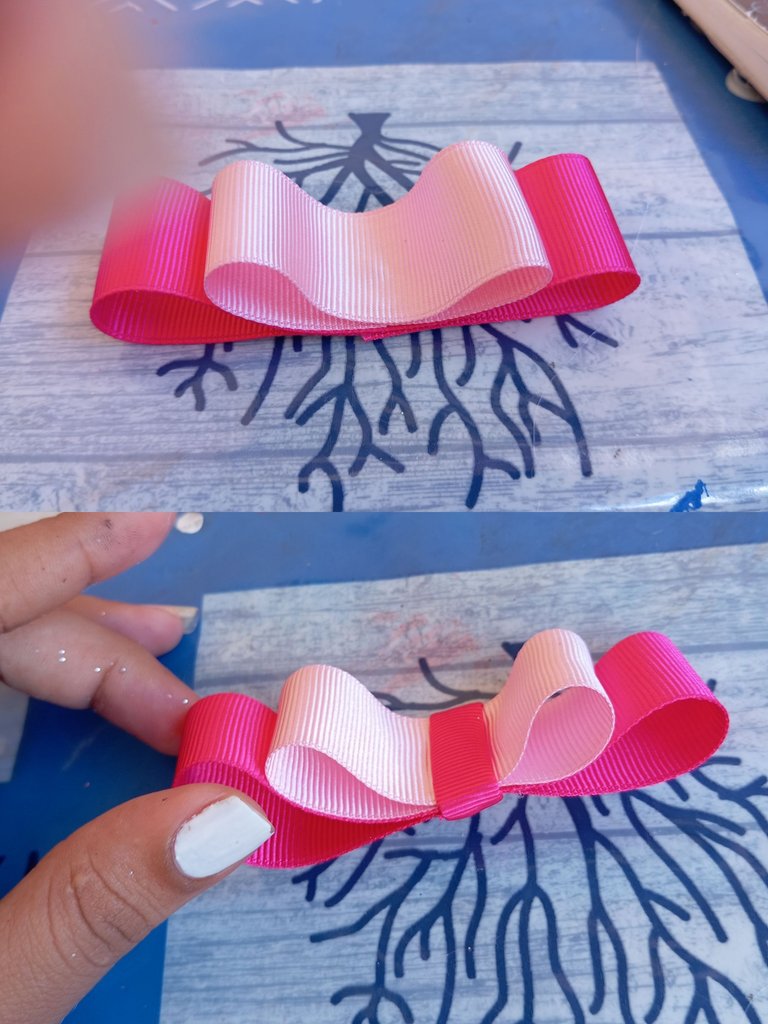
Luego continuaremos tomando la pieza rosa y pegando encima de la fucsia ,en todo el centro amigos para que se note la pieza de abajo , por último en el centro vamos a pegar la tira fucsia, finalizando nuestro lazo
Then we will continue taking the pink piece and gluing it on top of the fuchsia, all around the center friends so that the piece below is noticed, finally in the center we will glue the fuchsia strip, finishing our bow.
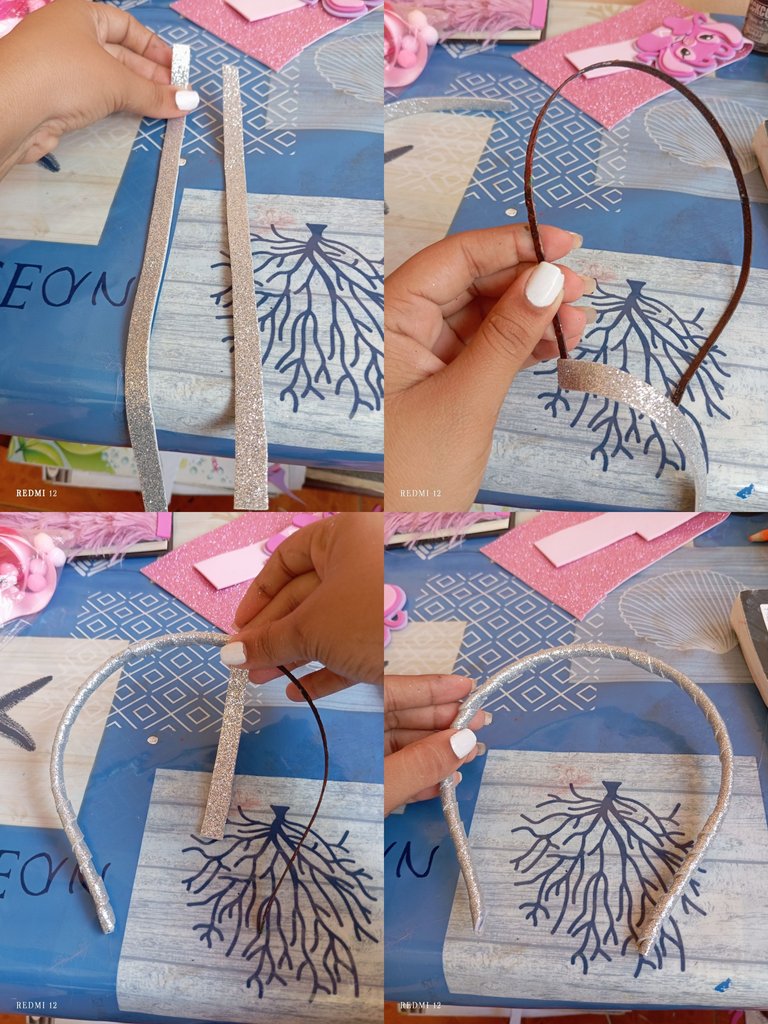
Seguidamente vamos a proceder decorando el cintillo, iniciamos recortando dos tiras de foamis escarchada , pegamos en la punta del cintillo y comenzamos a enrollar hasta cubrir todo el cintillo, pegamos de abajo hacia arriba ,es decir , de una punta hacia la otra
Next we will proceed to decorate the headband, we start by cutting out two strips of frosted foamis, we glue on the tip of the headband and begin to roll up to cover the entire headband, we glue from bottom to top, that is to say, from one end to the other.
A continuación procedemos pegando nuestras decoraciones, comenzamos pegando el lazo en una esquina del cintillo
Next we proceed by gluing our decorations, we start by gluing the ribbon in one corner of the headband.
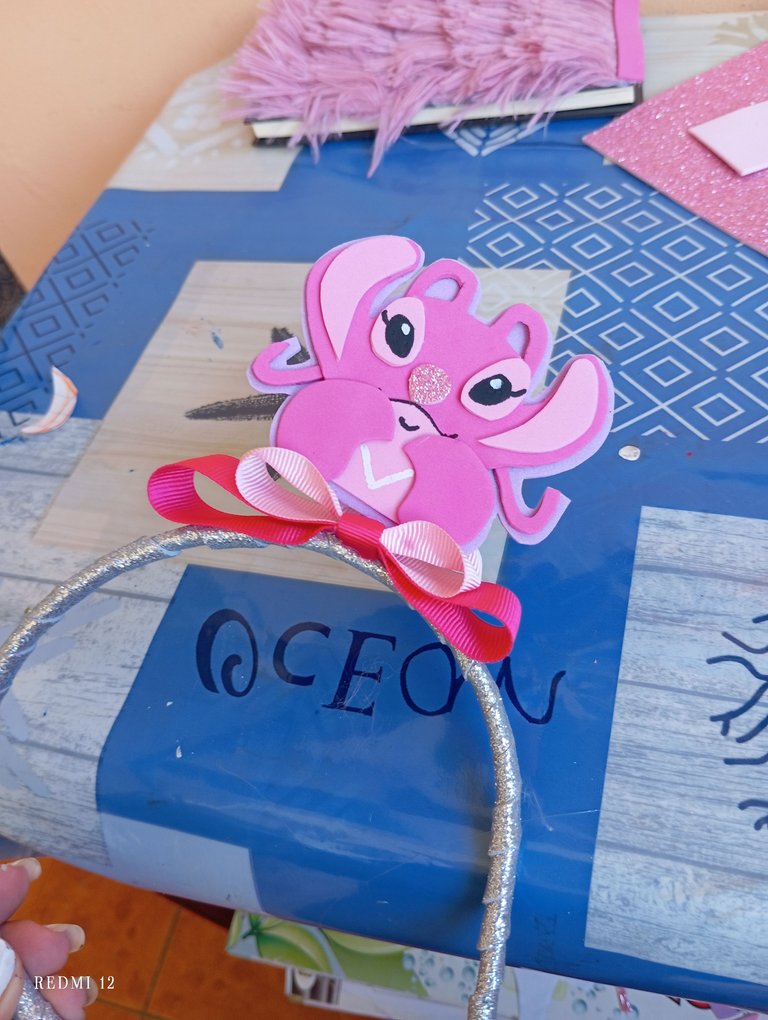
Por último en la parte de arriba del lazo vamos a proceder pegando a la Stitch rosa
Finally on the top of the ribbon we will proceed by gluing the pink Stitch.
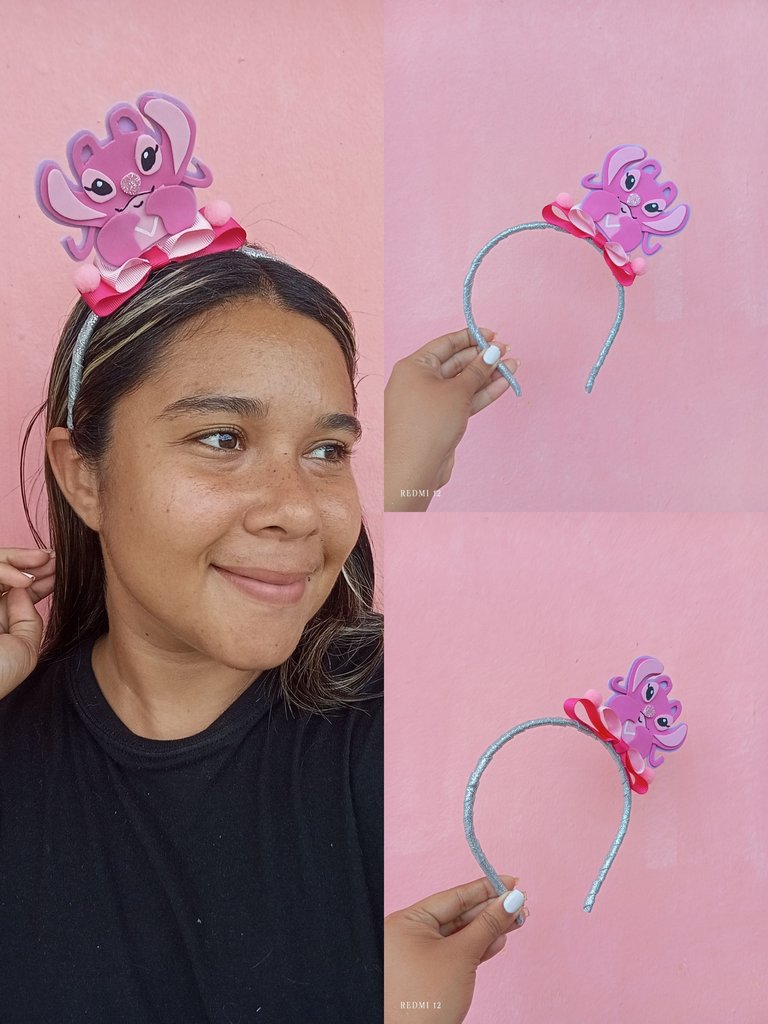
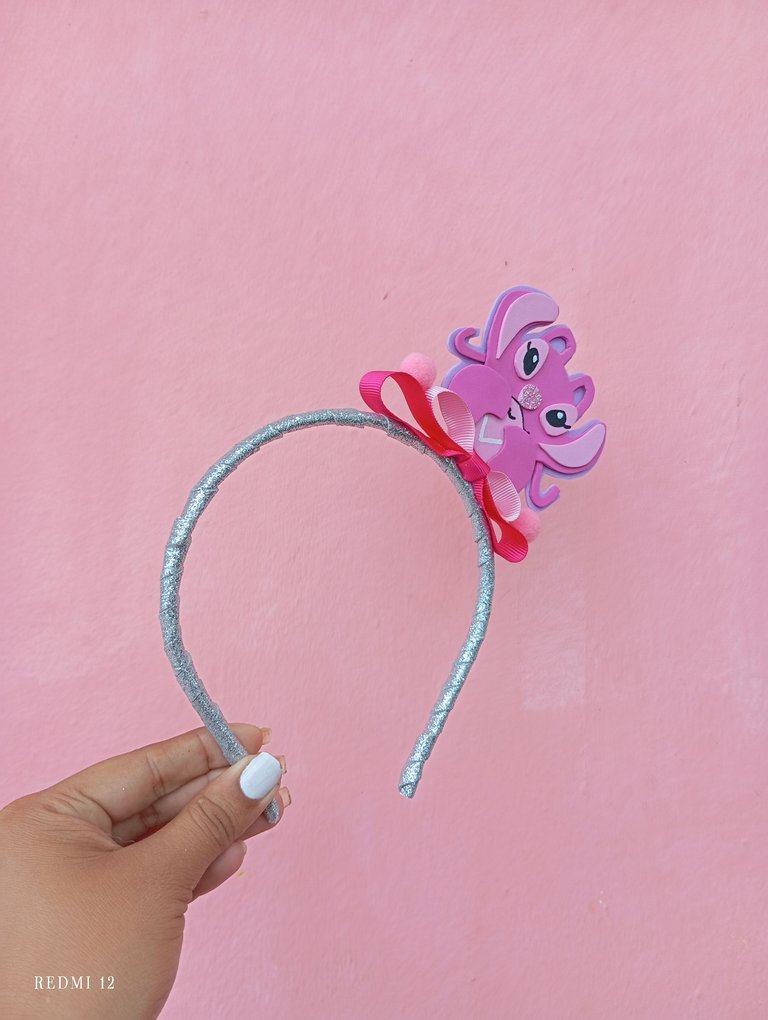
Resultado: está es la muestra final de mi creación de hoy , espero les guste, lo puedan realizar desde sus hogares, saludos créditos:las fotos las tomé con mi redmi 12 y traduje los textos con el traductor deepl, besos y abrazos
Result: this is the final sample of my creation today, I hope you like it, you can make it from home, greetings credits: the photos were taken with my redmi 12 and translated the texts with the translator deepl, kisses and hugs.
Wow this look so beautiful. I wish u luck on the contest
Thanks My friend
This is super beautiful and creative ❤️
The way you combined the baby pink and the deep pink together perfects it ❤️🩹
It looks pretty good. What you did, that's great. Love it. Good to see how you made this step by step. Well done!