Accesorios de figuras geométricas | Geometric figures accessories
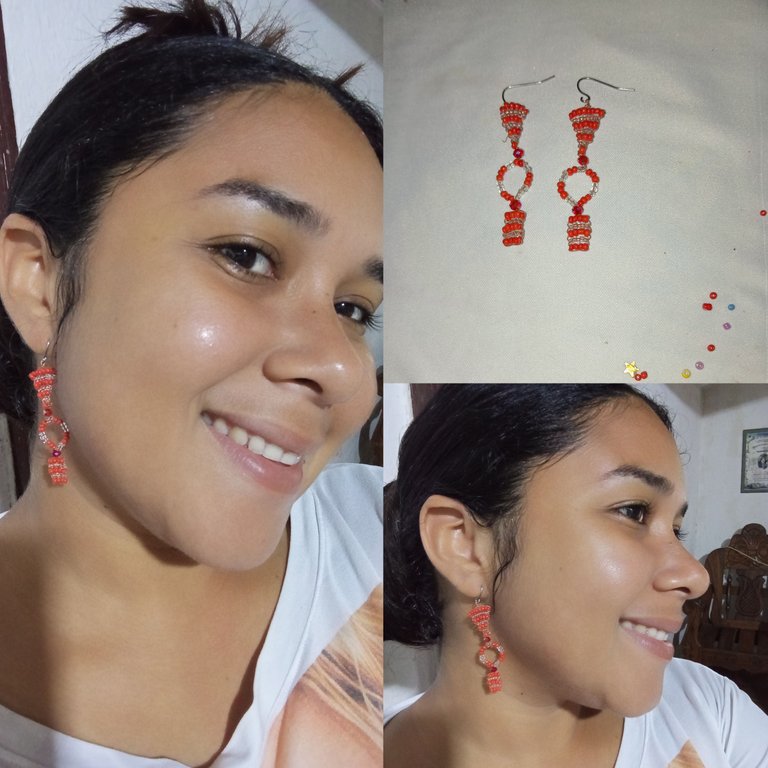
Hola mis hermosos amigos y comunidad jewelry, feliz domingo para todos , espero que se encuentren bien, abrazos desde la distancia, hoy les quiero compartir unos hermosos accesorios inspirados en figuras geométricas (cuadrado ,triángulo,círculo) una combinación con mostacillas rojas y transparente ideal para lucir en una tarde casual,demostrando siempre una diferencia y nuestro talento, a continuación les presentaré los materiales y pasos a seguir
Hello my beautiful friends and jewelry community, happy Sunday to all, I hope you are well, hugs from afar, today I want to share some beautiful accessories inspired by geometric shapes (square, triangle, circle) a combination with red beads and transparent ideal to wear in a casual evening, always showing a difference and our talent, then I will present the materials and steps to follow
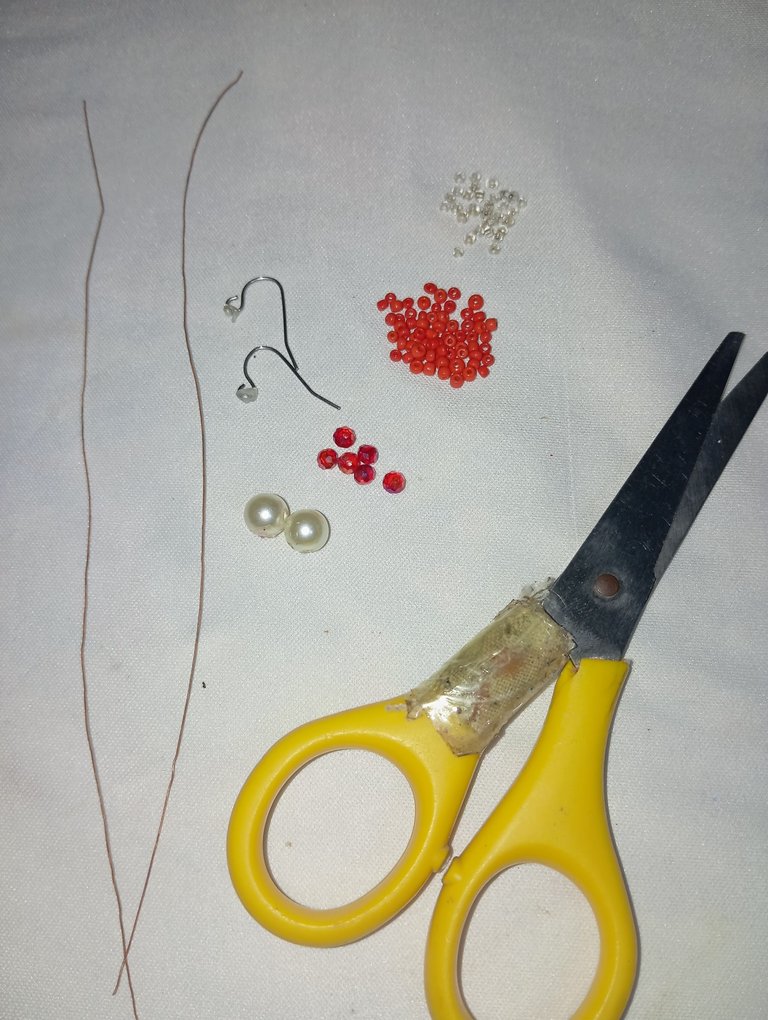
Materiales qué utilice:
-Alambre delgado
-Mostacillas rojas y transparente
-Zarcillos
-Tijera o cortaúñas
Materials I used:
-Thin wire
-Red and transparent beads
-Earrings
-Scissors or nail clippers
A continuación los pasos a seguir:
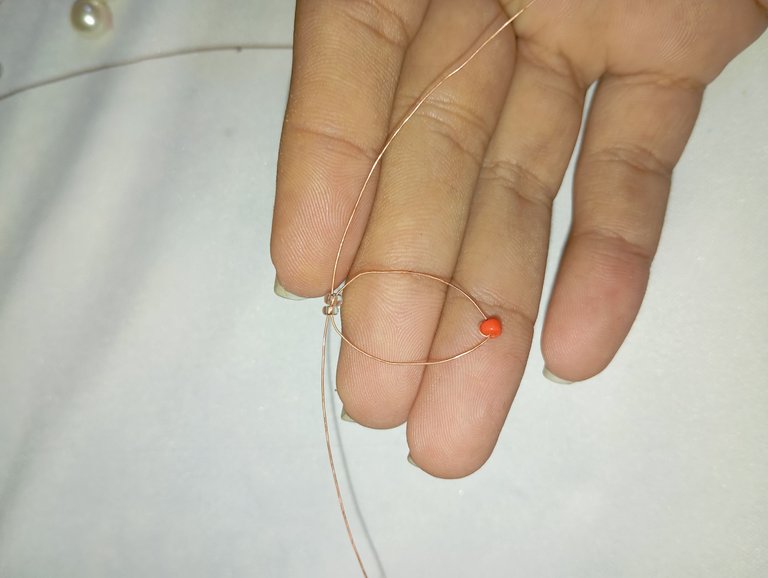
Comenzaré realizando el triángulo , para esto y para todas las figuras , iniciaremos tomando el alambre , luego tomaremos una mostacilla del color de nuestra preferencia la introducimos por el lado derecho y cruzamos el izquierdo por dentro de la mostacilla ,luego continuaremos introduciendo dos mostacillas transparente introduciendo el alambre al contrario del otro dentro de la mostacilla
Here are the steps to follow:
I will begin by making the triangle, for this and for all the figures, we will begin by taking the wire, then we will take a bead of the color of our preference, we introduce it on the right side and cross the left side inside the bead, then we will continue introducing two transparent beads introducing the wire opposite to the other inside the bead.
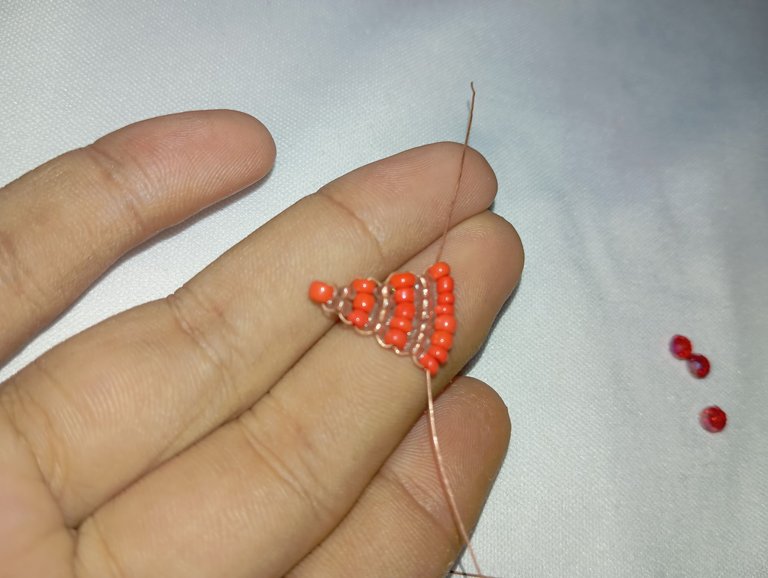
Debemos repetir el procedimiento hasta conseguir que el triángulo tomé tamaño y por supuesto su forma ,de esta manera debe quedar nuestro triángulo , utilice en total 17 rojas y 13 transparentes , a medida que introducía una roja ,colocaba dos transparente,luego tres rojas y a las transparente le sumaba otra más,así hasta formar nuestro triángulo
We must repeat the procedure until the triangle takes size and of course its shape, in this way our triangle should be, I used a total of 17 red and 13 transparent, as I introduced a red, placed two transparent, then three red and transparent to the transparent added another one, so to form our triangle
A continuación vamos a realizar el cuadrado, primero tomaremos cuatro mostacillas rojas y la introducimos por el lado derecho ,cruzando el alambre izquierdo por dentro de las mostacillas hacia el lado derecho,de esta manera debe quedar para que no se salgan las mostacillas
Next we are going to make the square, first we will take four red beads and introduce them on the right side, crossing the left wire inside the beads to the right side, in this way it should be so that the beads do not come out.
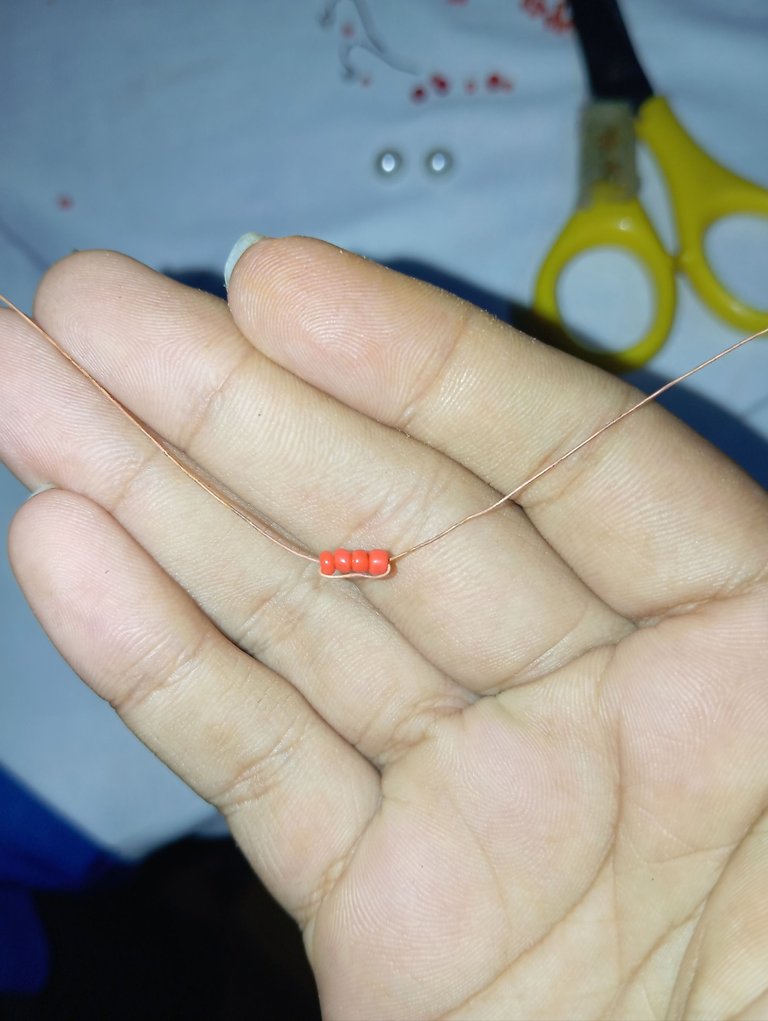
Luego continuamos introduciendo las mostacillas transparente como lo hicimos con las mostacillas rojas,de cuatro en cuatro cada color ,la introducimos por el alambre derecho ,cruzamos el izquierdo por dentro de las mostacillas hacia el derecho o viceversa amigos hasta obtener un tamaño deseado amigos , para esta pieza utilice 12 rojas y 8 transparente
Then we continue introducing the transparent beads as we did with the red beads, four by four each color, we introduce it through the right wire, cross the left wire inside the beads to the right or vice versa friends until you get a desired size friends, for this piece use 12 red and 8 transparent.
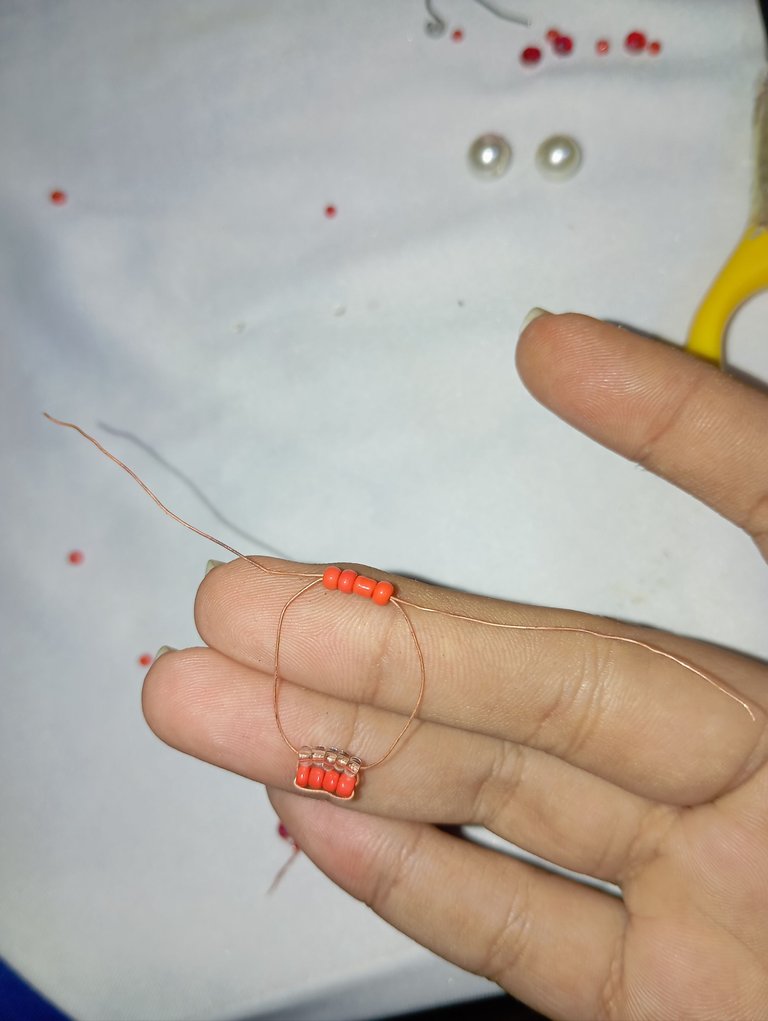
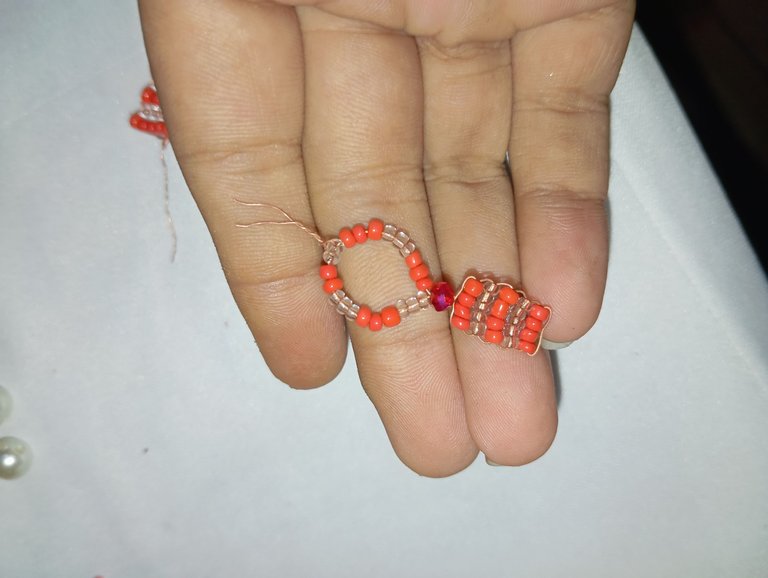
A continuación realizaremos el círculo en este siguiente paso, primero amigos introducimos la piedra brillante color rojo para que está quede formando la separación de las figuras geométricas, luego tomamos las dos puntas y comenzamos a introducir mostacillas transparente y rojas de ambos lados ,de dos en dos como lo pueden observar de forma ordenada para que se pueda apreciar el diseño y la combinación de ambas piedras
Next we will make the circle in this next step, first friends we introduce the bright red stone so that it is forming the separation of the geometric figures, then we take the two tips and begin to introduce transparent and red beads on both sides, two by two as you can see in an orderly manner so that you can see the design and the combination of both stones.

Por último tomamos ambas puntas y cerramos nuestro círculo , obteniendo nuestra figura geométrica redonda, la parte más sencilla y fácil a realizar es esta como lo han observado
Finally we take both points and close our circle, obtaining our round geometric figure, the simplest and easiest part to make is this as you have observed.
Para finalizar nuestros accesorios ya teniendo listos nuestras figuras geométricas, tomaremos una piedra brillante la introducimos arriba de el círculo y adaptamos el triángulo en la parte de arriba con las demás figuras
To finish our accessories and having our geometric figures ready, we will take a shiny stone, we introduce it on top of the circle and adapt the triangle on the top with the other figures.
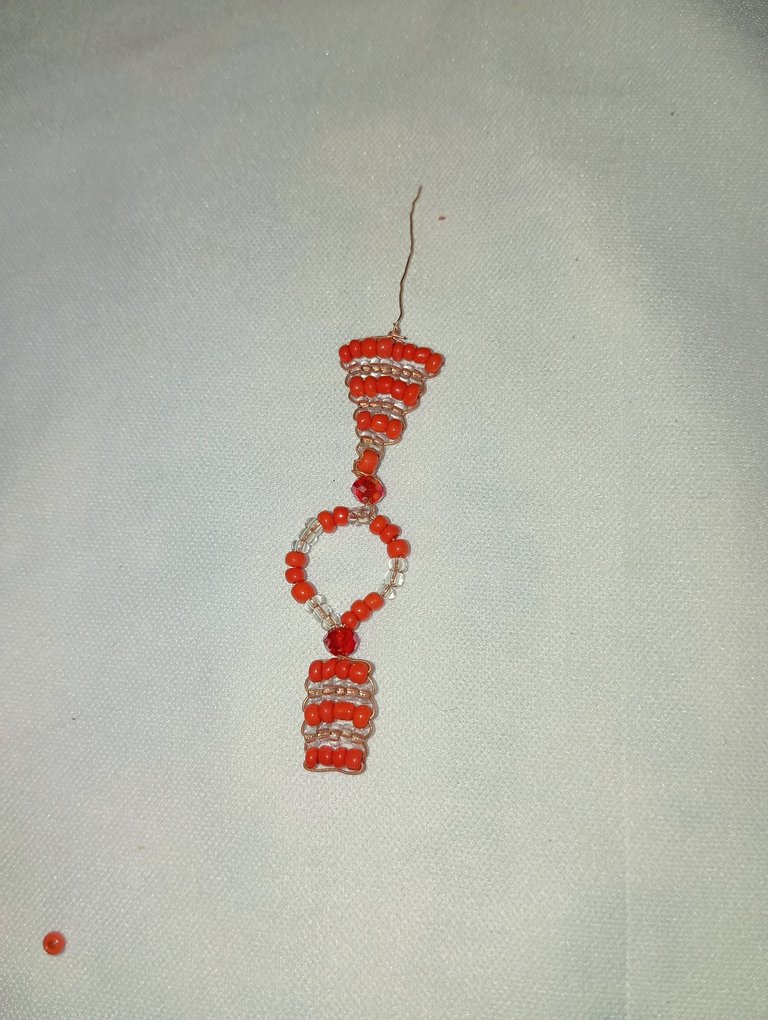
Por último tomaré mis zarcillos y los colocaré en la parte de arriba de las figuras geométricas para lucir mis bellos zarcillos
Finally I will take my earrings and place them on top of the geometric figures to show off my beautiful earrings.
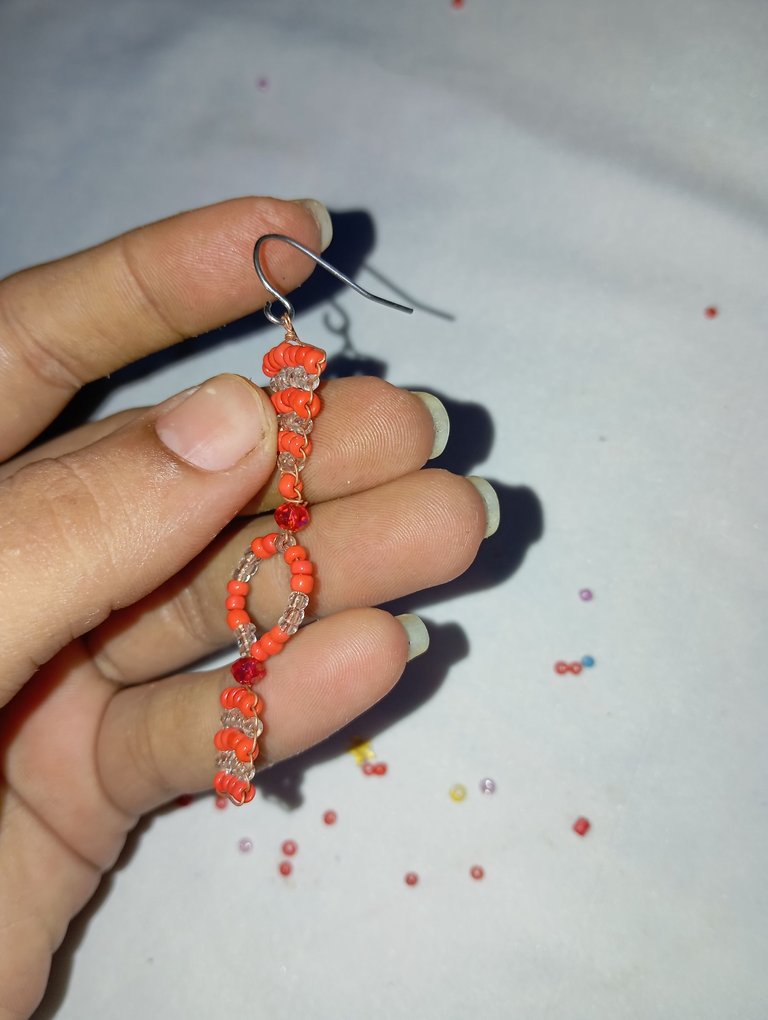
De esta manera realice mis accesorios inspirados en figuras geométricas, ideales para lucir en cualquier tarde de paseo , utilizando tres diseños en uno , creando sin parar amigos , las fotos las tomé con mi redmi 12 y traduje los textos con el traductor deepl, feliz tarde nos vemos la próxima
In this way I made my accessories inspired by geometric shapes, ideal to wear on any afternoon outing, using three designs in one, creating non-stop friends, I took the photos with my redmi 12 and translated the texts with the deepl translator, happy afternoon see you next time.
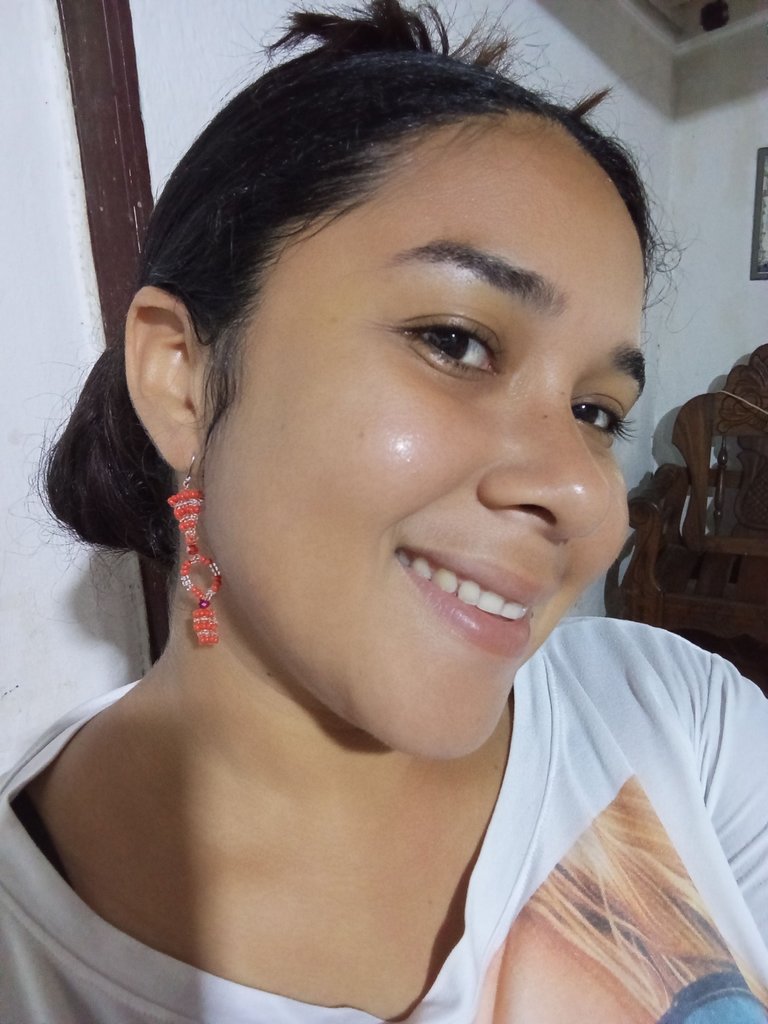
Muy casuales esos aretes, te lucen muy bien, saluditos.
Gracias amiga
It is stylish, elegant and beautiful. The design stands out. Great job!
thank you very much, happy night
Congratulations @jorgelissanchez! You have completed the following achievement on the Hive blockchain And have been rewarded with New badge(s)
You can view your badges on your board and compare yourself to others in the Ranking
If you no longer want to receive notifications, reply to this comment with the word
STOPCheck out our last posts:
Muy lindo mami, ese color me gustó mucho, y la creatividad con las figuras geométricas. Gracias por compartir
Te quedaron genial amiga excelente el paso a paso muy fácil saludos y bendiciones.
Gracias amiga
Feliz día bendiciones.