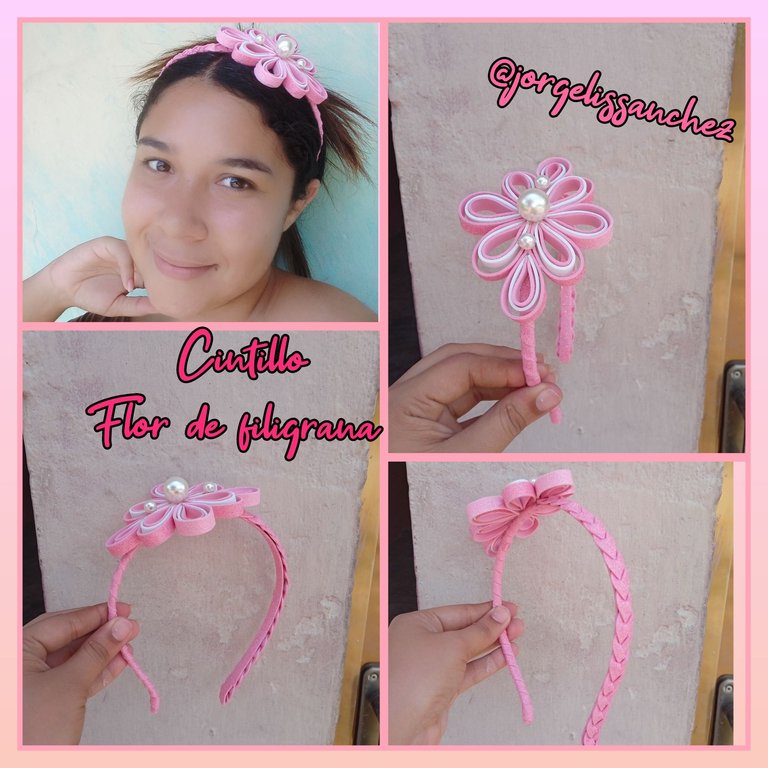
Accesorio para el cabello con flor de filigrana | Hair accessory with filigree flower
Hola queridos amigos ,feliz tarde tengan todos ,espero que se encuentren bien y así mismo deseo que sigan construyendo y cosechando buenos frutos cada día dentro de esta maravillosa plataforma , hoy les quiero compartir un tutorial muy hermoso, sobre cómo redecorar un cintillo con una flor utilizando la técnica de filigrana , estos bellos Accesorios son perfectos para cualquier ocasión
Hello dear friends, happy afternoon to you all, I hope you are well and I wish you continue to build and reap good fruits every day in this wonderful platform, today I want to share a very beautiful tutorial on how to redecorate a headband with a flower using the filigree technique, these beautiful accessories are perfect for any occasion.
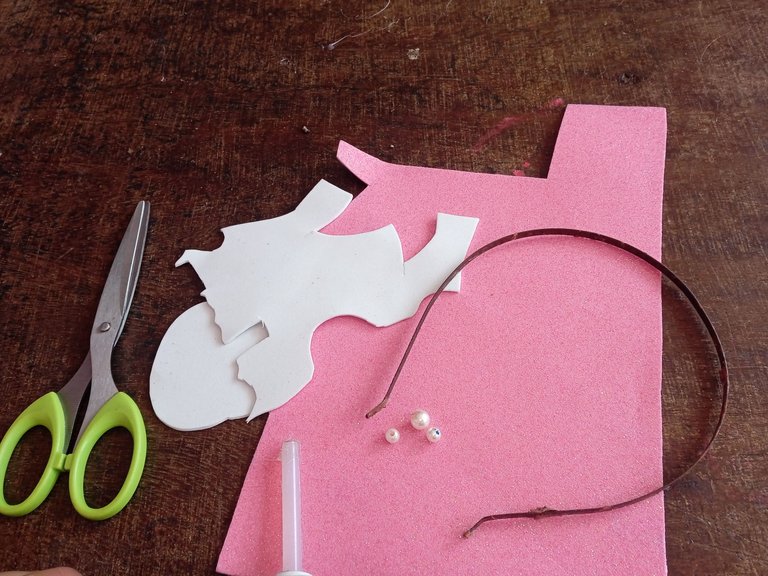
Materiales que utilice :
-Foamis (Blanco y Rosa )
-Tijera
-Silicon
-Piedras plásticas torno perlado
-Cintillo
Materials I used :
-Foamis (White and Pink )
-Scissors
-Silicon
-Plastic stones pearl lathe
-Cintillo
A continuación los pasos a seguir :
La técnica de filigrana casi siempre la realizamos con tira , es una técnica muy sencilla pero que hace ver las temáticas más allá de lo simple hermosas y elegantes , iniciaremos recortando doce tiras de foamis color rosa , seis tiras de un centímetros de ancho y seis de altura ,las otras seis de el mismo grosor pero la diferencia que estás son de cuatro centímetros
Here are the steps to follow:
The filigree technique is almost always done with strips, it is a very simple technique but it makes the themes look beautiful and elegant beyond the simple, we will start cutting twelve strips of pink foamis, six strips of one centimeter wide and six centimeters high, the other six of the same thickness but the difference is that these are four centimeters.
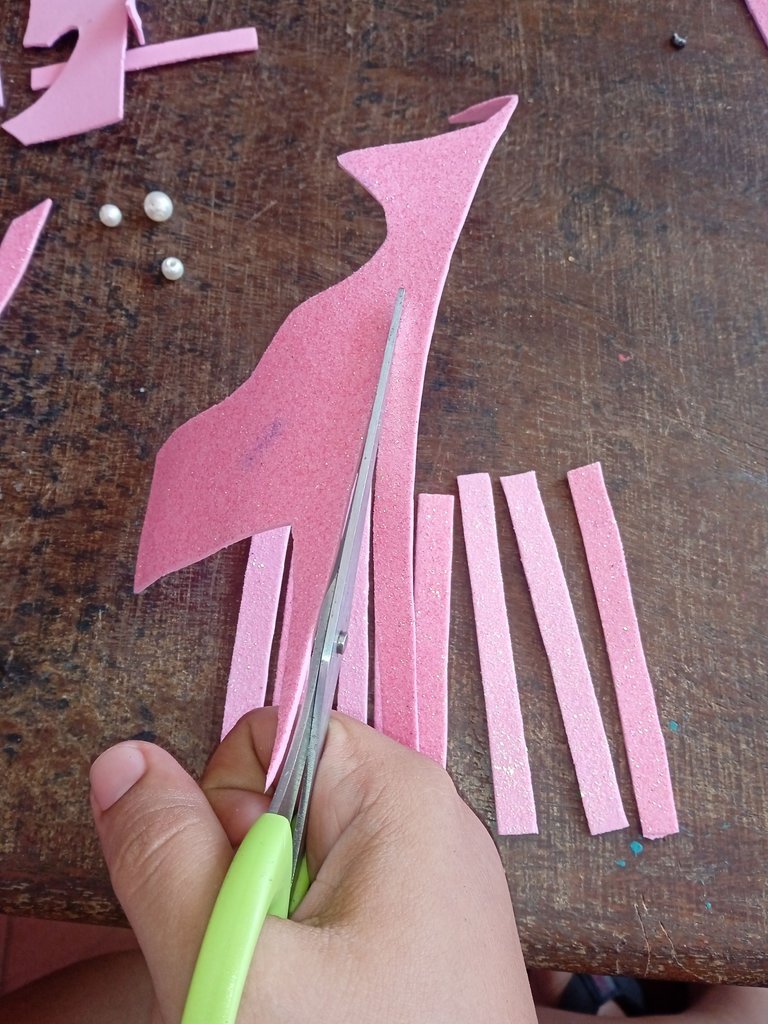
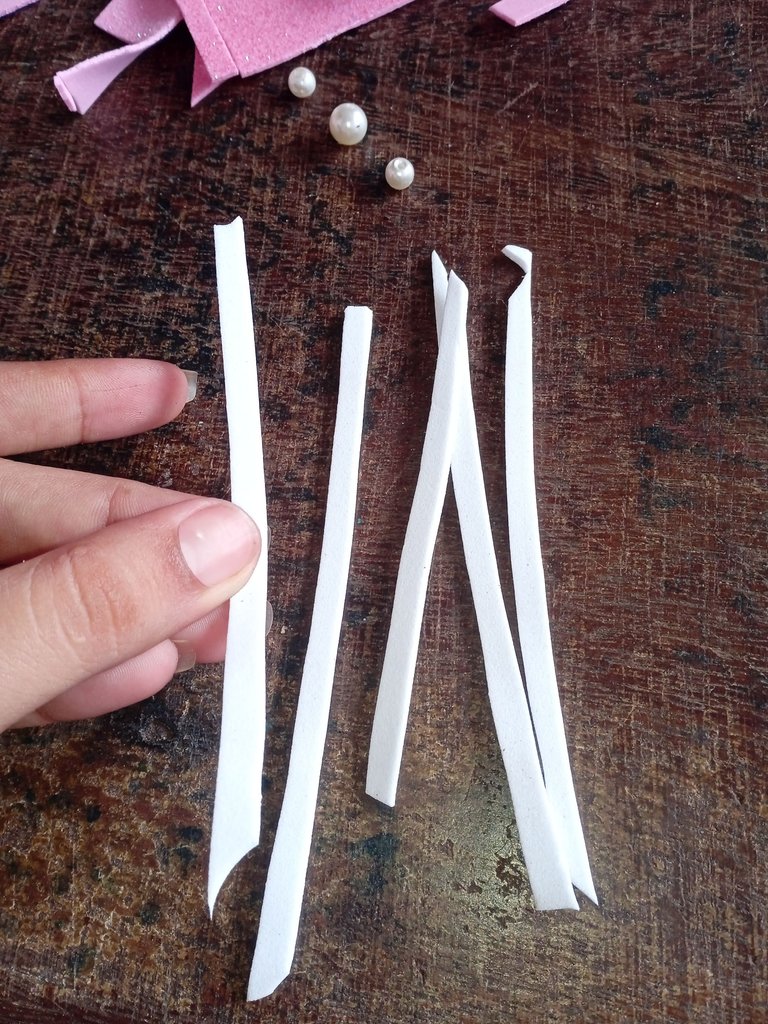
Luego continuaremos procediendo a recortar seis tiras más ,estás serán delgadas , y de cinco centímetros de altura ,para entre meter los colores vamos a utilizar el color blanco
Then we will proceed to cut six more strips, these will be thin, and five centimeters high, to insert the colors we will use the white color.
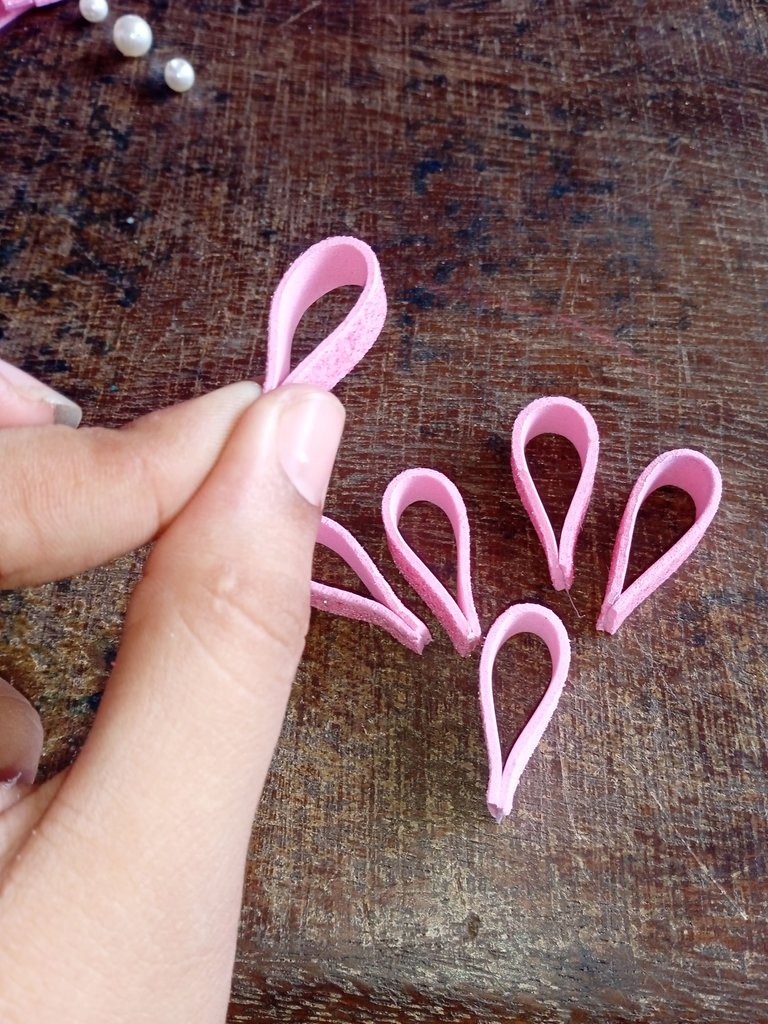
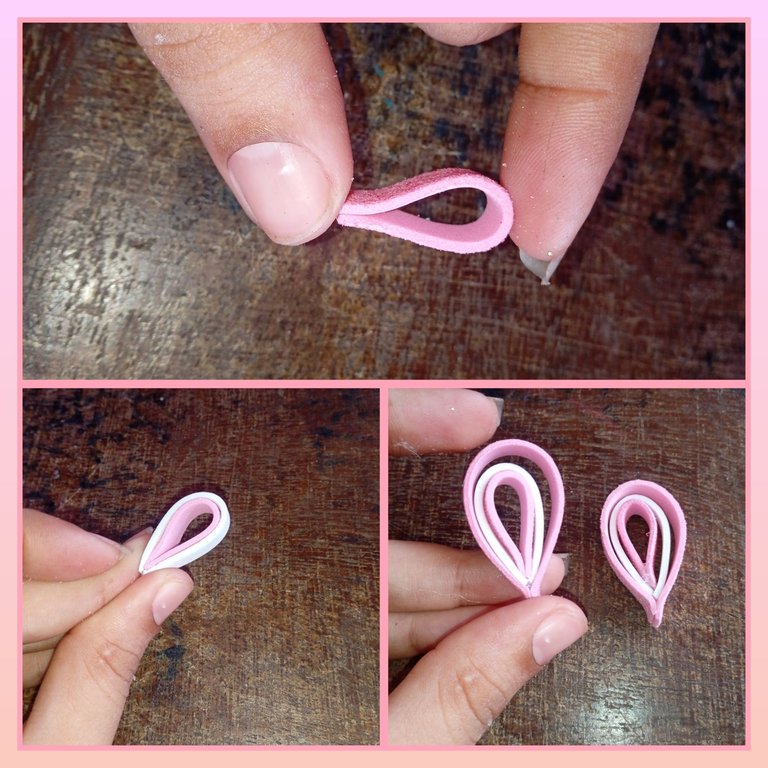
A continuación vamos a tomar primeramente las tiras más pequeñas color rosa y formaremos nuestros pétalos , primero añadimos silicon en una punta de la tira y la llevamos pegando hacia la otra hasta formar el pétalo
Next we will first take the smaller pink strips and form our petals, first add silicone to one end of the strip and stick it to the other until we form the petal.
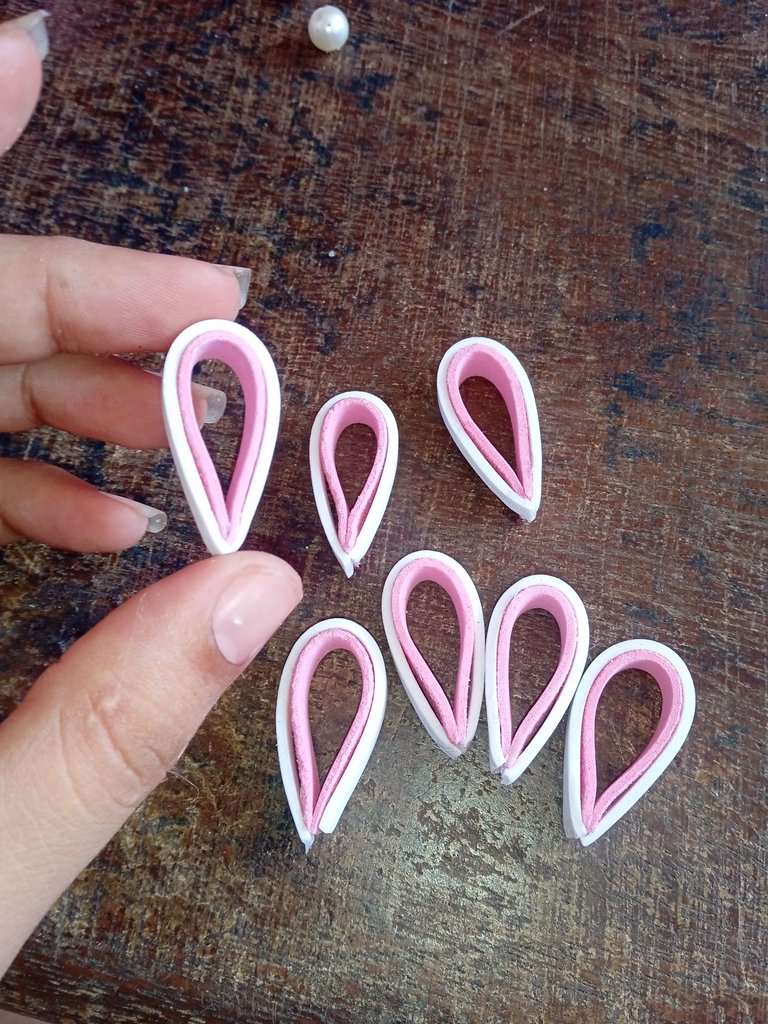
Luego tomaremos la tira color blanca y la pegaremos de la misma manera que el pétalo que formamos en el paso anterior , tomamos nuestro petalo pequeño agregamos silicon en una punta ,pegamos y luego pegamos la otra punta
Then we will take the white strip and glue it in the same way as the petal we formed in the previous step, we take our small petal, add silicon on one end, glue it and then glue the other end.
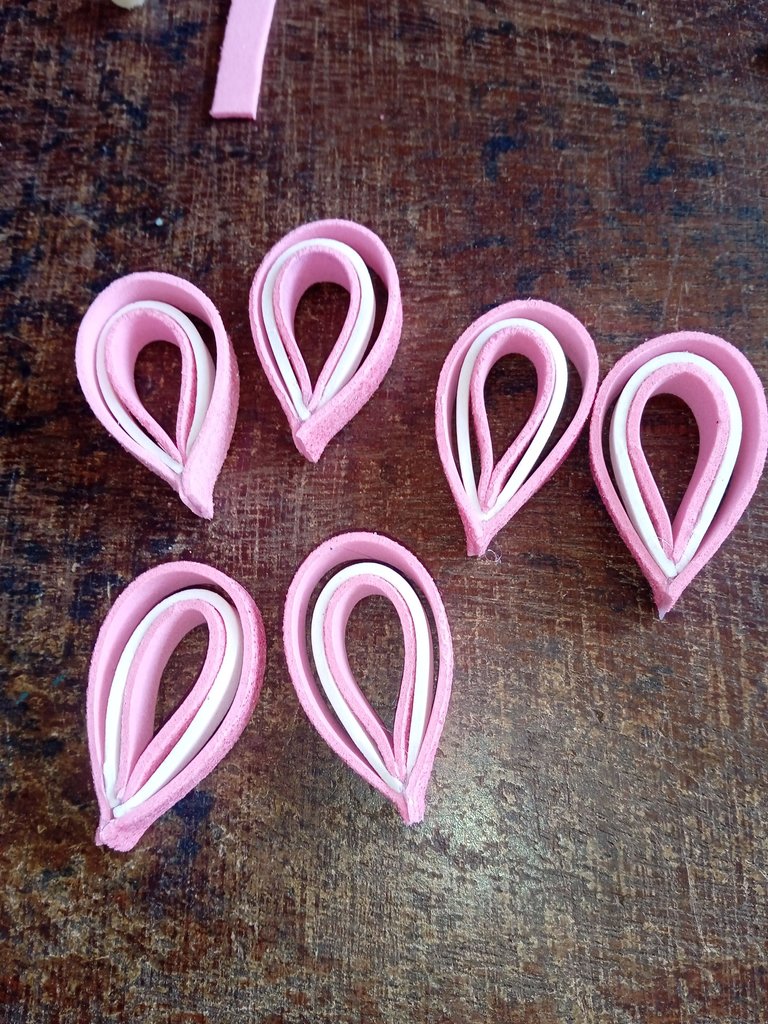
Una vez que tengamos los dos primeros pétalos listos vamos a continuar pegando el tercero , tomaremos la tira más larga y la pegaremos encima de los otros dos pétalos , desde una punta pegamos y continuamos hasta la otra punta hasta formar nuestro petalo tres en uno , si desean añadir más para que está se vea más voluminosa deben agregar más tiras ,ya que de esto consiste dar formas con tiras
Once we have the first two petals ready we will continue gluing the third one, we will take the longest strip and glue it on top of the other two petals, from one end we glue and continue to the other end until we form our petal three in one, if you want to add more to make it look more voluminous you must add more strips, since this is what it consists of giving shapes with strips
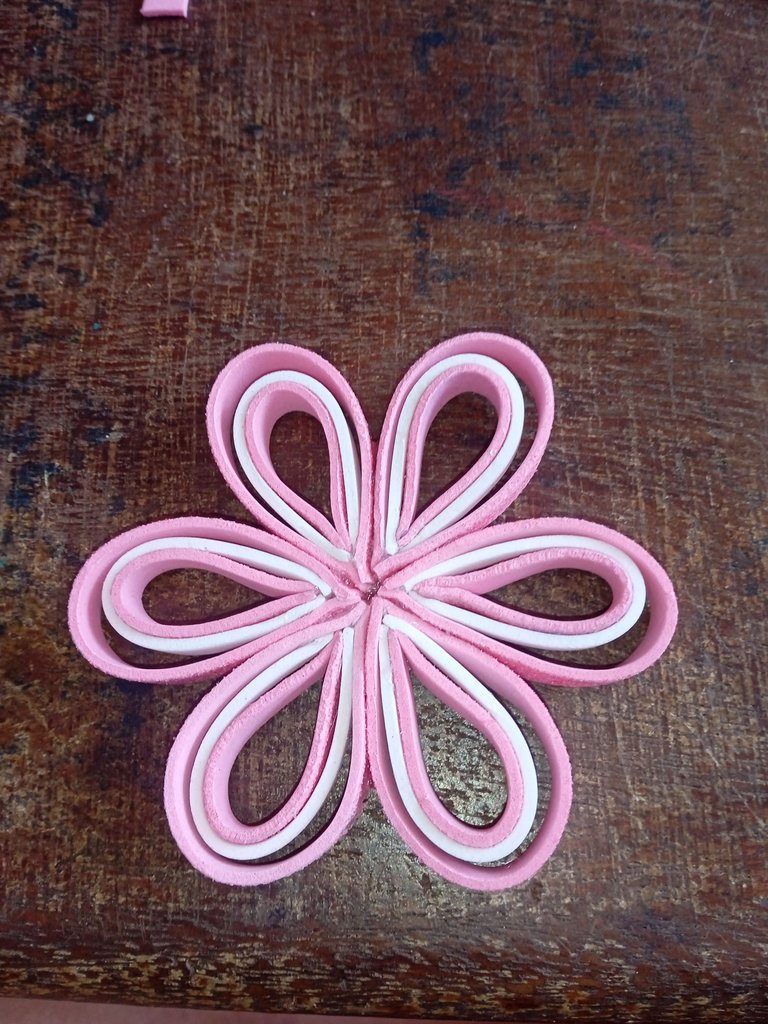
Cuando tengamos listos los pétalos ,para formar nuestra flor , debemos iniciar pegando tres pétalos juntos y tres más apartes , ya que está flor es de seis pétalos ,tal cual lo observan en la fotografía para que de esta manera quede derecha
When we have the petals ready to form our flower, we must start gluing three petals together and three more apart, as this flower is six petals, as you can see in the picture so that in this way it is straight
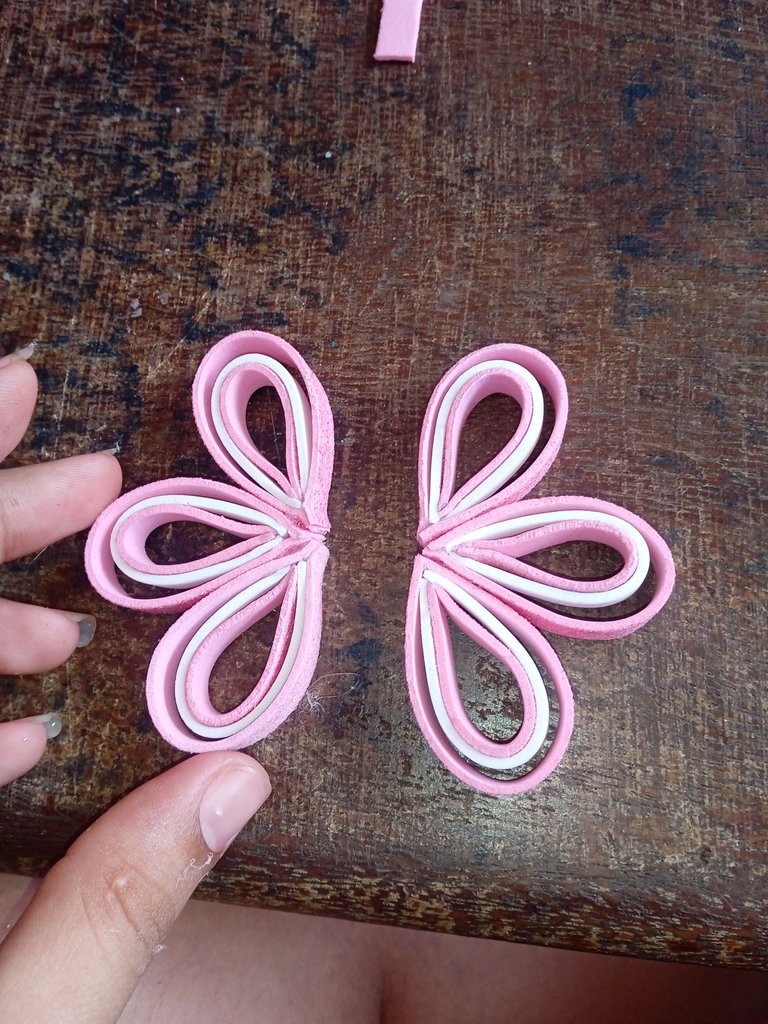
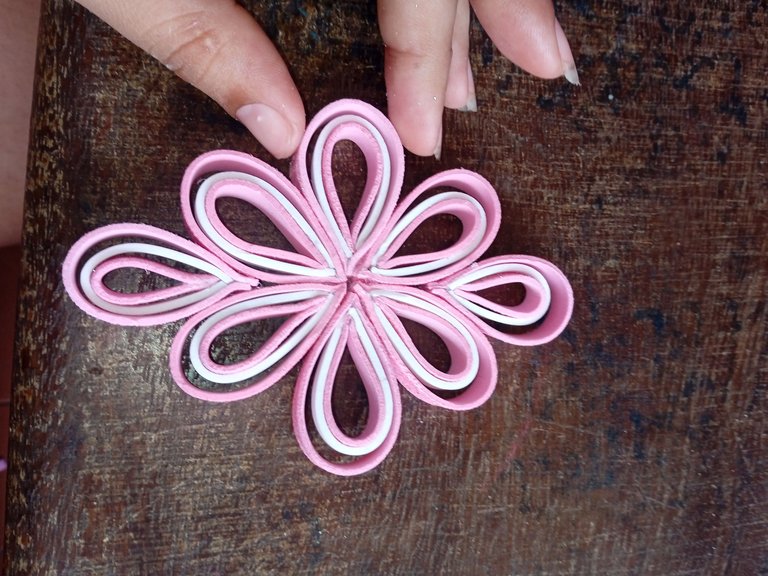
Luego tomaremos nuestros dos pétalos de tres y los uniremos hasta formar nuestra flor de seis pétalos
Then we will take our two petals of three and join them together to form our flower of six petals.
Adicionalmente vamos a realizar dos pétalos más para decorar en dos esquinas de nuestra flor , recortamos una tira rosa está será la más pequeña formamos nuestro petalo , luego arriba de esta misma pegaremos una tira blanca y por último la rosada hasta formar un pétalo de tres capa
Additionally we are going to make two more petals to decorate two corners of our flower, we cut a pink strip, this will be the smallest one, we will form our petal, then we will glue a white strip on top of it and finally the pink one to form a three layer petal.
Luego procederemos pegando nuestros dos pétalos adicionales un arriba de el otro tan sencillo como lo pueden observar
Then we proceed by gluing our two additional petals one on top of the other as simple as you can see
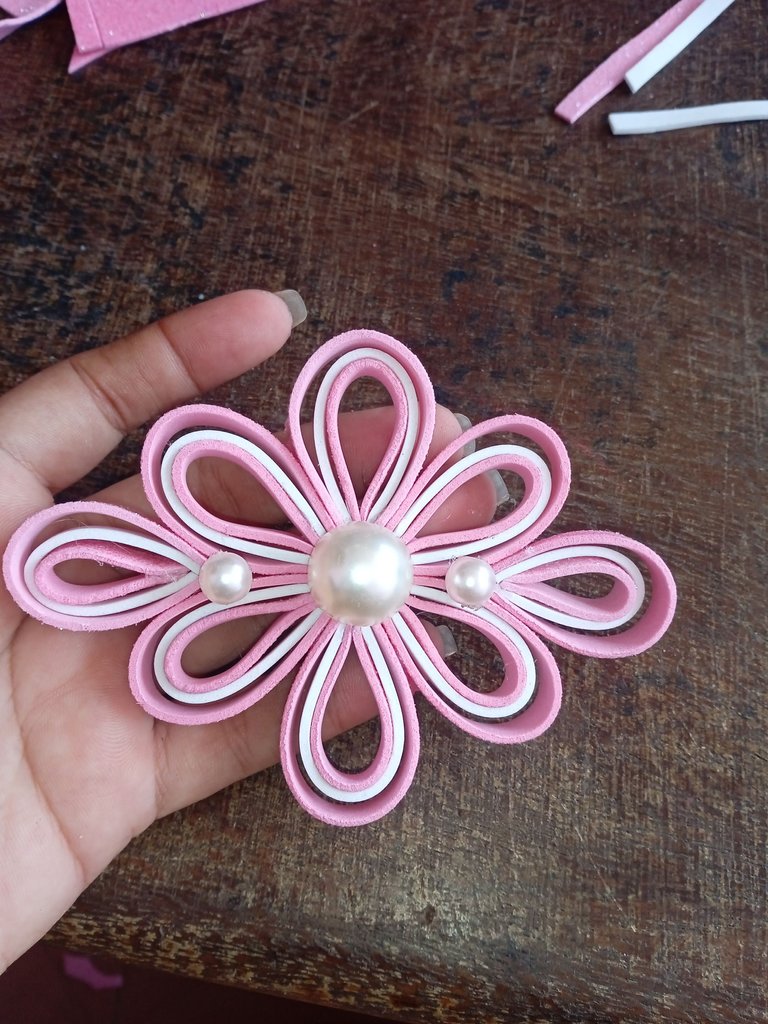
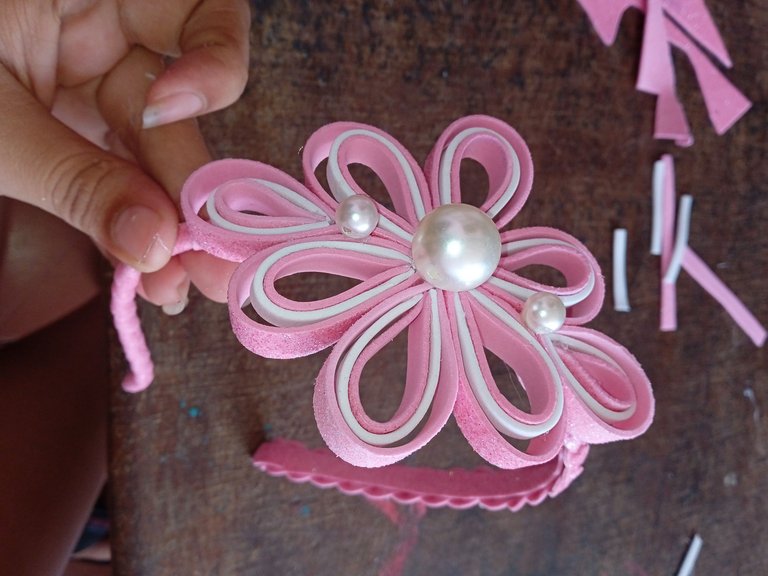
Luego tomaremos nuestras tres piedras plásticas torno perlado y procederemos a pegar la más grande en el entro de la flor , y las otras dos más pequeñas hacia los lados
Then we will take our three plastic pearl lathe stones and proceed to glue the largest one in the center of the flower, and the other two smaller ones to the sides
Para decorar nuestro cintillo vamos a recortar unas cuatros tiras , con tres de ellas realizaremos un tejido para aplicar dos diseños juntos a nuestro cintillo y se observe ,hermoso ,delicado y elegante
To decorate our headband we will cut some four strips, with three of them we will make a weave to apply two designs together to our headband and it will look beautiful, delicate and elegant

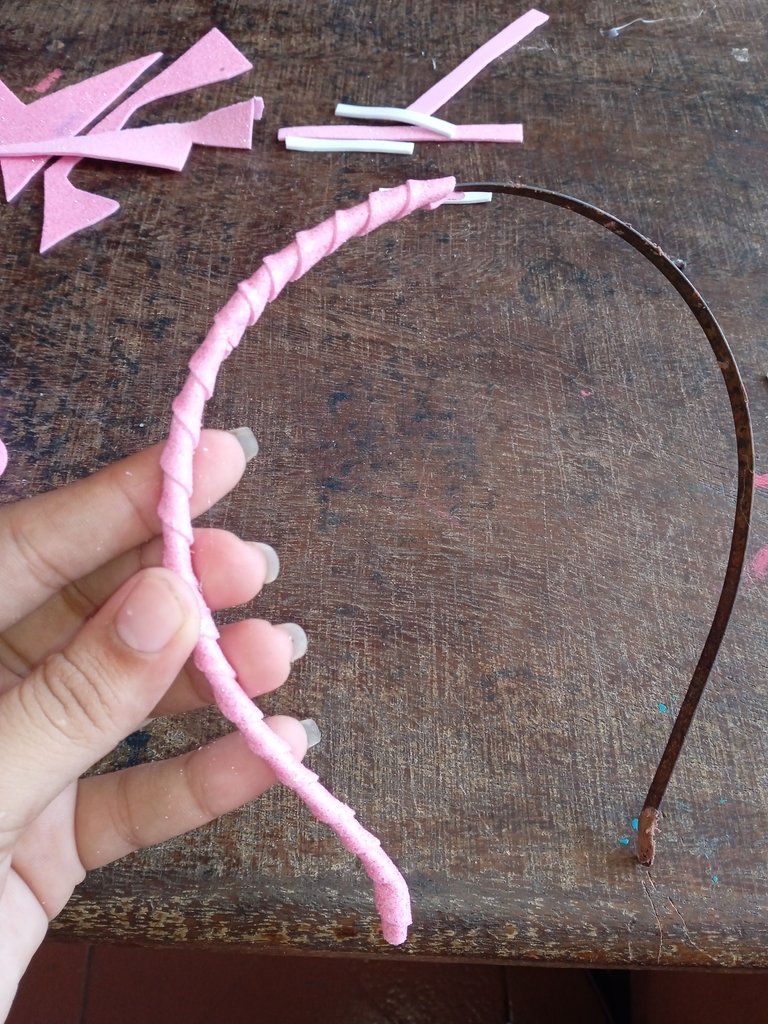
A continuación vamos a proceder a decorar nuestro cintillo , la mitad será enrollada y la otra tejida ,comenzamos con la enrollada , iniciamos decorando enrollando de abajo hacia arriba , hasta llegar a la mitad
Next we will proceed to decorate our headband, half of it will be rolled and the other half will be woven, we start with the rolled one, we start decorating by rolling from bottom to top, until we reach the middle.
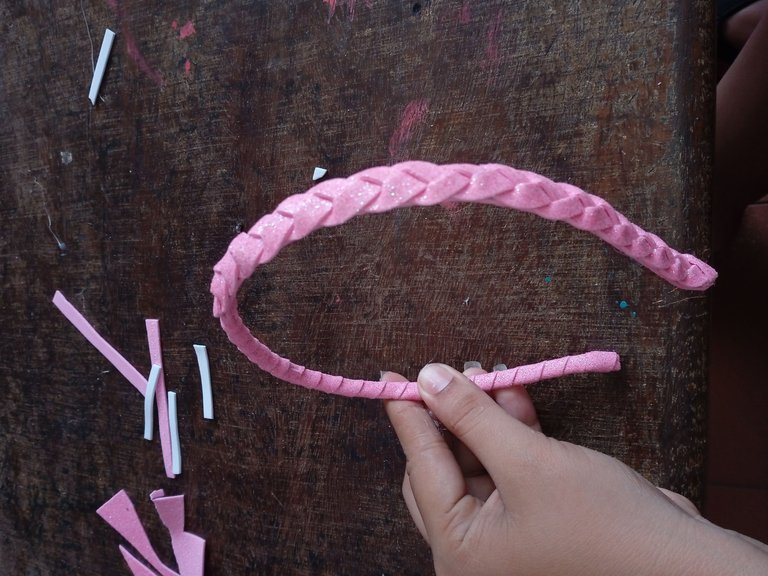
Luego para finalizar con la decoración de el cintillo vamos a tomar nuestro tejido y lo pegaremos desde la mitad que dejamos sin decorar hasta abajo , para que no se observe la parte de abajo de el cintillo pegamos una tira de forma recta
Then to finish with the decoration of the headband we will take our fabric and glue it from the half that we left undecorated to the bottom, so that the bottom of the headband is not observed, we glue a straight strip.
Para culminar vamos a tomar nuestra flor en con técnica de filigrana y la pegaremos en una esquina de nuestro hermoso cintillo ,dado por terminado nuestra hermosa decoración
To finish we are going to take our flower with filigree technique and glue it in a corner of our beautiful headband, we have finished our beautiful decoration
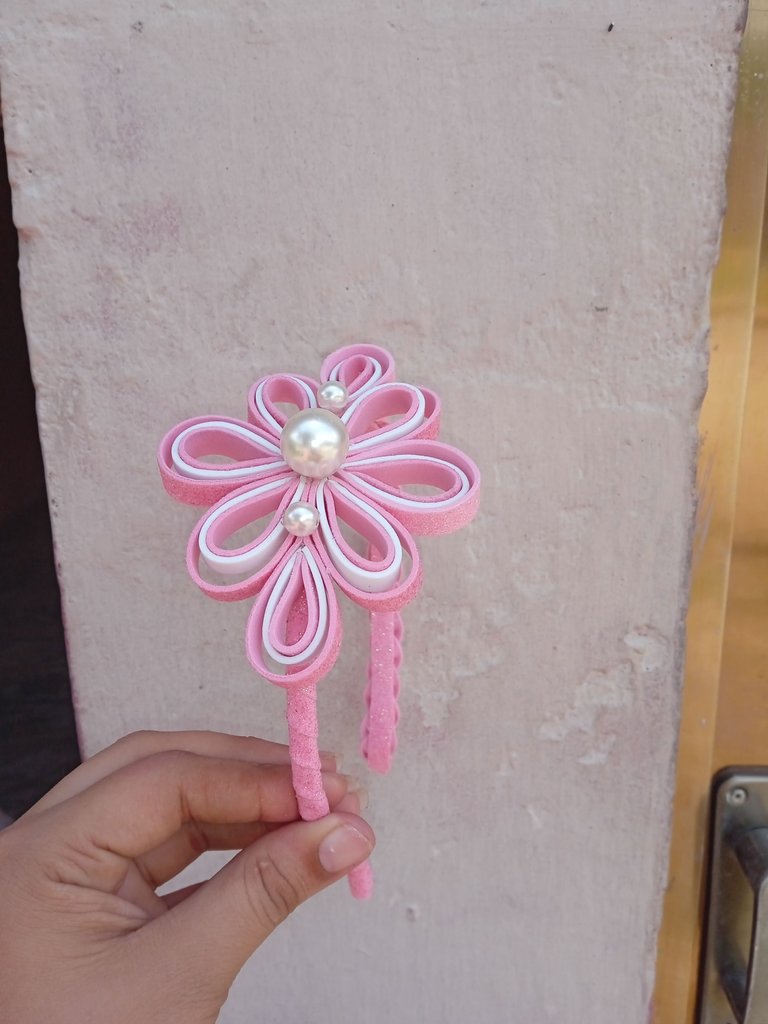
Este es el resultado final de mi hermoso cintillo , utilizando para base de el cintillo dos diseños ,enrollado y tejido , y para la decoración final una flor con la técnica de filigrana acompañado de unas lindas perlas plásticas , ideal para las damas y niñas que amamos lo delicado y sencillo ,las fotos las tomé con mi Redmi 9C y los textos los traduje con el traductor DeepL , que pasen bella tarde
This is the final result of my beautiful headband, using for the base of the headband two designs, rolled and woven, and for the final decoration a flower with filigree technique accompanied by a nice plastic pearls, ideal for ladies and girls who love the delicate and simple, the photos were taken with my Redmi 9C and the texts were translated with the translator DeepL, have a beautiful evening.
Está genial, me encantan los colores y el detalle de las perlas 👍
Me alegra que te haya gustado amiga
Te quedó hermoso amiga, me gustó la idea del tejido, tengo varios cintillos que se me han dañado y creo q ese tejido sería la opción perfecta para recuperarlos.
Felicidades por tu hermoso trabajo.
A mí también me gusta mucho los tejidos y las perlas amiga ,gracias
Está precioso! @jorgelissanchez Gracias por compartirlo
Gracias amiga linda