Splinterlands fanArt: Iza the Fanged
Arte Digital | Digital Art
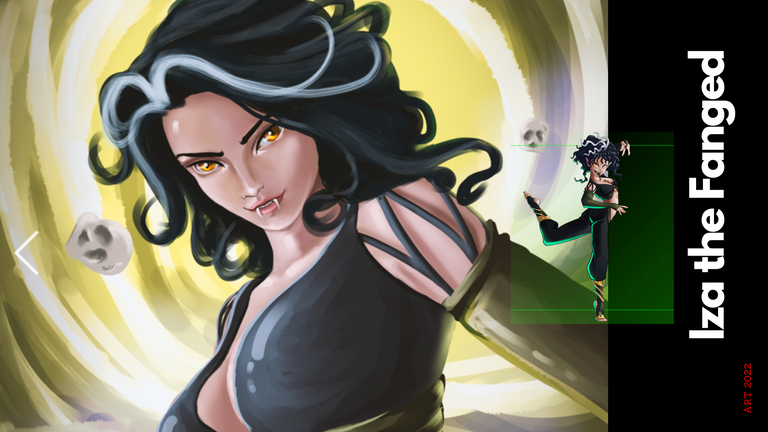
Saludos querida comunidad, presento un nuevo trabajo digital con el cual participare en el concurso de arte elaborado por @splinterlands, han pasado 7 dias desde mi ultima participacion en el concurso que aunque no quede entre los ganadores pero estuve muy feliz y agradecido por el apoyo que le dieron en recompensas a mi post, siempre estare agradecido con hive por todo el apoyo que me brinda, por eso jamas dejar de crear arte. Hablemos del Fanart, este personaje lo tenia guardado en mi galeria durante meses y no habia llegado la inspiracion hasta este momento, dure aproximadamente 7 horas seguidas en la elaboracion vamos a ver el proceso de creacion...
Greetings dear community, I present a new digital work with which I will participate in the art contest prepared by @splinterlands, 7 days have passed since my last participation in the contest that although I was not among the winners but I was very happy and grateful for the support that they gave in rewards to my post, I will always be grateful to hive for all the support it gives me, that's why I will never stop creating art. Let's talk about the Fanart, I had this character saved in my gallery for months and the inspiration had not arrived until now, it lasted approximately 7 hours in a row in the elaboration, let's see the creation process...
¡Espero te guste! | I hope you like!
Presentación del diseño | Desing presentación
Materiales | Materials
- Mini laptop
- Tableta Huion H950P
- Programa Adobe Photoshop 2019
- Mini laptop
- Huion H950P tablet
- Adobe Photoshop 2019 program

Proceso | Process
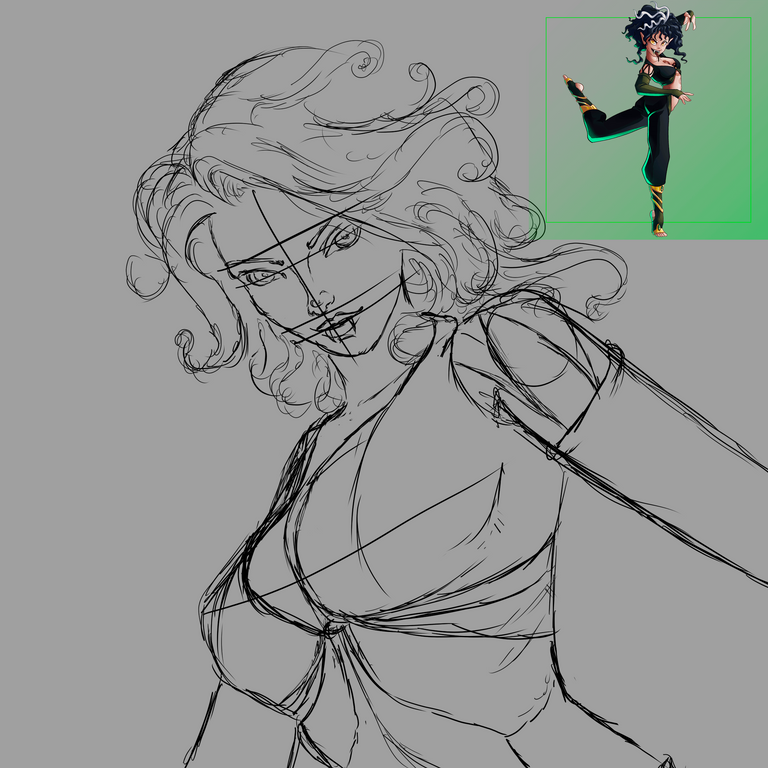
Primer paso: El boceto, es donde creamos la mayor parte de lo que queremos, despues tener lineas entendibles, continuamos al segundo paso:
First step: The sketch is where we create most of what we want, after having understandable lines, we continue to the second step:
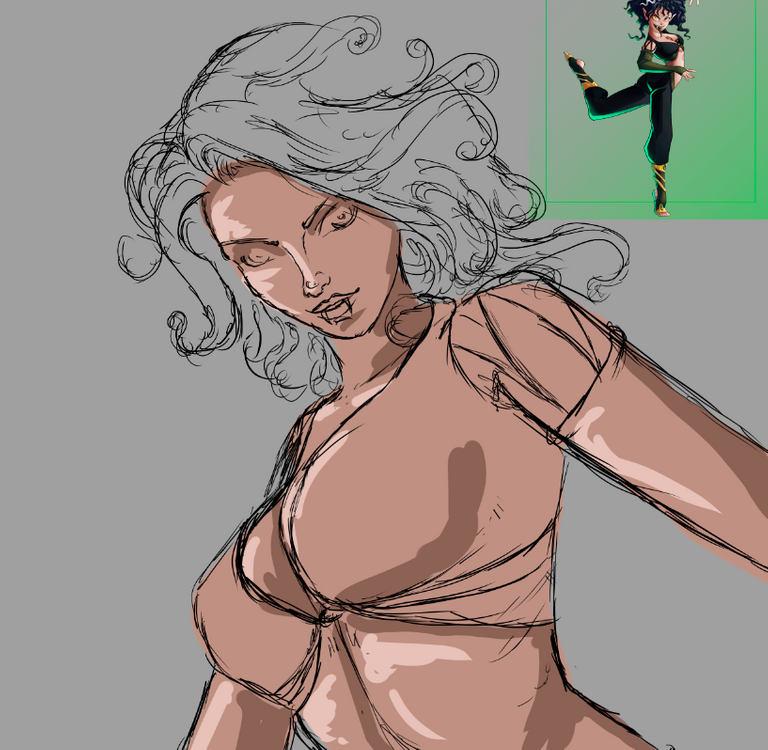
Segundo paso: colores base, Selecionamos algunas tonalidades un tono medio y adicional a este uno oscuro partiendo de la base y un claro partiendo de la misma base escogida anteriormente, y una tonalidad saturada para que sea mejor trabajada al piel al momento de mezclar las tonalidades.
Para este paso uso un pincel difuso, resulta mejor al momento de mezclar el color:
Second step: base colors, we select some shades a medium tone and in addition to this a dark one starting from the base and a light one starting from the same base chosen previously, and a saturated shade so that it is better worked to the skin when mixing the shades .
For this step I use a diffuse brush, it is better when mixing the color:
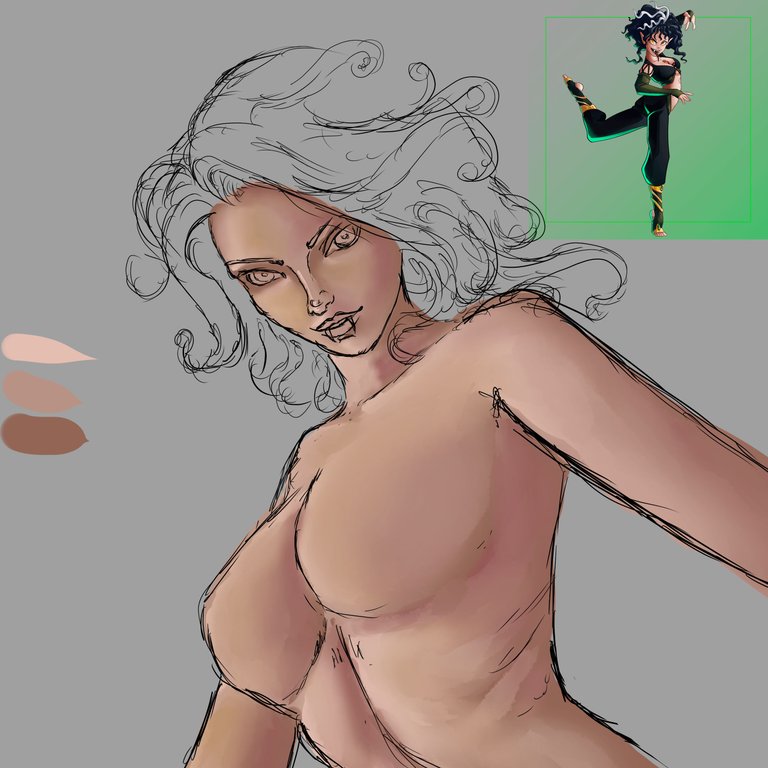
Tercer paso: una vez mezclamos todo el color de la piel es momento de detallar las otras partes de la ilustracion:
Third step: once we mix all the skin color, it is time to detail the other parts of the illustration:
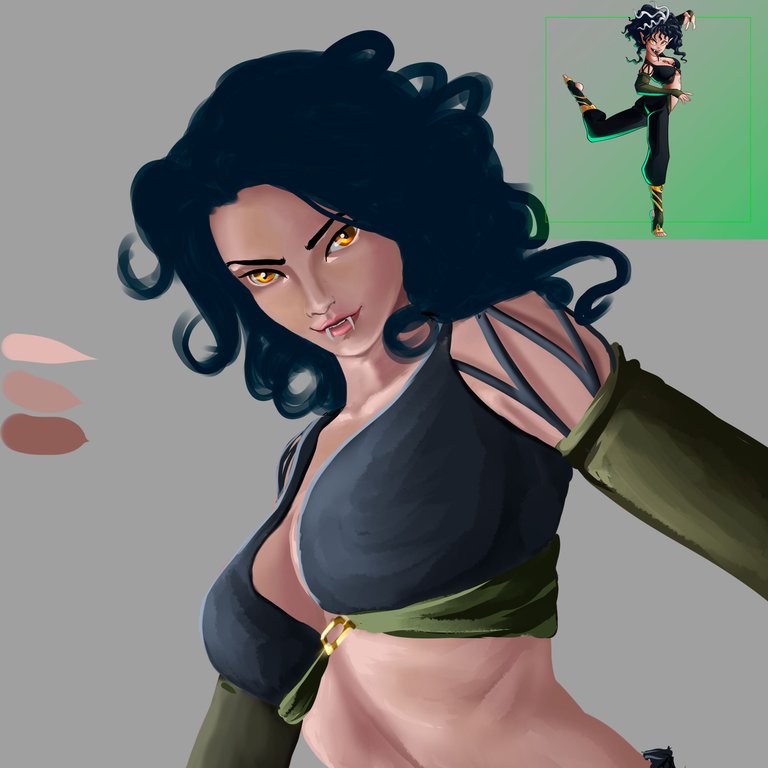
Paso cuatro: Despues de ajustar y unificar los tonos de la piel procecedi a agregar su vestuario y cabello este tipo de cabello me resulta un poco mas facil que los mas realistas creo que me quedare con este unas cuantas sobras y generan el volumen que necesito:
Step Four: After adjusting and unifying the skin tones, I proceeded to add her wardrobe and hair. This type of hair is a little easier for me than the more realistic ones. I think I'll keep this one with a few leftovers and they generate the volume I need:
Ajusté detalles finales y así obtuve el fino resultado:
I adjusted final details and that was how I obtained the fine result
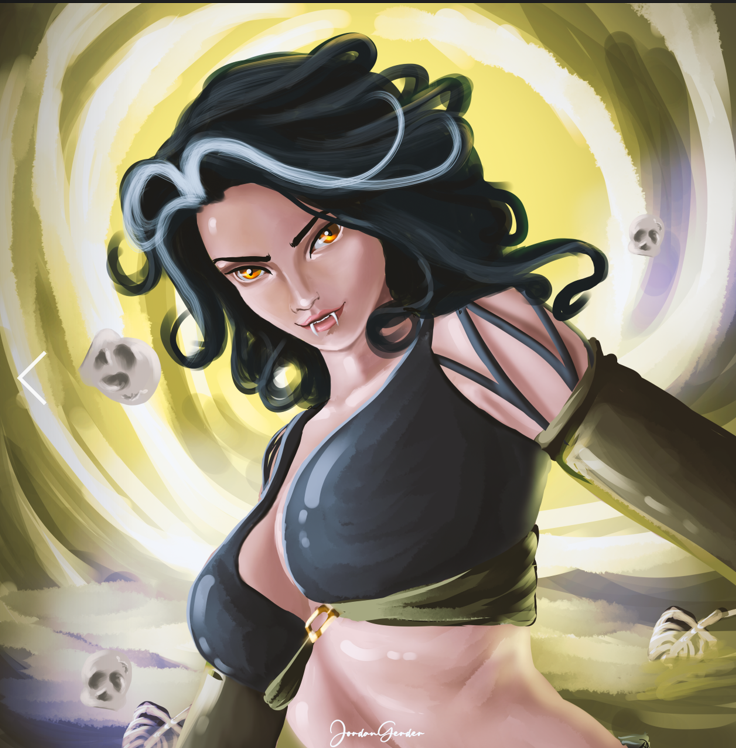
Espero te haya gustado lo he elaborado con cariño para ustedes, nos vemos en la próxima 😍
I hope you liked it, I have elaborated it with love for you, see you next time 😍
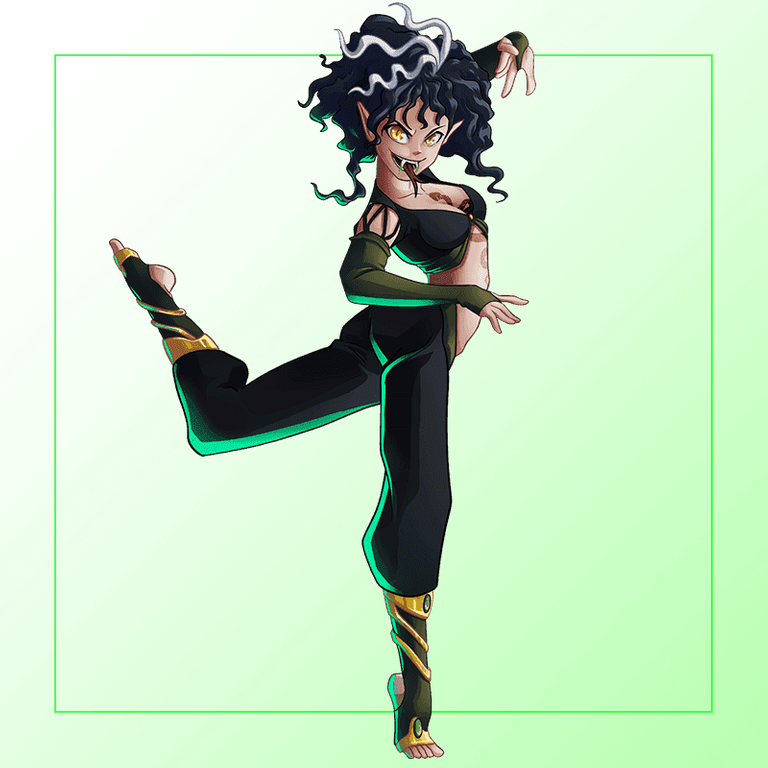
Art inspired by @splinterlands
¿Cómo pintar la piel en Photoshop? (piel difusa) | How to paint skin in Photoshop? (fuzzy skin)

Presentación del diseño | Desing presentación

Materiales | Materials
- Mini laptop
- Tableta Huion H950P
- Programa Adobe Photoshop 2019
- Mini laptop
- Huion H950P tablet
- Adobe Photoshop 2019 program

Proceso | Process
Primer paso: El boceto, es donde creamos la mayor parte de lo que queremos, despues tener lineas entendibles, continuamos al segundo paso:
First step: The sketch is where we create most of what we want, after having understandable lines, we continue to the second step:

Segundo paso: colores base, Selecionamos algunas tonalidades un tono medio y adicional a este uno oscuro partiendo de la base y un claro partiendo de la misma base escogida anteriormente, y una tonalidad saturada para que sea mejor trabajada al piel al momento de mezclar las tonalidades.
Para este paso uso un pincel difuso, resulta mejor al momento de mezclar el color:
Second step: base colors, we select some shades a medium tone and in addition to this a dark one starting from the base and a light one starting from the same base chosen previously, and a saturated shade so that it is better worked to the skin when mixing the shades .
For this step I use a diffuse brush, it is better when mixing the color:

Tercer paso: una vez mezclamos todo el color de la piel es momento de detallar las otras partes de la ilustracion:
Third step: once we mix all the skin color, it is time to detail the other parts of the illustration:

Paso cuatro: Despues de ajustar y unificar los tonos de la piel procecedi a agregar su vestuario y cabello este tipo de cabello me resulta un poco mas facil que los mas realistas creo que me quedare con este unas cuantas sobras y generan el volumen que necesito:
Step Four: After adjusting and unifying the skin tones, I proceeded to add her wardrobe and hair. This type of hair is a little easier for me than the more realistic ones. I think I'll keep this one with a few leftovers and they generate the volume I need:

Ajusté detalles finales y así obtuve el fino resultado:
I adjusted final details and that was how I obtained the fine result

Espero te haya gustado lo he elaborado con cariño para ustedes, nos vemos en la próxima 😍
I hope you liked it, I have elaborated it with love for you, see you next time 😍

Art inspired by @splinterlands
¿Cómo pintar la piel en Photoshop? (piel difusa) | How to paint skin in Photoshop? (fuzzy skin)

0
0
0.000
This is actually the only card out of the airdrops that i got. I was happy that this was the character you did since i was mildly familiar with her. You did a wonderful job staying true to the character design but also making it your own. Awesome art as always!
oh congratulations on receiving this card, it is a great letter indeed and thank you also for your appreciation of my work ❤️
I was hoping to get more of the airdrop cards but i am happy to at least have gotten this one. Keep up the awesome art!
Thanks for sharing! - castleberry#6859

Thank you❤️
awesome picture. I like how you add the details into the process and what you used
Thank you❤️
hi all wooow 😮
!PIZZA
!PGM
!LOLZ
BUY AND STAKE THE PGM TO SEND A LOT OF TOKENS!
The tokens that the command sends are: 0.1 PGM-0.1 LVL-2.5 BUDS-0.01 MOTA-0.05 DEC-15 SBT-1 STARBITS-[0.00000001 BTC (SWAP.BTC) only if you have 2500 PGM in stake or more ]
5000 PGM IN STAKE = 2x rewards!
Discord
Support the curation account @ pgm-curator with a delegation 10 HP - 50 HP - 100 HP - 500 HP - 1000 HP
Get potential votes from @ pgm-curator by paying in PGM, here is a guide
I'm a bot, if you want a hand ask @ zottone444
lolztoken.com
They just work on so many levels.
Credit: reddit
@jordangerder, I sent you an $LOLZ on behalf of @matons
Farm LOLZ tokens when you Delegate Hive or Hive Tokens.
(1/1)
Thank you❤️
PIZZA Holders sent $PIZZA tips in this post's comments:
@curation-cartel(16/20) tipped @jordangerder (x1)
thecuriousfool tipped jordangerder (x1)
matons tipped jordangerder (x1)
Please vote for pizza.witness!
Woah. Perfect composition. 😍
You did a great job making the face the focal point. Your background also helped a lot in supporting your focal point.
It is rare to see this kind of art output. 🙂
!1UP !PGM !PIZZA !LUV
BUY AND STAKE THE PGM TO SEND A LOT OF TOKENS!
The tokens that the command sends are: 0.1 PGM-0.1 LVL-2.5 BUDS-0.01 MOTA-0.05 DEC-15 SBT-1 STARBITS-[0.00000001 BTC (SWAP.BTC) only if you have 2500 PGM in stake or more ]
5000 PGM IN STAKE = 2x rewards!
Discord
Support the curation account @ pgm-curator with a delegation 10 HP - 50 HP - 100 HP - 500 HP - 1000 HP
Get potential votes from @ pgm-curator by paying in PGM, here is a guide
I'm a bot, if you want a hand ask @ zottone444
@thecuriousfool(1/1) gave you LUV. tools | wallet | discord | community | <><
HiveBuzz.me NFT for Peace
Oh thank you so much❤️
You have received a 1UP from @thecuriousfool!
@monster-curator, @oneup-curator, @ccc-curator, @neoxag-curator, @pal-curator
And they will bring !PIZZA 🍕.
Learn more about our delegation service to earn daily rewards. Join the Cartel on Discord.