Rada Quest Art Contest! / Serel / FanArt
Arte Digital | Digital Art
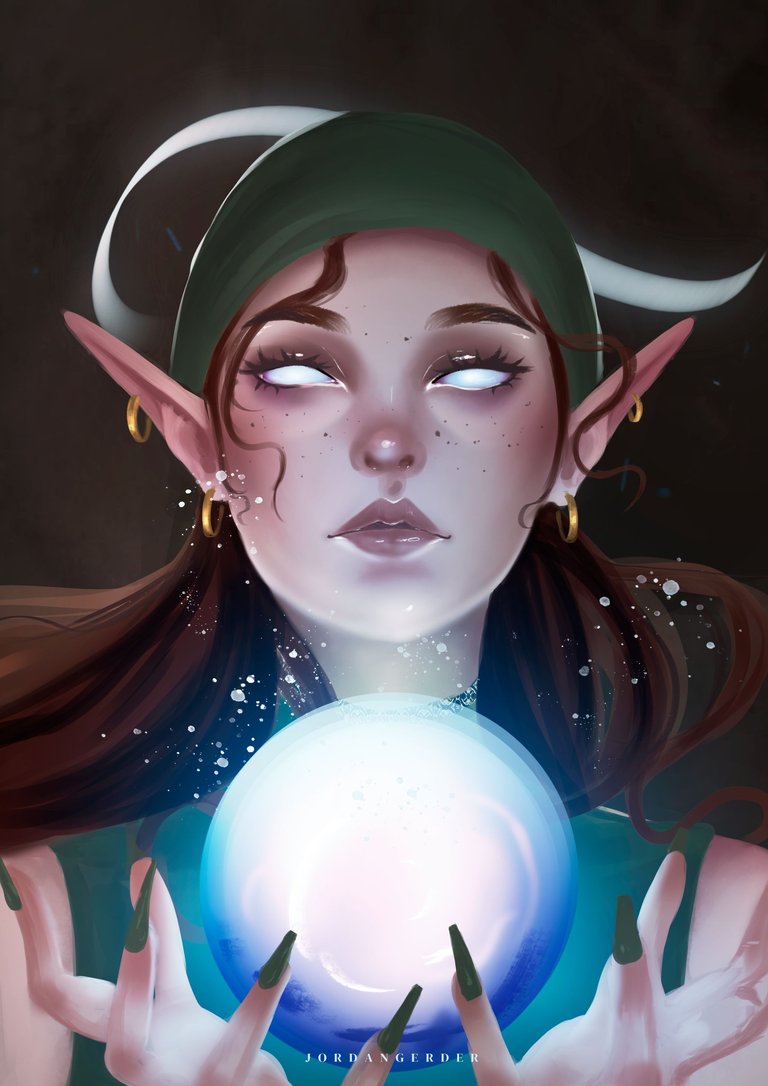
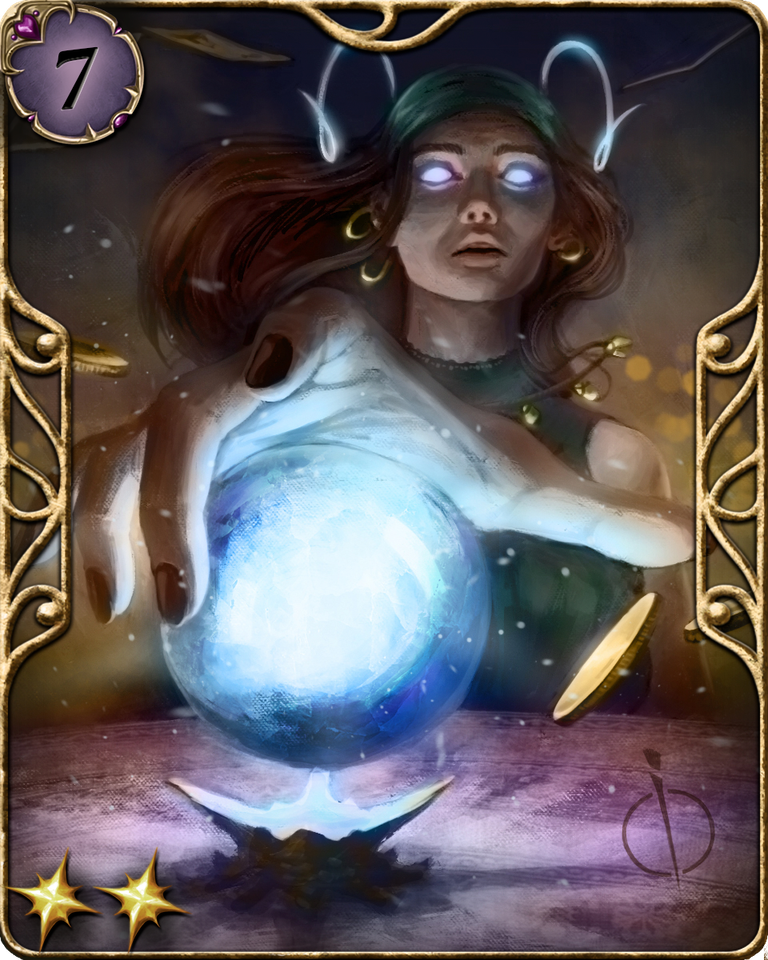
Hello people. How are you doing today? I hope you are doing well, I was preparing a new digital work this time for the art contest created by @radaquest, walking around the site looking for inspiration for this week, I came across the beautiful Serel, her magic ball was perfect for creating luminosity in the face and the whole scene was something fantastic, her beautiful hair flying out of her scarf gave the touch of movement I was looking for, all the energy was already accumulated and set to predict the future, oh yes 😆...
Let's see a little about the creation process, it's always good to see what's behind each art, come with me⏩⏩⏩...
Materiales | Materials
- Desktop computer
- Tableta Huion H950P
- Programa Adobe Photoshop 2019
- Ordenador de mesa
- Huion H950P tablet
- Adobe Photoshop 2019 program
Proceso | Process
Paso 1
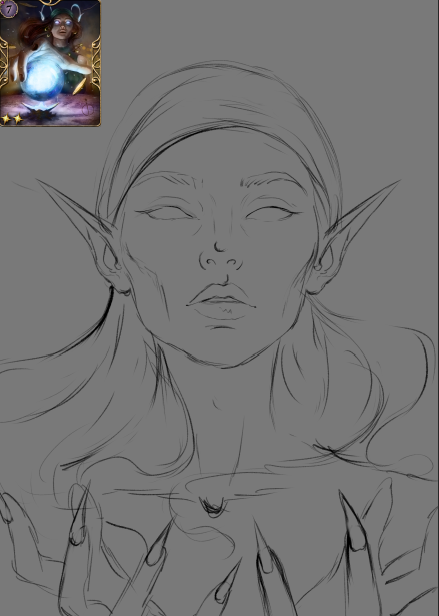
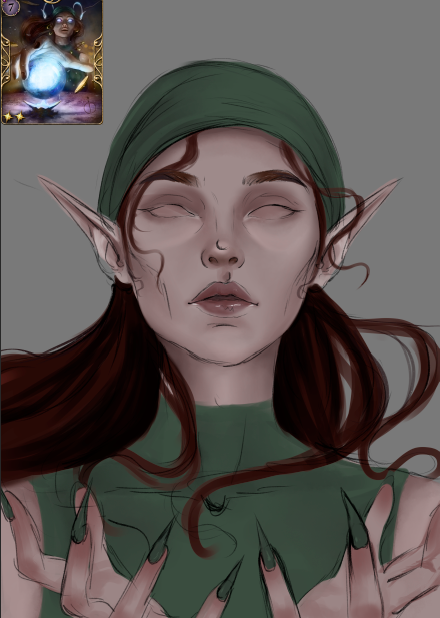
- Inciamos con un bosquejo de lo que sería el personaje agregué al personaje orginal en un extremo para captar todas las partes y no perder ningun detalle, asi es como resulta mas facil su creación:
Step 1
- We start with a sketch of what the character would be, I added the original character at one end to capture all the parts and not lose any details, this is how its creation is easier:
Paso 2
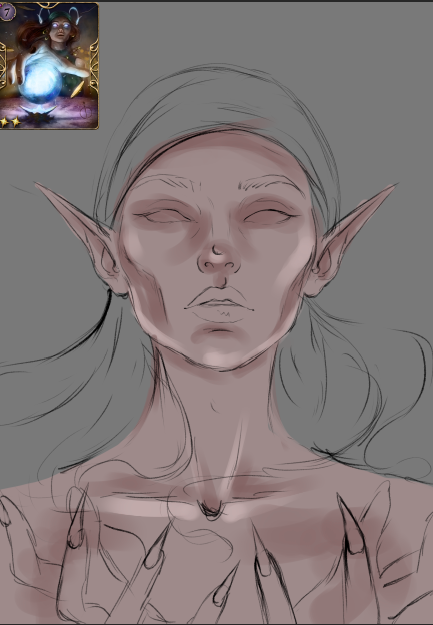
- Una ves que conseguimos un bosquejo mas claro, o donde se aprecie el personaje al cual agregaremos color, es momento de pasar a la siguiente etapa donde se seleccionan tres tonos de color no muy saturados para empezar a crear volumen en su piel:
Step 2
- Once we get a clearer sketch, or where we can see the character to which we will add color, it is time to move on to the next stage where three not very saturated color tones are selected to start creating volume in their skin:
Paso 3
- Es momento de mezclar los parches de color que agregué anteriormente (este paso lo hago con la herramienta dedo), para luego suavizar un poco con un pincel difuso, y asi es como conseguimos una piel mas trabajada:
Step 3
- It's time to mix the color patches that I added previously (I do this step with the finger tool), and then soften a little with a diffuse brush, and this is how we get a more polished skin:
Paso 4
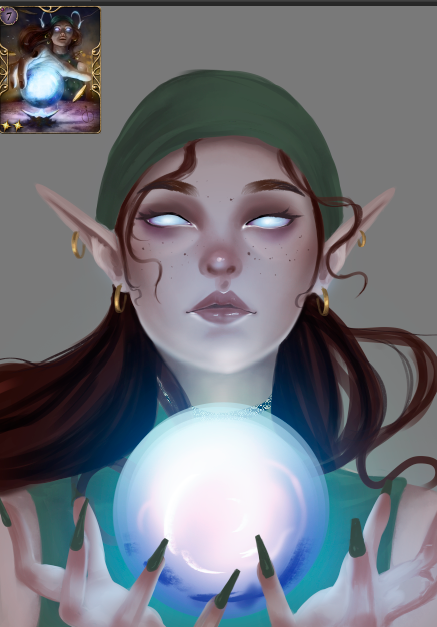
- Trabajé en los detalles del rostro antes que nada, sus ojos blancos con tonalidades en azul y magenta no podian faltar, detallé tambien su nariz esta vez me gustó el tono rojo superexpuesto sobre ella tambien lo agregué a sus pómulos, trabajé en su bola magica, el futura estaba listo para ser percibido, con solo usar efectos de capa obtuve la luminosidad que estaba buscando...
Step 4
- I worked on the details of the face first of all, her white eyes with shades of blue and magenta could not be missed, I also detailed her nose this time I liked the red tone superexposed on her I also added it to her cheekbones, I worked on her magic ball, The future was ready to be perceived, just by using layer effects I got the luminosity I was looking for...

Paso final
- Para finalizar todo el proceso de creación agregué detalles finales como brillos, mas luces y ajustes totales de color.
Final step
- To finalize the entire creation process, I added final details such as highlights, more highlights and total color adjustments.
Name WAX: juboy.c.wam
We got an incredible result, I really enjoyed the creation process. I hope you liked it, I have elaborated it with love for all the viewers who visit this publication, see you in the next one 😍
𝑮𝒓𝒂𝒄𝒊𝒂𝒔 𝒑𝒐𝒓 𝒗𝒊𝒔𝒊𝒕𝒂𝒓 𝒎𝒊 𝒃𝒍𝒐𝒈, 𝒂𝒑𝒓𝒆𝒄𝒊𝒐 𝒎𝒖𝒄𝒉𝒐 𝒕𝒖 𝒂𝒑𝒐𝒚𝒐 / 𝑻𝒉𝒂𝒏𝒌 𝒚𝒐𝒖 𝒇𝒐𝒓 𝒗𝒊𝒔𝒊𝒕𝒊𝒏𝒈 𝒎𝒚 𝒃𝒍𝒐𝒈, 𝑰 𝒓𝒆𝒂𝒍𝒍𝒚 𝒂𝒑𝒑𝒓𝒆𝒄𝒊𝒂𝒕𝒆 𝒚𝒐𝒖𝒓 𝒔𝒖𝒑𝒑𝒐𝒓𝒕.
TWITTER ⚪ NFT SHOWROOM ⚪ INSTAGRAM ⚪ DISCORD



Me encantó la pitonisa, está demasiado estupenda y poderosa <3
Gracias querida @equipodelta un placer verte por aquí 🫰🏾🥰
https://twitter.com/AlienArtHive/status/1782497350449283567
looks super well made C: i love how soft the lines mix with eachother. nice work man
Posted using Bilpcoin
Credit: shaungerow
Earn Crypto for your Memes @ HiveMe.me!
Credit: orionvk
Earn Crypto for your Memes @ HiveMe.me!